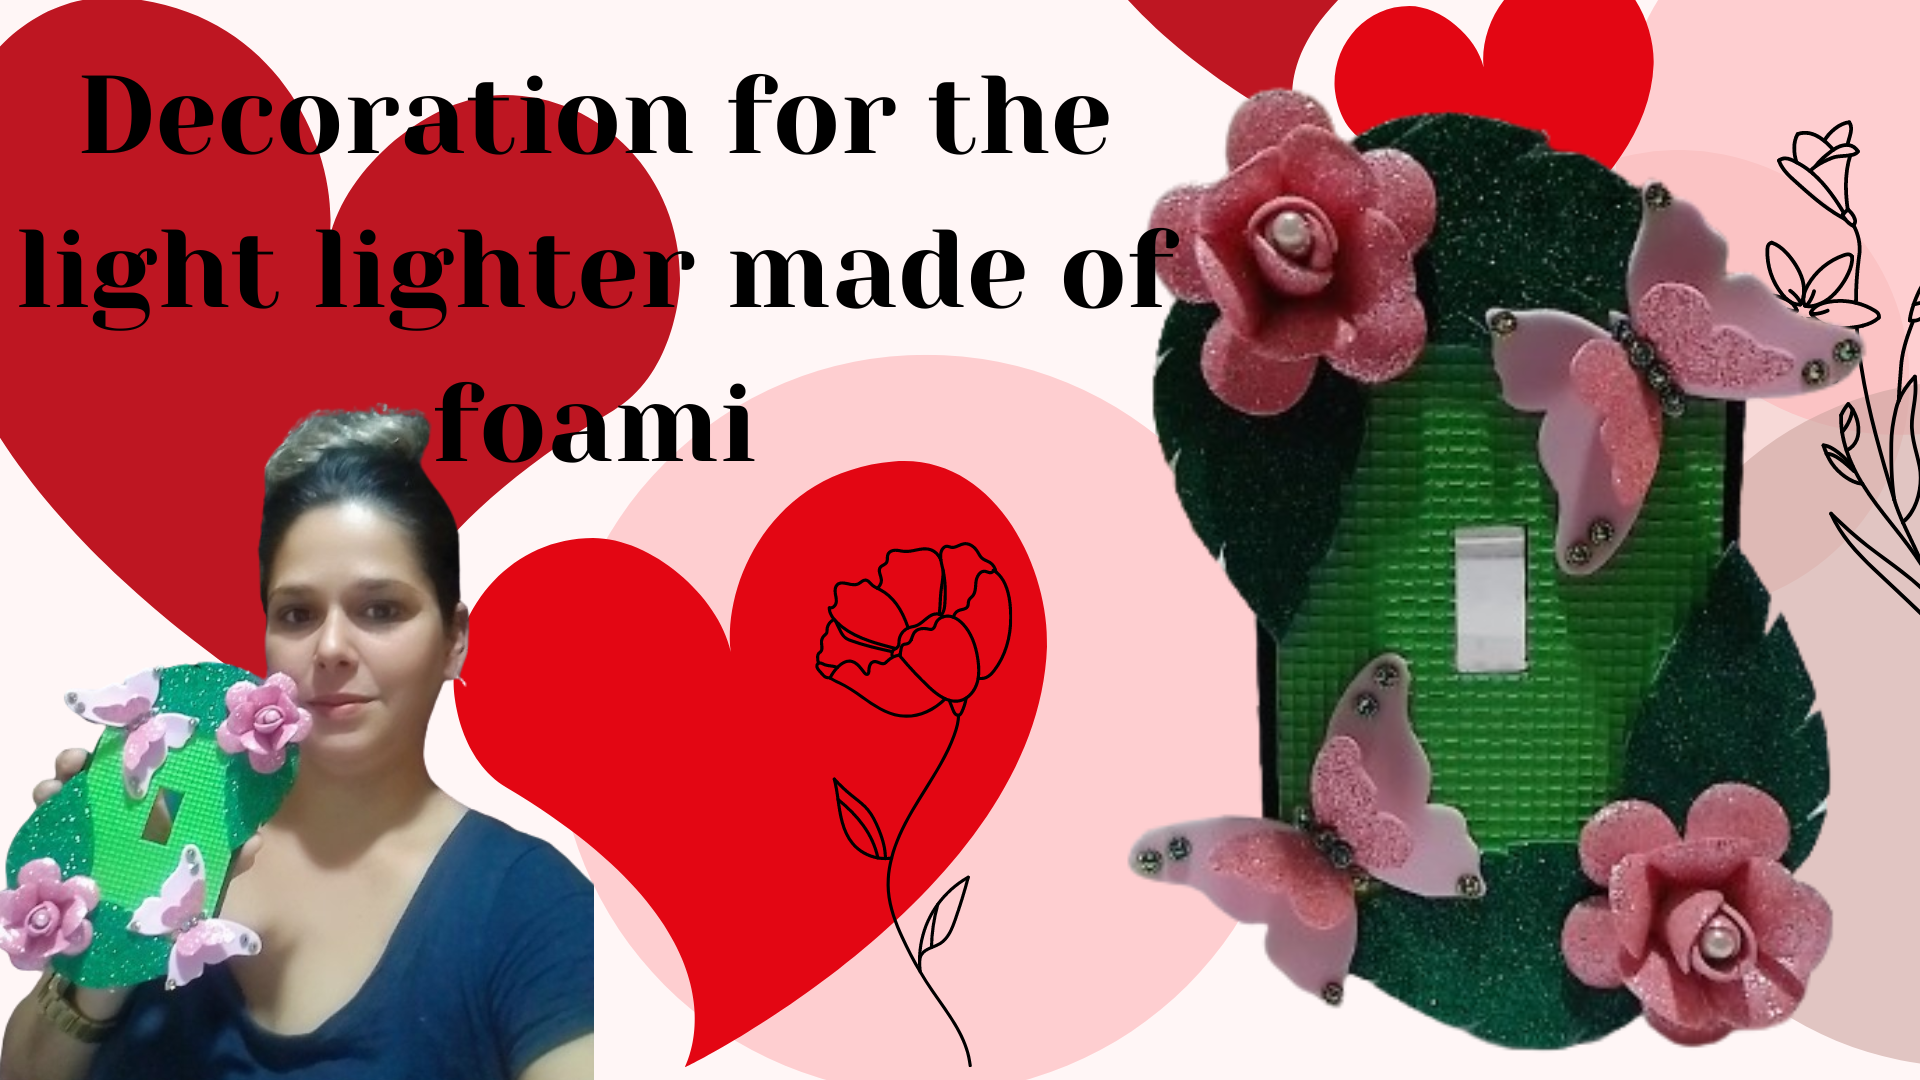
Hello creative friends, as always trying to decorate every corner of my home or my work, as I love to do crafts and to see that the environment around me is nice and well decorated, today I want to show you how to decorate the lighters of the light of my office and this I made it with foami.
Hola amigos creativos, como siempre tratando de decorar cada rincón de mi casa o mi trabajo, ya que me gusta mucho hacer manualidades y a la ver que el entorno que me rodee se encuentre bonito y bien decorado, hoy les quiero mostrar como adorne los encendedores de la luz de mi oficina y este lo elabore con foami.
The work that I am going to show you next I really liked the result because sometimes these lighters get dirty with paint when we paint our house or office and this is a good idea to make them look very nice after having painted the place.
El trabajo que les voy a mostrar a continuación me gusto mucho su resultado ya que abecés estos encendedores se ensucian de pintura cuando pintamos nuestras casa u oficina y esta es una buena idea para que se vean muy bonito luego de haber pintado dicho local.
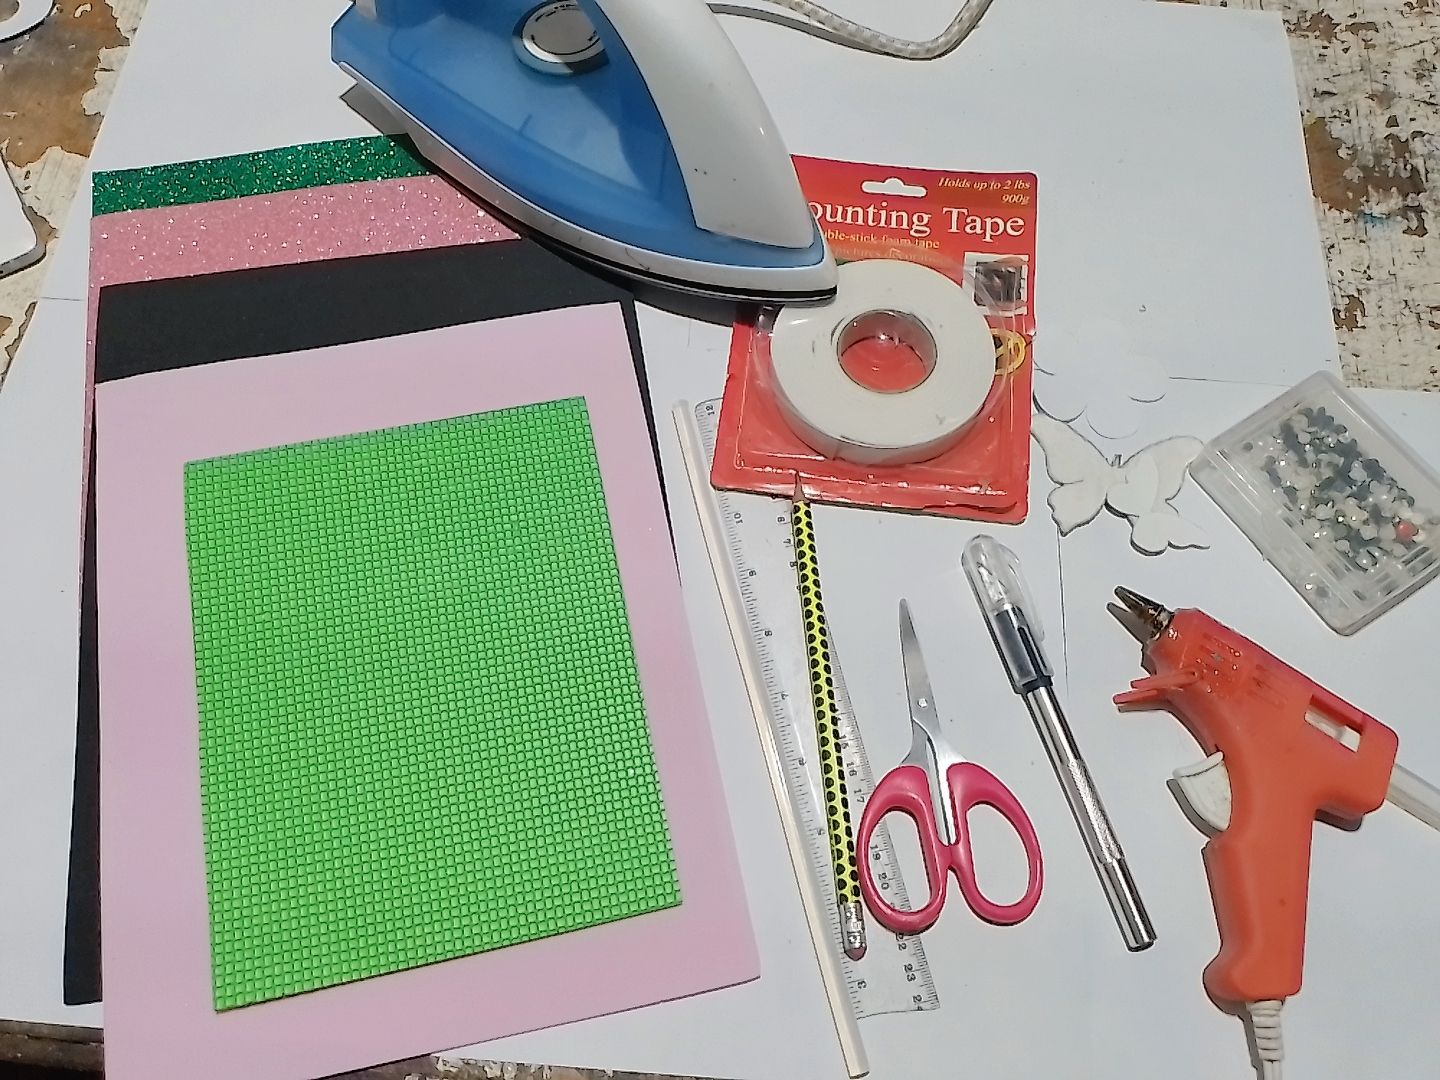
Materials
- Black and light pink colored shimmer foami
- Green and light pink frosting Foami
- Texturized green foami
- Silicone gun
- Silicone sticks
- Double contact sticker
- Ruler
- Marking pencil
- Scissors
- Precision cutter
- Box of beads
- Paper mold (flower and butterfly)
- Clothes iron
Materiales
- Foami lizo de color negro y rosado claro
- Foami de escarcha de color Verde y rosado claro
- Foami texturizado de color verde
- Pistola de silicona
- Barras de silicona
- Pegatina de doble contacto
- Regla
- Lápiz Para marcar
- Tijera
- Cúter de precisión
- caja de perlas
- Molde de papel (de flor y de mariposa)
- Plancha de ropa
Step by step, Paso a paso
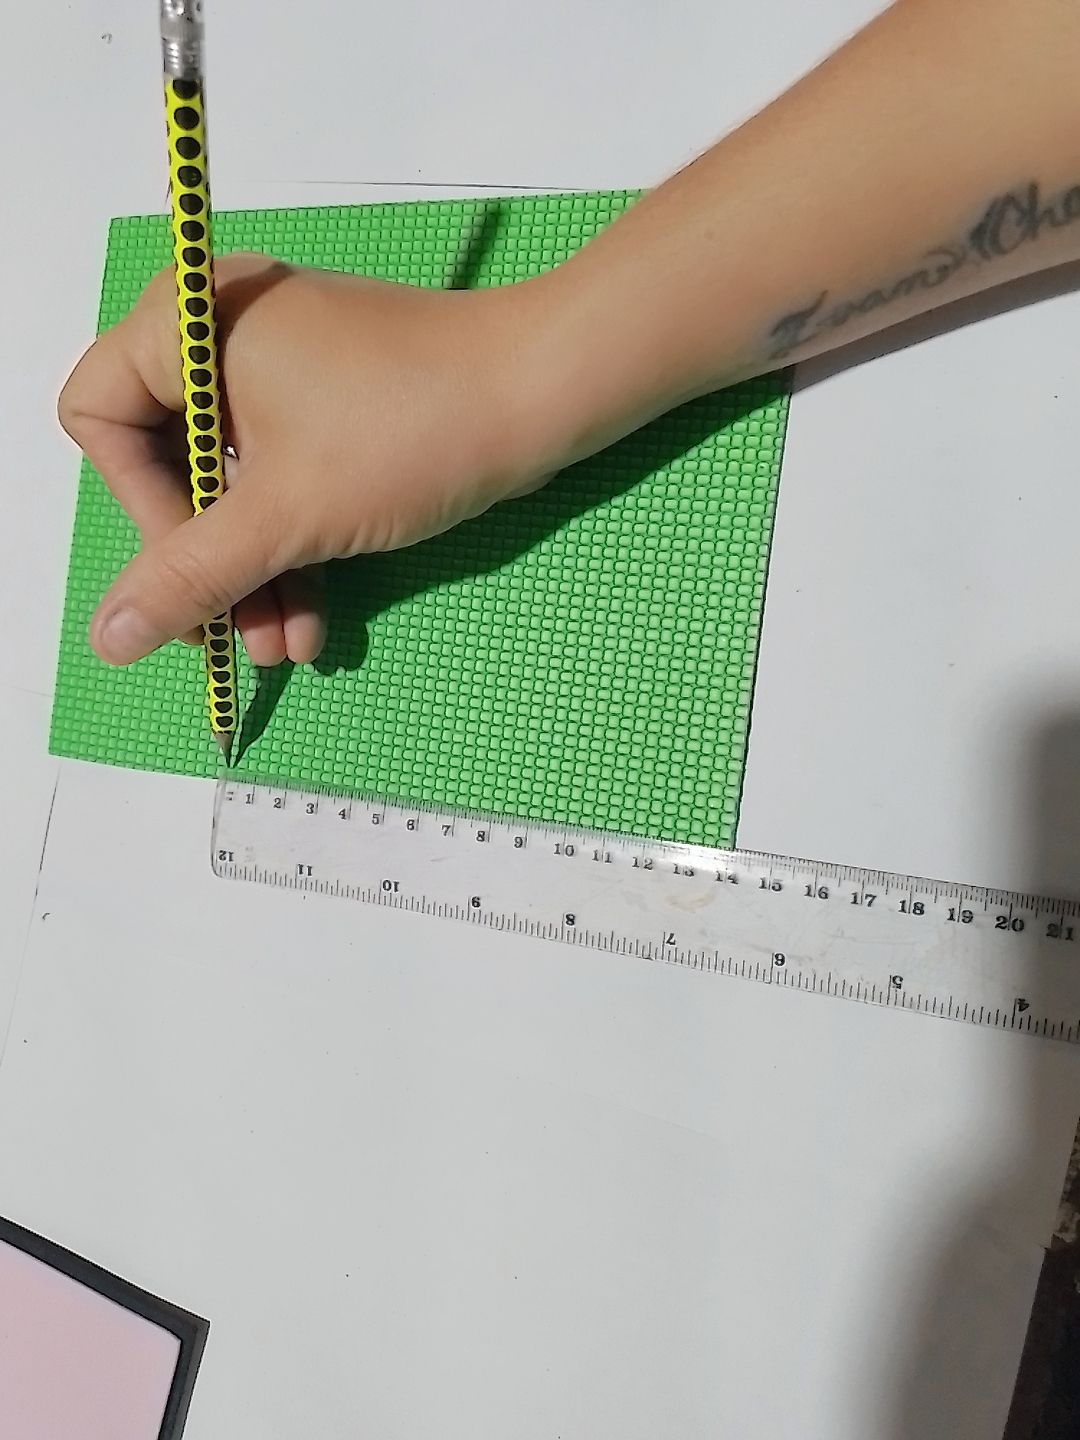
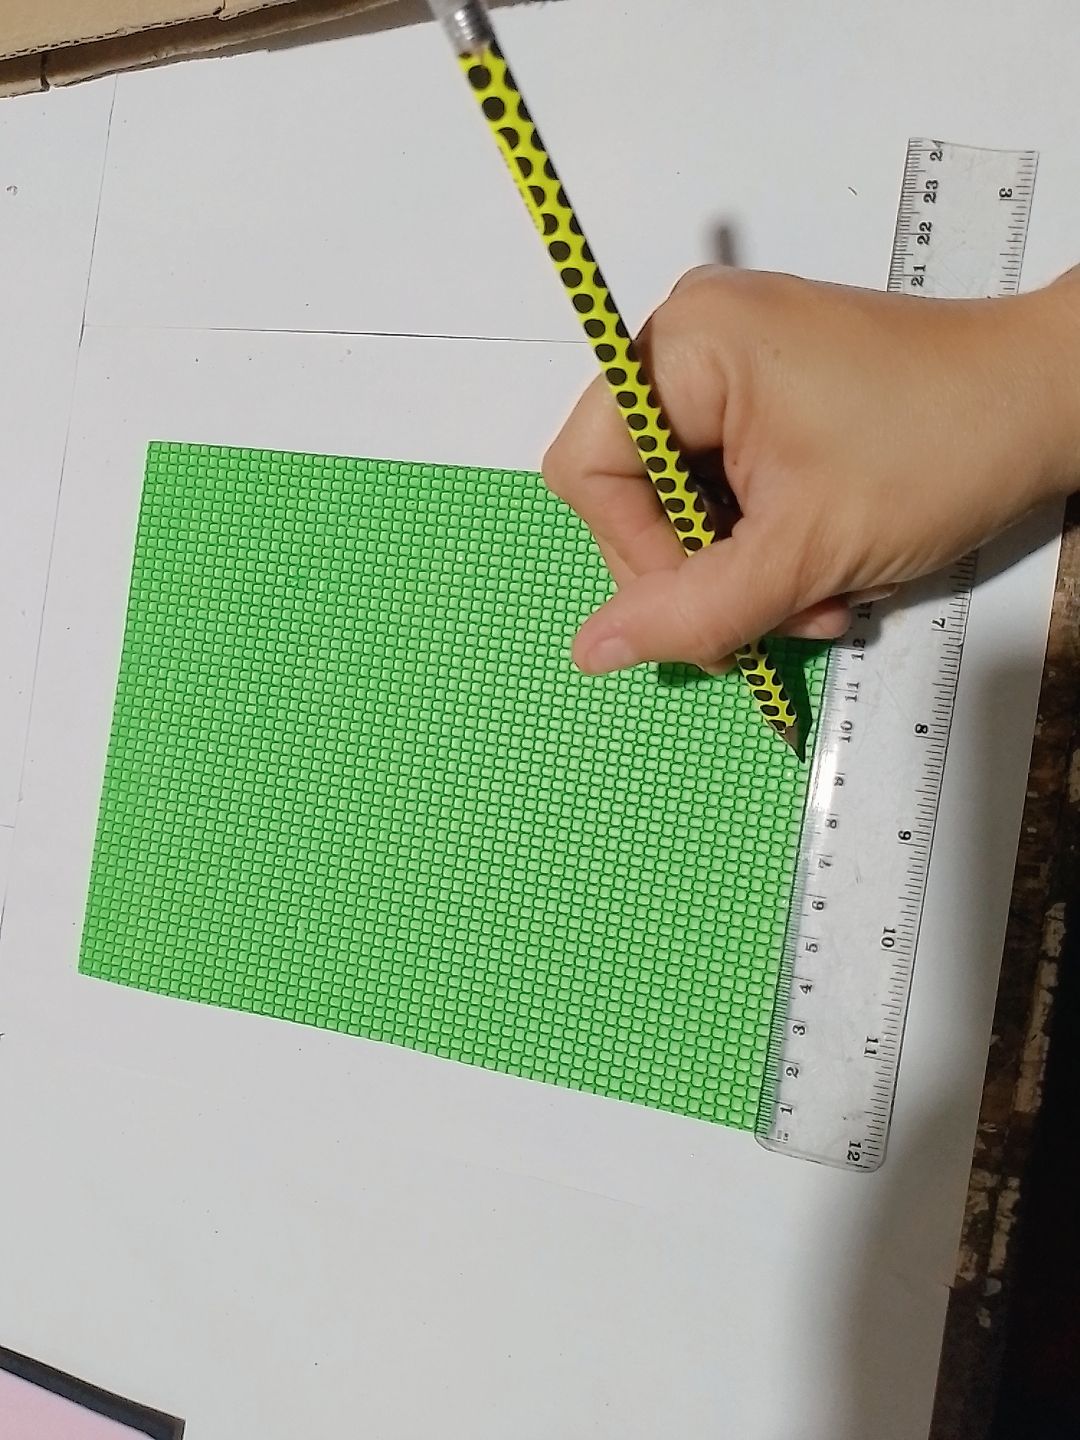
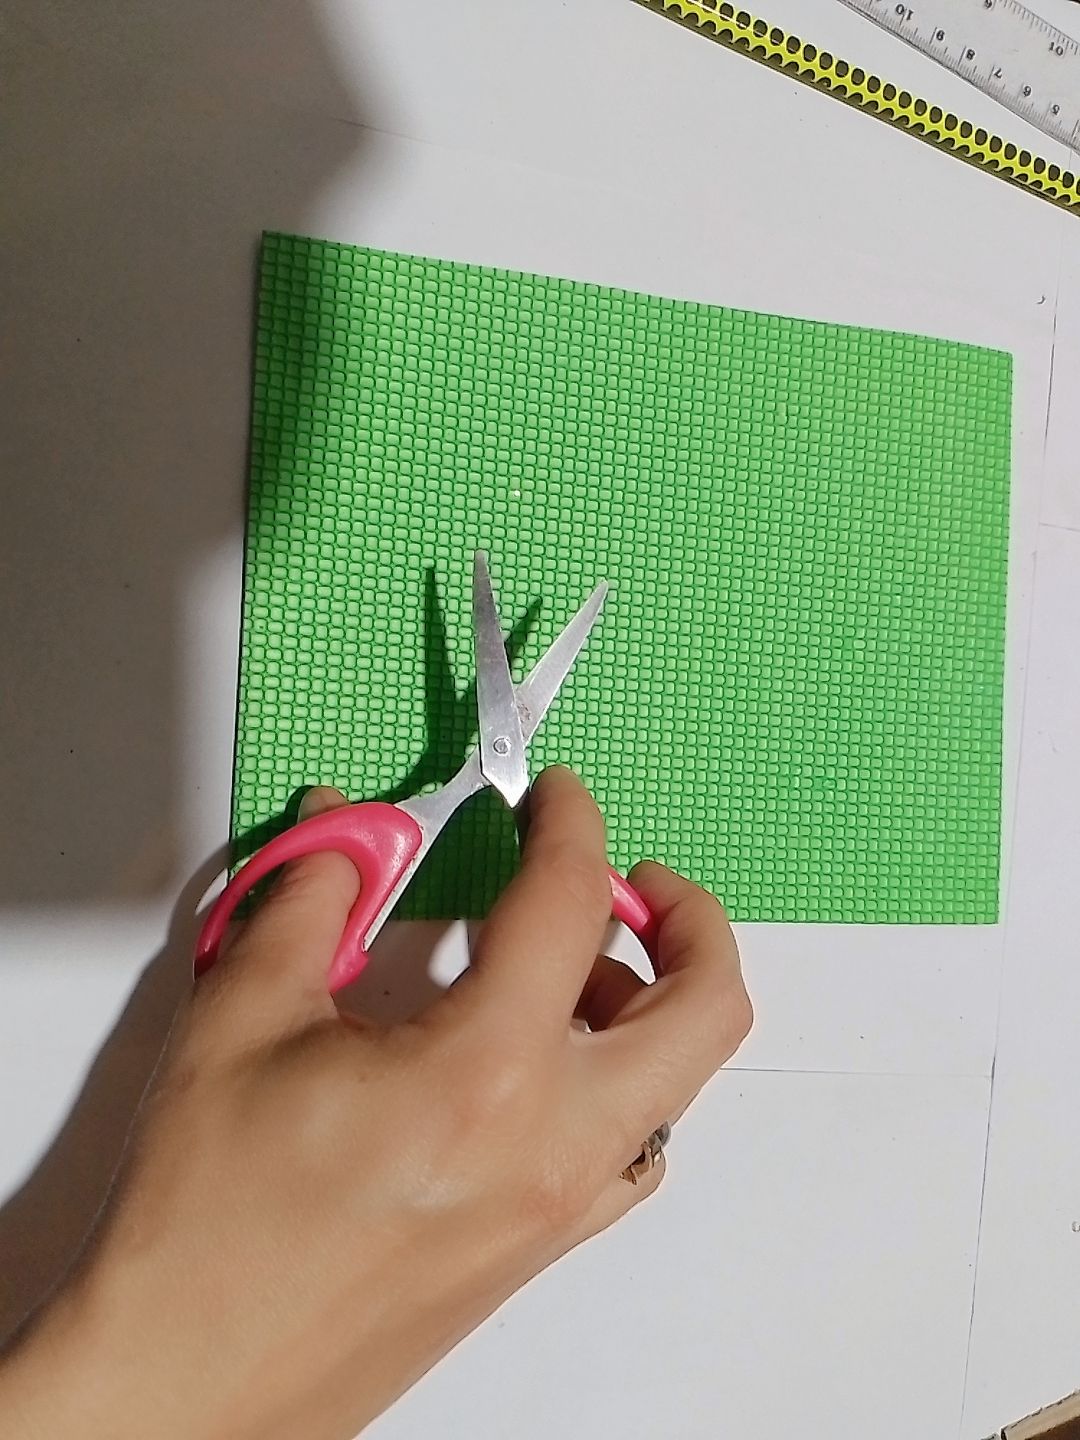
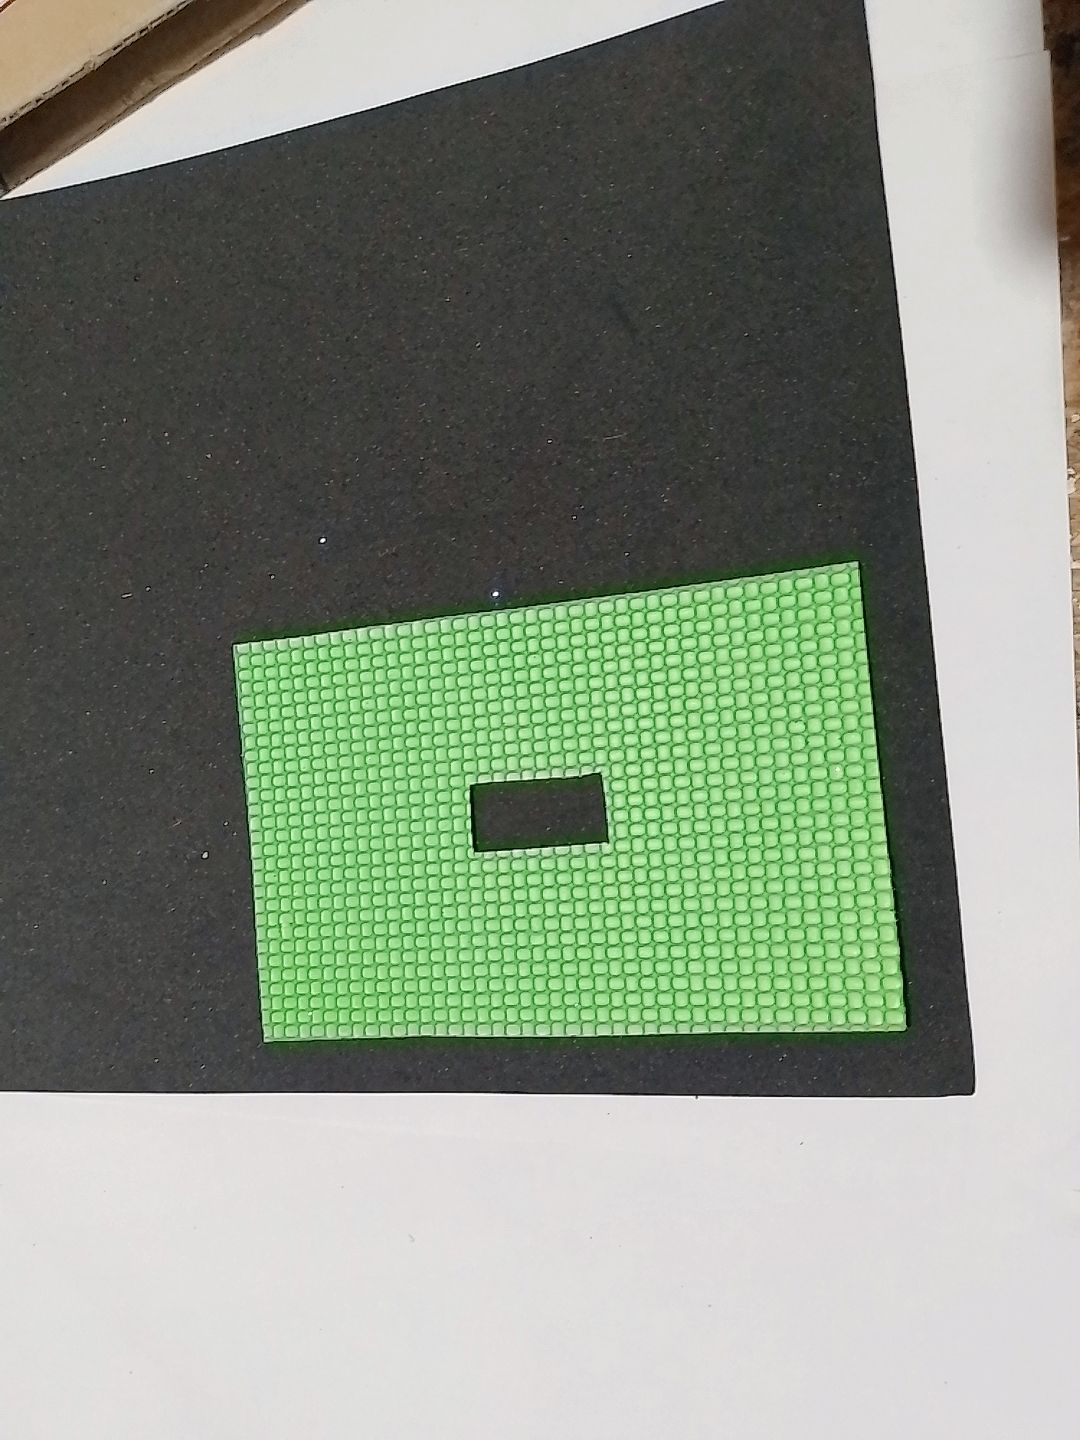
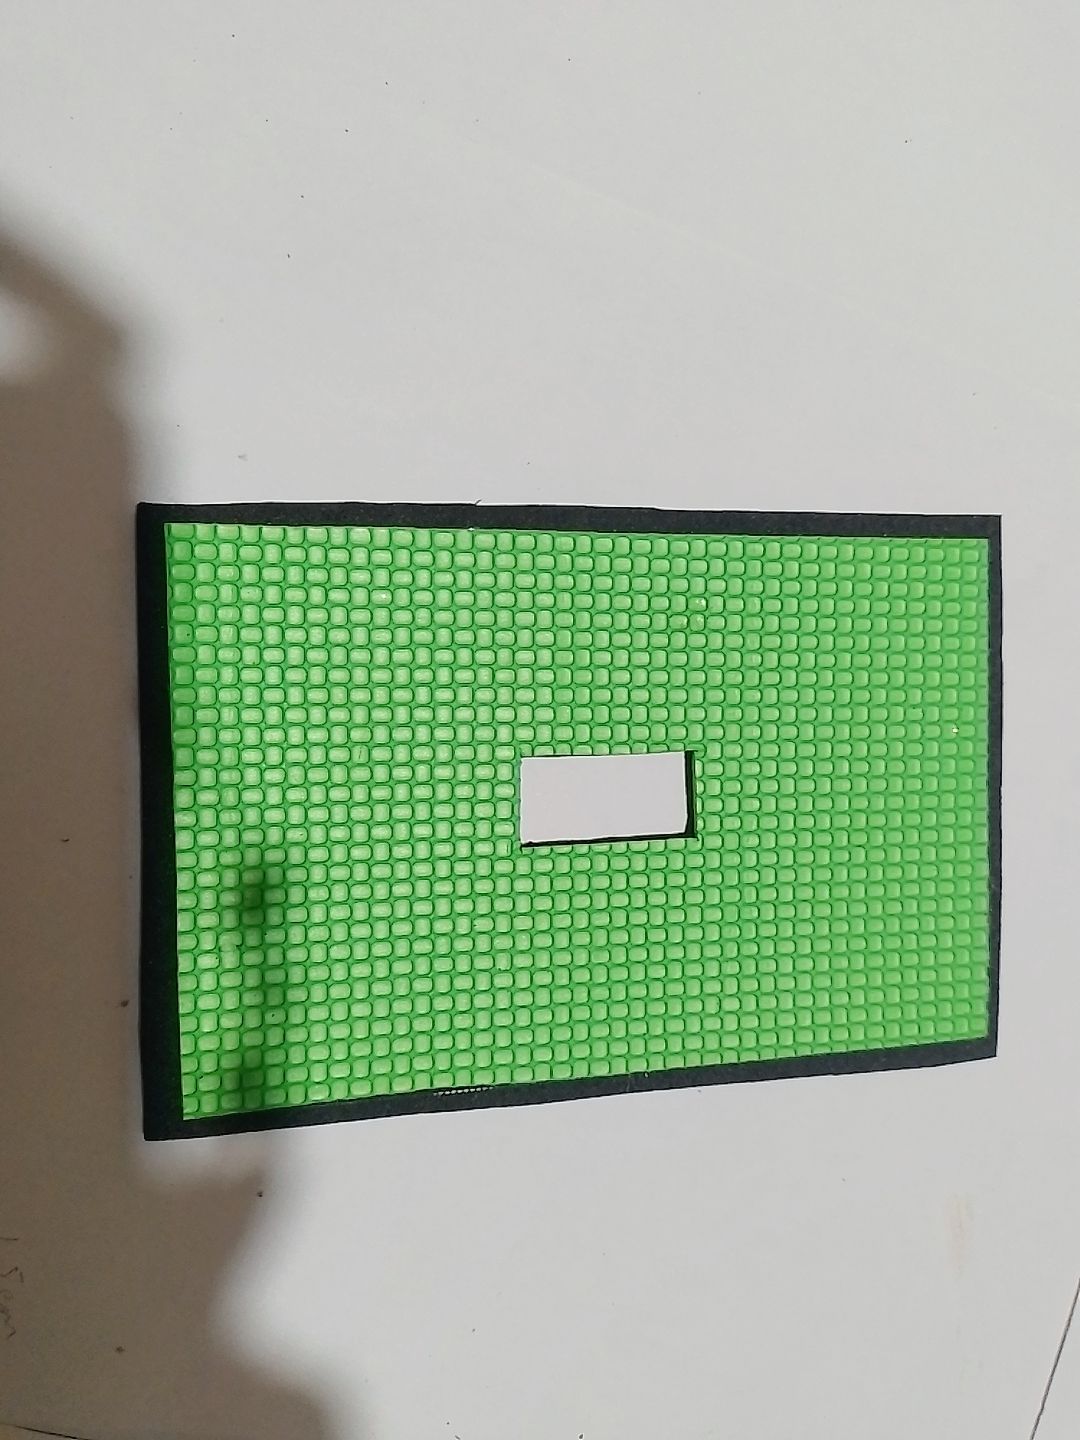
Step 1: Measure a rectangle 8 cm wide by 14 cm high on the green textured foami and cut it out.
Paso 1: En el foami verde texturizado medimos un rectángulo de 8 cm de ancho por 14 cm de alto y lo recortamos.
|
|
|
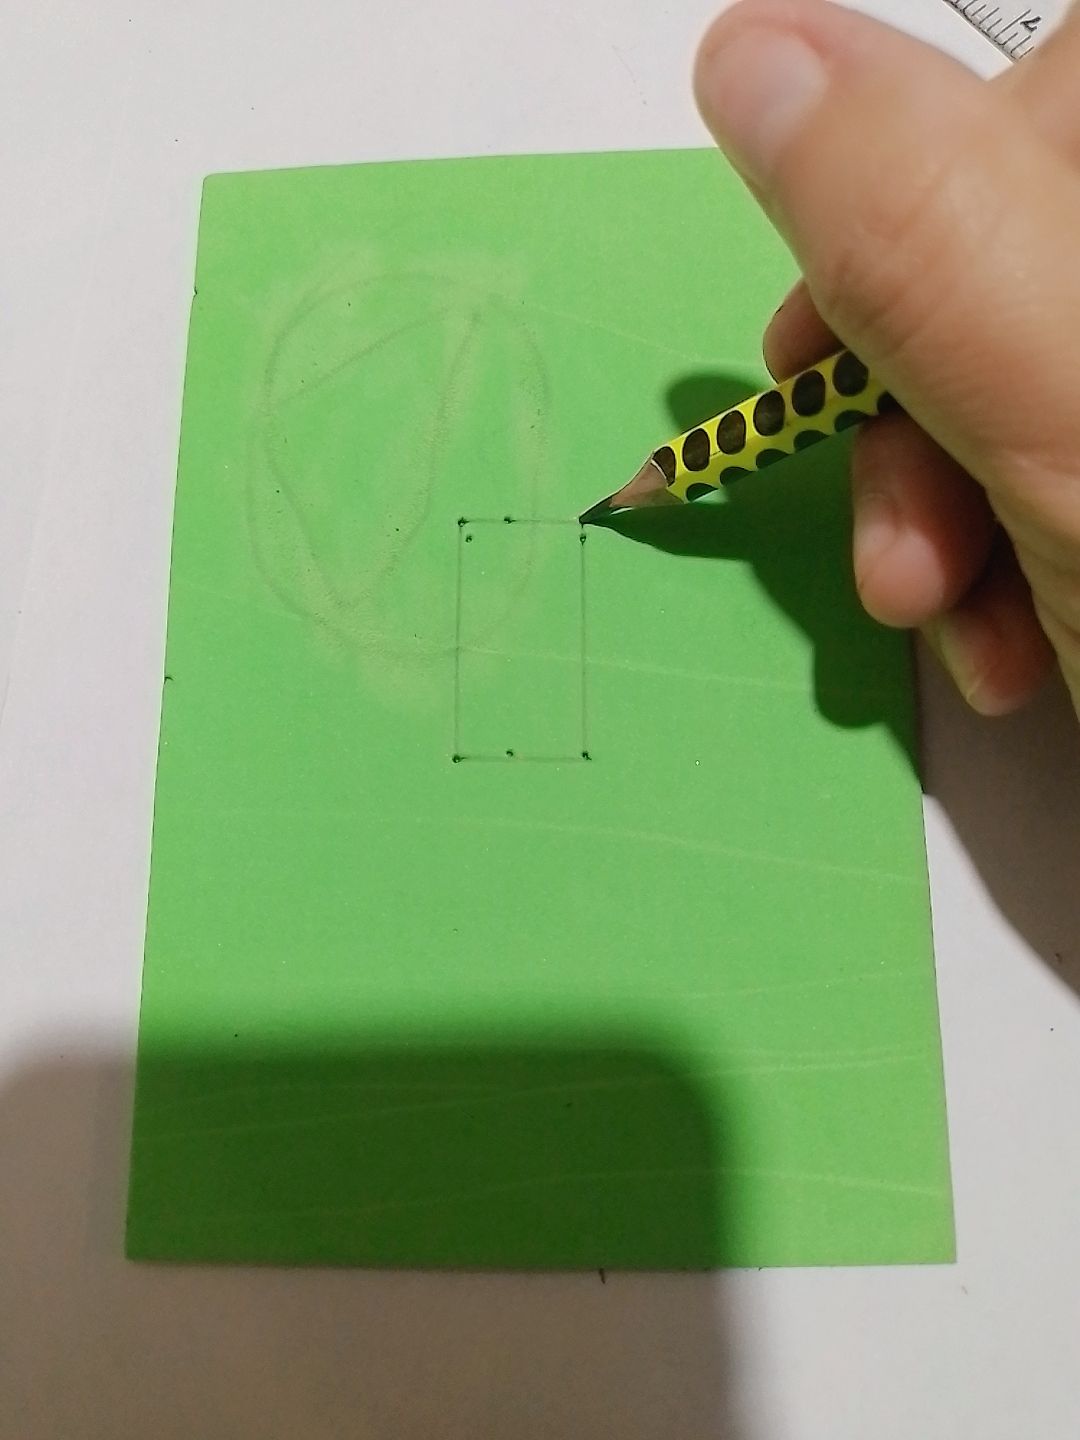
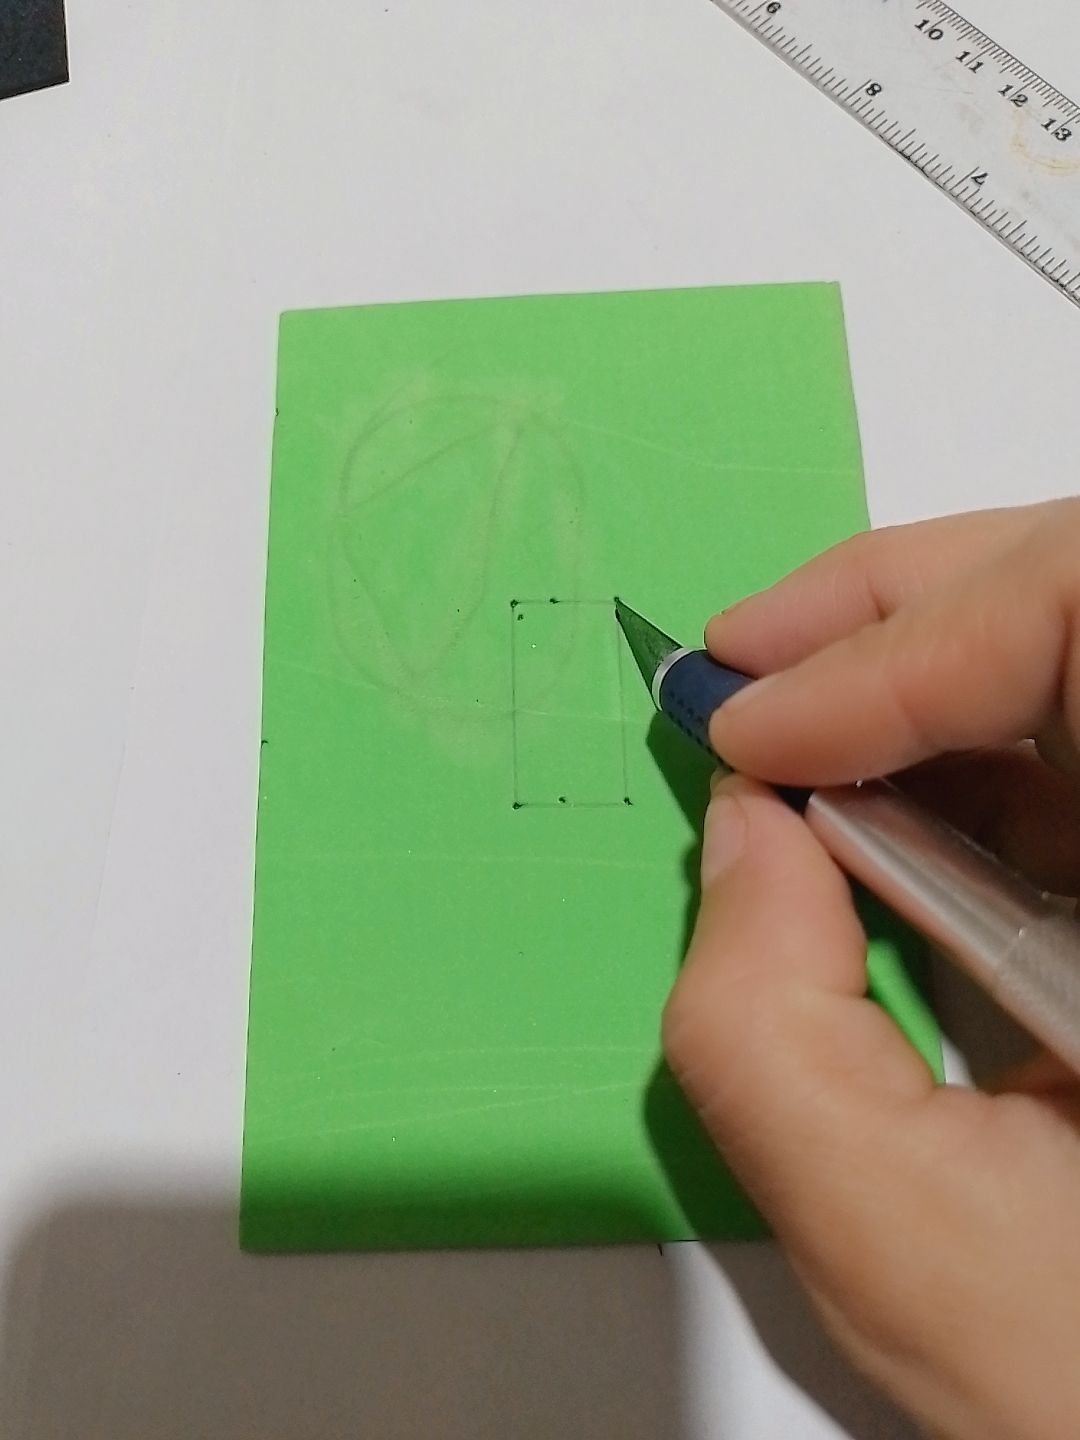
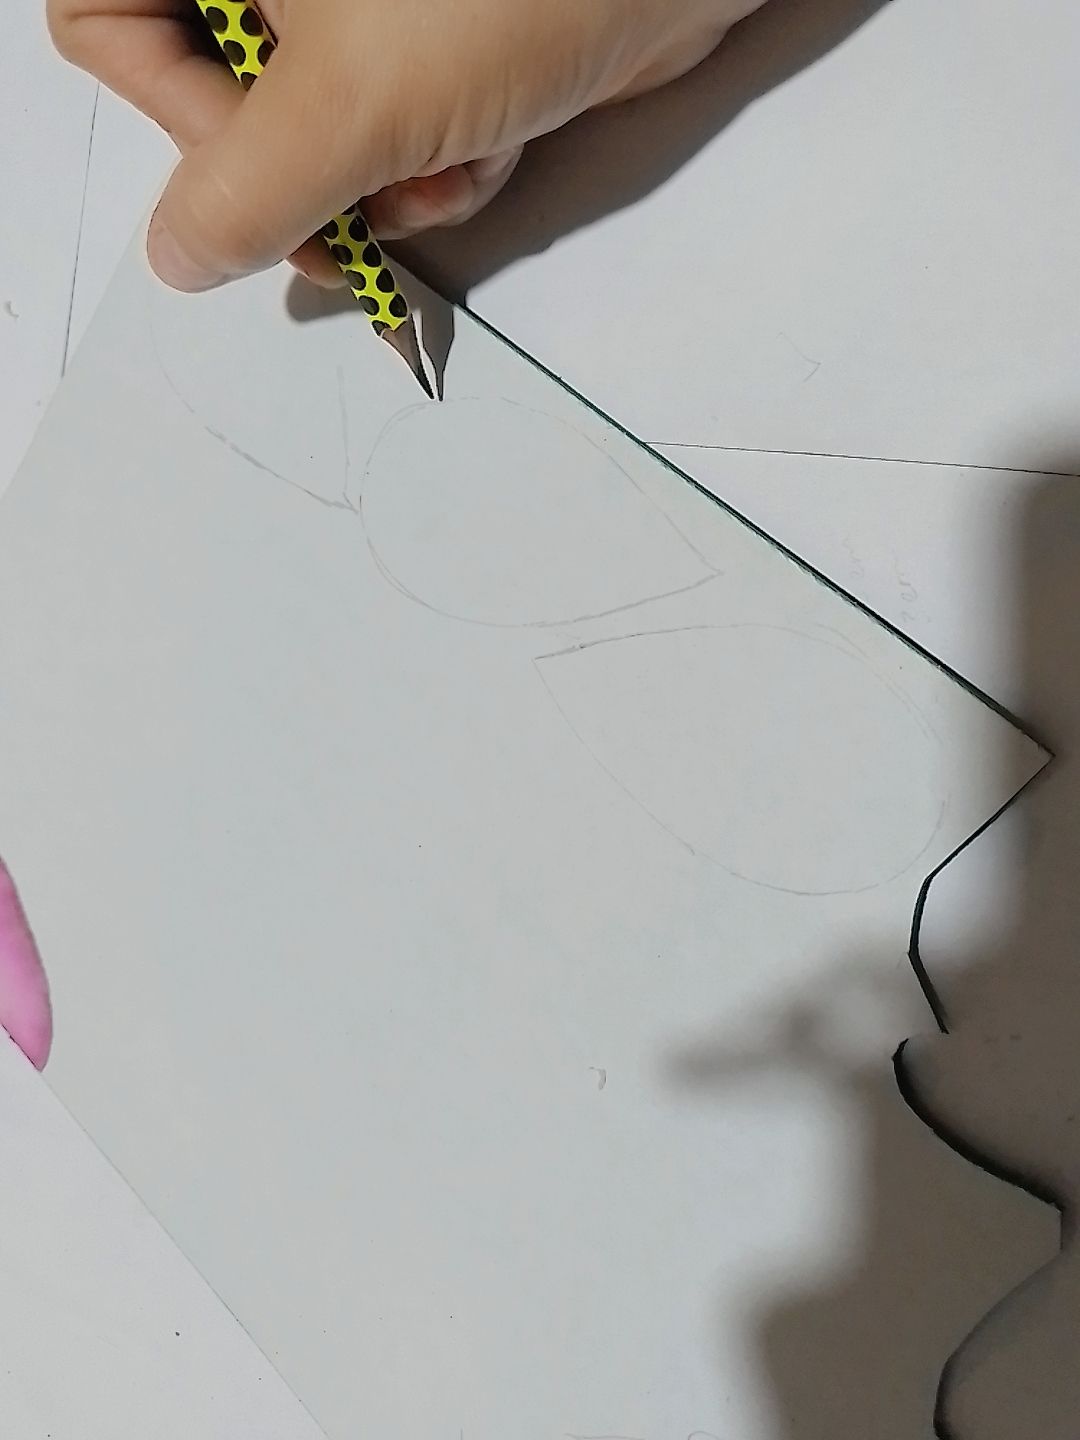
Step 2: In the middle of the rectangle we mark a smaller rectangle where the lighter goes, this is 1.5 cm wide by 3 cm high and we cut it with the precision cutter.
Paso 2: En el medio del rectángulo marcamos un rectángulo mas pequeño donde va el encendedor, este es de 1.5 cm de ancho por 3 cm de alto y lo cortamos con el cúter de precisión.
|
|
|
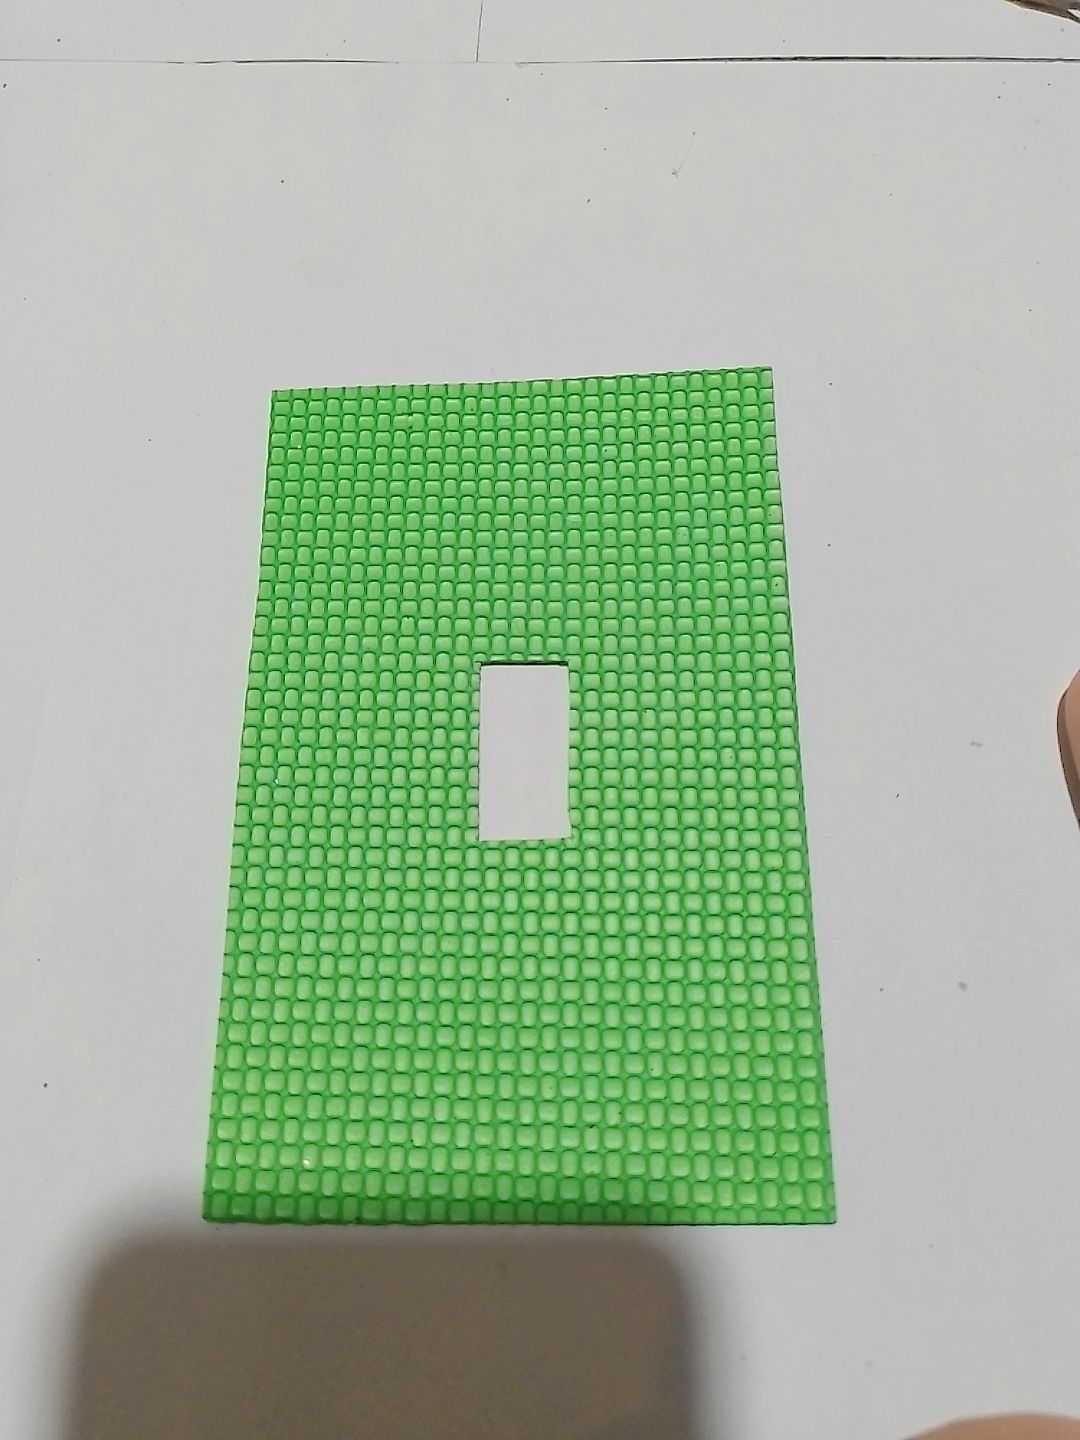
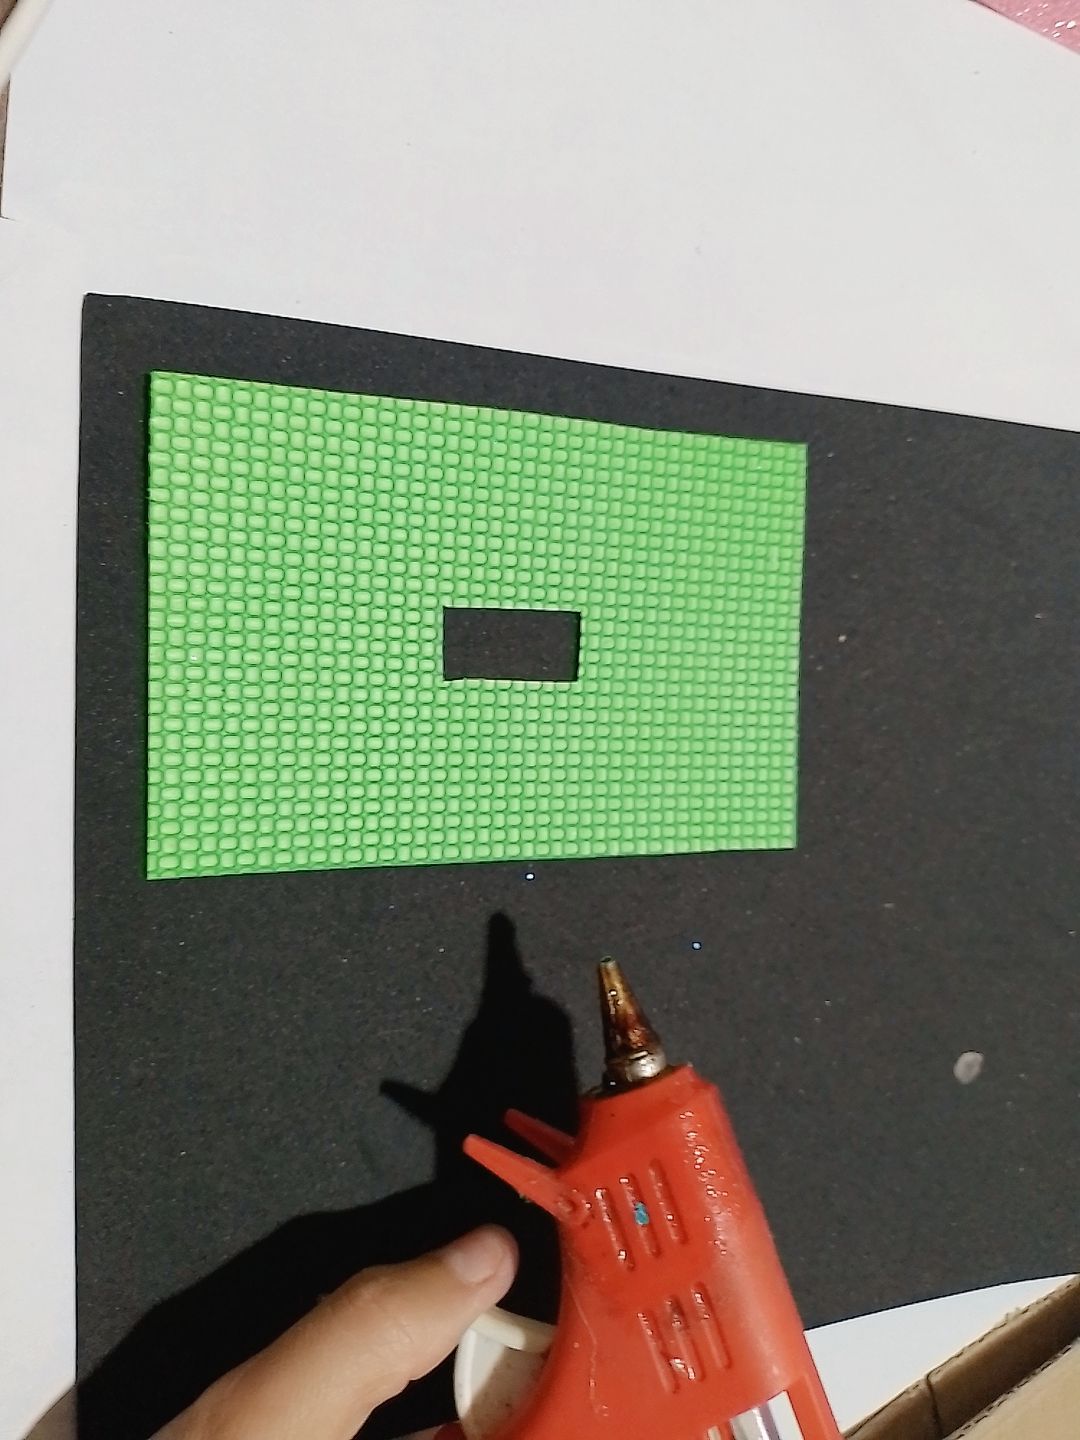
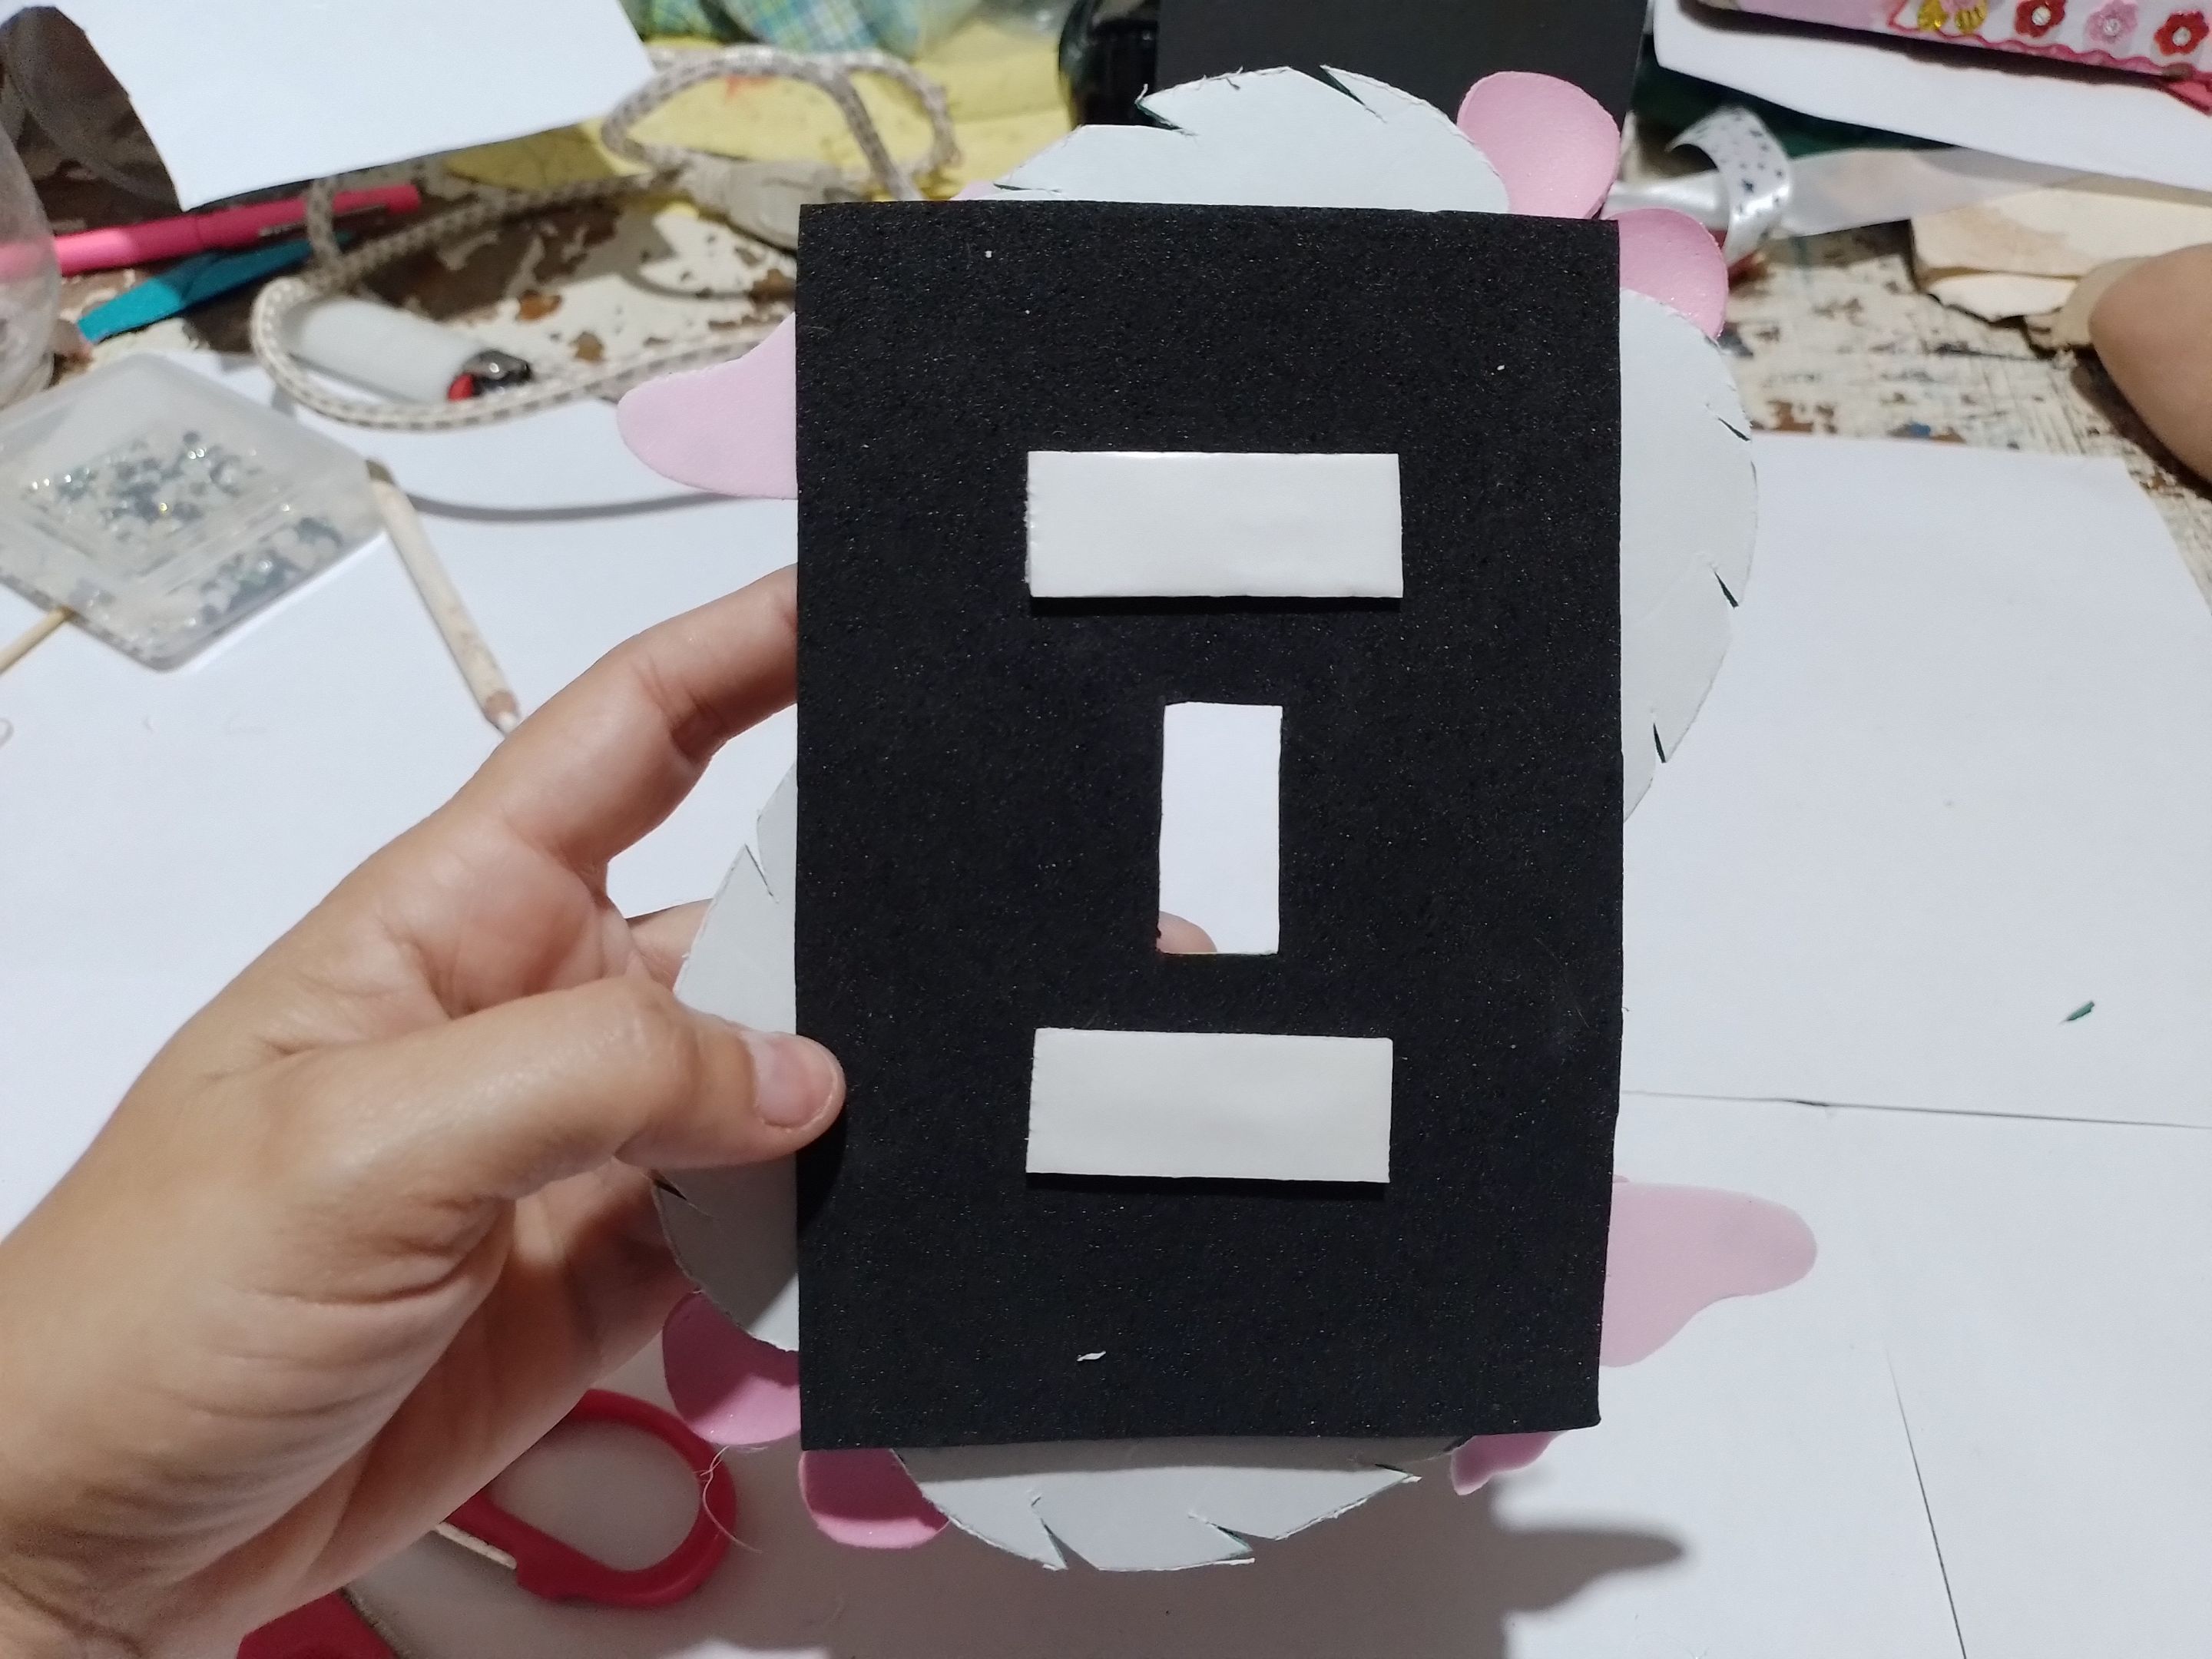
Step 3: Once the rectangle is made, glue it on top of the black foami.
Paso 3: Luego de tener el rectángulo hecho, lo pegamos encima del foami negro.
|
|
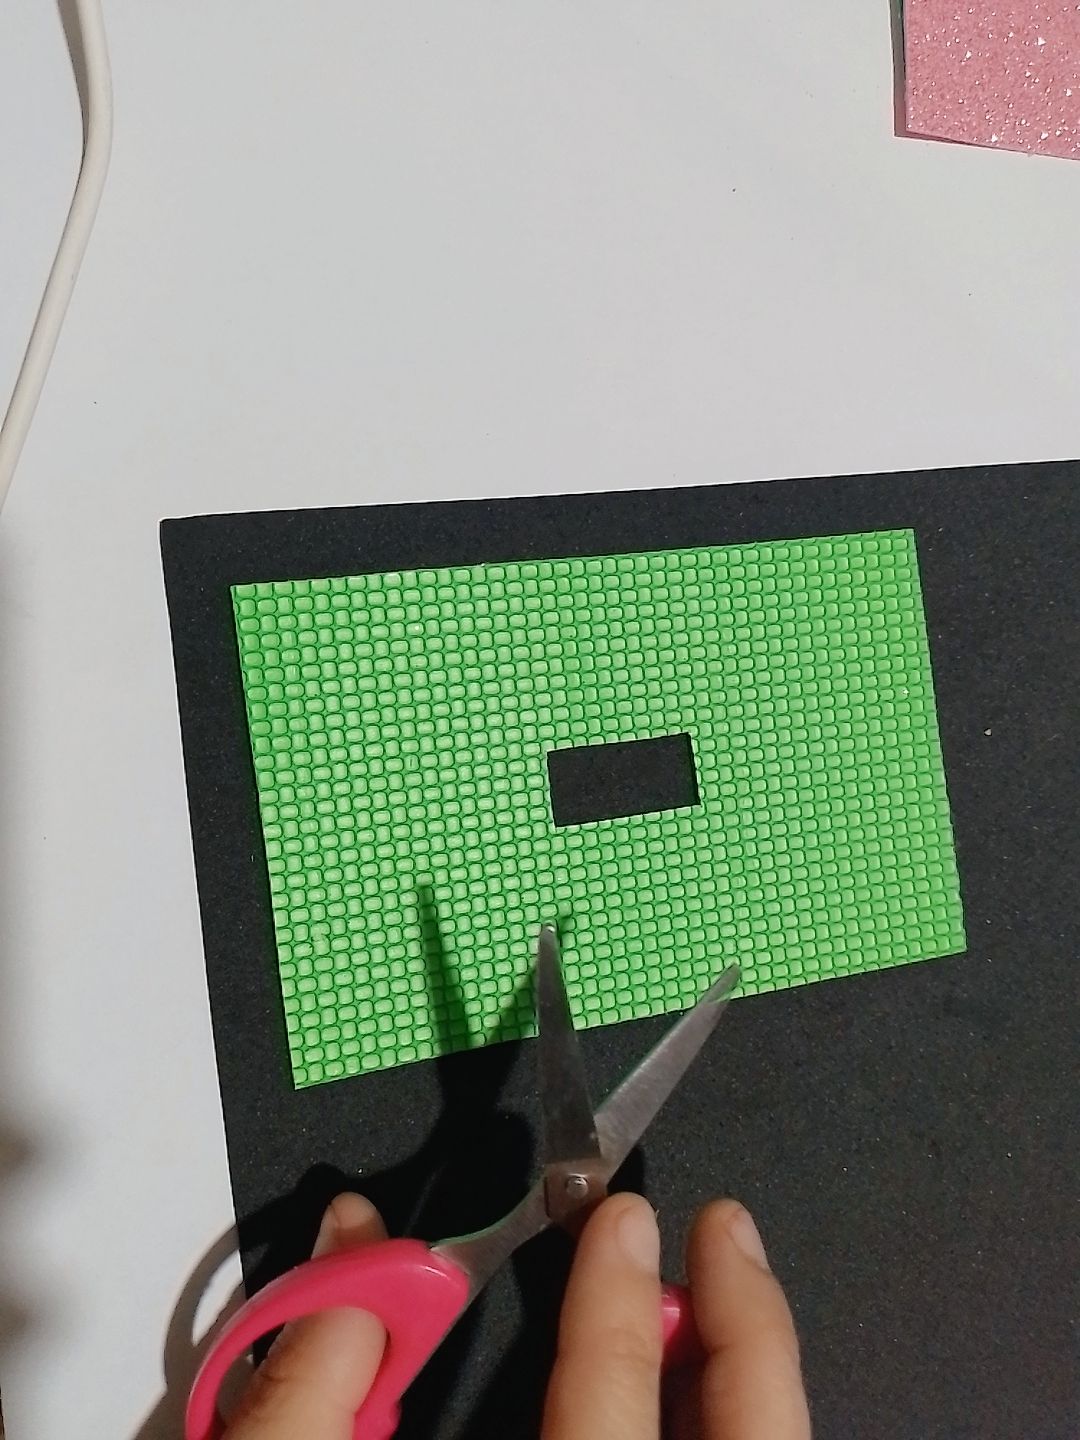
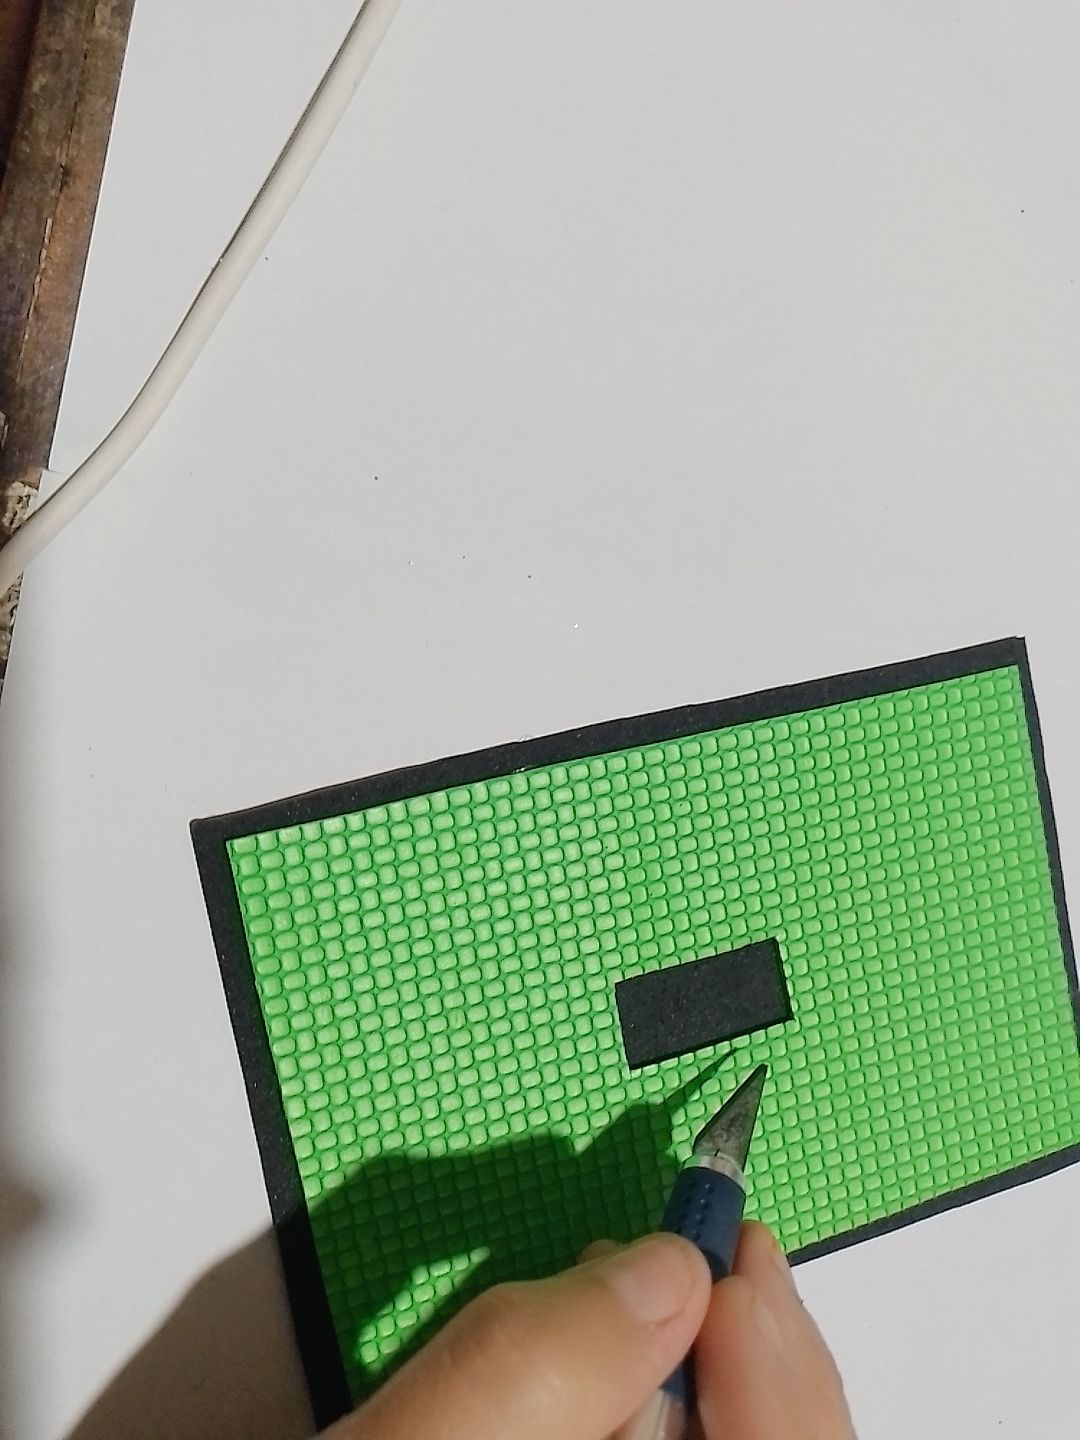
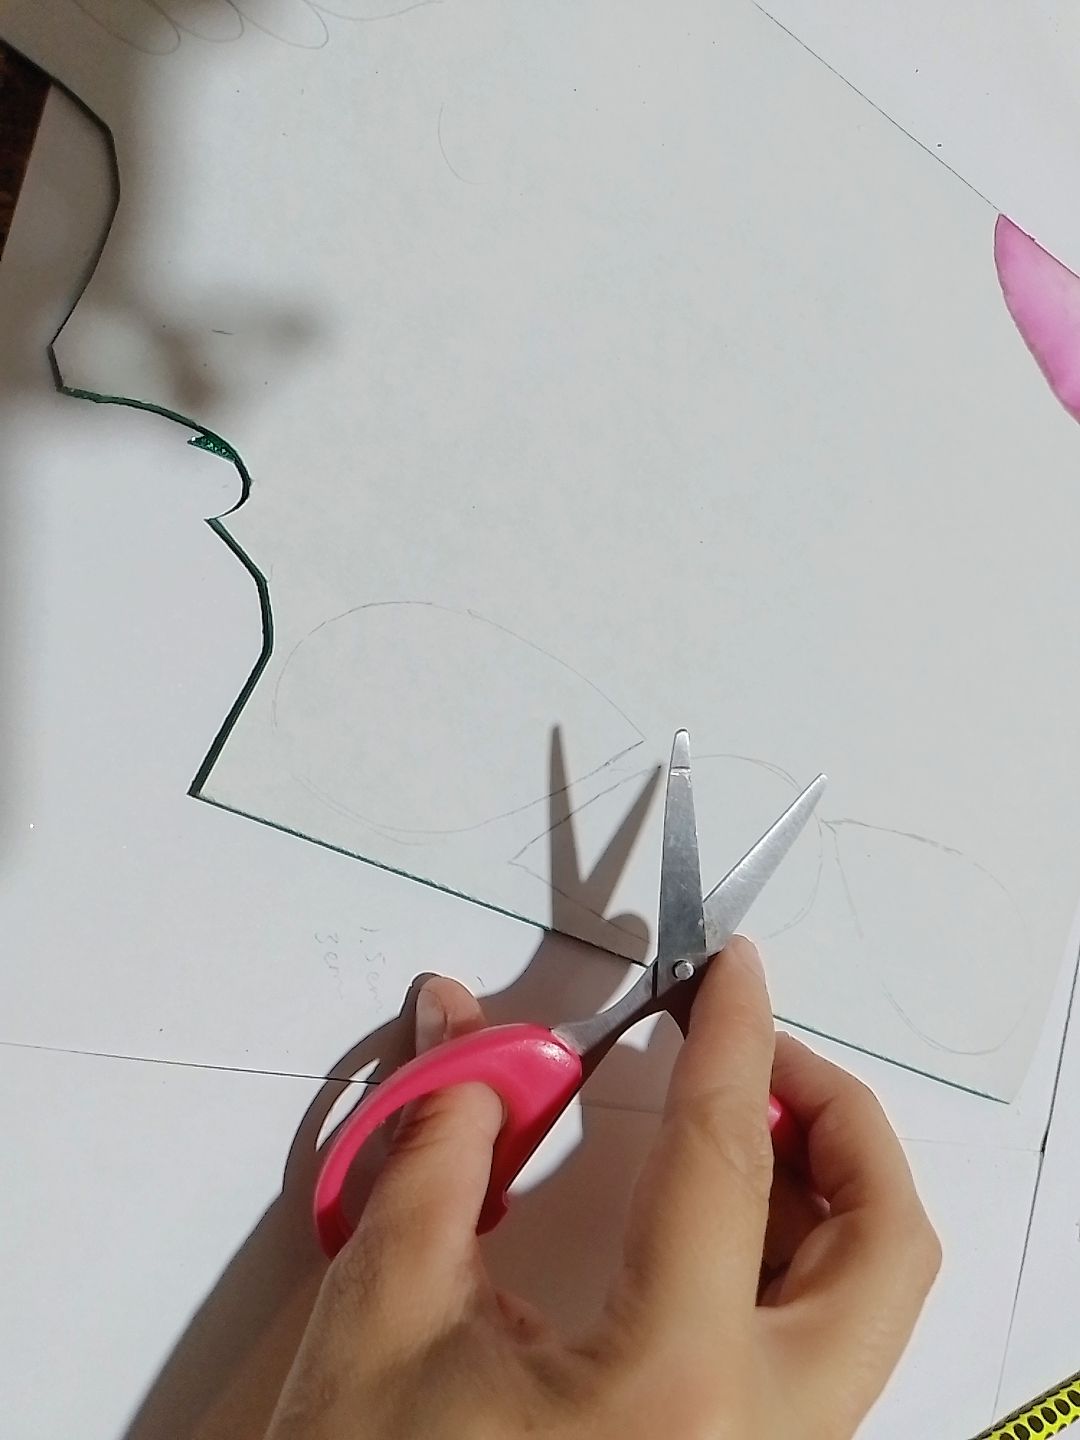
Step 4: Once the green rectangle is glued on top of the black foami, cut it on the outside edge leaving 3 mm left over and also cut the small rectangle in the middle leaving a hole, and put it to one side to make the ornaments.
Paso 4: Ya pegado el rectángulo verde encima del foami negro lo recortamos por el borde de afuera dejando 3 mm sobrantes y recortamos también el rectángulo pequeño del medio dejando un orificio, y lo ponemos hacia un lado para realizar los adornos.
|
|
|
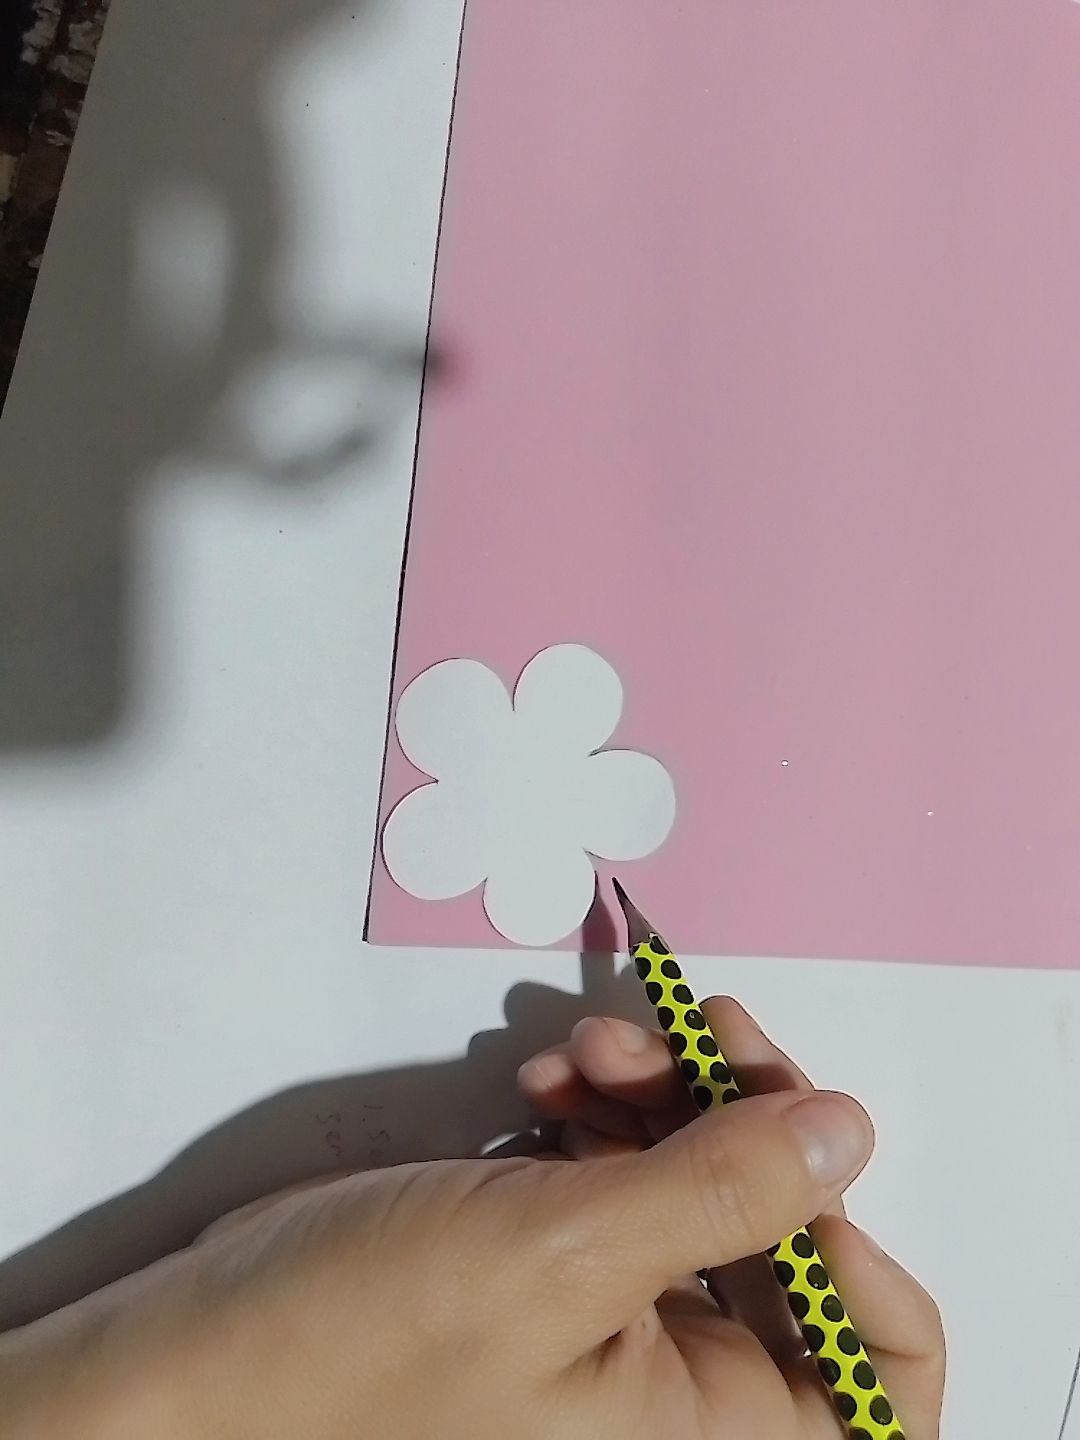
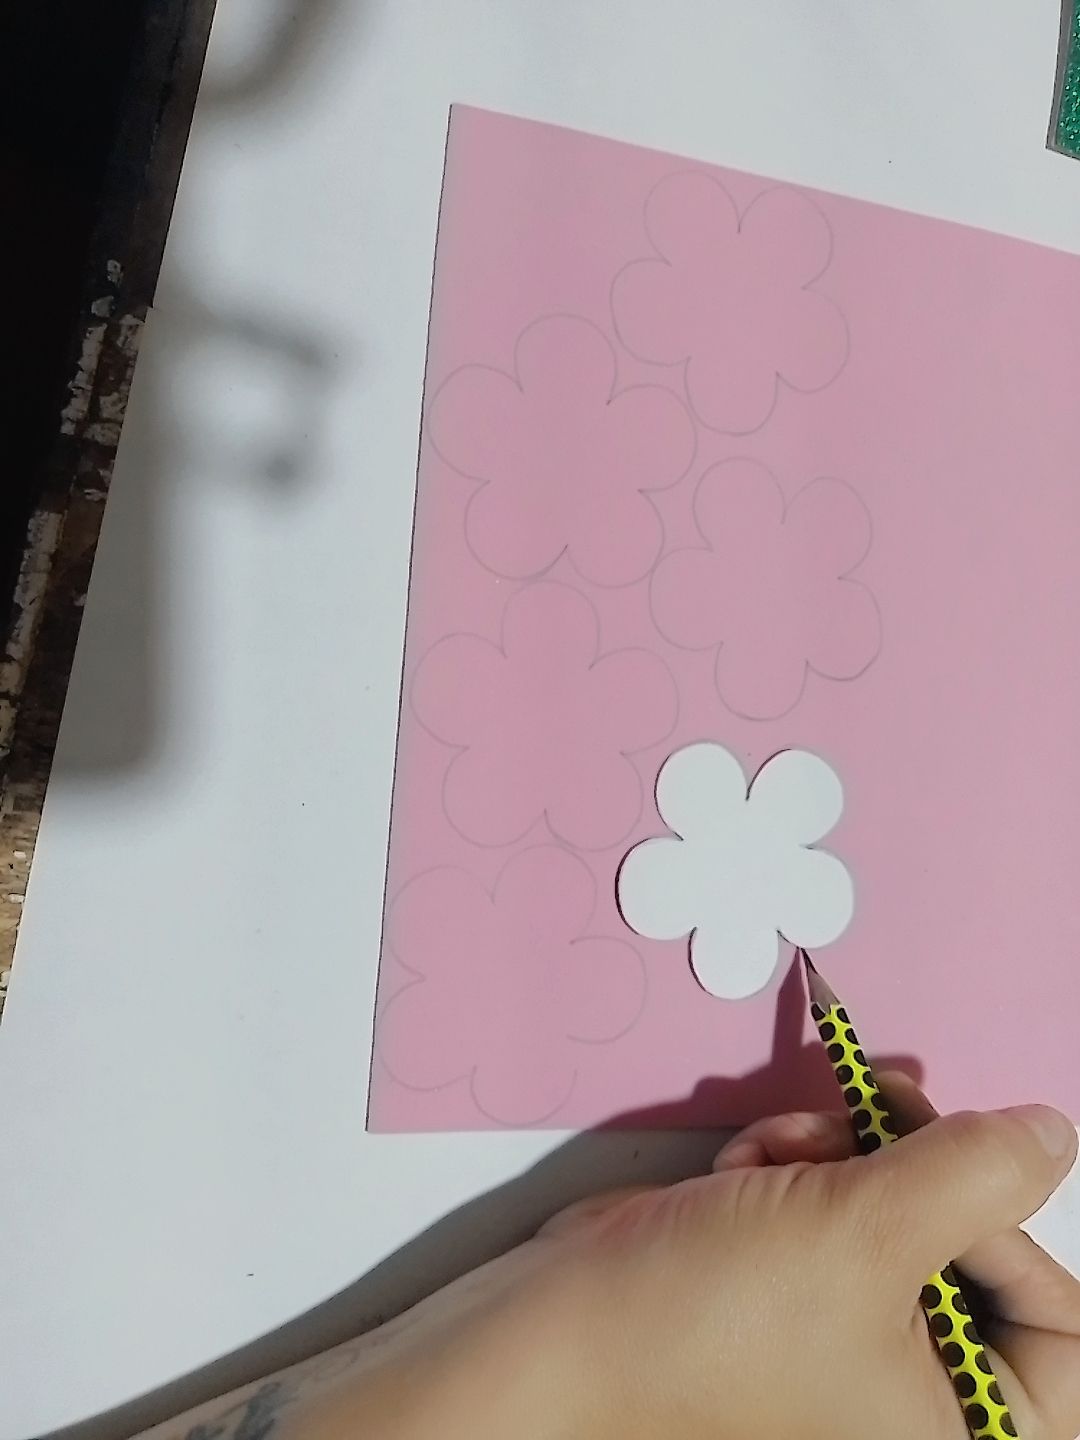
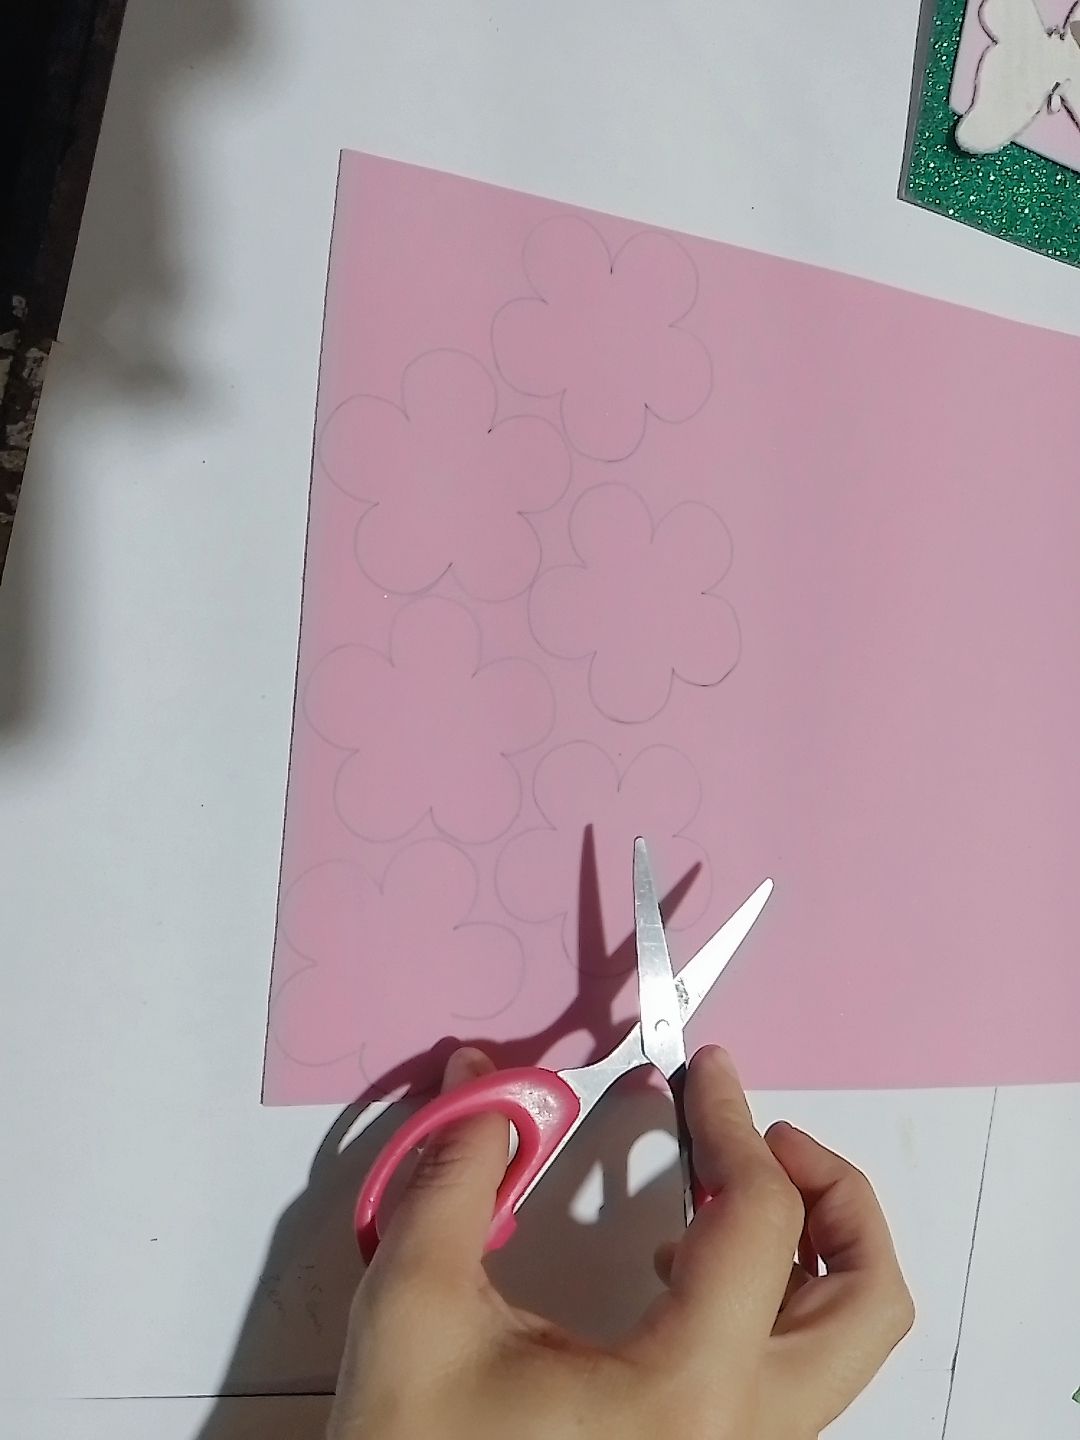
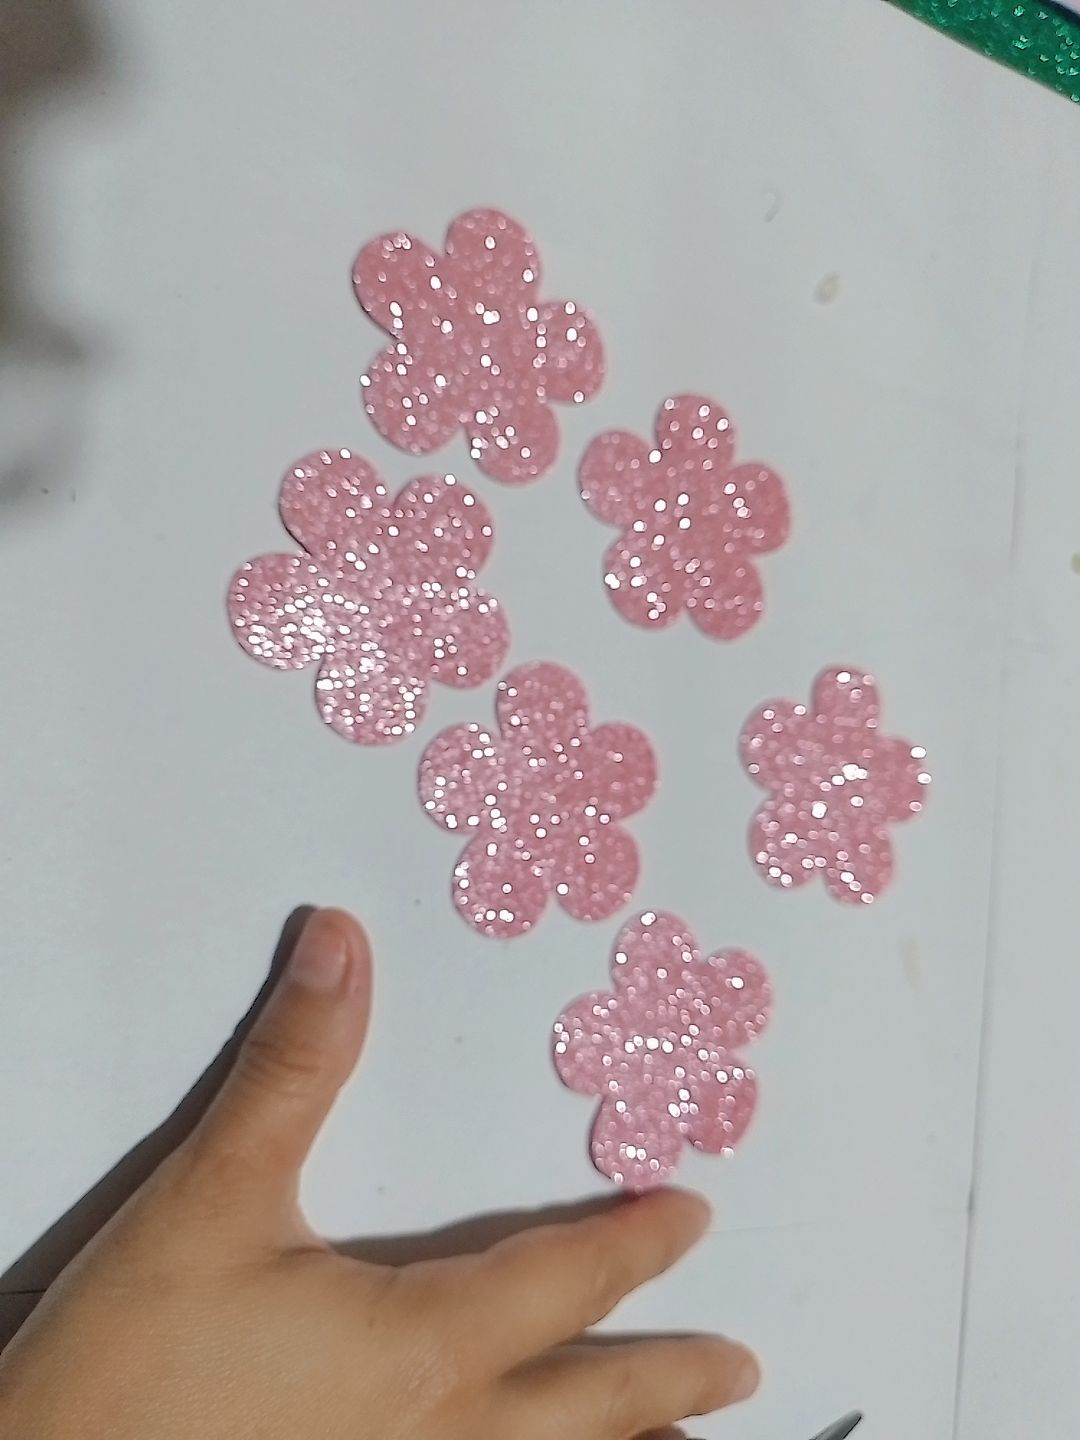
Step 5: With the paper molds we mark 6 flowers and cut them out.
Paso 5: Con los moldes de papel marcamos 6 flores y las recortamos.
|
|
|
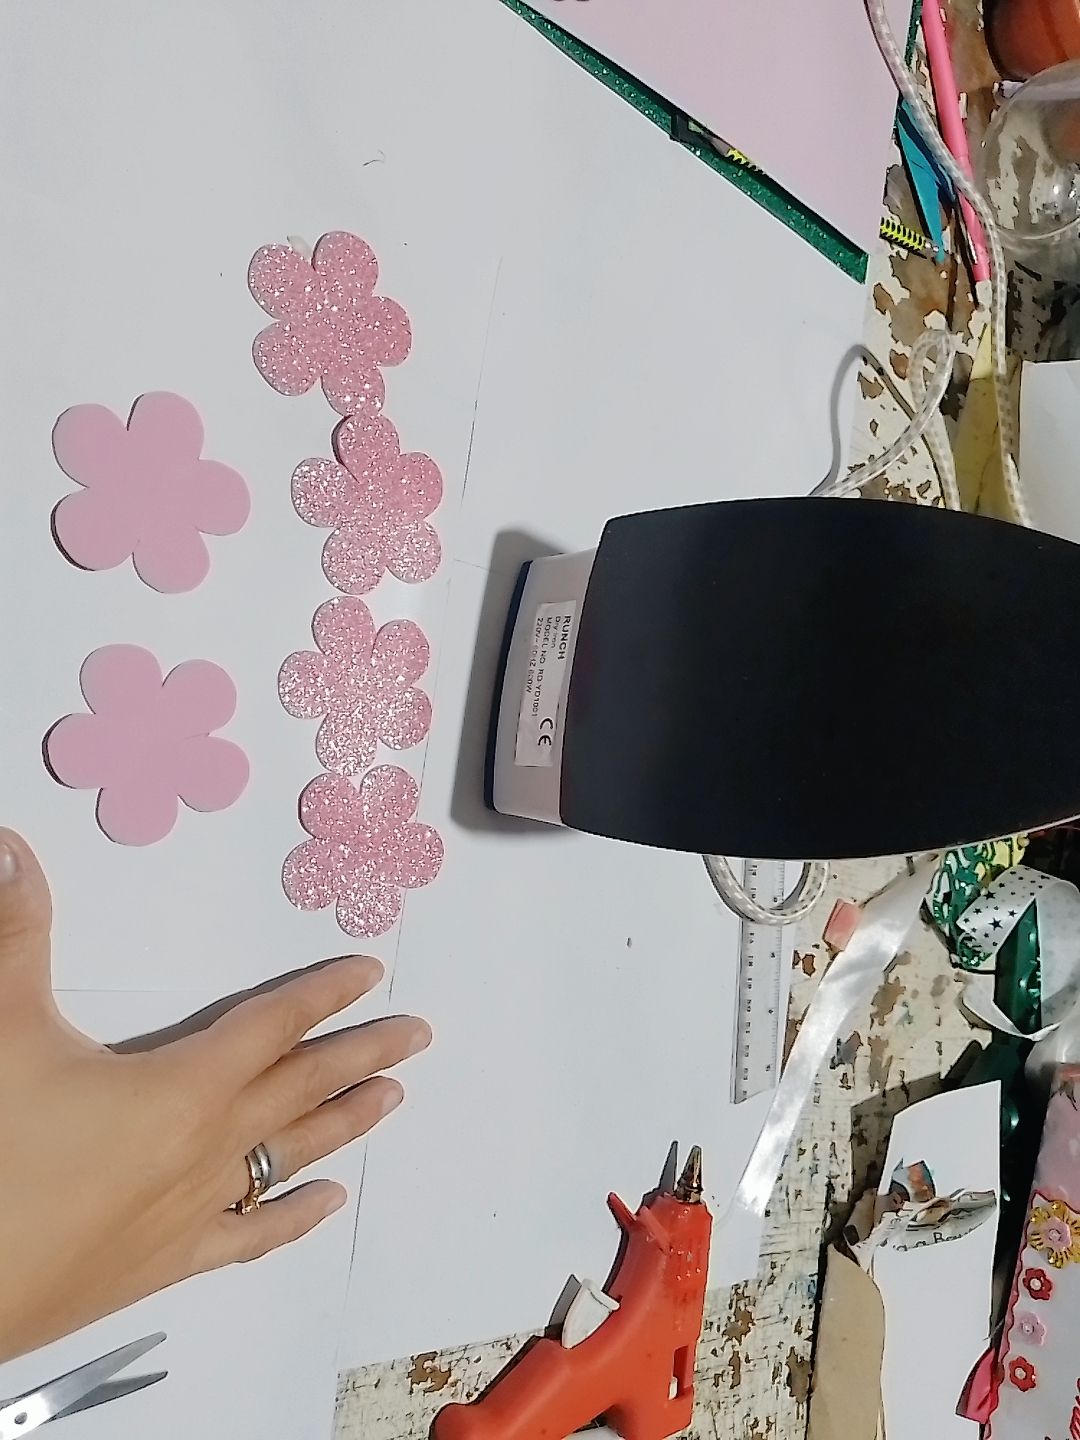
|
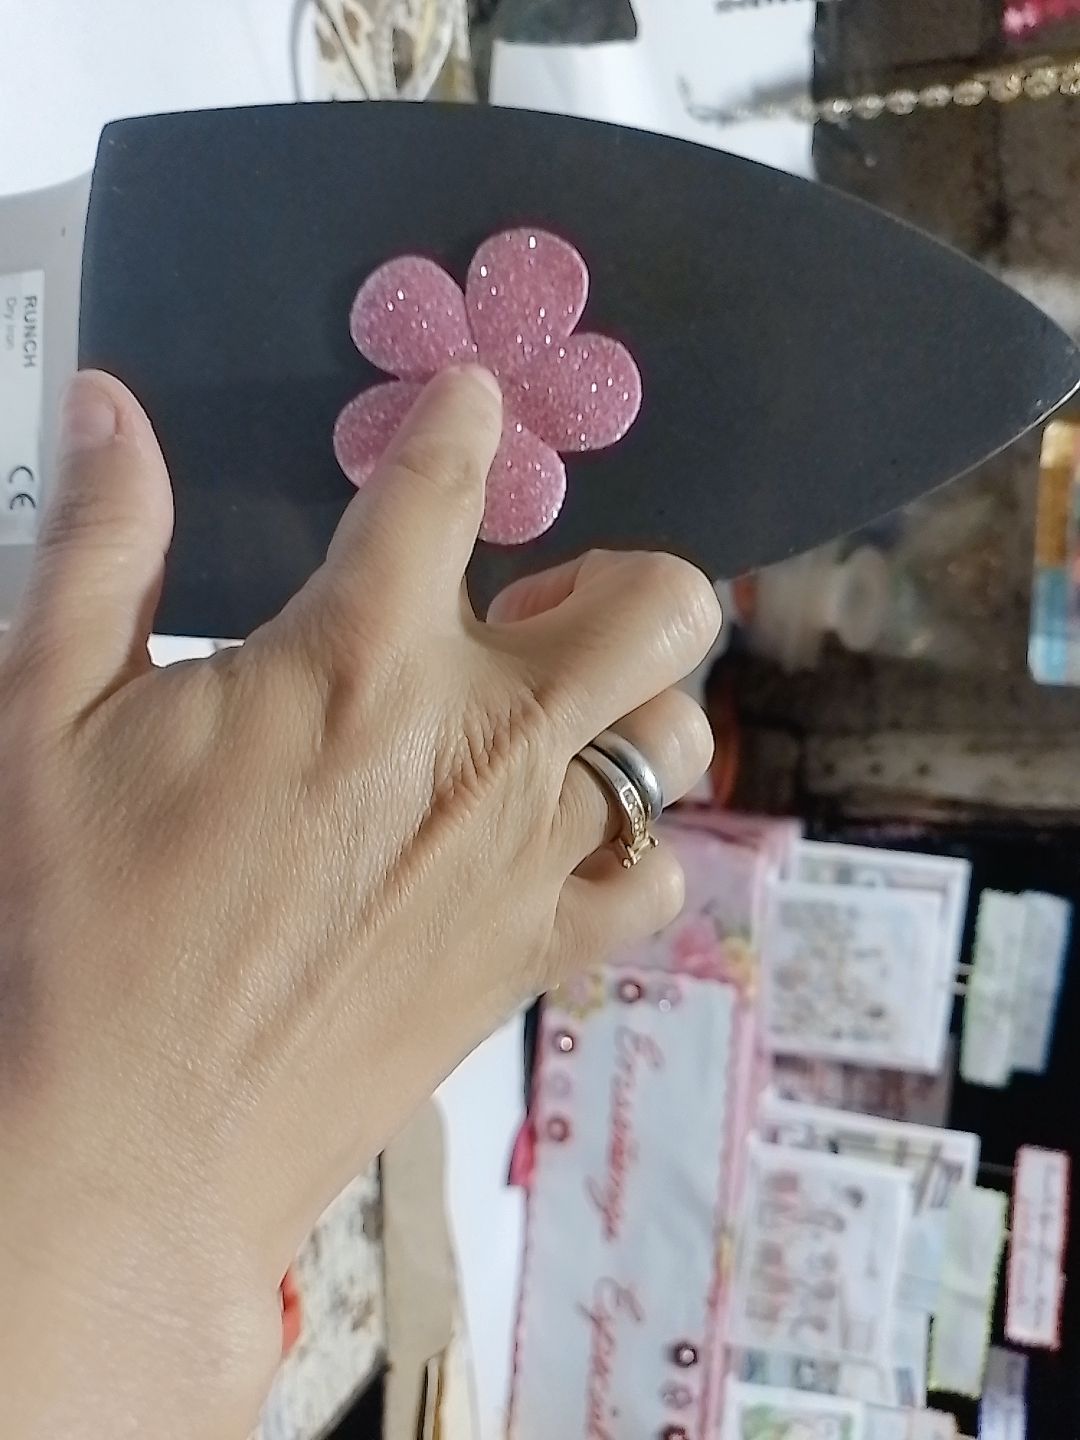
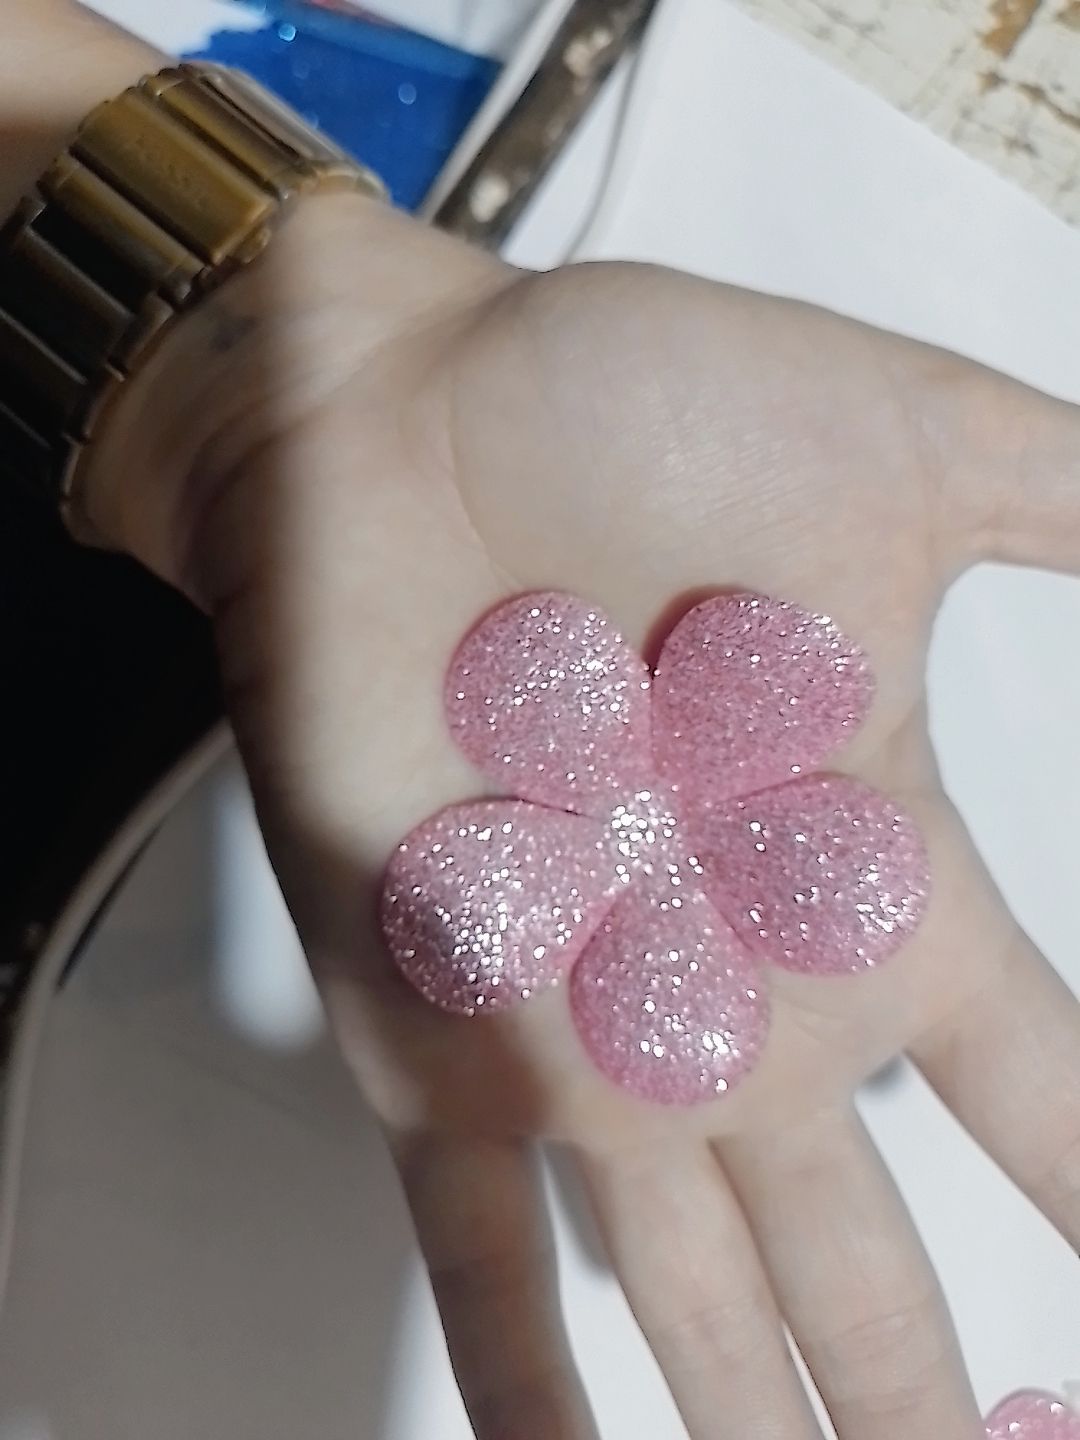
Step 6: Once the flowers are cut out, heat the iron and when it is very hot, place the flowers on the smooth side so that they get a more beautiful shape.
Paso 6: Ya las flores recortadas ponemos a calentar la plancha y cuando este bien caliente colocamos las flores por la parte lisa para que estas cojan un molde mas bonito.
|
|
|
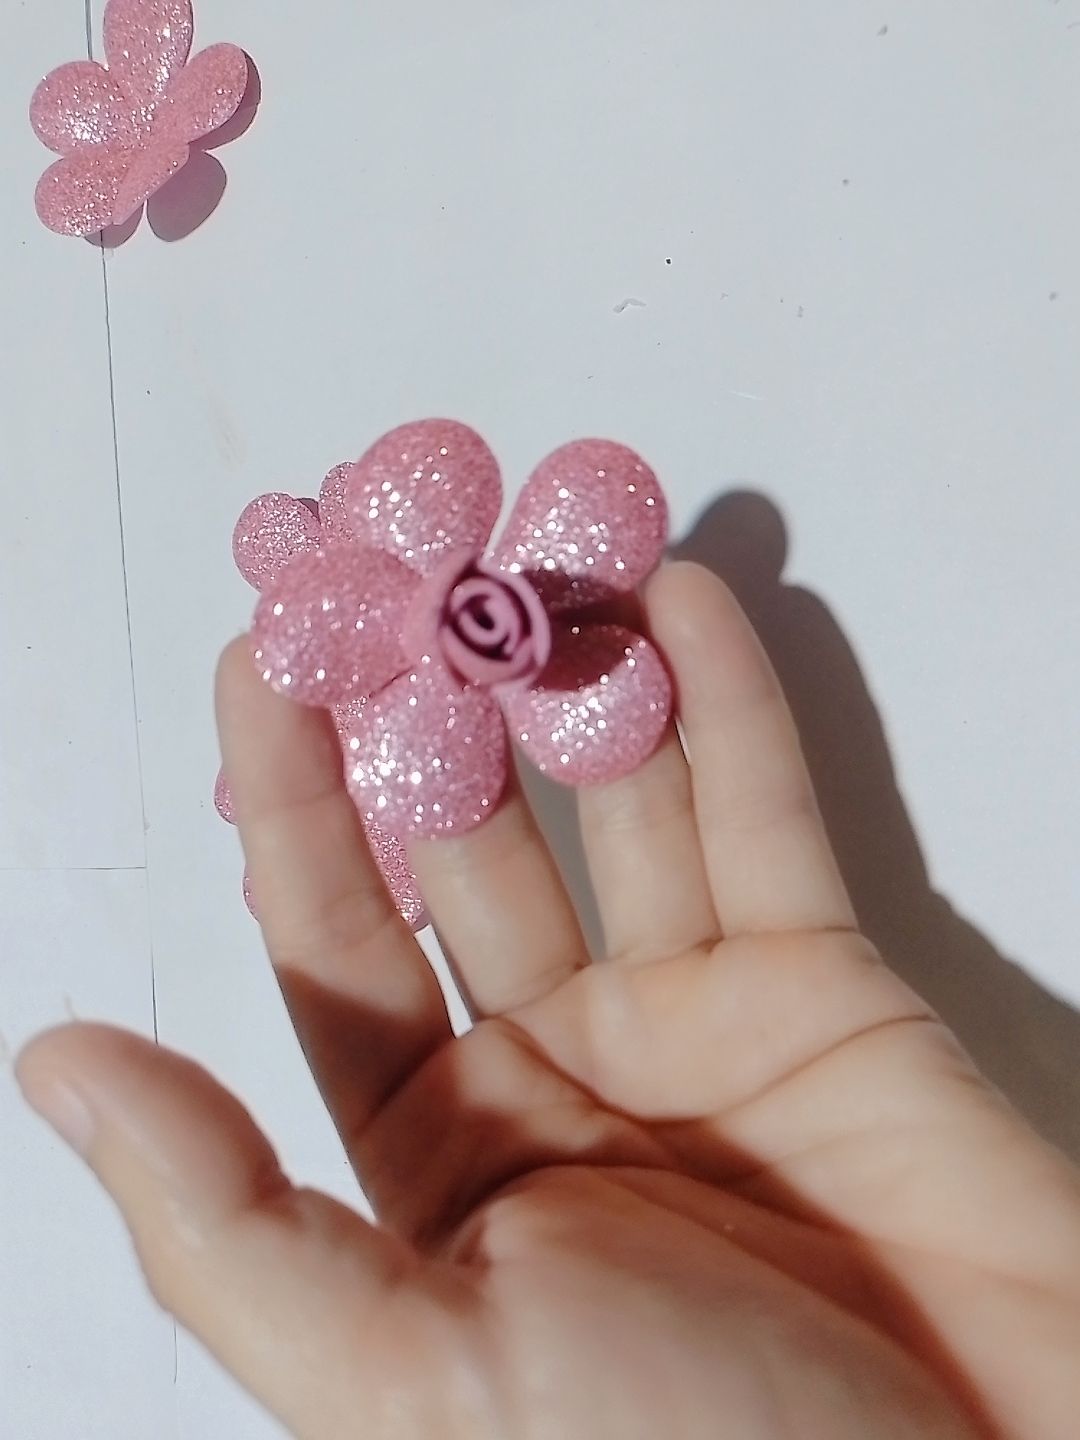
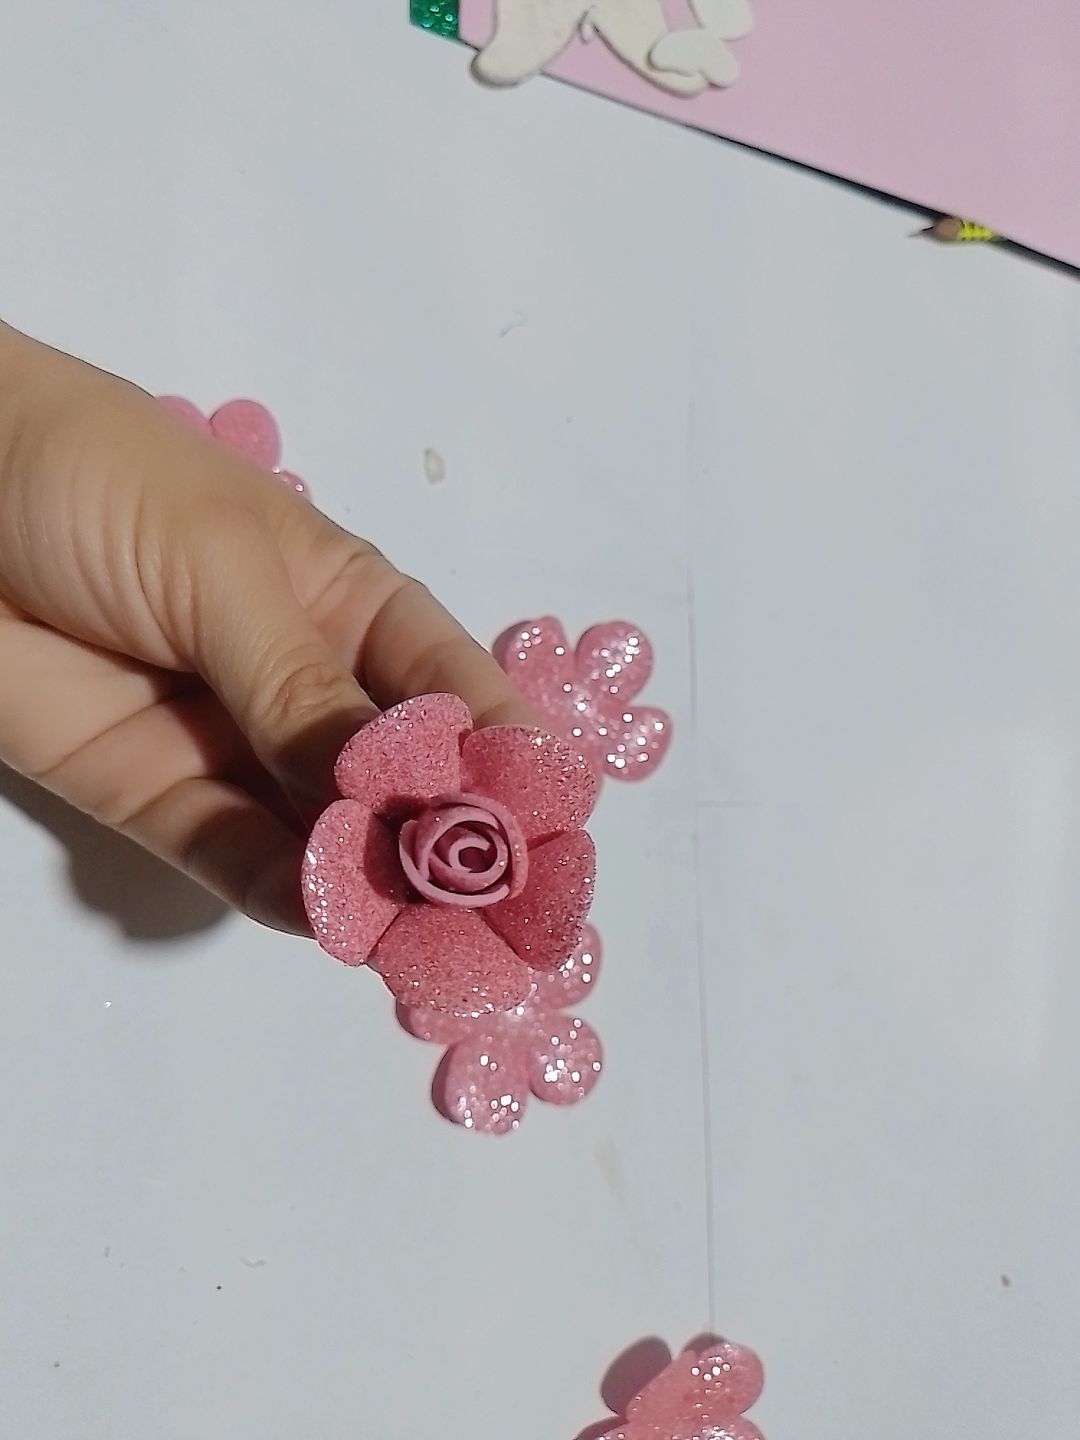
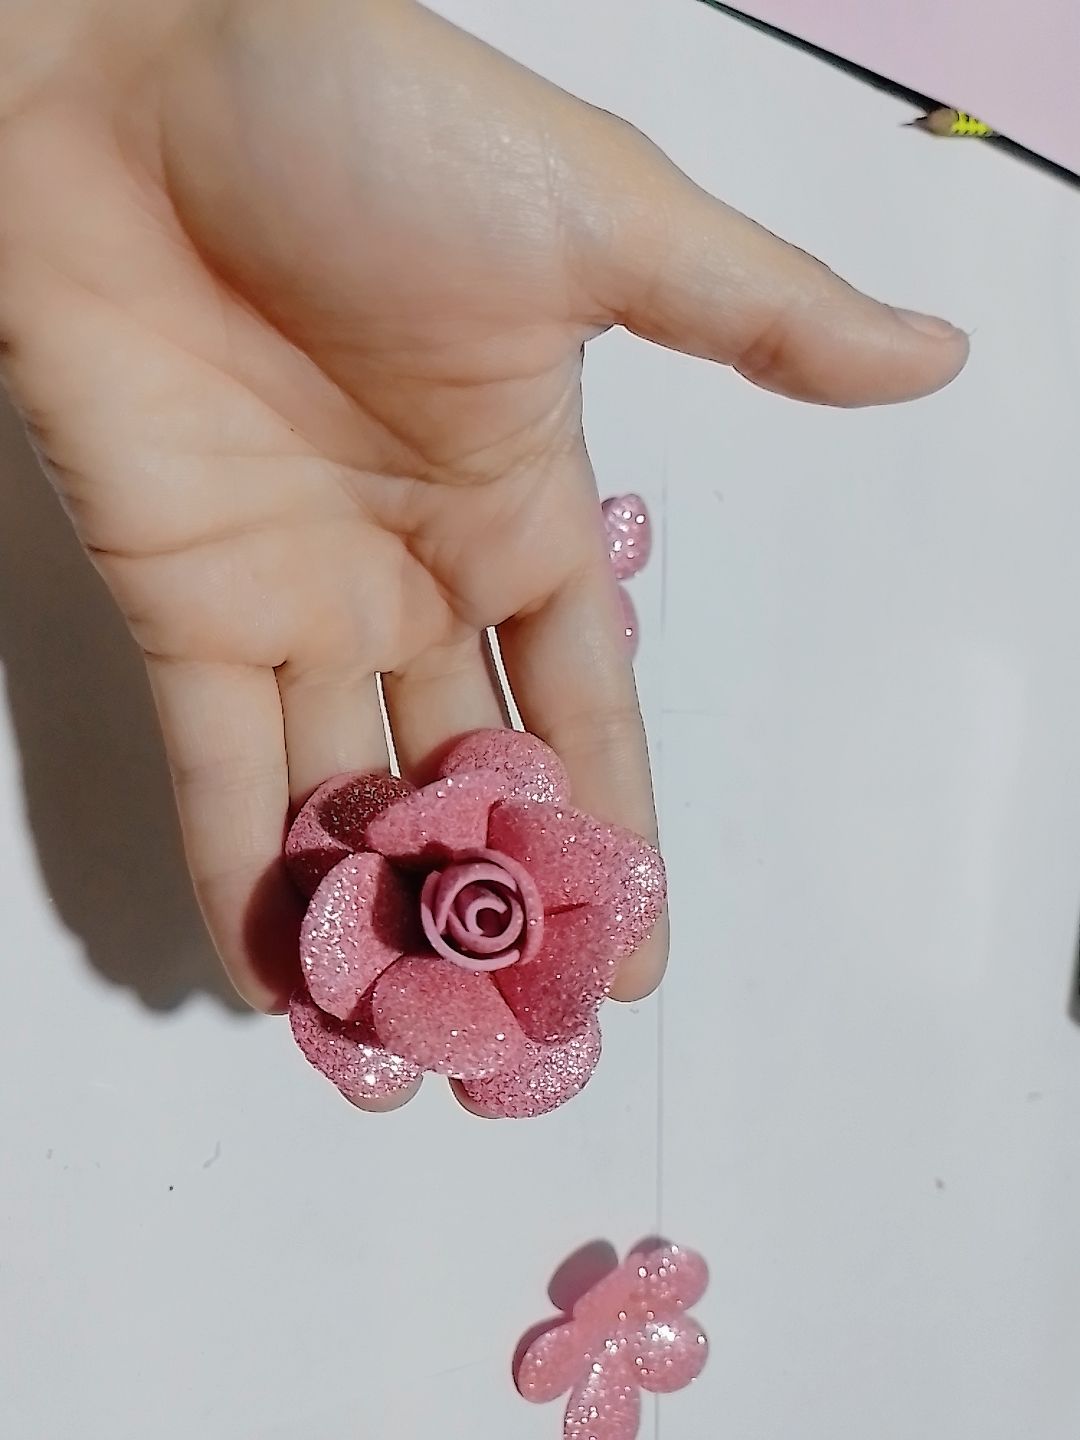
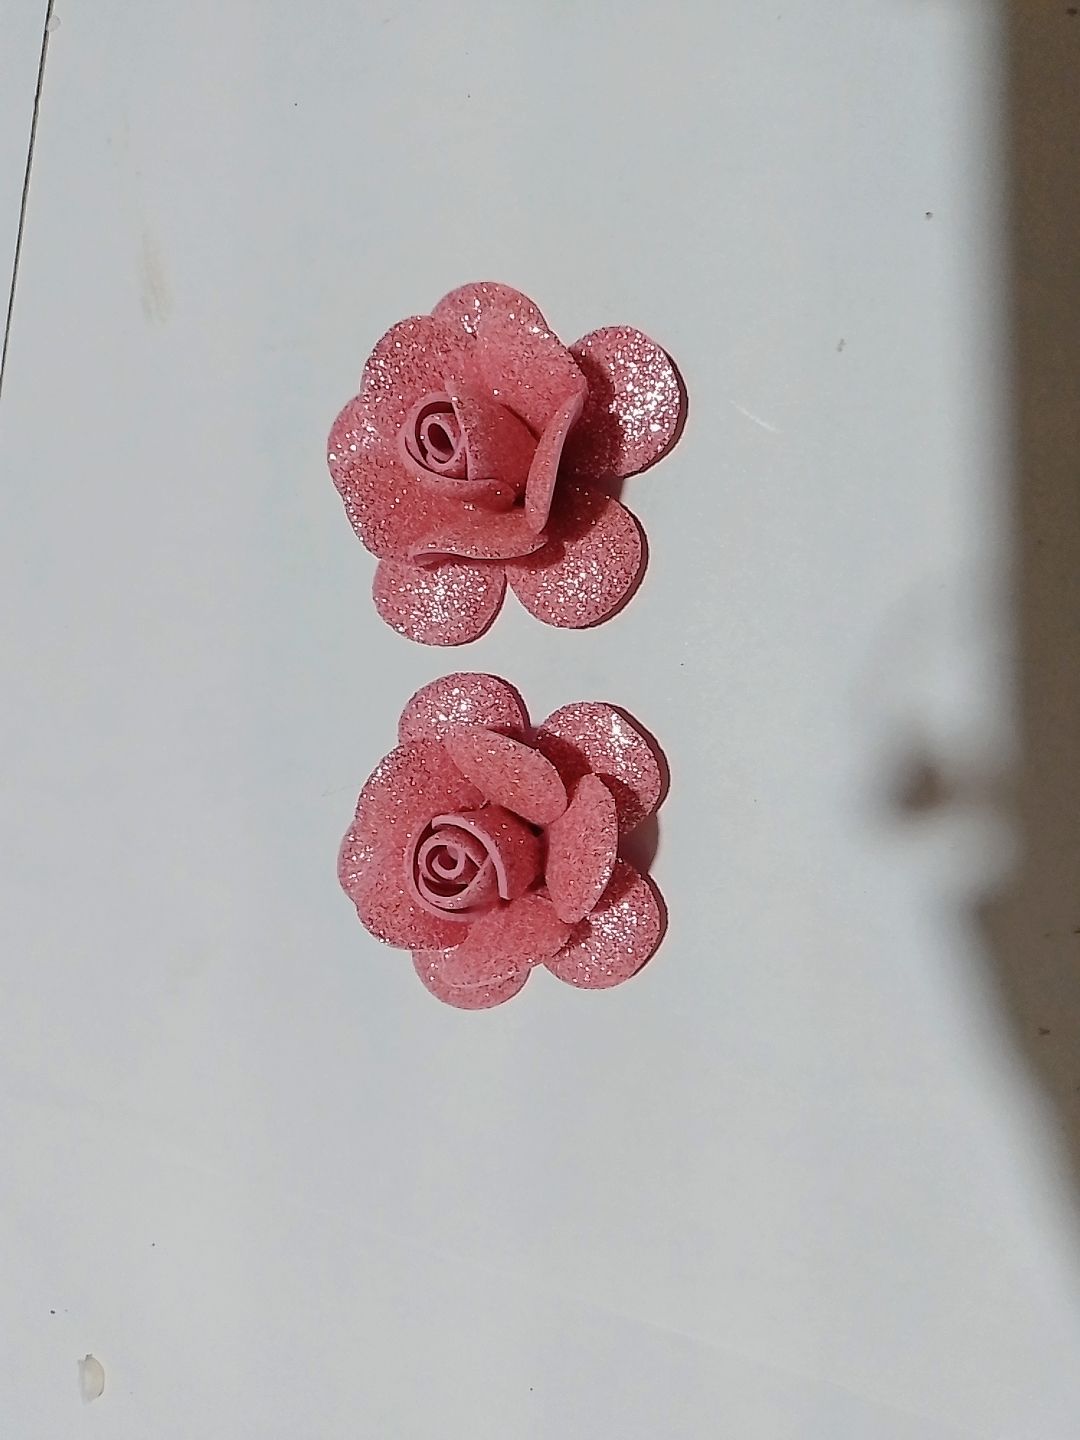
Step 7: then we glue the first flower petal by petal in the form of a bud and already glued together all the petals we glue it on top of another flower and again we glue up these petals but this time differently, since they are not glued complete they are left protruding and then we glue again on top of another flower and so we finish the first flower, then we make the second flower like the first one.
Paso 7: luego vamos pegando por pétalo la primera flor en forma de capullo y ya pegados entre si todos los pétalos la pegamos encima de otra flor y volvemos a pegar hacia arriba estos pétalos pero esta ves diferente, ya que no se pegan completos se dejan sobresalientes y después volvemos a pegar encima de otra flor y así terminamos la primera flor, luego realizamos la 2 flor igual que la primera.
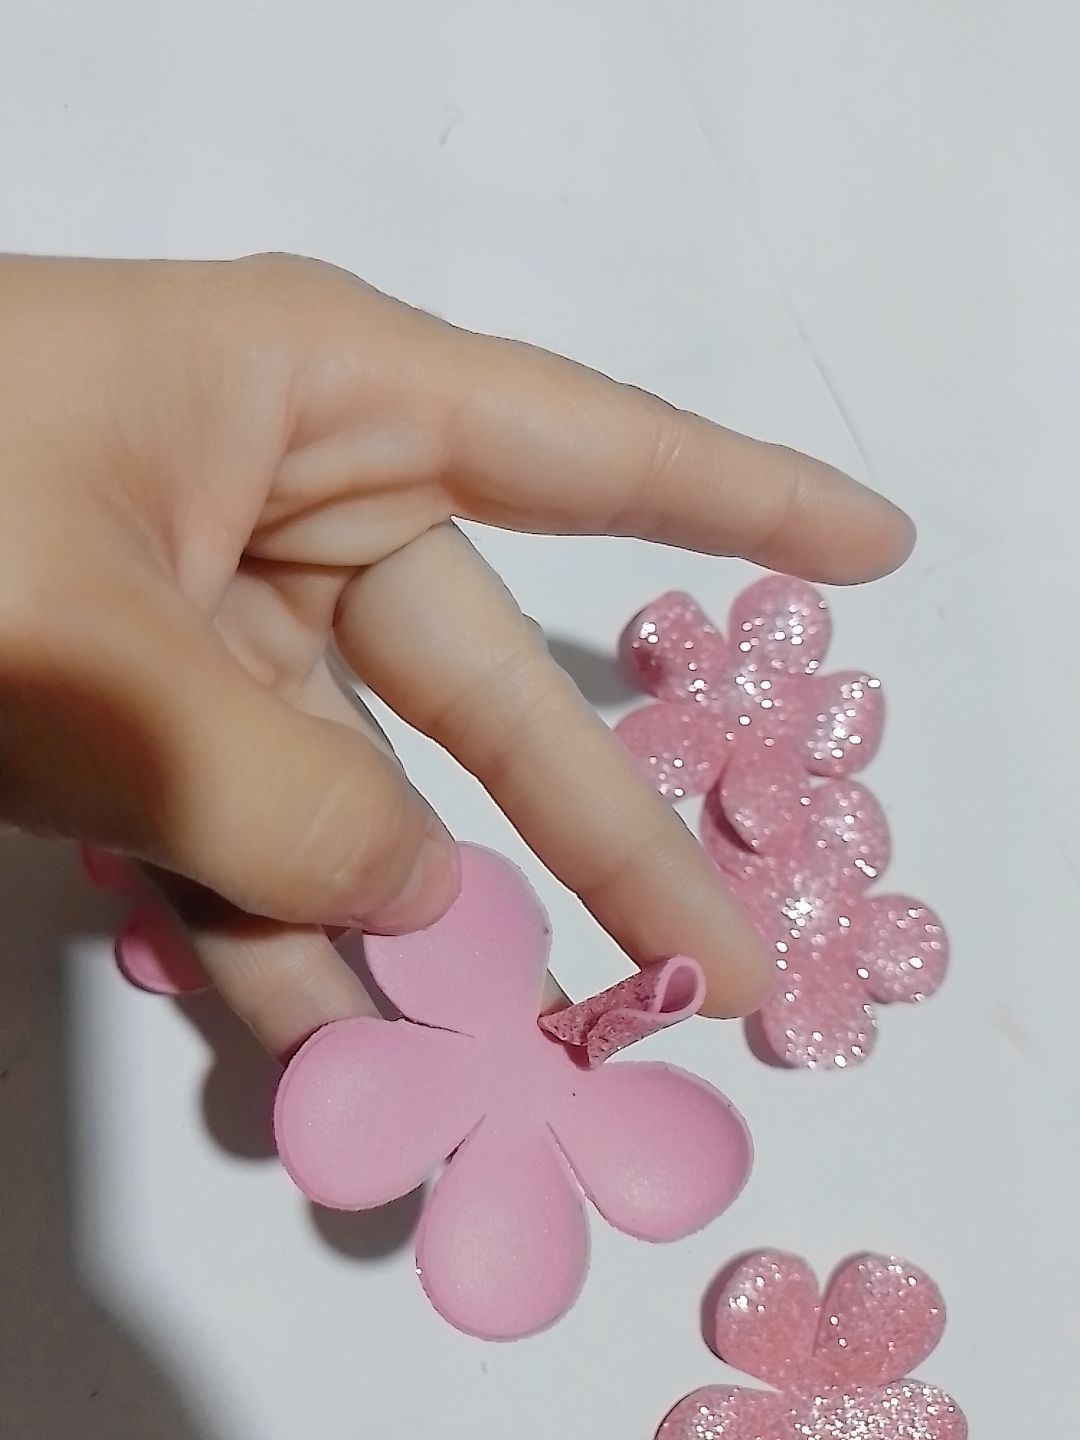
|
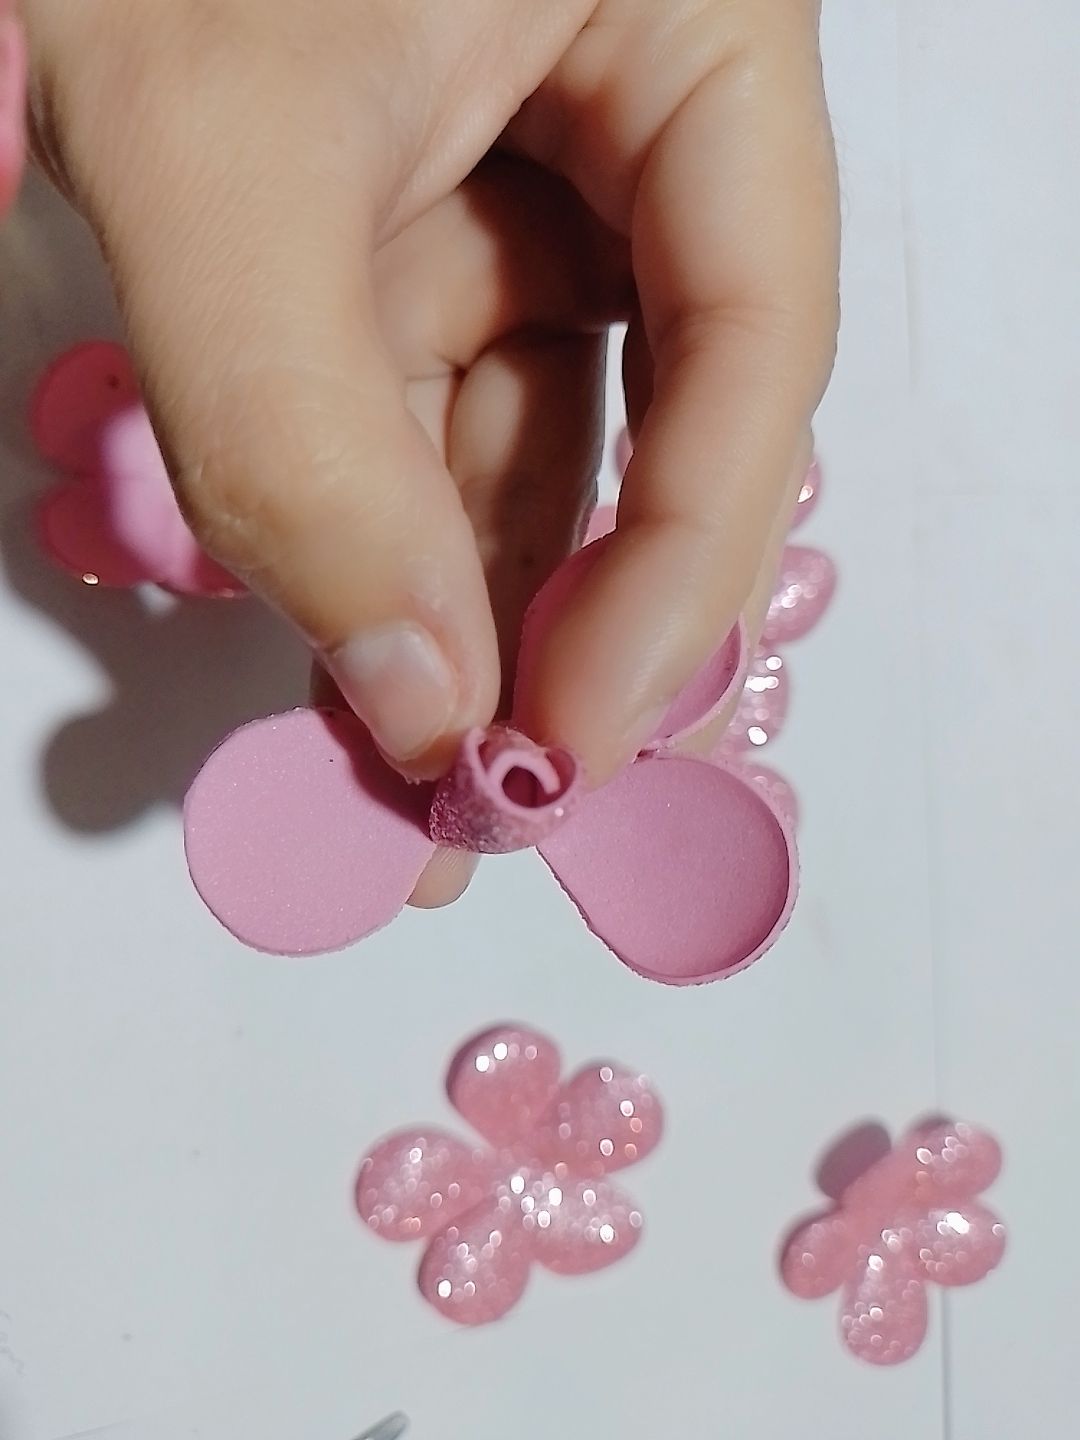
|

|
|
|
|
|
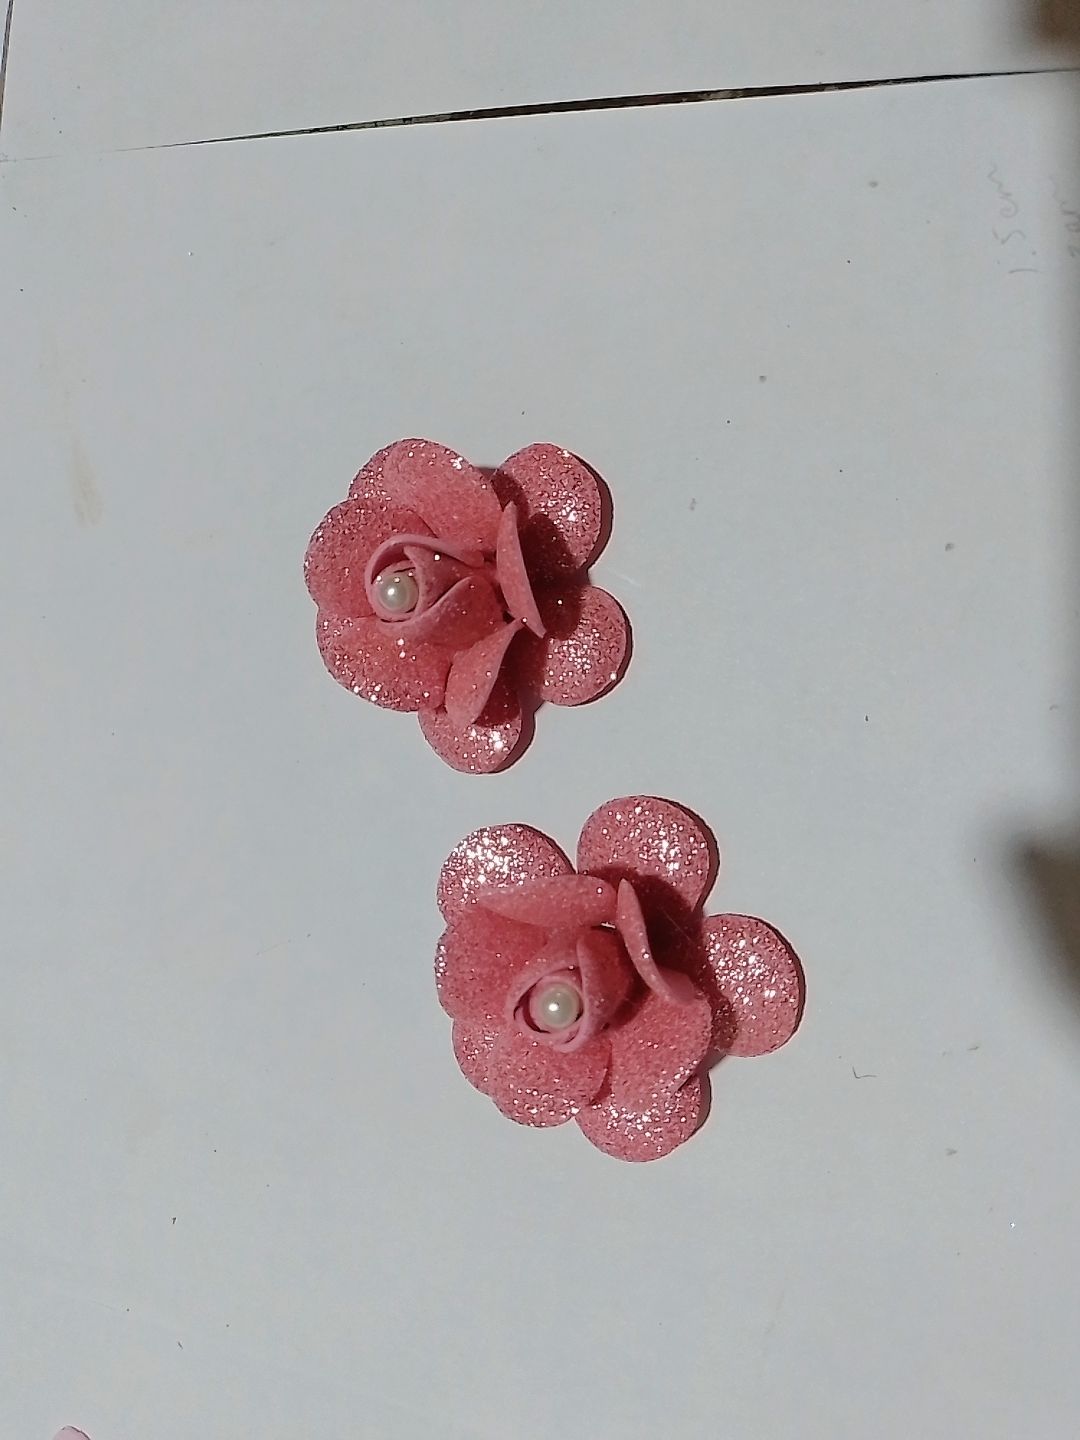
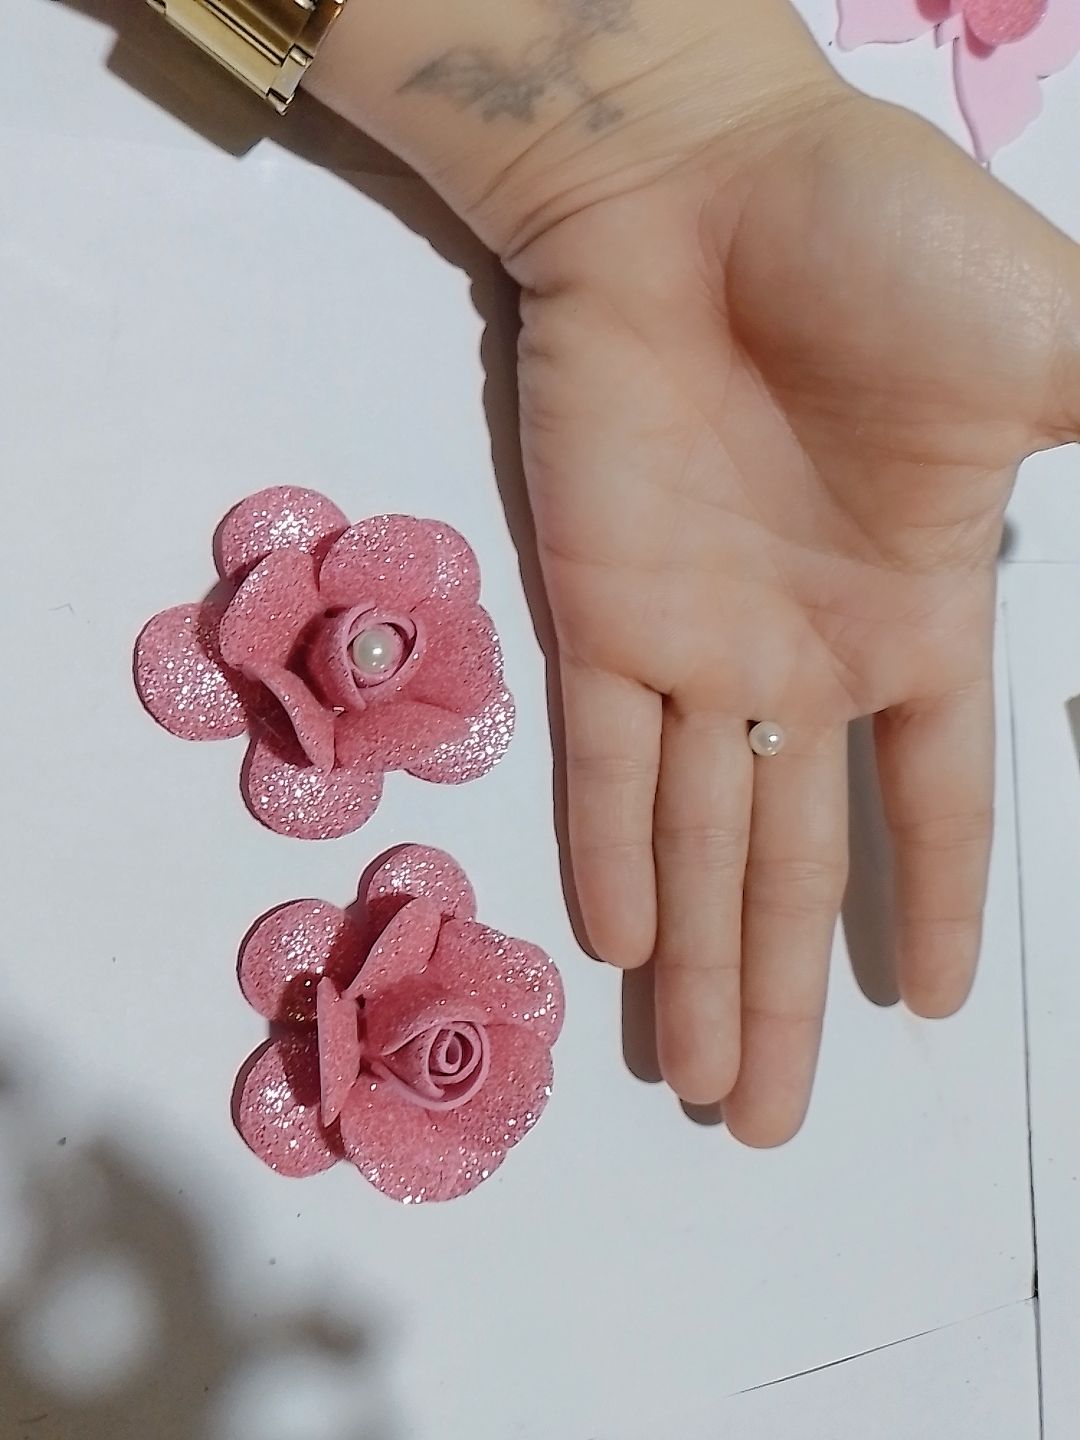
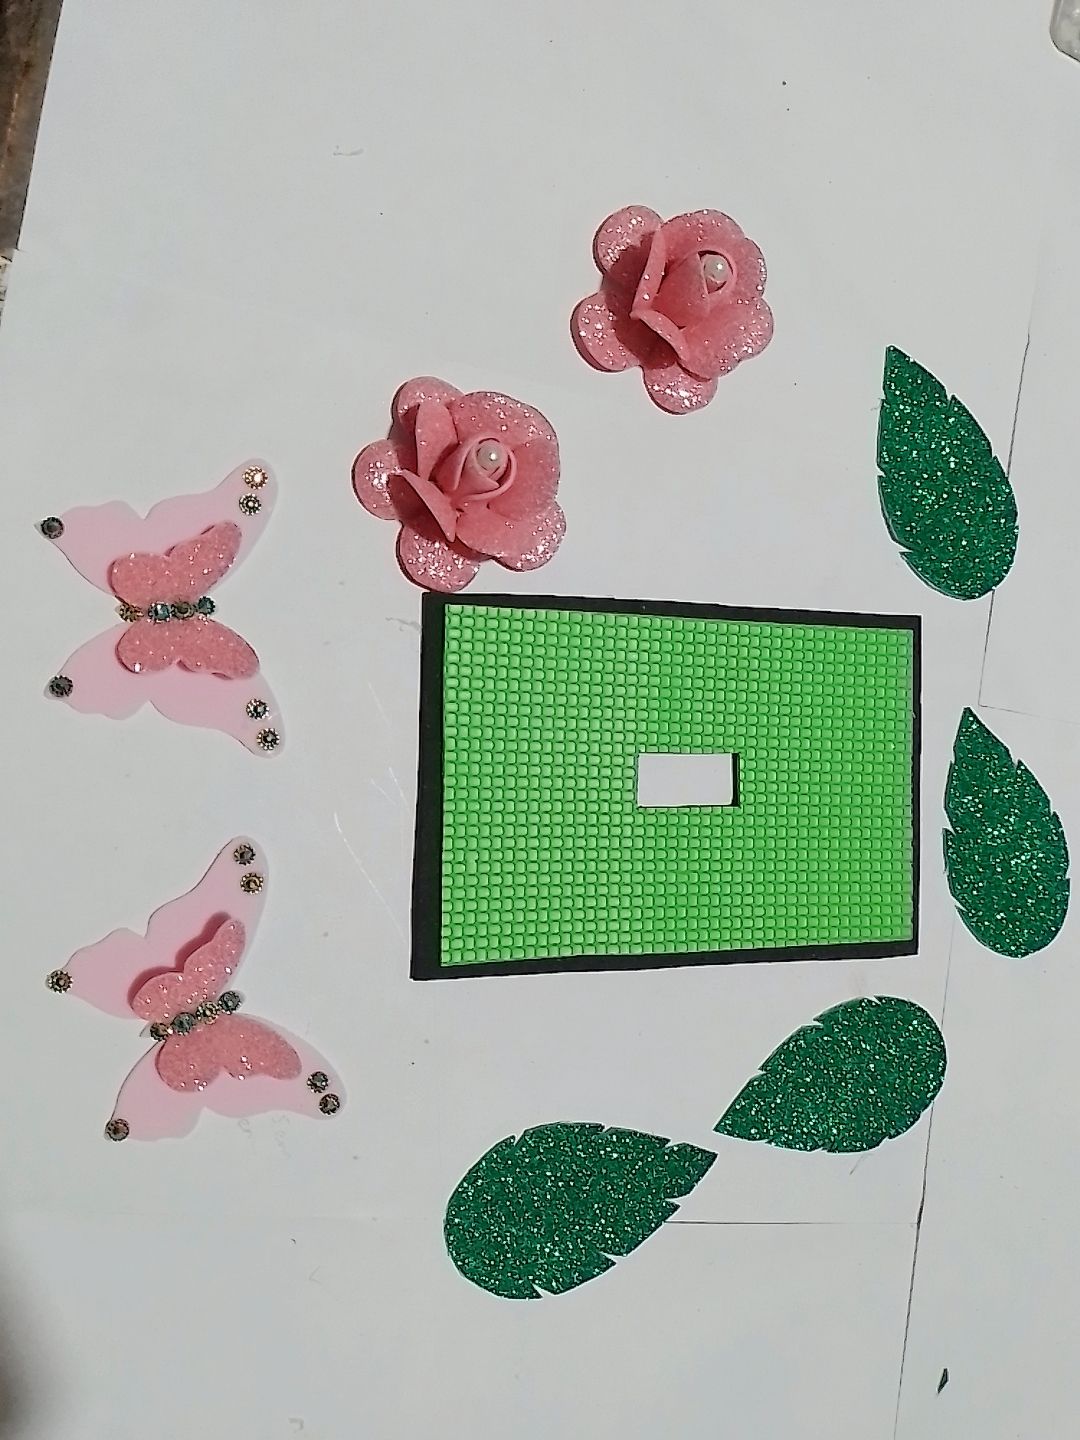
Step 8: To the flowers we glue a large pearl in the middle of the bud.
Paso 8: A las flores le pegamos una perla grande en el medio del capullo.
|
|
|
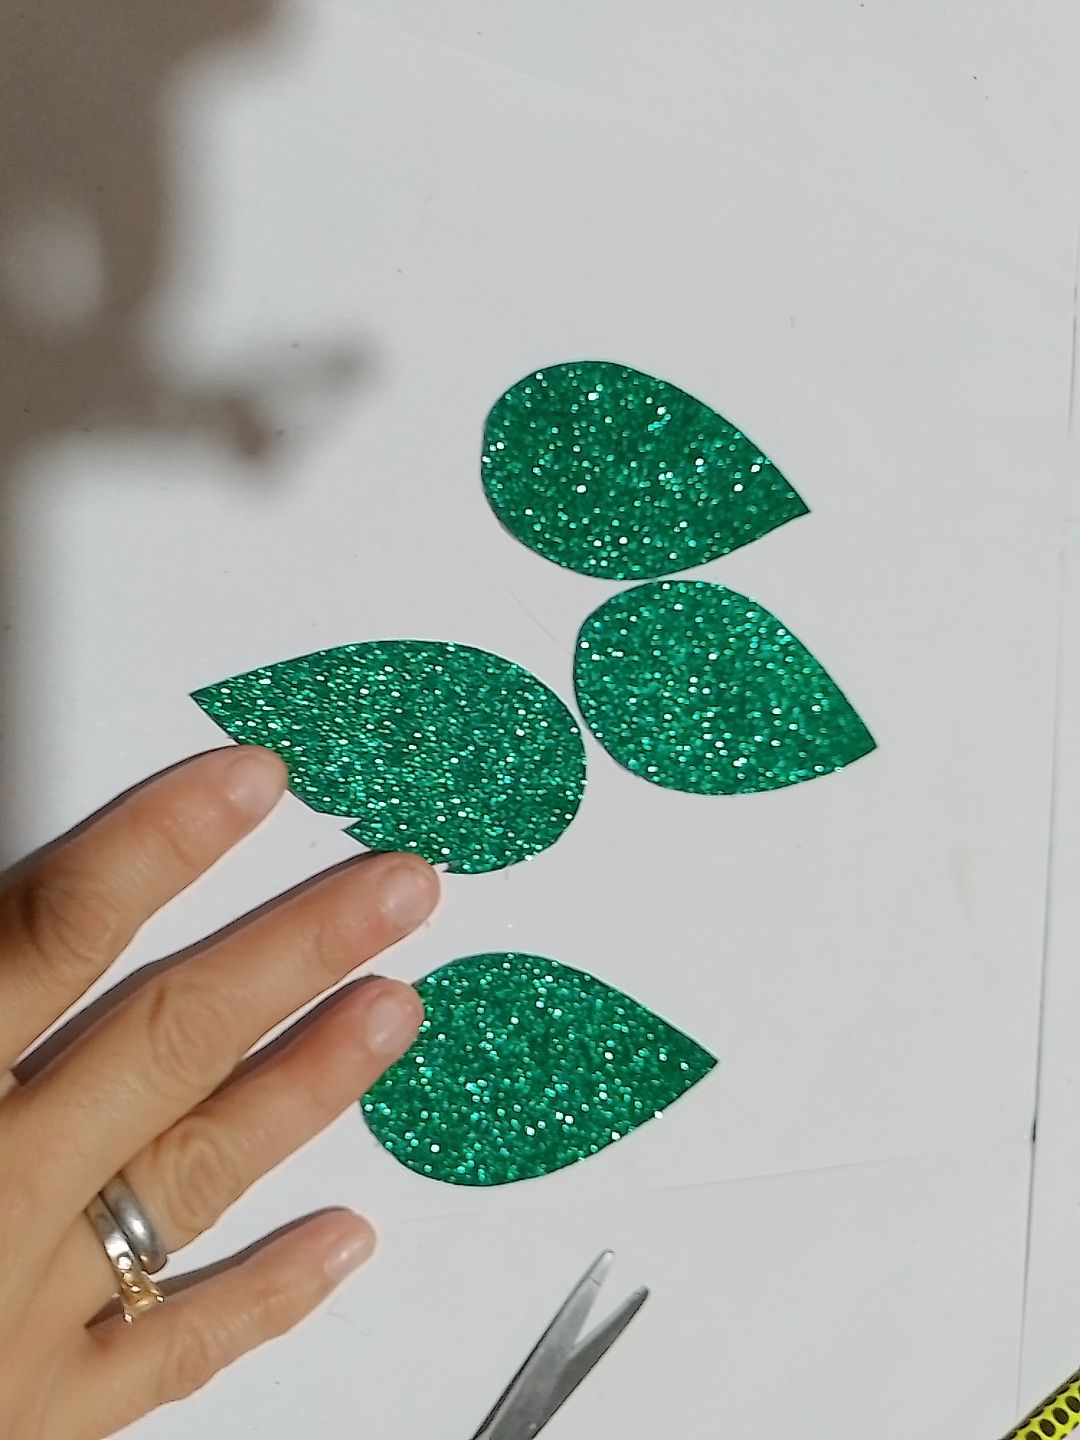
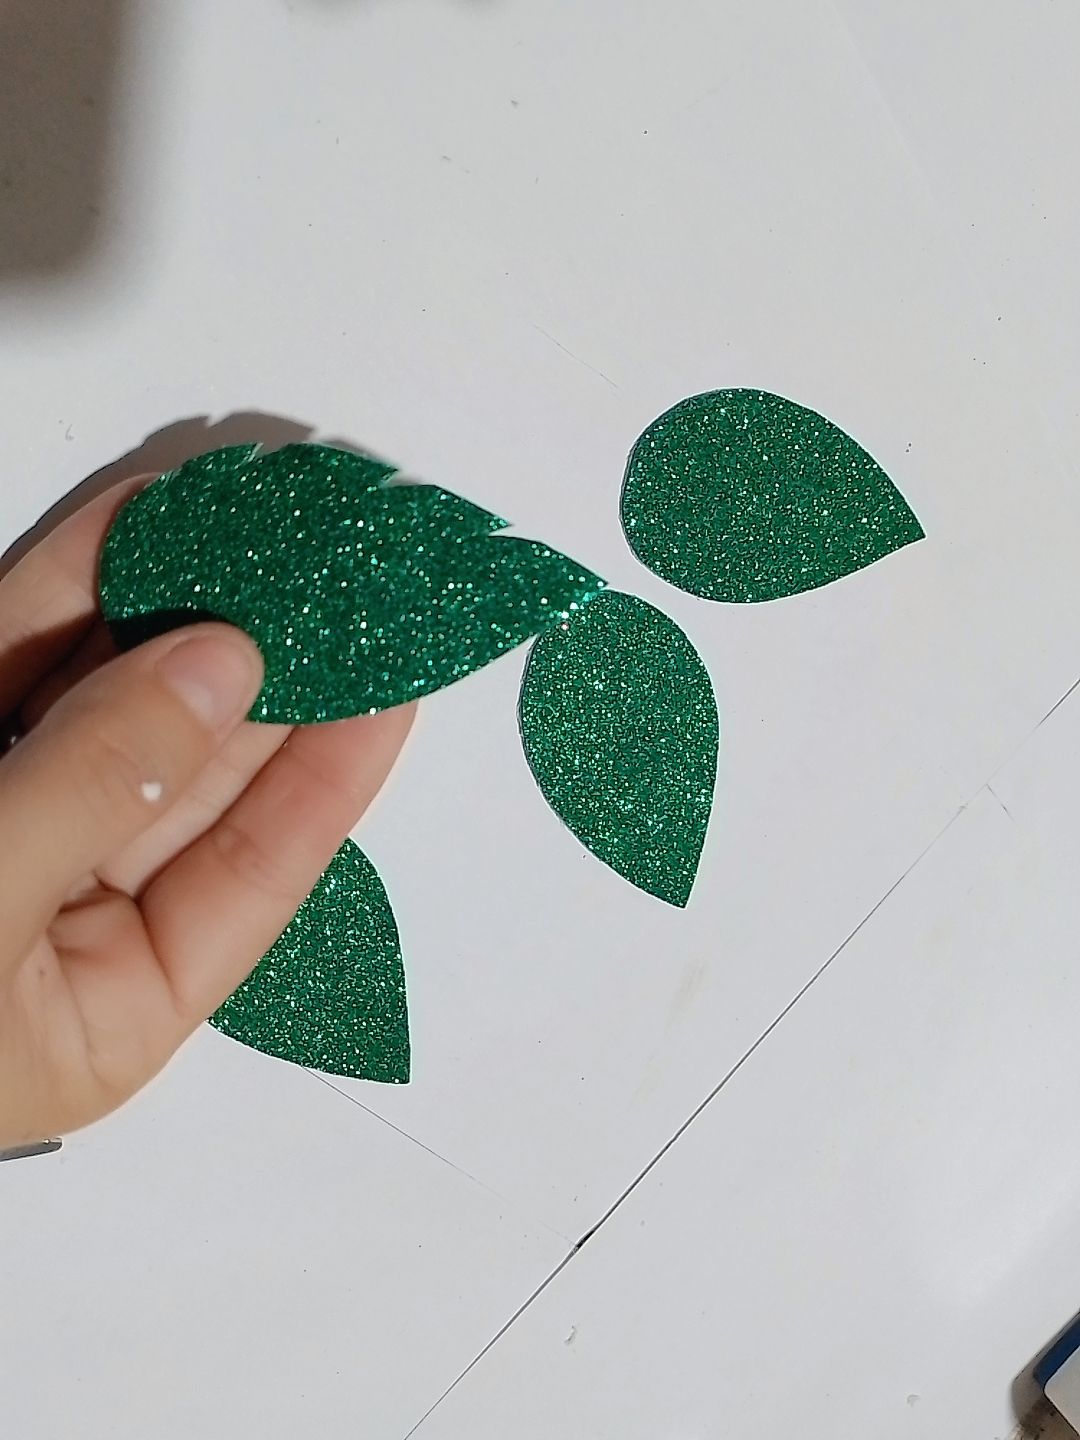
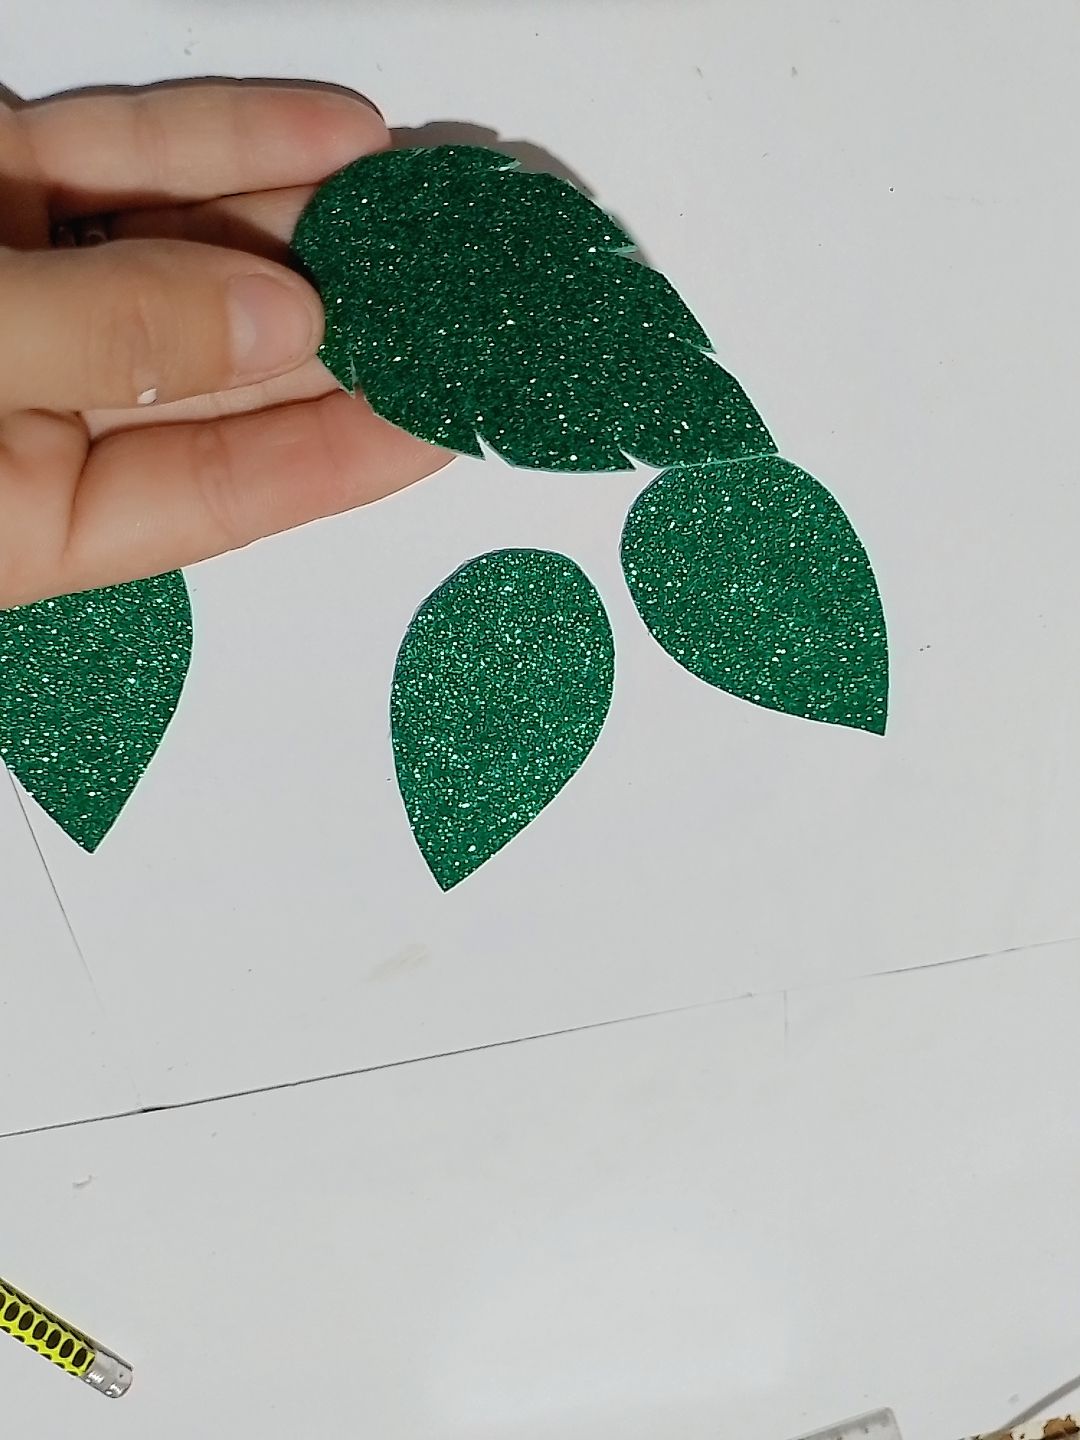
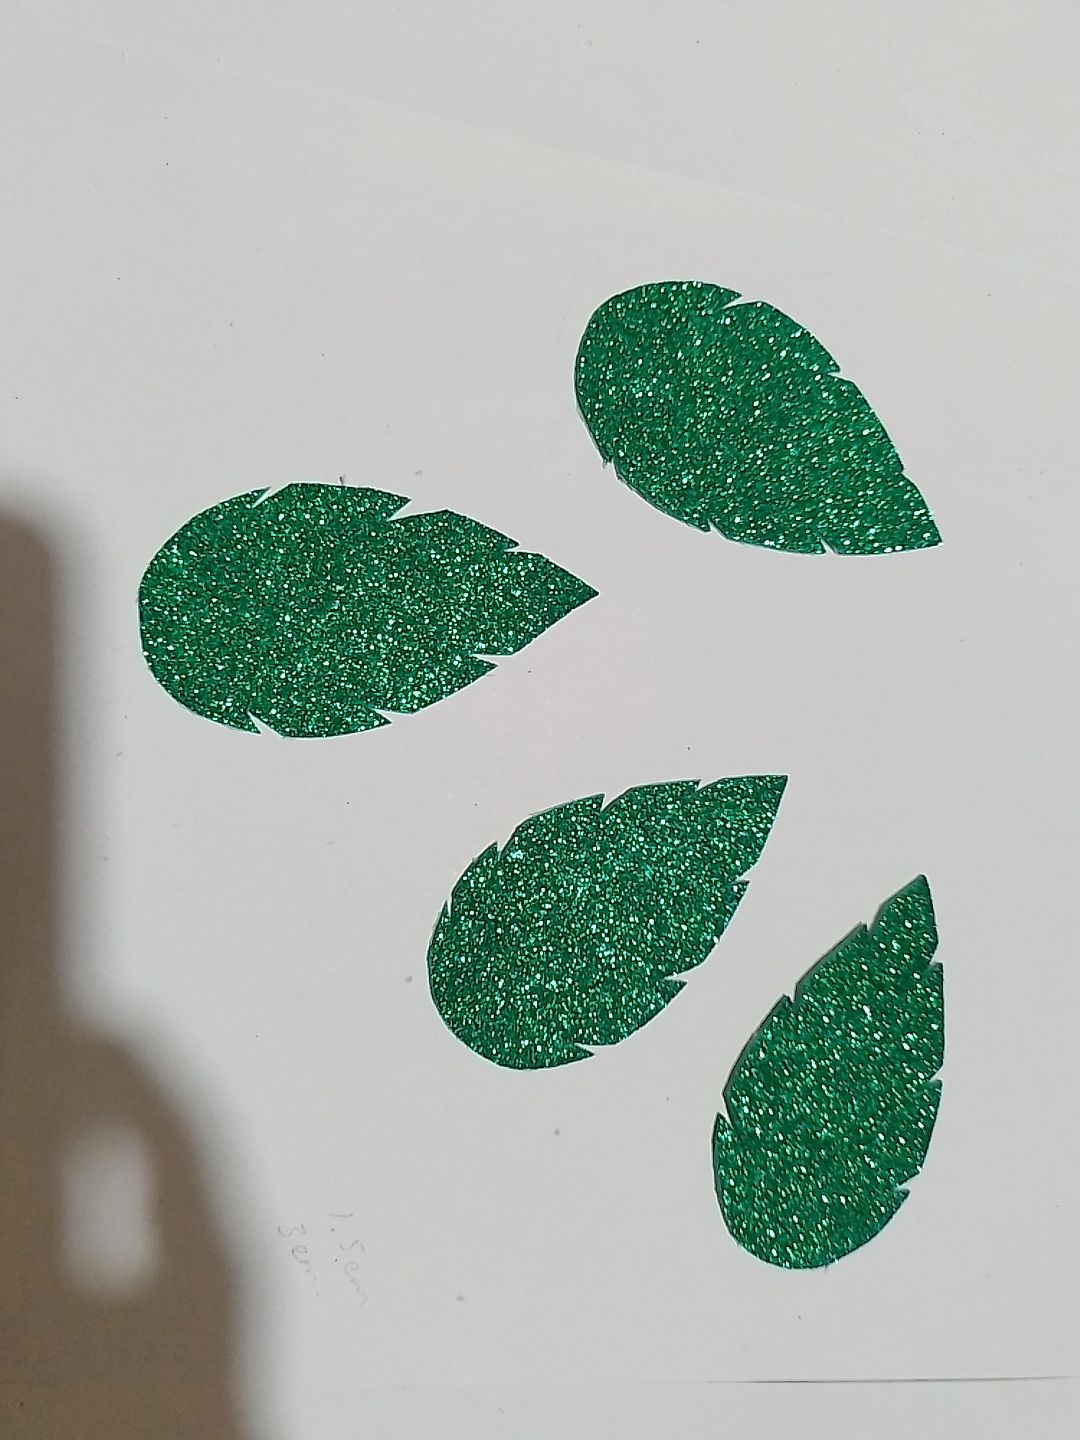
Step 9: On the green glitter foami we mark 4 leaves for the flowers and cut them out, and we cut small cuts along the edge of the leaves to make them look pretty.
Paso 9: En el foami verde de brillo marcamos 4 hojas para las flores y las recortamos, y le asemos cortes pequeños por el borde de las hojas y así quedan bien bonitas
|
|
|
|
|
|
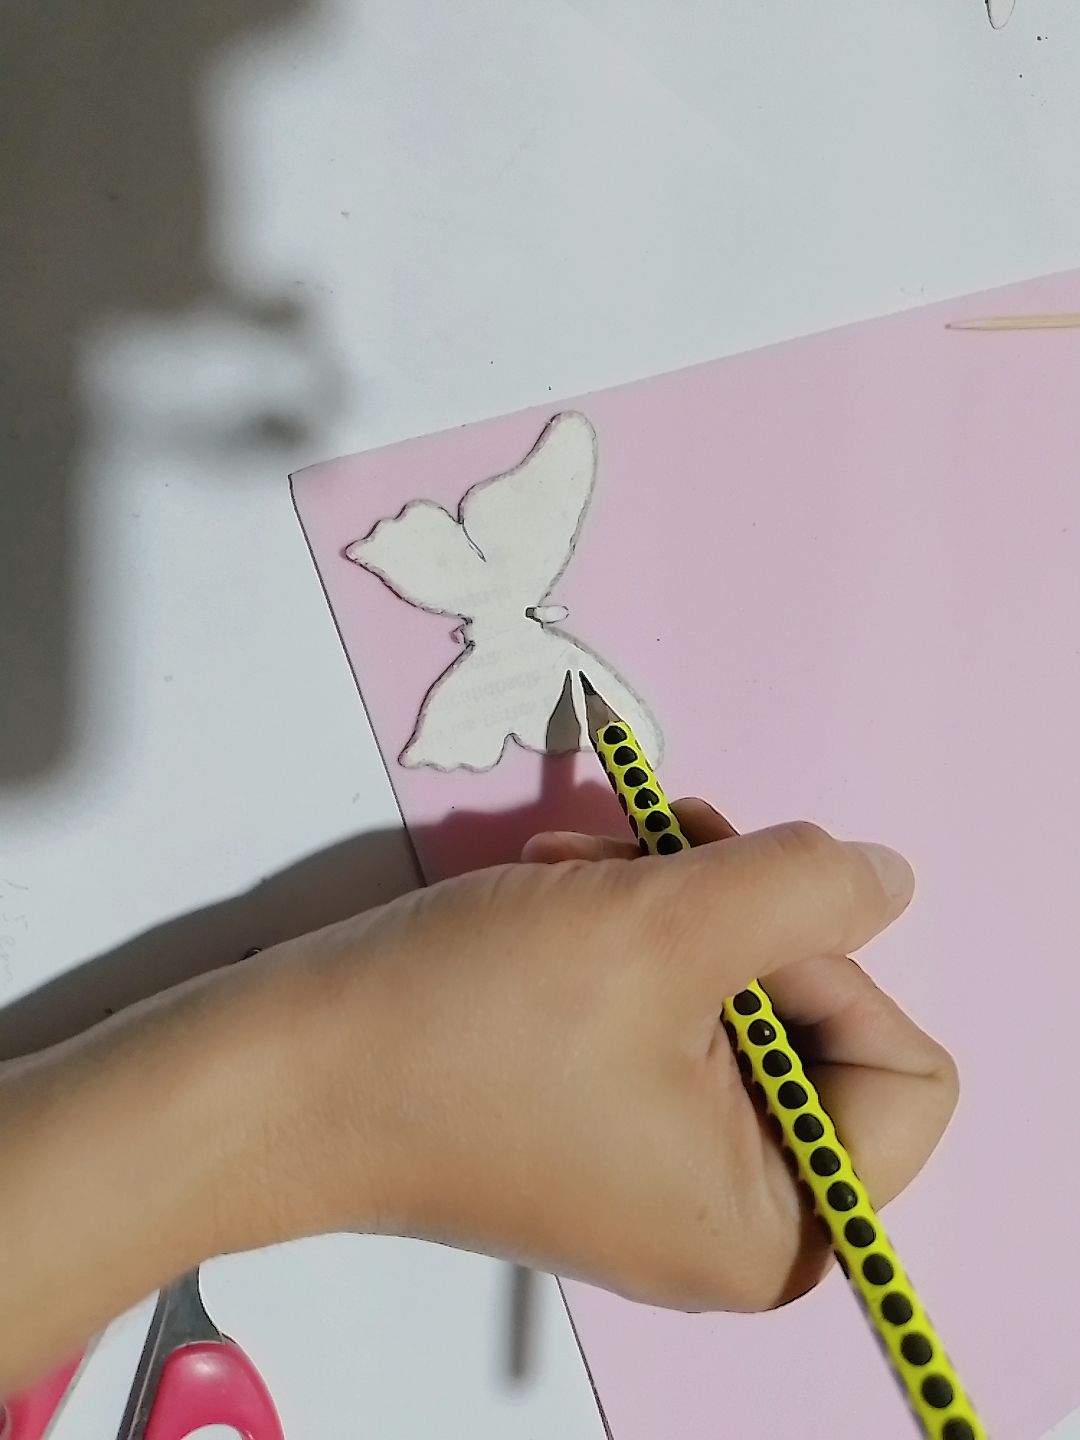
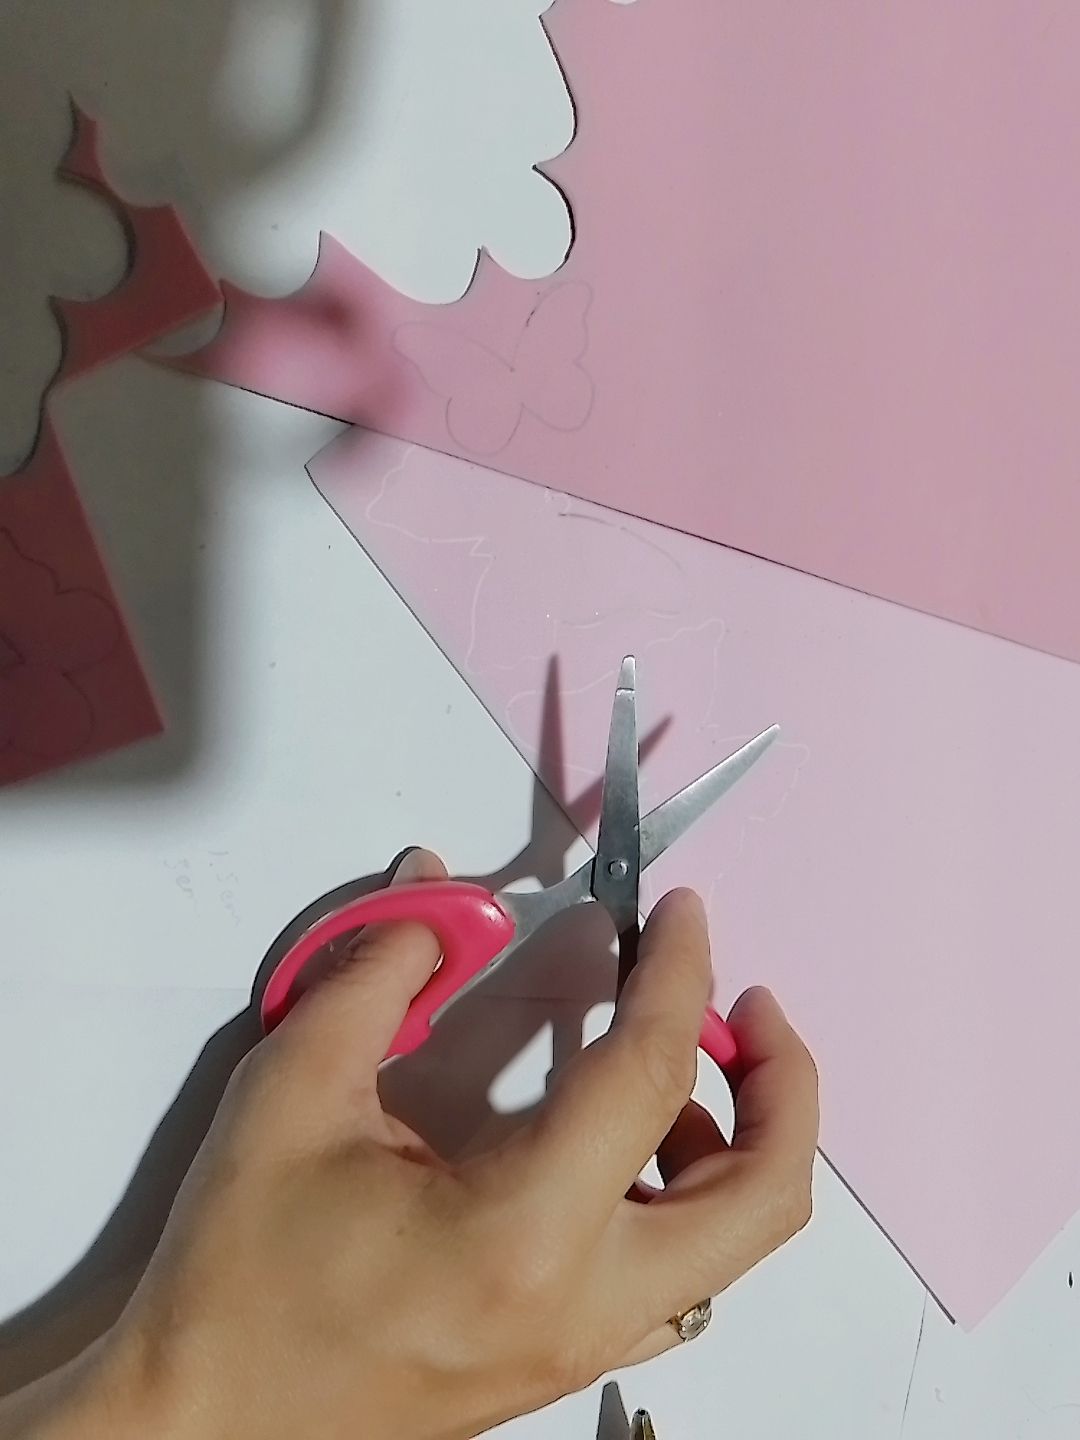
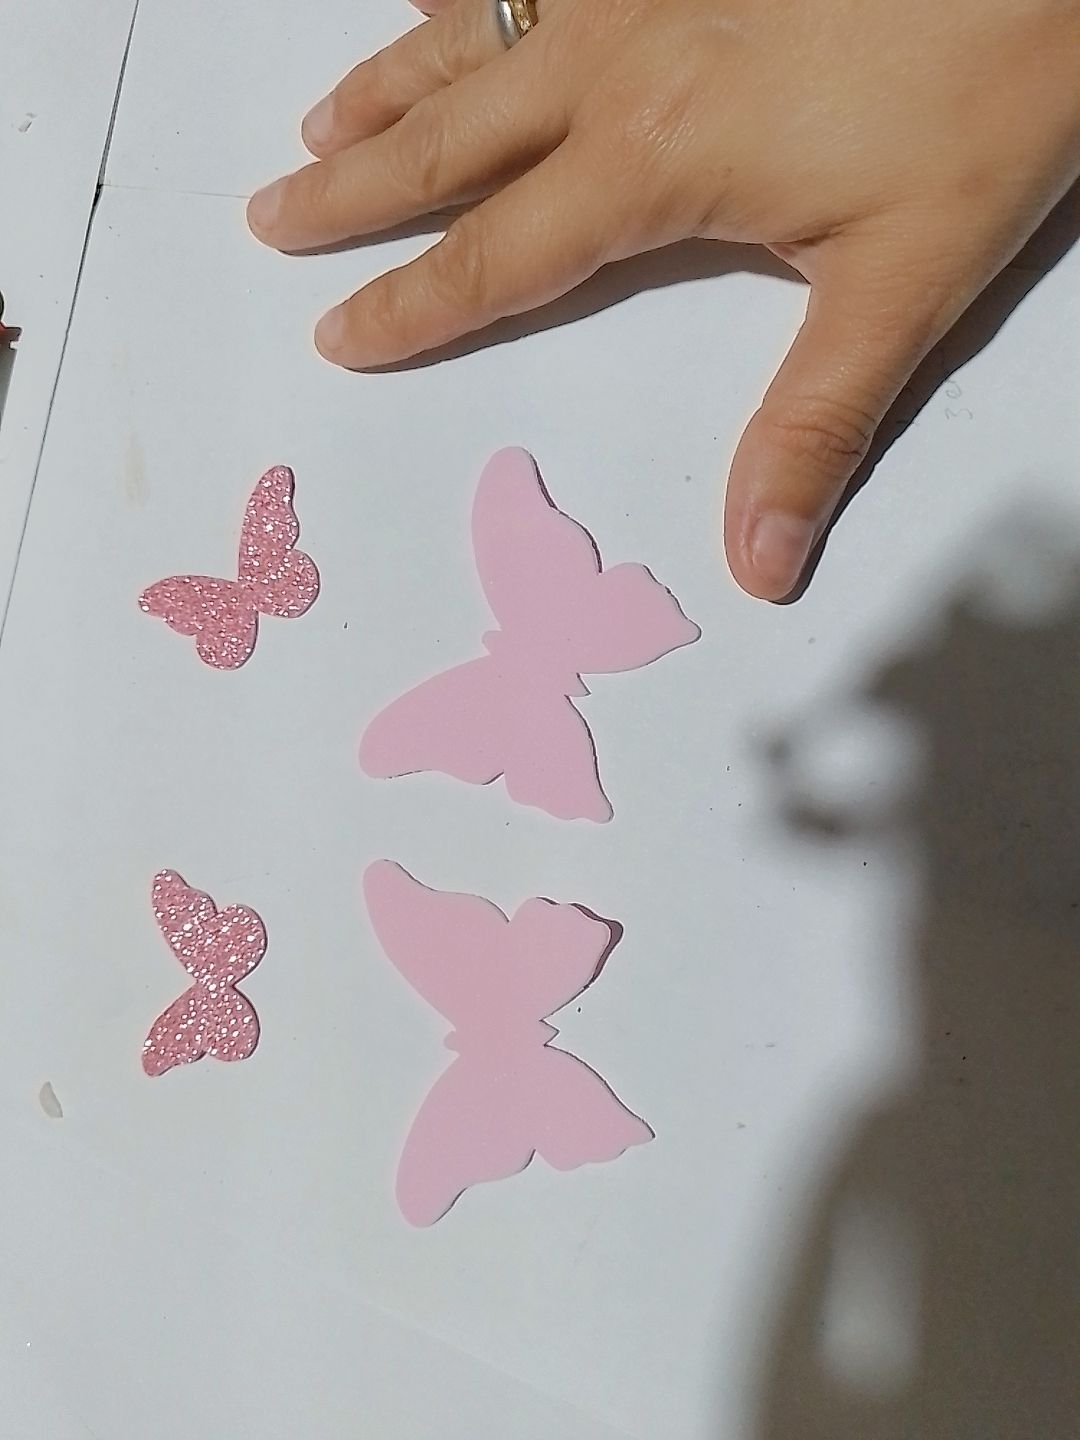
Step 10: Now we mark the butterflies with the paper molds, two small and two large ones and cut them out.
Paso 10: Ahora marcamos las mariposas con los moldes de papel dos pequeñas y dos grandes y las recortamos.
|
|
|
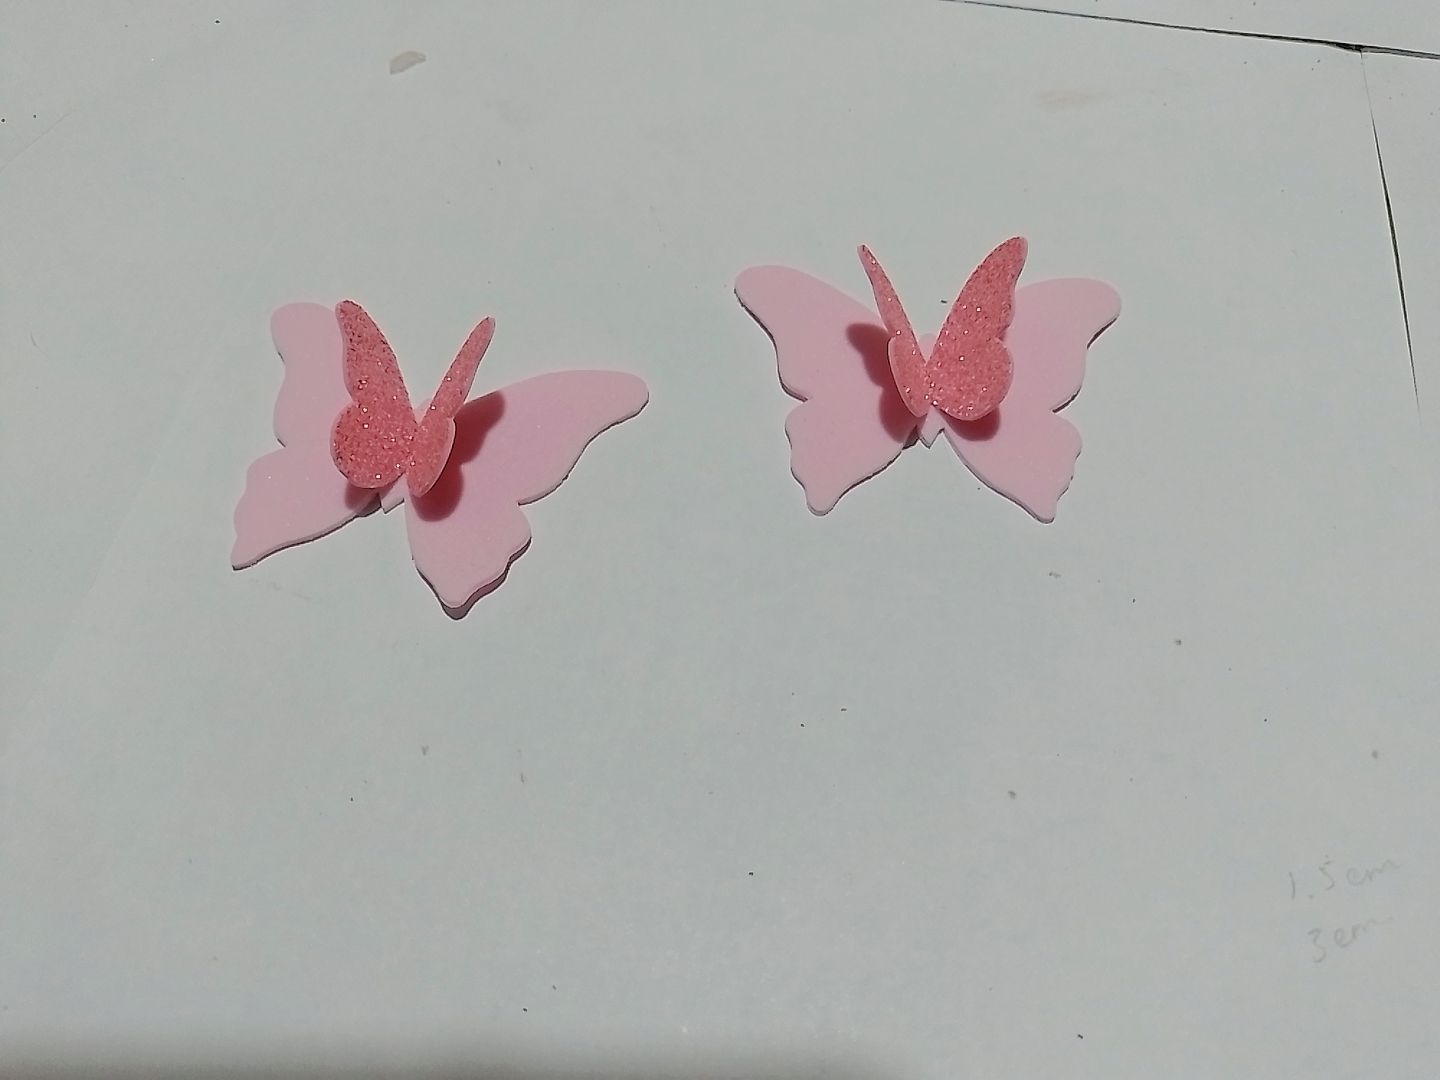
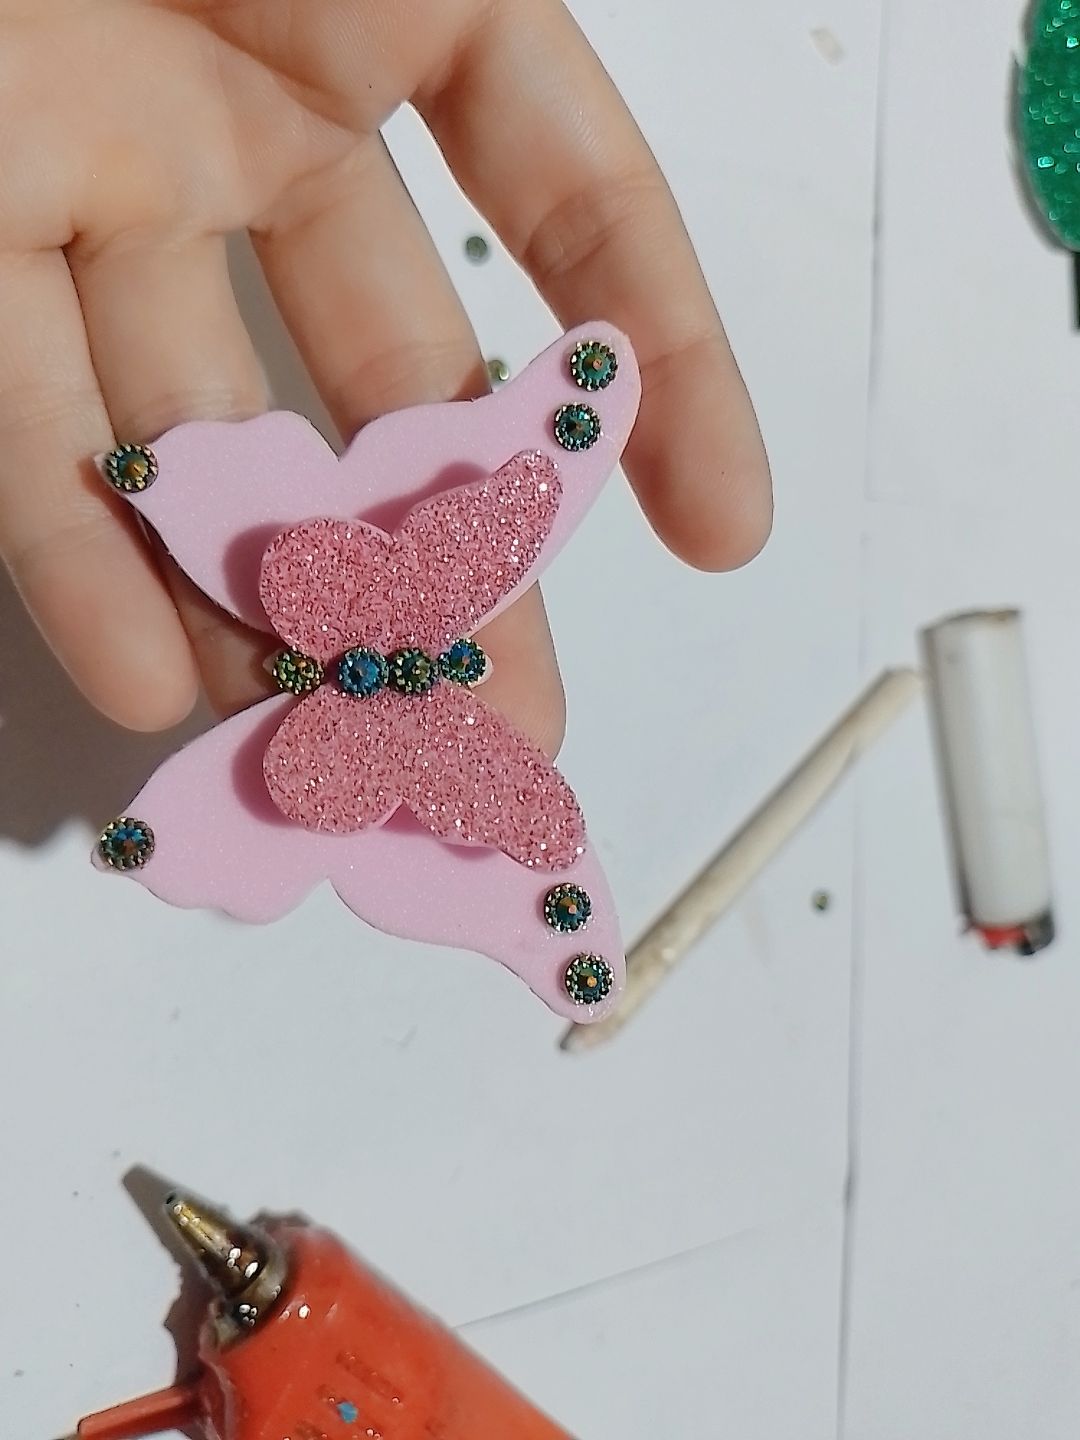
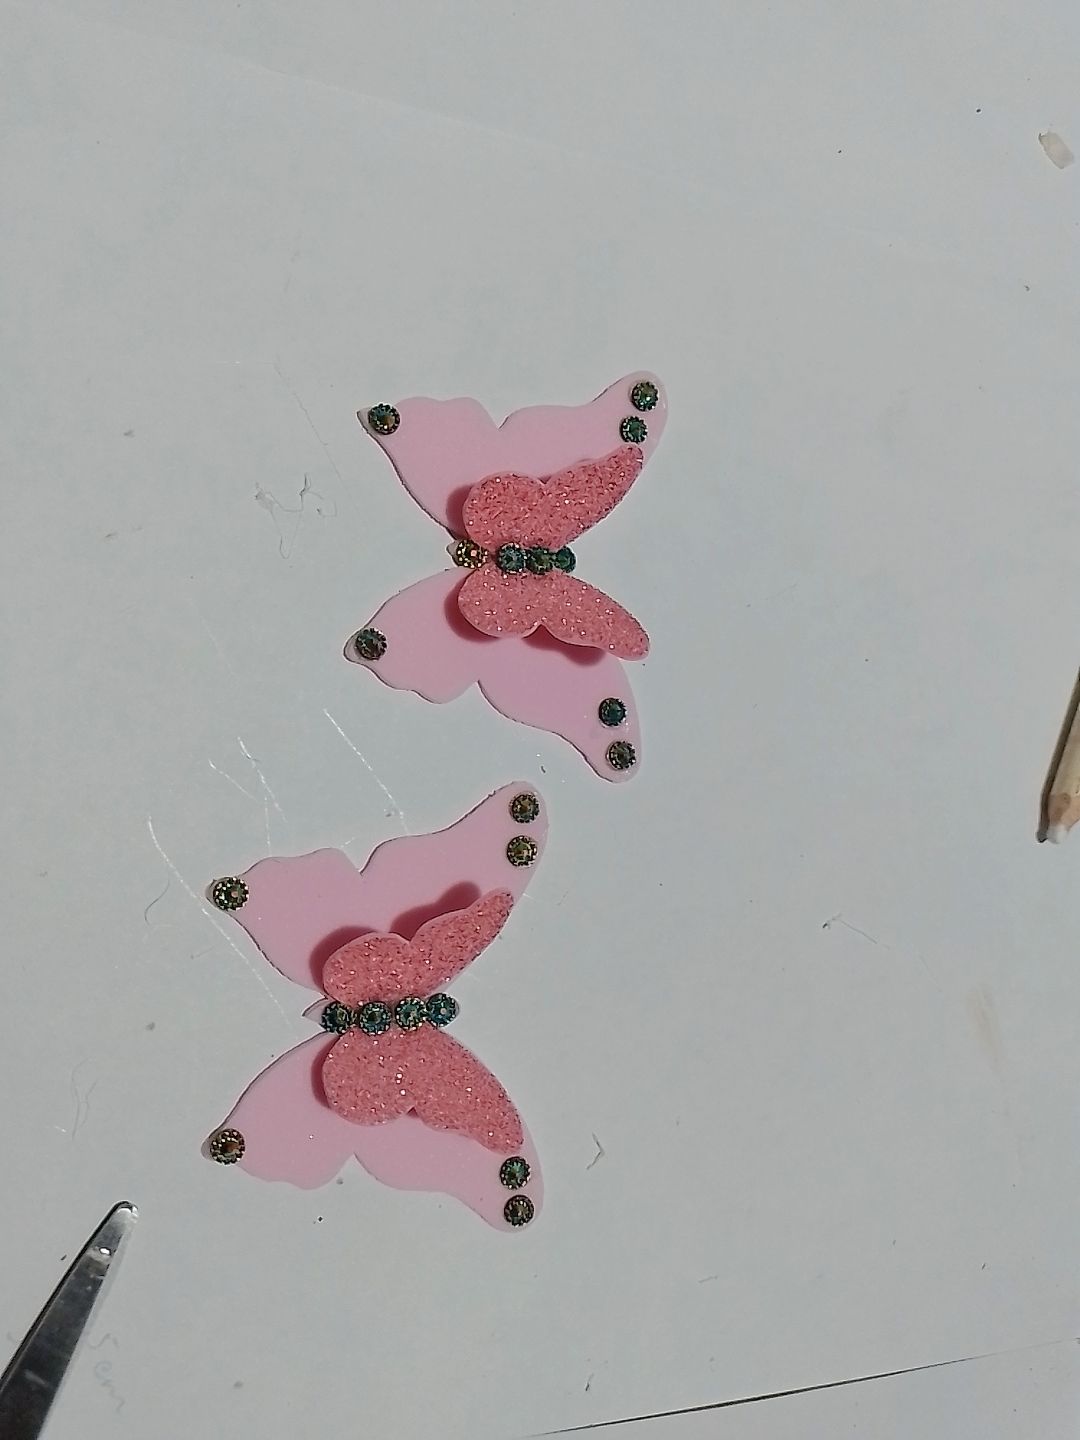
Step 11: With the tip of the gun we pass through the middle of the small butterflies so that they bend a little and we glue them on top of the big ones.
Paso 11: Con la punta de la pistola le pasamos por el medio de las mariposas chiquitas para que estas se doblen un poco y las pegamos encima de las grandes.
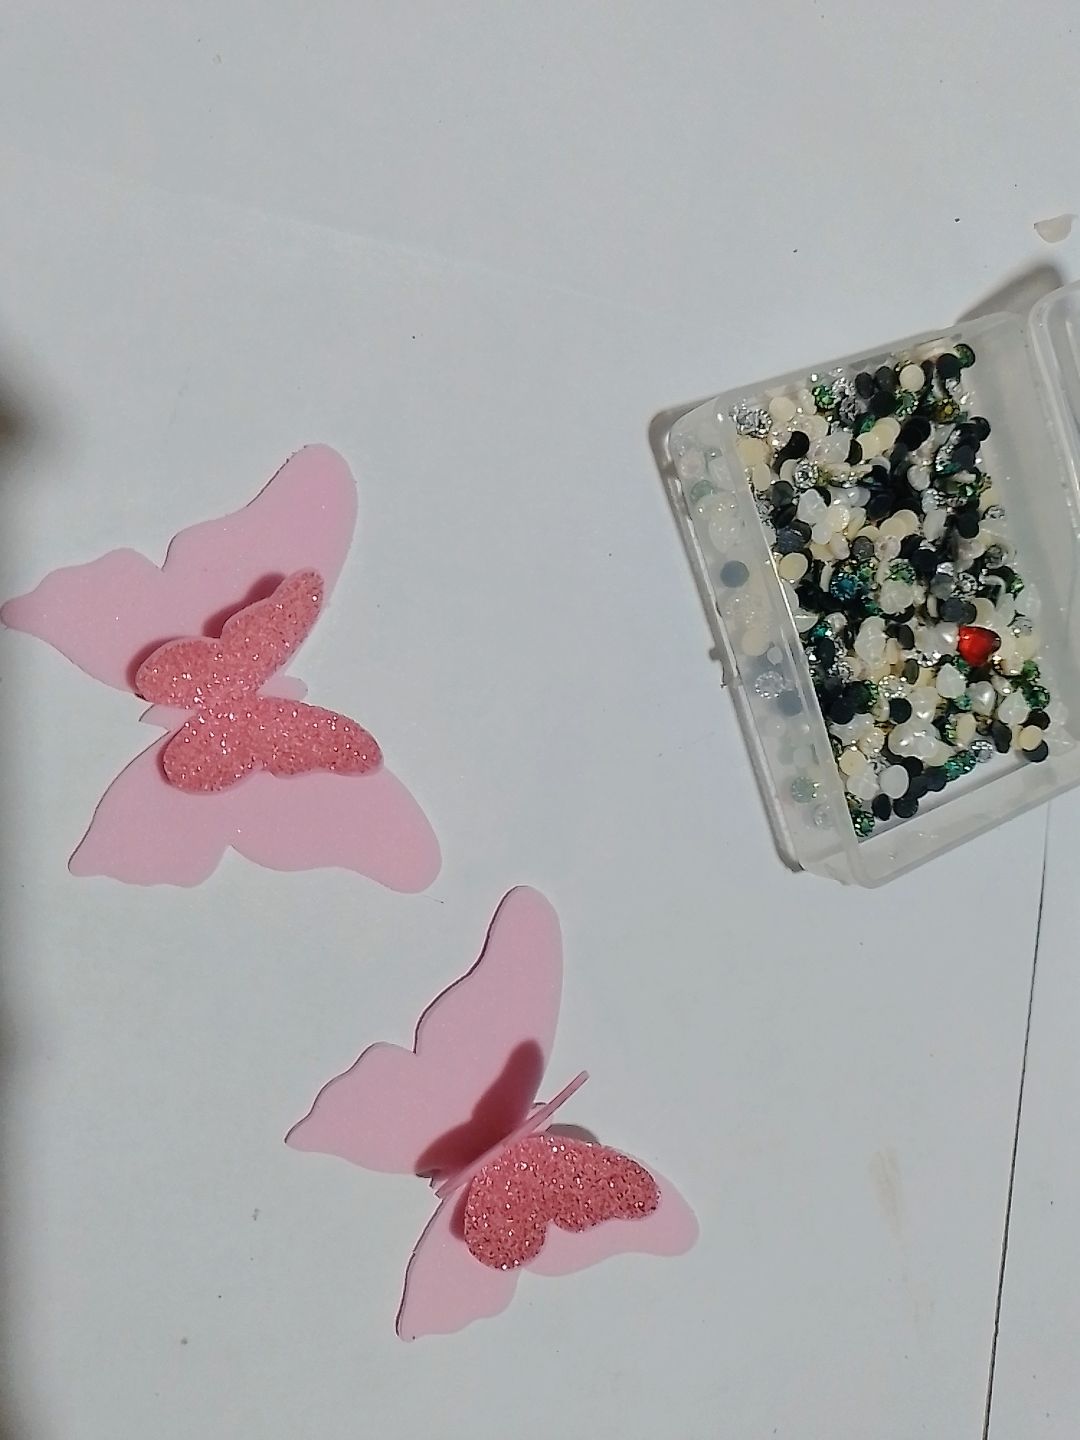
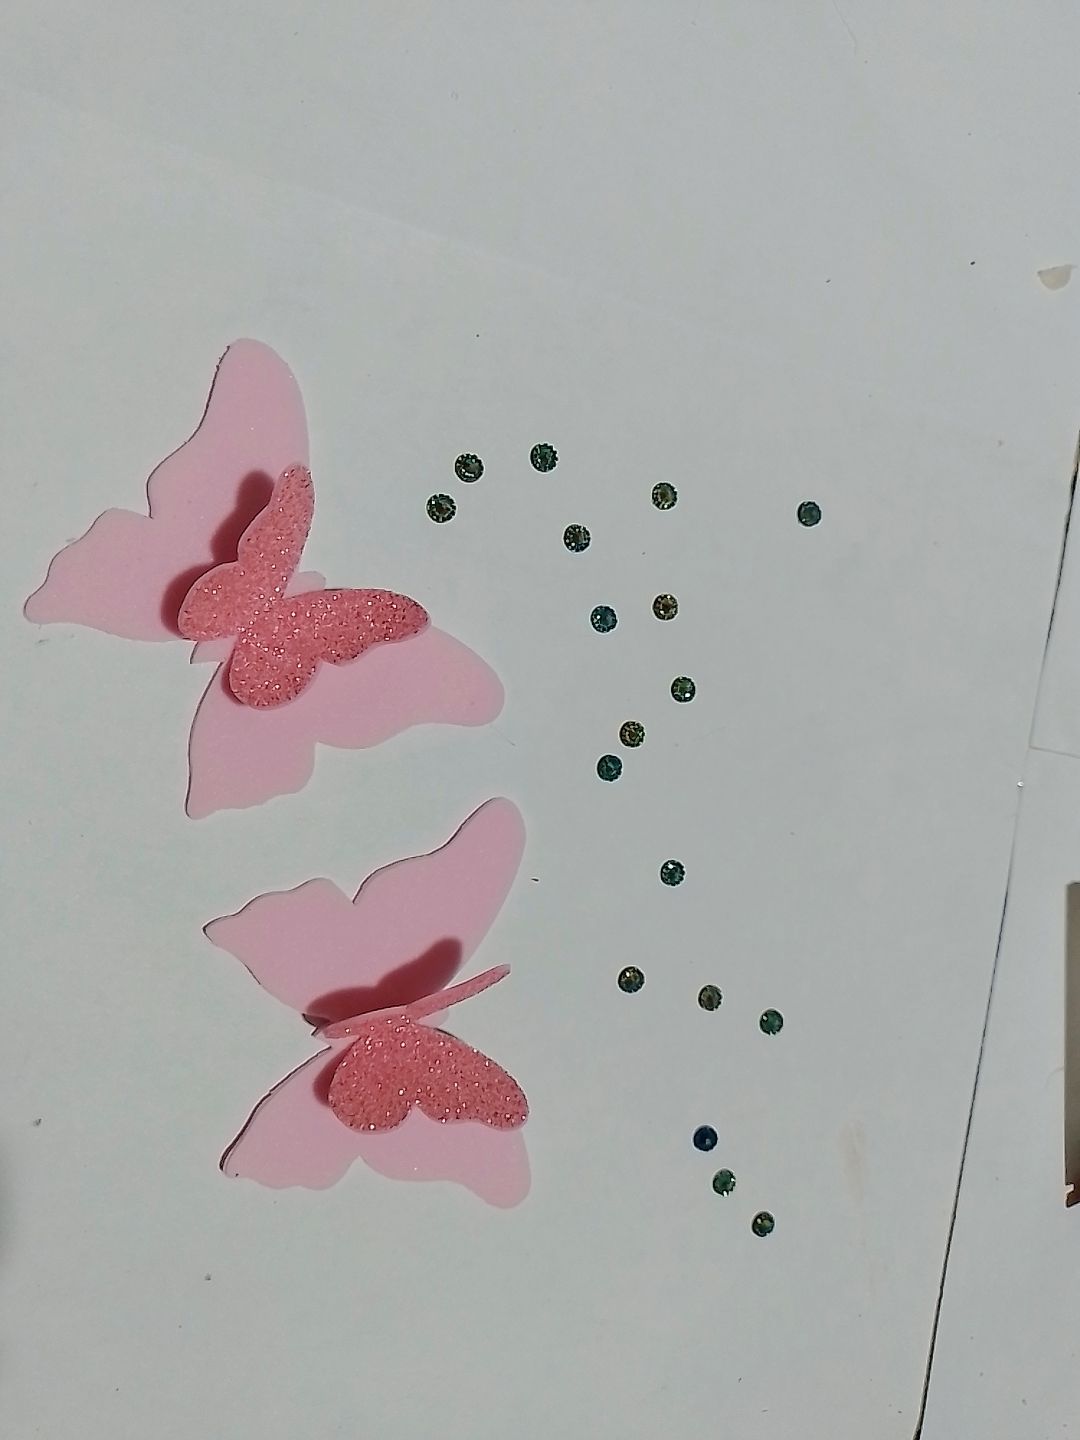
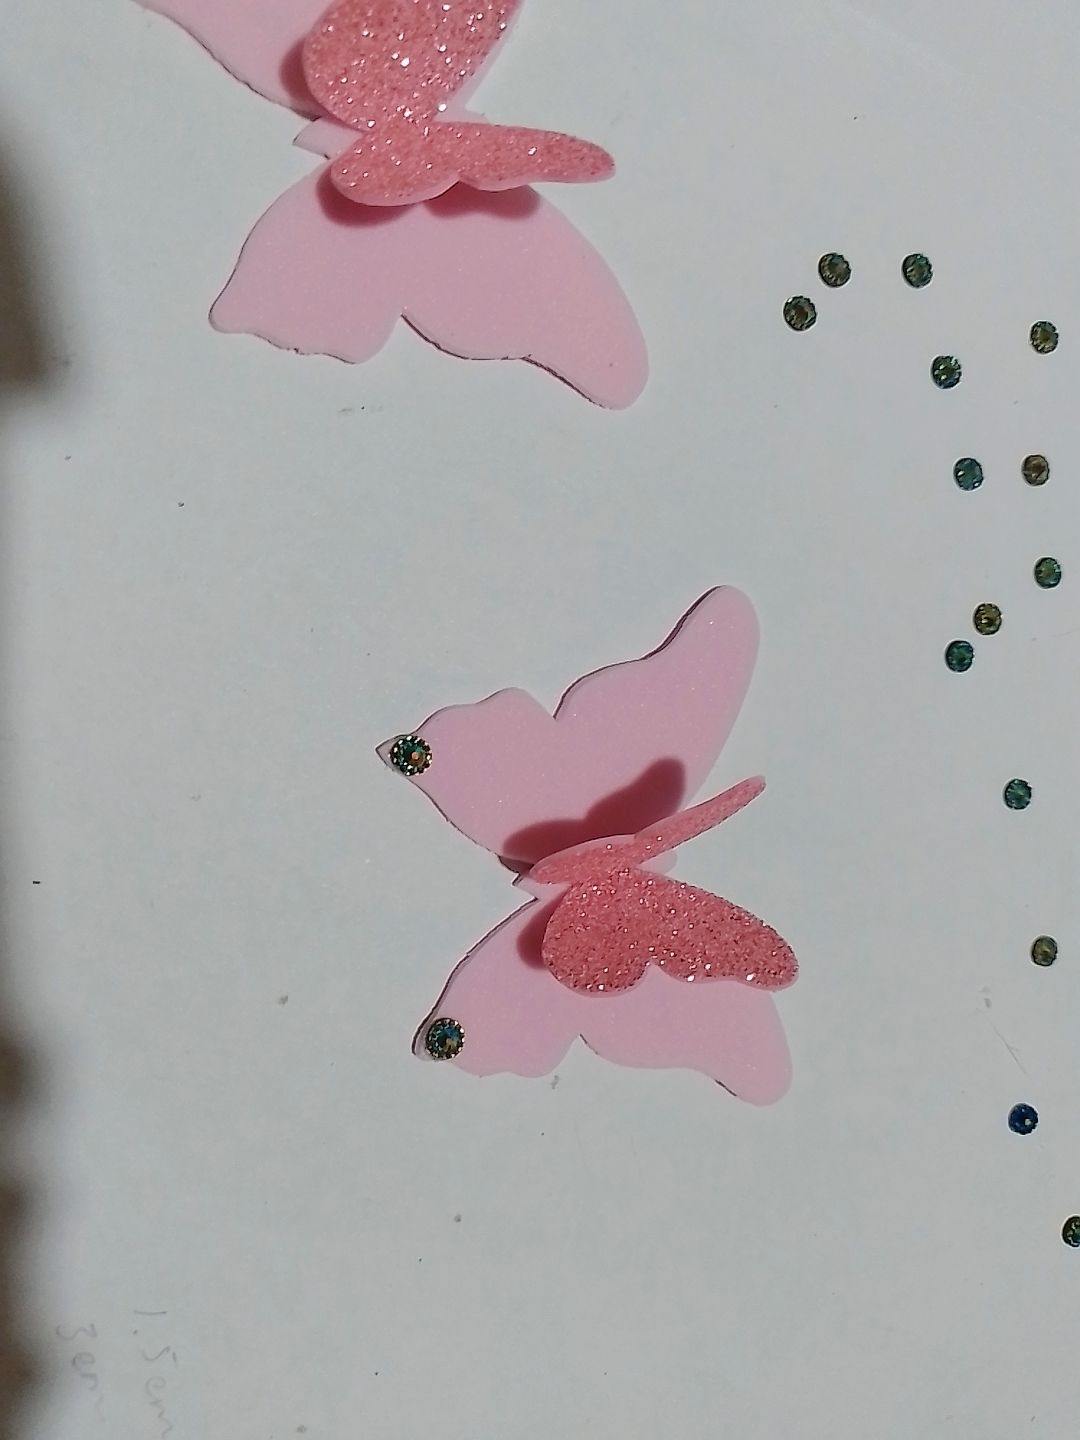
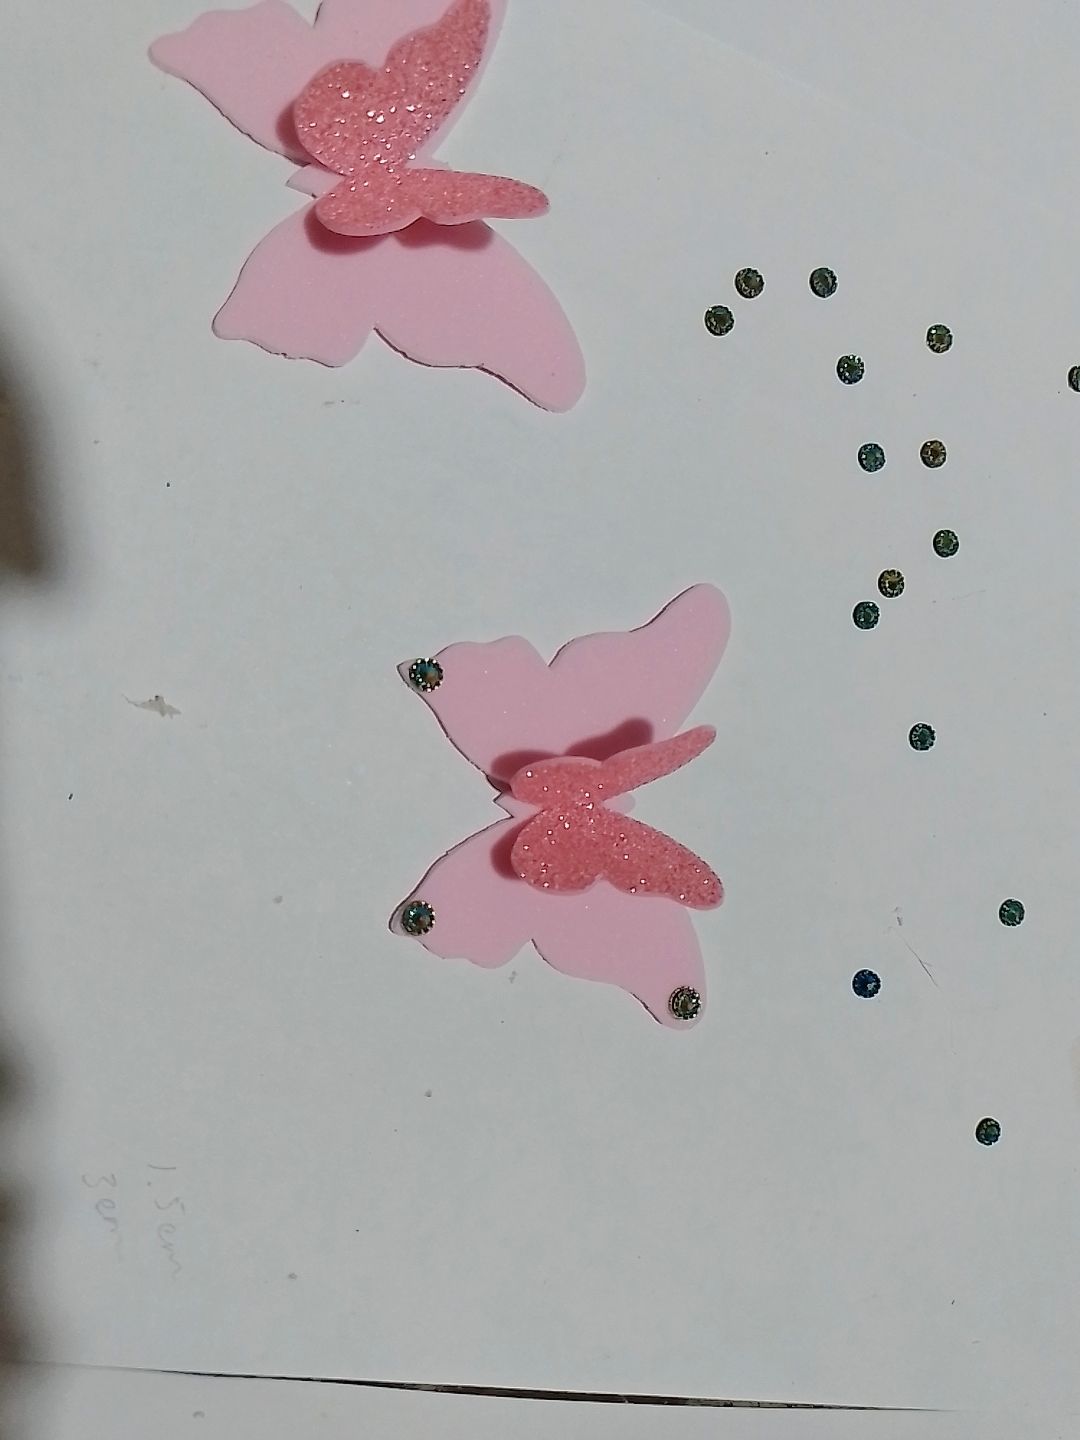
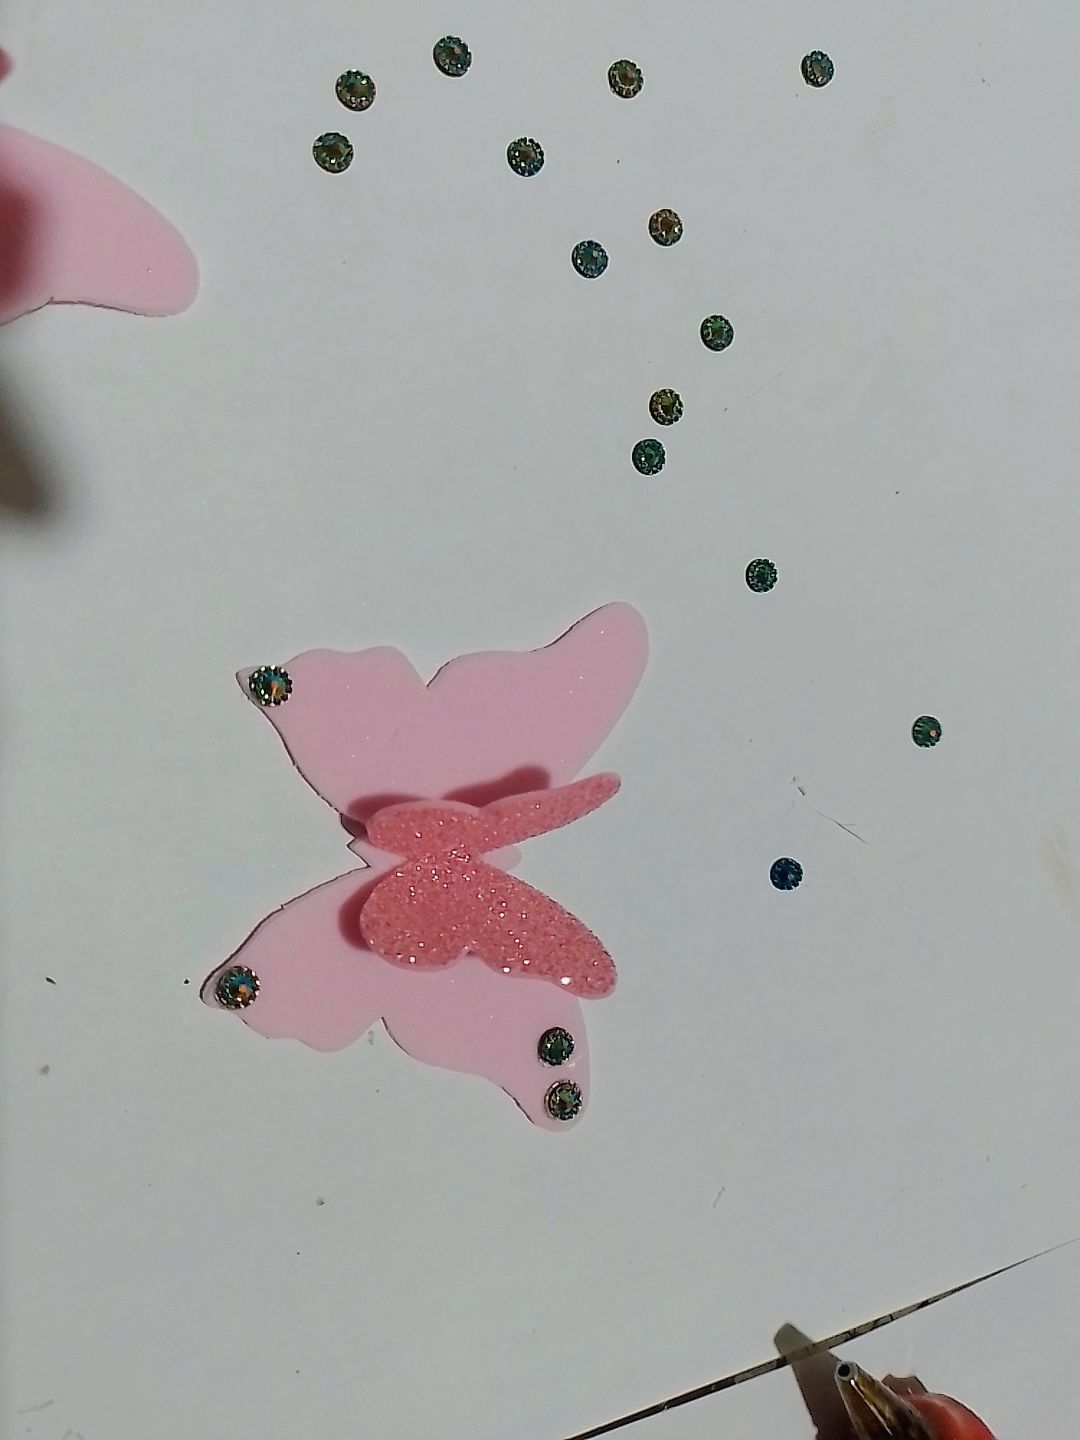
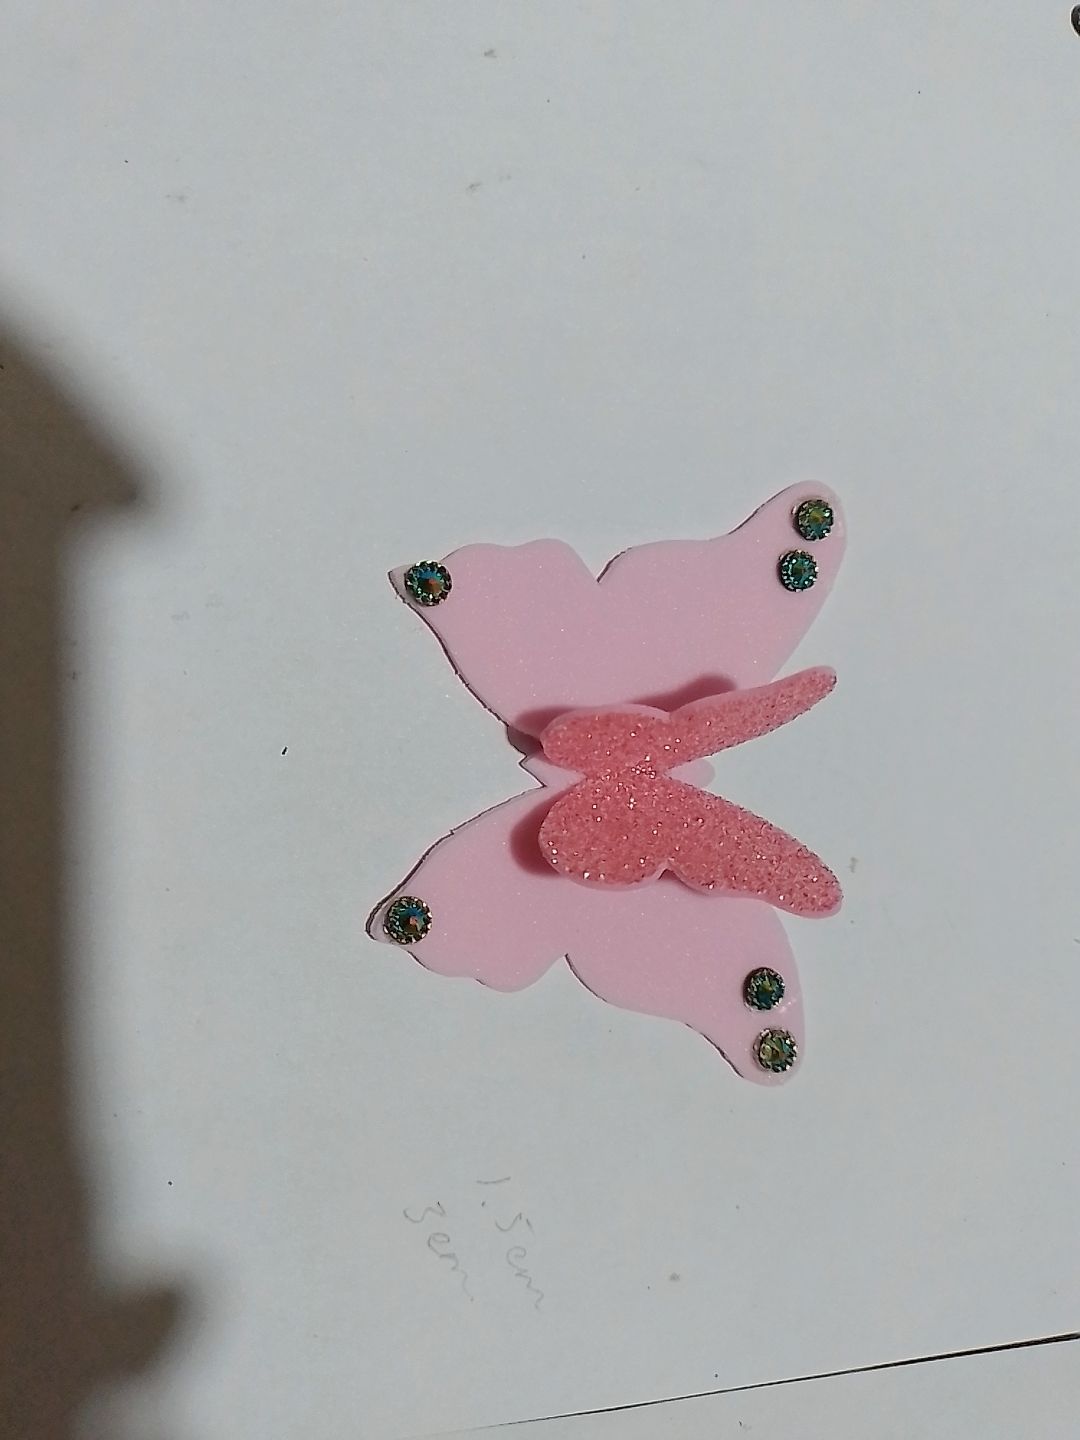
Step 12: With the small pearls we glue them in the middle of the butterflies and on the tips to make them look pretty.
Paso 12: Con las perlas pequeñas las pegamos en el medio de las mariposas y en las puntas para que queden bonitas.
|
|
|
|
|
|
|
|
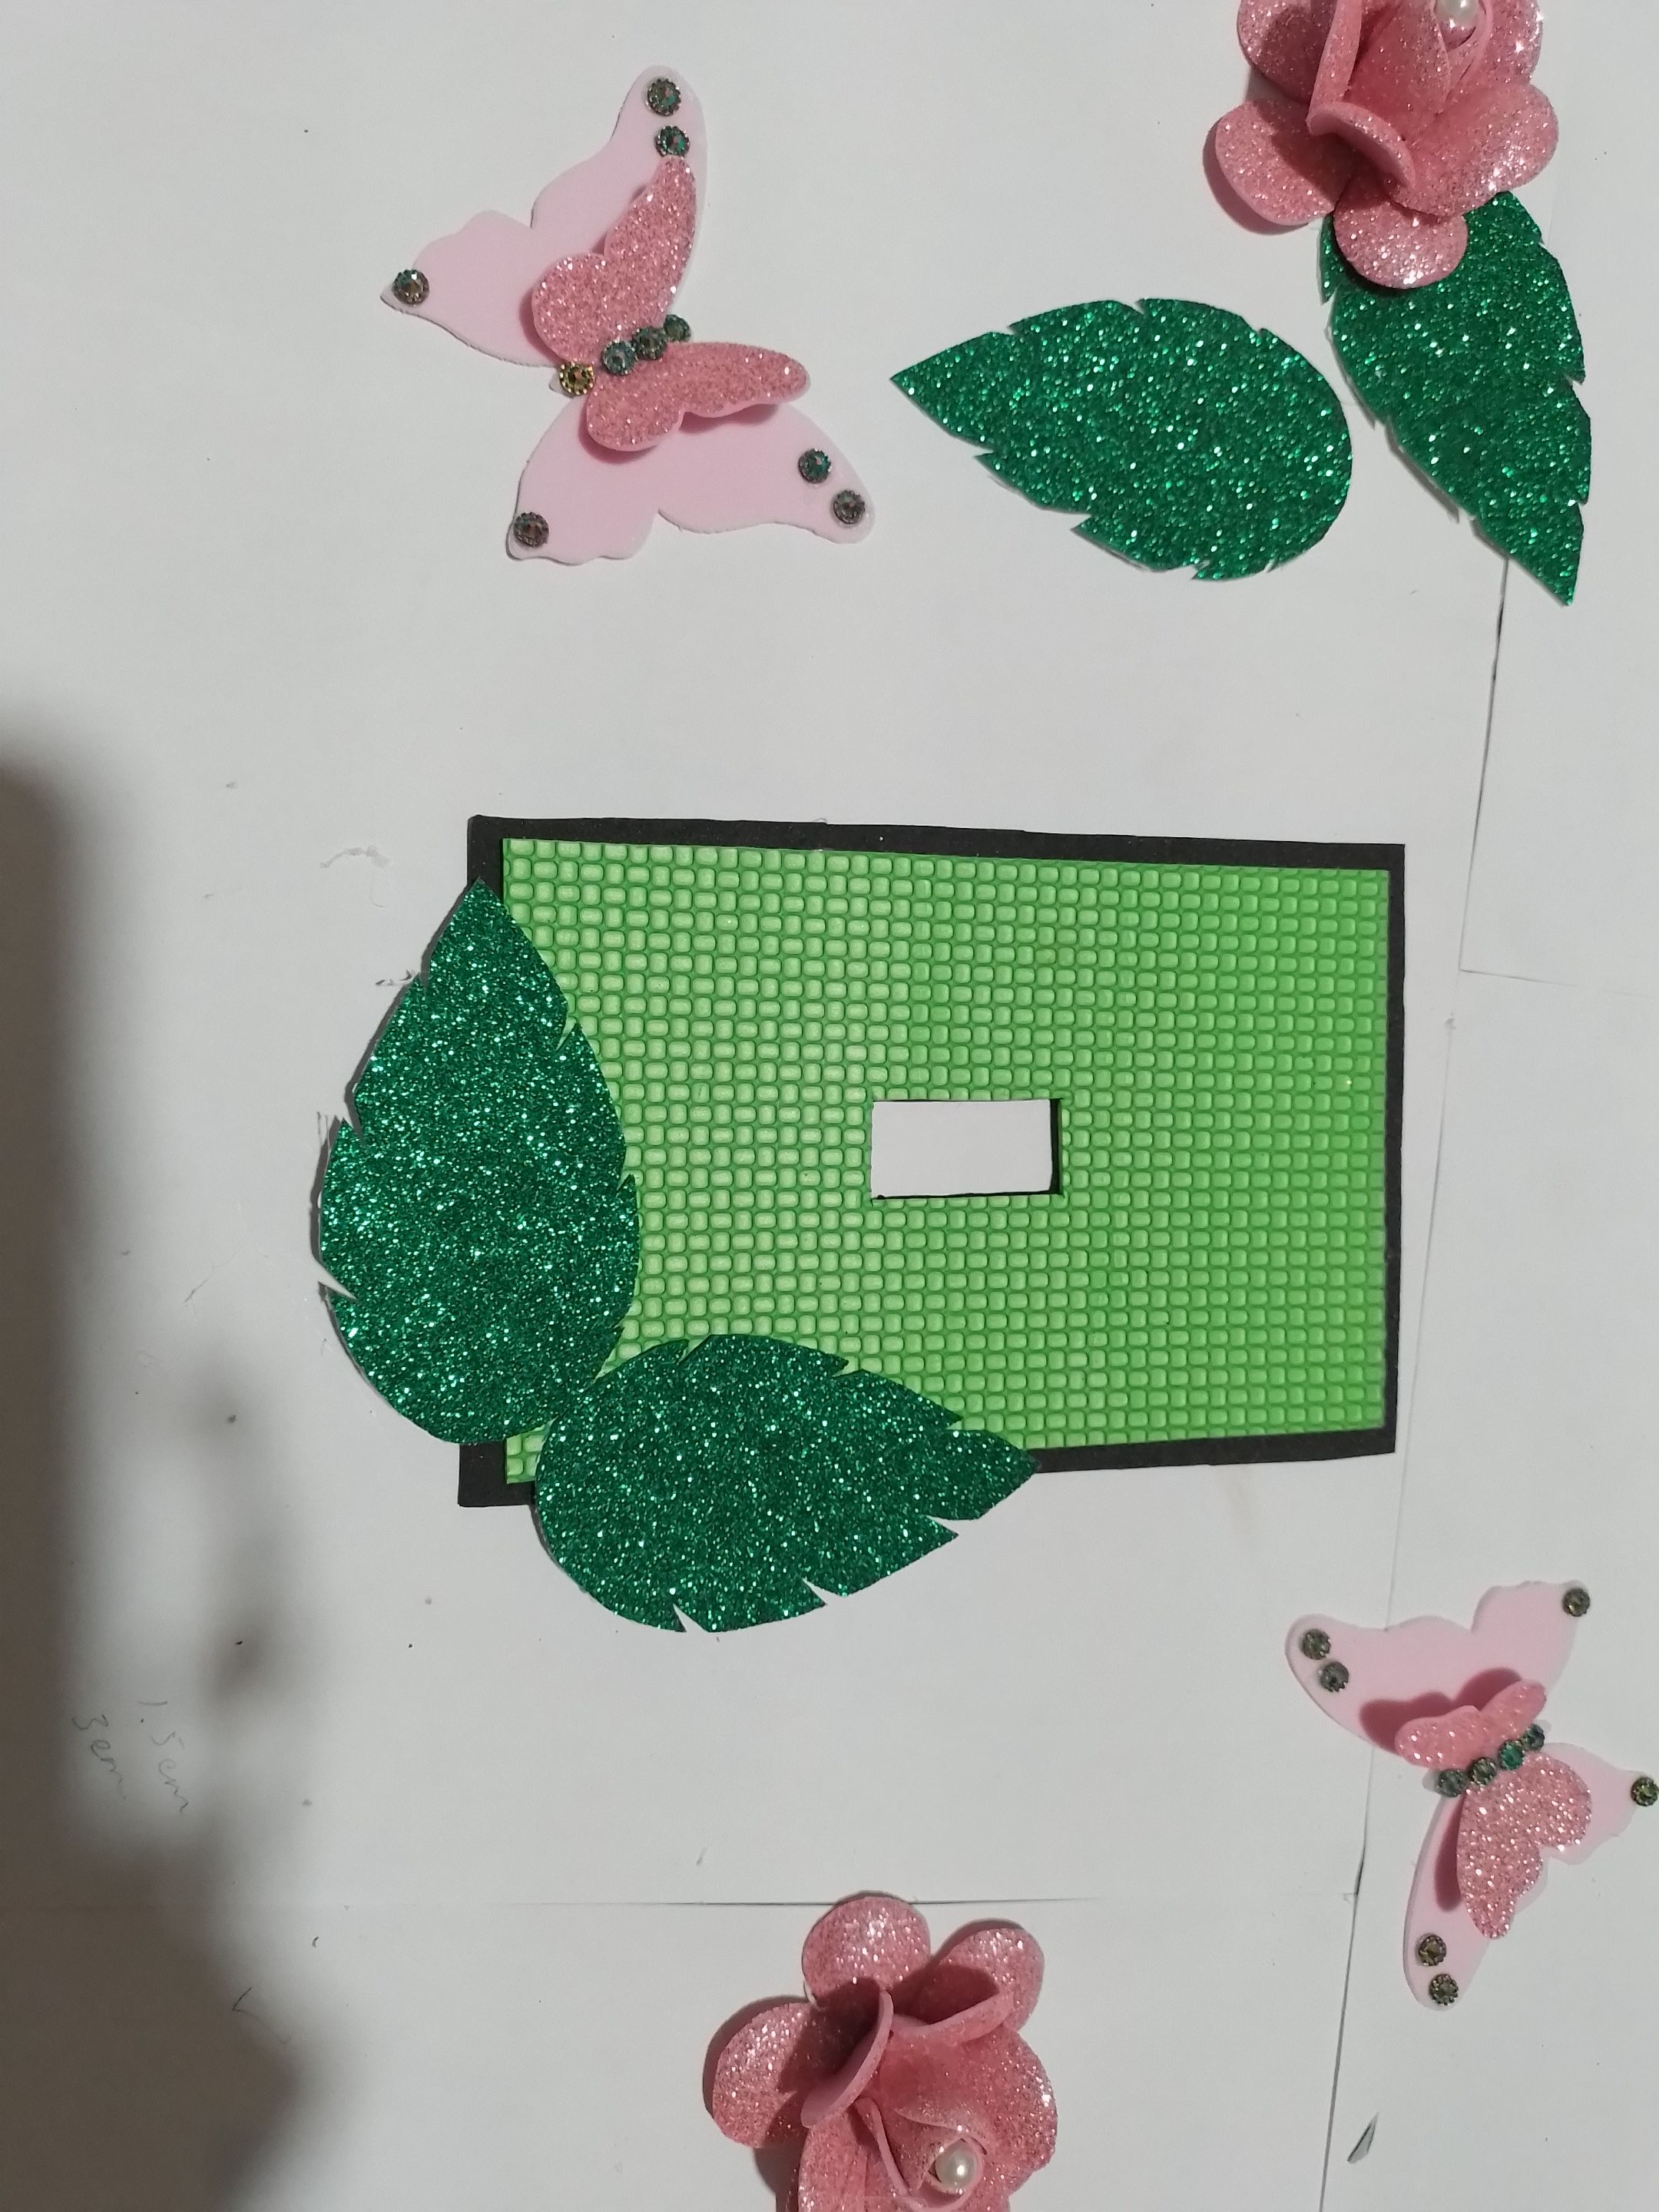
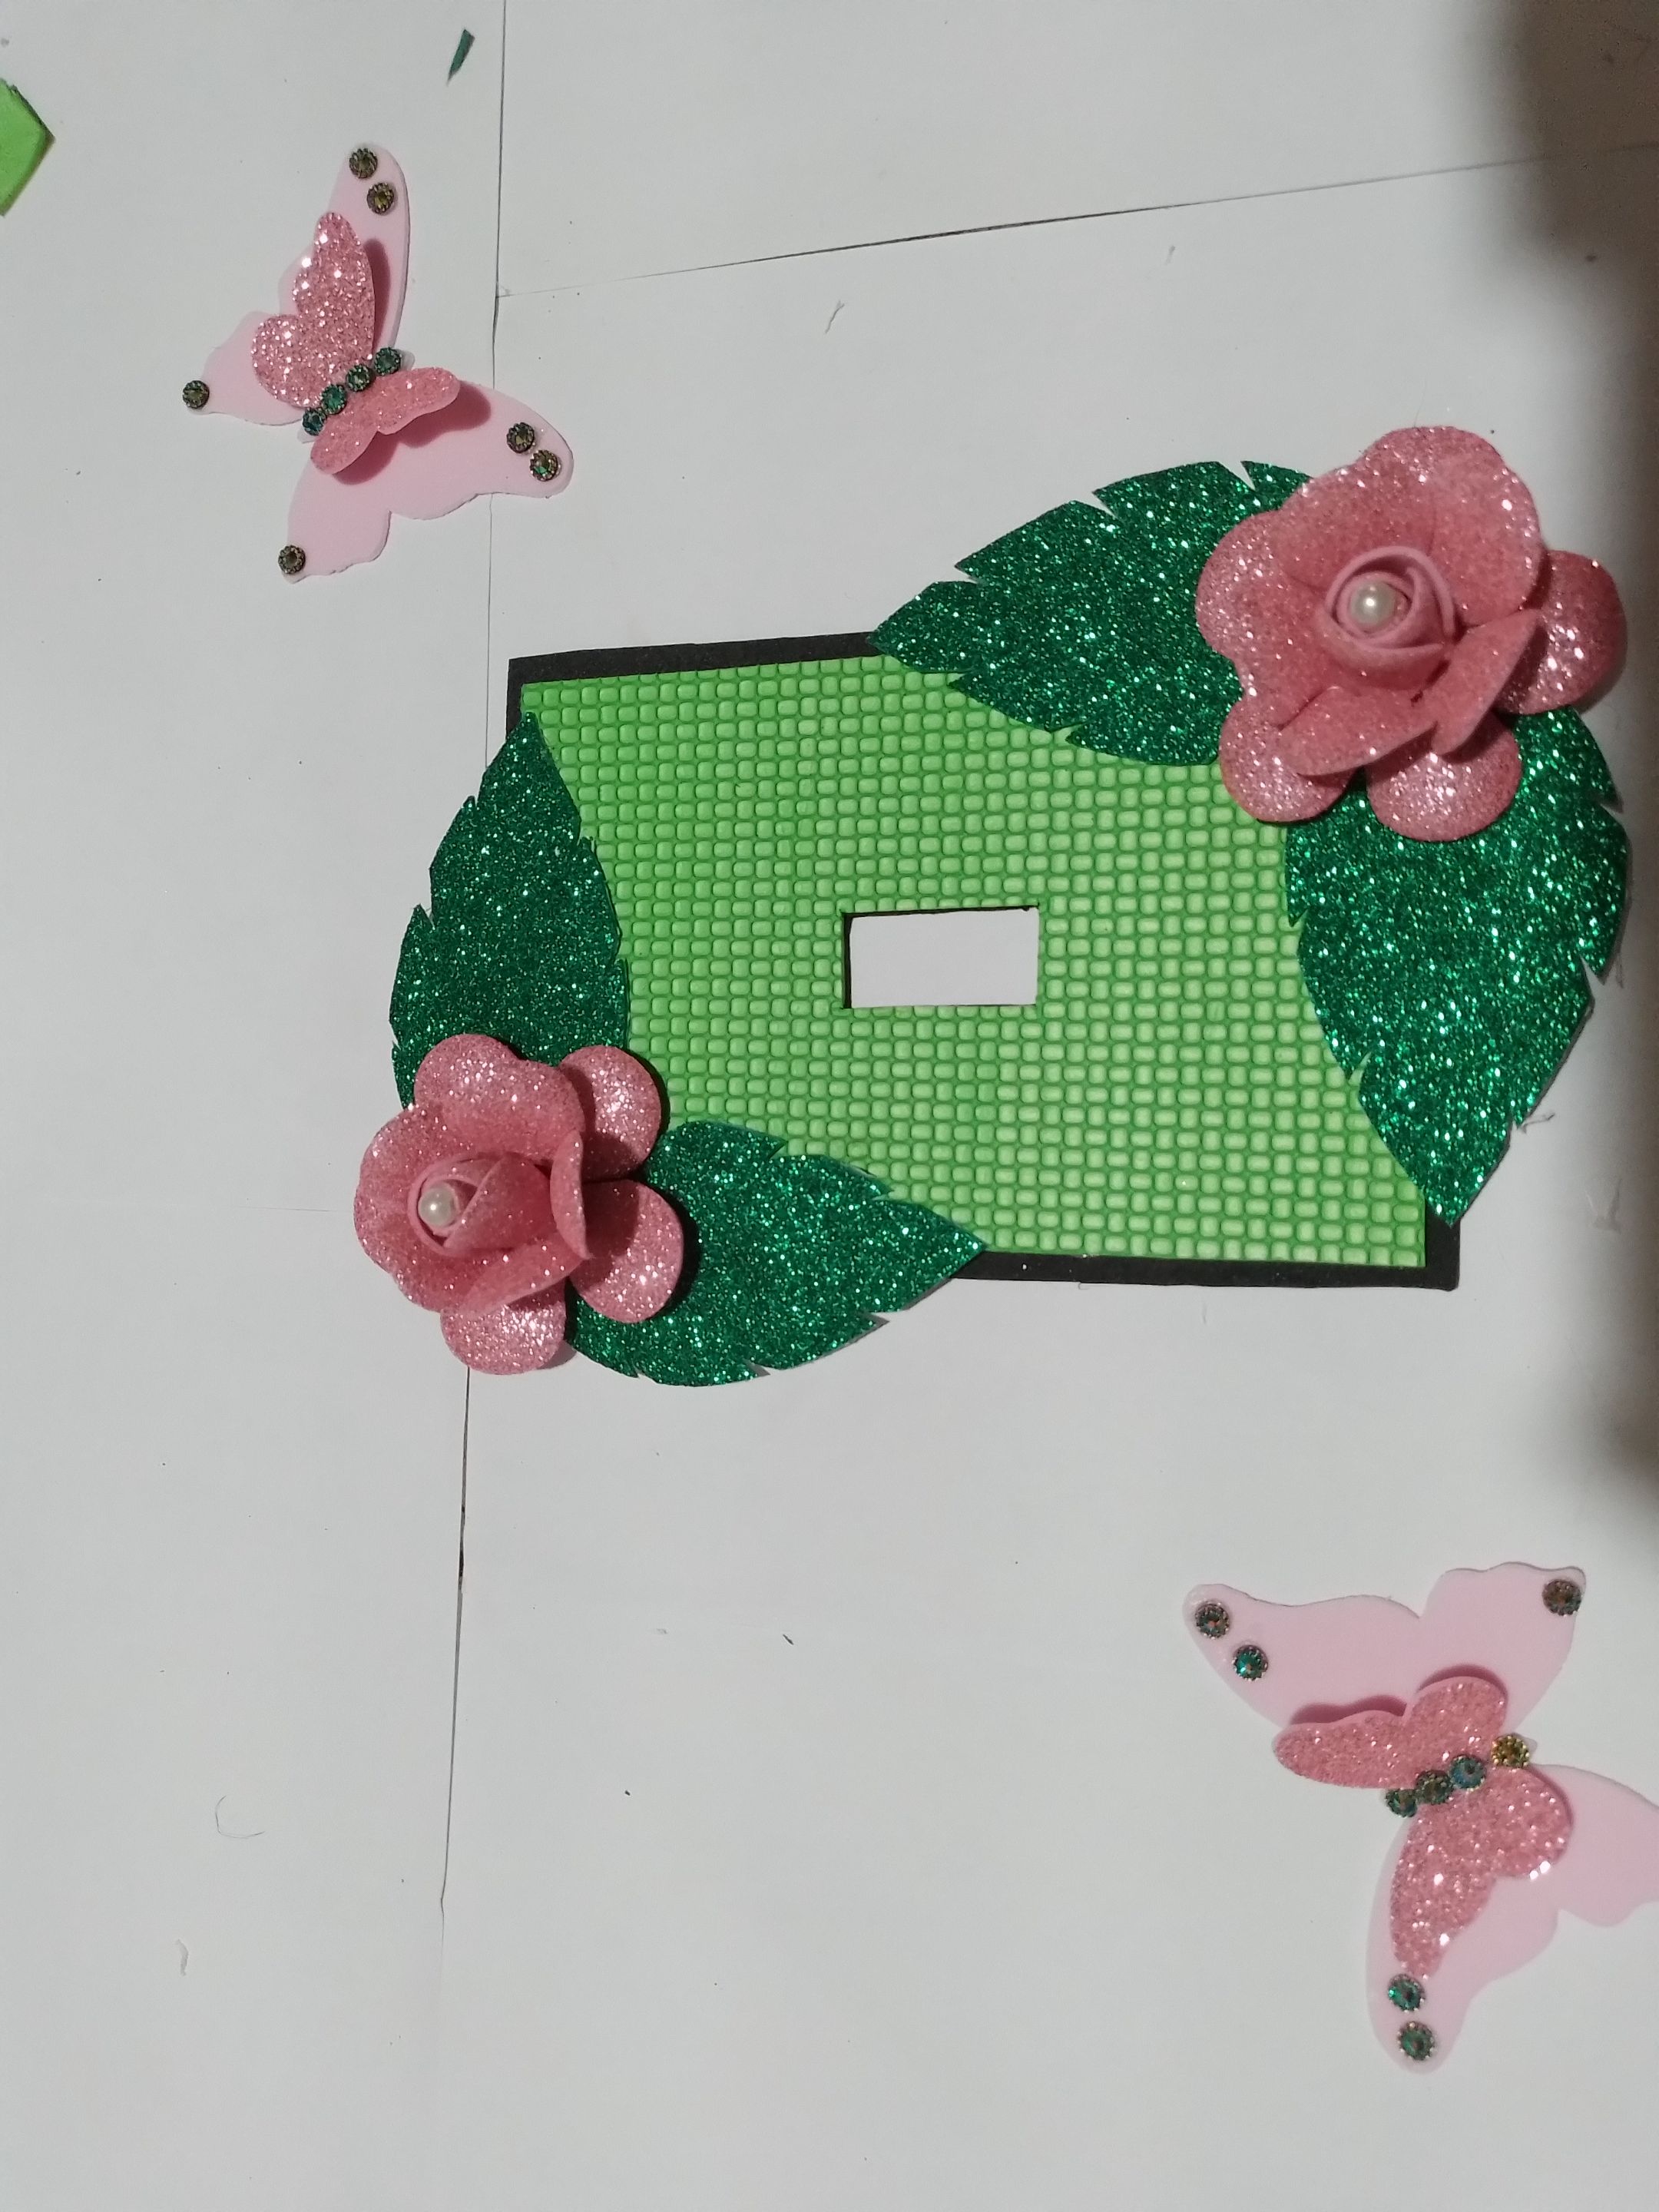
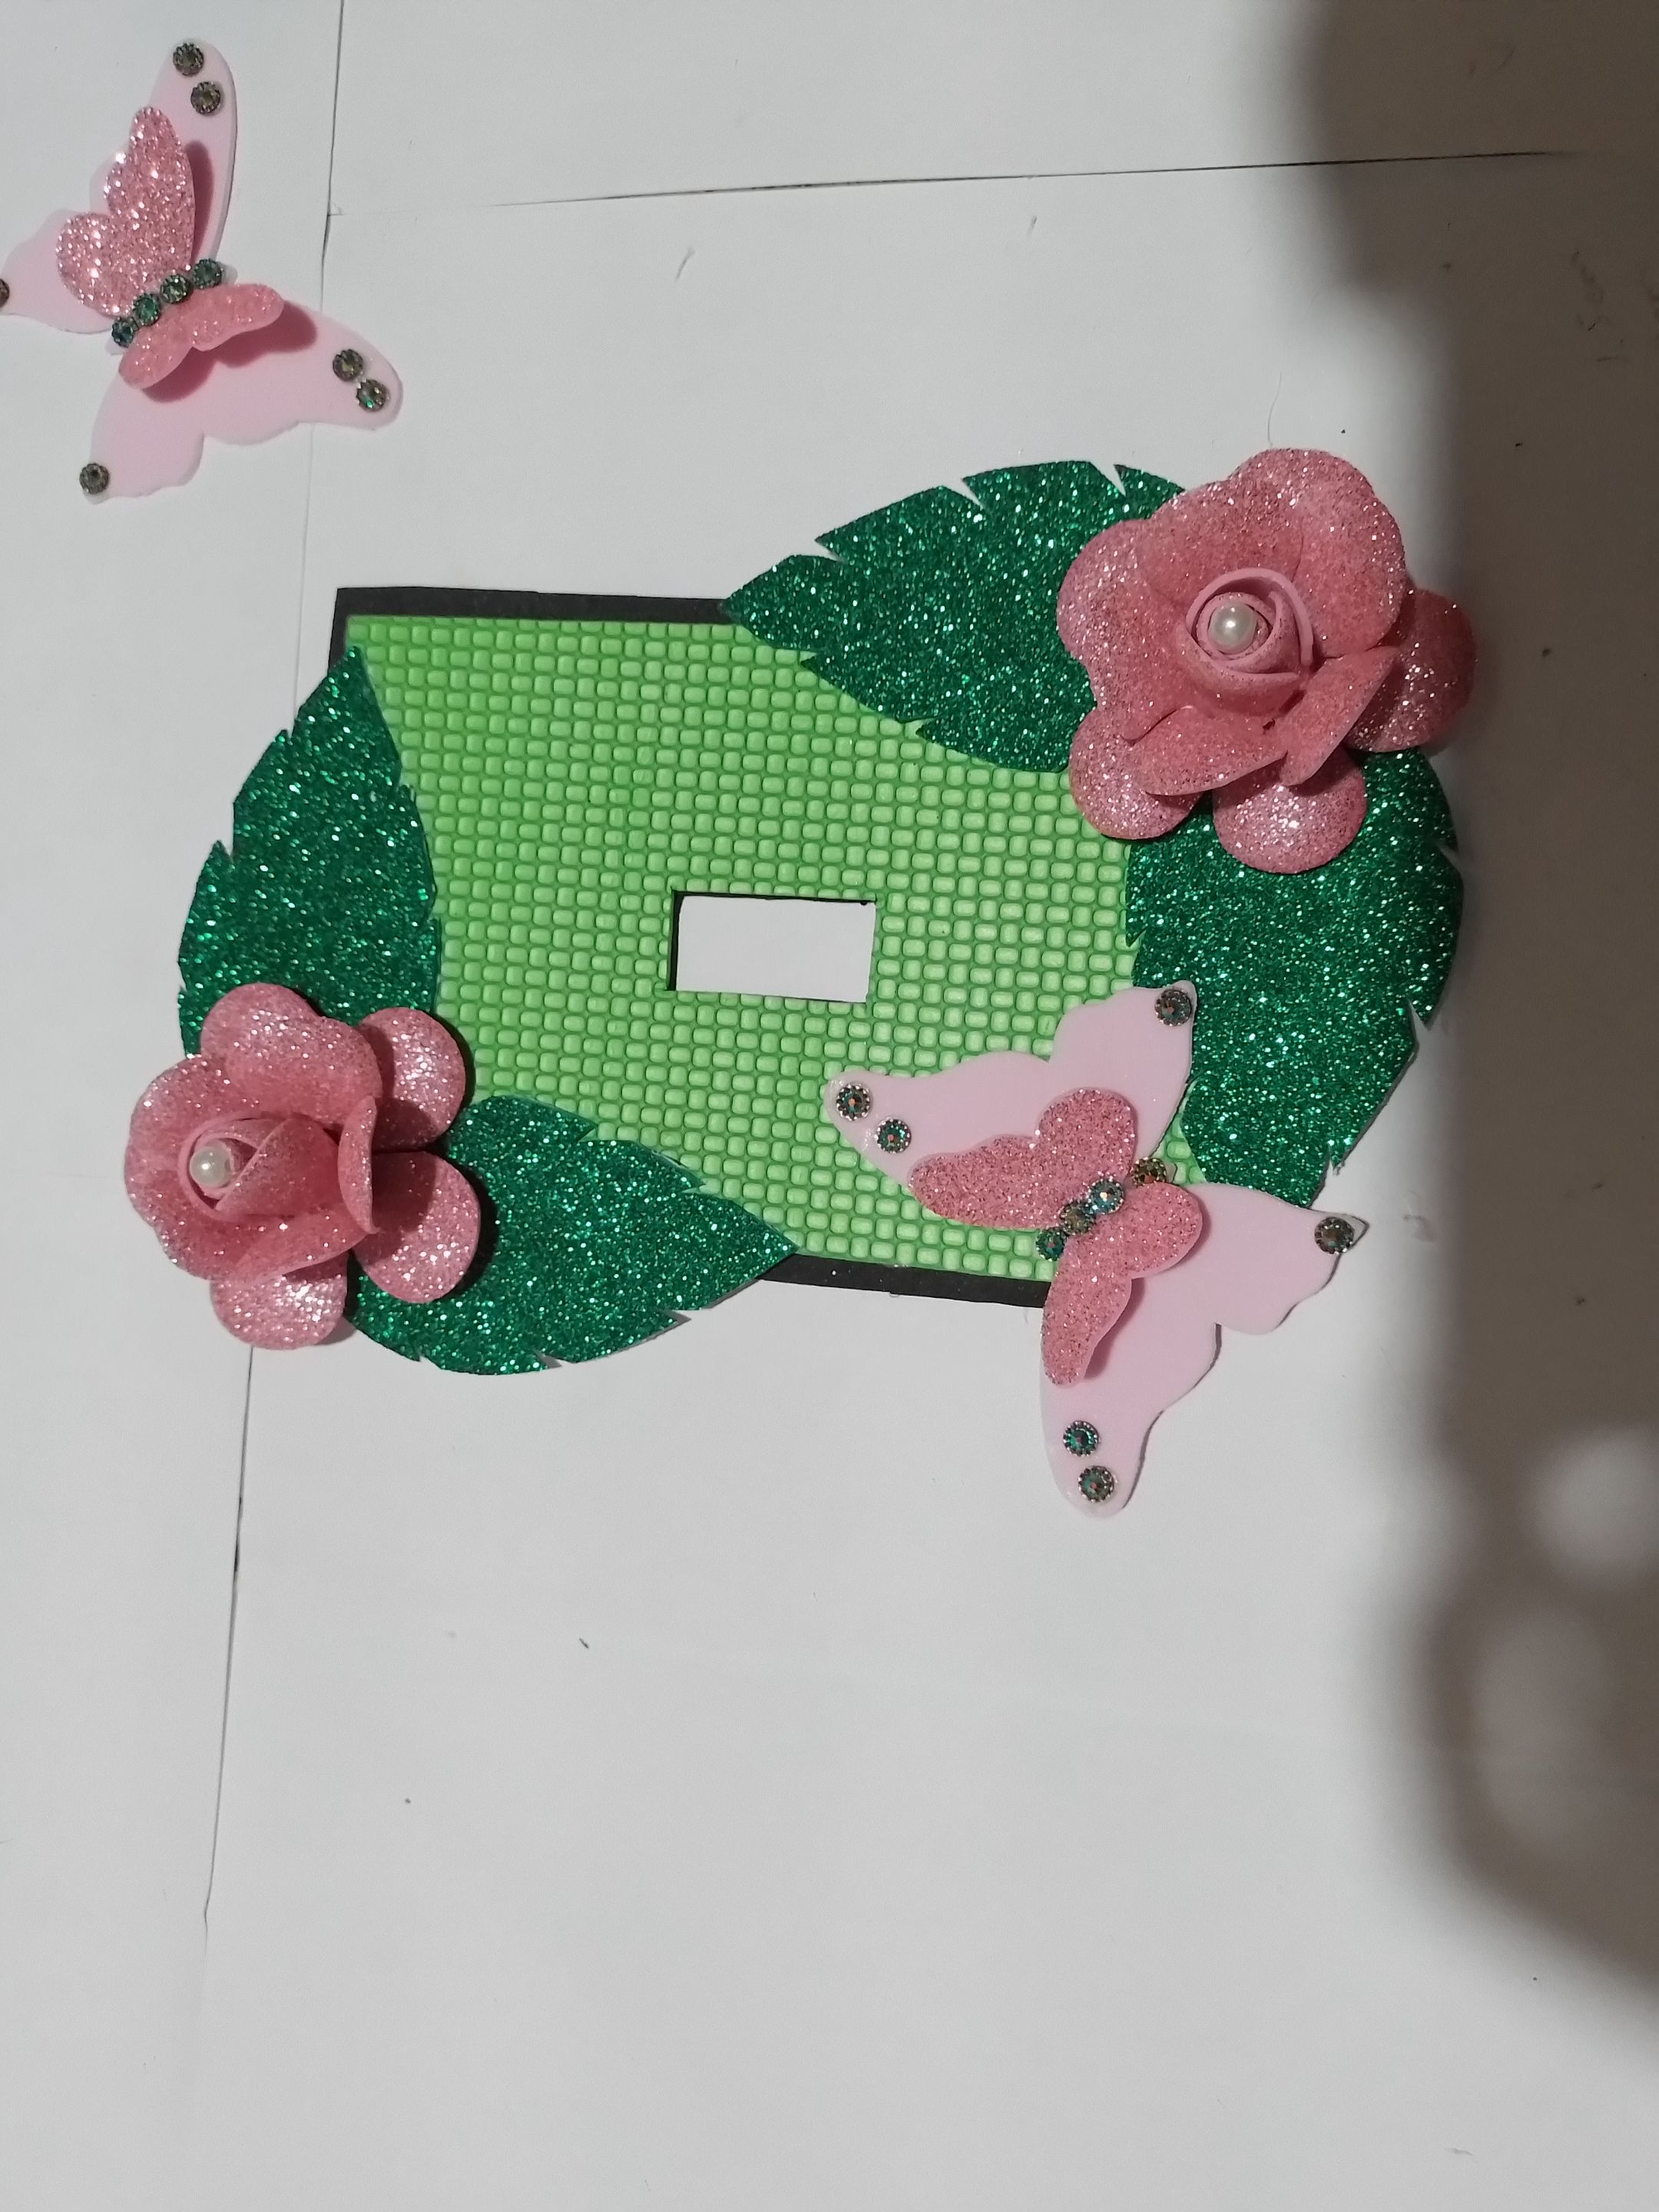
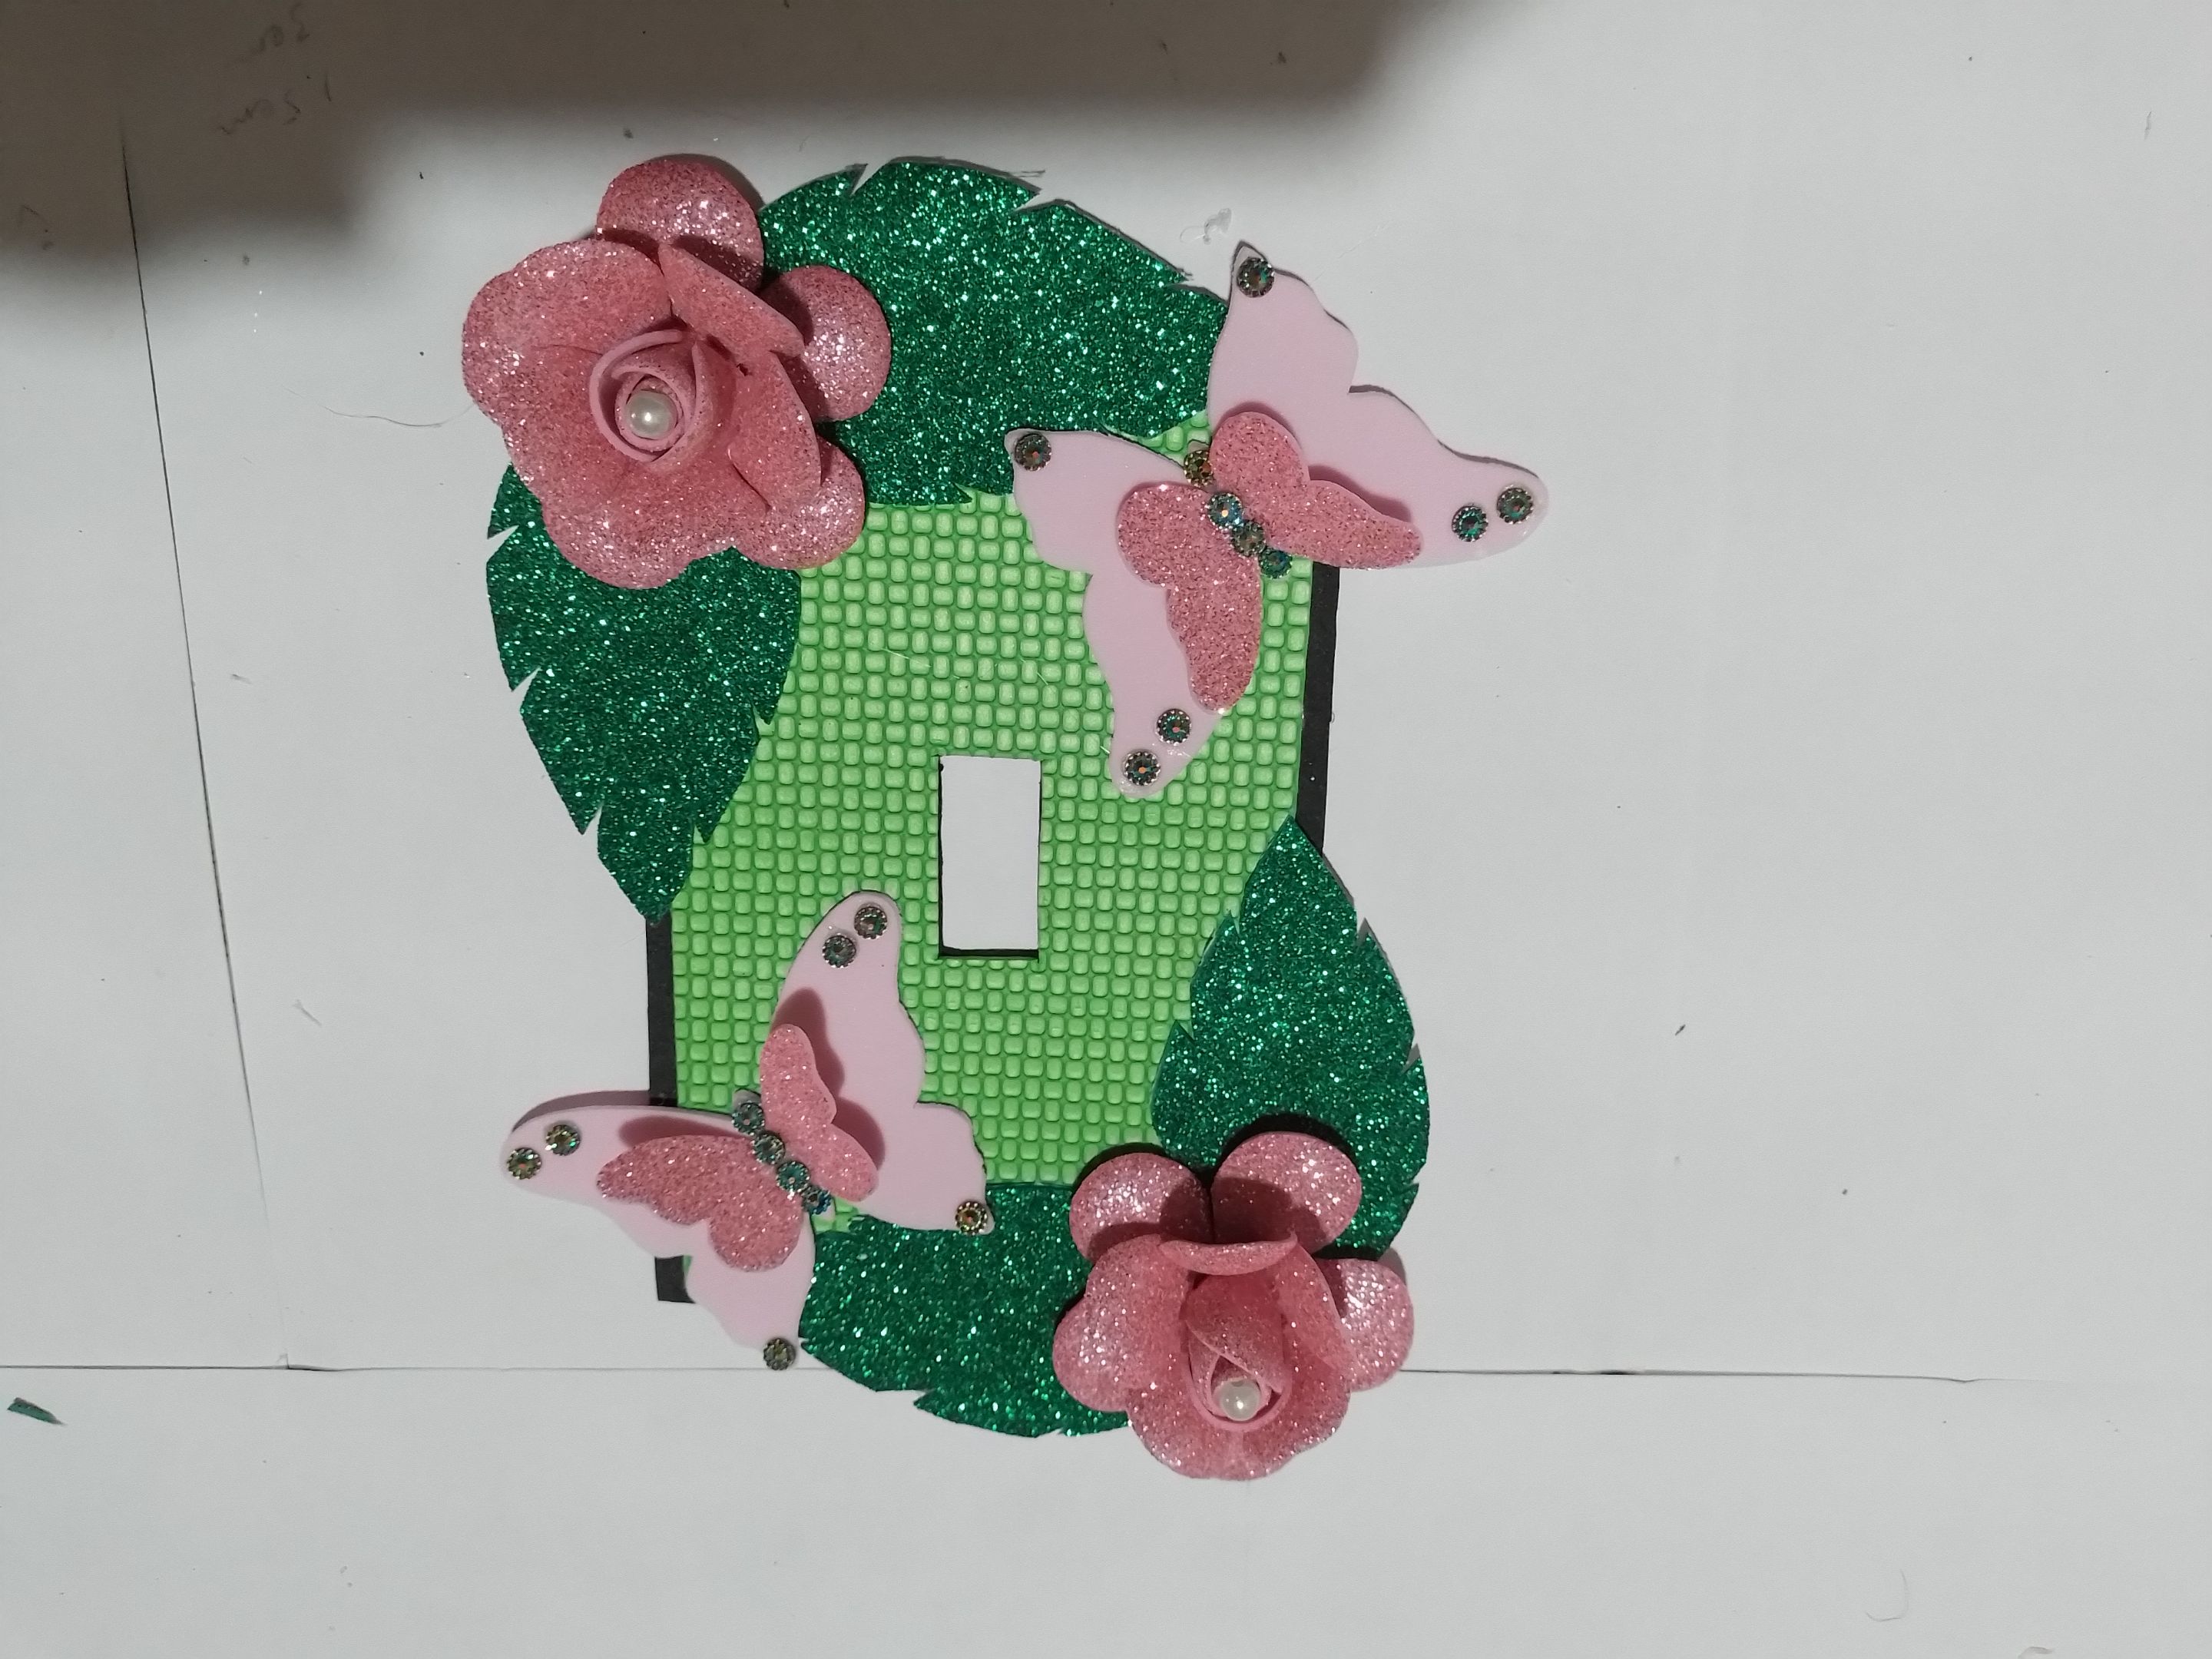
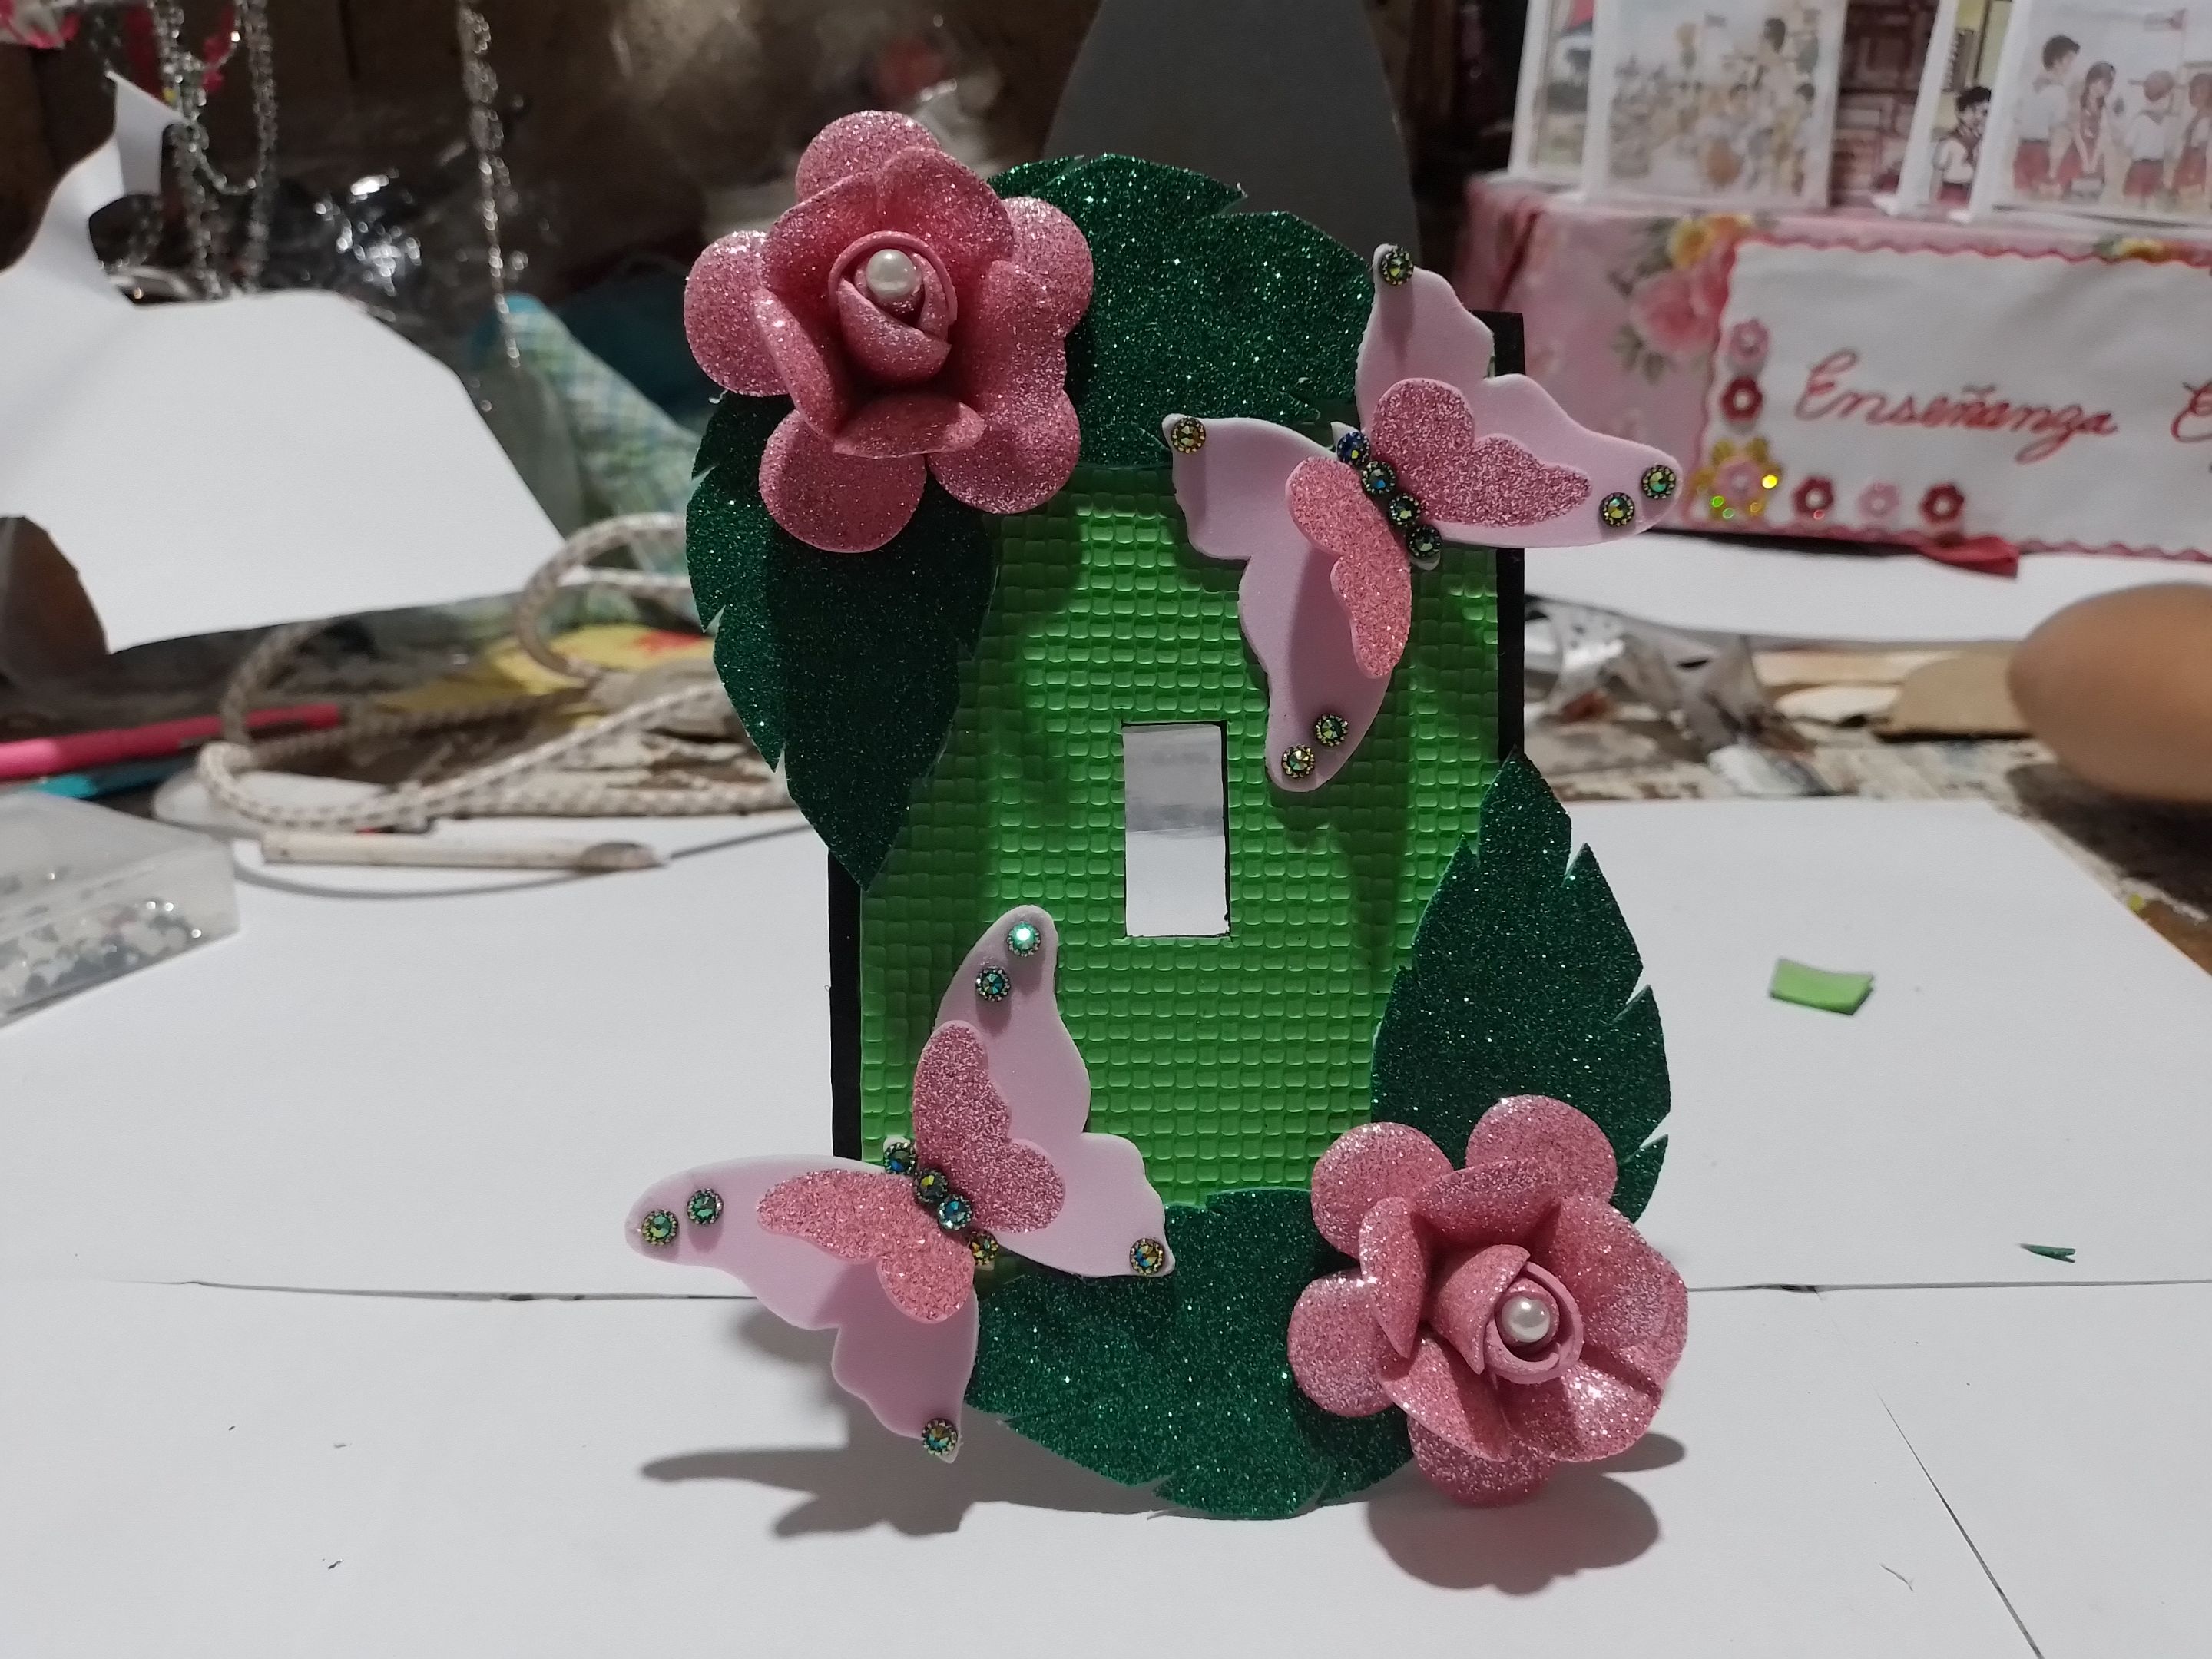
Step 13: Once all the parts are finished, we place them and glue them in place with the silicone gun, first we glue the leaves on the corners of the rectangle, then on top of the leaves we glue the flowers and finally the butterflies on each side of the rectangle.
Paso 13: Ya terminadas todas las partes las vamos acomodando y pegando en su lugar con la pistola de silicona, primero pegamos las hojas en las esquinas del rectángulo después encima de las hojas pegamos las flores y ya para terminar las mariposas a cada lado del rectángulo.
|
|

|
|
|
|
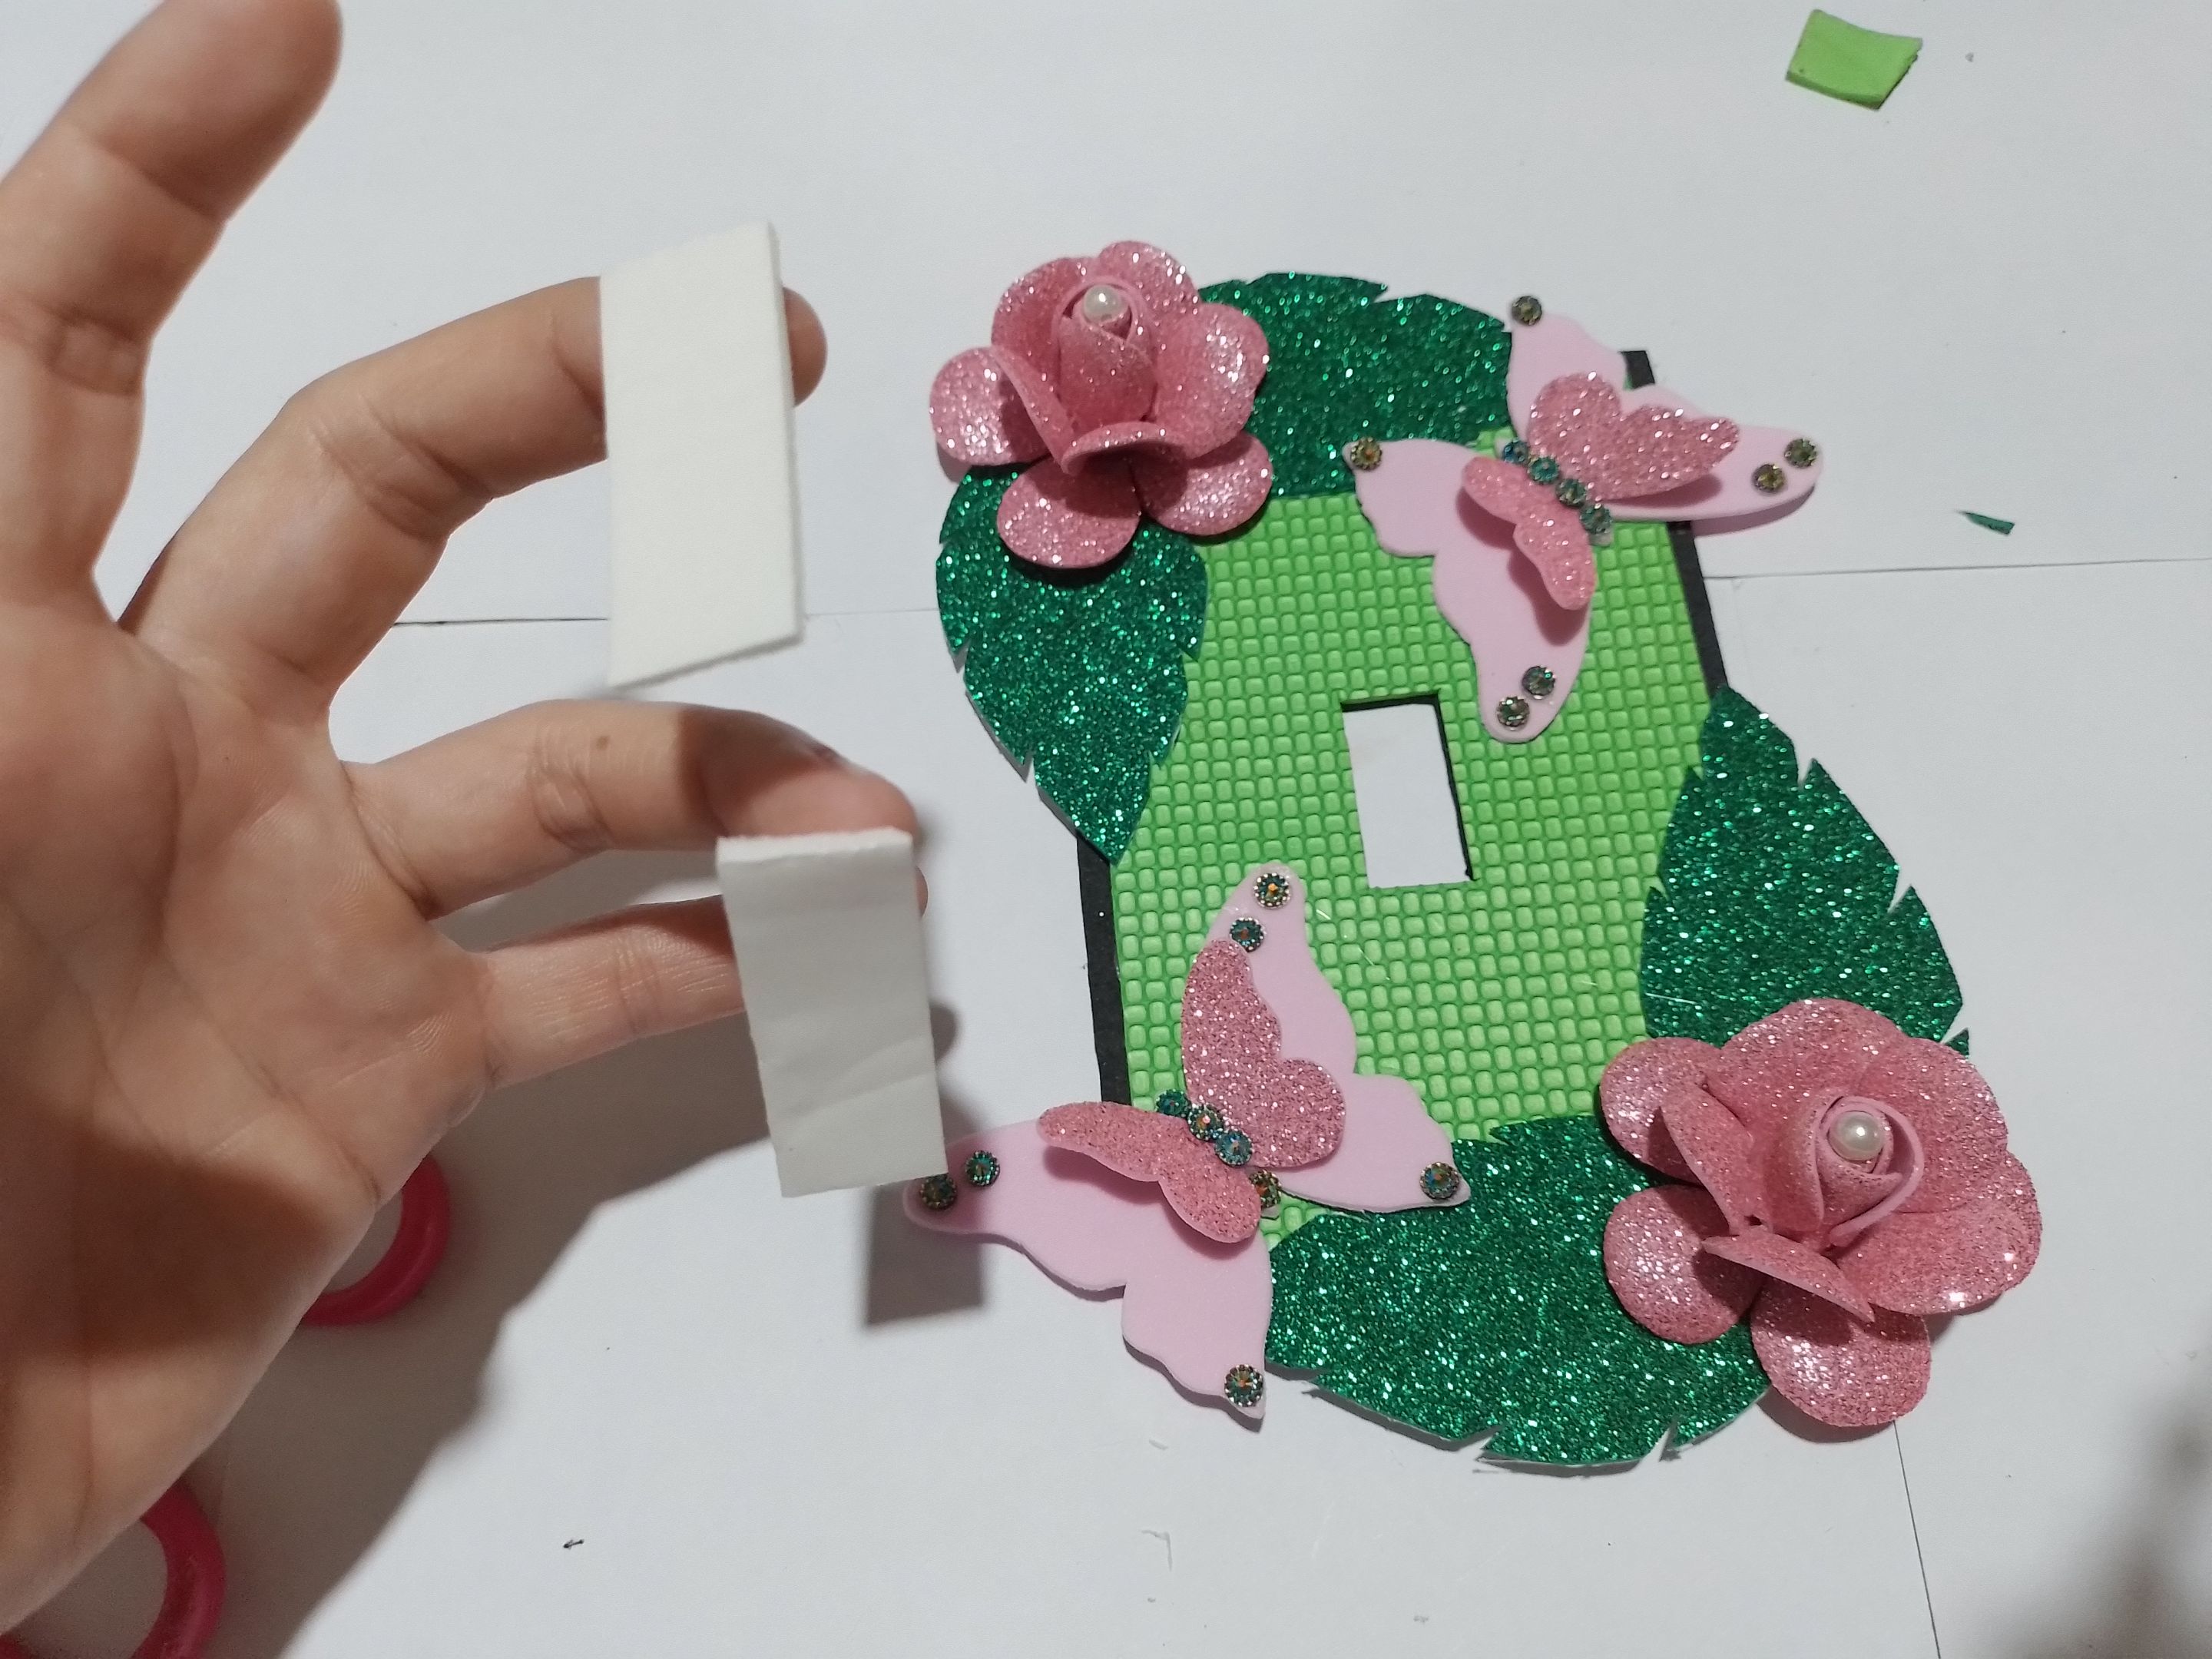
Step 14: Finally we put the double contact sticker on the back of the ornament to be able to stick it on the wall where the lighter is located.
Paso 14: Ya por ultimo le ponemos la pegatina de doble contacto por detrás del adorno para poderlo pegar en la pared donde se encuentra el encendedor.
|
|
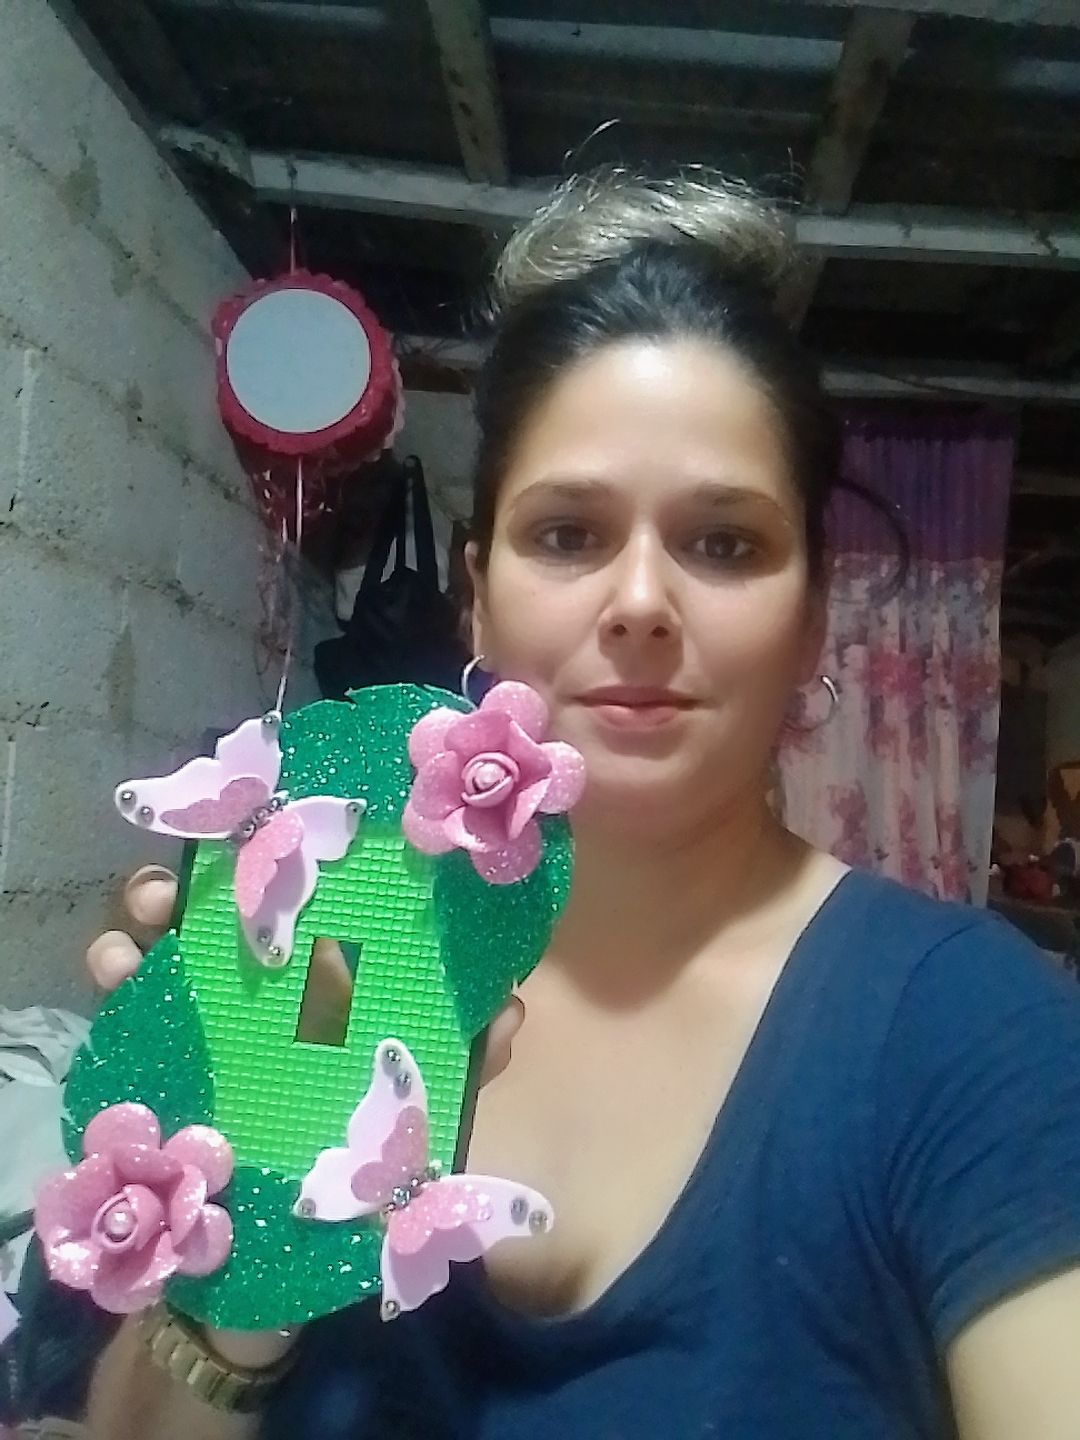
Now finished this beautiful ornament for lighters we can see that every corner of our home can be transformed with various crafts. I hope you like the result.
Ya terminada este bello adorno para los encendedores podemos ver que cada rinconcito de nuestro hogar lo podemos transformar con diversas manualidades. Espero les guste el resultado.
Cover made in Canva
Translated by DeepL