Muy feliz domingo queridos lectores y creadores de esta linda comunidad, espero se encuentren muy bien y que hayan disfrutado al máximo de este fin de semana que ya casi acaba. Me siento súper contenta de estar aquí de nuevo y compartir una vez más con ustedes, en esta ocasión les quiero compartir una bonita transformación de una cola simple a una cola con lazo.
Very happy Sunday, dear readers and creators of this beautiful community, I hope you are feeling very well and that you have fully enjoyed this weekend that is almost over. I feel super happy to be here again and share with you once again, this time I want to share with you a beautiful transformation from a simple tail to a tail with a bun.
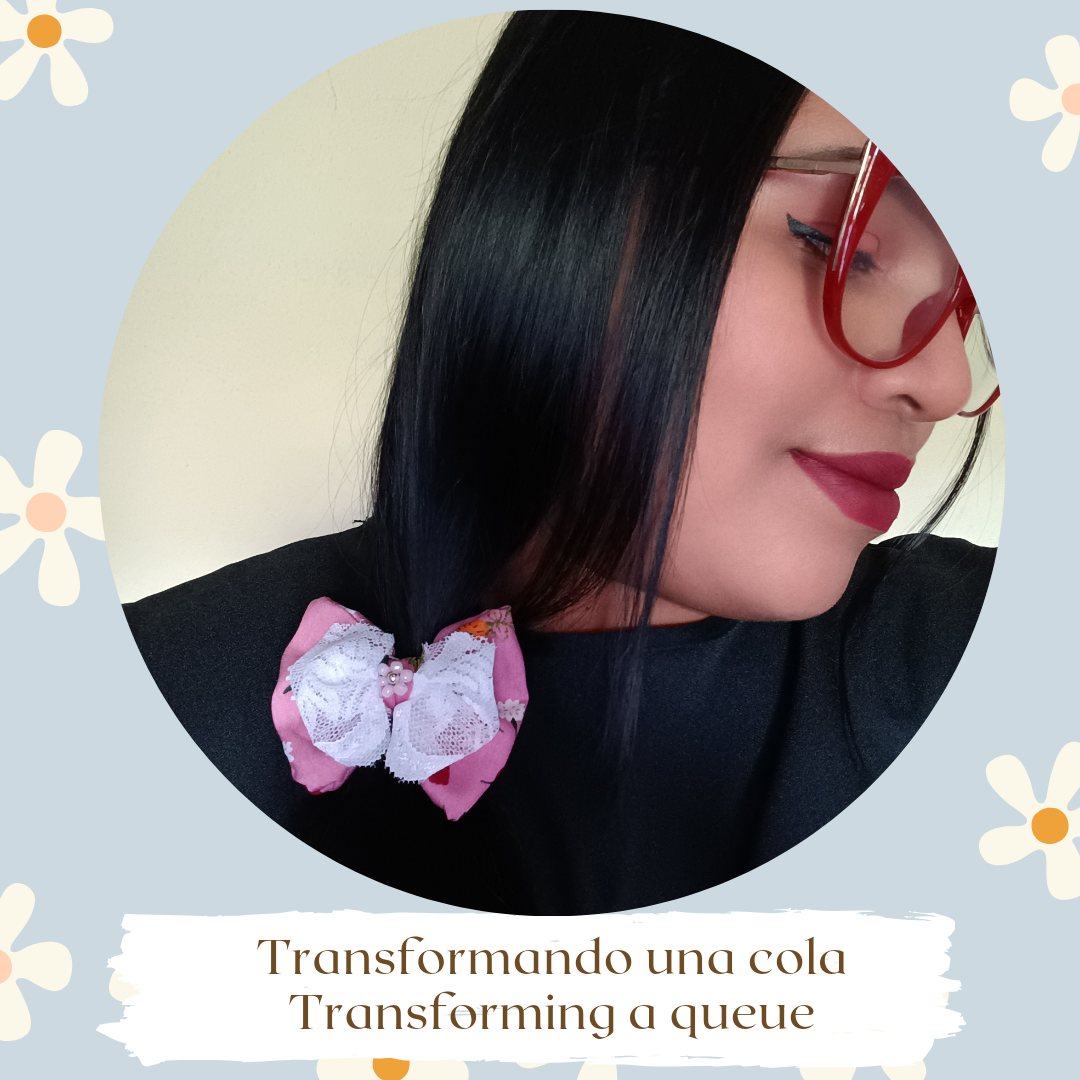
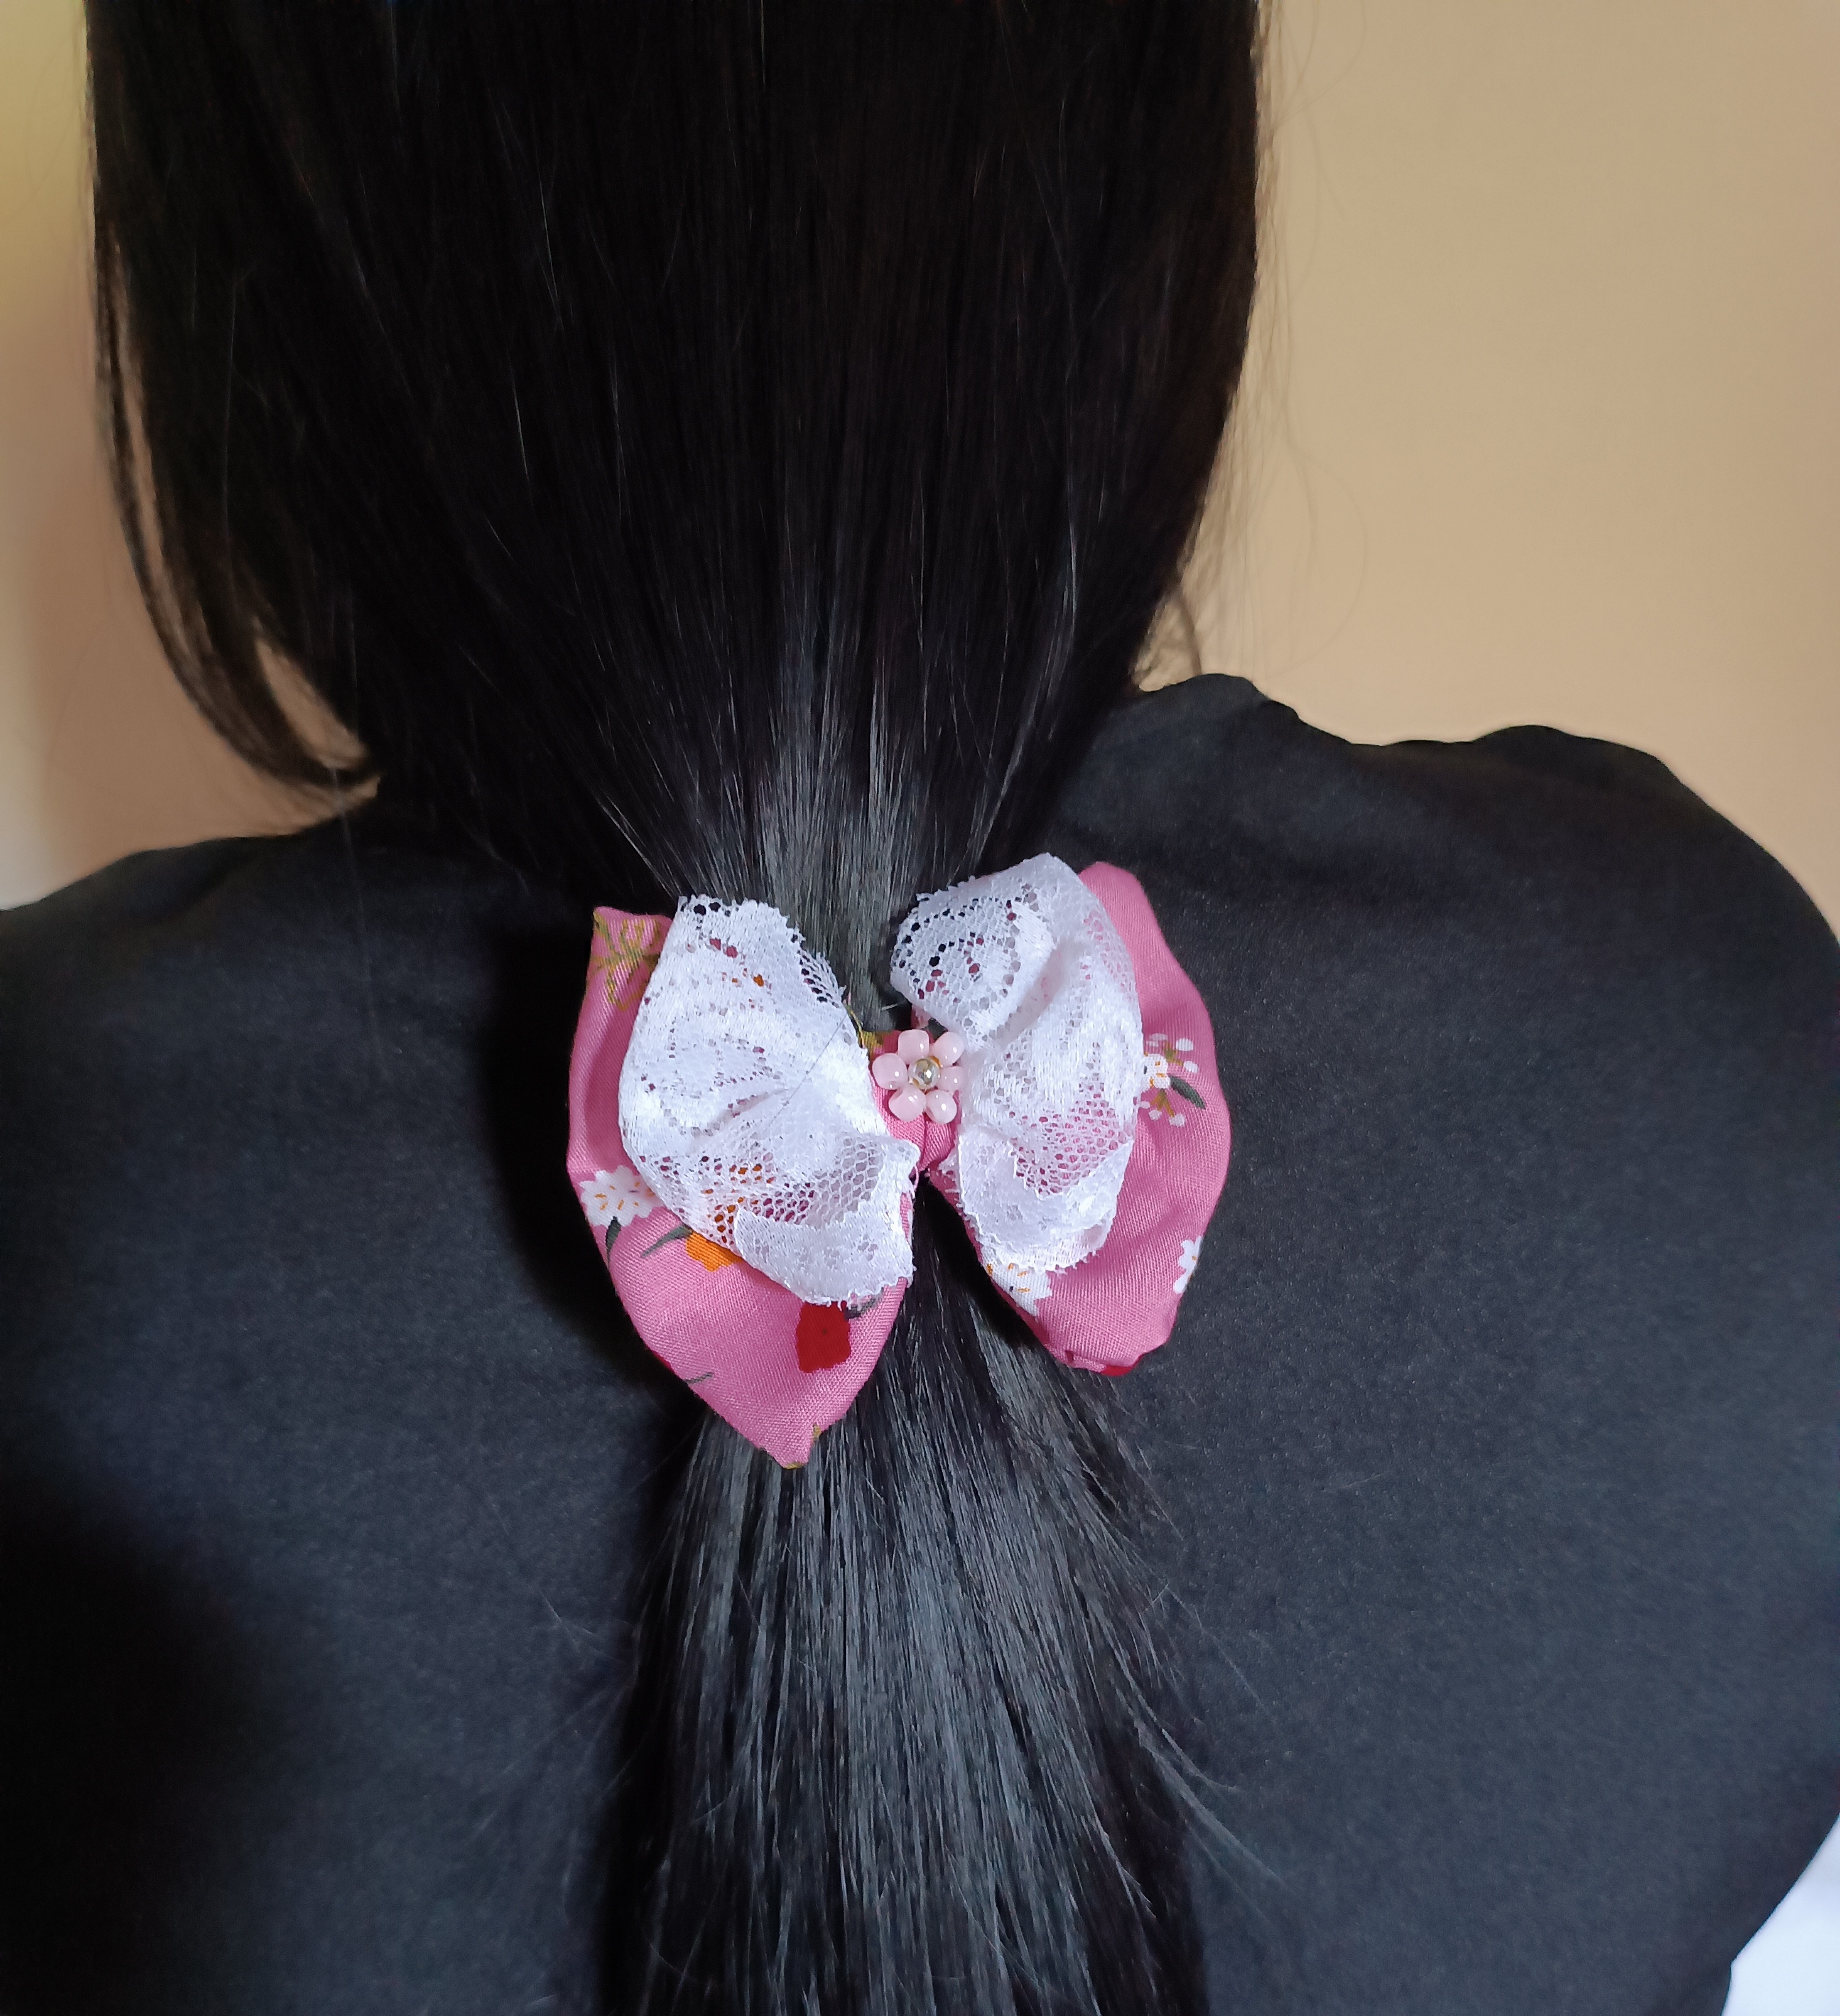
Una cola es un accesorio que la mayoría de nosotras utilizamos a diario una cola simple de puede transformar con diferentes materiales y darle un toque especial y coqueto además que quedará más bonita al llevarla en el cabello, esta cola la transforme con tela reciclada y en medio lleva una flor que se realizó con mostacillas, el tema del lazo me encanta y queda muy linda al lucirla. A continuación les muestro los materiales que utilicé y el paso a paso.
A tail is an accessory that most of us use on a daily basis. A simple tail can be transformed with different materials and give it a special and flirty touch. It will also look prettier when worn in our hair. I transformed this tail with recycled fabric and in the middle It has a flower that was made with beads, I love the bow theme and it looks very pretty when you show it off. Below I show you the materials I used and the step by step.

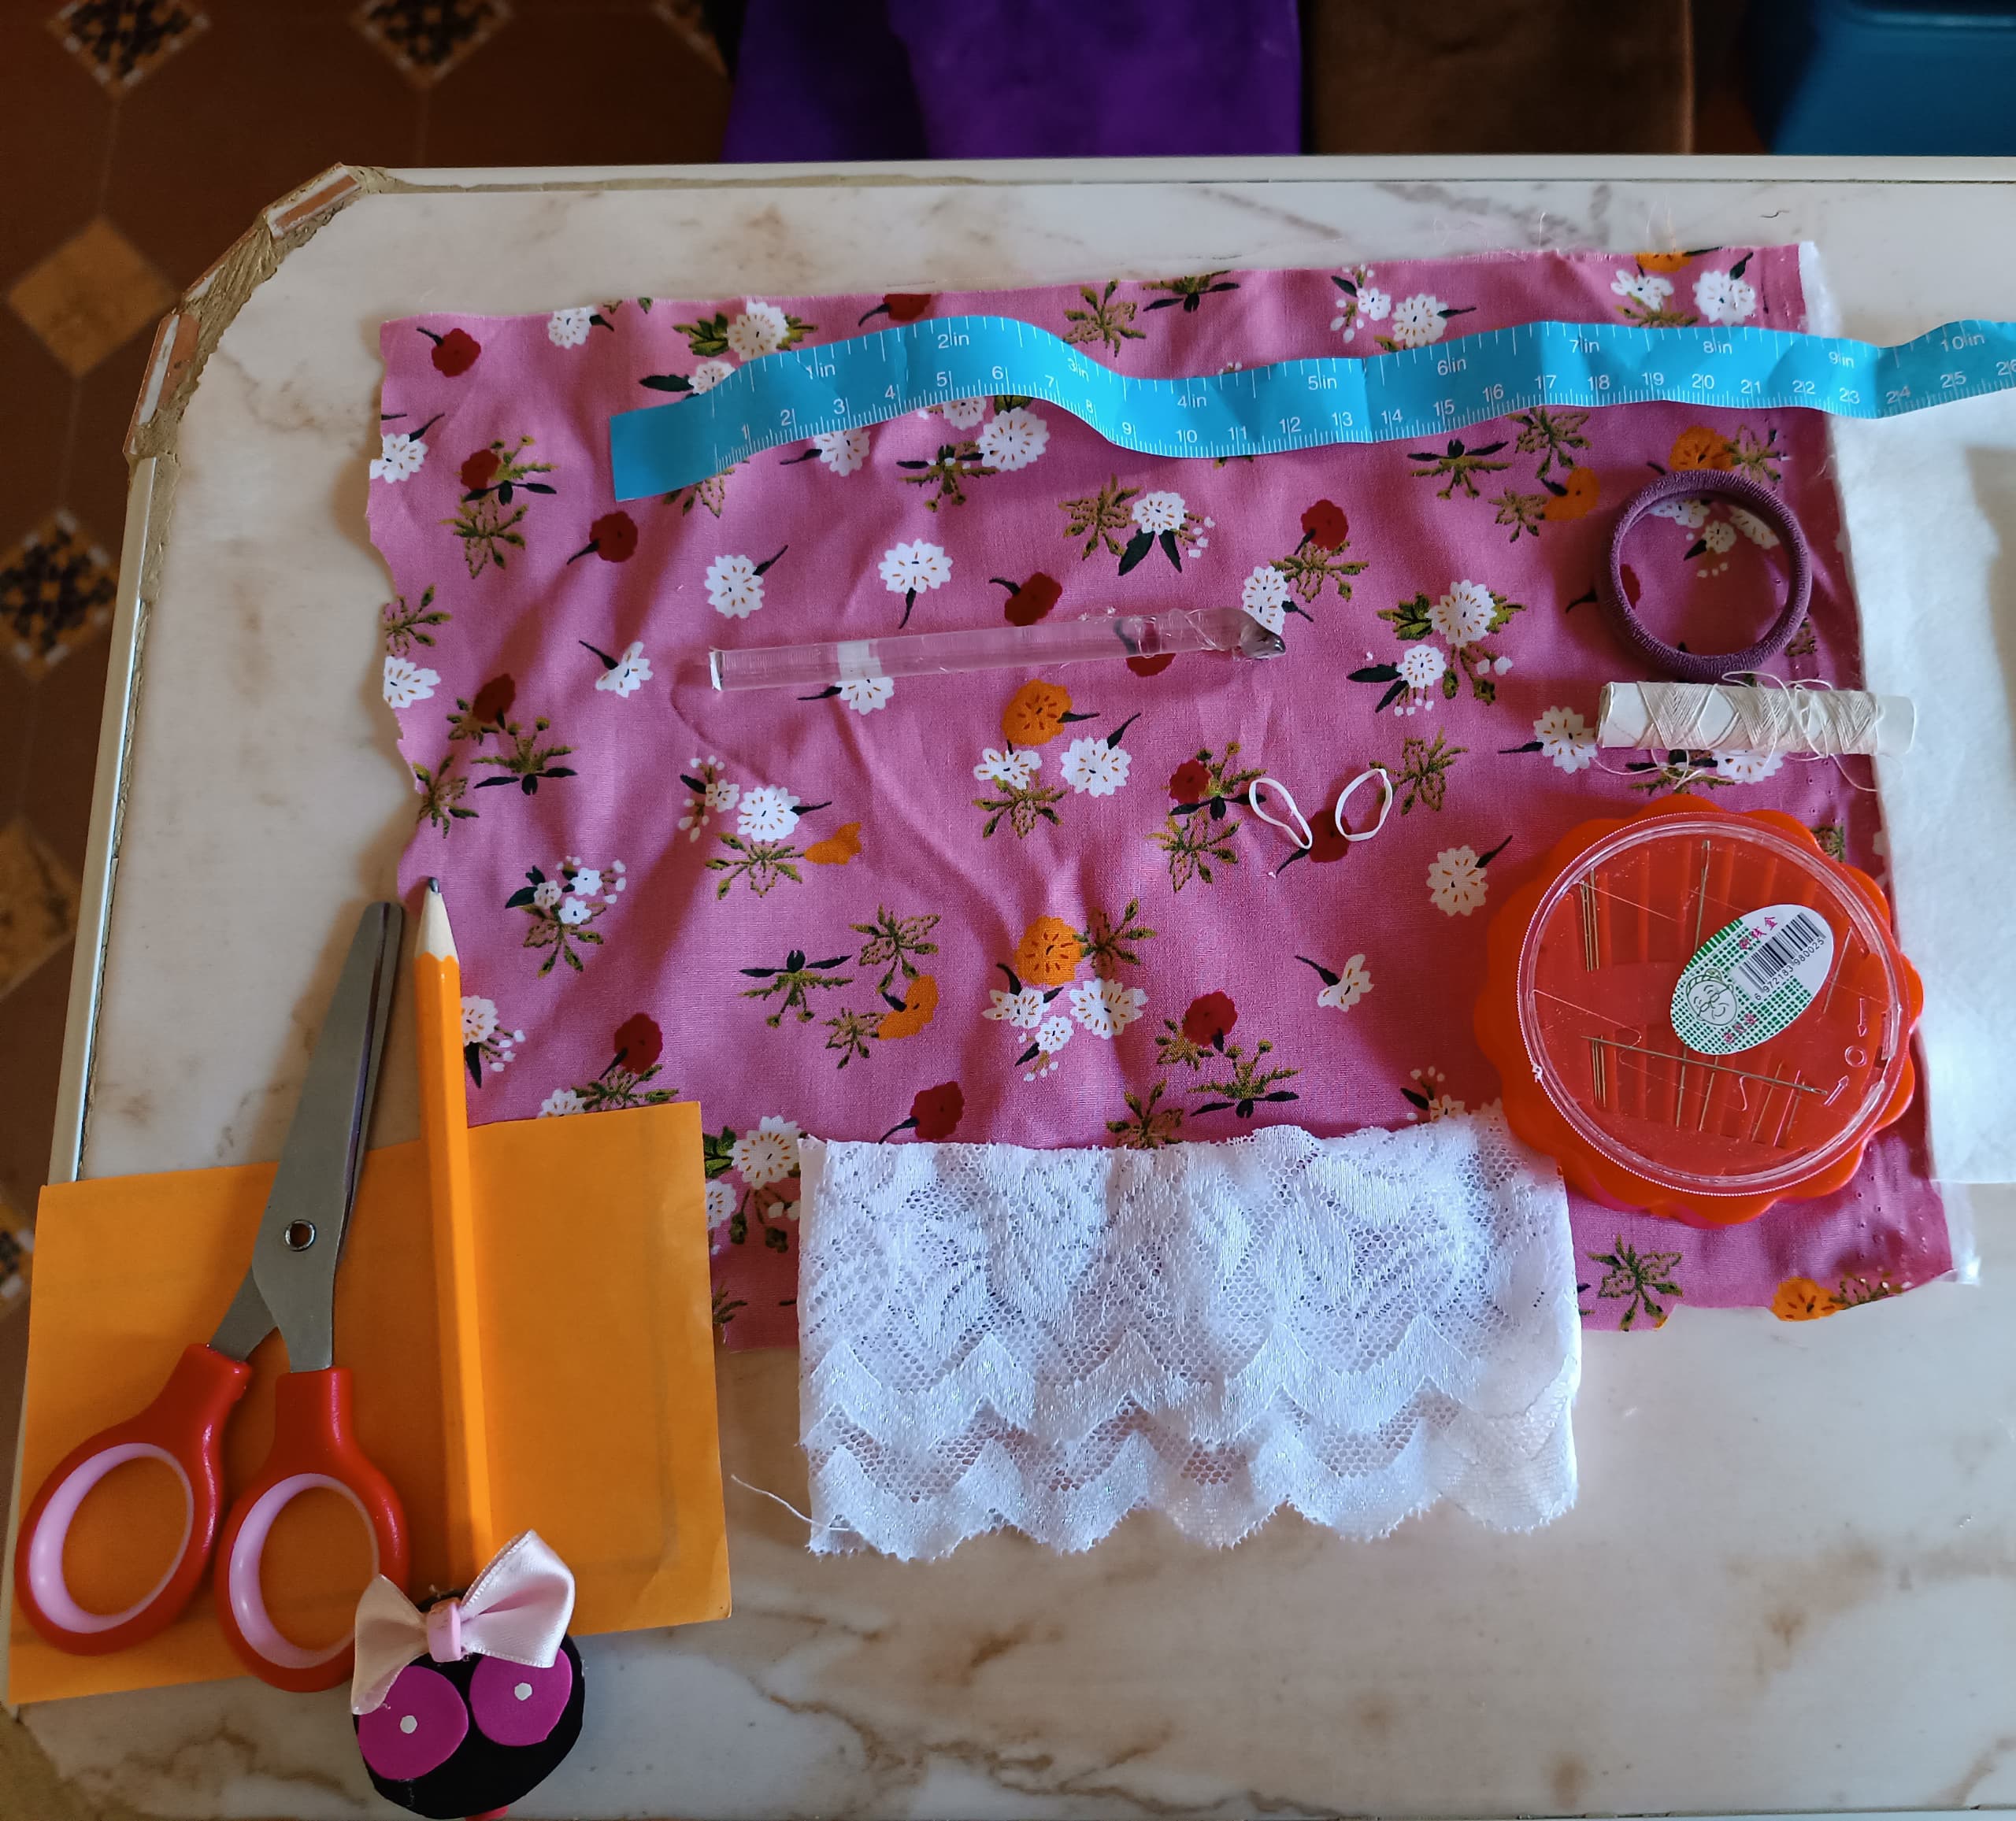
Materiales
✅Un retazo de tela, yo utilicé de color rosa con flores.
✅Un retazo de tela de blonda.
✅Aguja.
✅Hilo.
✅Tijera.
✅Silicón.
✅Dos ligas.
✅Lápiz.
✅Papel de reciclaje.
✅Una cola.
✅Cinta métrica.
✅Seis mostacillas rosadas.
✅Un balín dorado.
✅Un retazo de nylon.
Materials
A piece of fabric, I used pink with flowers.
A piece of lace fabric.
Needle.
Thread.
Scissors.
Silicone.
Two leagues.
Pencil.
Recycled paper.
A tail.
Measuring tape.
Six small pink beads.
A golden bead.
A piece of nylon.
Paso a paso / Step by Step
El primer paso es realizar un molde con el tamaño que queremos que quede el lazo, la tela color rosa mide aproximadamente de largo 18 cm y de ancho 6cm, y la tela de blonda 14 cm de largo y 7 de ancho, a medida que iba acomodando la tela recorté los bordes sobrantes para que quede más alineada.
The first step is to make a mold with the size we want the bow to have, the pink fabric measures approximately 18 cm long and 6 cm wide, and the lace fabric measures 14 cm long and 7 cm wide, just as He was fixing the fabric. , I trimmed the excess edges so that it was more aligned.
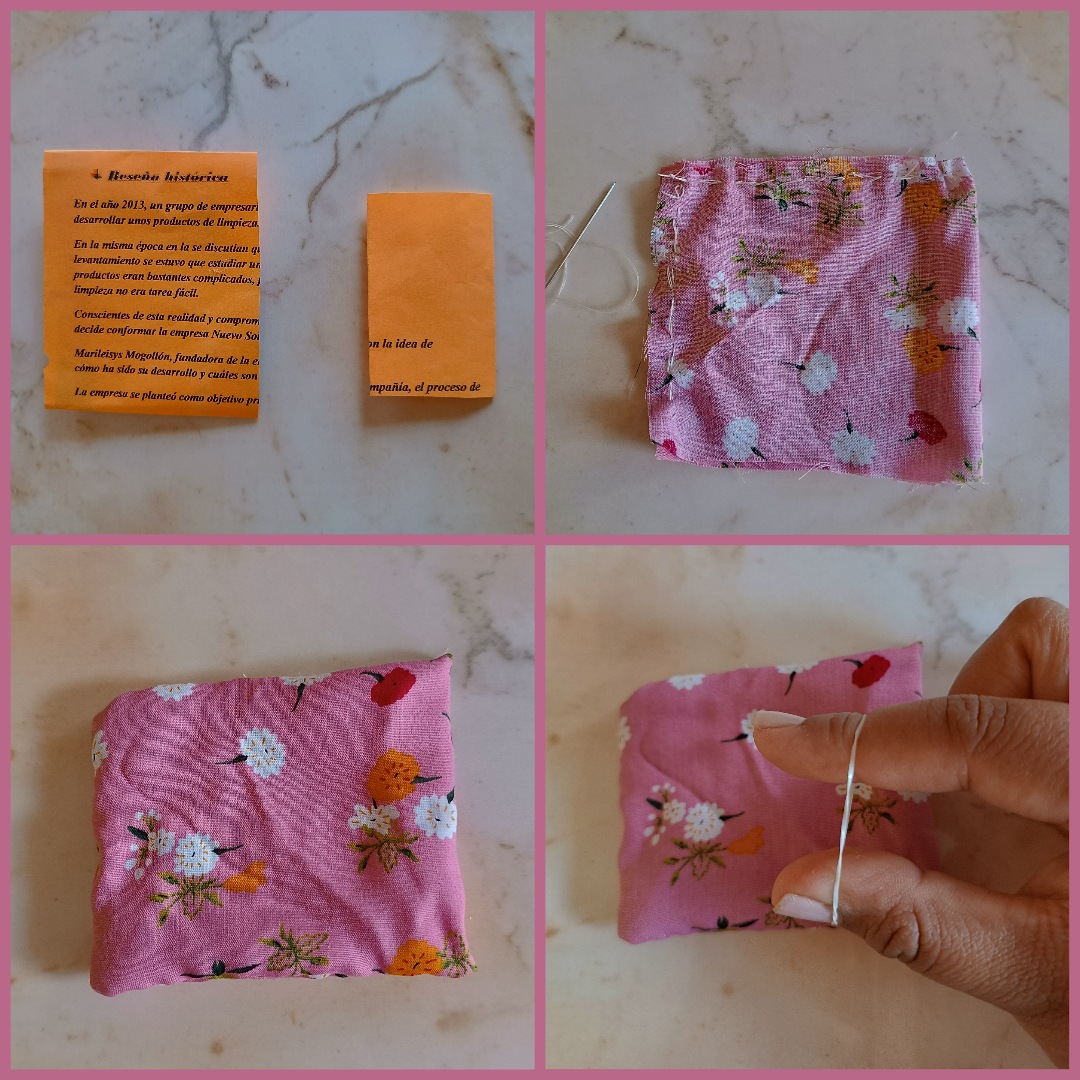
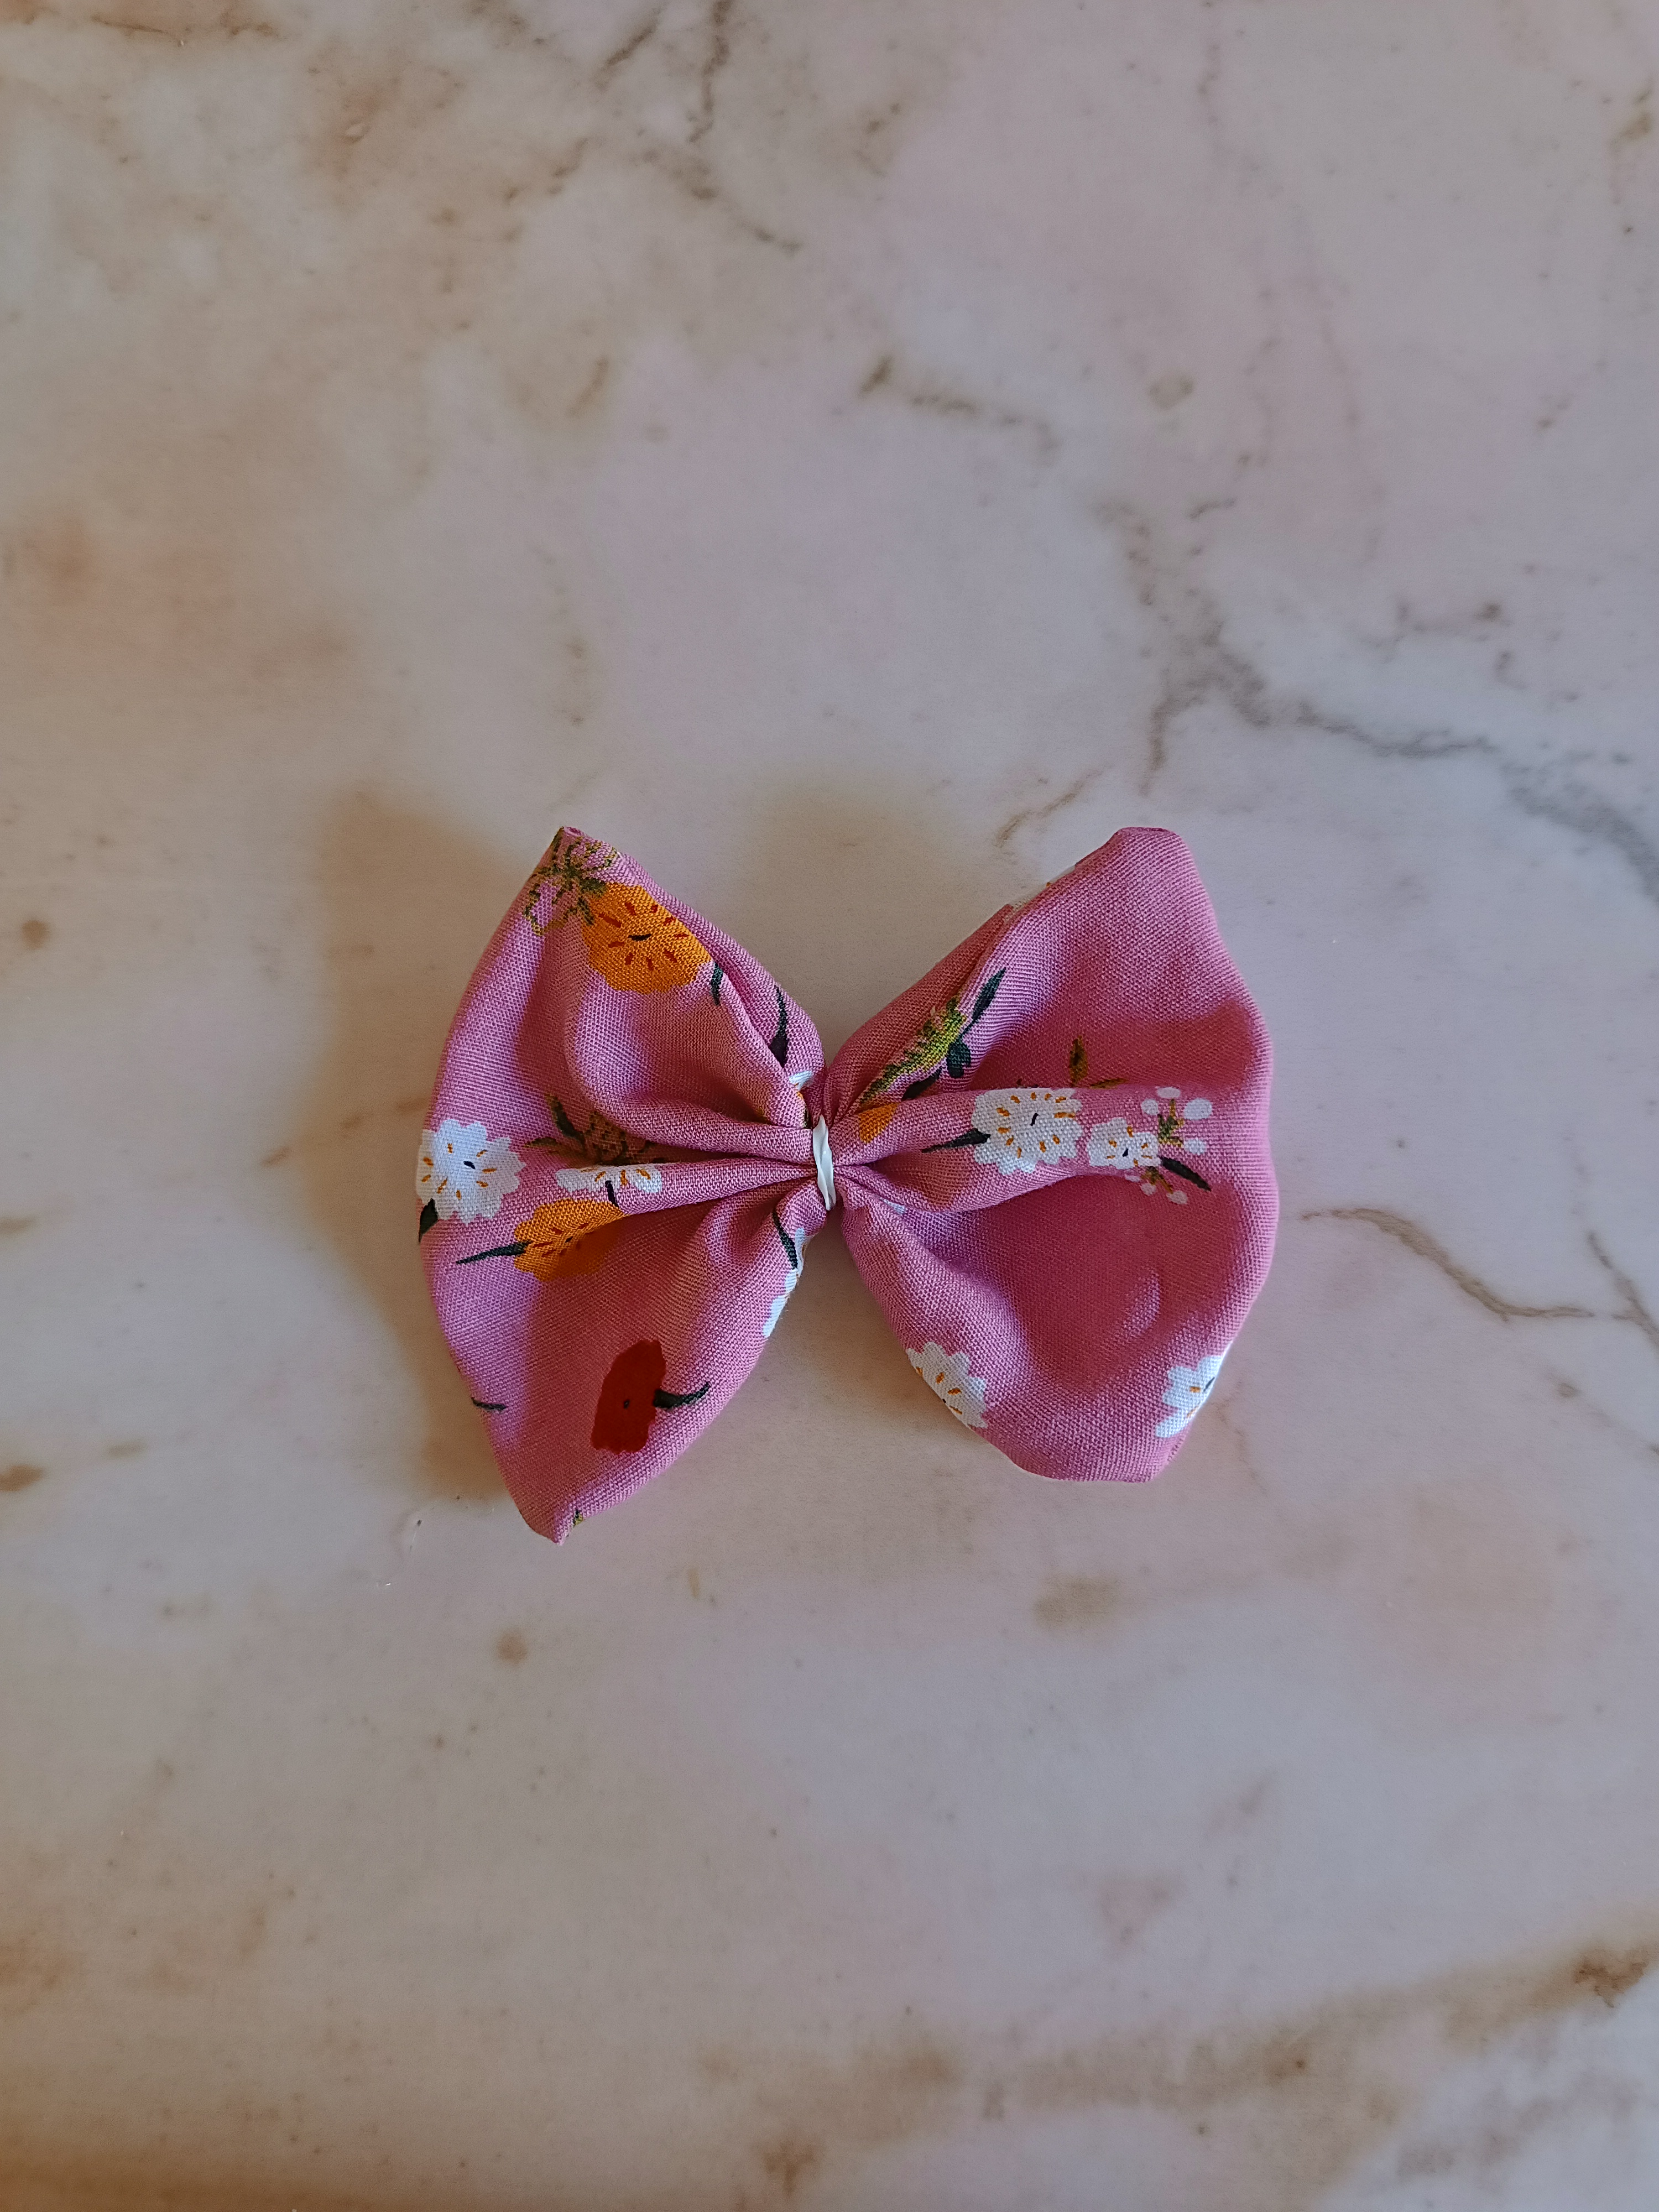
Luego corté la tela color rosa la doble en la mitad y comencé a coser con hilo color blanco el borde dejando un lado sin coser para poder dar la vuelta a la tela, una vez que ya esté en reverso con unos puntos de hilo y silicón termino de sellar el espacio sin costura, nos quedará un cuadrito.
Then I cut the pink fabric, folded it in half and started sewing the edge with white thread, leaving one side unstitched so I could turn the fabric inside out. Once it was on the back with a few stitches of thread and silicone, I was done. After sealing the seamless space, we will be left with a small square.

Con una liga de color blanco la voy a colocar en medio de la tela fijándola bien de inmediato nos daremos cuenta como se forma el lazo, luego cosemos unos puntos con hilo en medio de la liga, y ya la primera parte está lista.
With a white rubber band I am going to place it in the middle of the fabric, fixing it well. We will immediately notice how the bow is formed, then we will sew some stitches with thread in the middle of the garter, and the first part is ready.
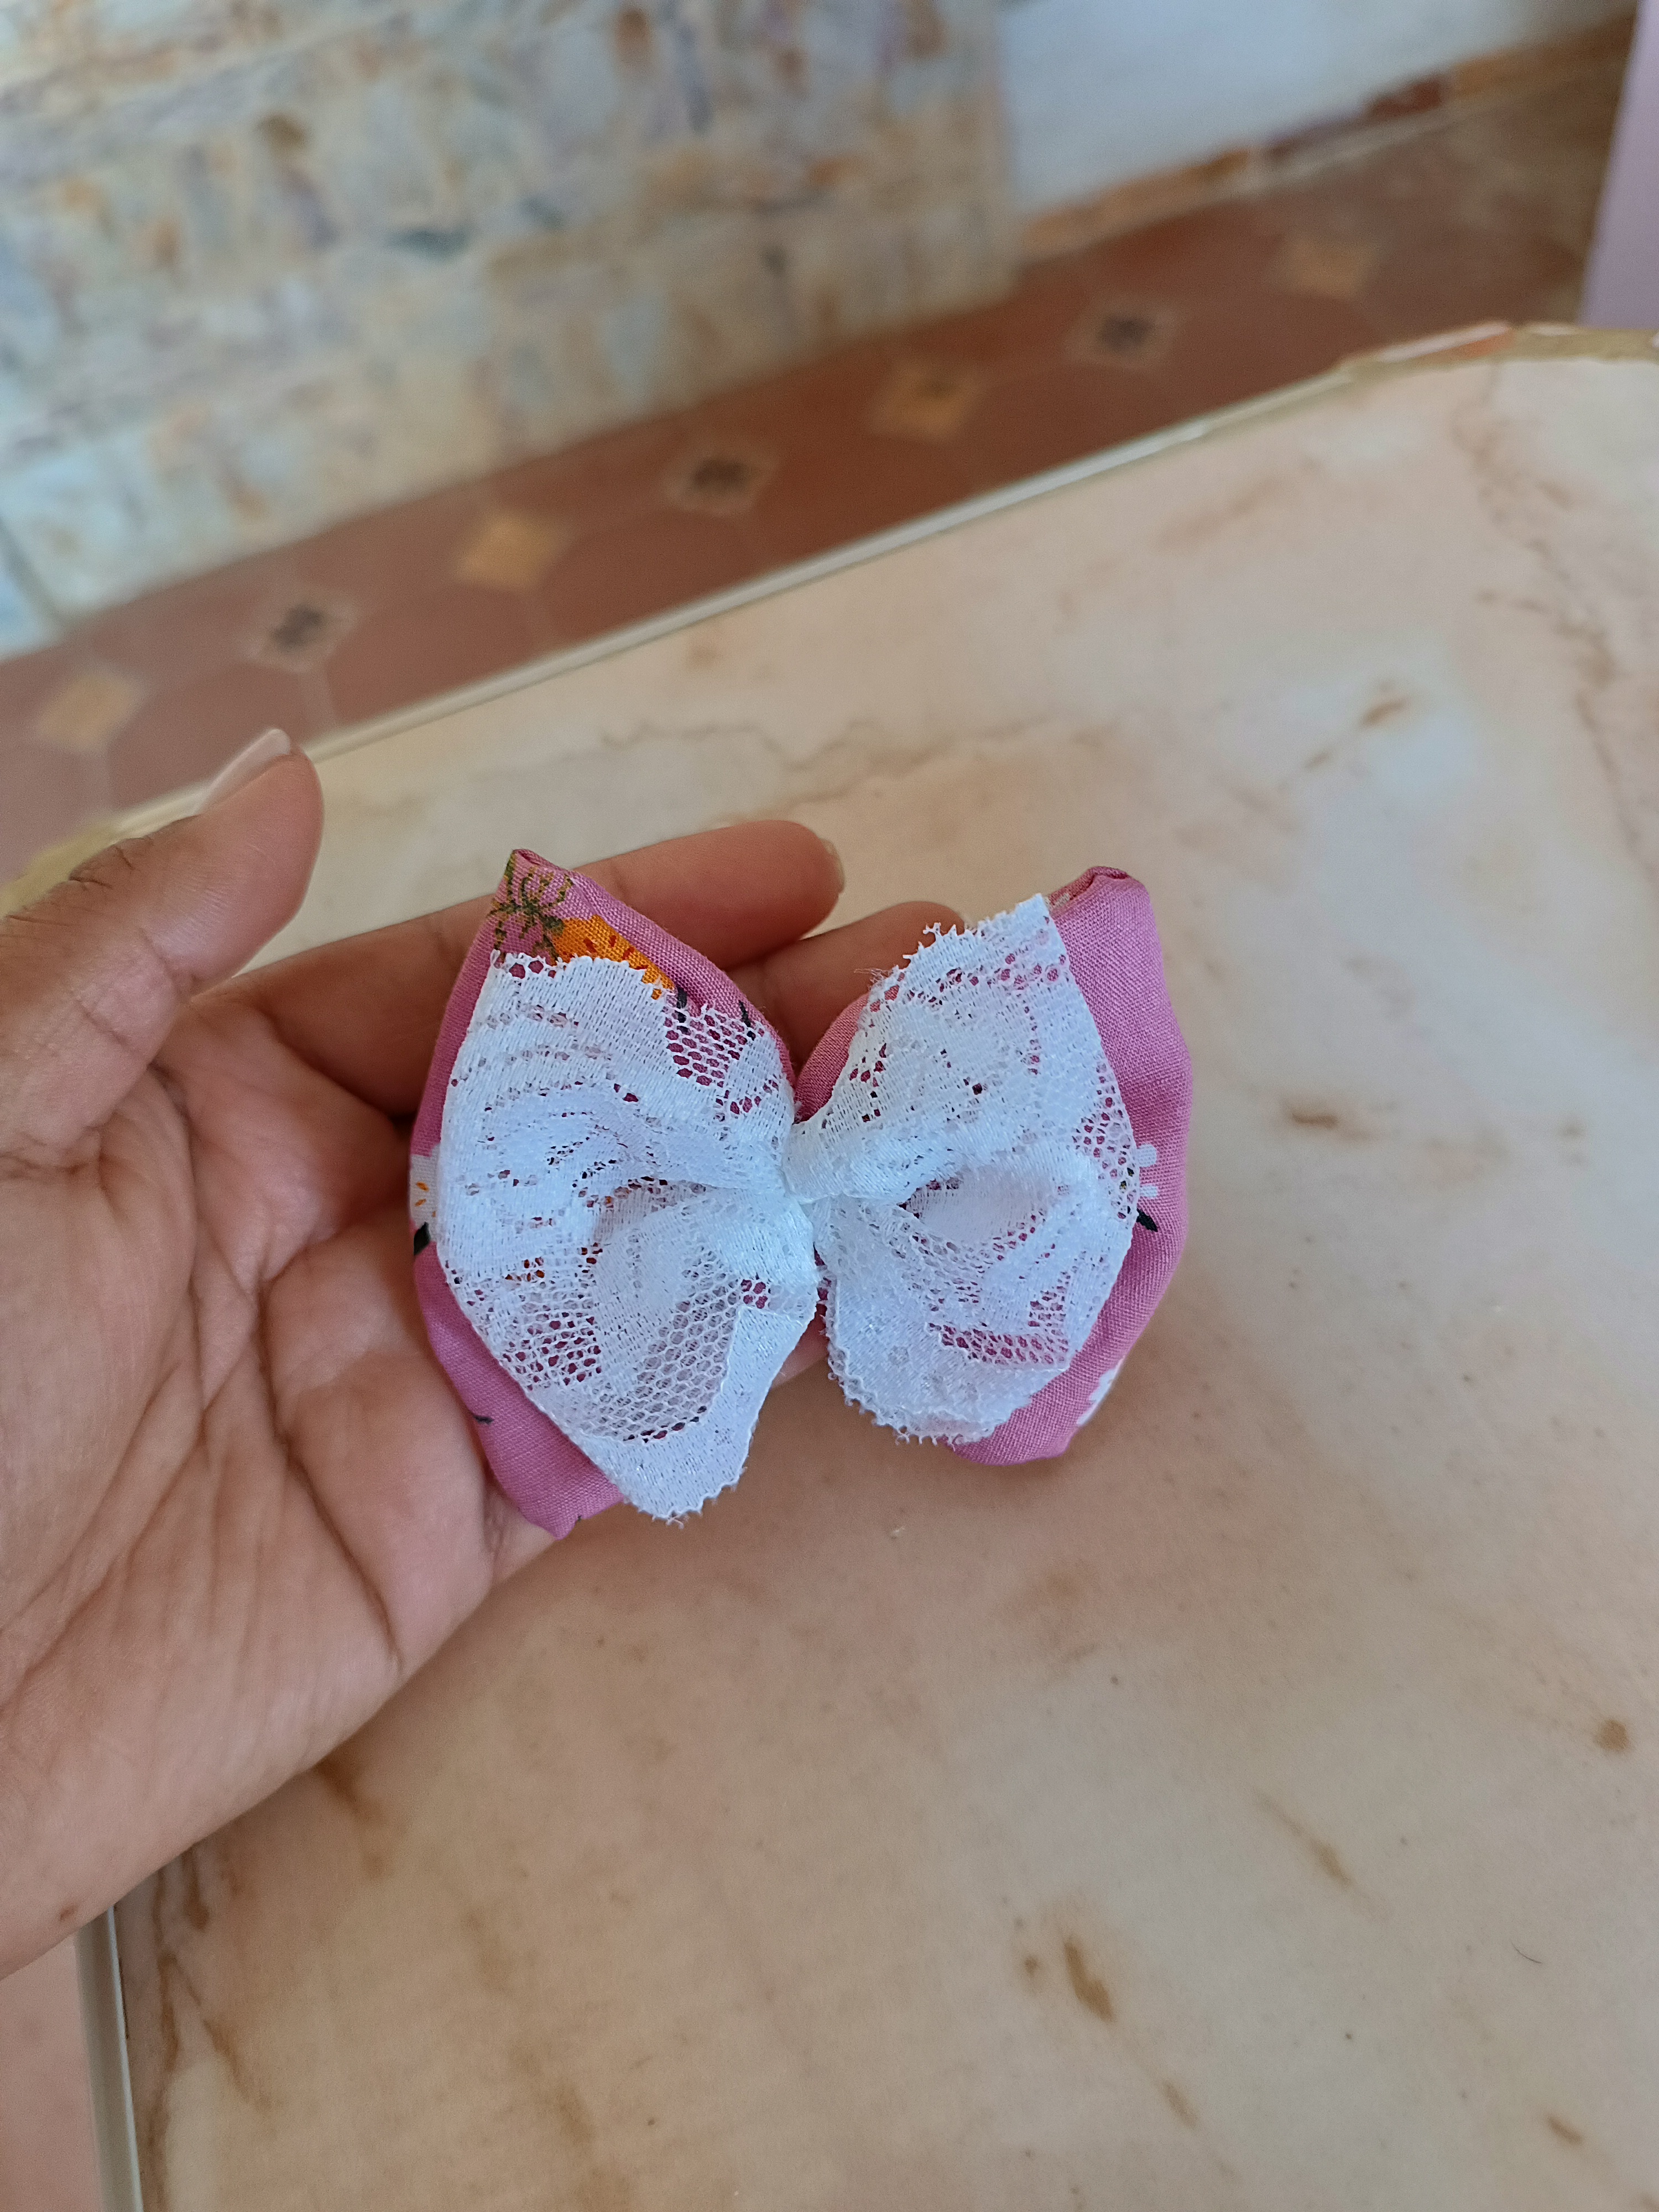
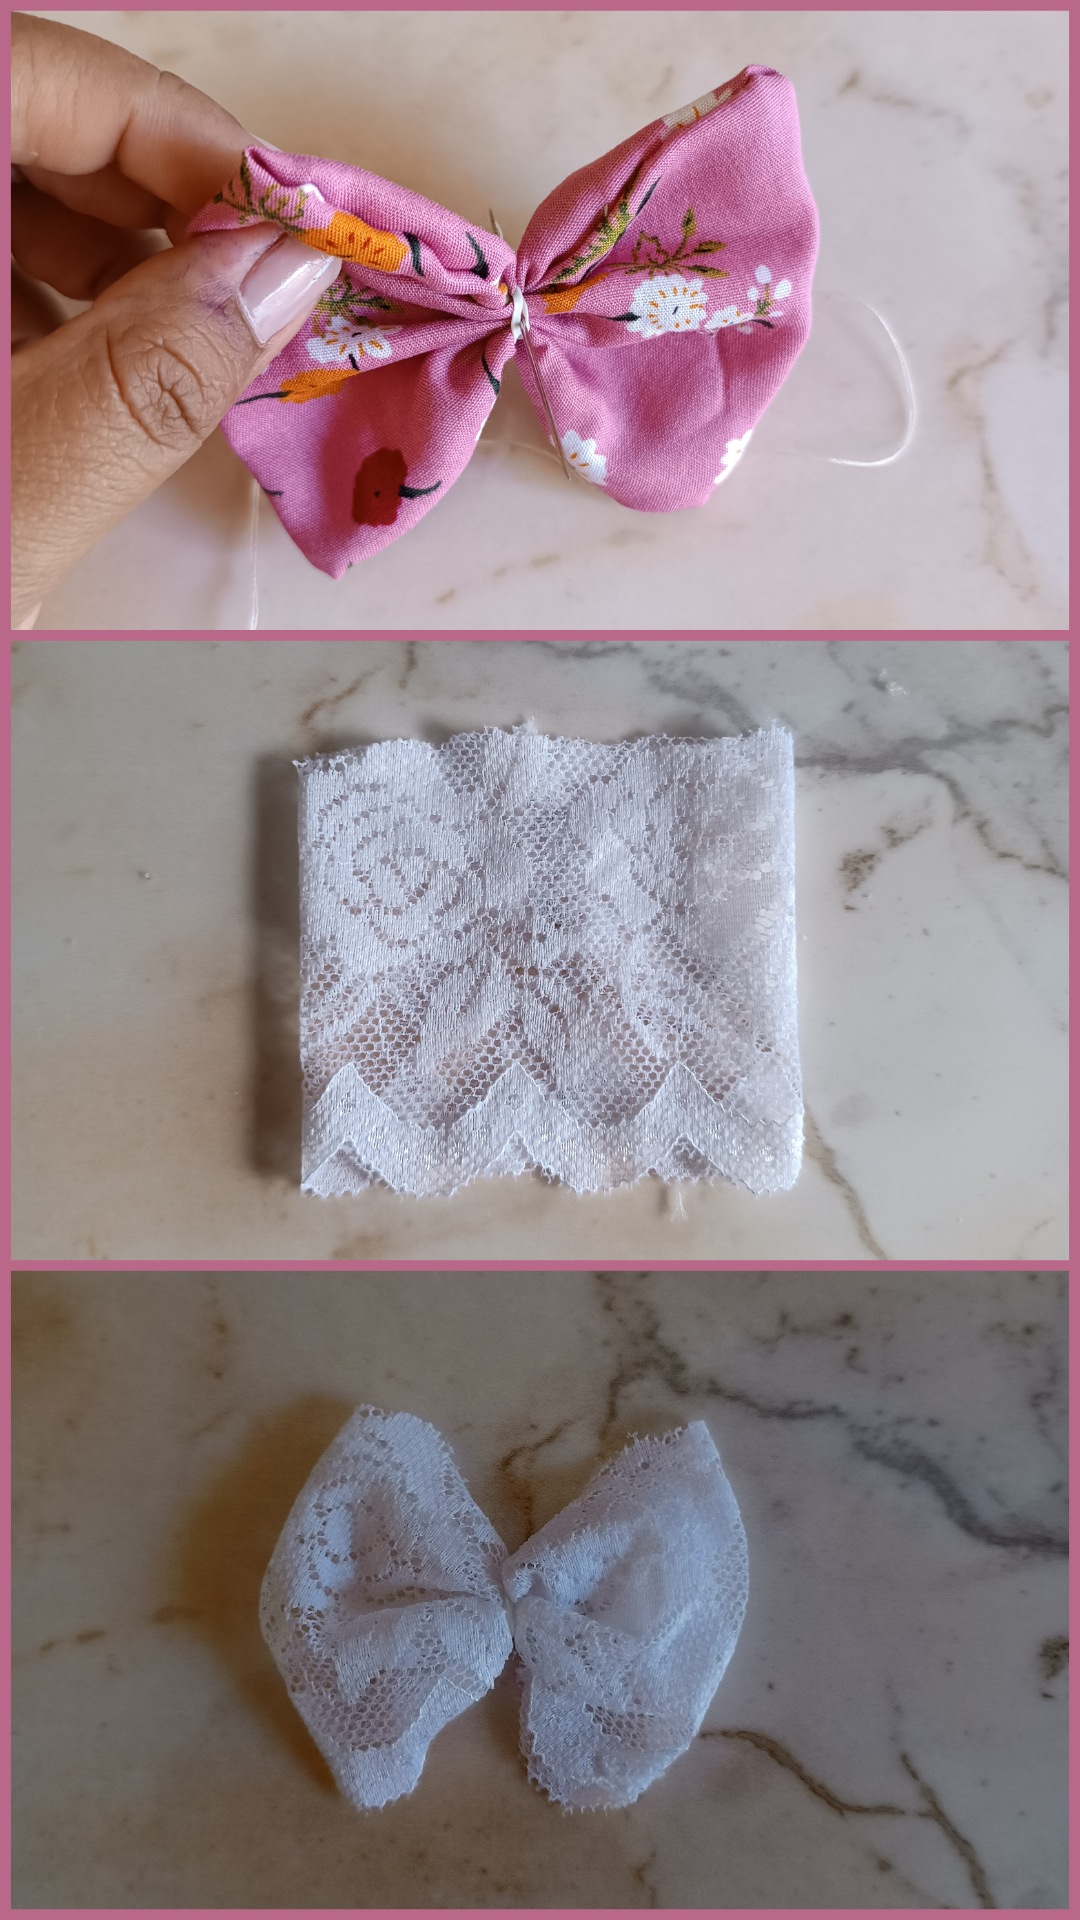
Ahora voy a unir los extremos de la tela de blonda nos fijamos que quede bien alineado, y aplicamos unos pequeños puntos de silicón más unos puntos con hilo para fijar, también colocamos una liga en medio y cosemos, ahora teniendo ya los dos lazos armados corte una tira fina de tela rosada y la coloqué en medio del lazo.
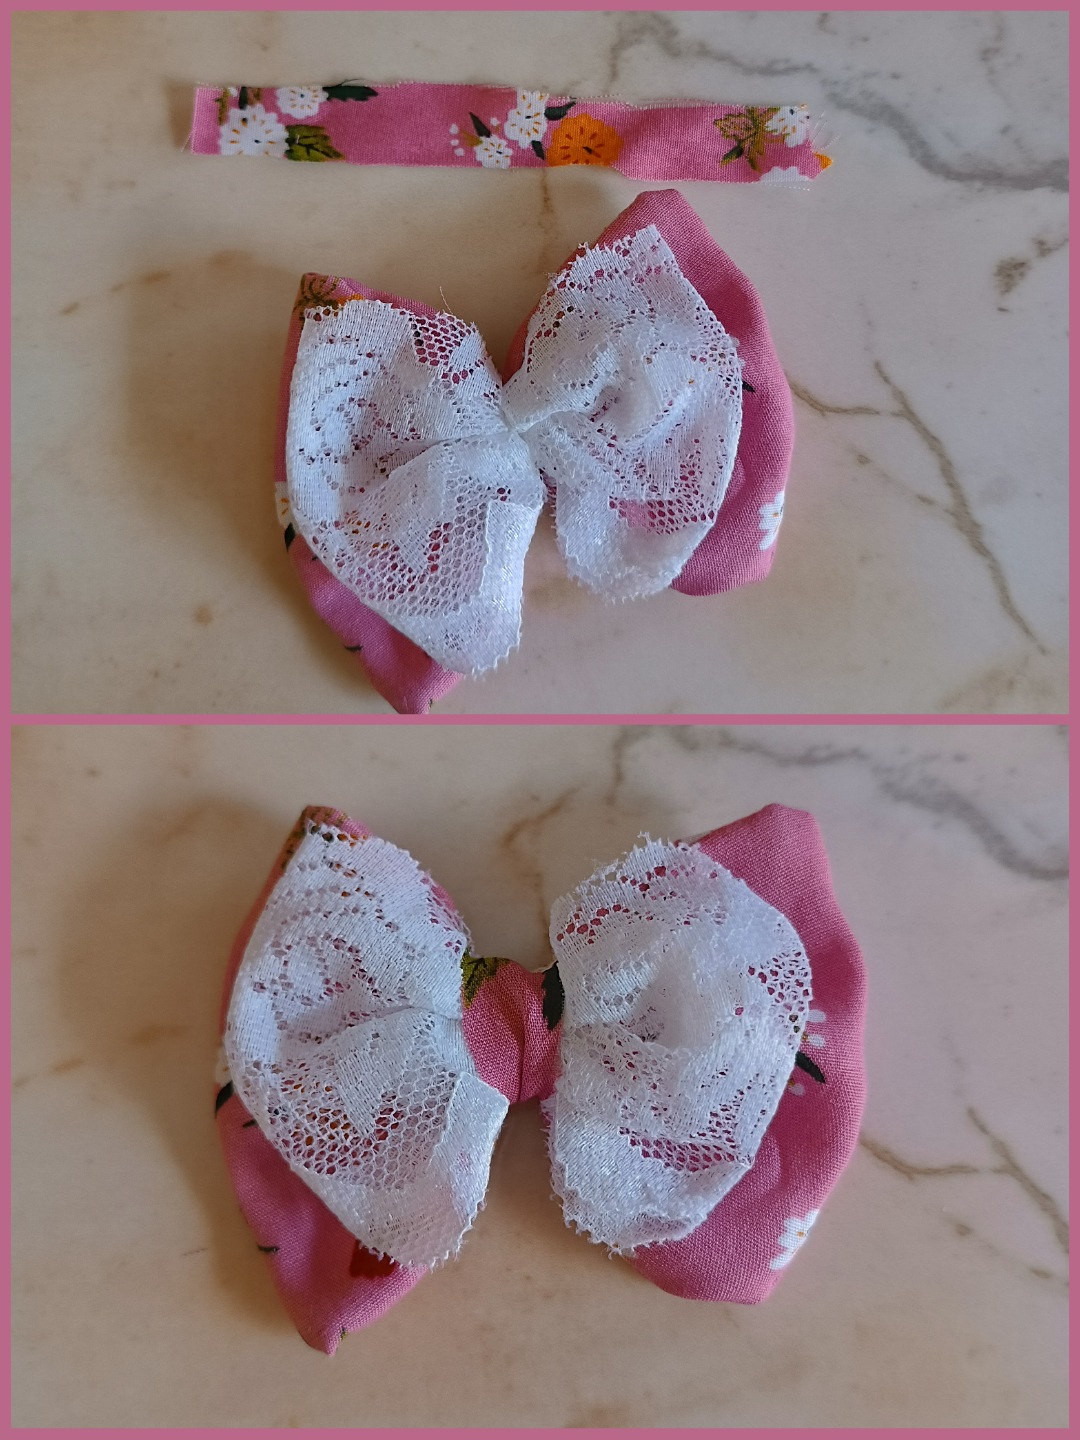
Now I am going to join the ends of the lace fabric, we make sure that it is well aligned, and we apply some small silicone dots plus some stitches with thread to fix, we also place a garter in the middle and sew, now having Once assembled the two ties, we cut a thin strip of pink fabric and placed it in the middle of the bow.
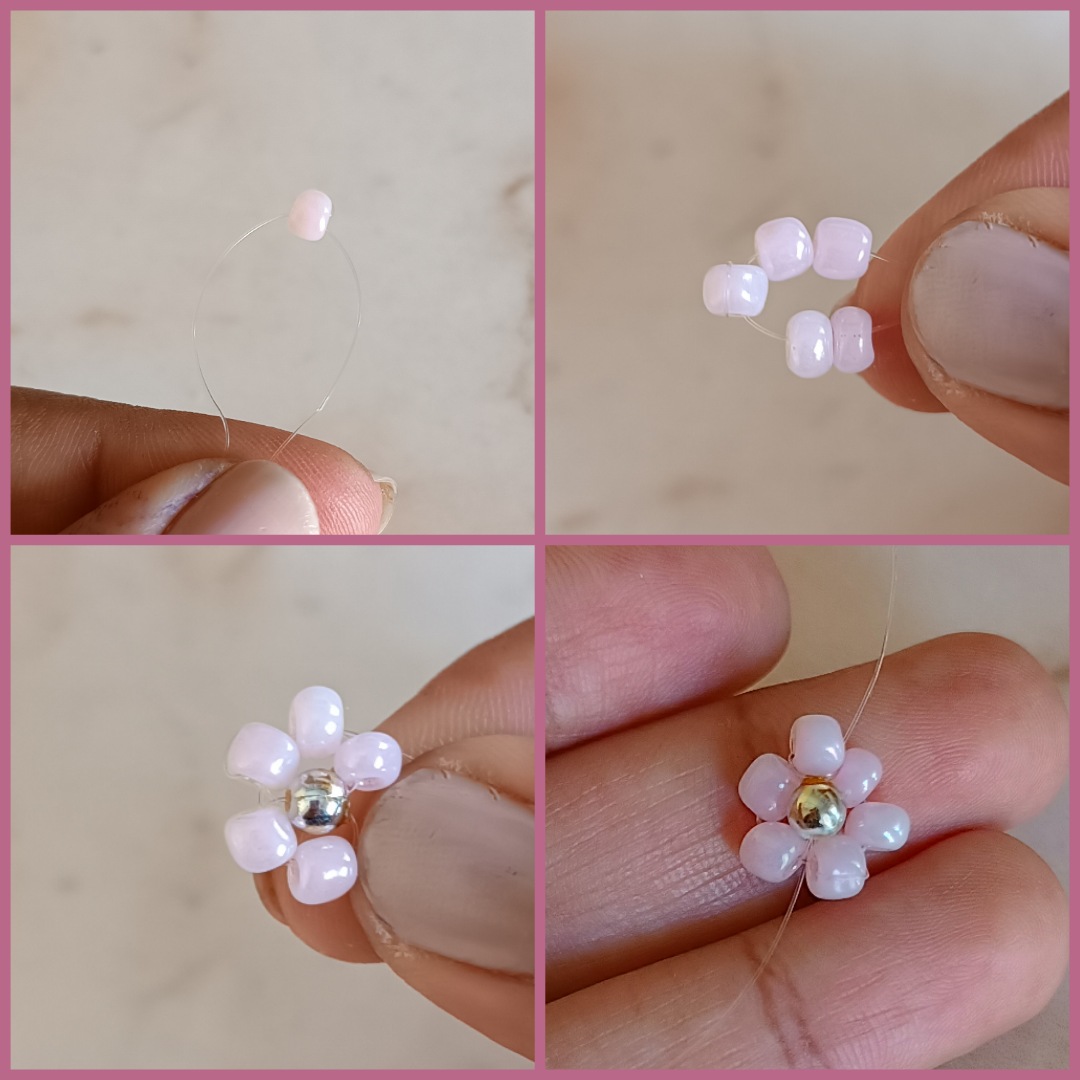
Ahora para el detalle final voy a realizar una flor, tomé un retazo de nylon y coloqué una mostacilla en una punta luego paso la otra punta del nylon a través de la mostacilla, luego coloqué dos mostacillas de cada lado y pase ambas puntas entre las mostacillas ahora voy a colocar un balín entre las dos tiras de nylon y las llevaré al fondo colocándola en medio para finalizar la flor con una última mostacilla la coloco en una de las puntas y cruzo la otra punta a través de esta para formar la flor.
Now for the final detail I am going to make a flower, I took a piece of nylon and placed a bead on one end, then I passed the other end of the nylon through the bead, then I placed two beads on each side and passed the ends between the beads . Now I am going to place a ball between the two nylon strips and take them to the bottom, placing it in the middle to finish the flower with a last ball, I place it at one of the ends and cross the other end. through it to form the flower.
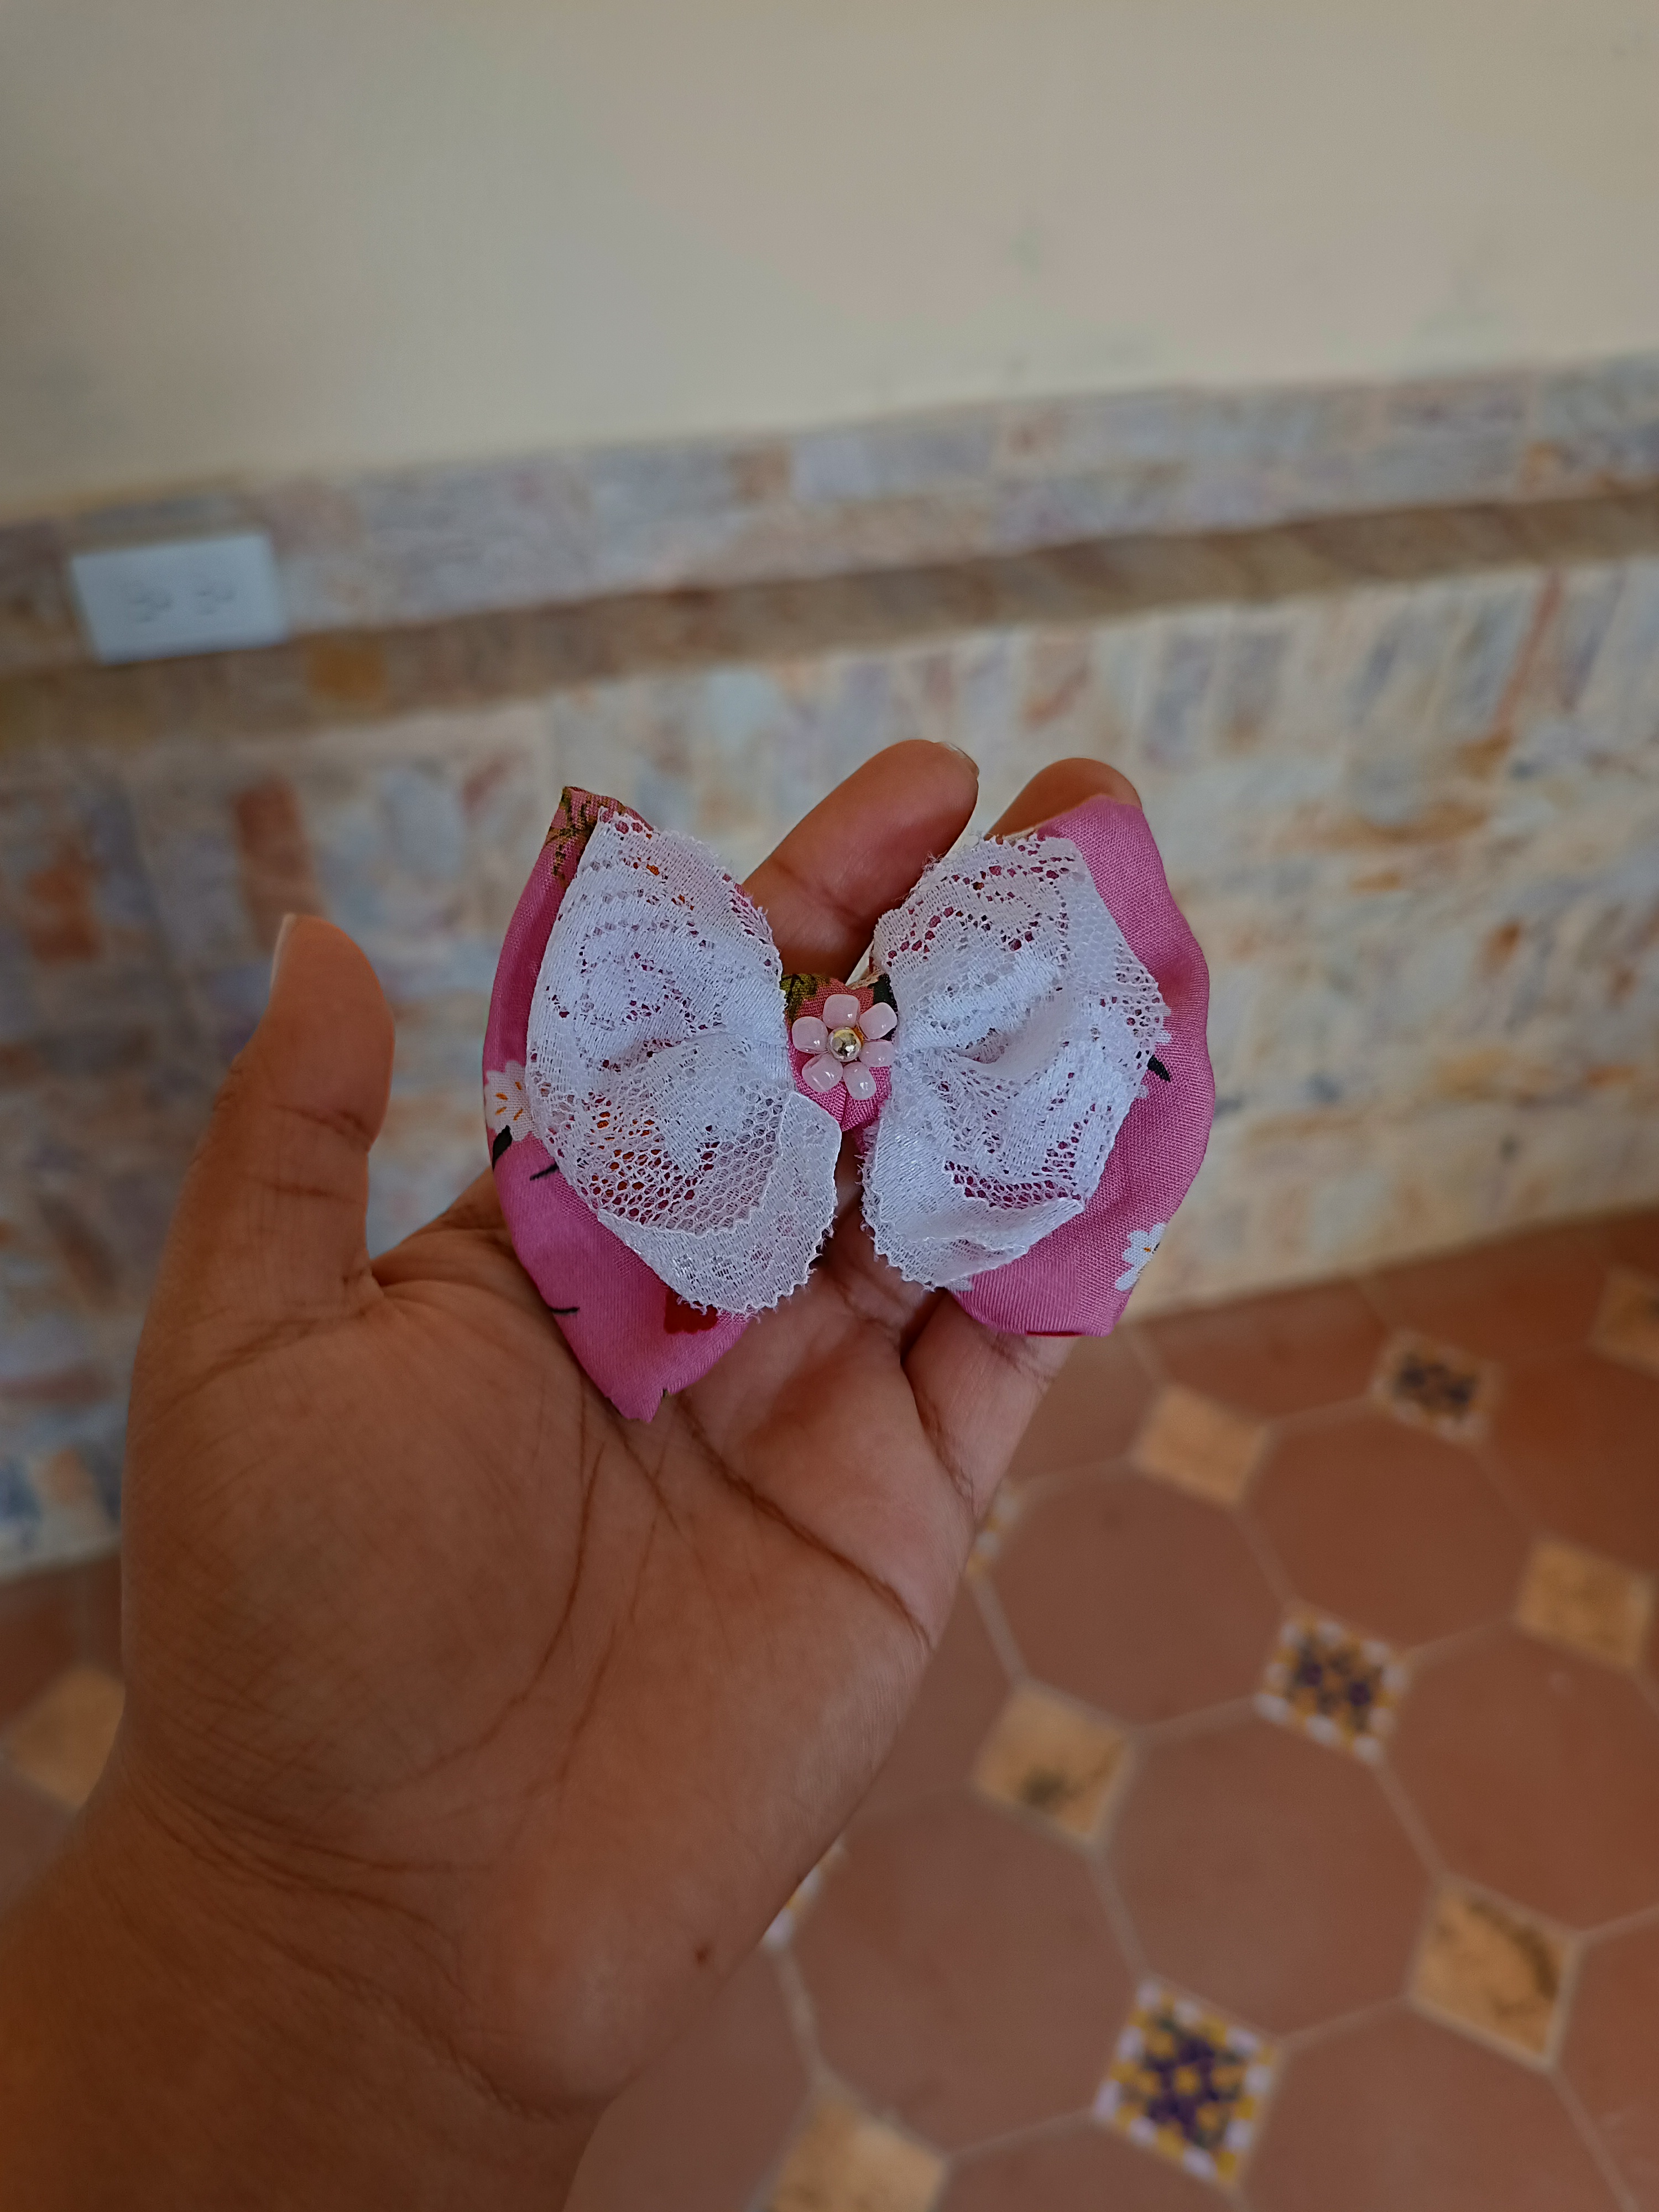
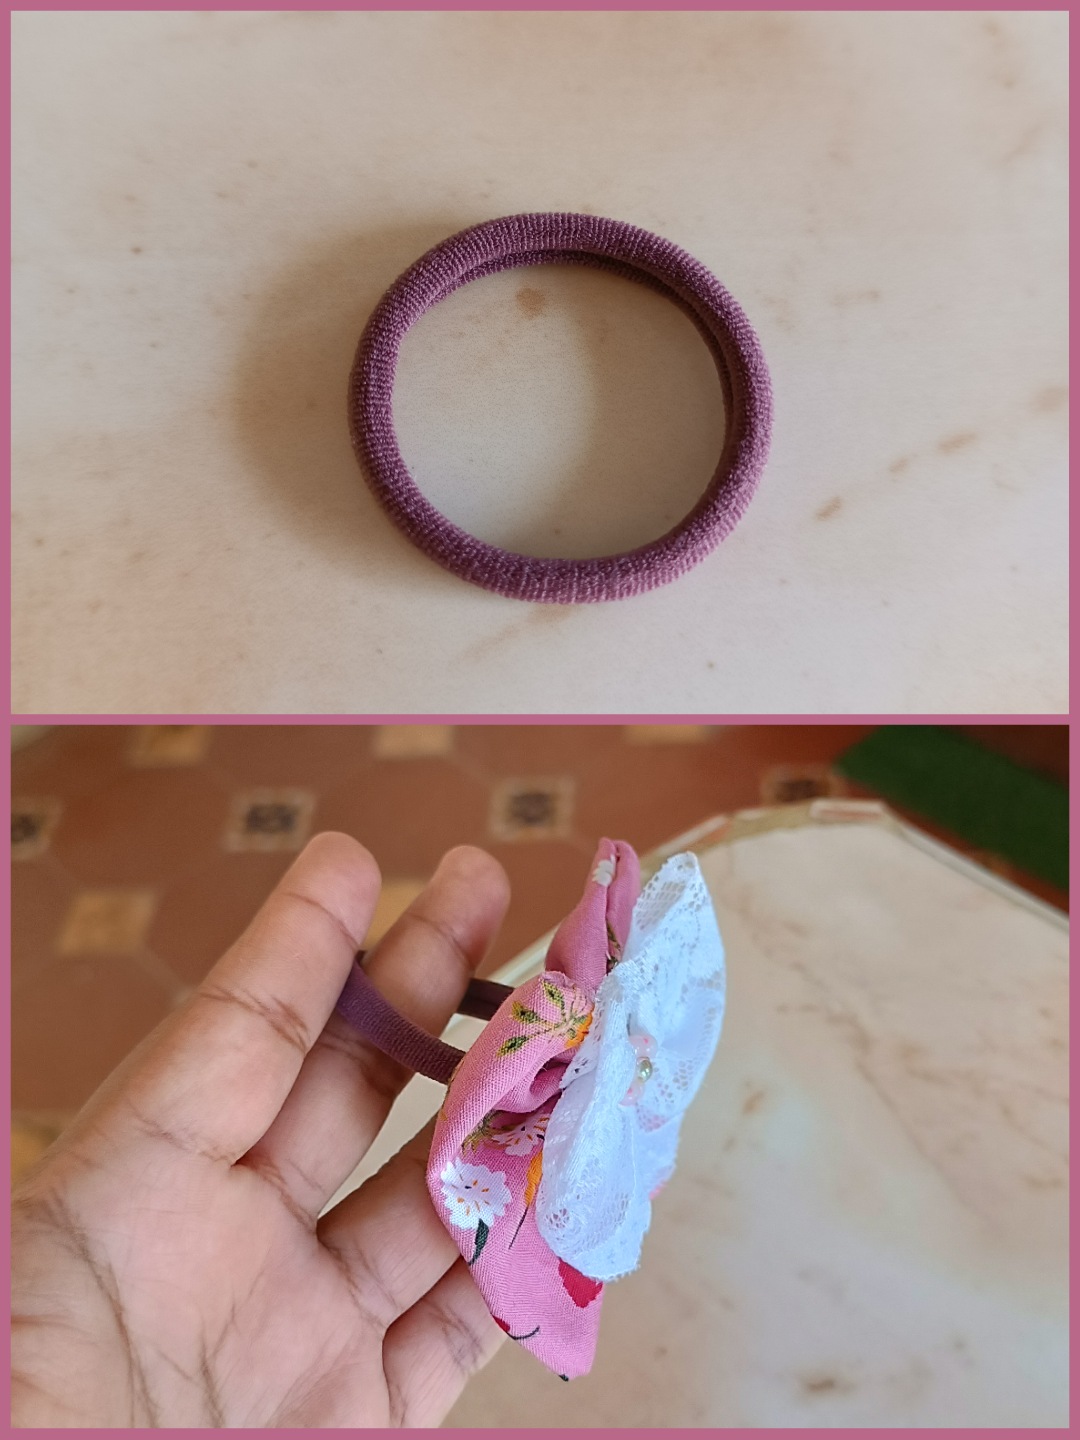
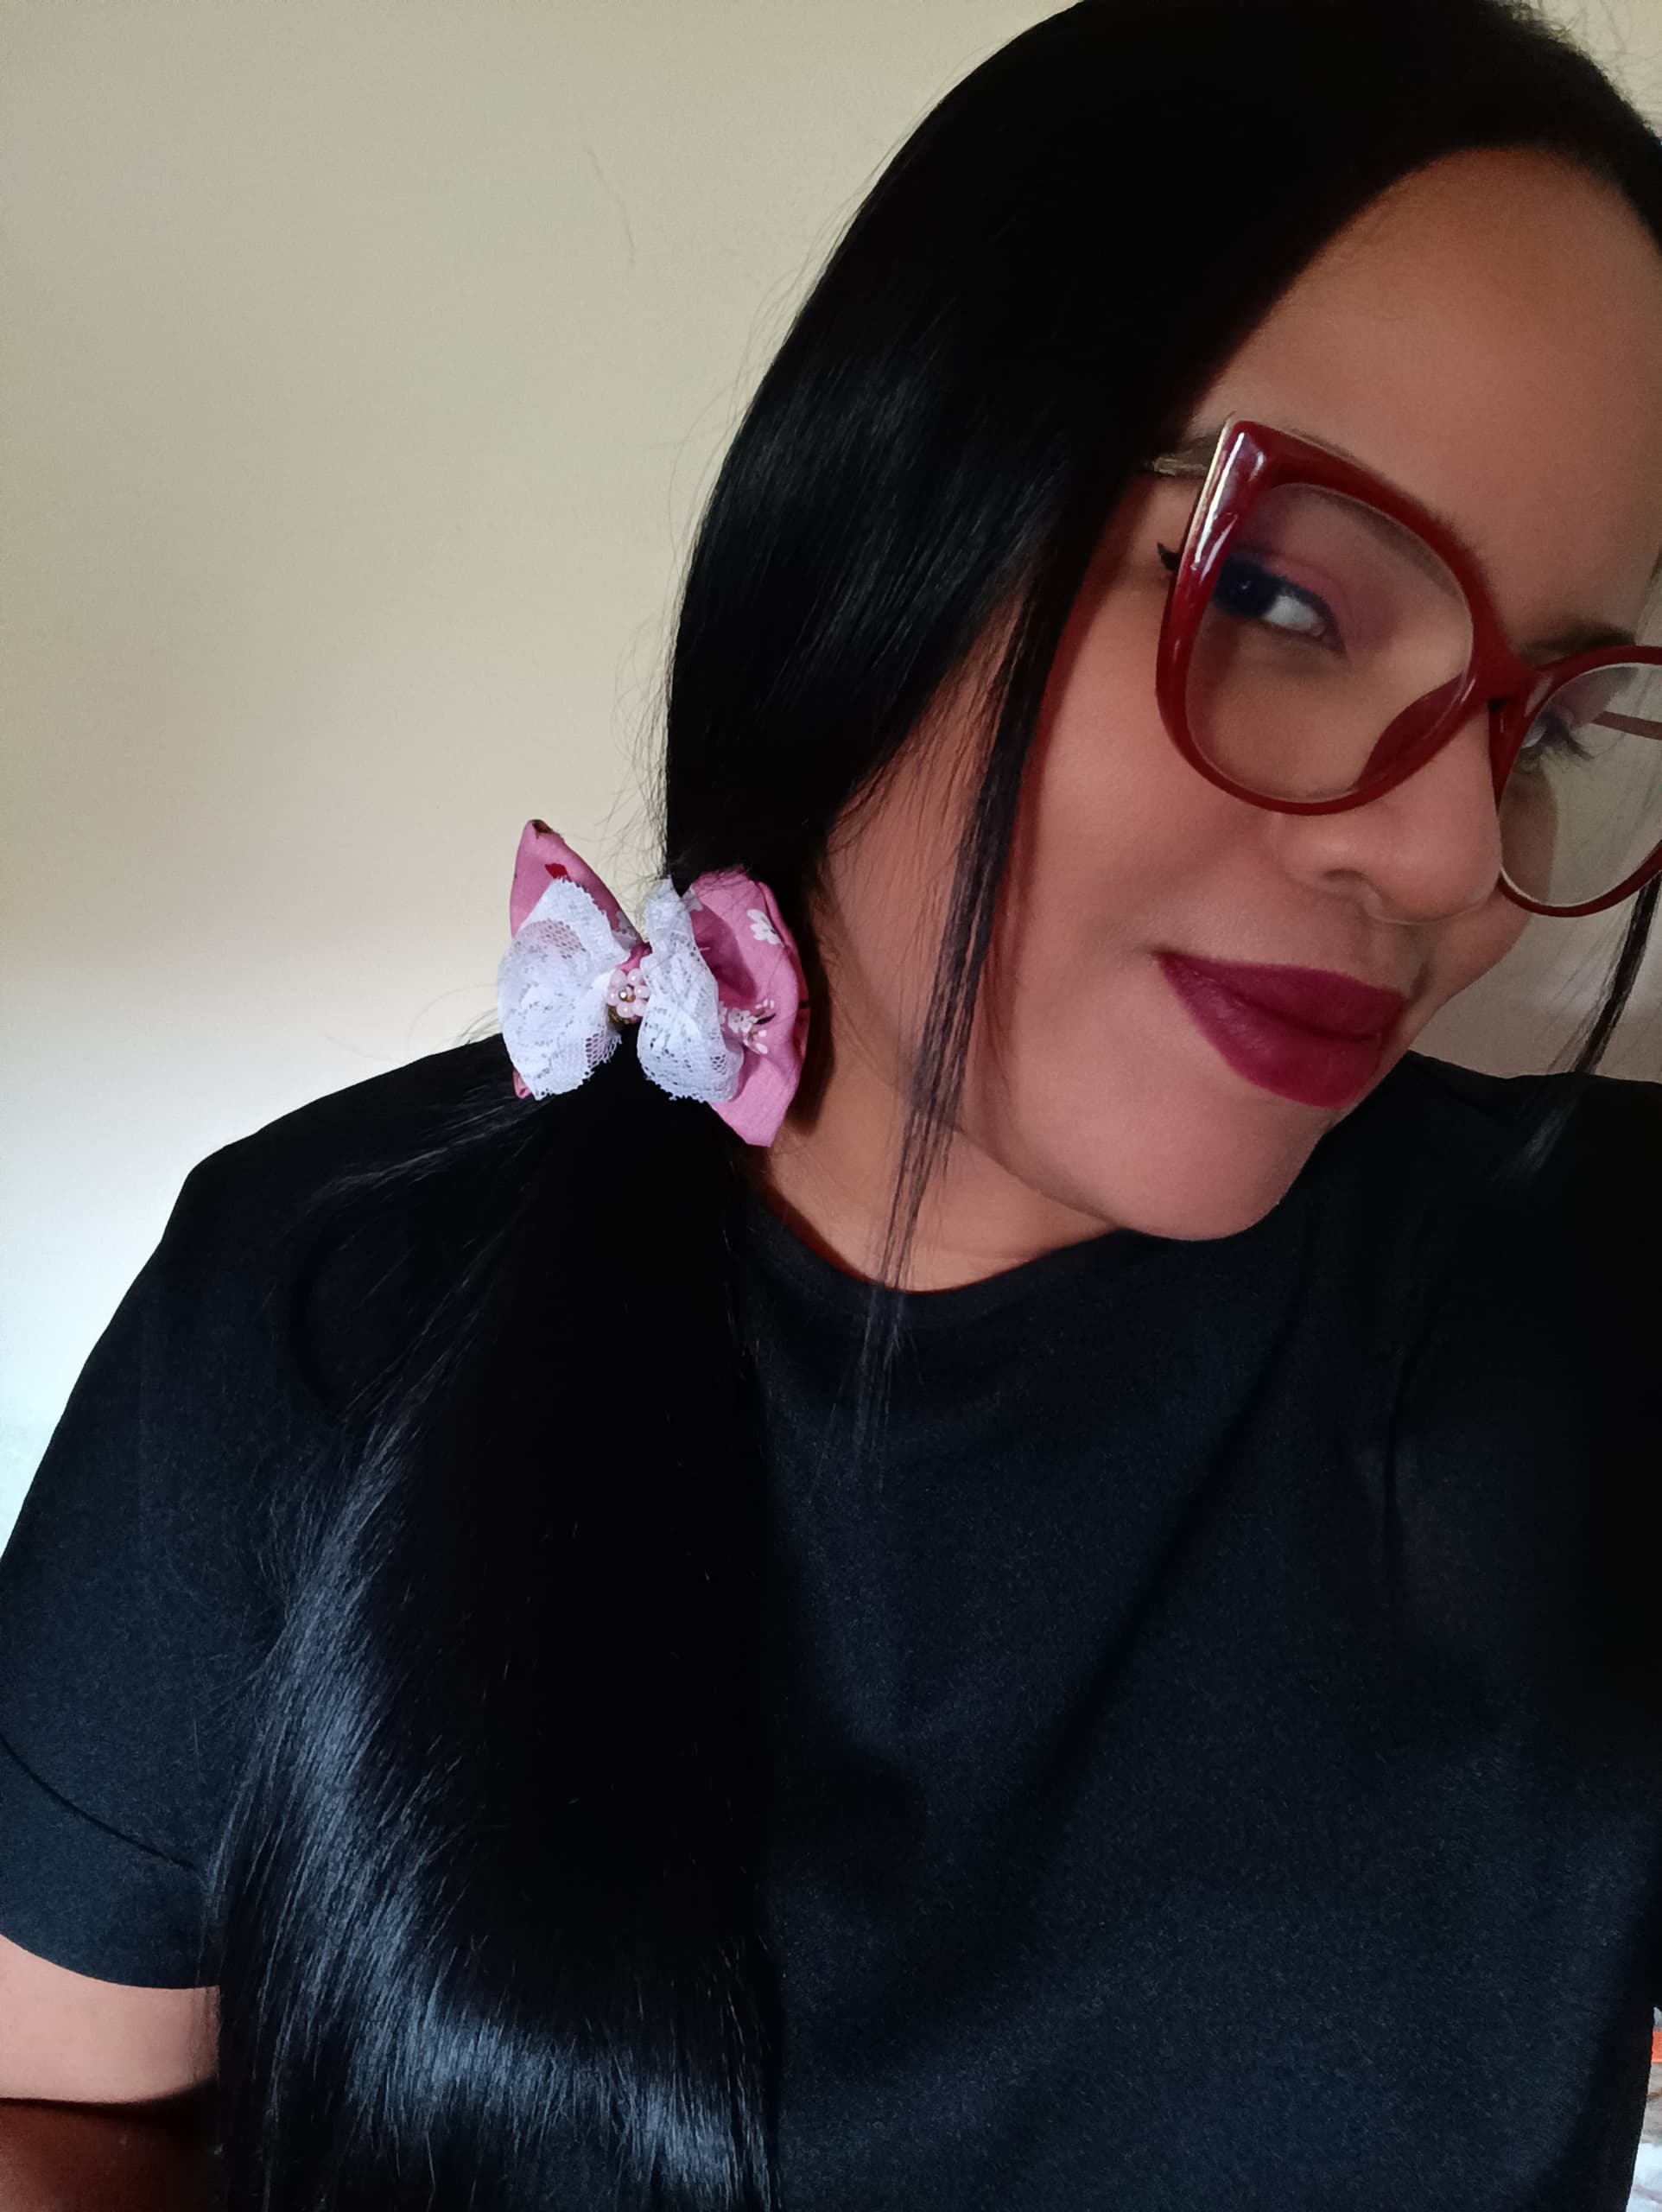
Pegamos con silicón la flor en medio del lazo, y el último paso es pegar el lazo ya terminado en la cola y de esta manera hemos terminado esta linda transformación, el cual puedes utilizar para salir al trabajo y a dónde quieras, me encanta como quedó y además que es sencillo de realizar.
We glue the flower in the middle of the bun with silicone, and the last step is to glue the finished bun to the tail and in this way we have finished this beautiful transformation, which you can wear to go out to work and wherever you want. I love how it turned out and it's also easy to make.

Muchas gracias por visitar mi publicación, nos vemos en una próxima oportunidad.
Thank you very much for visiting my publication, see you next time.

Contenido original. - original content.
Los separadores y banner fueron realizados en Canva. - The dividers and banner were made in Canva.
Las fotografias son tomadas con mi teléfono Redmi Note 11s y editadas en PicsArt - The photographs are taken with my Redmi Note 11s phone and edited in PicsArt.
Traducción de: Google traductor - Translation of: Google translator.