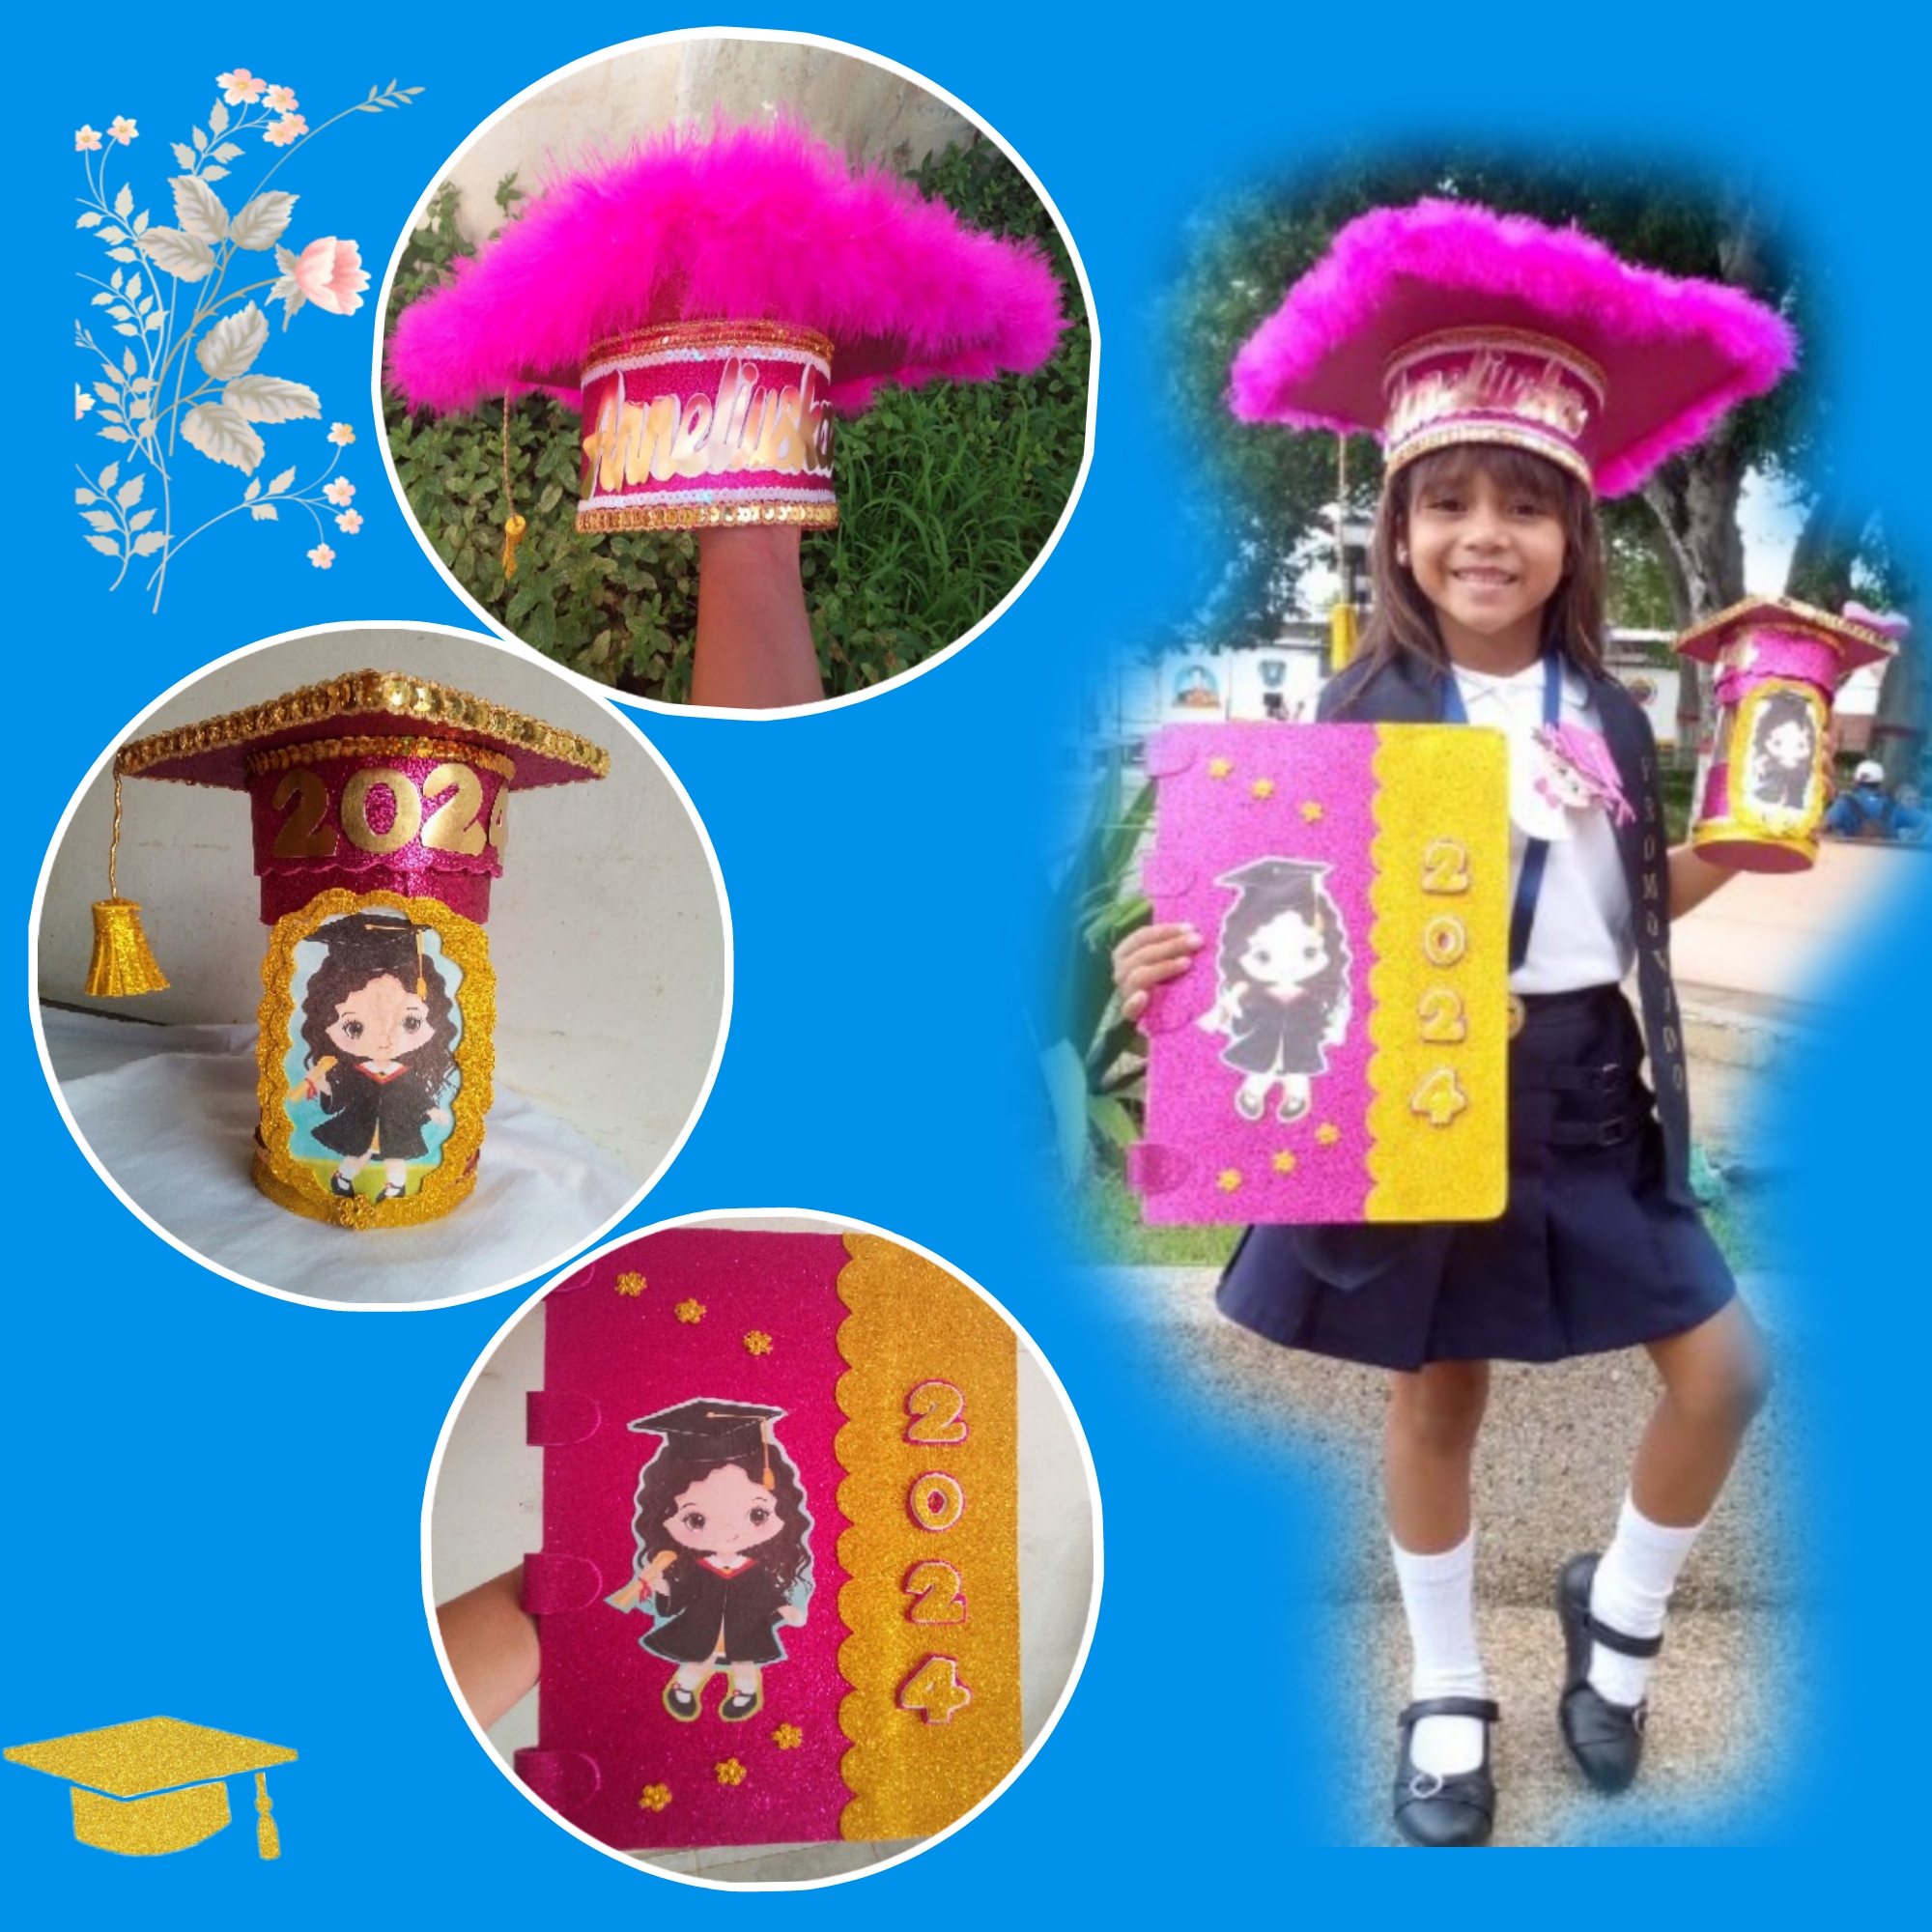
Saludos hivers creativos, Dios les bendiga!!! Le doy la bienvenida a este mi espacio artesano, tu espacio para que aprendas a crear conmigo un bonito set de graduación para niñas promovidas a primaria.
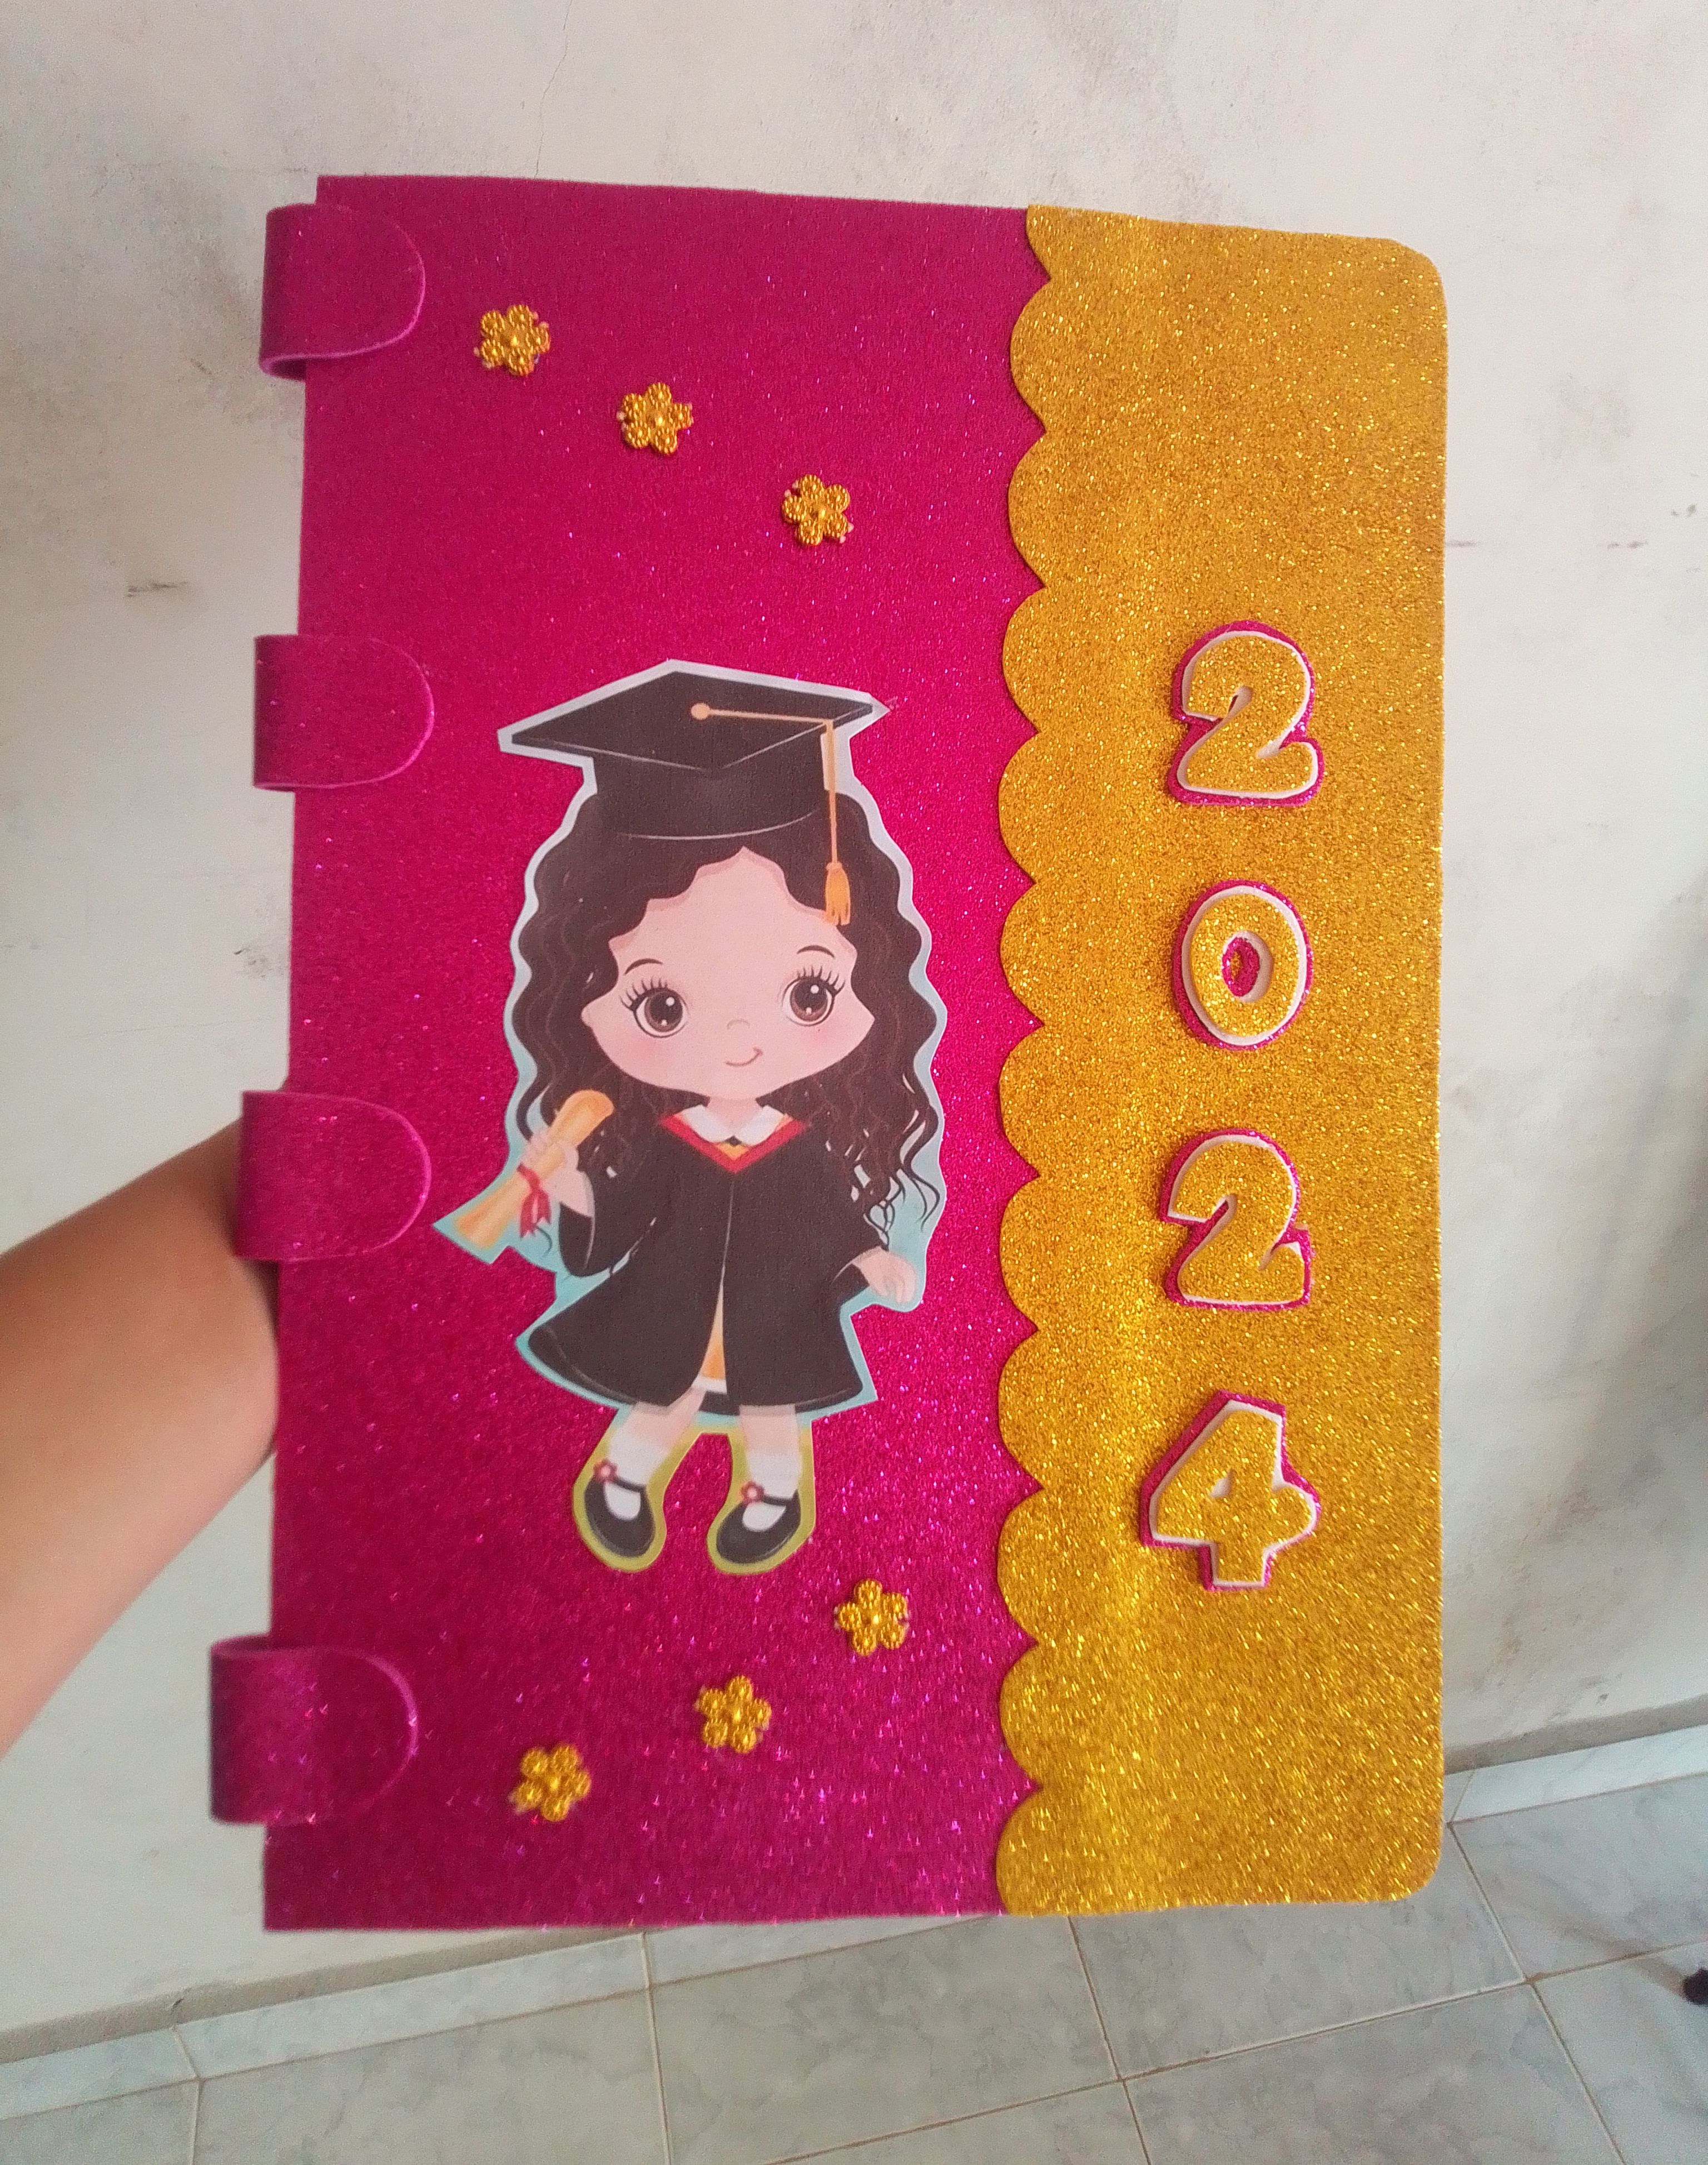
Yo no recuerdo si cuando yo estudiaba esto lo hacían de verdad; yo recuerdo que comprabamos estas cosas en el famoso "Paquete de Graduación" cuando éramos promovidos, hoy tener la oportunidad de poder crear los com nuestra propias manos es muy grado en realidad, yo no sé pero a mí está modernidad en la graduaciones me tiene enamorada es la mejor idea que he visto, puesto que nos permite lucir mucho mejor y tener un presente que no quede para recordar el día especial en que logramos una de nuestras metas, y me refiero a mi proyecto de hoy un birrete, un cotillon y hasta una carpeta personalizada con nuestros trabajos.
Mi amiga quedó fascinada con el trabajo anterior que hice en color azul, y llegó a mi casa insistiendome que le hiciera uno para su nena pero ella quería el set completo... Yo no sé si ustedes son igual que yo, pero no puedo decir que no cuando de crear manualidades se trata 🤭, así no tenga idea yo digo que si sé, si puedo, no hay problemas, es facil y despues pienso ¡Ay señor ! ¿en qué me estoy metiendo? 🤣, pero bueno bueno, todo sea por siempre aprender e intentar cosas nuevas.. Pues esto me pasó cuando acepte hacer este proyecto, pensando que todo de verdad seria sencillo, pero como cualquier otro proyecto requiere de esfuerzo, dedicación y dejar fluir la imaginación . Si te gusta está idea tanto como a mi, hoy tengo el agradó de mostraste como lo hice utilizando foami escarchado y algunos materiales reciclables y ven acompañame hasta el final.
Greetings creative hivers, God bless you!!! I welcome you to this my artisan space, your space for you to learn how to create with me a beautiful graduation set for girls promoted to primary school.
I don't remember if when I studied this they really did it; I remember that we bought these things in the famous "Graduation Package" when we were promoted, today having the opportunity to be able to create them with our own hands is actually very great, I don't know but this modernity in graduations has me in love It is the best idea I have seen, since it allows us to look much better and have a present that is not left to remember the special day in which we achieved one of our goals, and I am referring to my project today, a cap, a party favor and even a personalized folder with our work.
My friend was fascinated with the previous work I did in blue, and she came to my house insisting that I make one for her baby but she wanted the complete set... I don't know if You are the same as me, but I can't say no when it comes to creating crafts 🤭, even if I have no idea, I say yes I know, yes I can, there are no problems, it's easy and then I think, Oh Lord! What am I getting into? 🤣; but hey well, everything is about always learning and trying new things... Well, this happened to me when I agreed to do this project, thinking that everything would really be simple, but like any other project it requires effort, dedication and letting your imagination flow. If you like this idea as much as I do, today I am pleased to show you how I did it using frosted foam and some recyclable materials and come join me until the end.
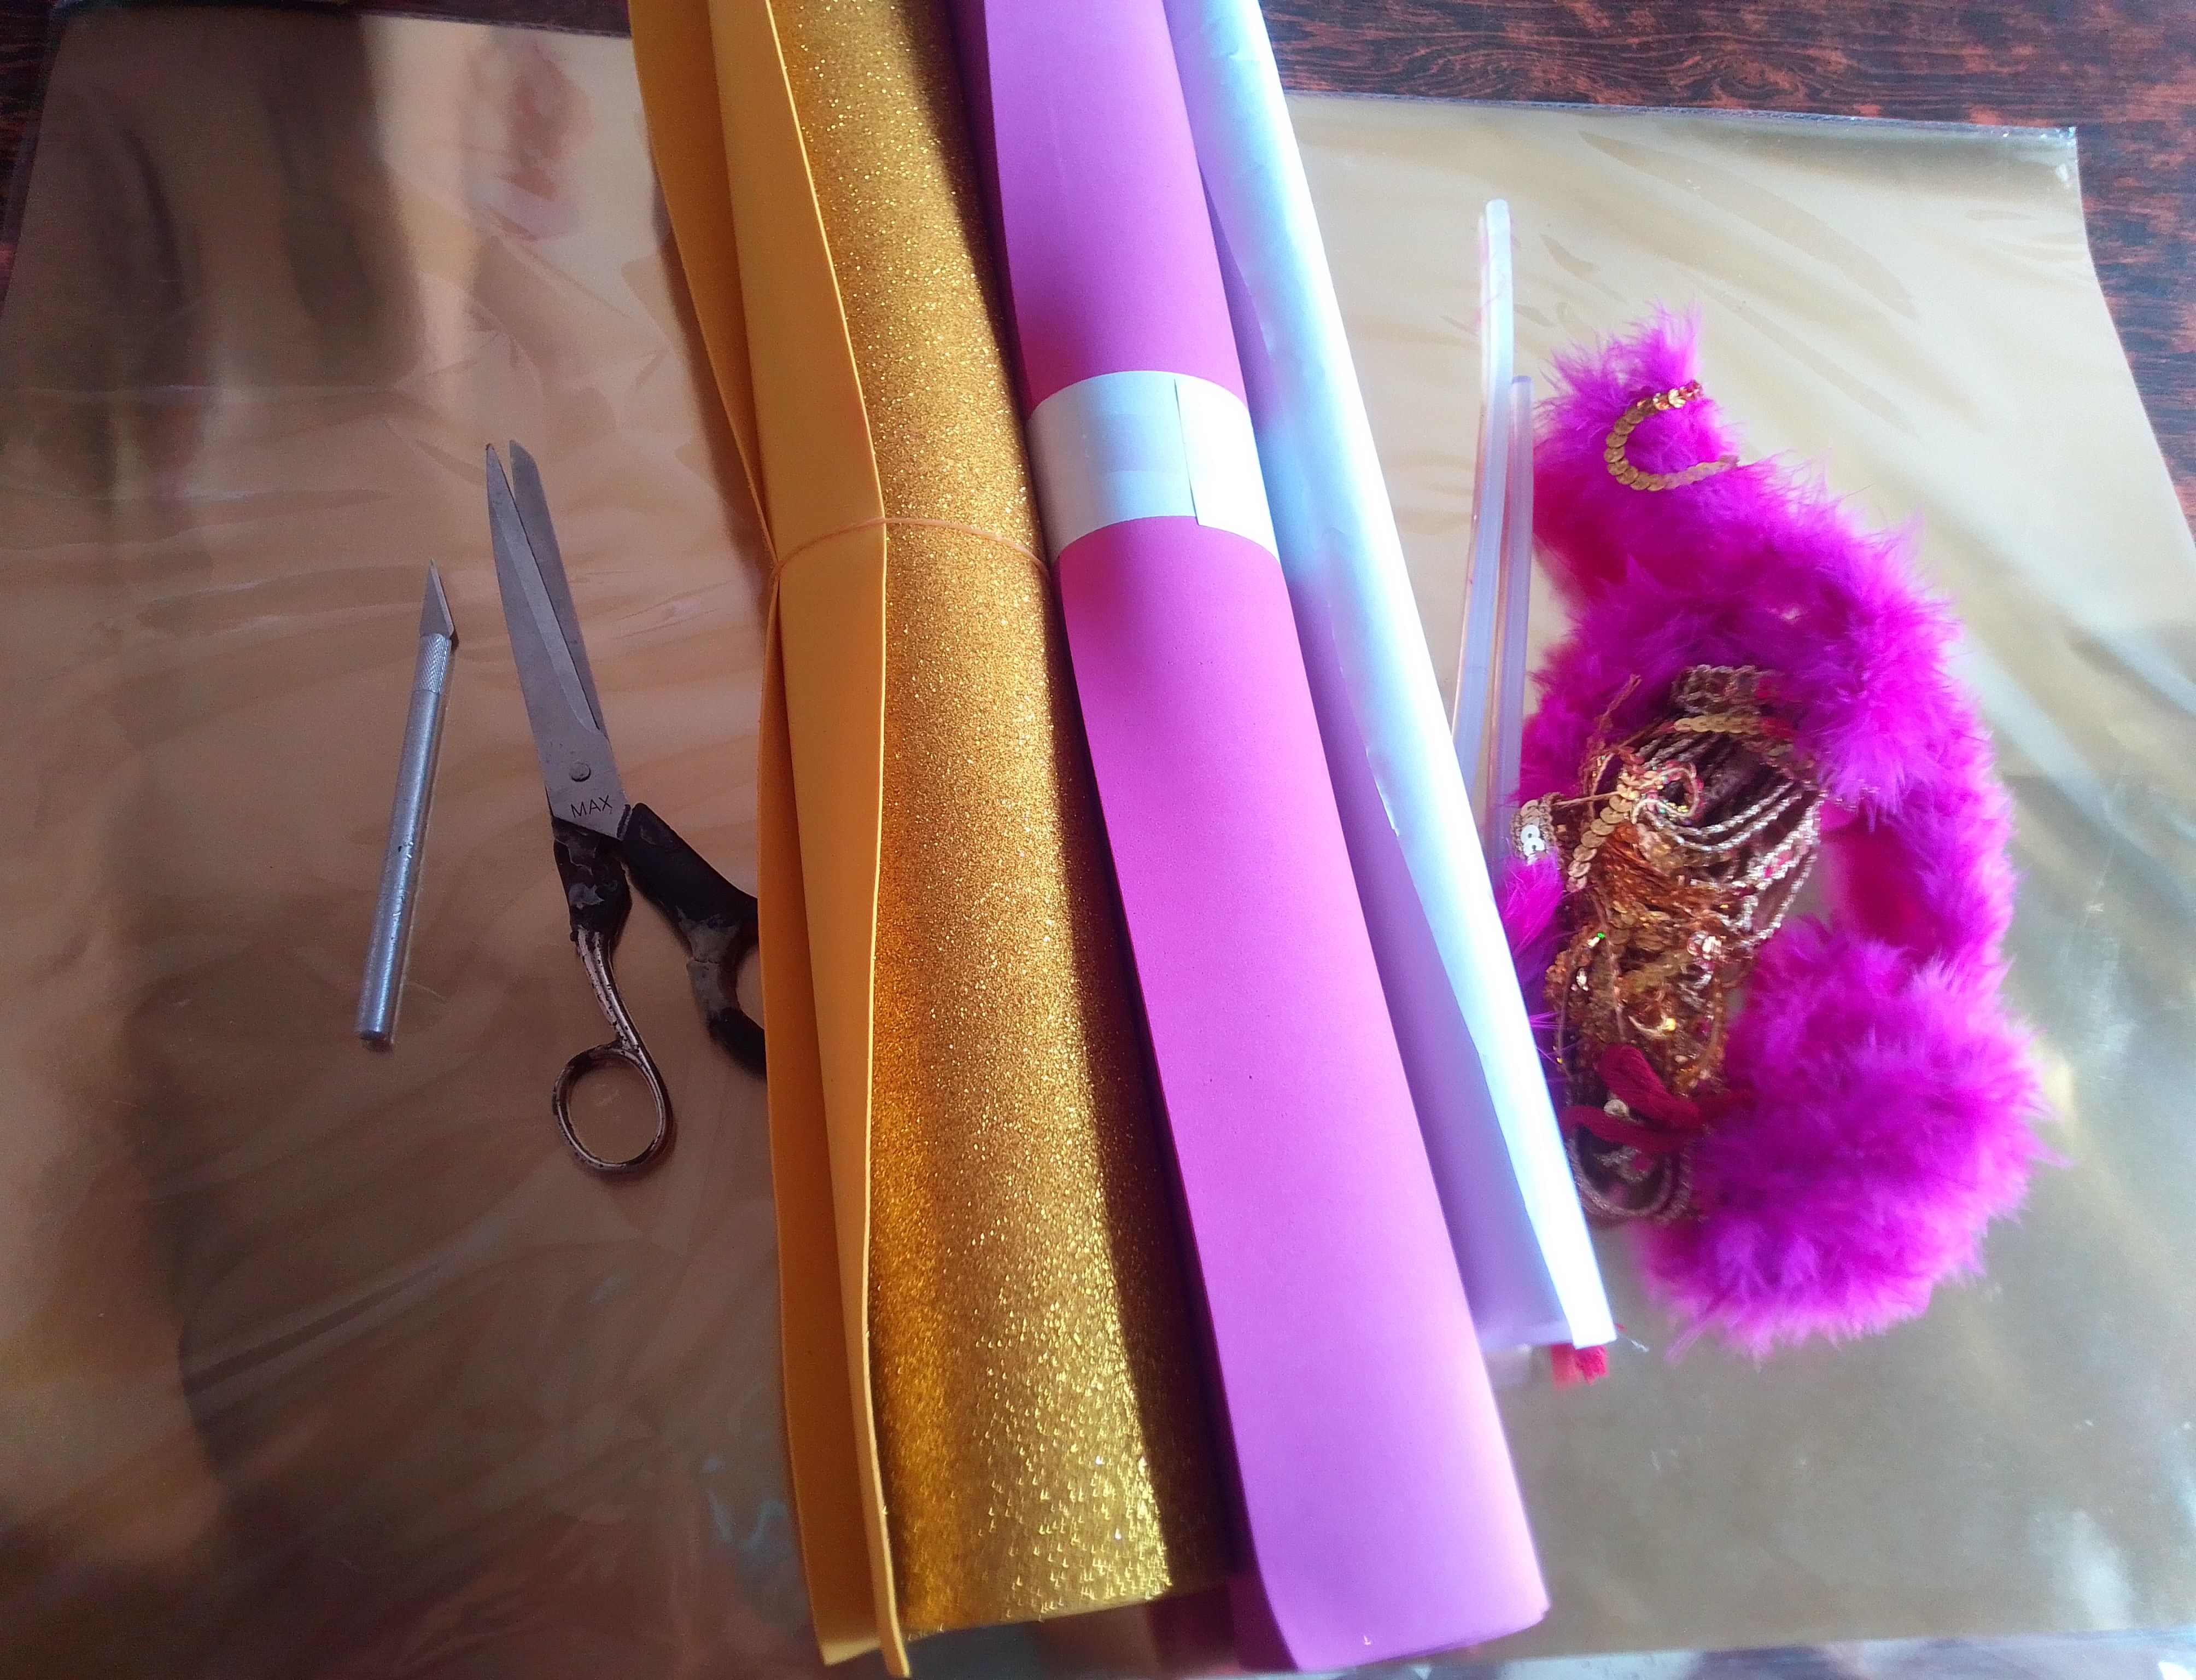
Materiales que necesitas:
- Foami fucsia y dorado.
- Cartulina metalizado dorada..
- Silicón en barra.
- Cinta métrica.
- Cartón.
- Botella plástica.
- Tijeras y cutter.
- Encajes dorados y lentejuelas.
- Cinta métrica.
- Fuchsia and gold foami.
- Gold metallic cardboard.
- Silicone stick.
- Tape measure.
- Cardboard.
- Plastic bottle.
- Scissors and cutter.
- Gold lace and sequins.
- Tape measure.
(PROCEDIMIENTO)
Paso 01
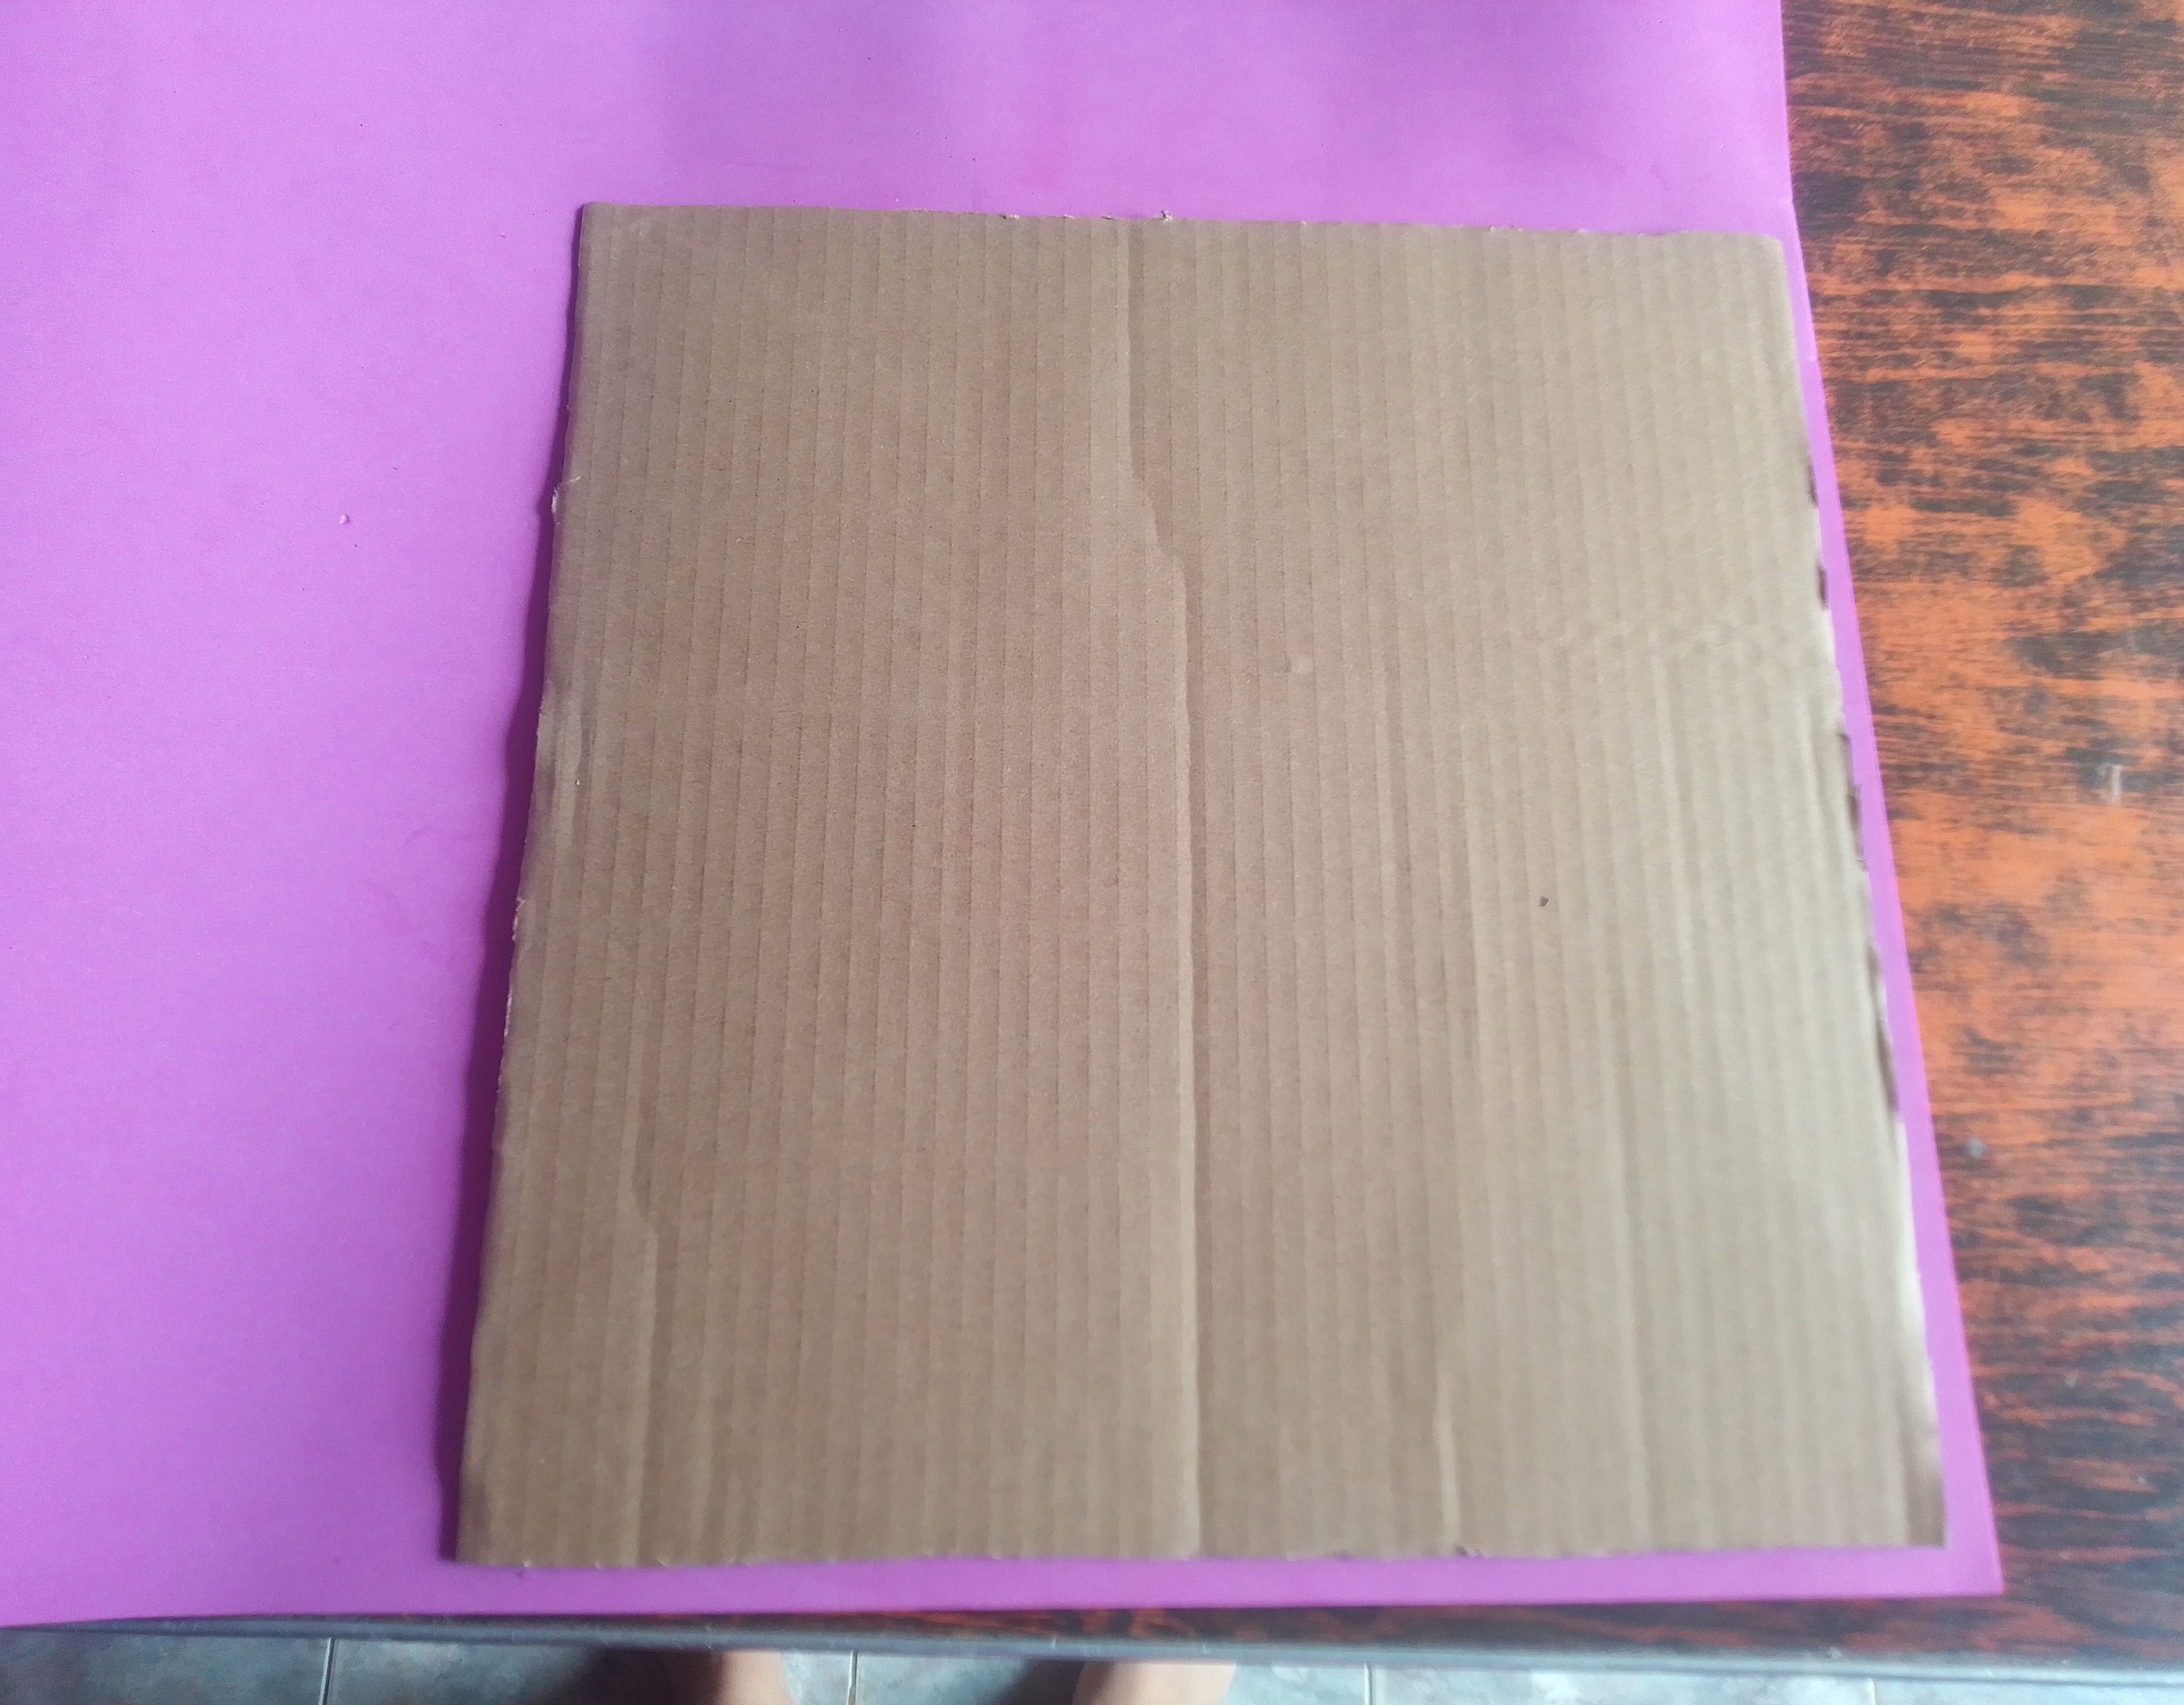
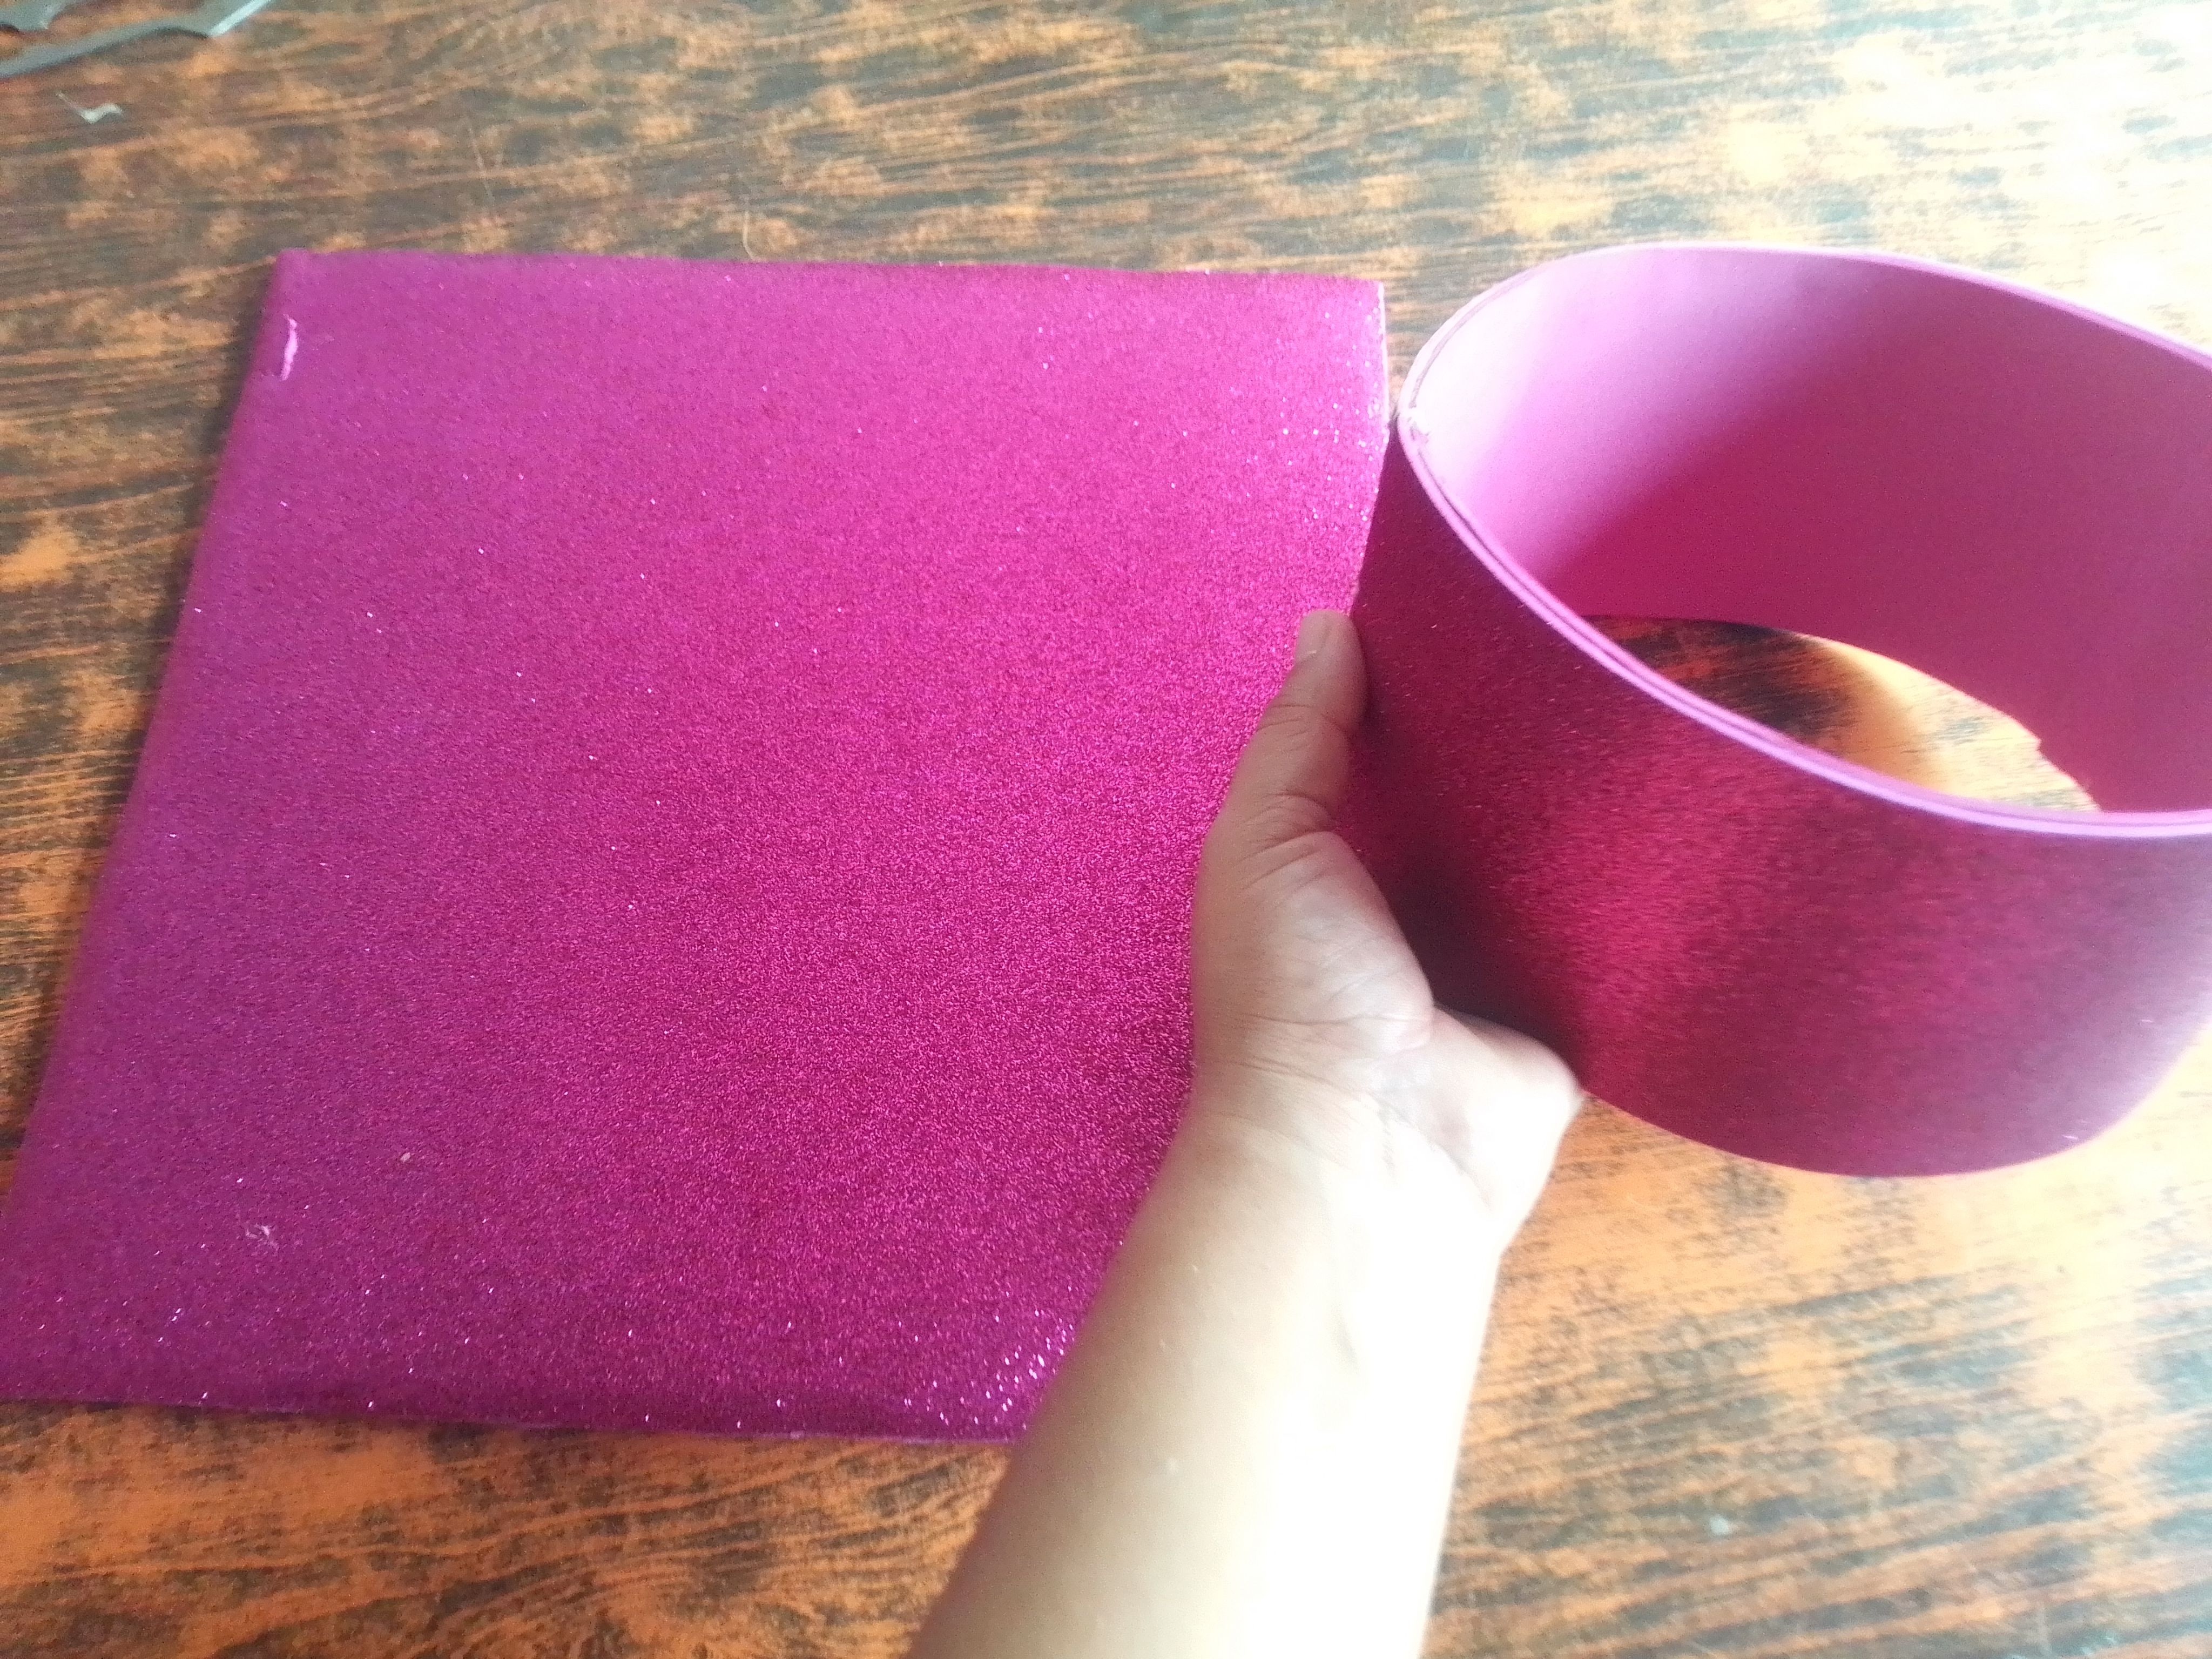
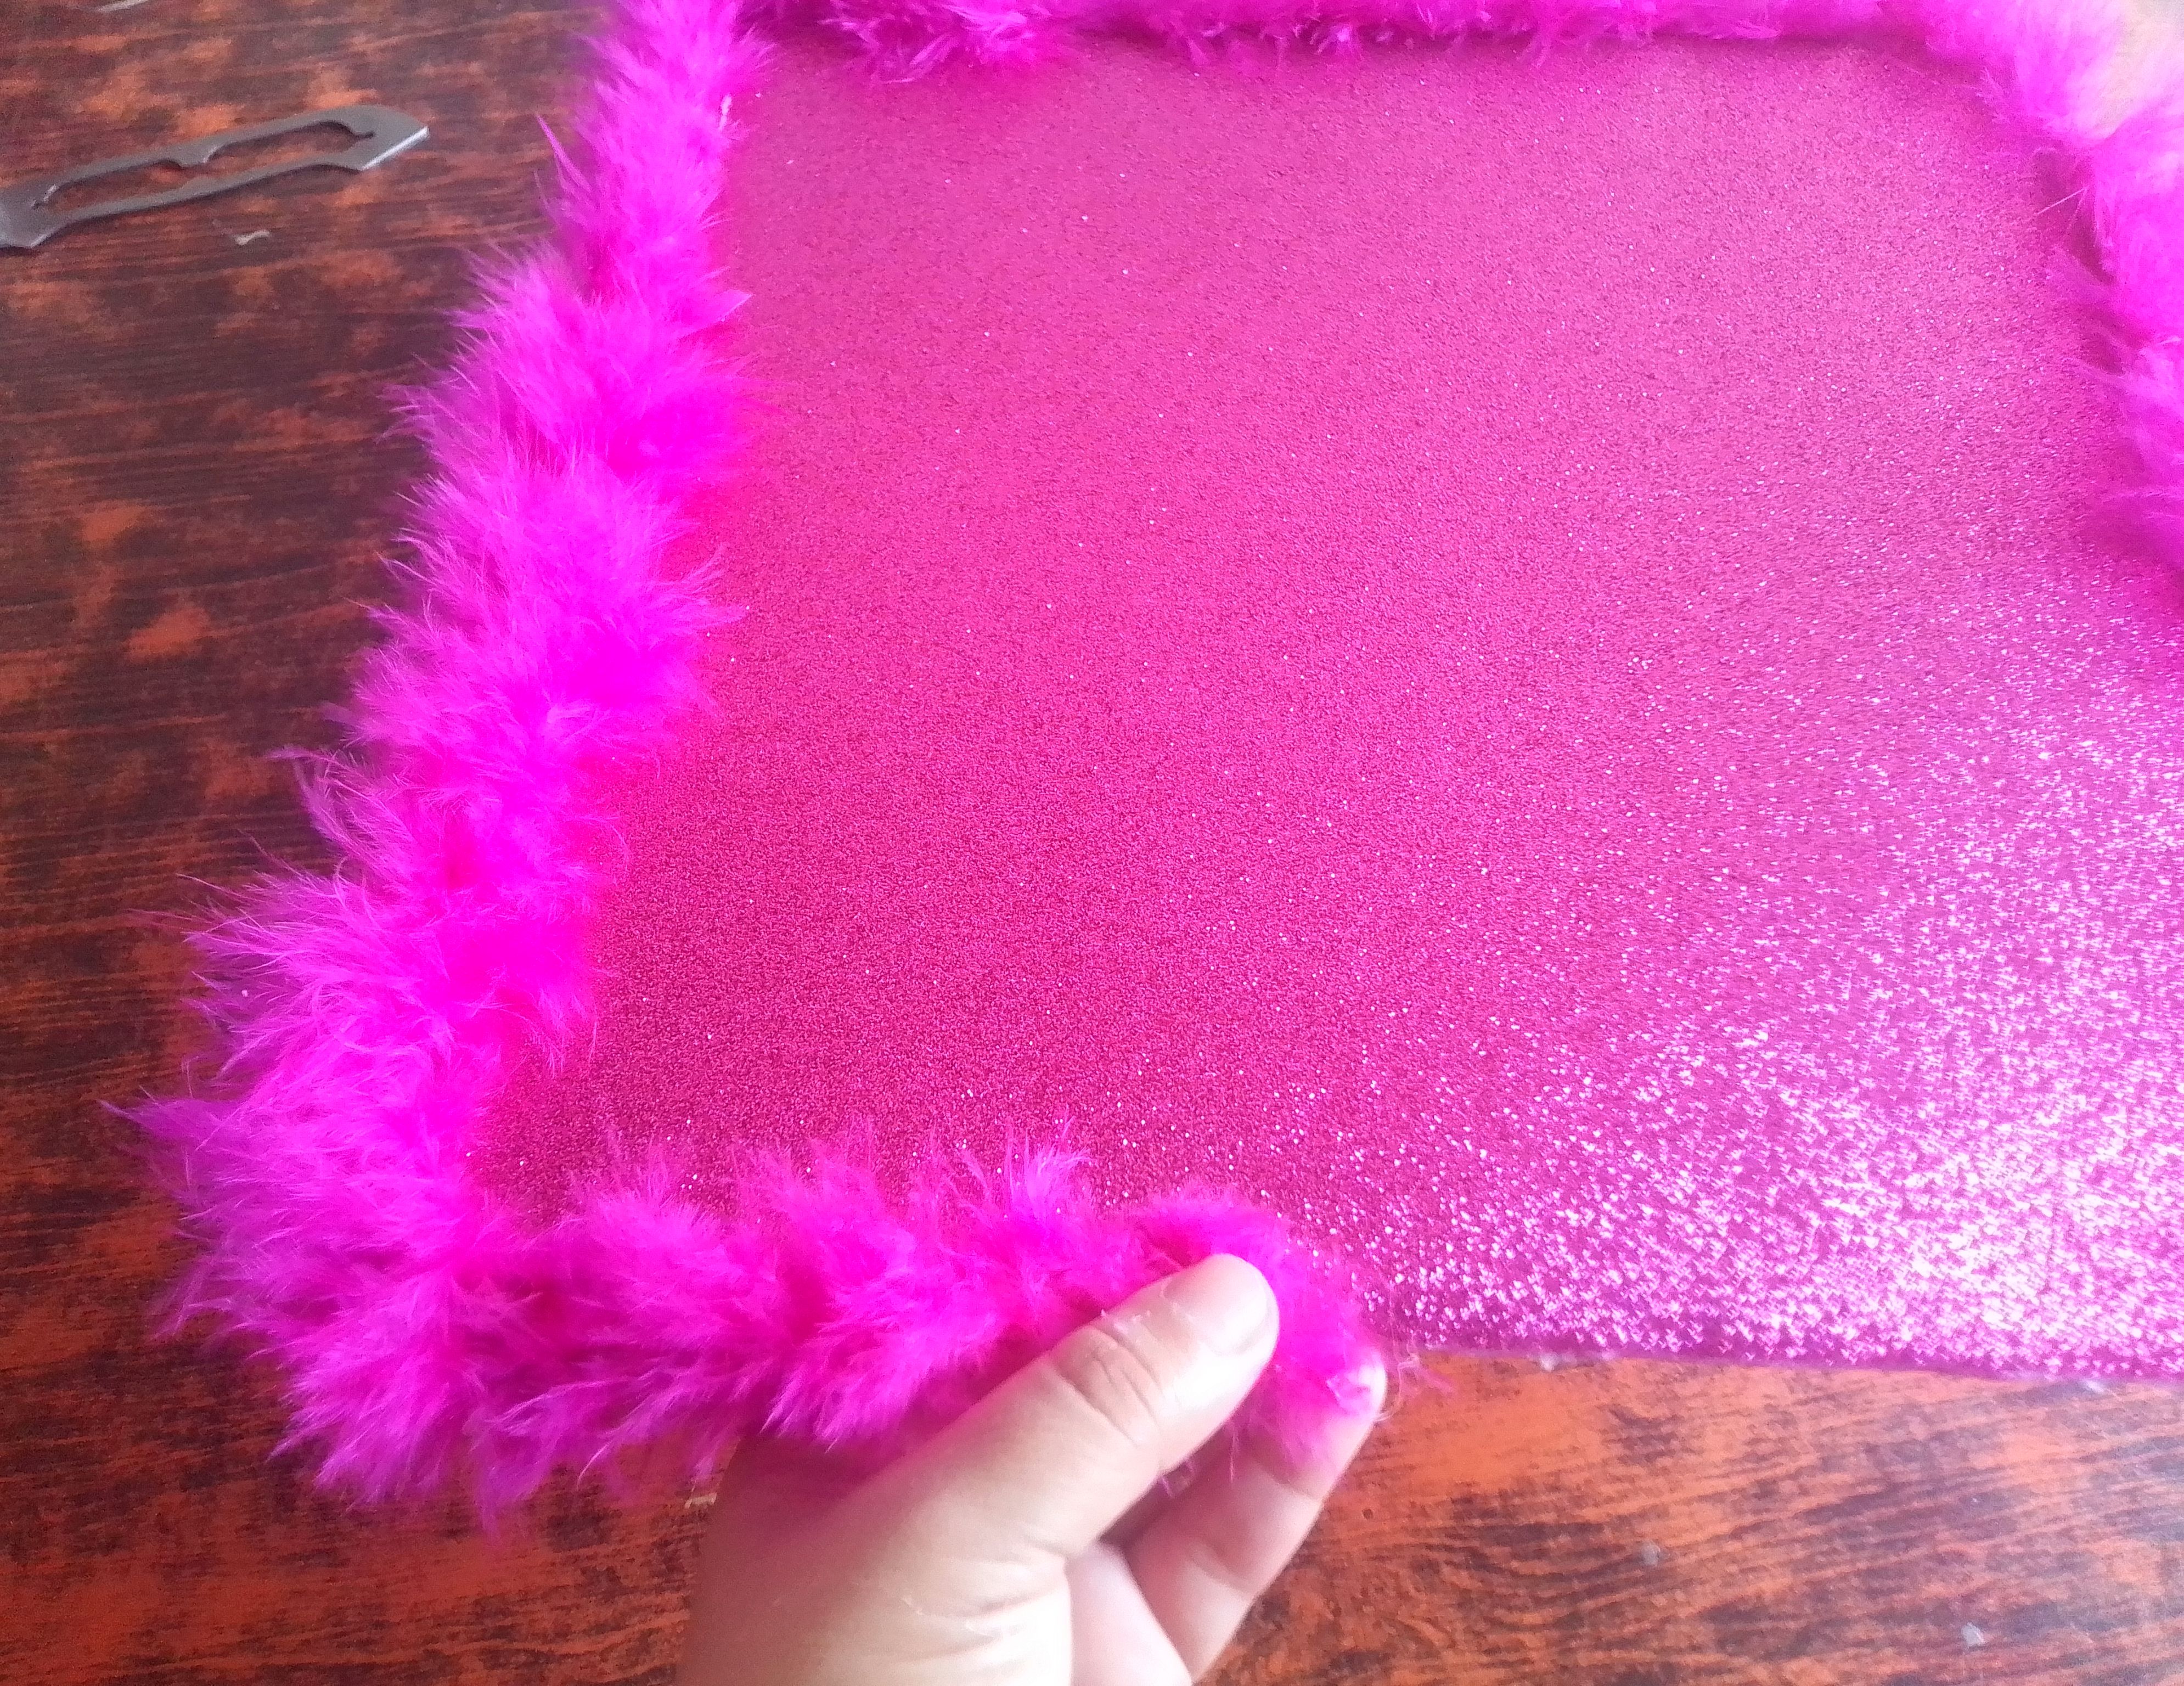
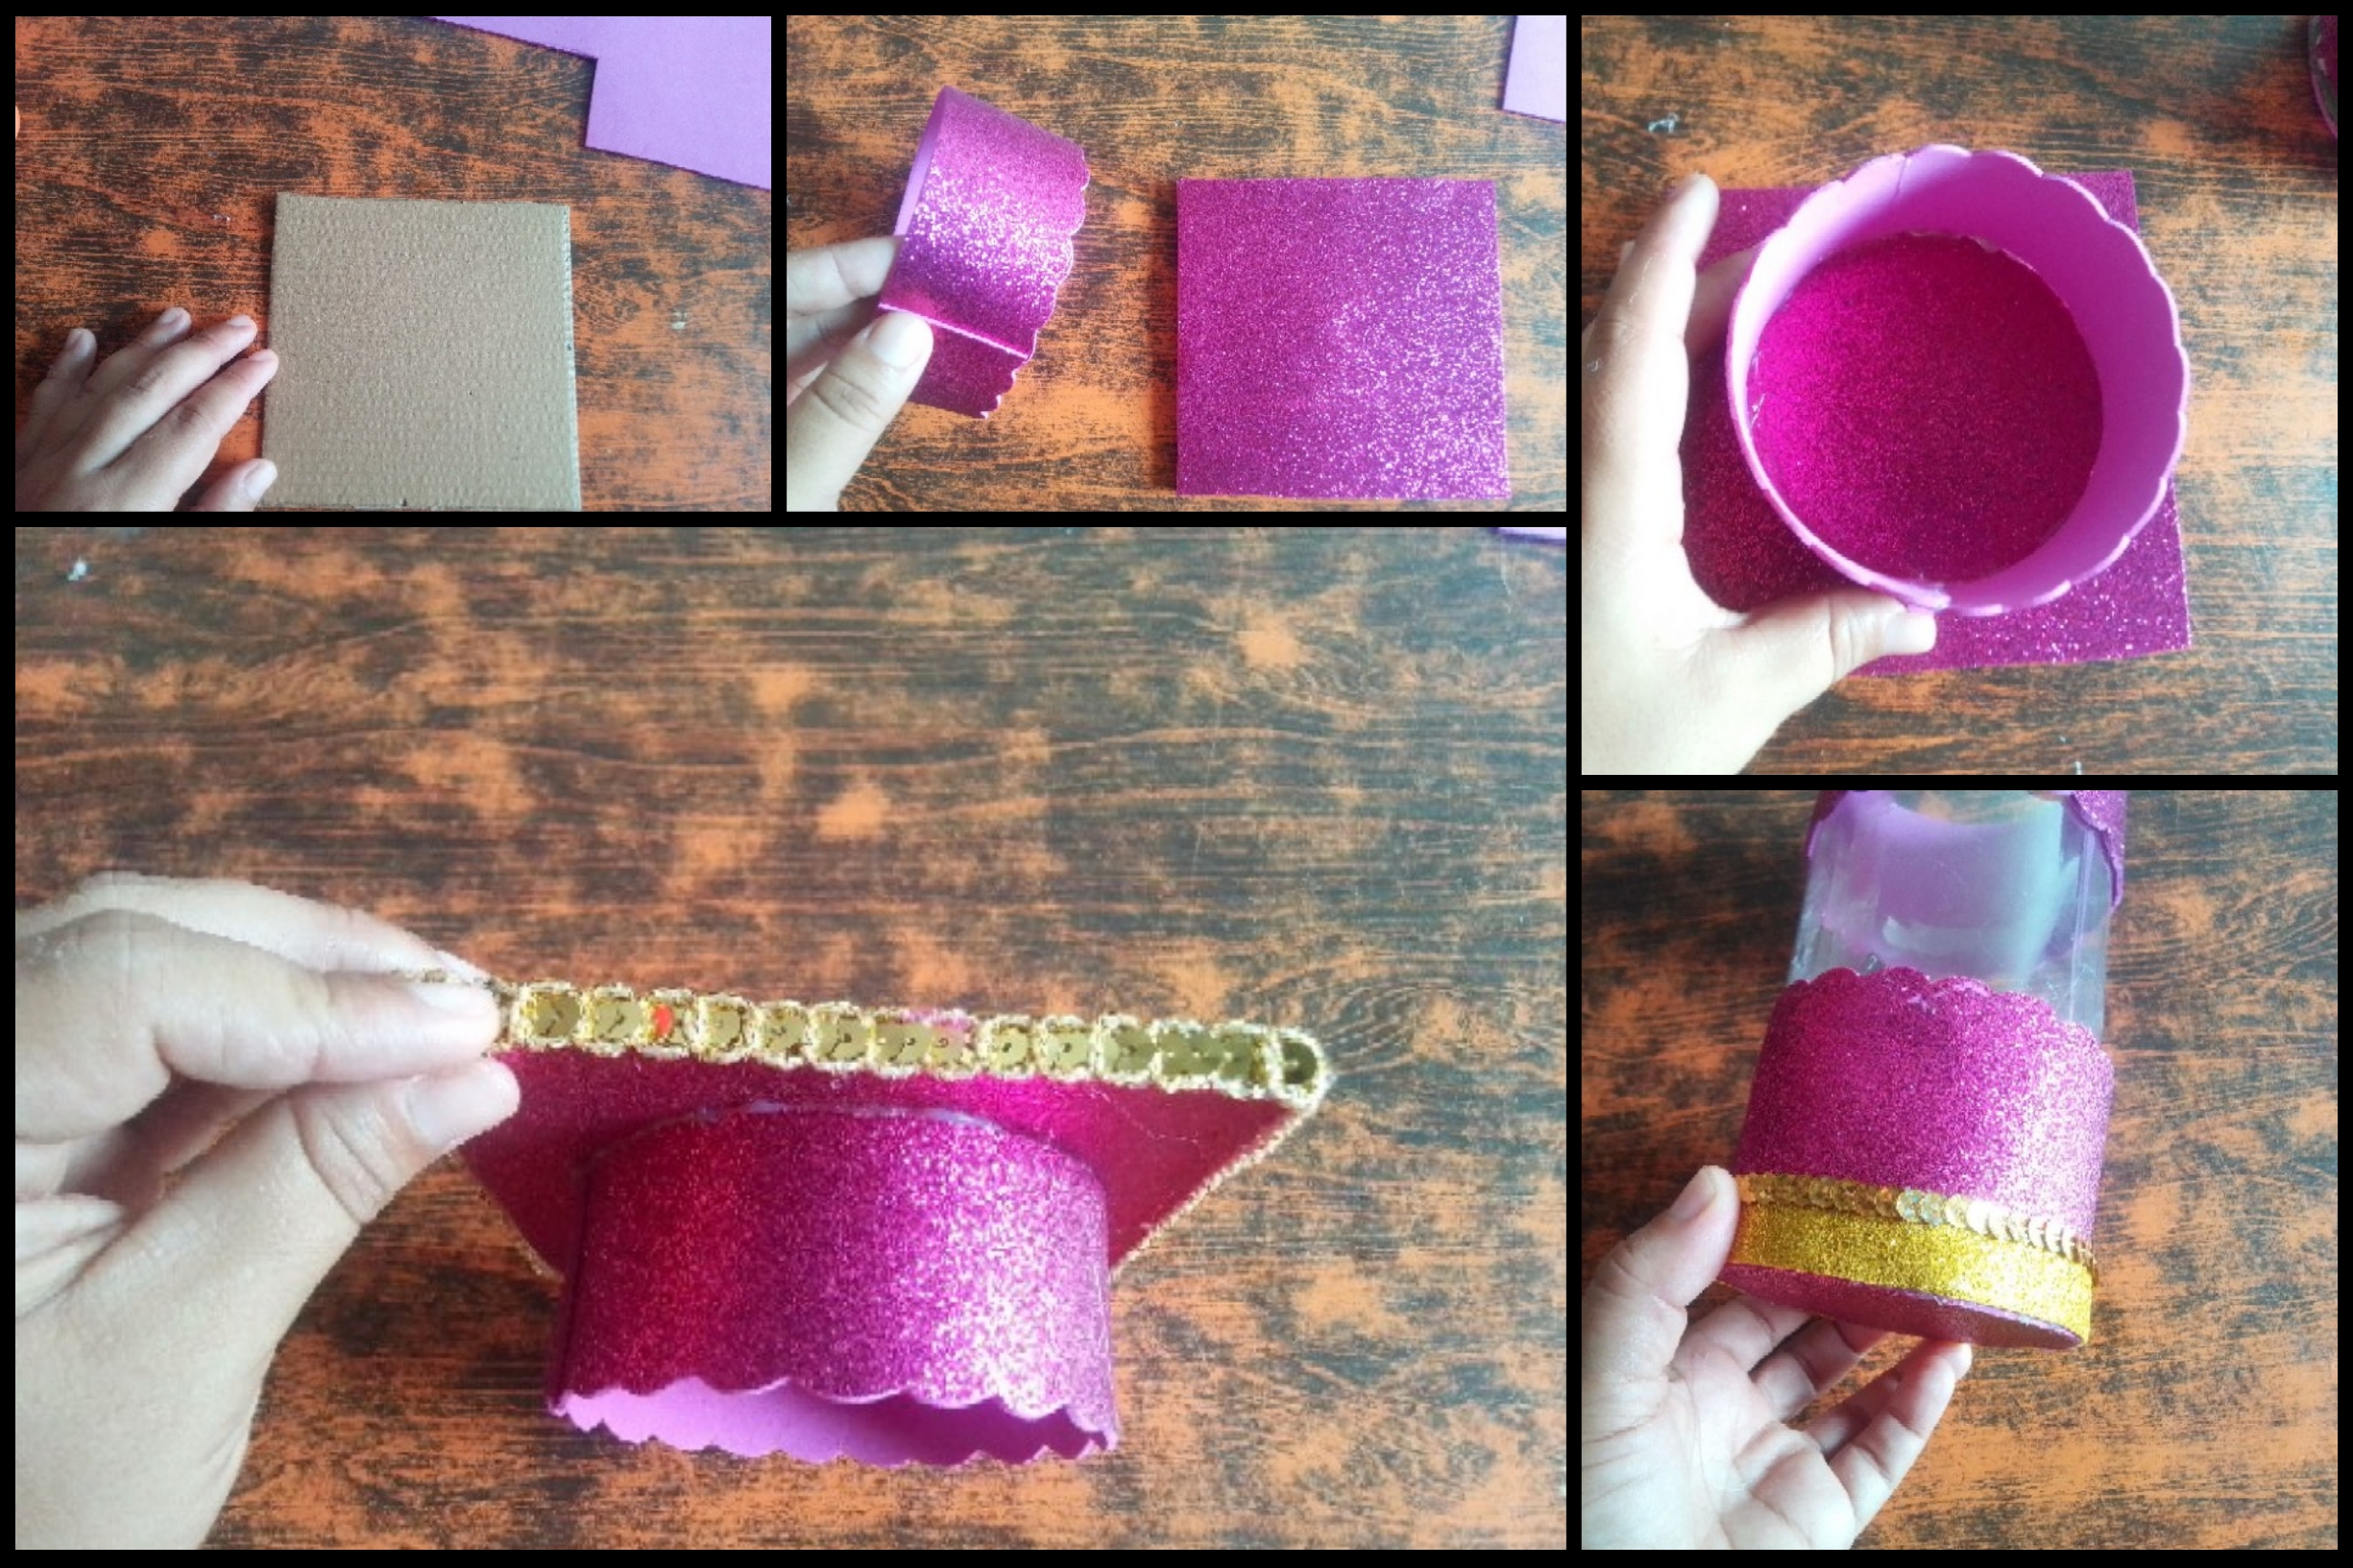
Mi birrete estás formado por dos piezas fundamentales, que son la parte cuadrada de arriba que normalmente lleva medida de 25x25cm hecha de cartón , forrada de foami escarchado fucsia, y la circunferencia de la cabeza en la parte abajo hecha con foami grueso o en su defecto un foami doble. Es muy importante usar silicón caliente para todo este trabajo excepto para las letras del siguiente paso.
Step 01
My cap is made up of two fundamental pieces, which are the square part at the top that normally measures 25x25cm made of cardboard, lined with fuchsia frosted foam, and the circumference of the head in the bottom part made with thick foami or, failing that, double foami. It is very important to use hot glue for all of this work except for the letters in the next step.
Paso 02
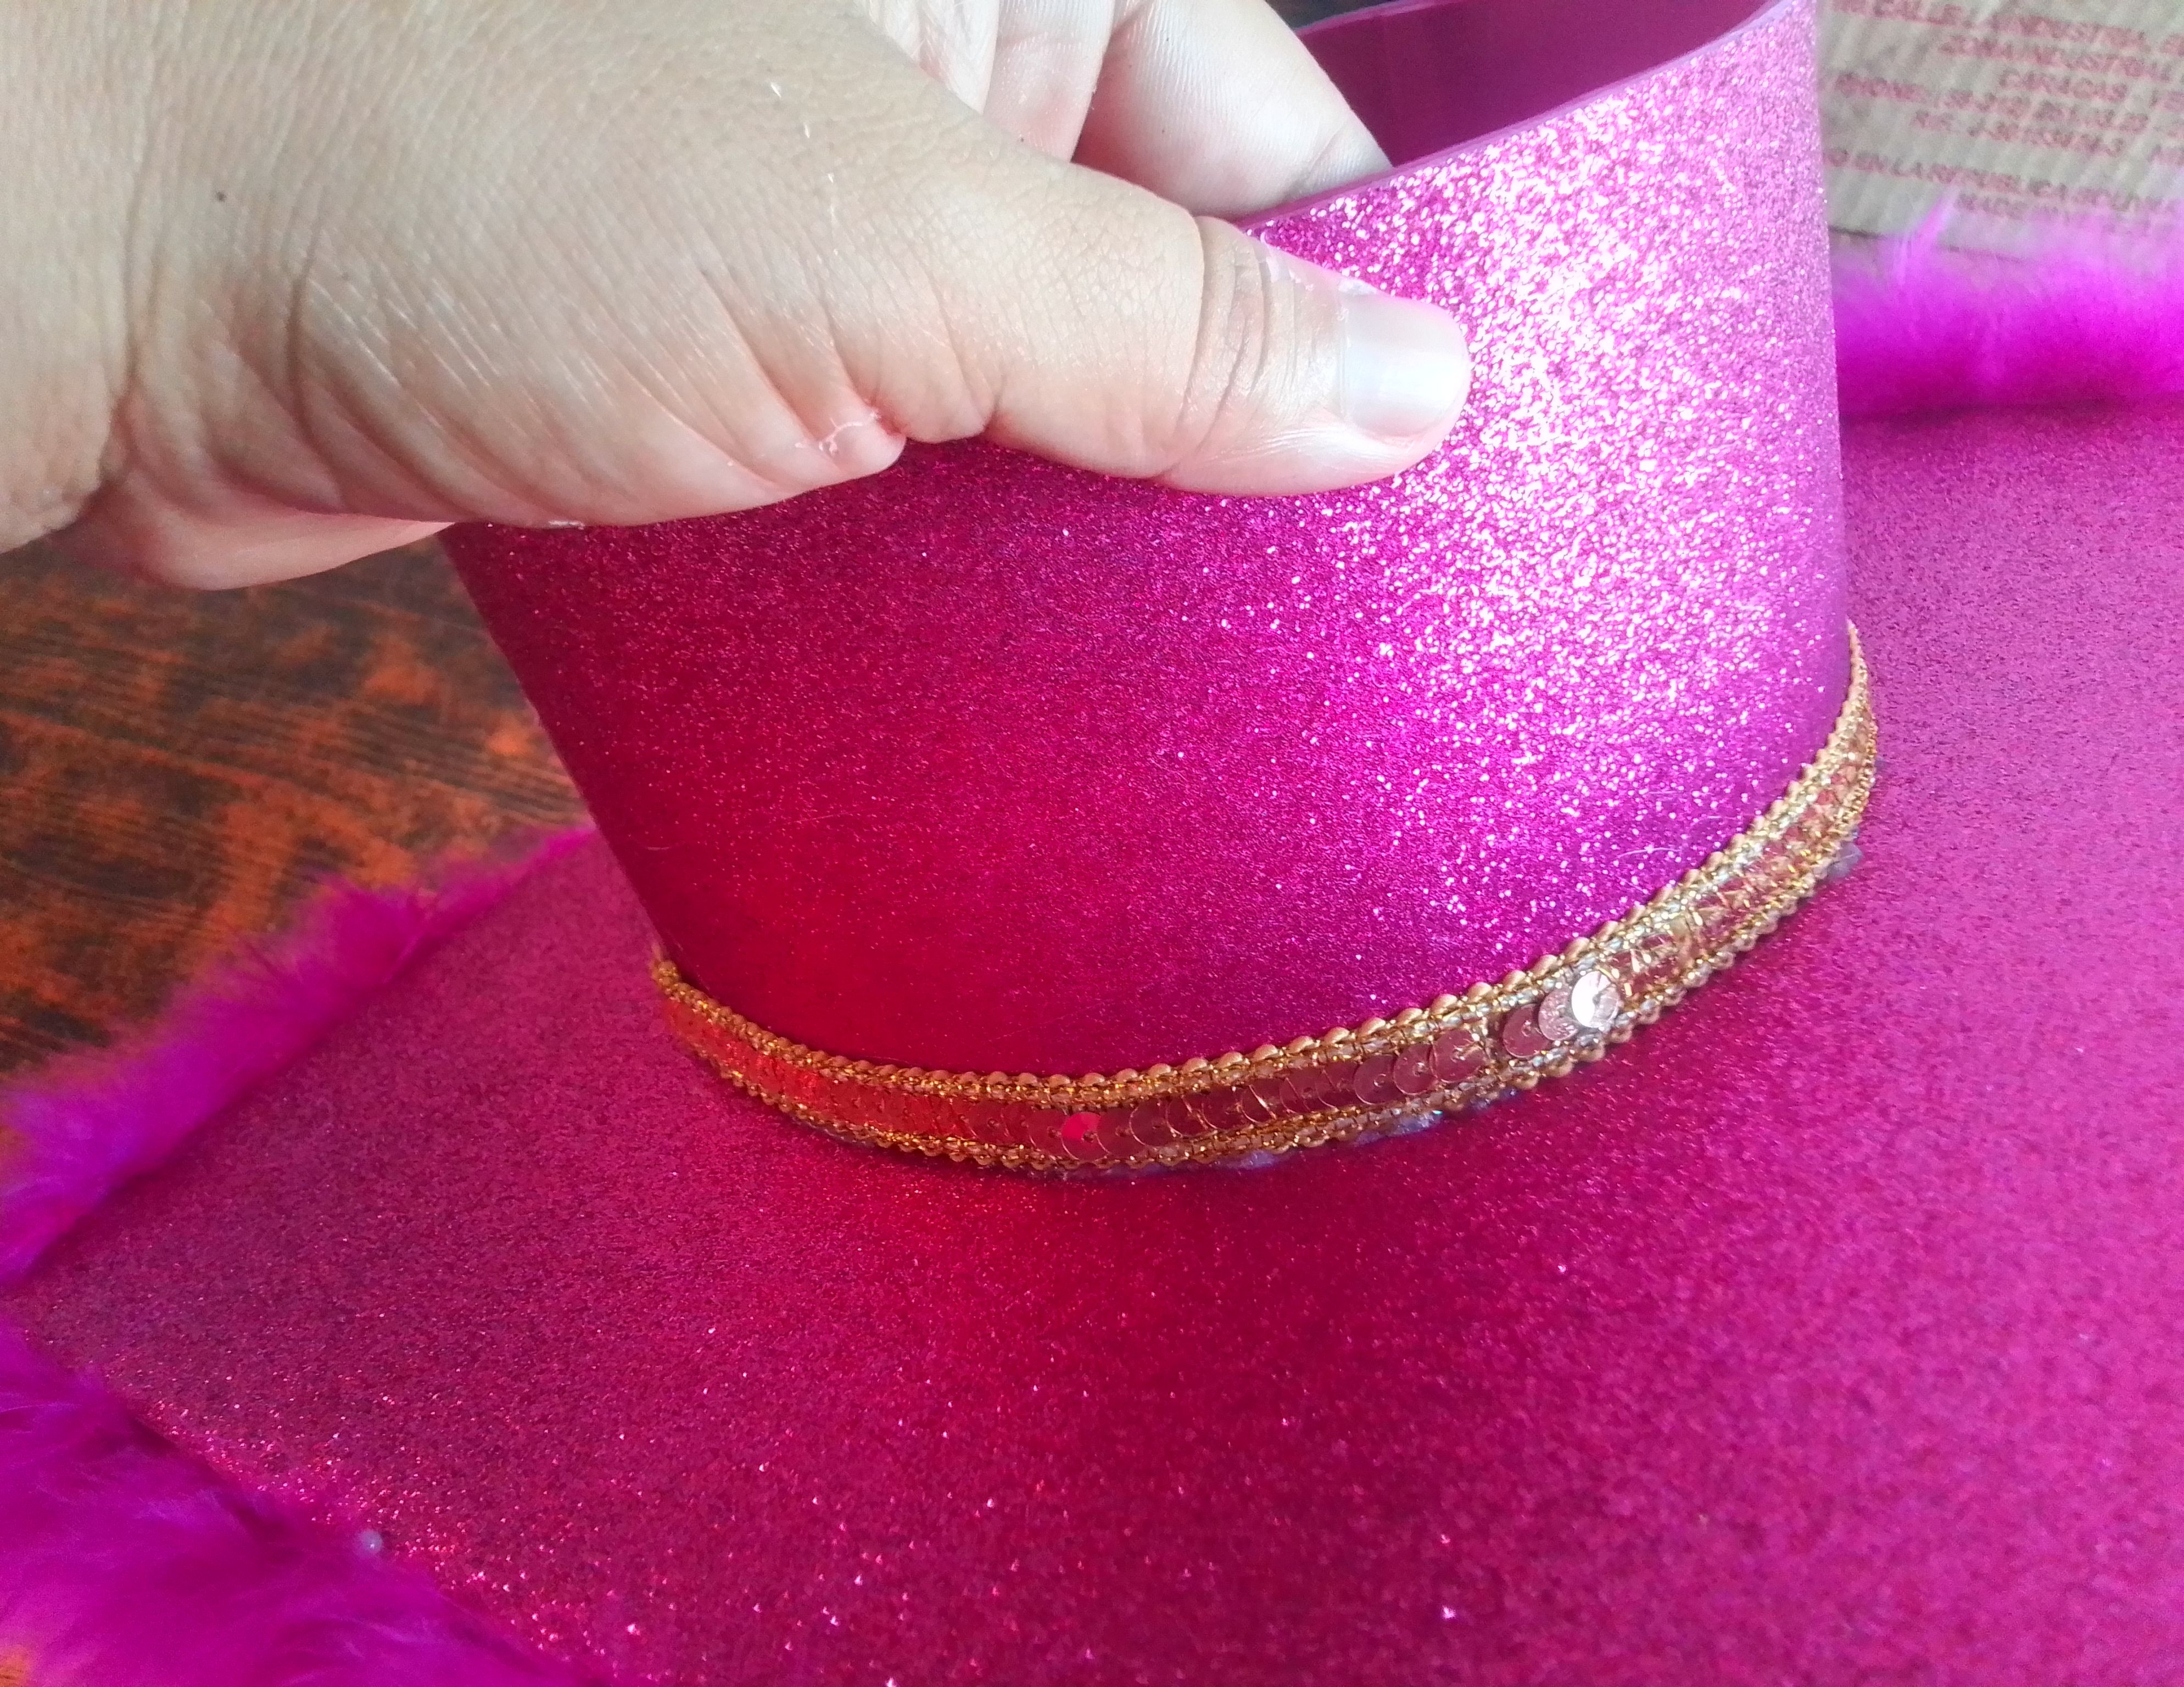
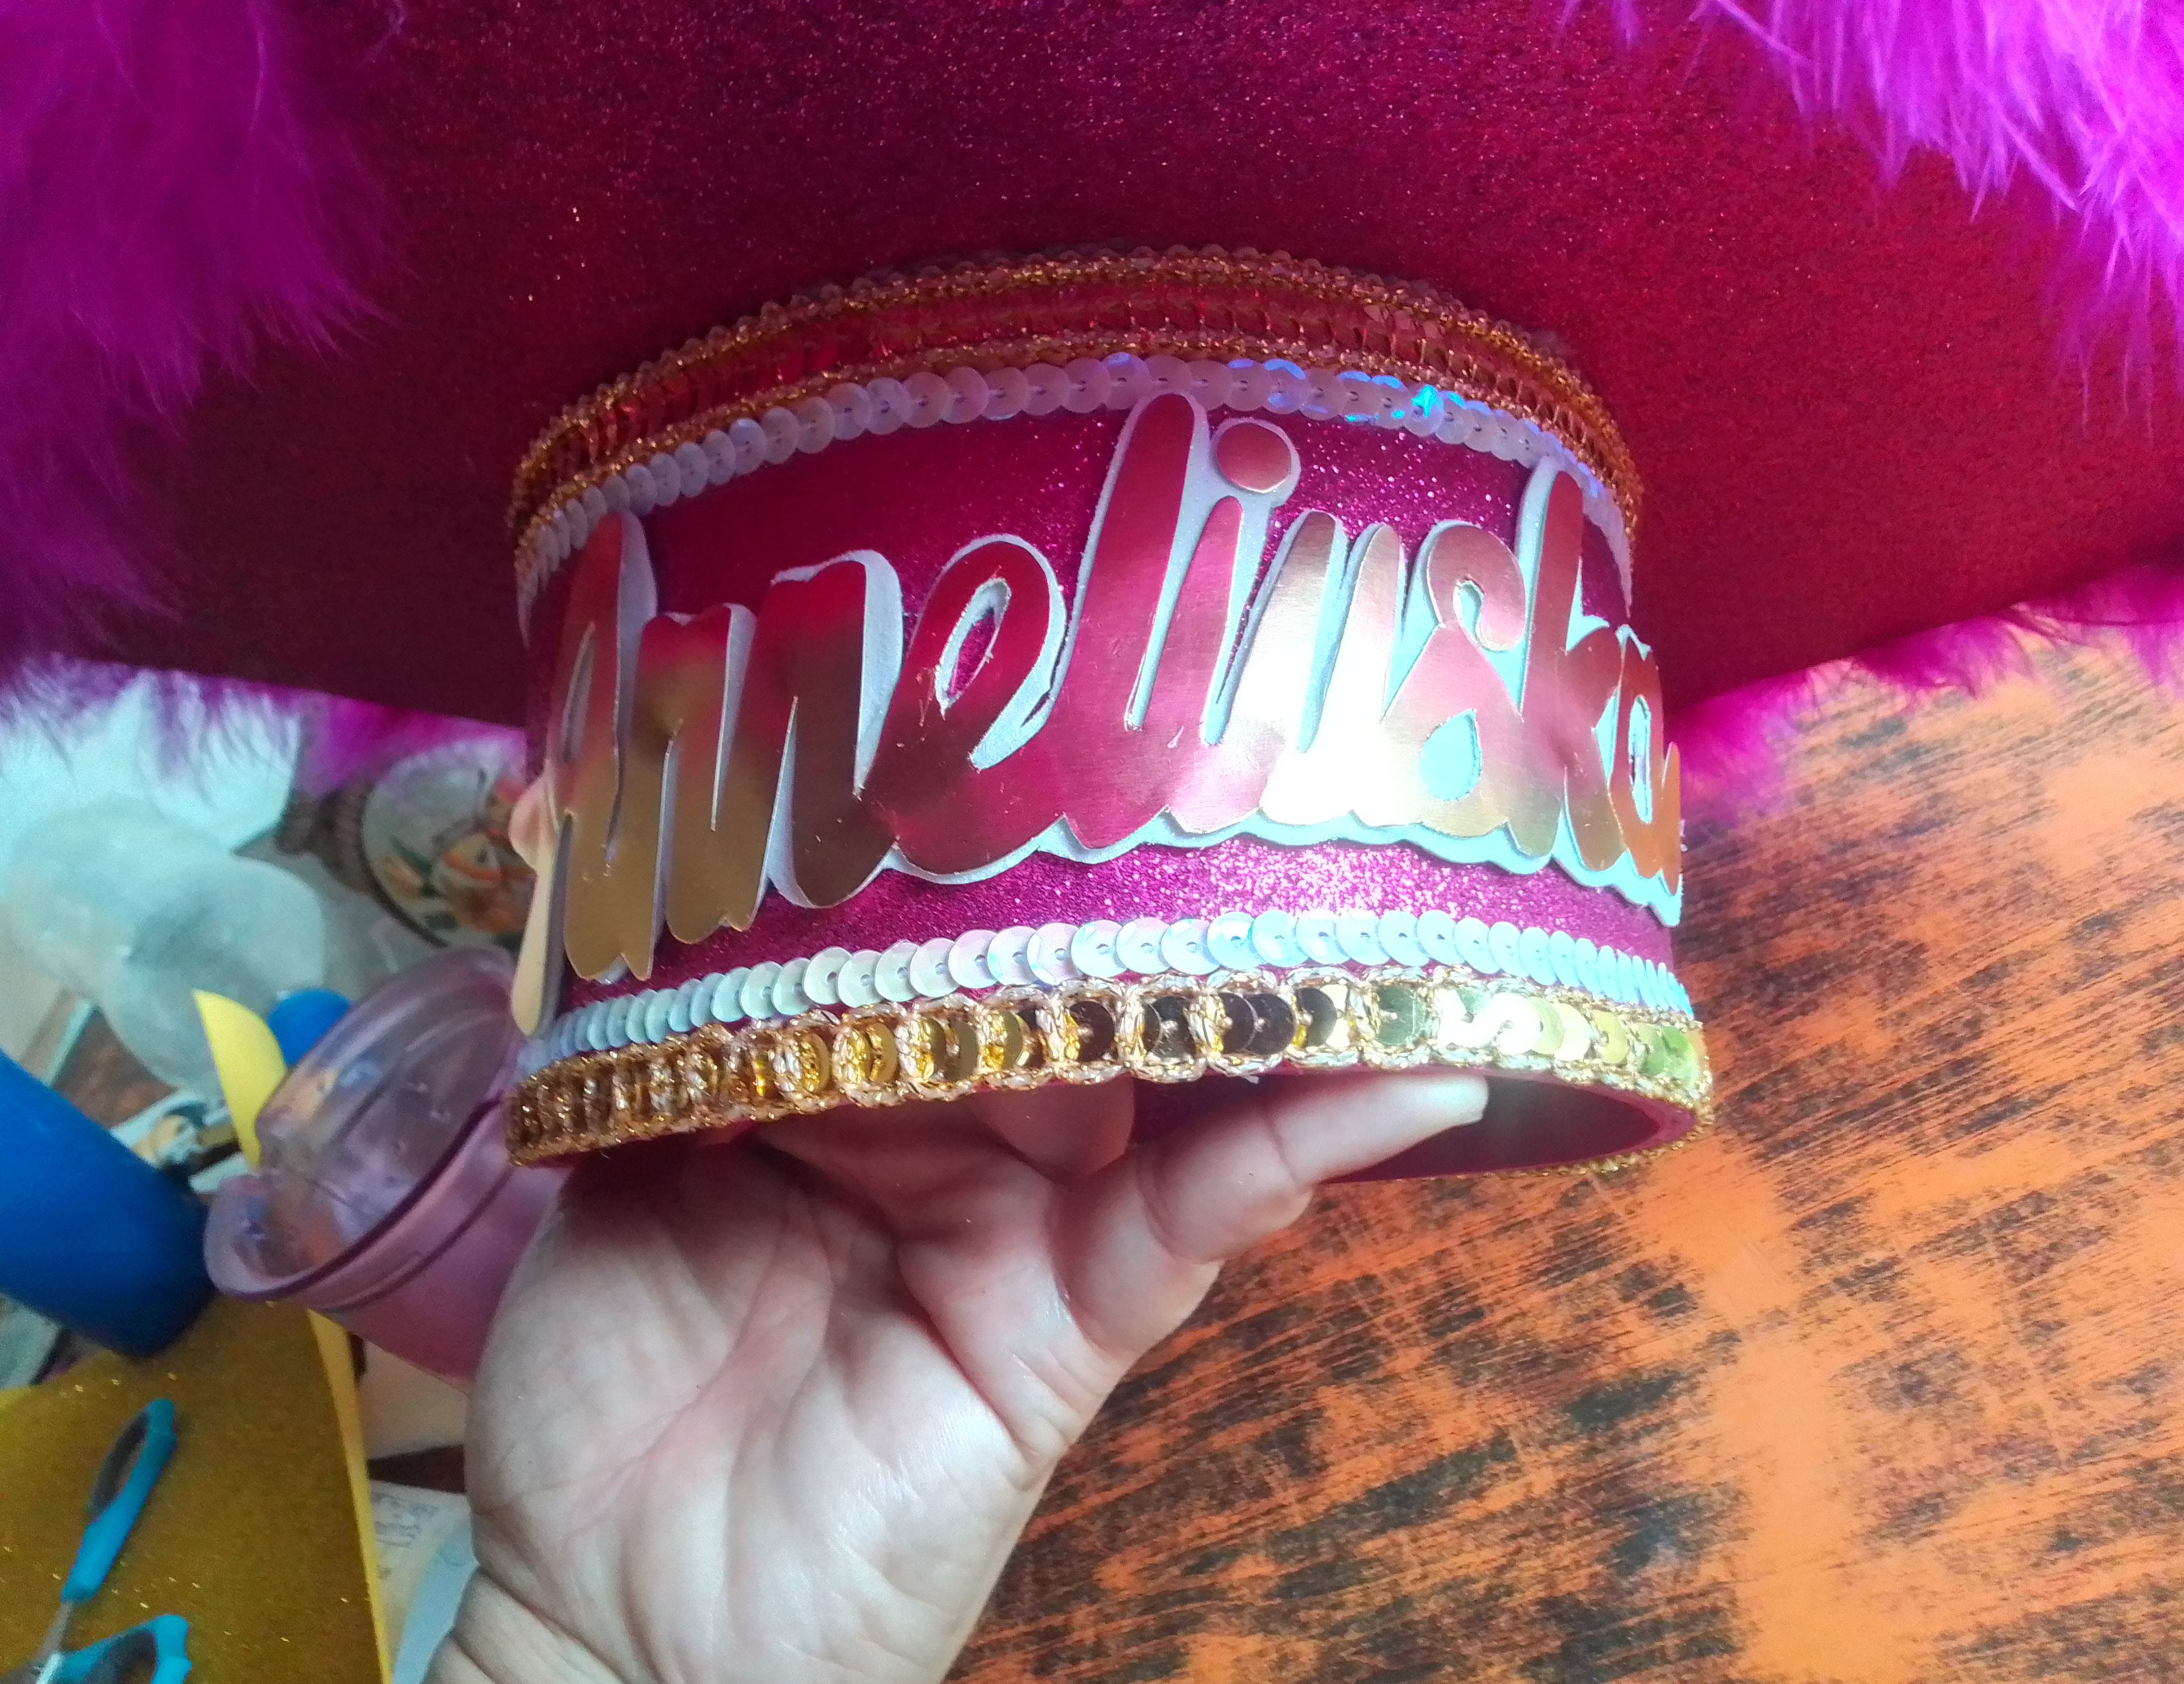
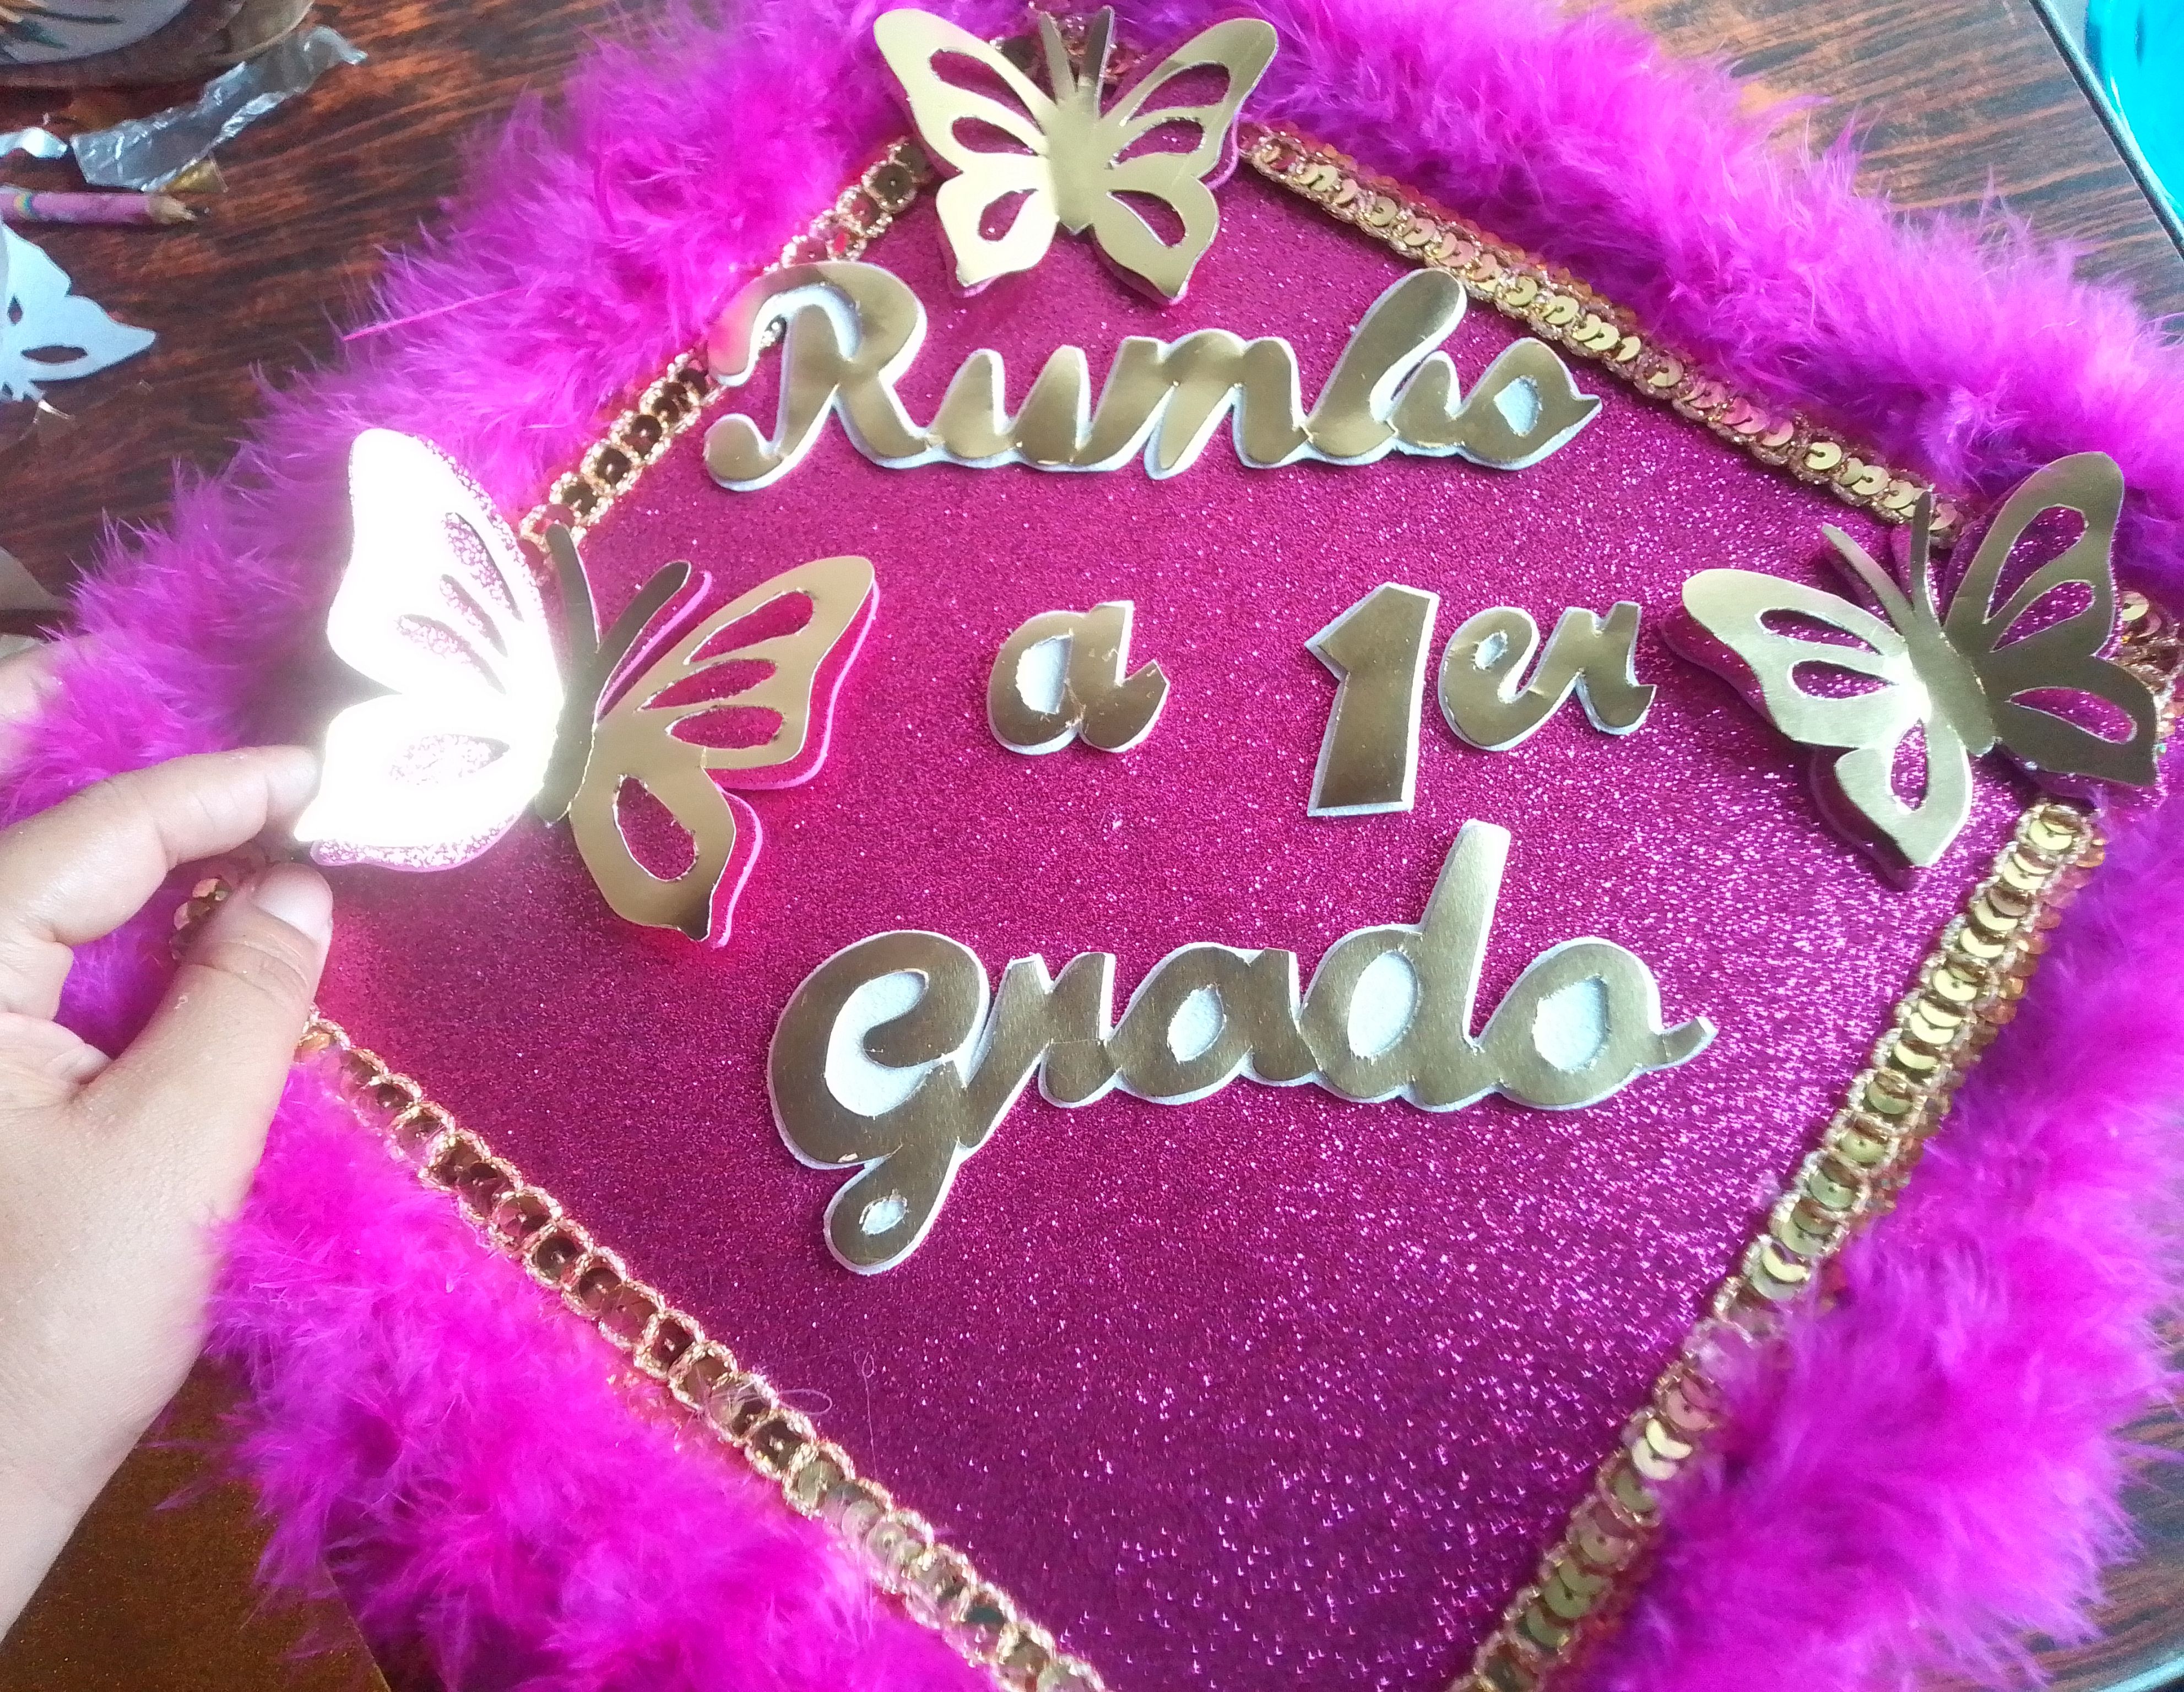
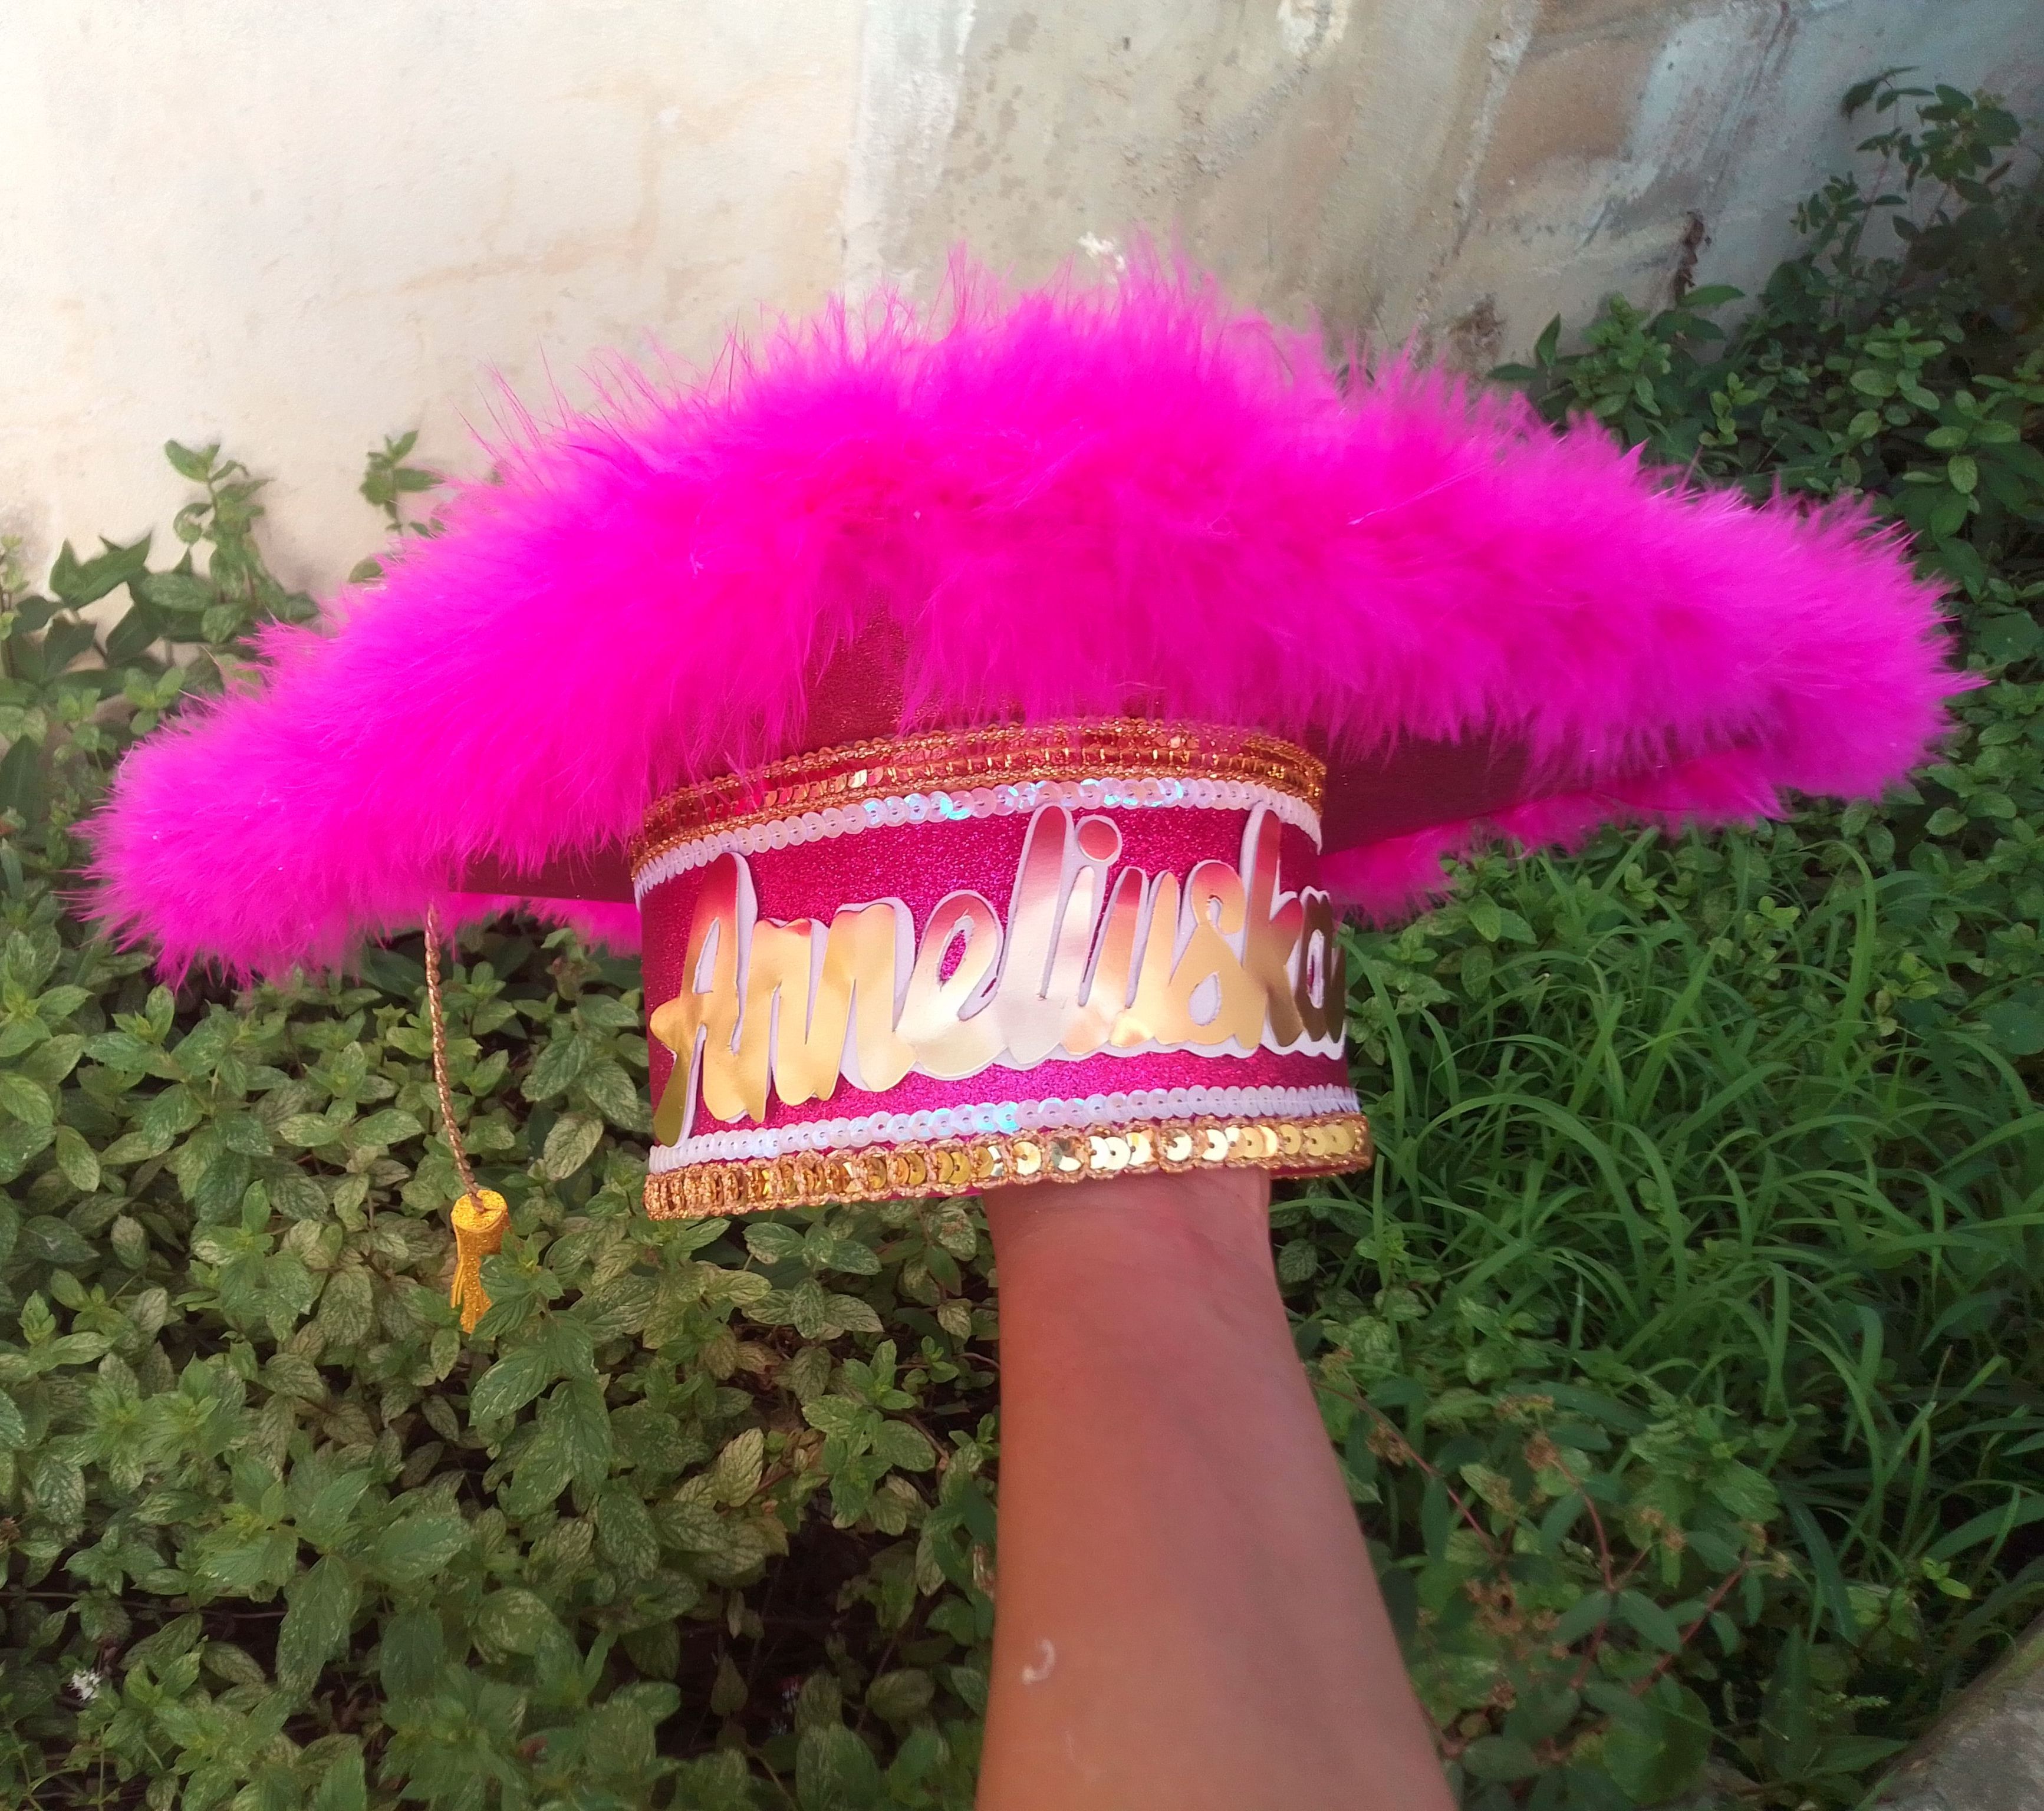
Empiezo a cubrir la unión con encaje dorado y lentejuelas todo lo que es la orilla de la circunferencia del birrete.. A diferencia de la parte cuadrada que pondré marabú o plumas, también voy agregar el mismo encaje para combinar.En la parte de adelante coloco el nombre cortado en cartulina metalizada dorada y decoro la zona de arriba con la letras de la promoción "Rumbo a primer 1er Grado", añado unas mariposas de la misma cartulina y flores de foami, tambien un pequeño colgante hacia el lado derecho.
Step 02
I begin to cover the union with gold lace and sequins, everything that is the edge of the circumference of the cap. Unlike the square part that I will put marabou or feathers, I am also going to add the same lace to combine. On the front I place the name cut out of gold metallic cardboard and decorate the upper area with the letters of the promotion "Heading to First 1st Grade", I add some butterflies from the same cardboard and foam flowers, too a small pendant towards the right side.
Paso 03
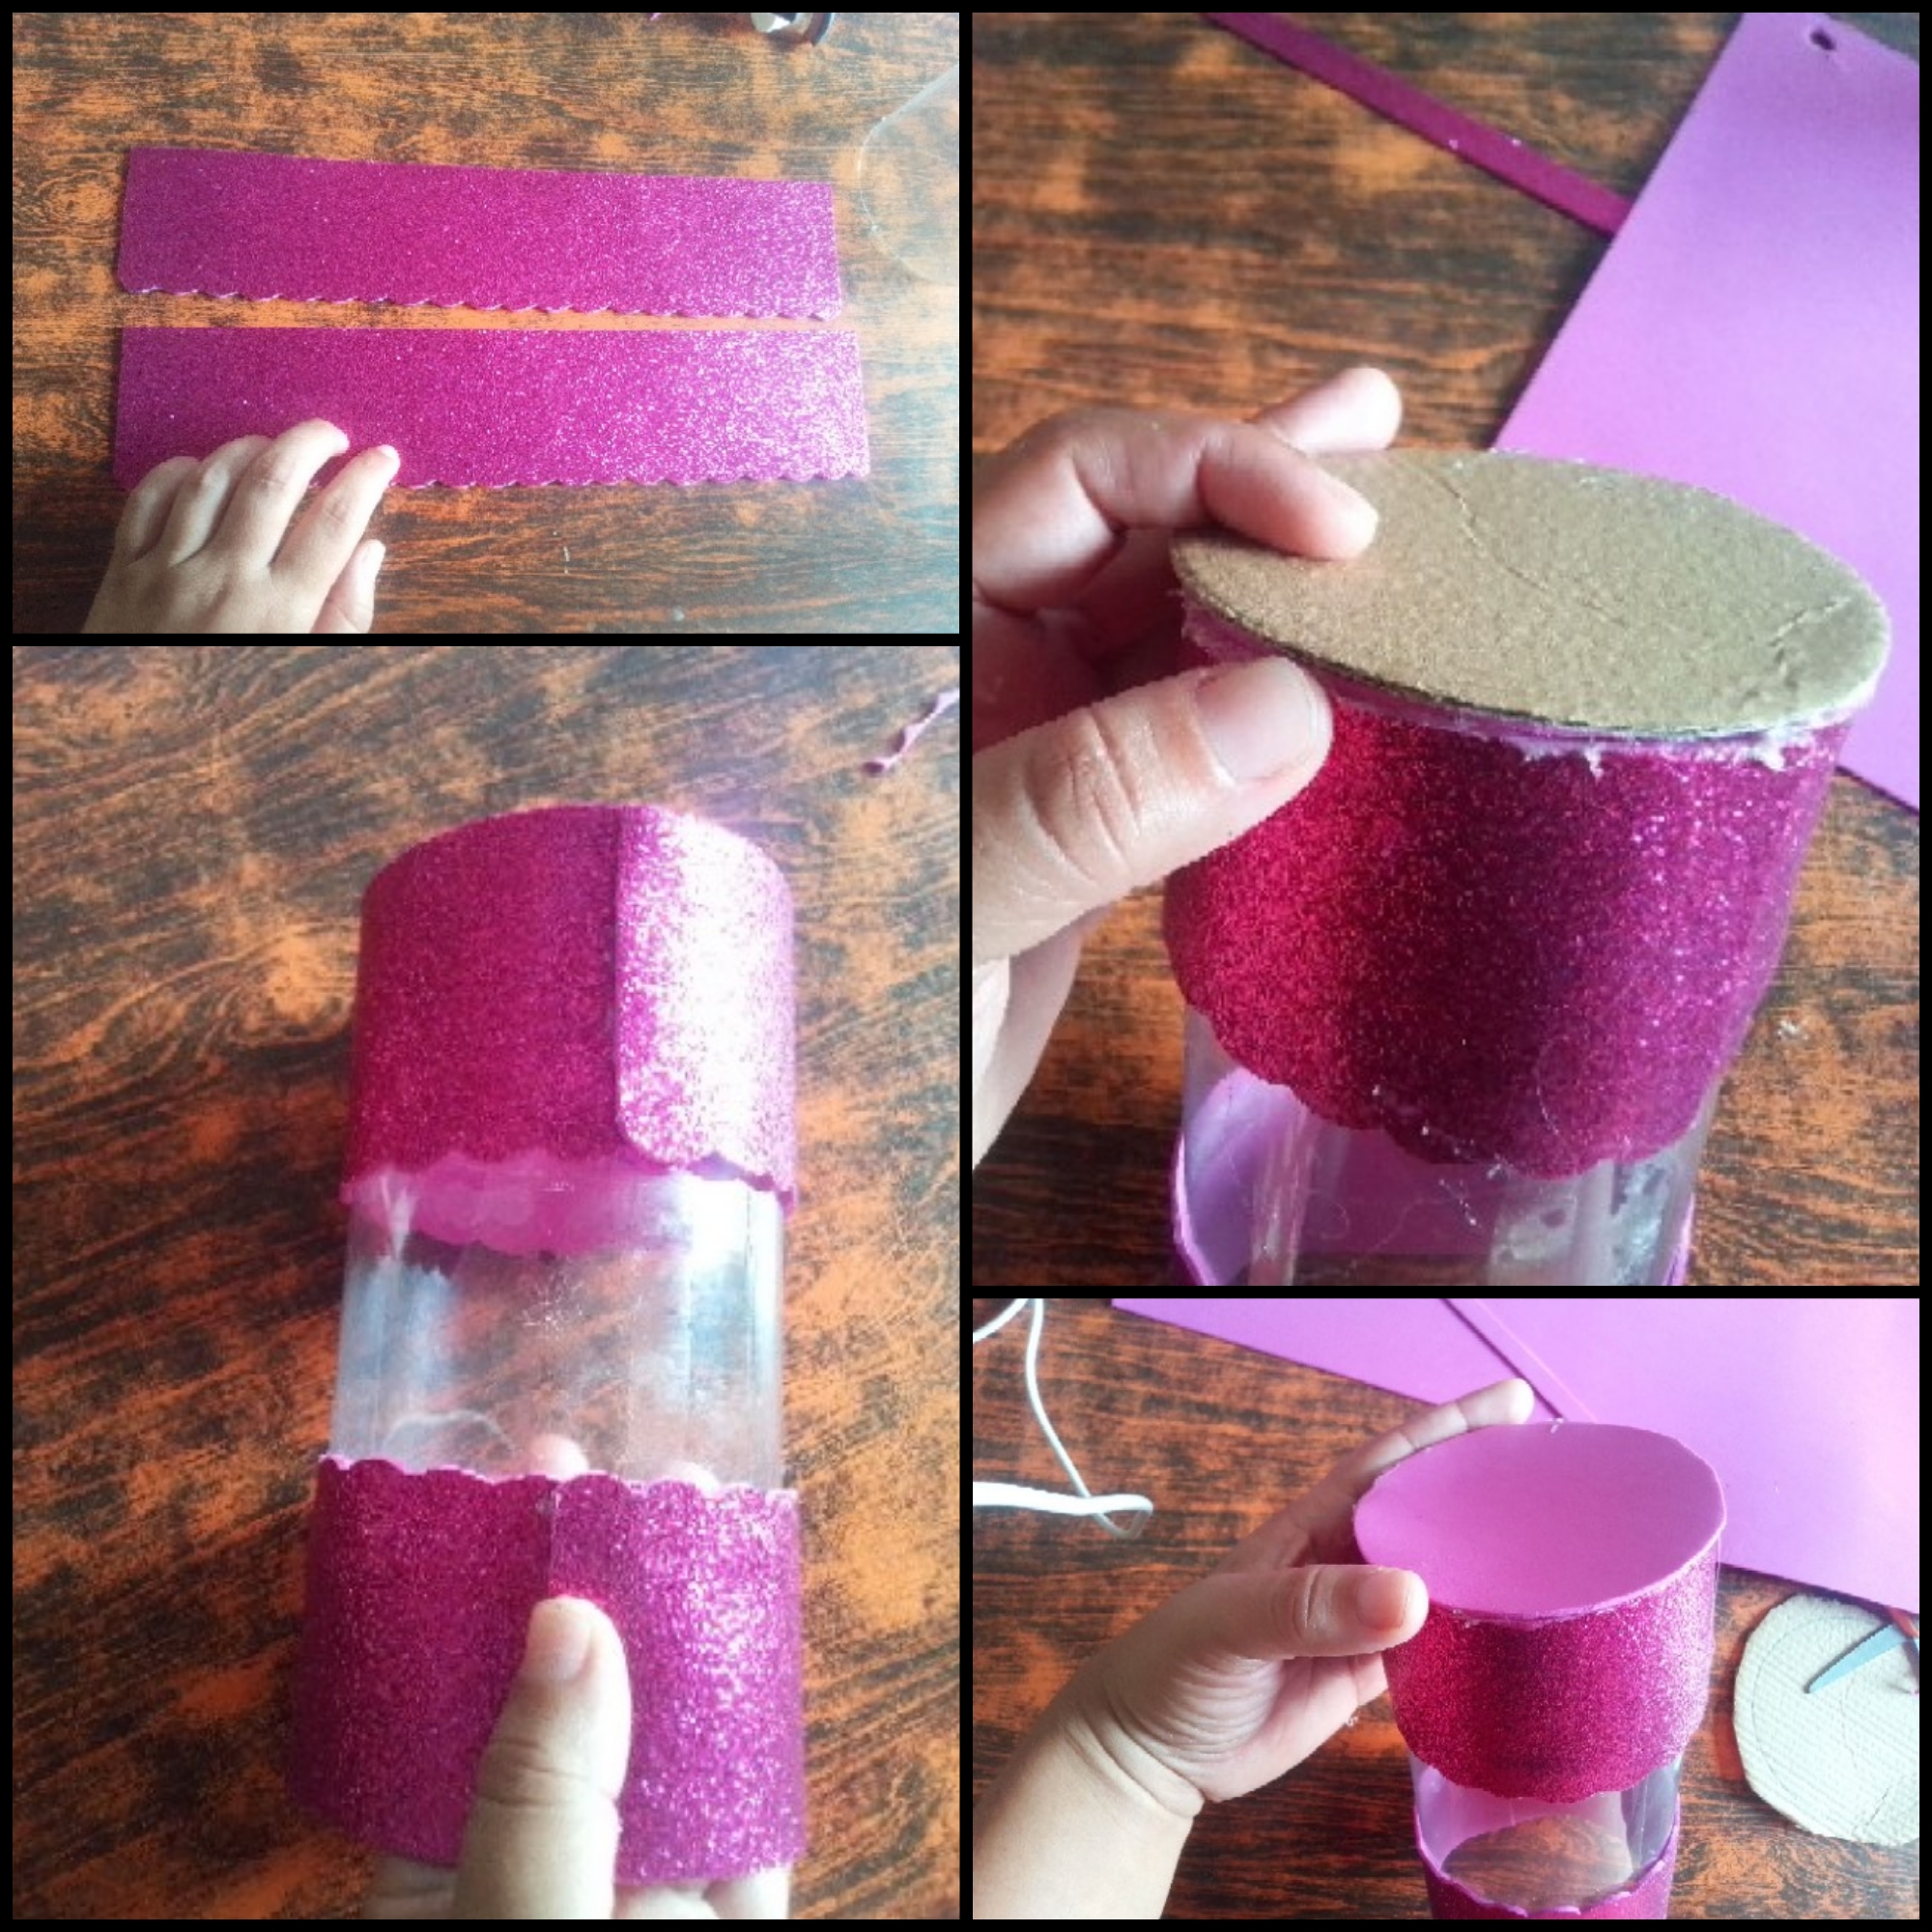
Seguidamente ponemos manos a la obra con el cotillón y todo será una mezcla de colores y diseño. Corto el centro de una botella de refresco transparente y decoro las orillas con dos tiras del mismo foami color fucsia y en el fondo colocó cartón para la base. Justo en la unión voy a pegar foami dorado y encaje.
Step 03
Next we get to work with the party favors and everything will be a mix of colors and design. I cut the center of a transparent soda bottle and decorate the edges with two strips of the same fuchsia foam and placed cardboard at the bottom for the base. Right at the junction I'm going to glue gold foam and lace.
Paso 04
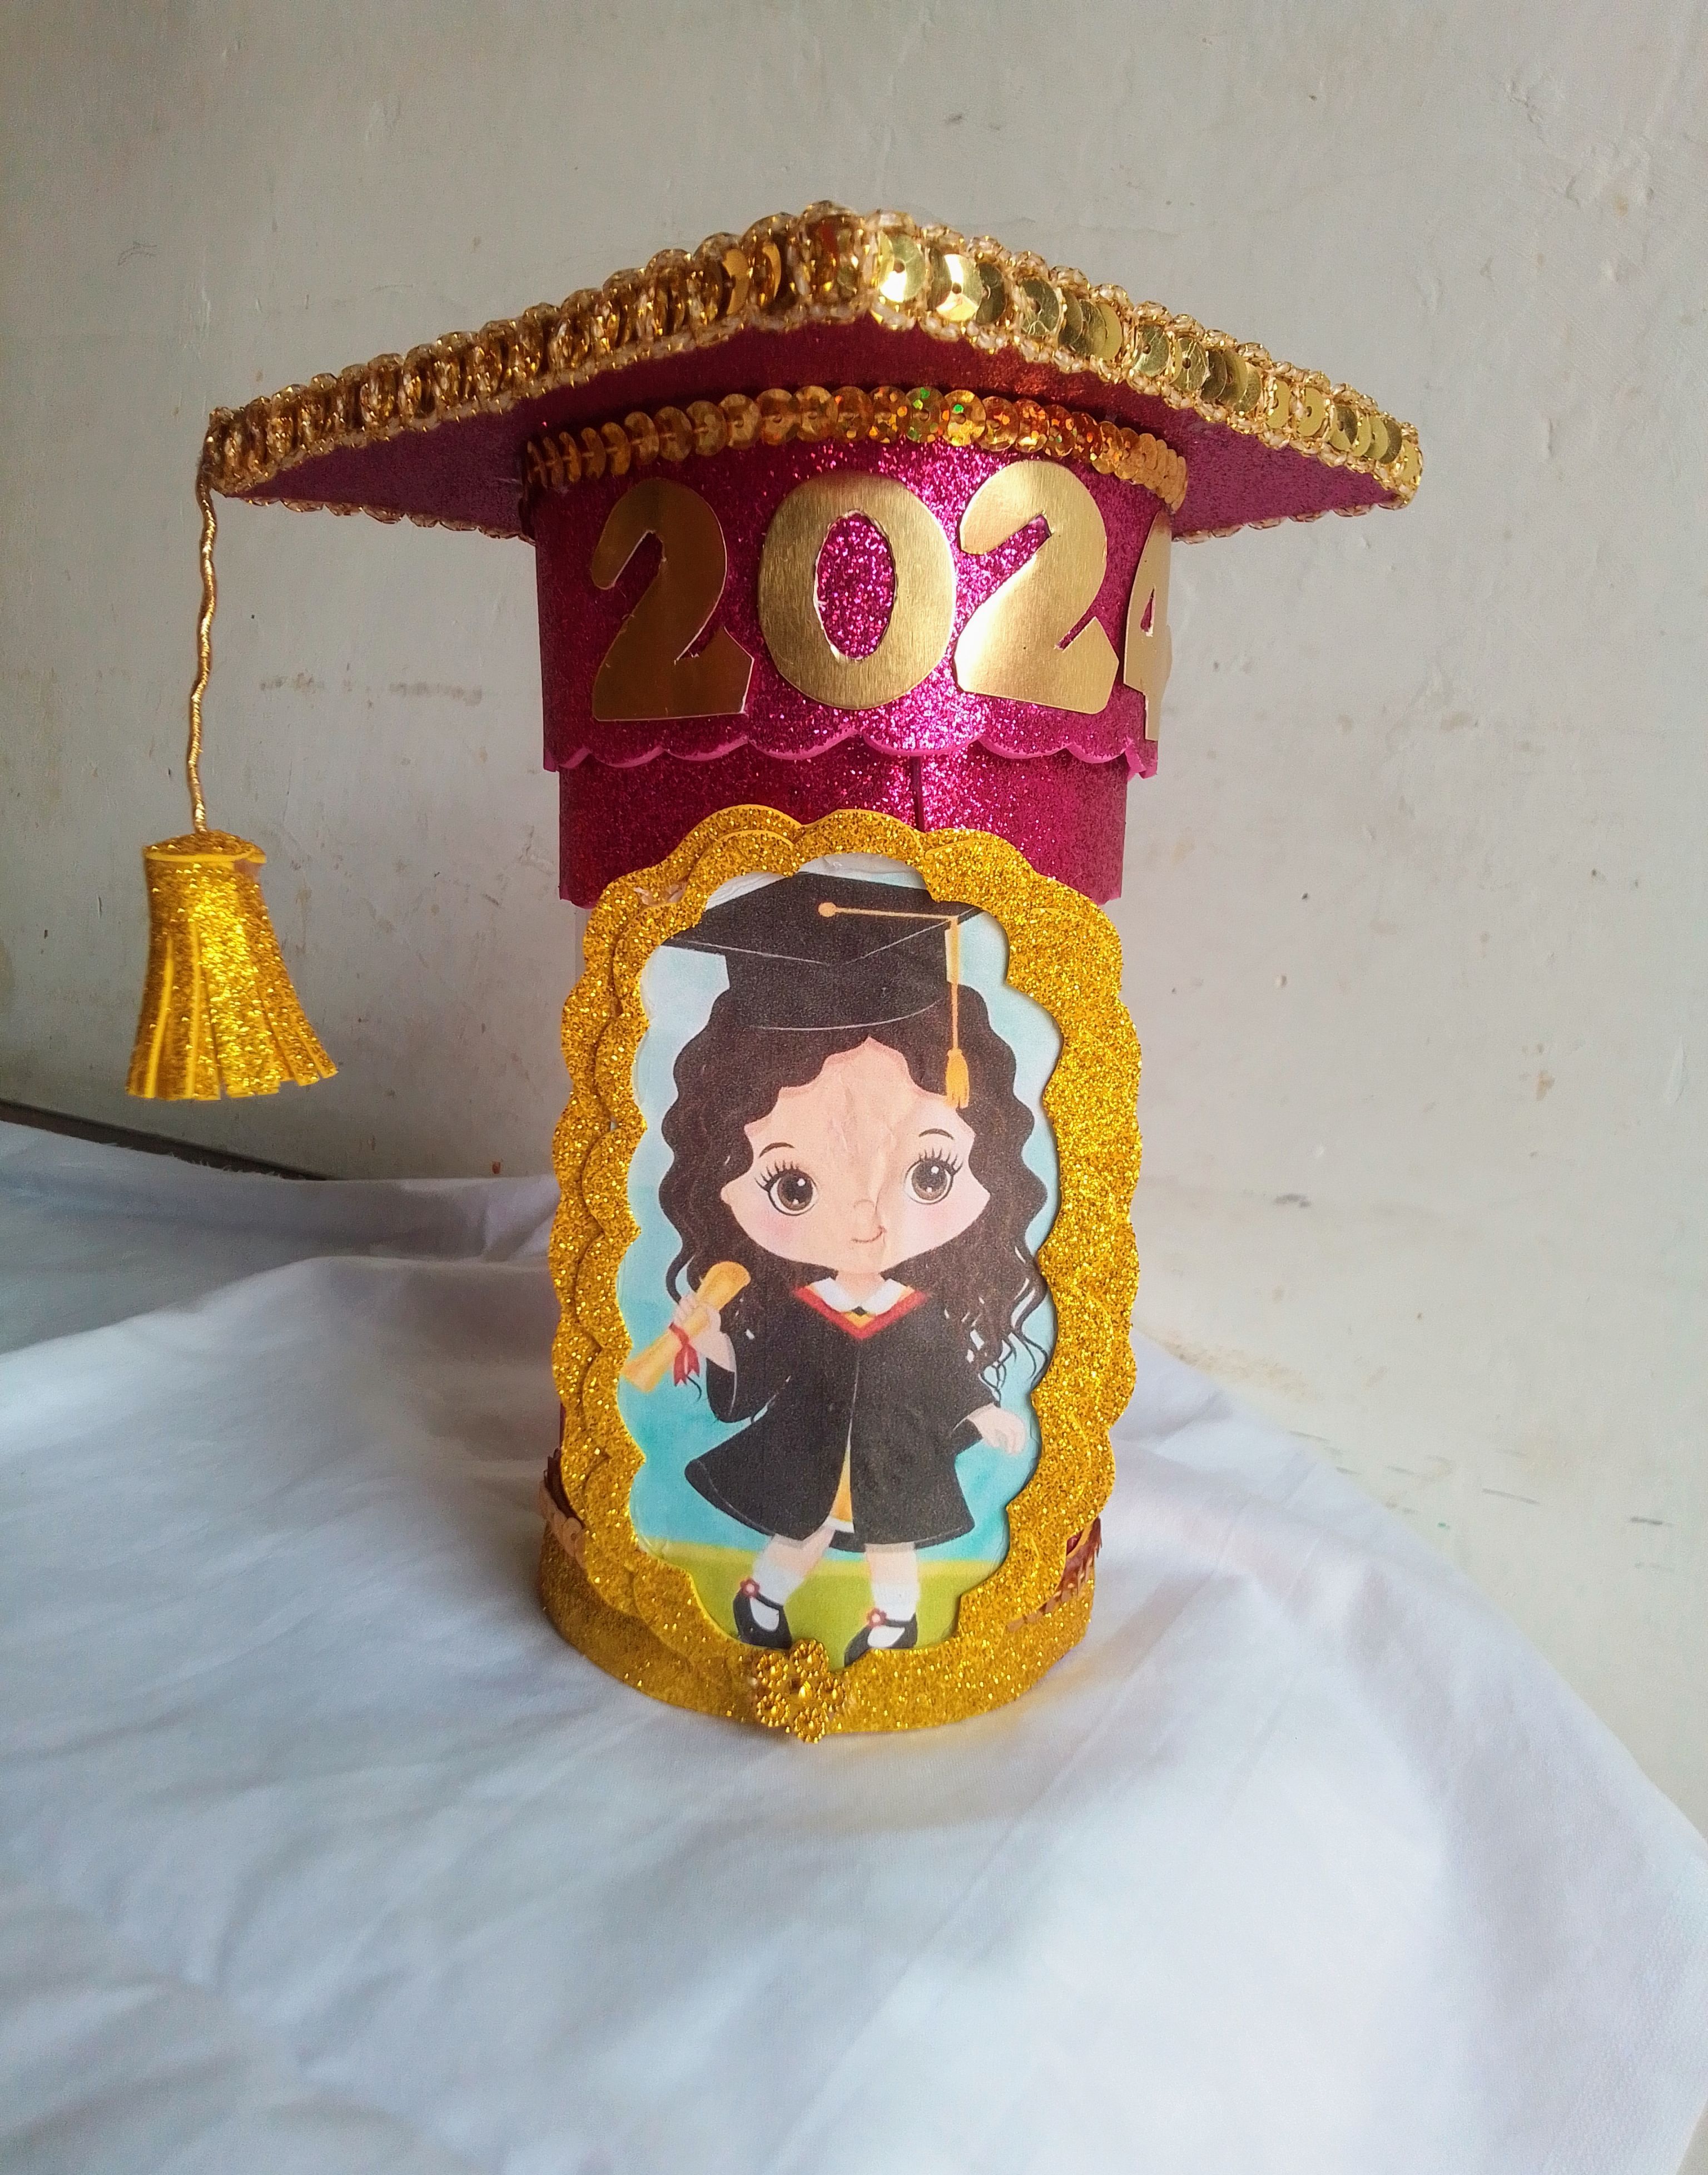
Tomo la idea del birrete y voy hacer umo más pequeñito a la medida de la circunferencia que quedó del la botella y el foami, corto su base cuadra y la tira para hacer el círculo, agregamos encaje y el año de su promoción. En la parte de arriba decoro con una mariposa, flores y un colgante. En la parte de adelante pegamos una linda muñequita graduada..
Step 04
I take the idea of the cap and I am going to make one smaller to the measurement of the circumference that was left from the bottle and the foam, I cut its square base and the strip to make the circle, we add lace and the year of his promotion. At the top I decorate with a butterfly, flowers and a pendant. On the front we glued a cute little graduated doll..
Resultado!
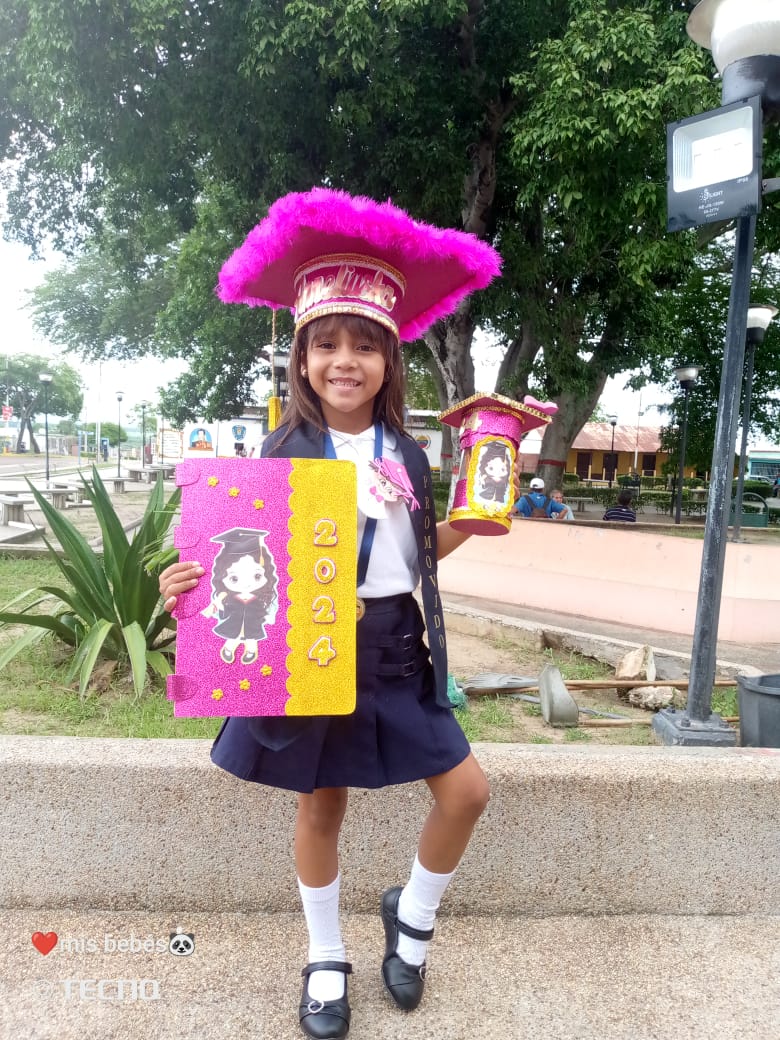
Aunque no pude fotografíar todo el proceso, espero les haya servido de ayuda cada paso de este tutorial y se animen a hacerlos para sus pequeñas.. Ahora con mucho amor y orgullo te muestro lo bonita que lucía está pequeña, lo tierna y feliz que encontraba.
Although I could not photograph the entire process, I hope that each step of this tutorial has been helpful to you and that you are encouraged to make them for your little ones. Now with a lot of love and pride I show you how beautiful Lucía is small, how tender and happy she was.
Me encuentro feliz de haber compartido con ustedes este espacio de creatividad, espero sea de su agrado..Dígame que les pareció, puesto pronto volveré con más ideas.
I am happy to have shared this space of creativity with you, I hope you like it...Tell me what you think, I will return soon with more ideas.