
🍀
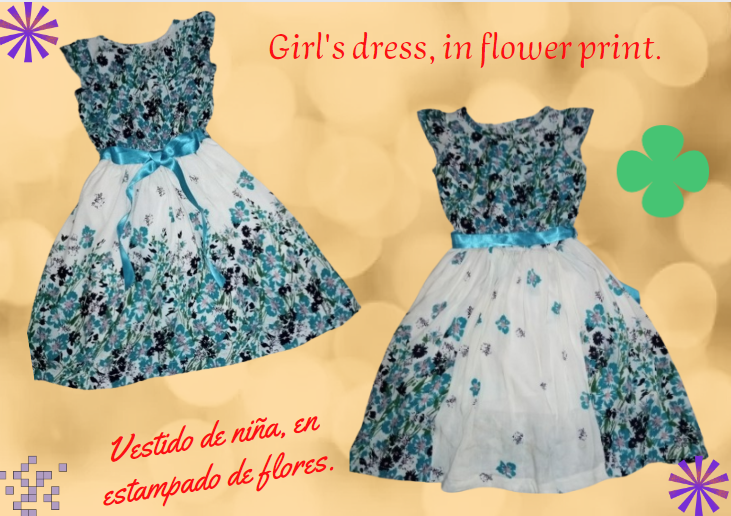
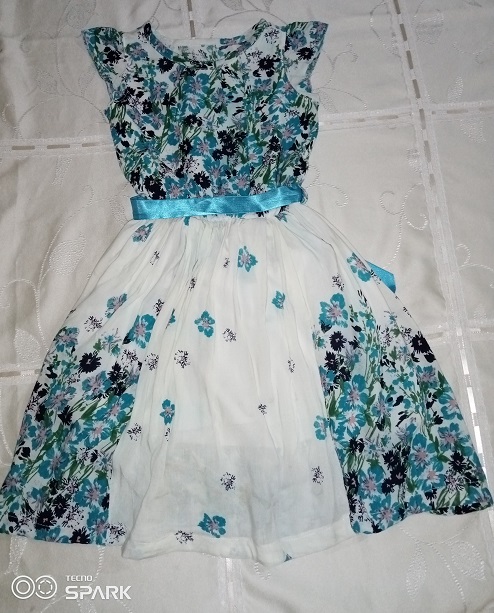
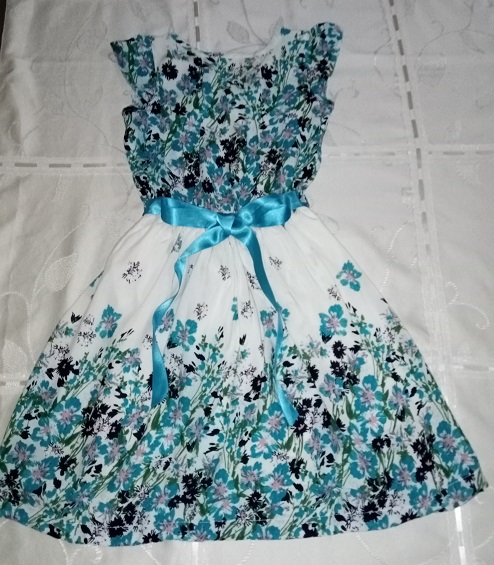
Happy day dear community hoping you are very well in this day. In this new week, with many blessings to all. I want to share with you the process of making a dress for girls size 8, which is a very soft cotton fabric, or almost lightning fabric, because it is very thin, but has a beautiful flower print, also some stripes, which I obviated because I only wanted the flowers.
I had already bought the fabric a few weeks ago, to go to my niece's birthday, so then I started to make it, without much detail because of its print I made it simple.
This dress for my daughter, although at first she liked the fabric, then she told me that she was not sure after buying it, but I still made it and she loves the dress, those skirts that have a lot of movement when walking, and then everything was very nice.
The process was fast for the design, which is nothing more than her blouse with flounced sleeves, leaving an opening in the back with buttons, or it could also be a zipper, and for the skirt it is all ruffled at the waist.
This model is common in many, what will make it different is the print of the fabric, this was the only color that was in the store, of this design, and I liked it very much, so I show you how I made each of its parts for its elaboration.
Feliz día querida comunidad esperando se encuentren muy bien en este día. En esta nueva semana, con muchas bendiciones para todos. Quiero compartir con ustedes el proceso de elaboración de un vestido para niñas talla 8, el cual es una tela muy suave de algodón, o casi tela de rayón, porque es muy finita, pero tiene un bello estampado de flores, también unas rayas, las cual las obvie porque sólo quería las flores.
Ya había comprado la tela hace unas semanas, para ir a cumpleaños de mi sobrina, así que luego fue que empecé hacerlo, sin mucho detalles ya que por su estampado lo hice sencillo.
Este vestido de mi hija aunque al principio si le gustó la tela , luego me dijo que no estaba segura después de haberla comprado, pero igual se lo hice y a ella le encanta los vestido, esas falda que tengan mucho movimiento al caminar, y luego todo le quedó muy lindo.
El proceso fue rápido por el diseño, el cual no es más que su blusa con mangas voladas, dejando abertura en la espalda con sus botones, o también pudiera ser un cierre, y para la falda es toda arruchada en la cintura.
Este modelo es común en muchos, lo que lo va hacer diferente es el estampado, de la tela, este era el único color que había en la tienda, de este diseño, y me gustó mucho, así que te enseño como hice cada una de sus partes para su elaboración.
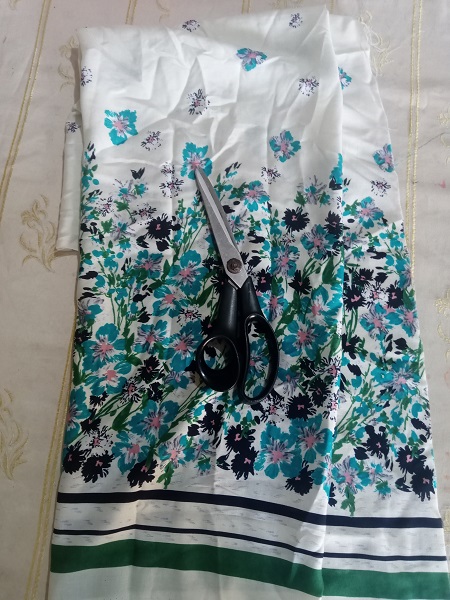
My materials:
Floral printed fabric 1 1.5 meter.
Elastic 1 cm wide.
Thread, needle, measuring tape, measuring pattern.
Sewing machine.
Mis materiales:
Tela estampada de flores 1 1,5 metro.
Elástica de 1cm de ancho.
Hilo, aguja, cinta métrica, patrón de medida.
Máquina de coser.
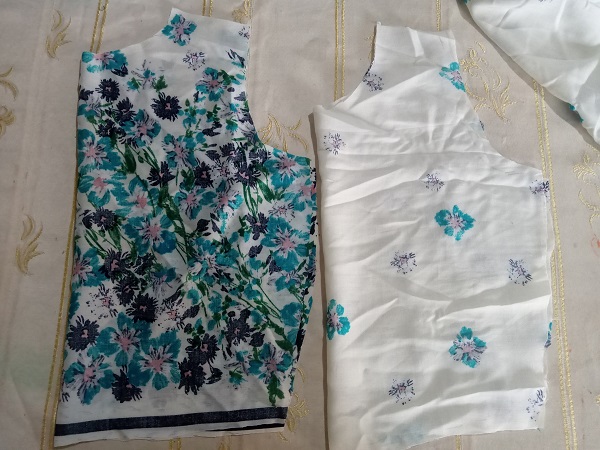
To begin the cutting process, I did it with the skirt by cutting a whole rectangle of cm wide and cm high.
The blouse was the front part with round neck, and the back part in two parts with the buttons.
With the skirt I made a straight seam to the machine but all loose to be able to pull the thread and so it is made up to the waist measurement. I also cut another lining fabric since this fabric is very light.
For the blouse I sew the shoulder part together with the lining fabric, then with the sleeve ruffles ready, I start sewing them at the armhole, and then close the sides of the blouse.
For the buttonholes and buttons, I sew and turn the whole blouse together with the lining fabric, so this part is neater.
Para empezar el proceso de cortar, lo hice con la falda cortando todo un rectángulo de cm de ancho y de alto cm.
La blusa fue la parte del frente con cuello redondo, y la parte trasera en dos partes la sus botones.
Con la falda le hice una costura recta a la máquina pero toda floja para poder arruchar o halar el hilo y así se va haciendo hasta la medida de la cintura. También corté otra tela de forro ya que esta tela es muy clarita.
Para la blusa uno y coso la parte de los hombros junto con la tela de forro, luego con los volados de las manga listos, los empiezo a coser en la sisa, para luego cerrar los costados de la blusa.
Para el borde de los ojales y botones cosí y volteo toda la blusa junto con la tela de forro así queda más prolija esta parte.

Once I have the blouse part ready, I proceed to place and join the skirt by adjusting it with the pins and then I sew straight and zig-zag seams.
I measure the width of the waist on the elastic and sew it.
Finally I make the hem, also the buttonholes and attach the buttons with the same sewing machine.
Al tener la parte de la blusa lista, procedo a colocar y a unir la falda ajustándola con los alfileres y luego le paso costura recta y zig-zag.
Mido bien el ancho de la cintura en la elástica y se la voy cosiendo.
Por último le hago su ruedo, también los ojales y le pego sus botones con la misma máquina de coser.
Once the dress was ready, I placed a turquoise satin ribbon at the waist that will make a bow when she wears it.
Al tener el vestido listo le coloqué una cinta de raso en color turquesa en la parte de la cintura que se hará un lazo cuando se lo ponga.
Thank you very much for your time and visit, until the next presentation of a new garment, keep having a great time, bye! 😍
Muchas gracias por tu tiempo y visita, hasta la próxima presentación, de una nueva prenda de vestir, sigue pasandola muy bien, chau! 😍
🌼