
ENGLISH🇺🇲
💚WELCOME TO A NEW POST💚
Hello friends of @hivediy! This is my first time posting in this beautiful community.
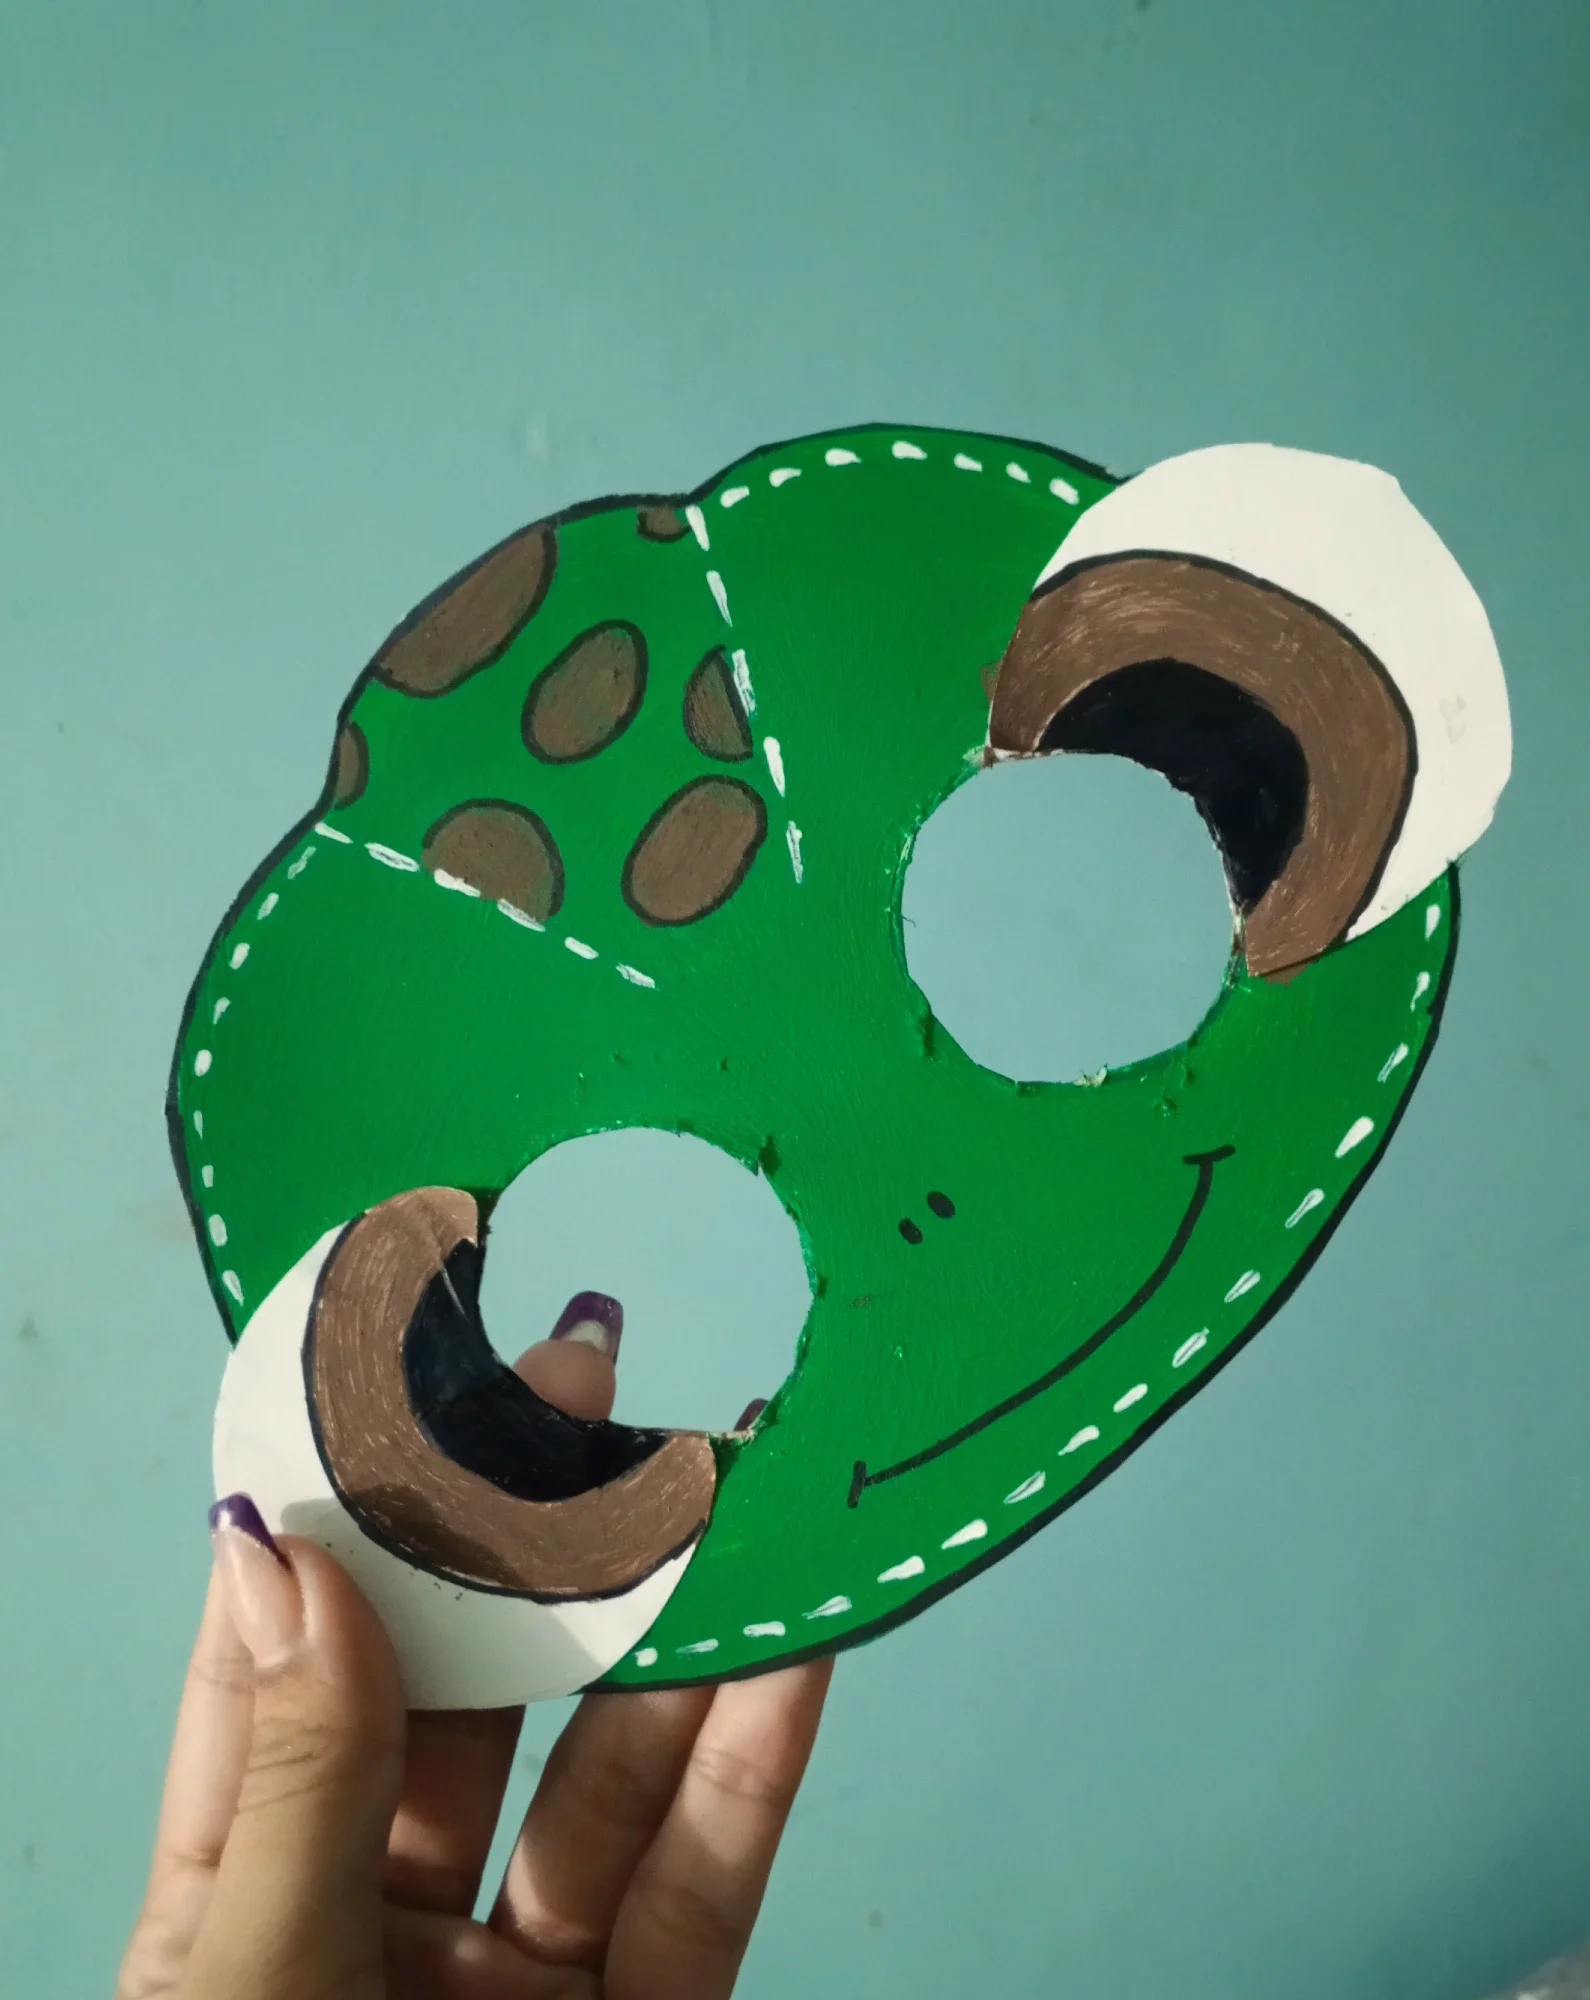
On this occasion I bring a turtle mask made with recyclable materials.
For the closing of the project, my daughter was asked to make a turtle costume, since her project is about sea animals. So I quickly thought about how to do it, and I just remembered that I had some cardboard and boxes saved "because I knew I was going to need it at any moment" and that's how it was!
Unfortunately I didn't take photos of the turtle's process since I did it in my free time after getting home, so I did everything as quickly as possible.
🖌️MATERIALS TO USE🖌️
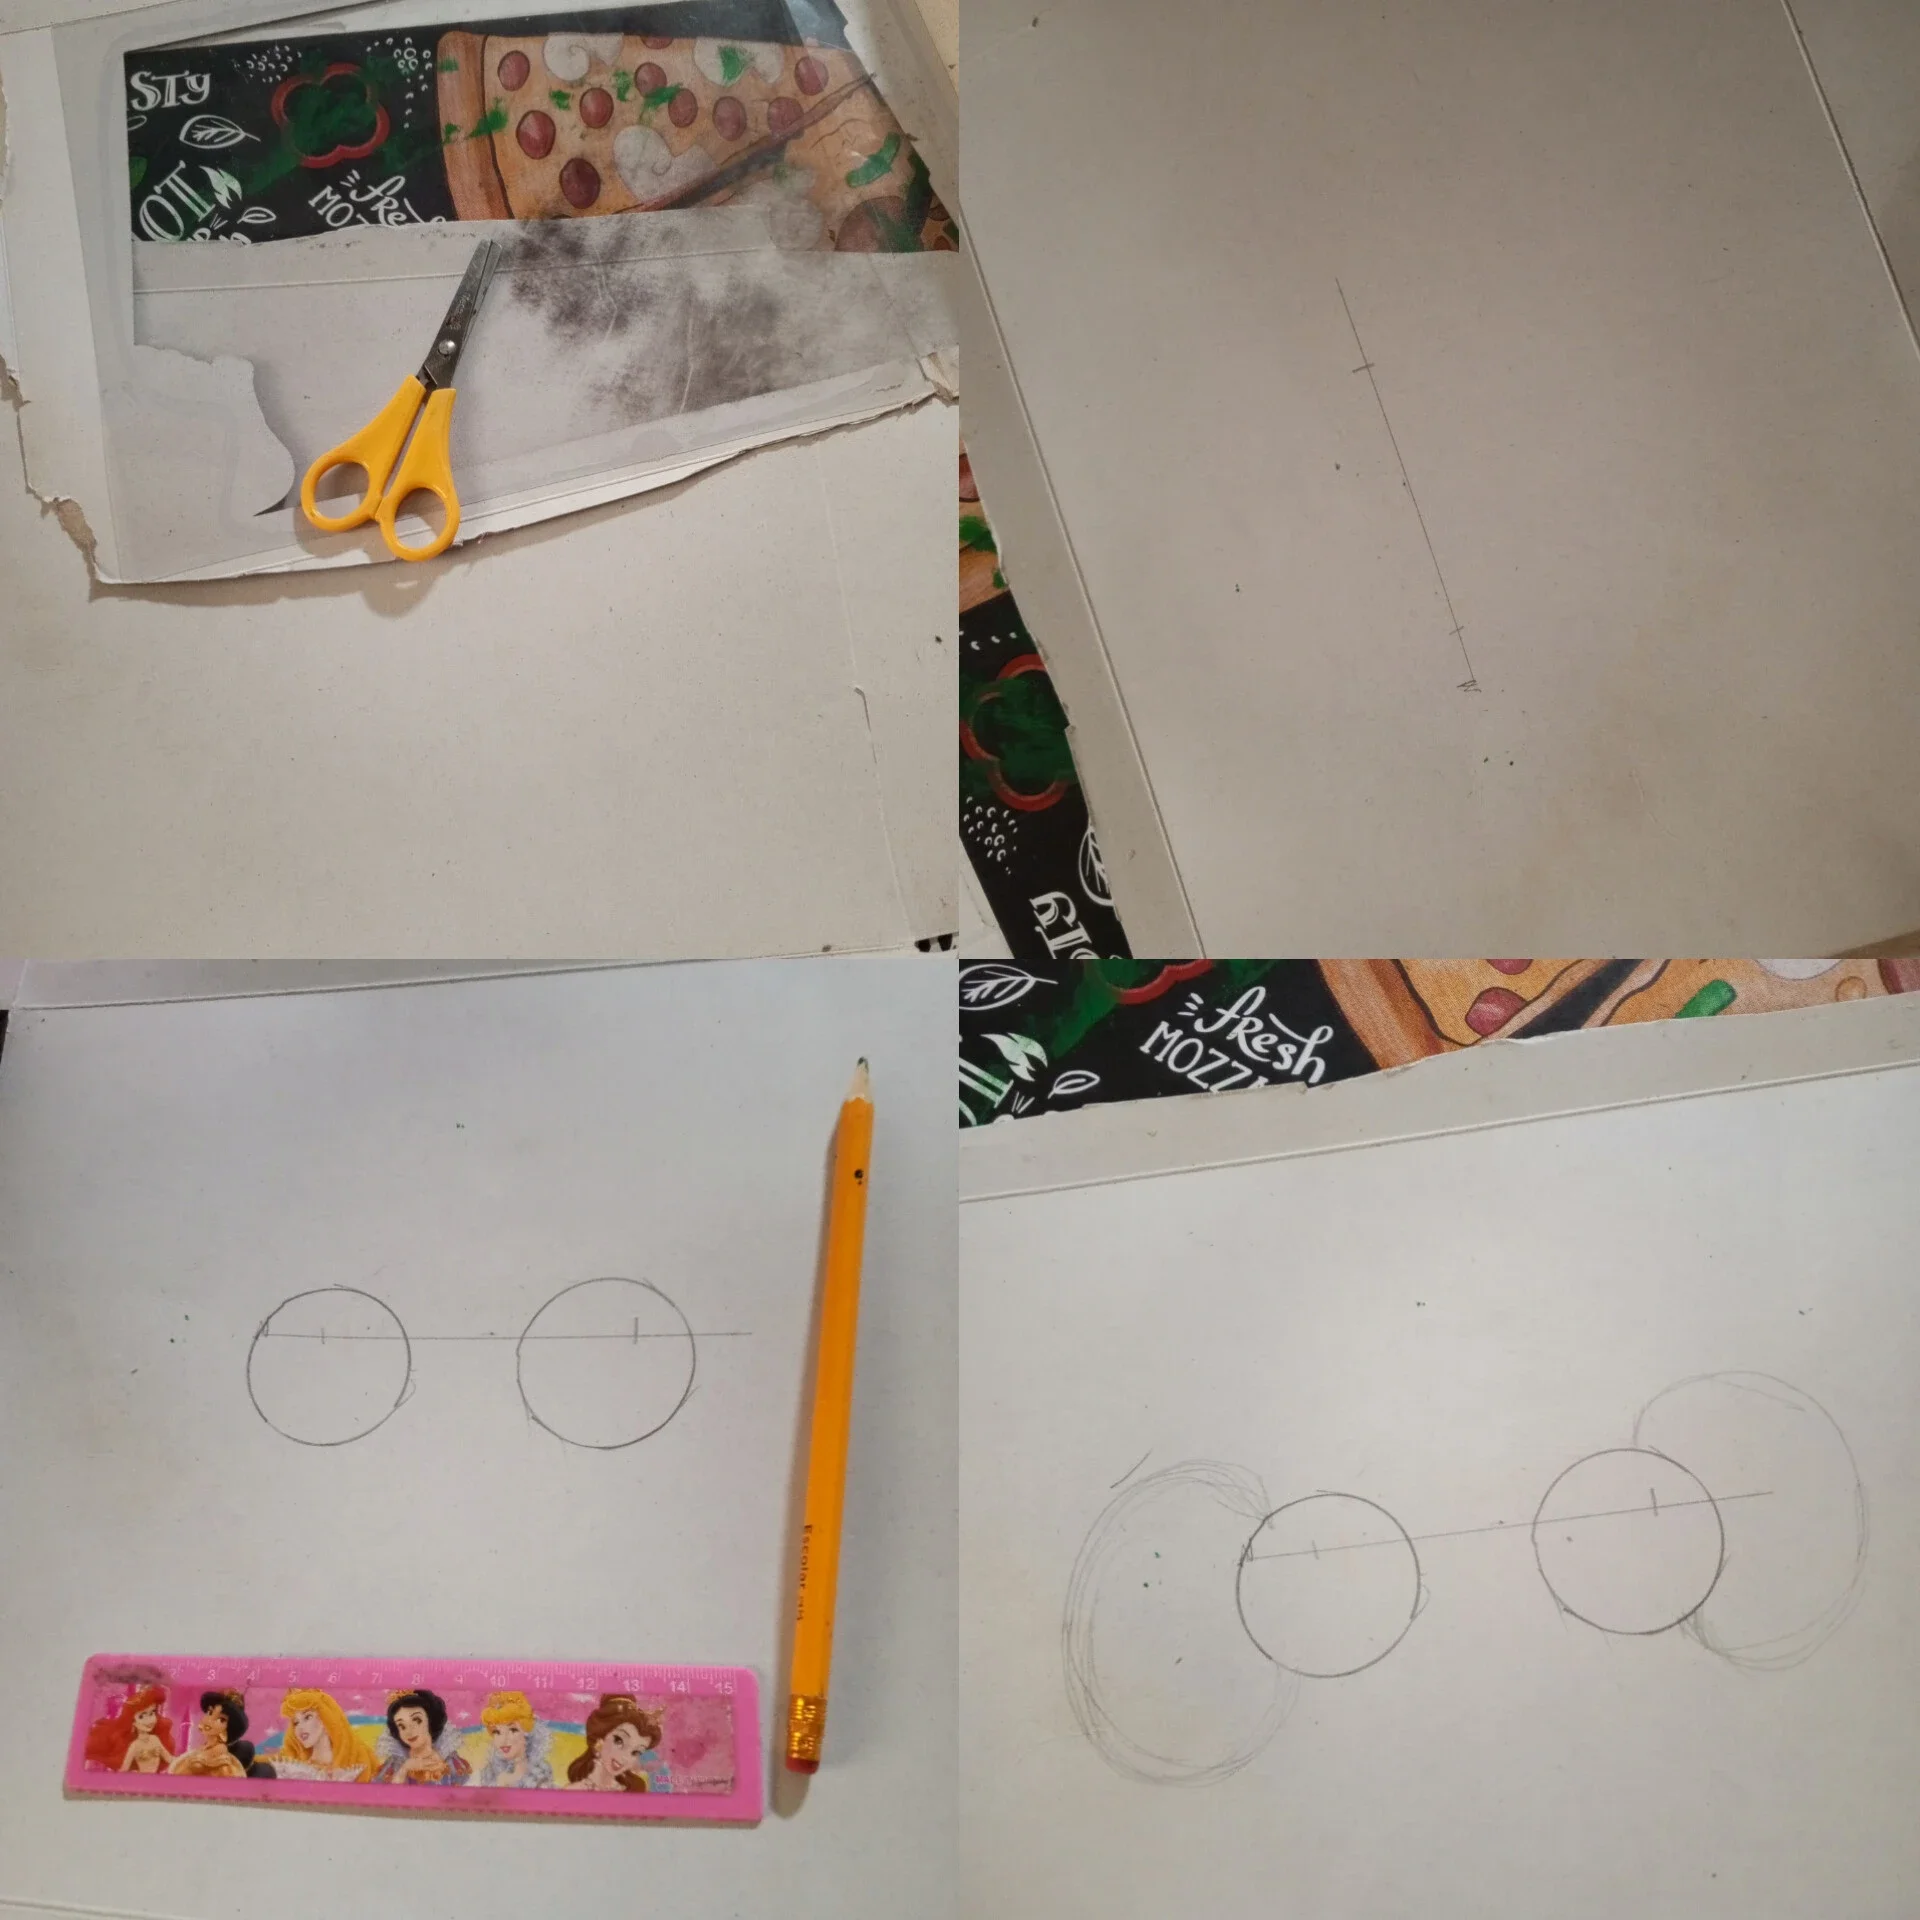
• Scissors.
• Cardboard.
• Brushes.
• Job.
• Pencil.
• Rules.
• Cold paints.
• Recycling sheets.
• Markers
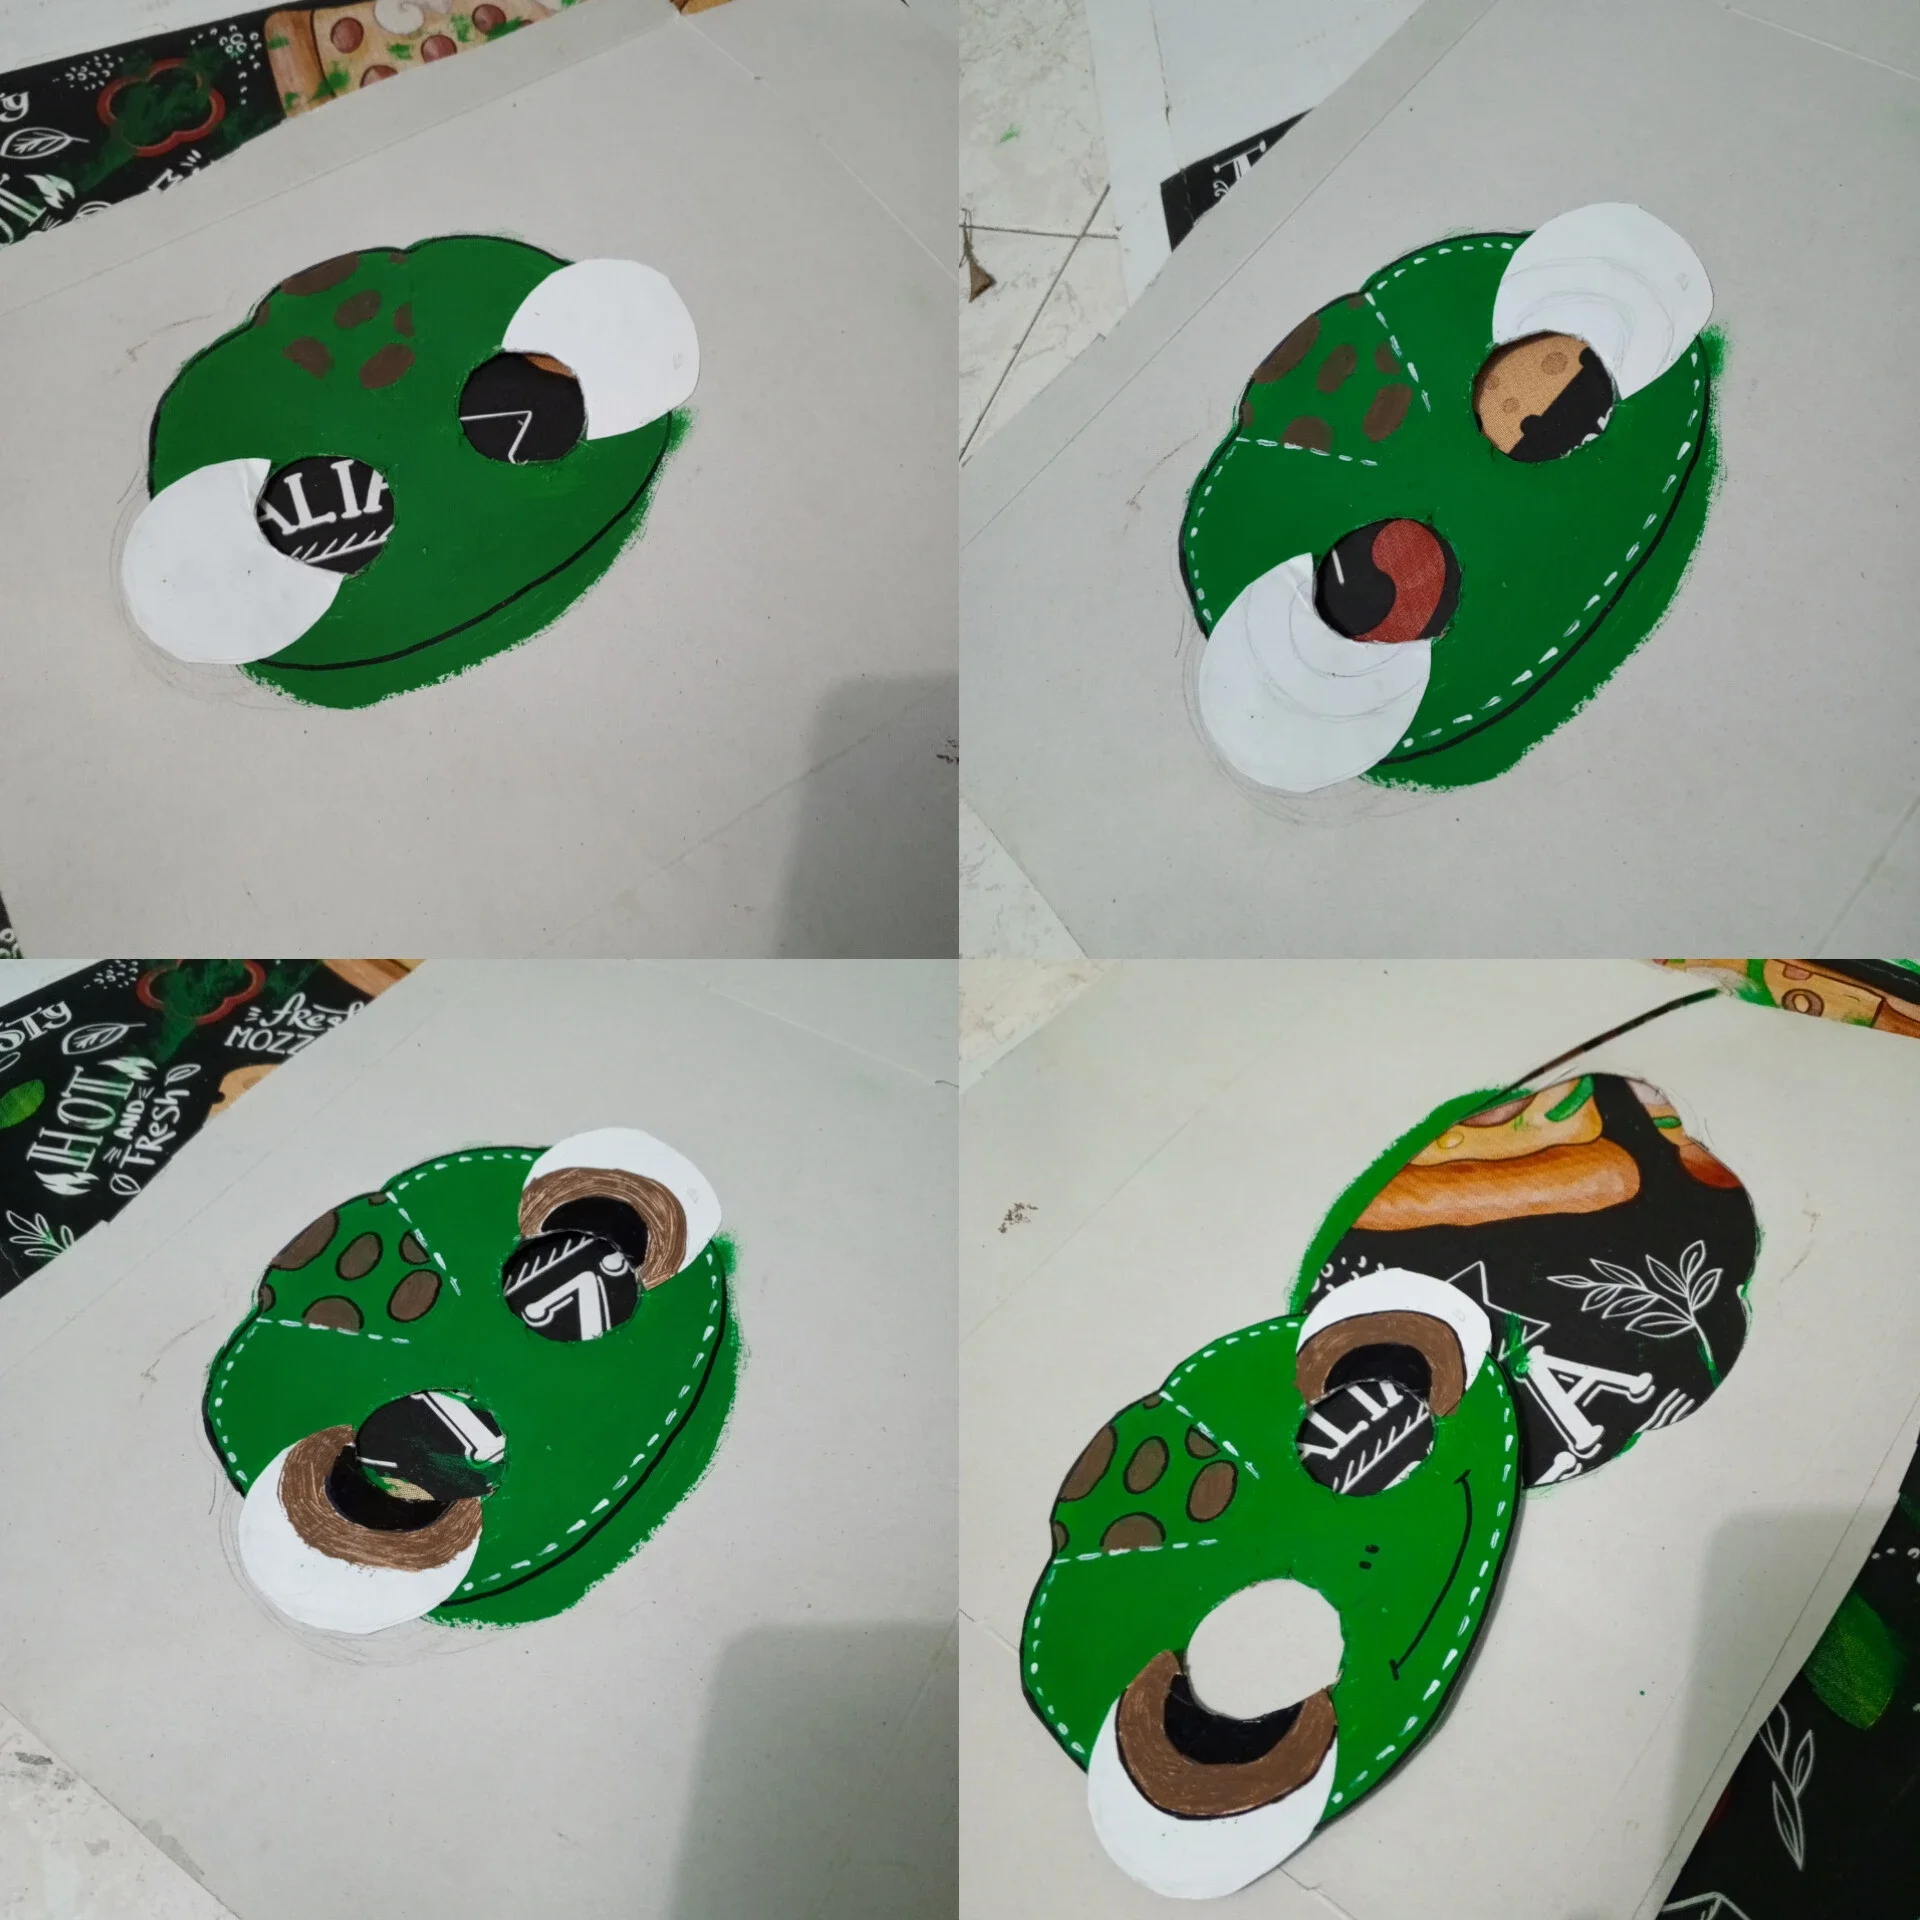
🎨PROCEDURE🎨
Step 1: I started by marking a 12 cm line and dividing with 8 cm to create the distance between each eye.
Step 2: with the base of a paint, trace two circles where the eyes would go and trace the eyes that would come out.
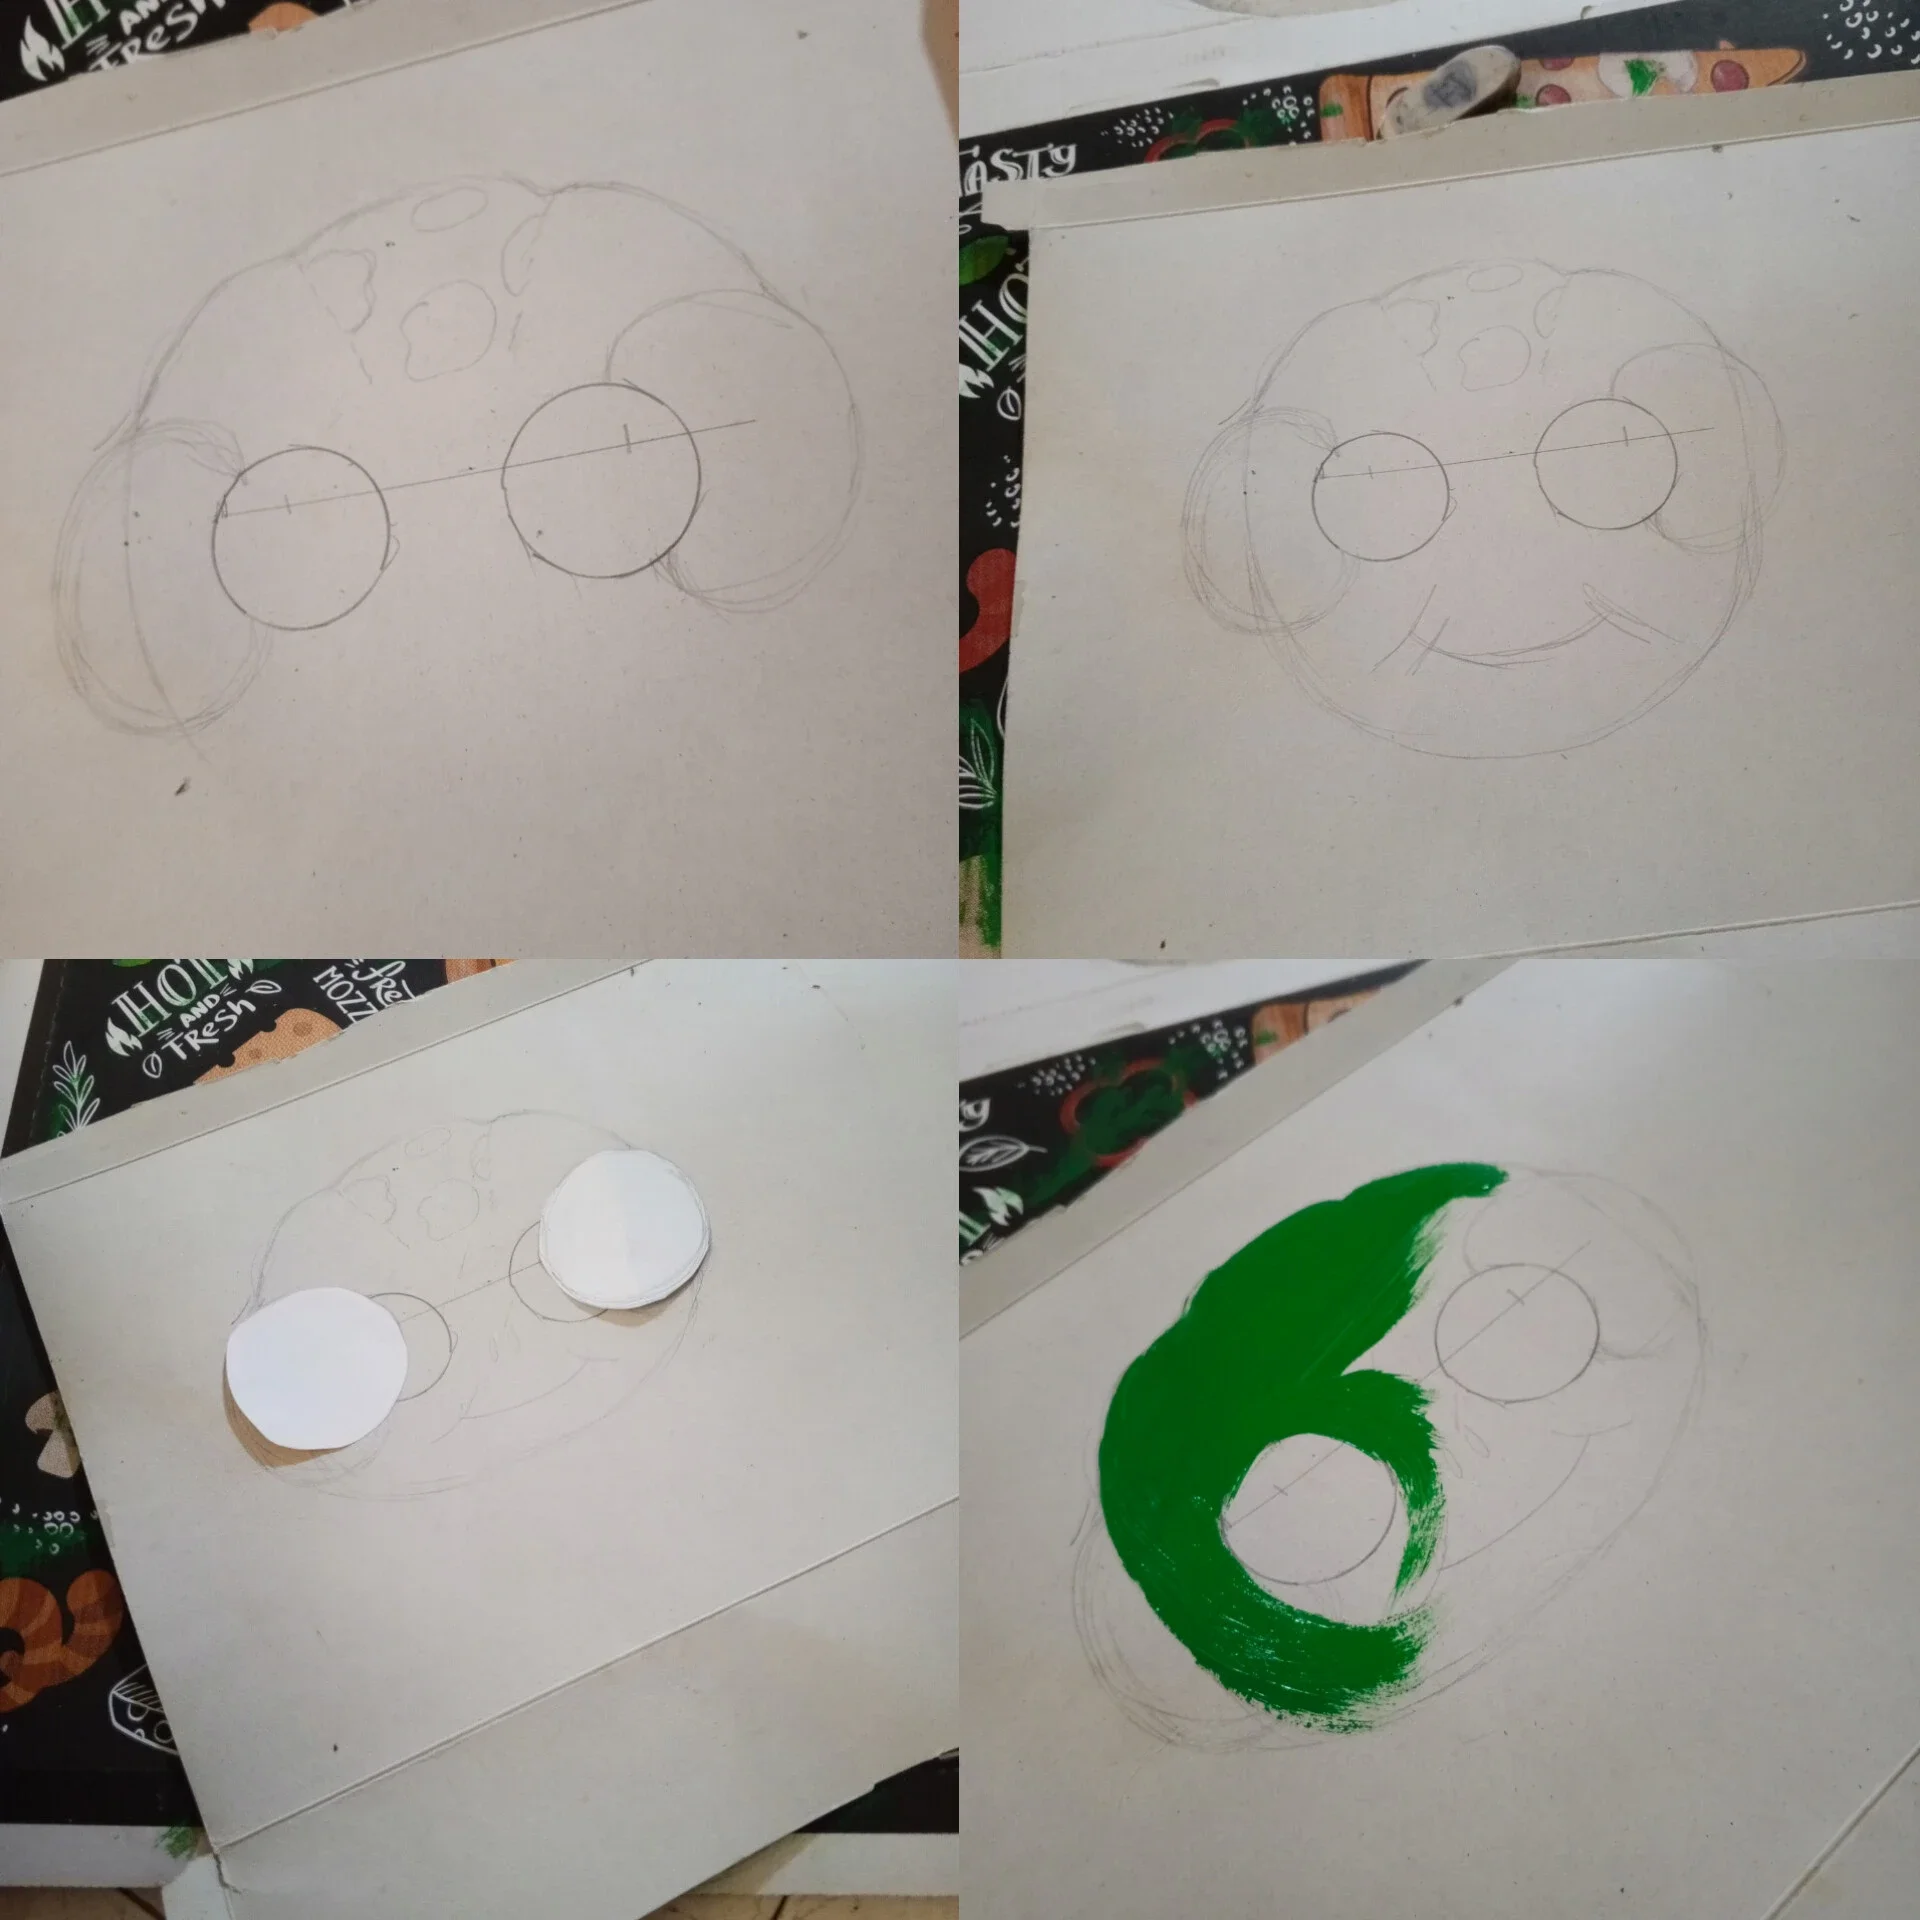
Step 3: with a pencil I started the sketch of the head, where the little spots that the turtles have on top and the smile that can't go would go.
Step 4: From a recycling sheet, take out two circles that would be the protruding eyes.
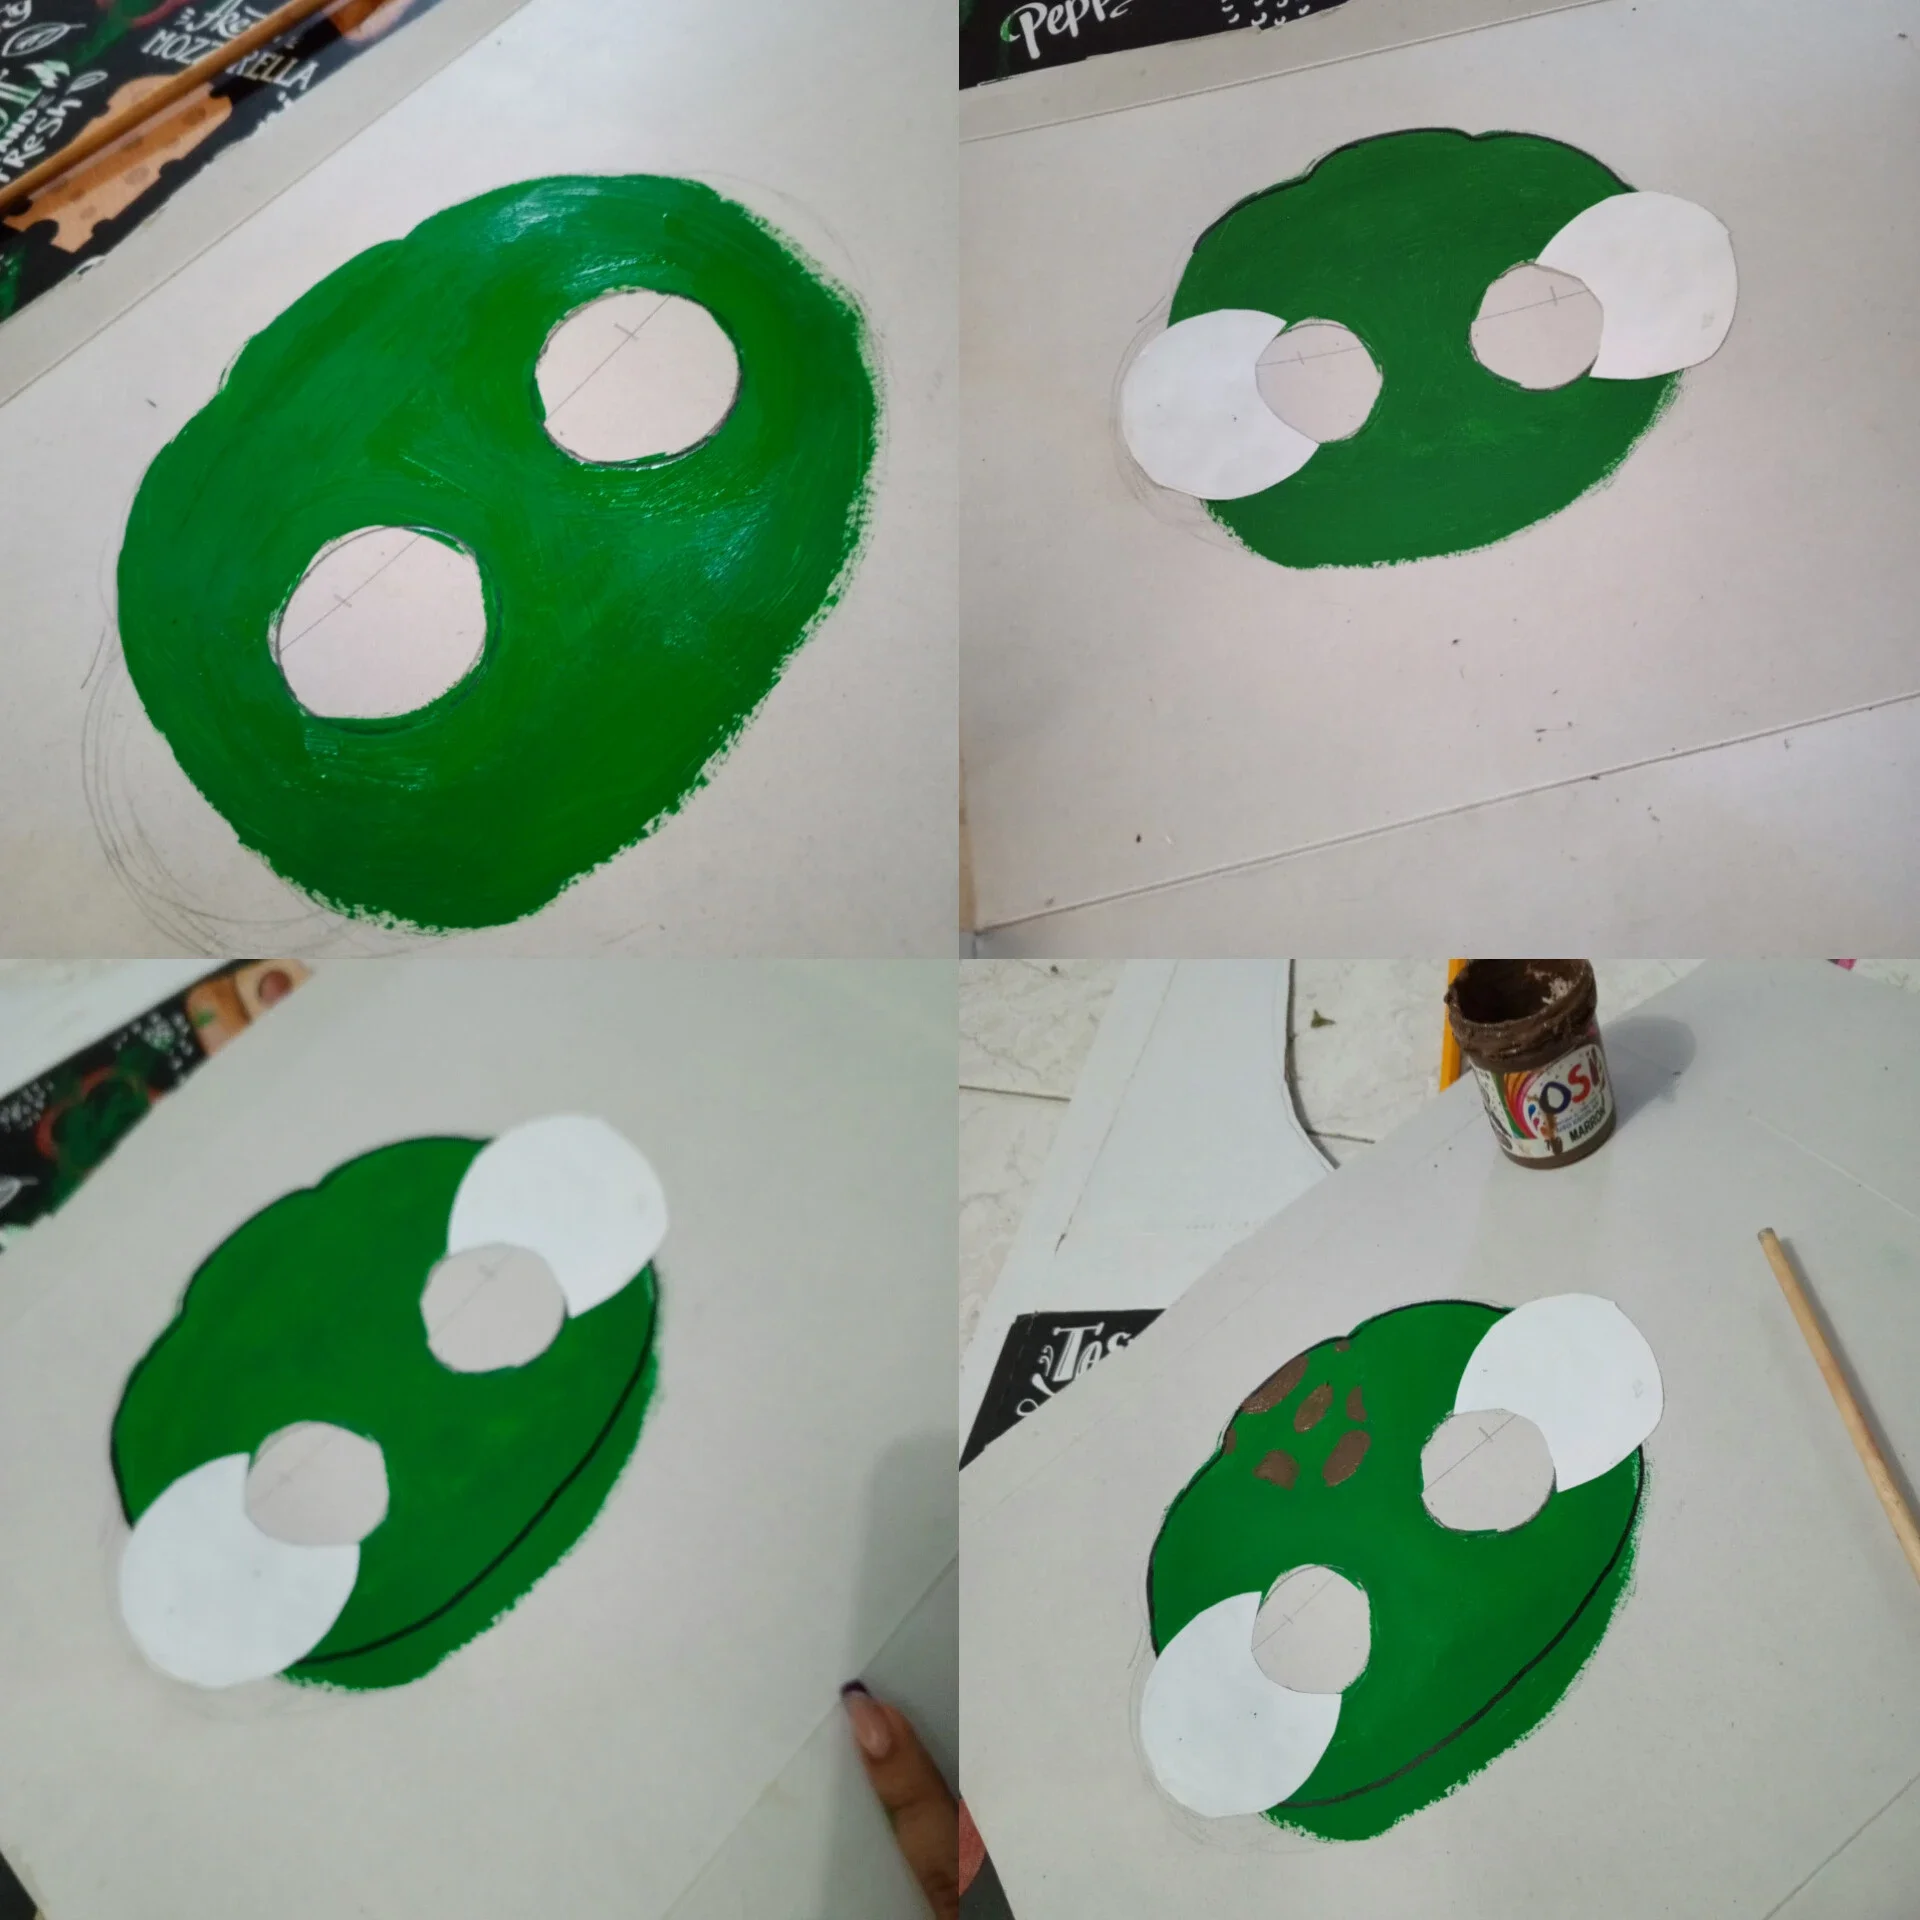
Step 5: I started to paint the entire sketch green (I realized that I had left out a lot but it didn't matter)
Step 6: Cut out the eyes from step 5 with a crescent to glue on.
Step 7: with a black marker trace the entire contour (as I had done before to get the shape)
Step 8: Paint the spots on the head brown.
Step 9: with a pencil and white paints I made small lines outlining the entire mask to give it a nice touch.
Step 10: Finally, I arranged the details with marker, I colored the eyes and cut to have it ready.
🎨END OF THE PROCESS🎨
I hope you liked it! I was inspired by a Pinterest PIN. Here I leave the link ()
My daughter was delighted, and it will be a very cute turtle!
Thank you for coming here and reading me💚
Photos edited with INSTSHOT.
Inspo: Pinterest PIN.
End banner made by Canva.
Corporate image made by @noctav.
ESPAÑOL
💚BIENVENIDOS A UN NUEVO POST💚
Hola amigos de @hivediy! Está es mi primera vez publicando en esta linda comunidad.
En esta oportunidades traigo una máscara de tortuga realizada con materiales reciclables.
A mí hija por su cierre de proyecto le pidieron realizar un traje de tortuga, ya que su proyecto trata de los animales del mar. Así que rápidamente pensé en como hacerlo, y justo me acordé que yo tenía unos cartones y cajas guardadas "porque sabía que en cualquier momento lo iba a necesitar" y así fue!
Lamentable no le tomé fotos al proceso de la tortuga ya que lo hacía en mis ratos libres luego de llegar a casa, por lo que hacía todo lo más rápido posible.
🖌️MATERIALES A USAR🖌️
• Tijera.
• Cartón.
• Pinceles.
• Pega.
• Lápiz.
• Reglas.
• Pinturas al frío.
• Hojas de reciclaje.
• Marcadores.
🎨PROCEDIMIENTO🎨
Paso 1: inicié marcando una línea de 12 cm y dividiendo con 8 cm para crear la distancia entre cada ojo.
Paso 2: con la base de una pintura, trace dos círculos donde irían los ojos y trace los ojos que sobre saldrían.
Paso 3: con lápiz empecé el boceto de la cabeza, donde irían las manchitas que tienen las tortugas por arriba y la sonrisa que no puede.
Paso 4: De una hoja de reciclaje saque dos círculos que serían los ojos sobresalientes.
Paso 5: empecé a pintar de verde todo el boceto ( me di cuenta que me había salido mucho pero no importaba)
Paso 6: corte los ojos del paso 5 con una media luna para pegarla.
Paso 7: con un marcador negro trace todo el contorno(como me había pasado trace antes para sacarle la forma)
Paso 8: pinte las manchas de la cabeza de color marrón.
Paso 9: con un lápiz y pinturas blanca hice pequeñas líneas contorneando toda la máscara para darle un toque lindo.
Paso 10: por último acomode los detalles con marcador, le di color a los ojos y corte para tenerla ya lista.
🎨FIN DEL PROCESO🎨
Espero les haya gustado! Me inspire de un PIN de Pinterest. Aquí les dejo el link ( )
Mi hija quedó encantada, y será un tortuga muy linda!
Gracias por llegar hasta aquí y leerme💚
Fotos editadas con INSTSHOT.
Inspo: PIN de Pinterest.
Banner del final realizado por Canva.
Imagen corporativa realizada por @noctav.
For the best experience view this post on Liketu