🔸Sin más que añadir, a continuación los dejo con el paso a paso:
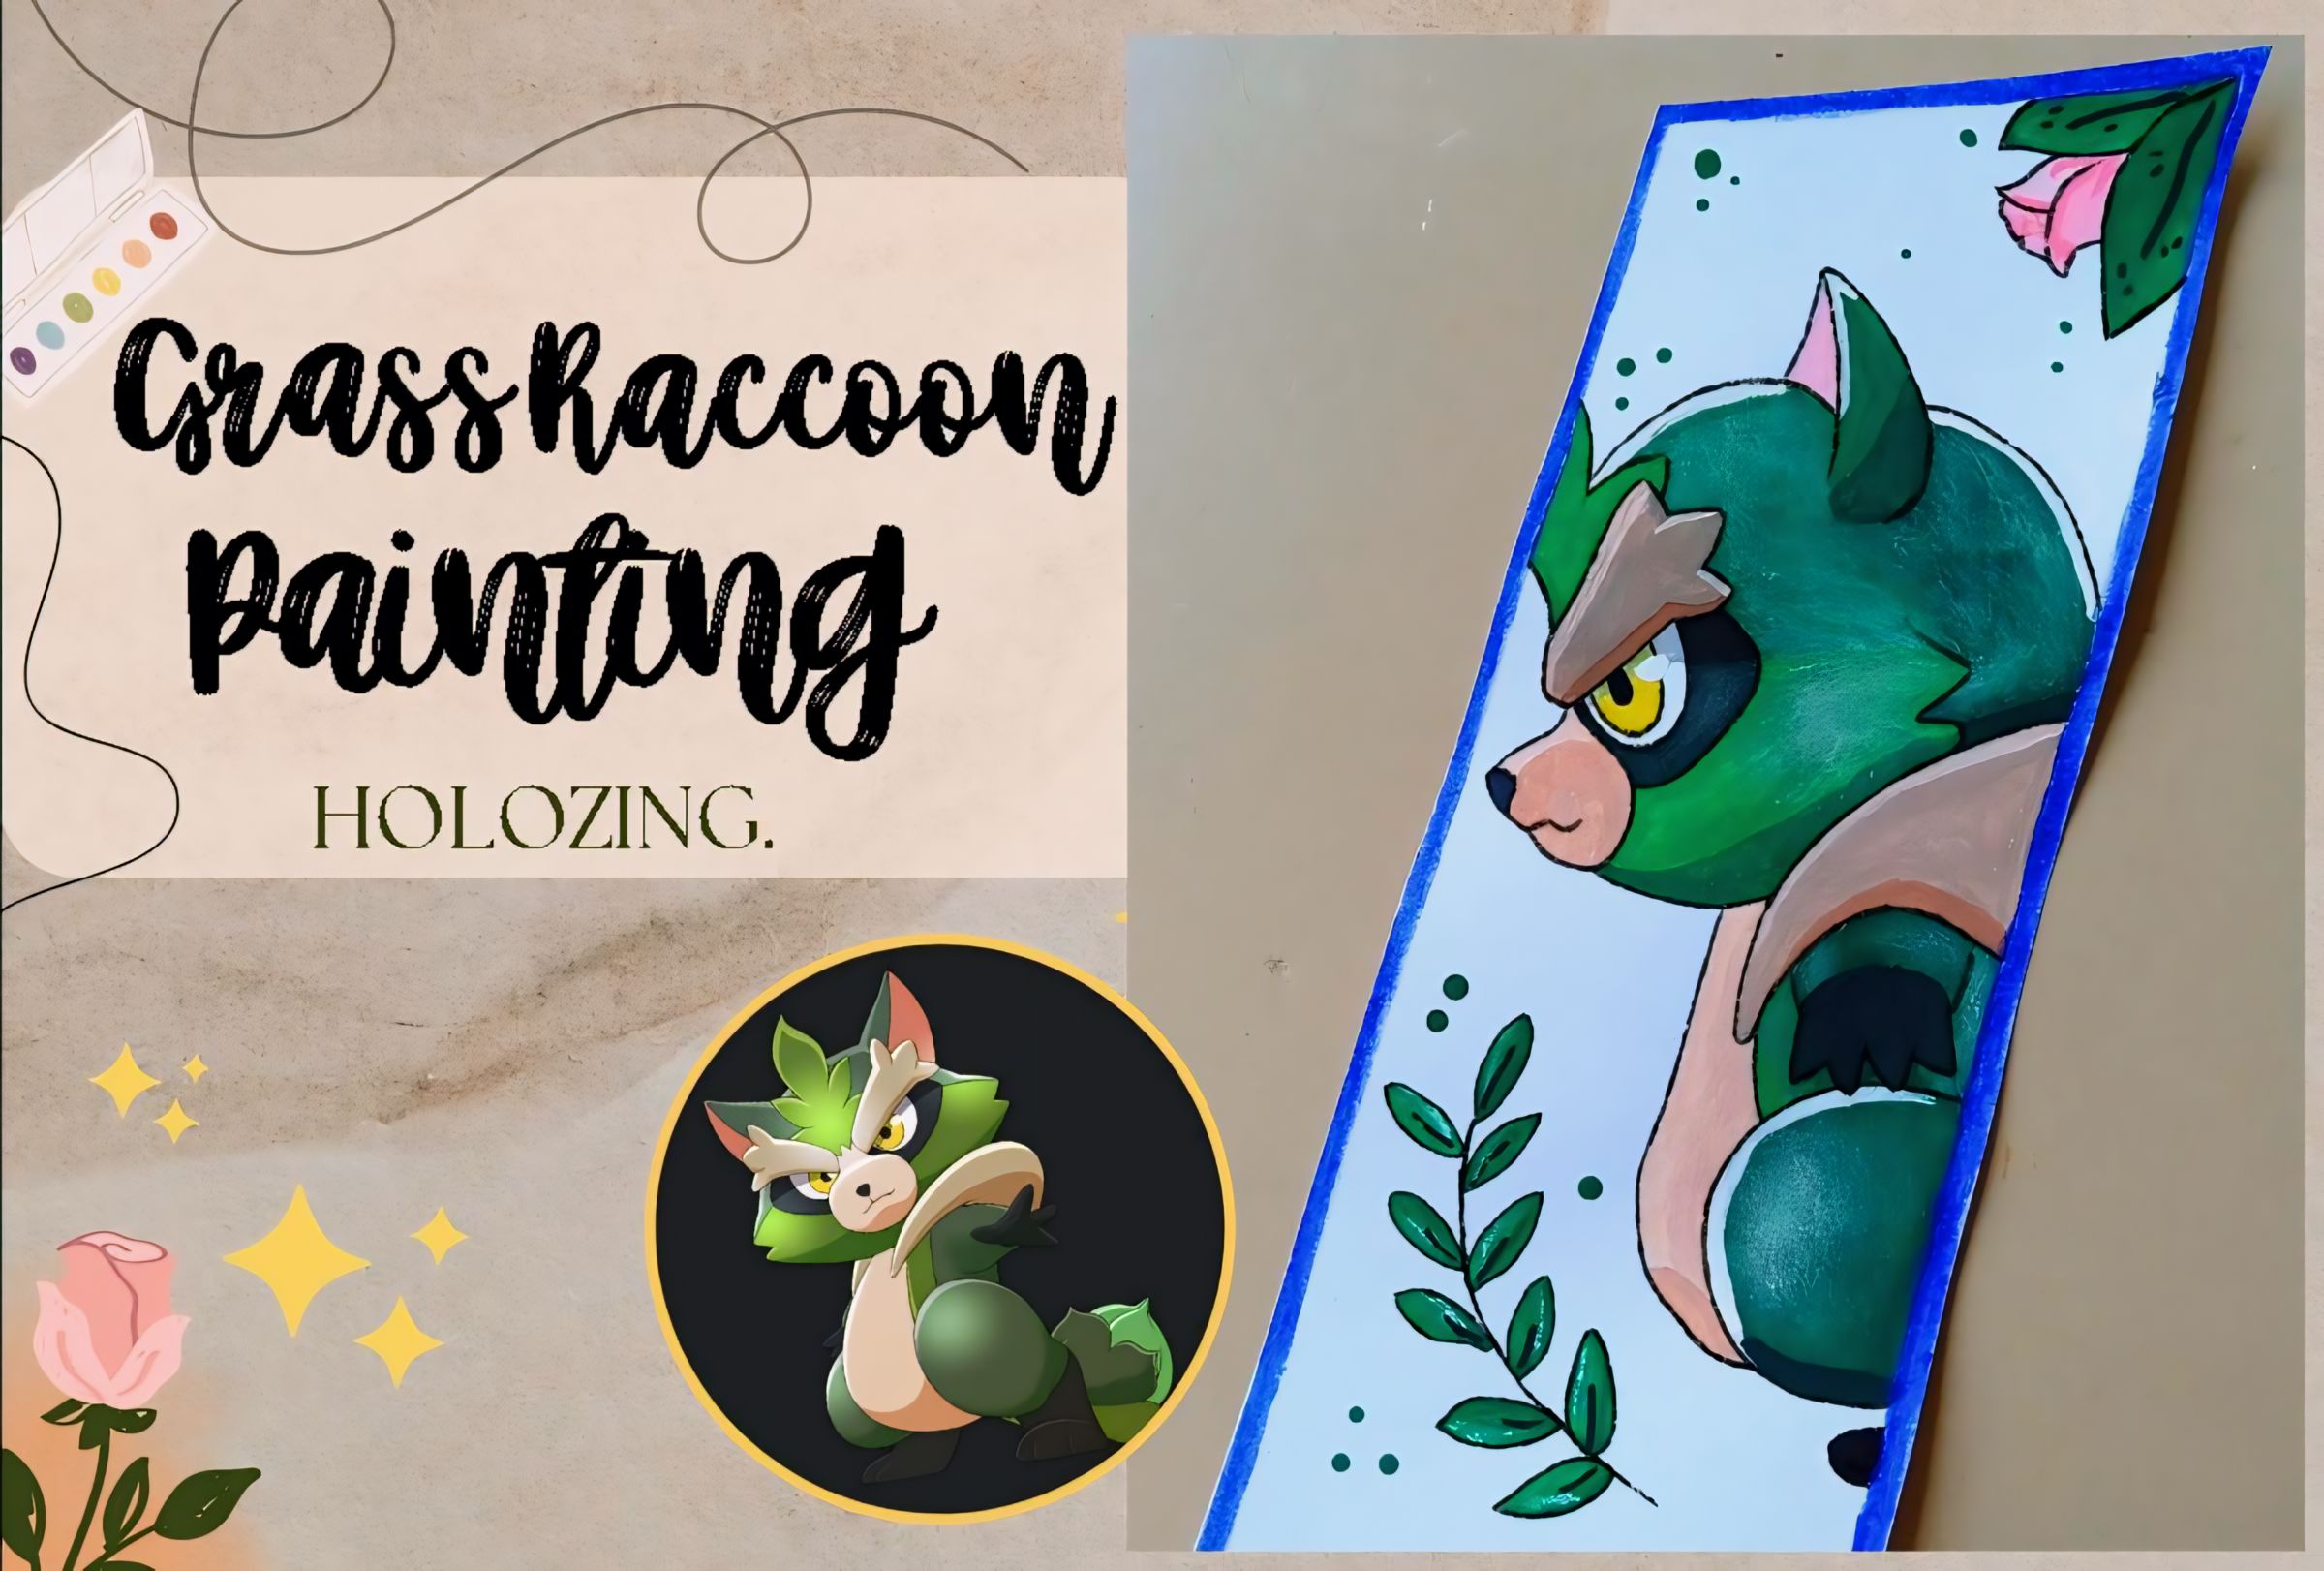
🍃Good afternoon, Holozing friends! I am happy to stop by here again to share with you a new painting, this time I decided to paint the Grass Raccoon. As I said in a previous post, little by little I am learning new techniques and someone who made me a little nervous about painting was just the Raccoon, since, although it looks simple because it has green colors, I still don't get along very well with the subject of blurring, but hey... Little by little you learn.
At the moment I continue to enjoy painting creatures and soon characters, but if it continues to get complicated, sometimes I will take the path of crafts to share beautiful creations here, expressed in another way.
🔸Without more to add, then I leave you with the step by step:
♥️ESPERO QUE TE GUSTE,
¡Empecemos!
♥️I HOPE YOU LIKE IT,
Let's start!

✂️ MATERIALES | ✂️ MATERIALS
- Opalina o cartulina blanca.
- Pinceles.
- Marcador negro.
- Pinturas.
- Lápiz.
- Opaline or white cardboard.
- Brushes.
- Black marker.
- Paintings.
- Pencil.
🍃 PROCEDIMIENTO | 🍃** PROCESS
- ✨ PASO 1:
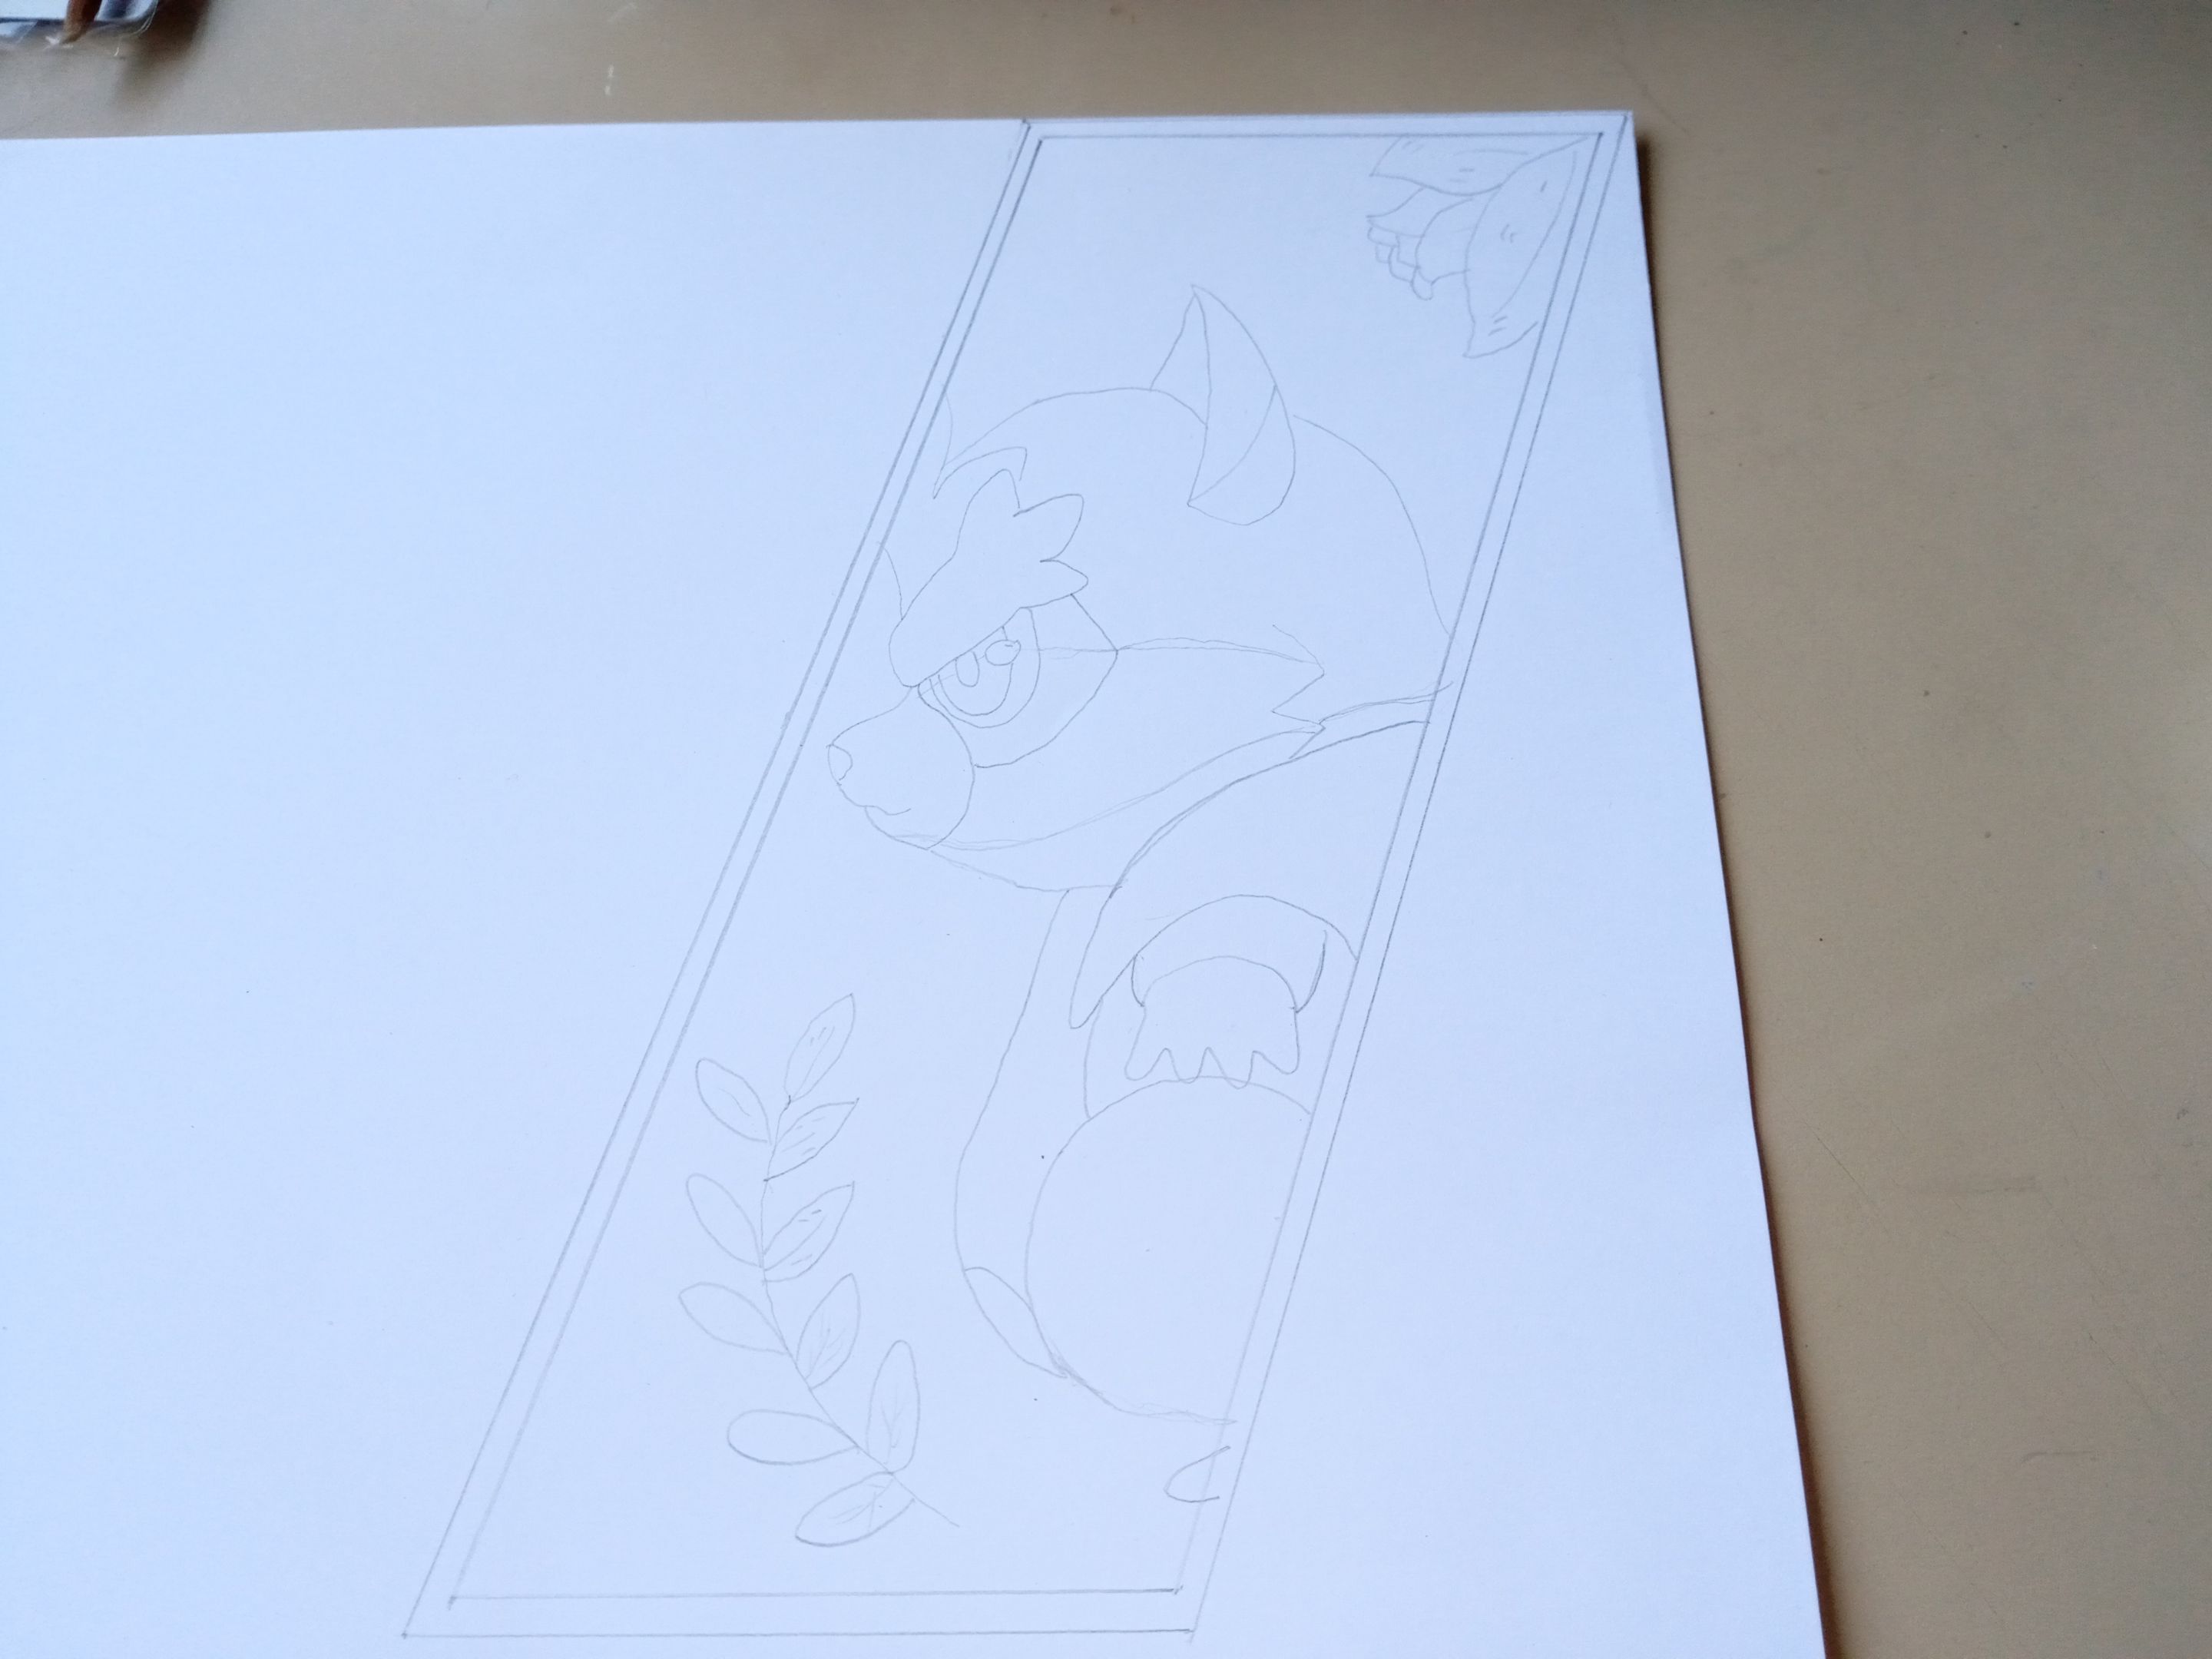
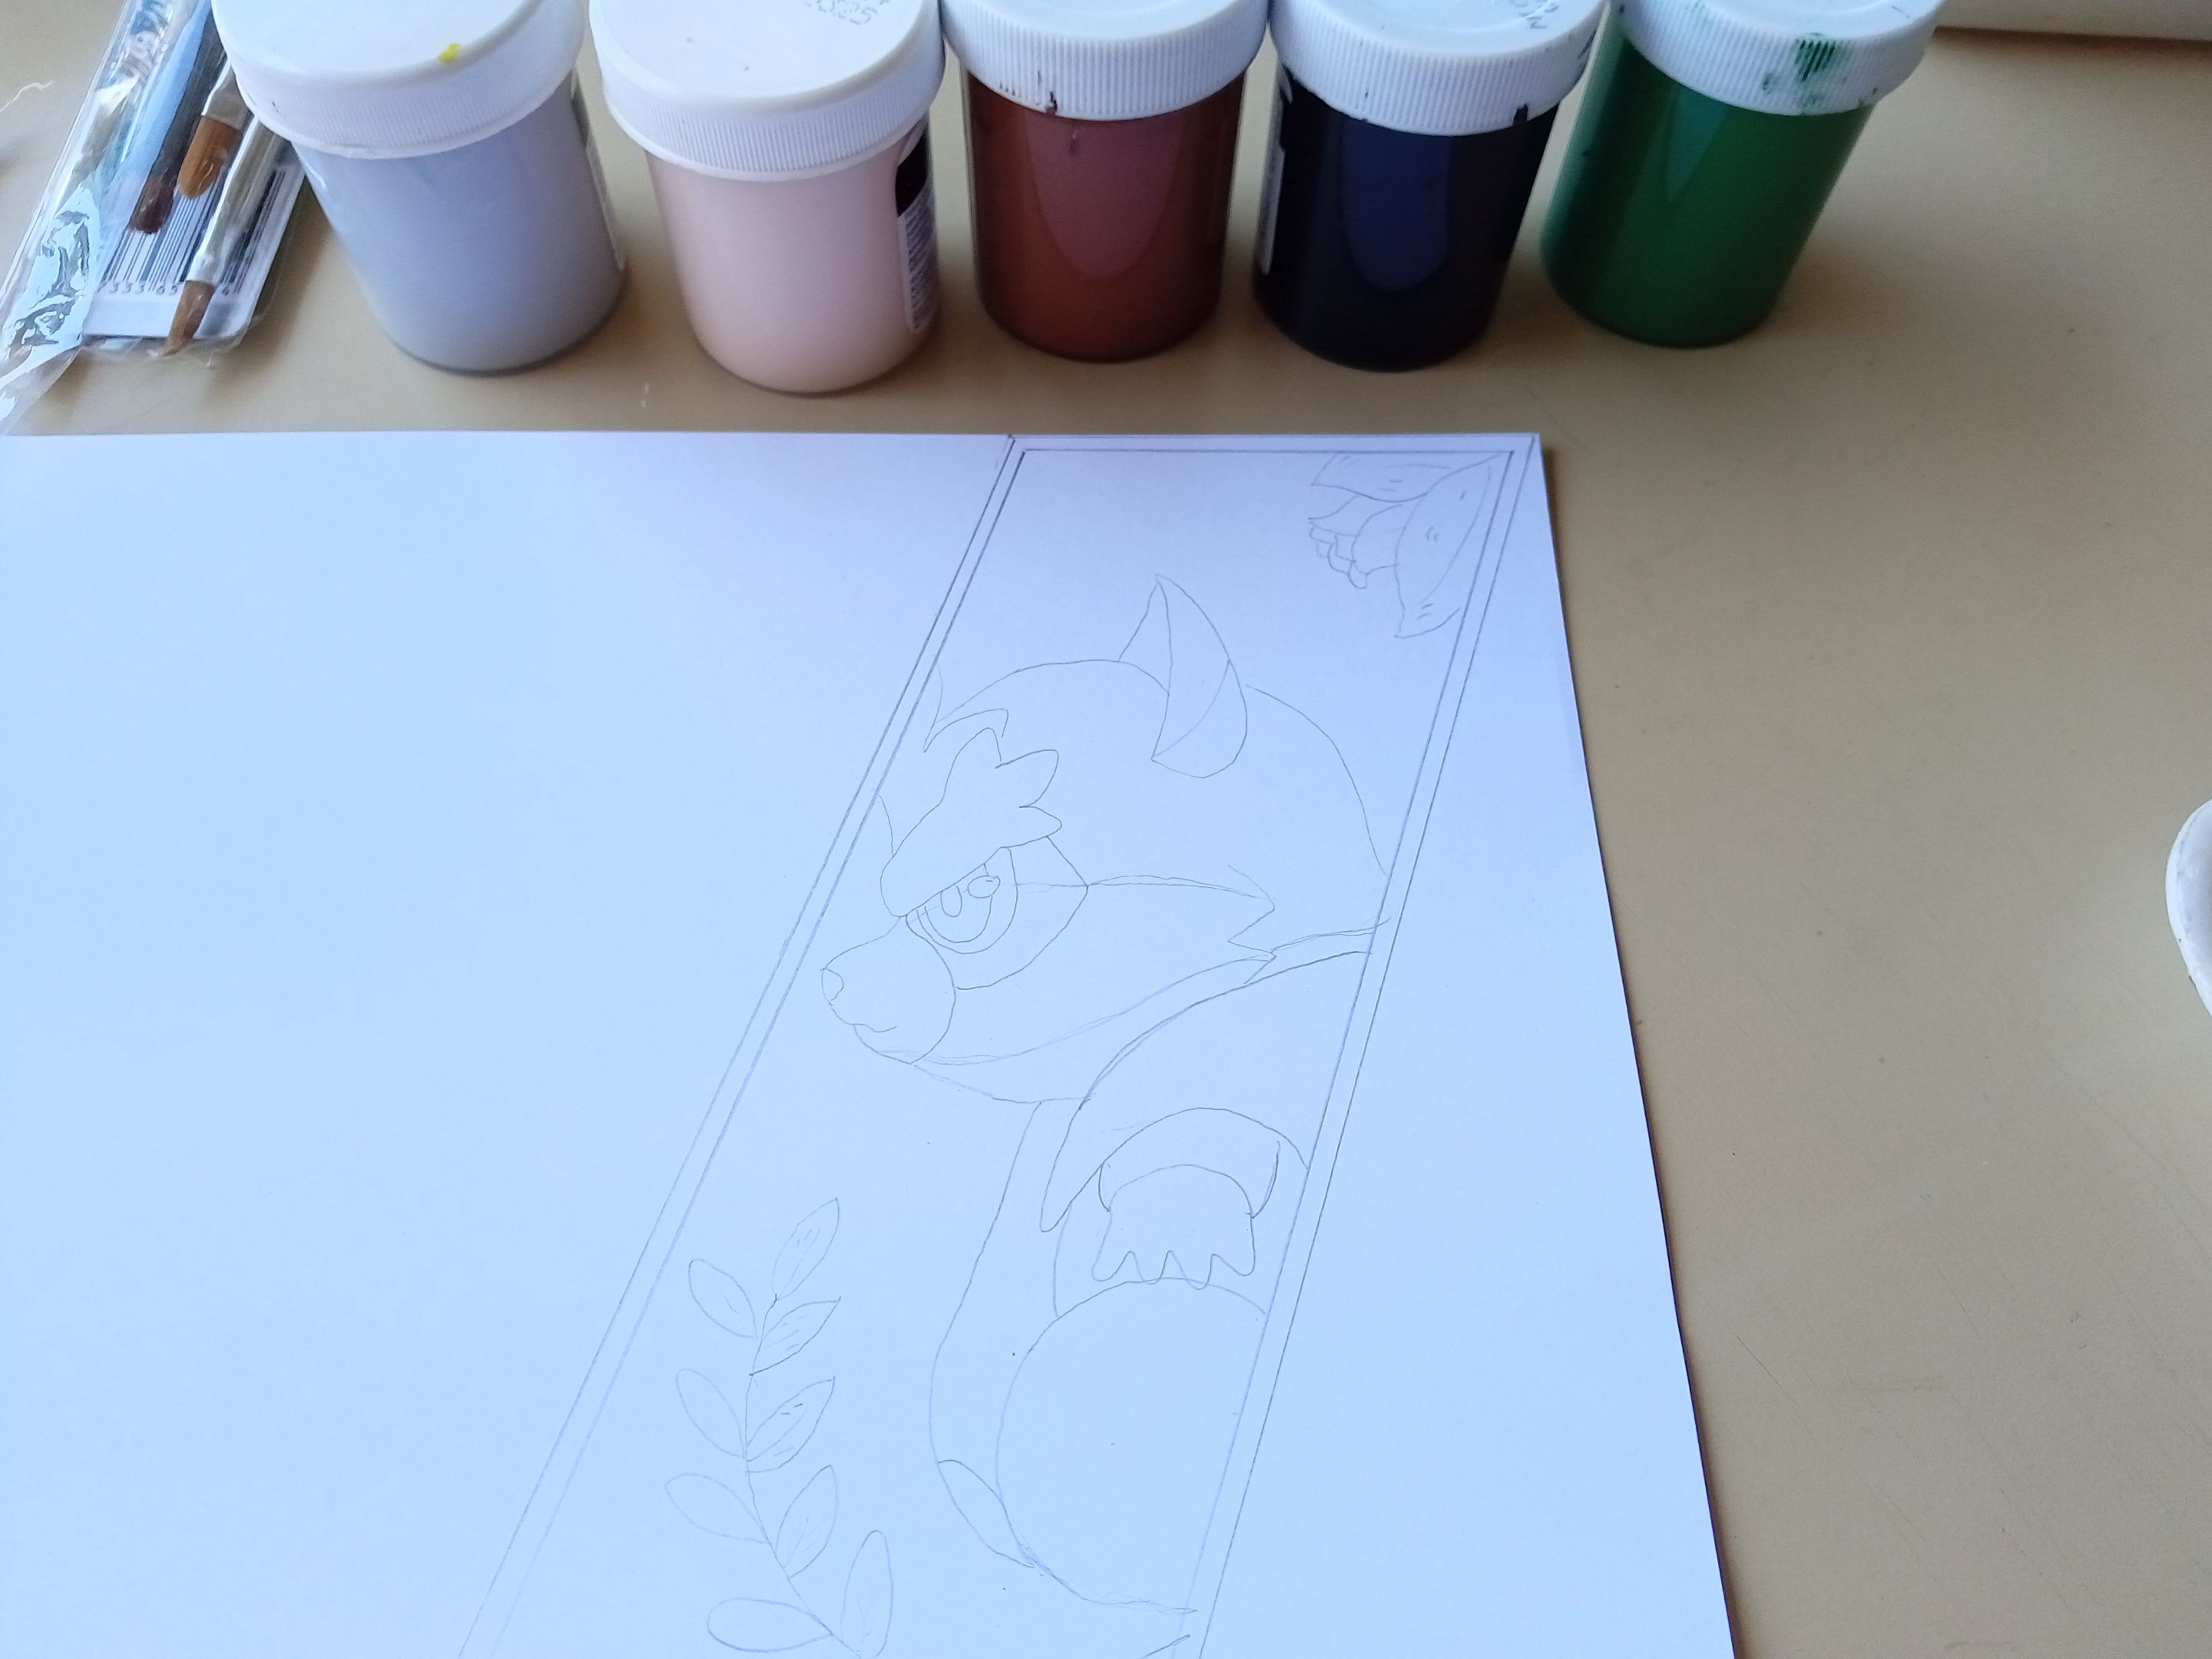
Como siempre, lo primero que hice fue el dibujo en la opalina, quise agregar detalles al fondo, en este caso unas cuantas hojas y una pequeña rosa en la parte superior. Una vez listo el boceto, seleccioné más o menos los colores de pintura que iba a estar utilizando, los pinceles y el agua para limpiar mis pinceles.
- ✨ STEP 1:
As always, the first thing I did was the drawing on the opaline, I wanted to add details to the background, in this case a few leaves and a small rose at the top. Once the sketch was ready, I more or less selected the paint colors I was going to be using, the brushes, and the water to clean my brushes.
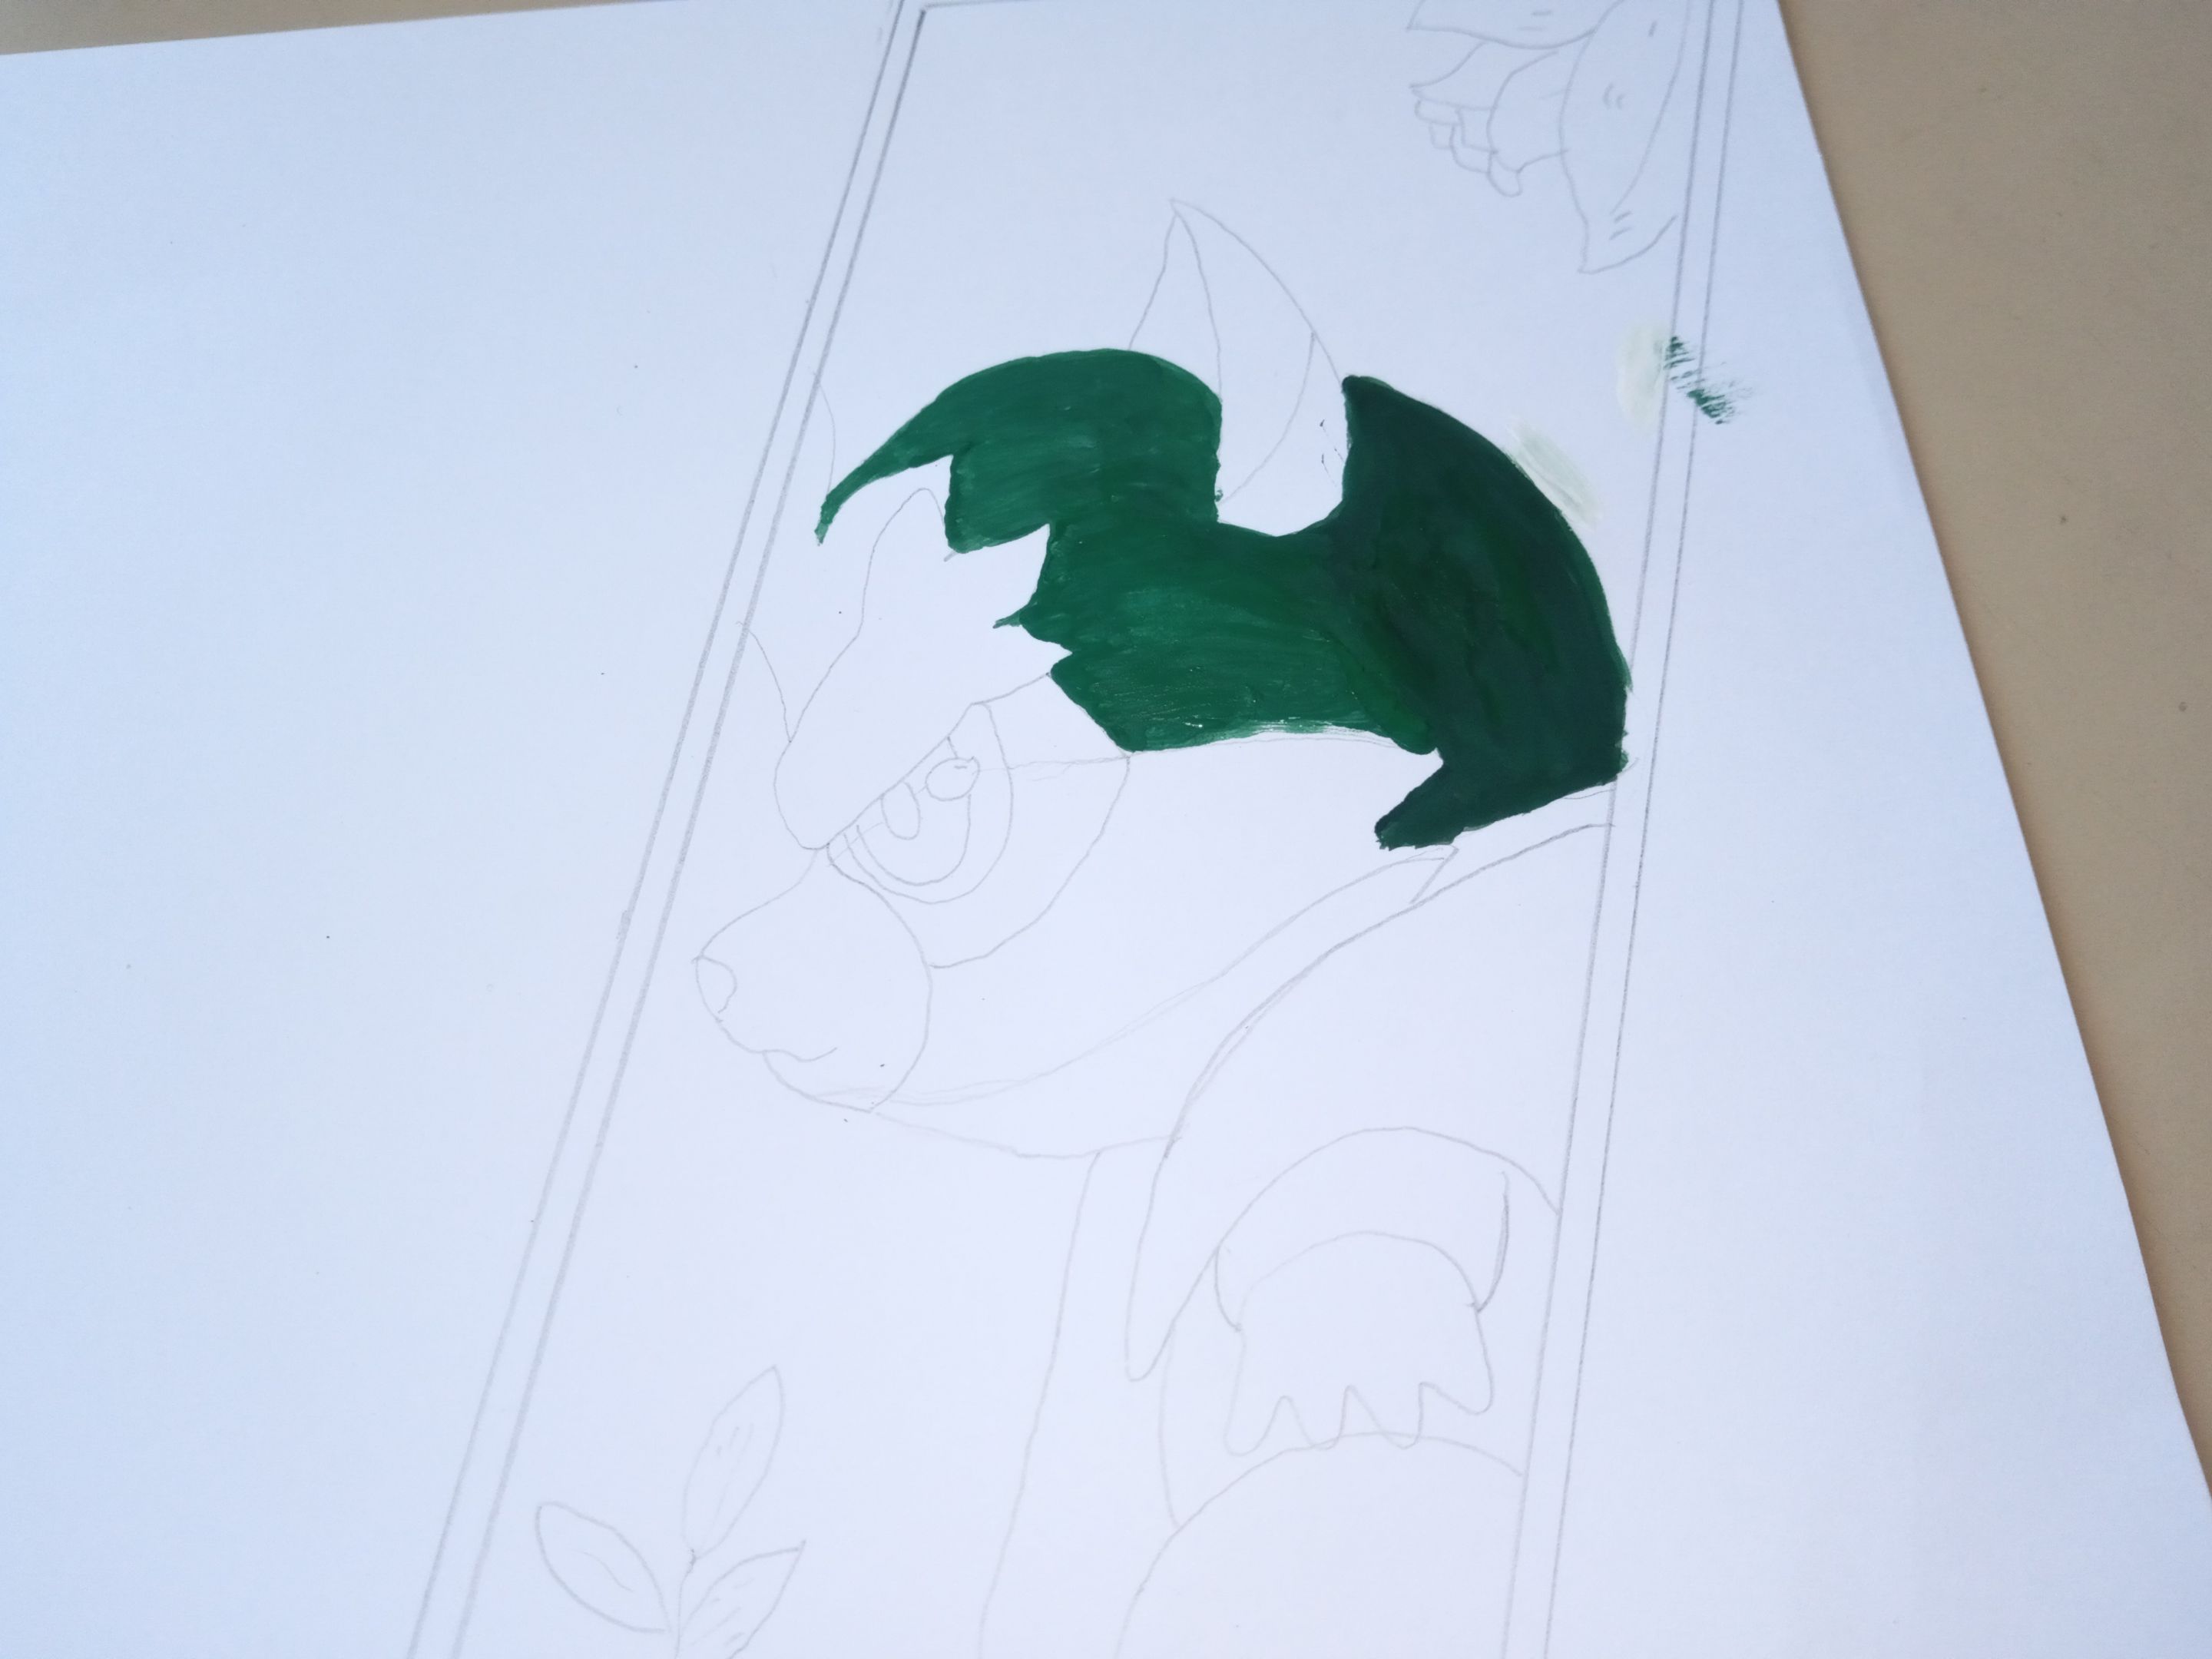
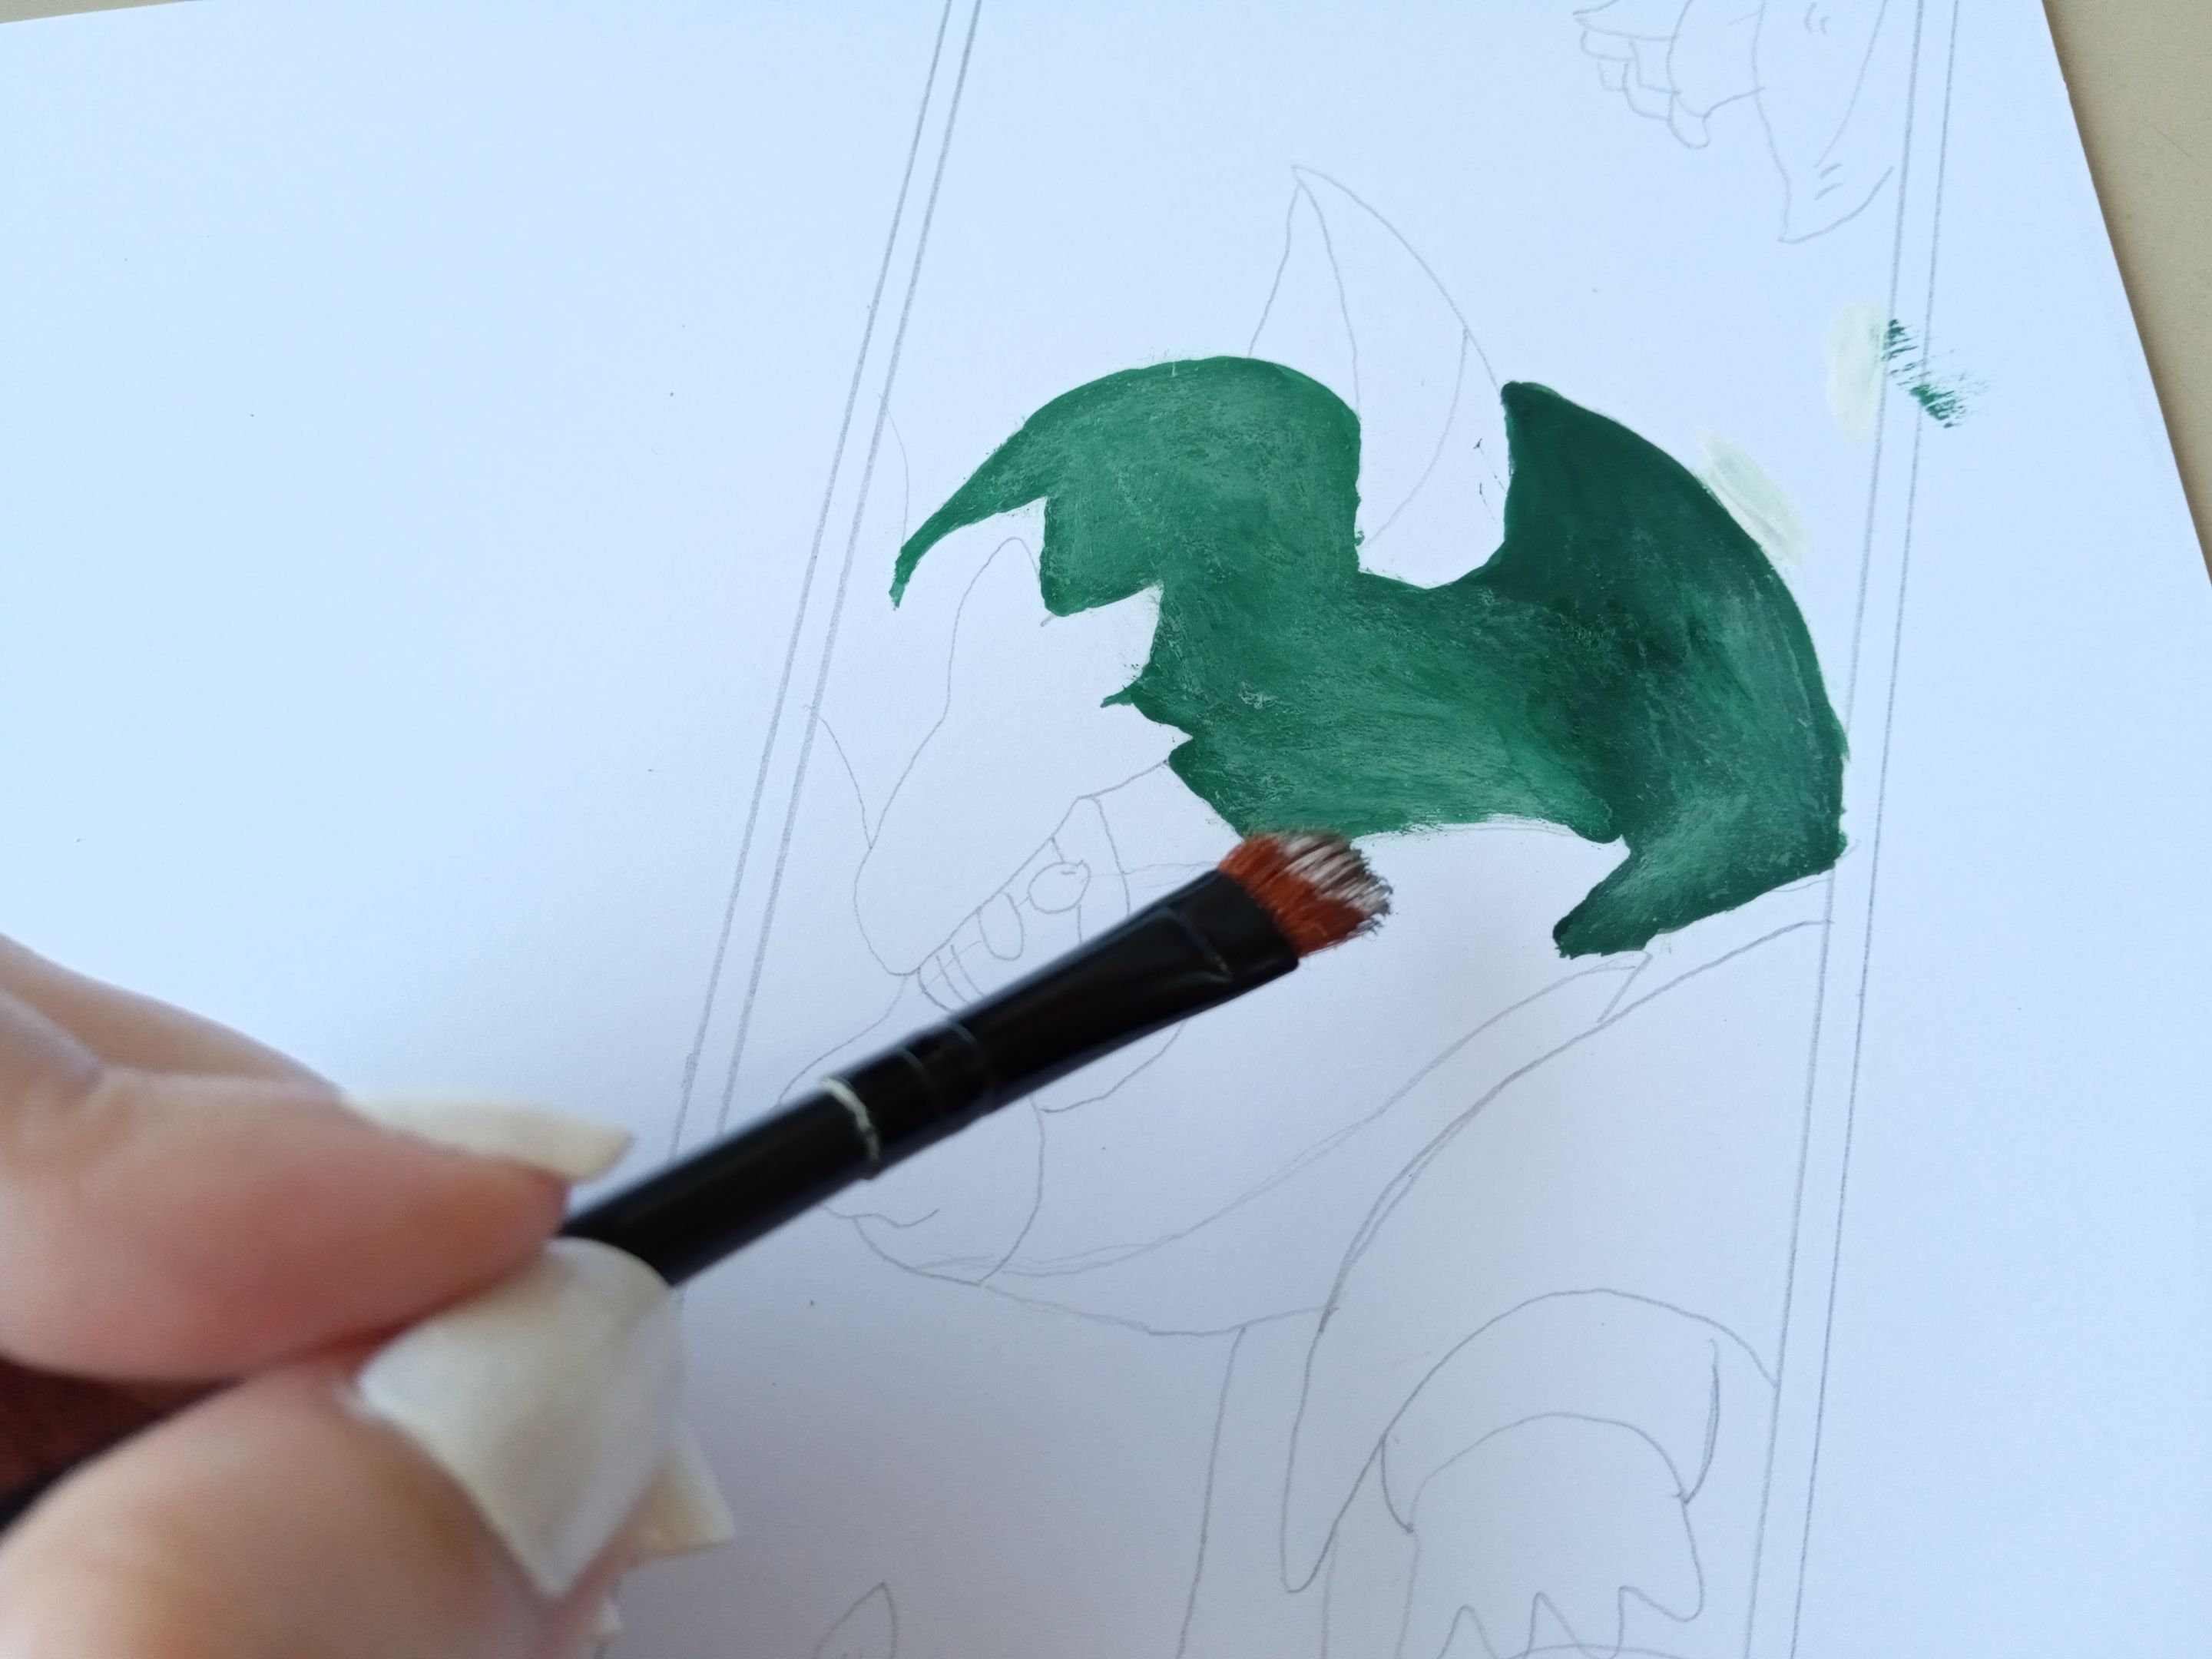
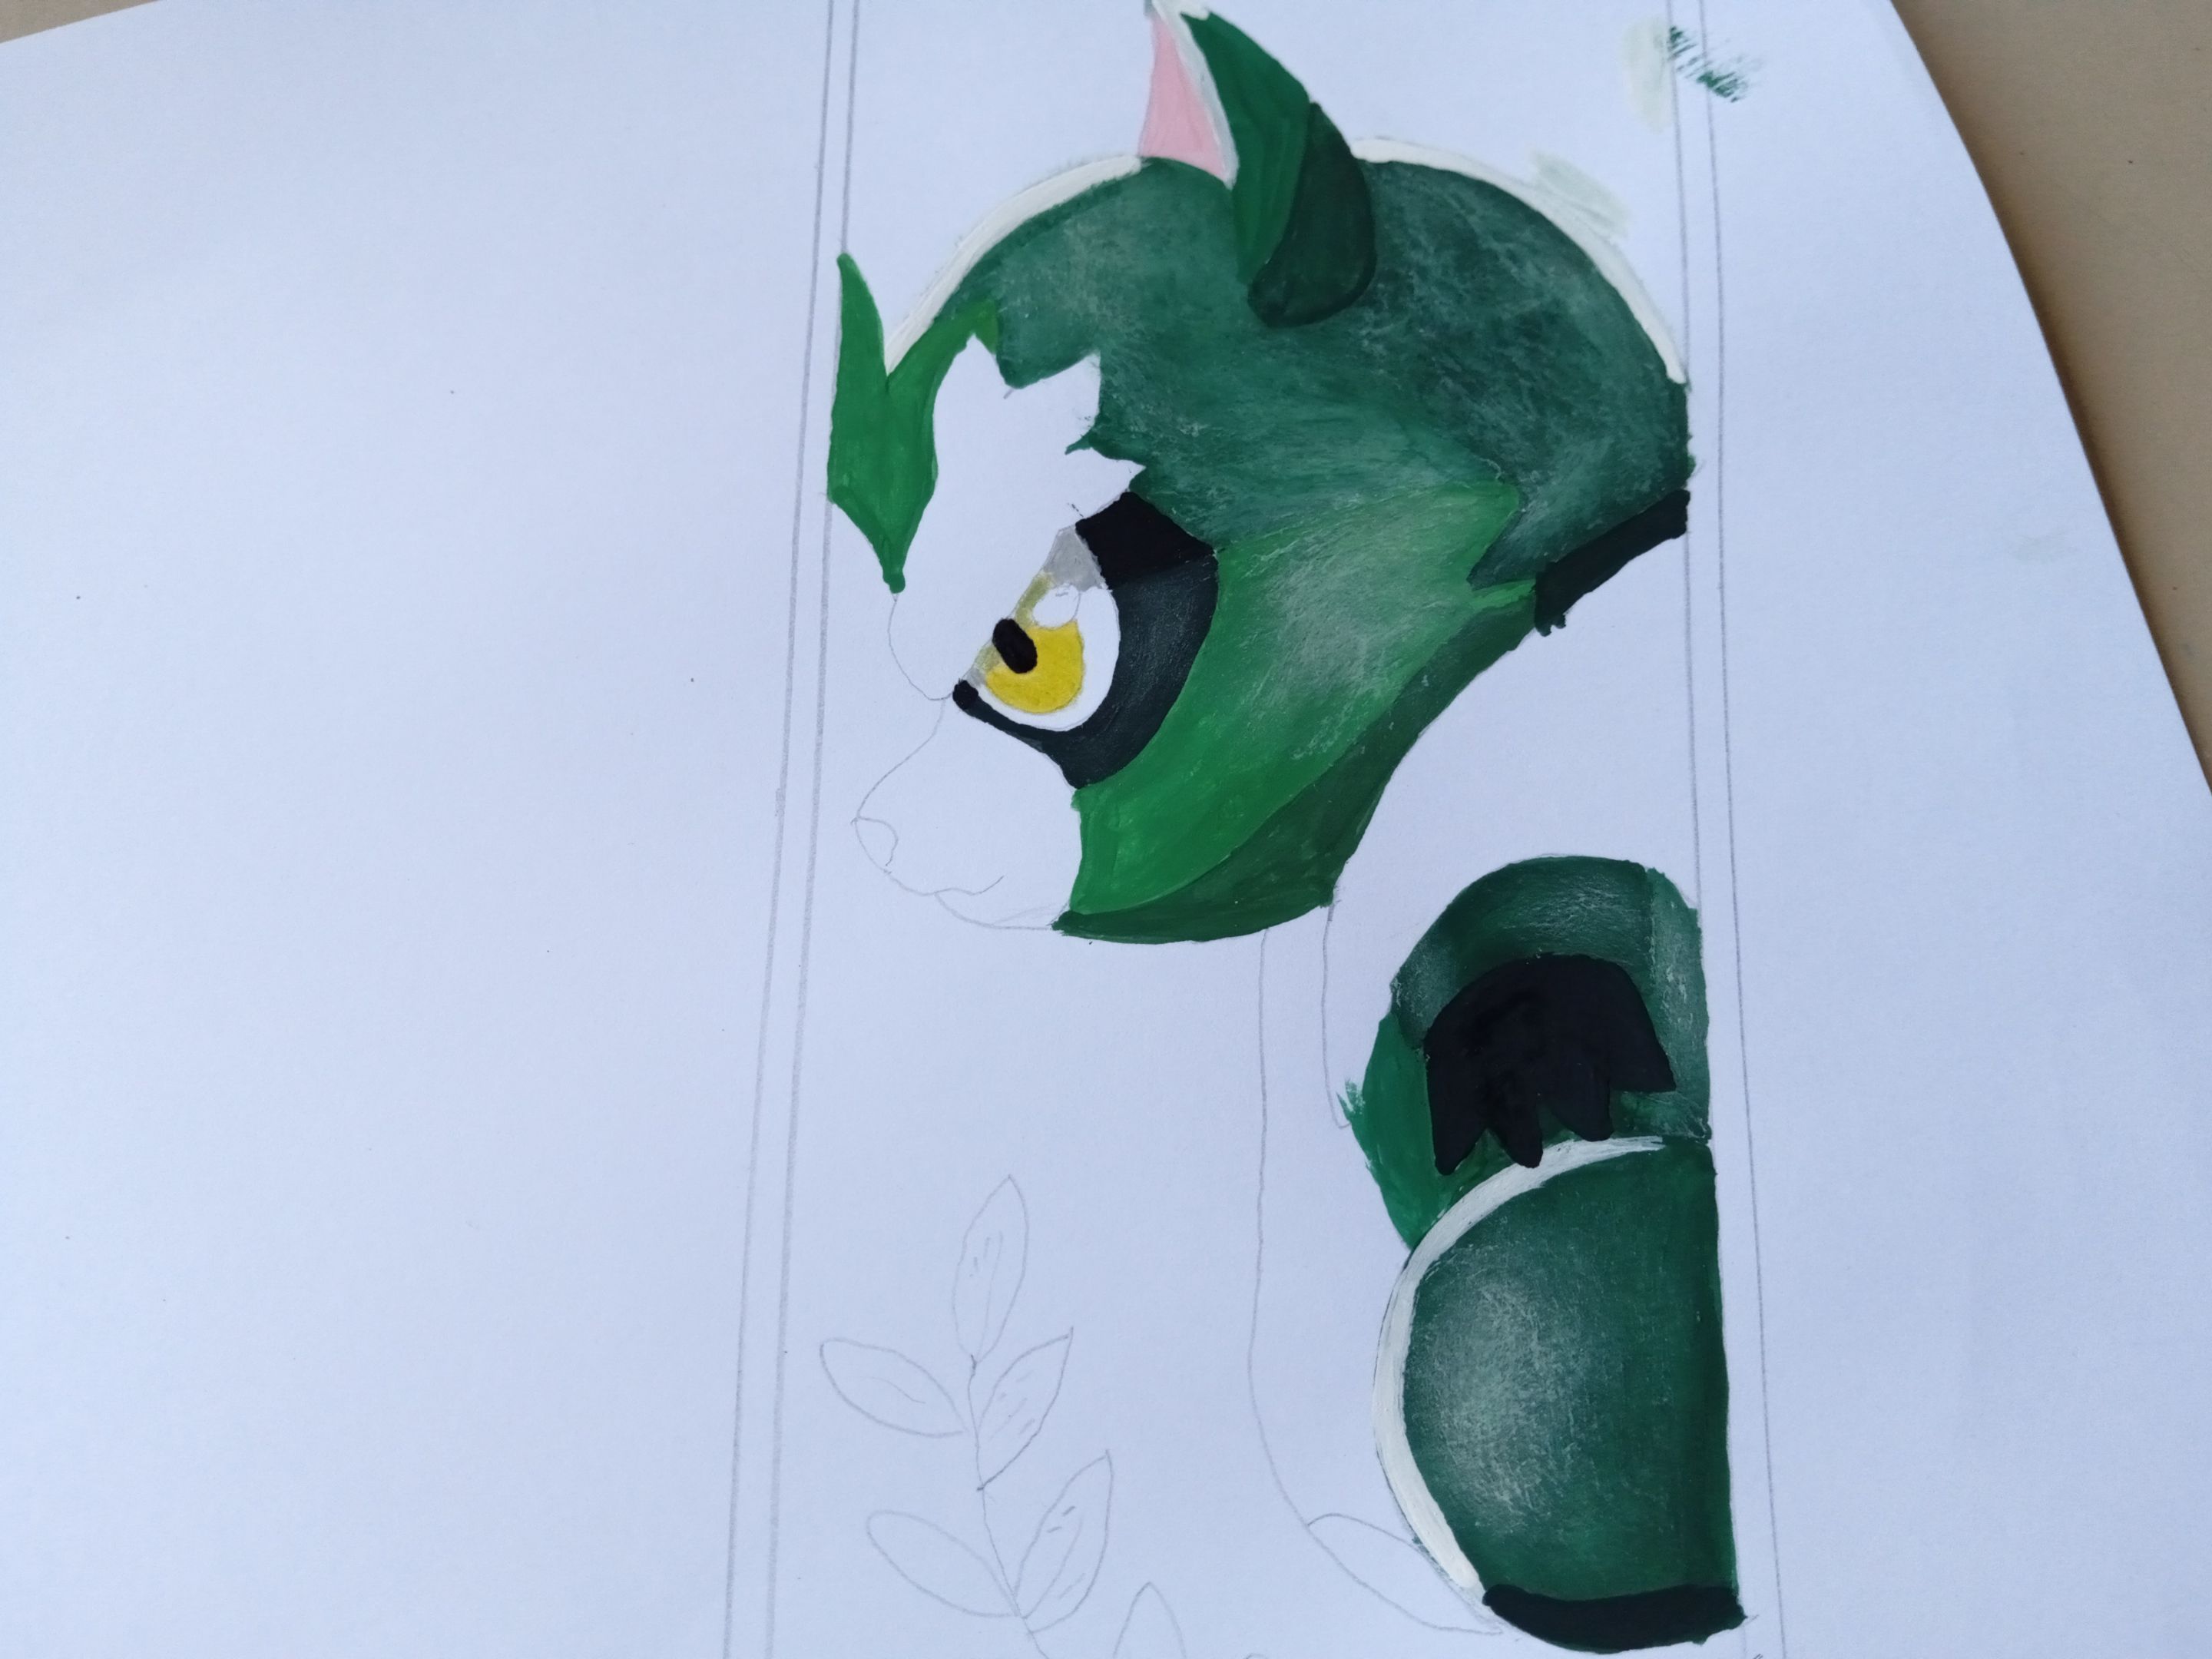
- ✨ PASO 2:
Quise comenzar pintando la parte superior de la cabeza, como la pintura verde que tengo es un color medio, pues añadí una gota de negro para oscurecer y pinté la parte superior de la cabeza y para hacer un difuminado, tomé un pincel seco con un poco de blanco y lo pasé por encima del verde, justo en las partes que hay luz en el dibujo original y repetí el mismo proceso en el resto del cuerpo.
- ✨ STEP 2:
I wanted to start by painting the top part of the head, as the green paint I have is a medium color, so I added a drop of black to darken and painted the top part of the head and to make a blend, I took a dry brush with a little white and I passed it over the green, right in the parts where there is light in the original drawing and I repeated the same process on the rest of the body.
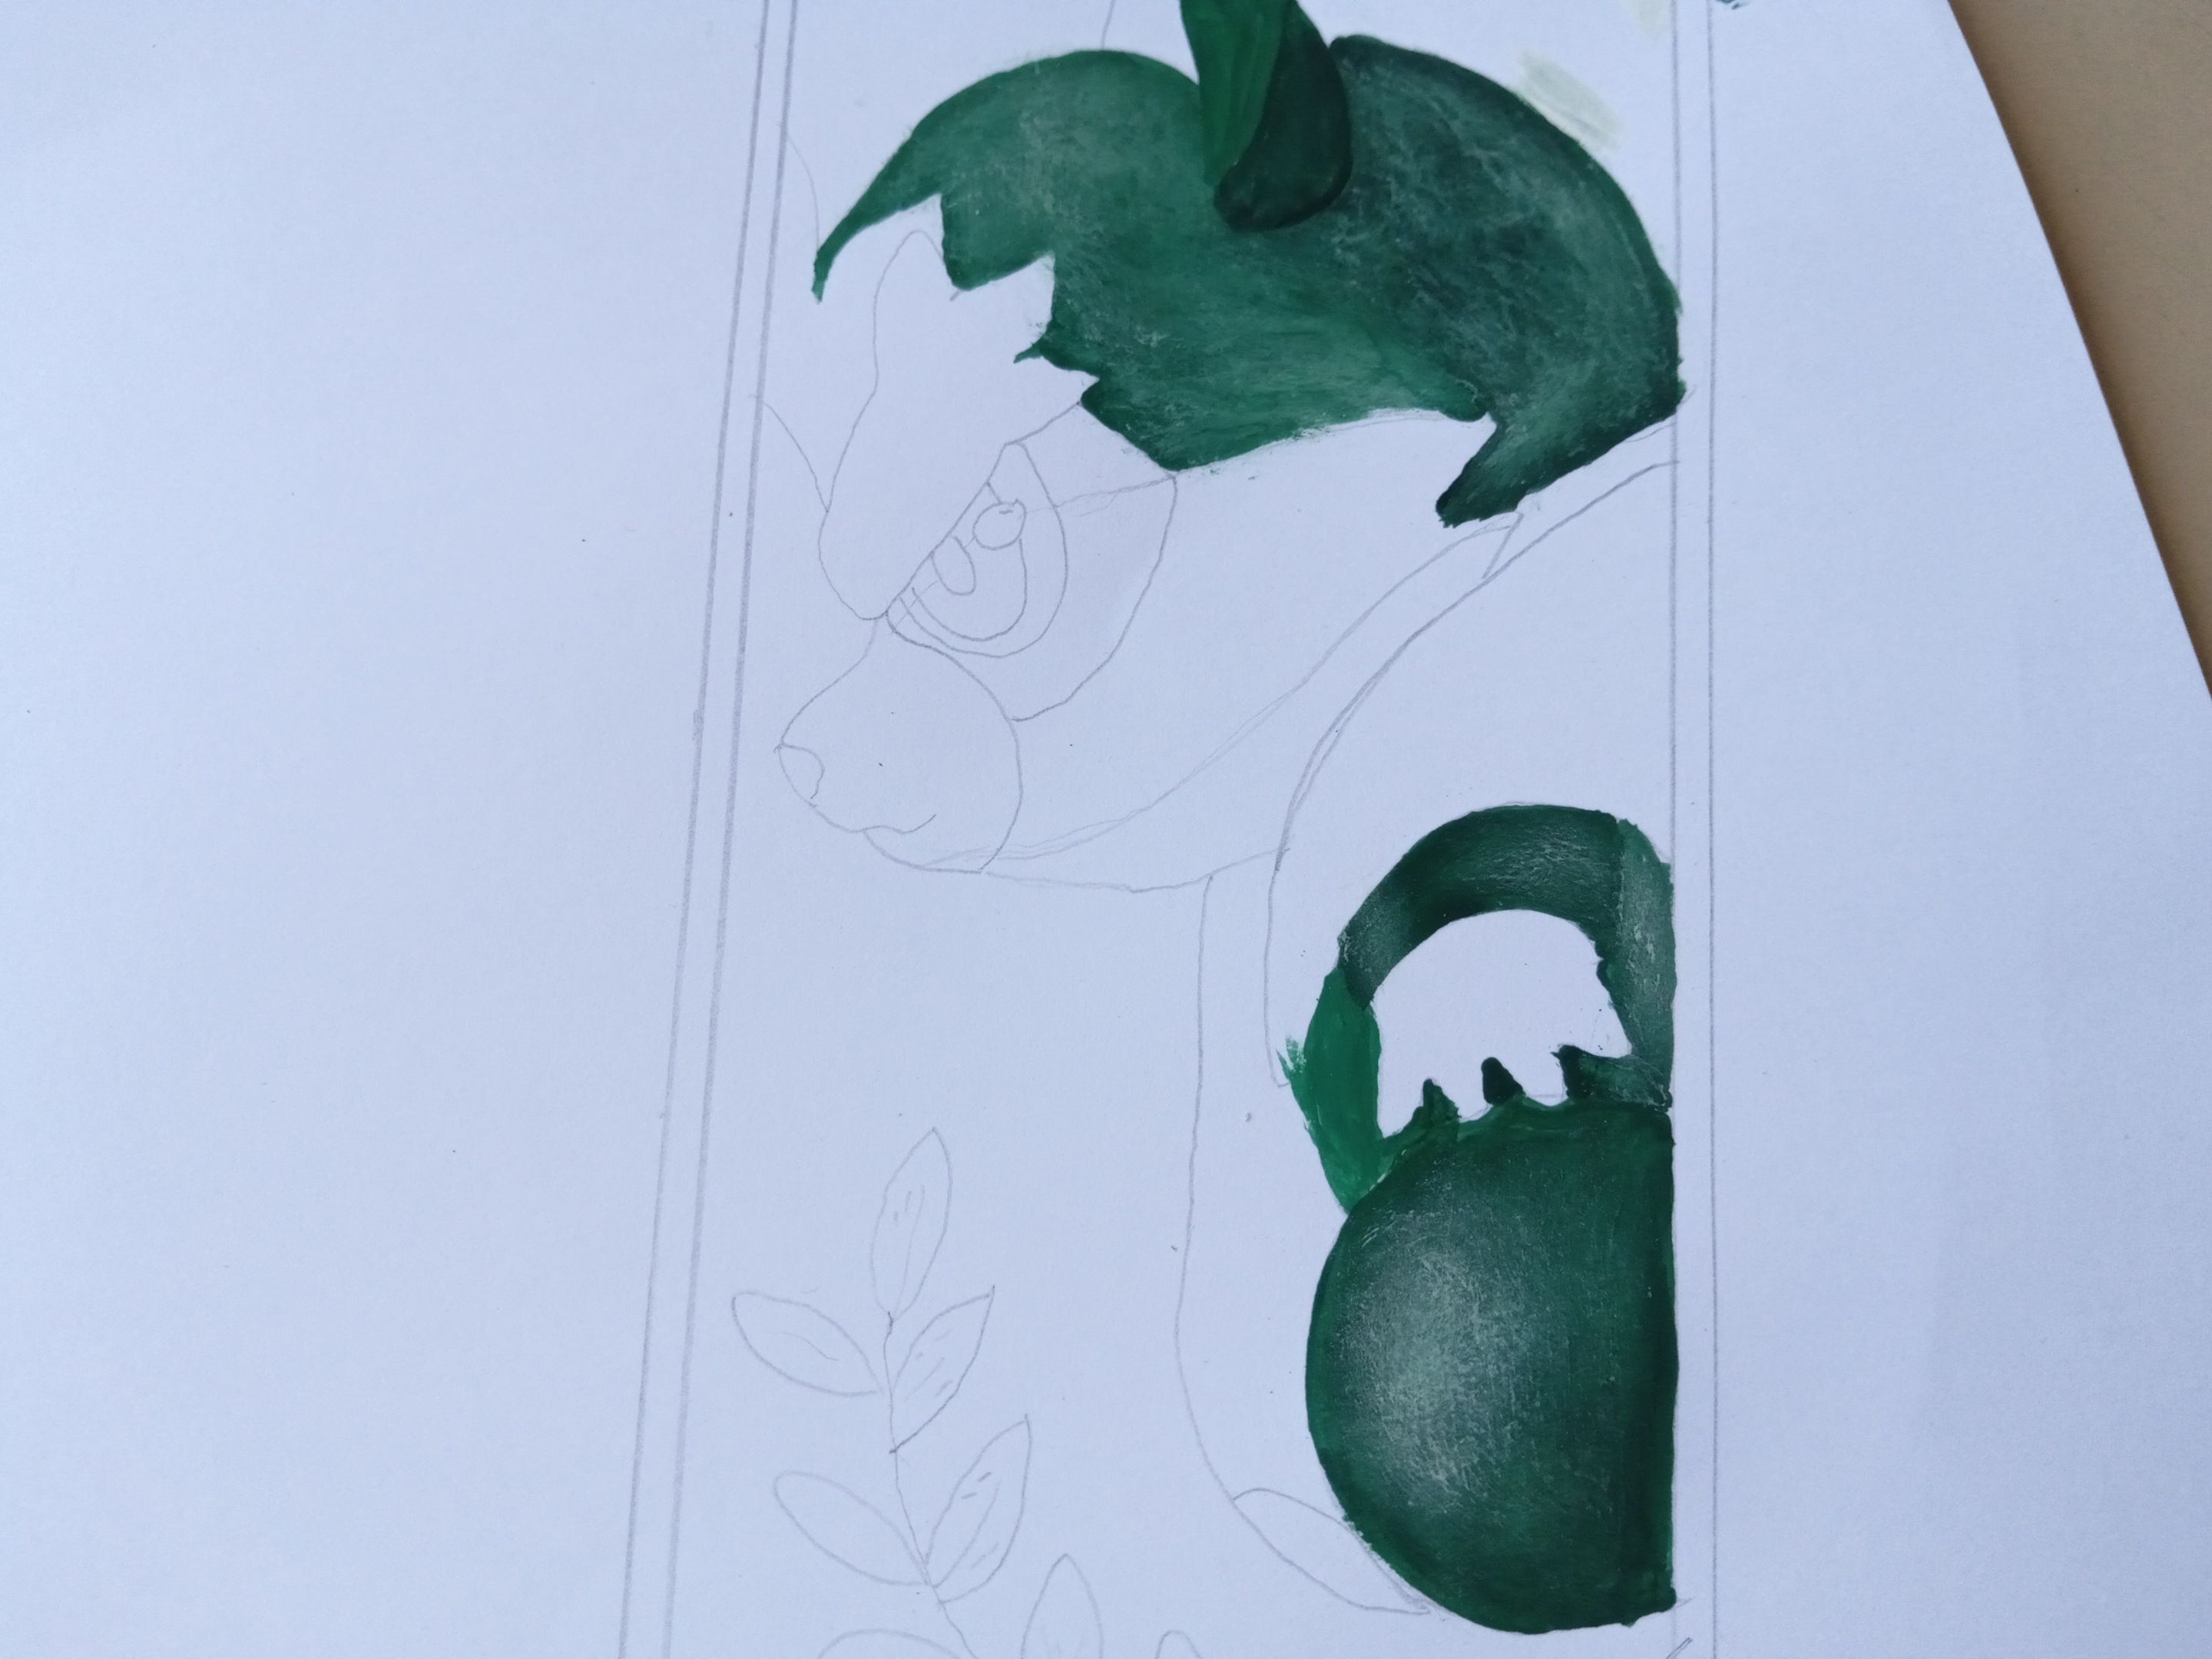
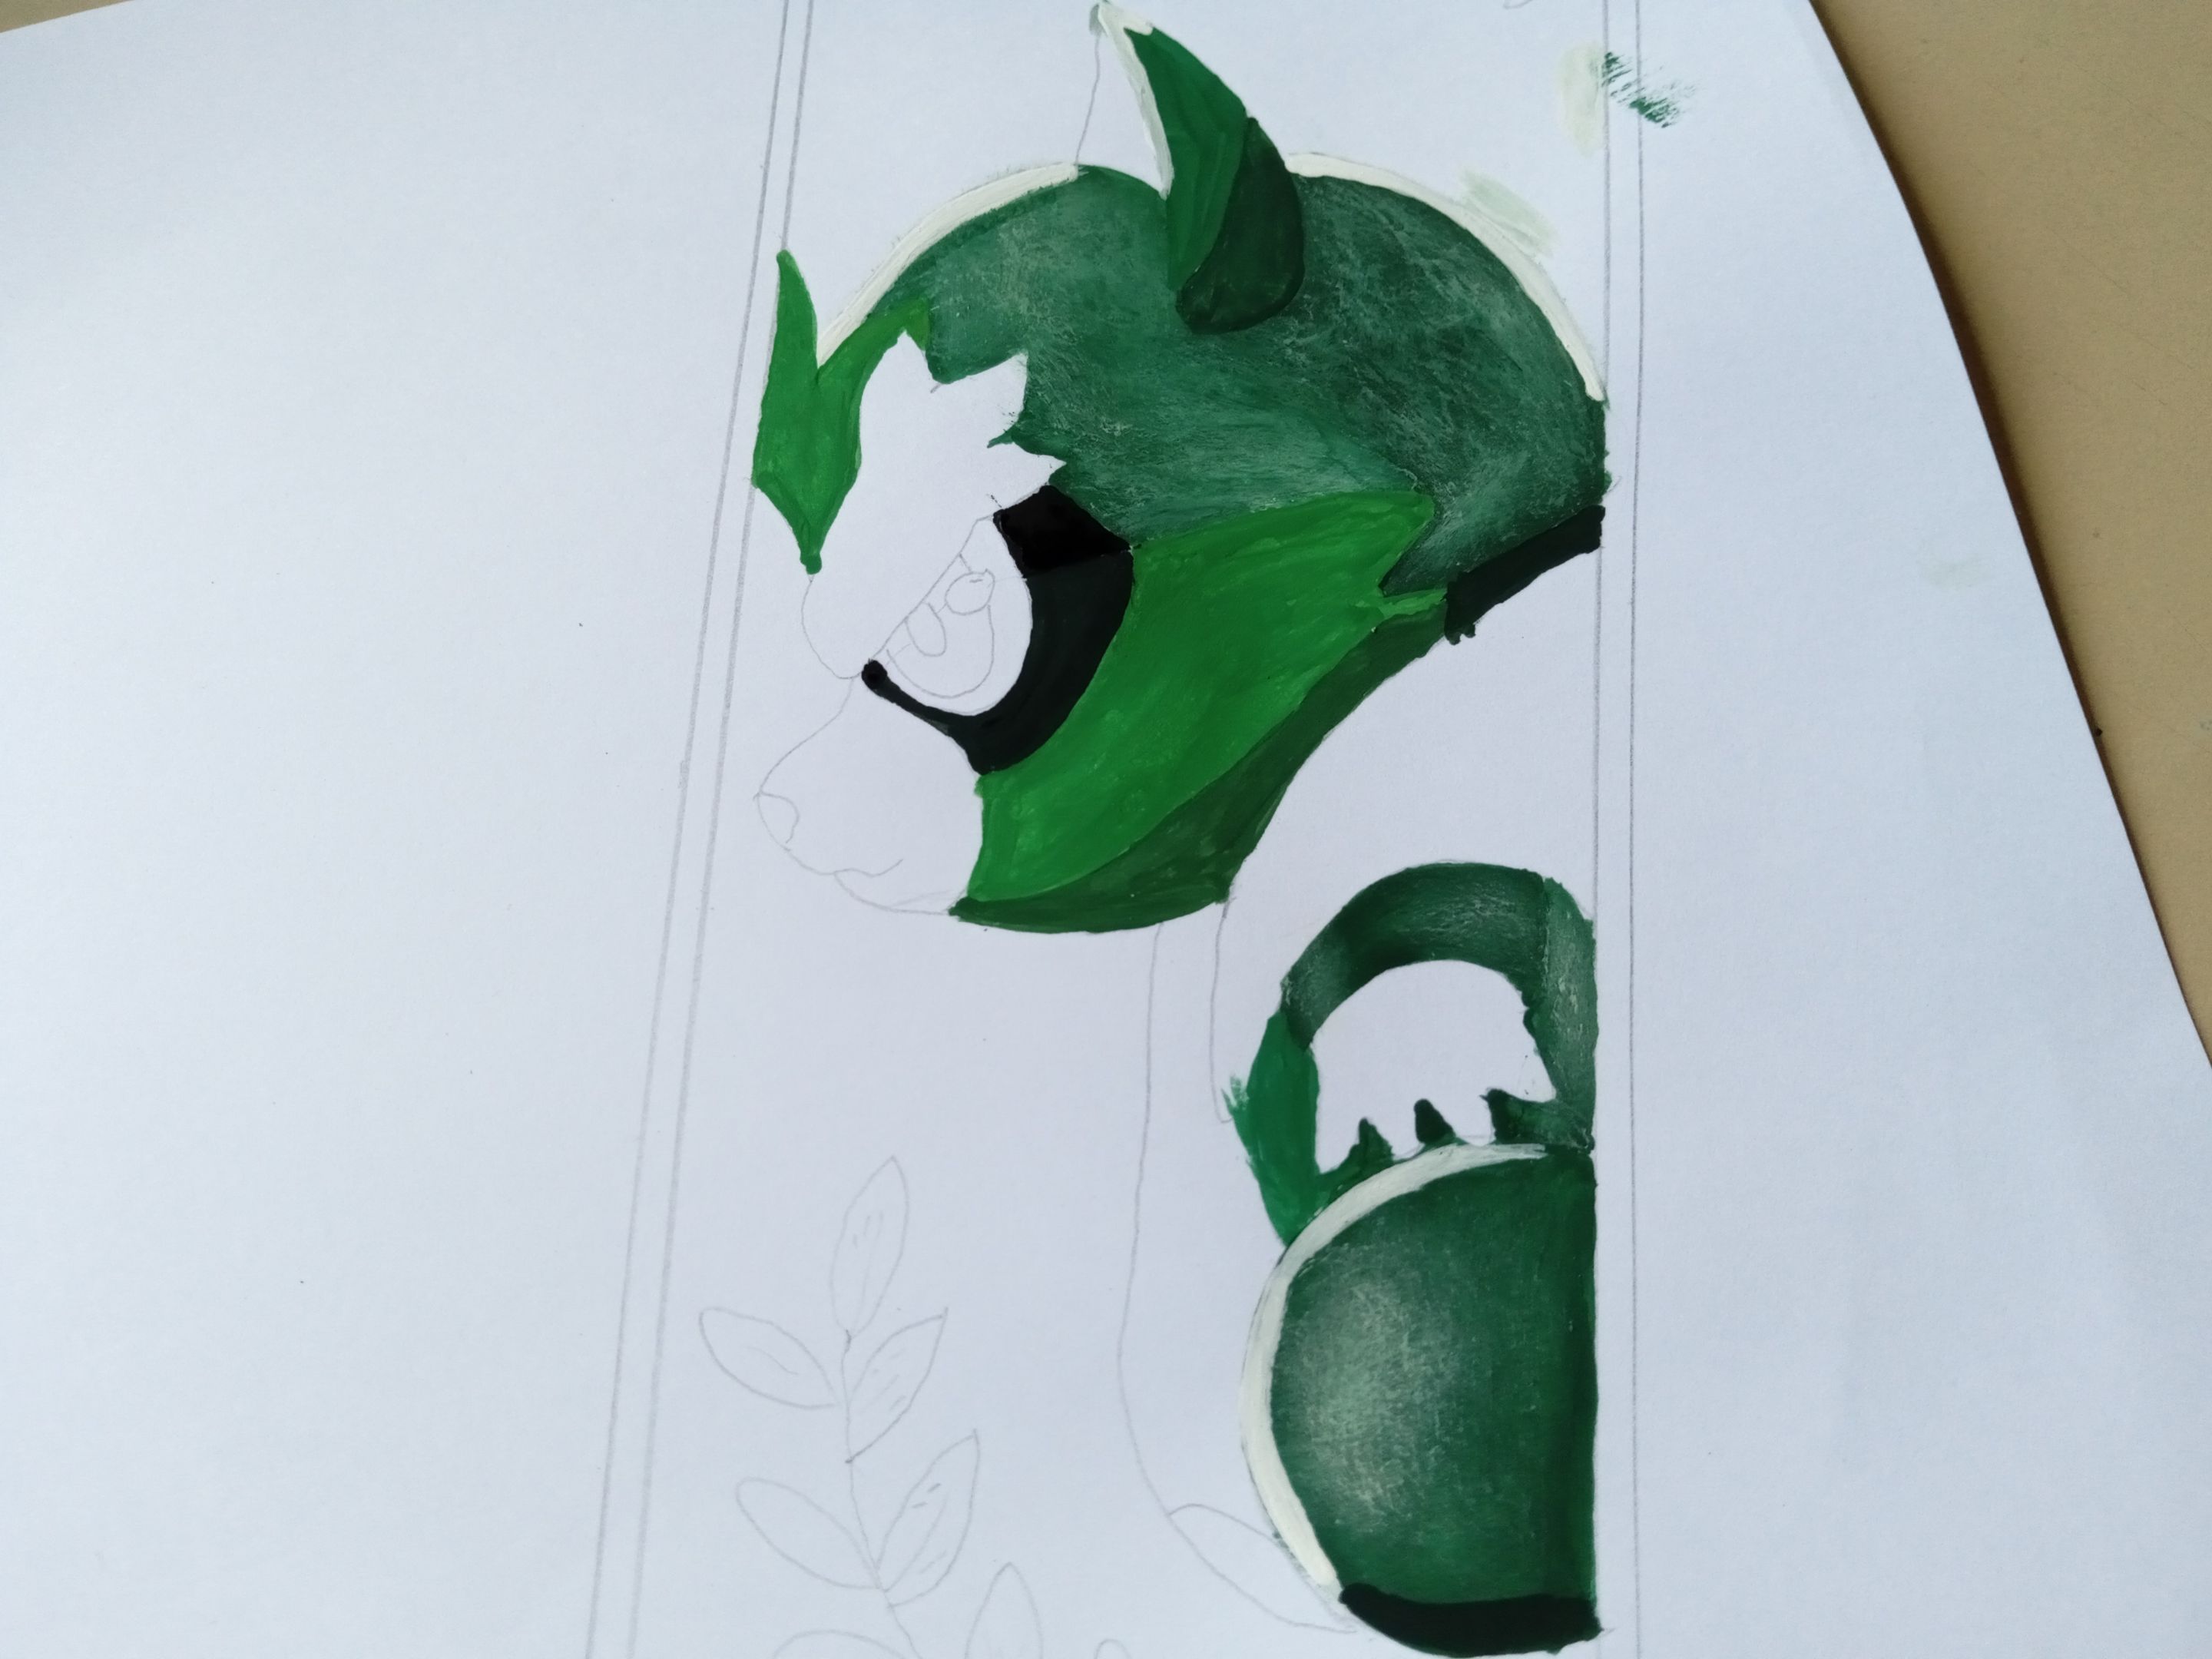
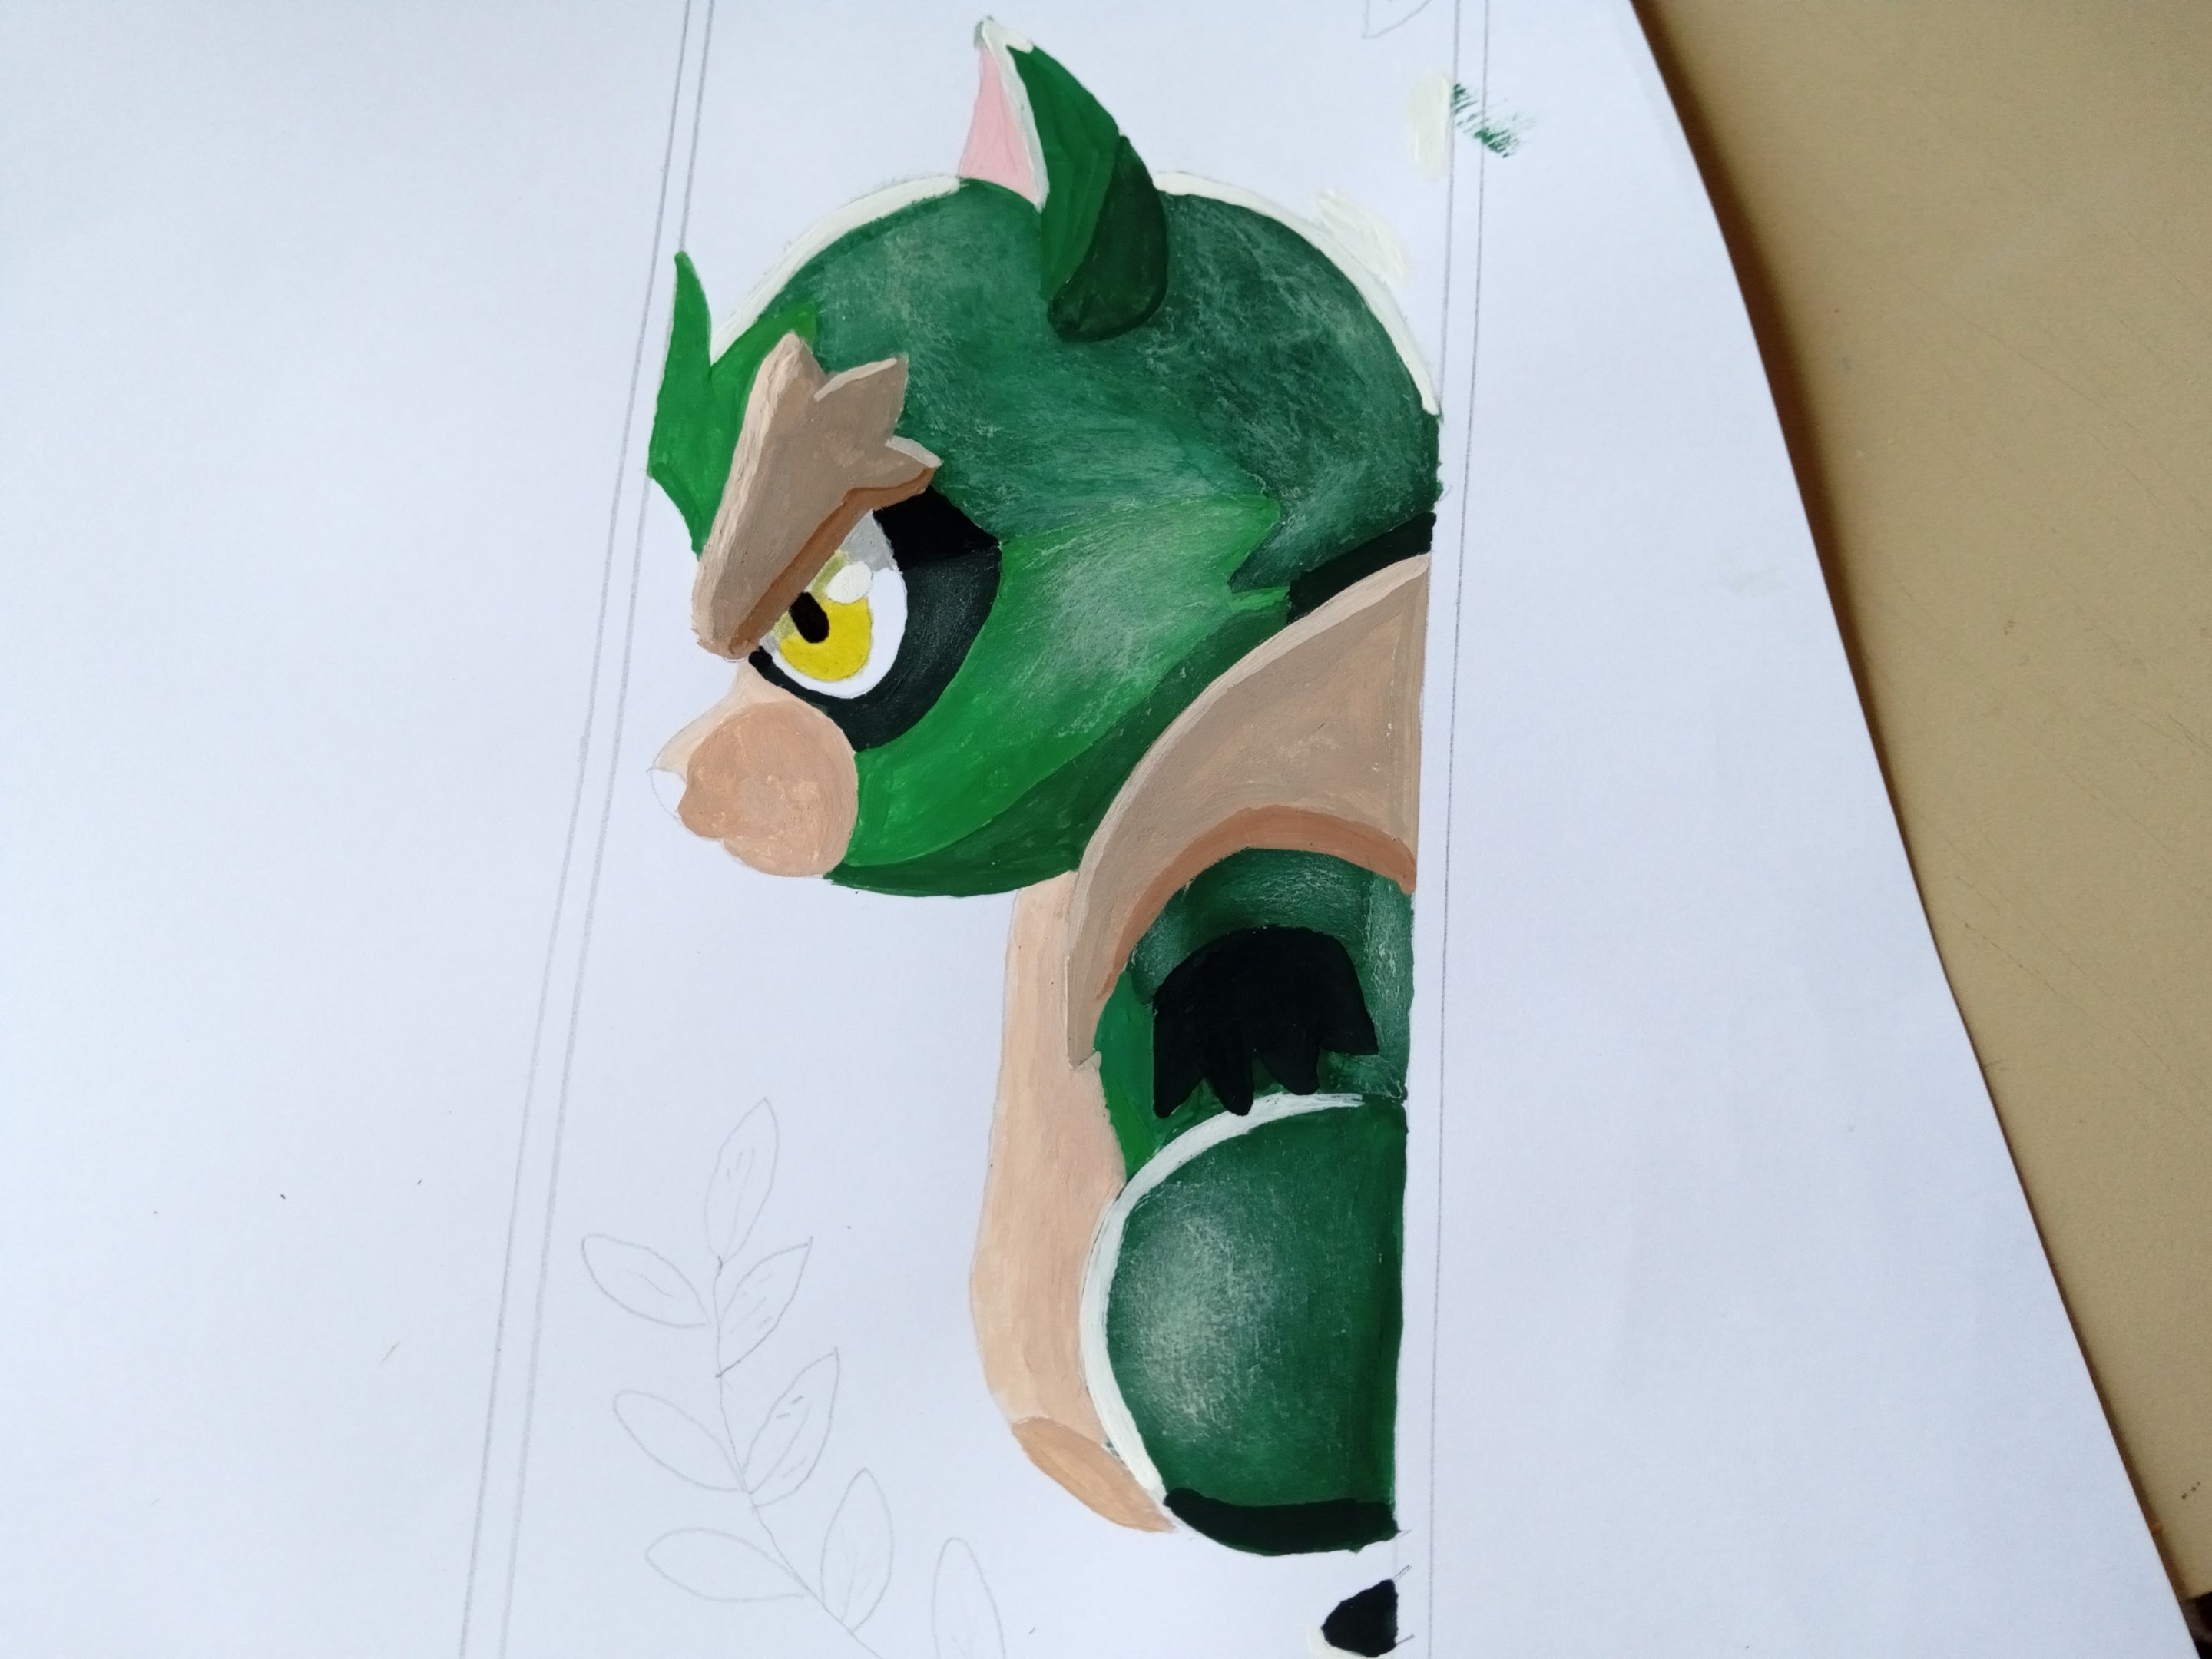
- ✨ PASO 3:
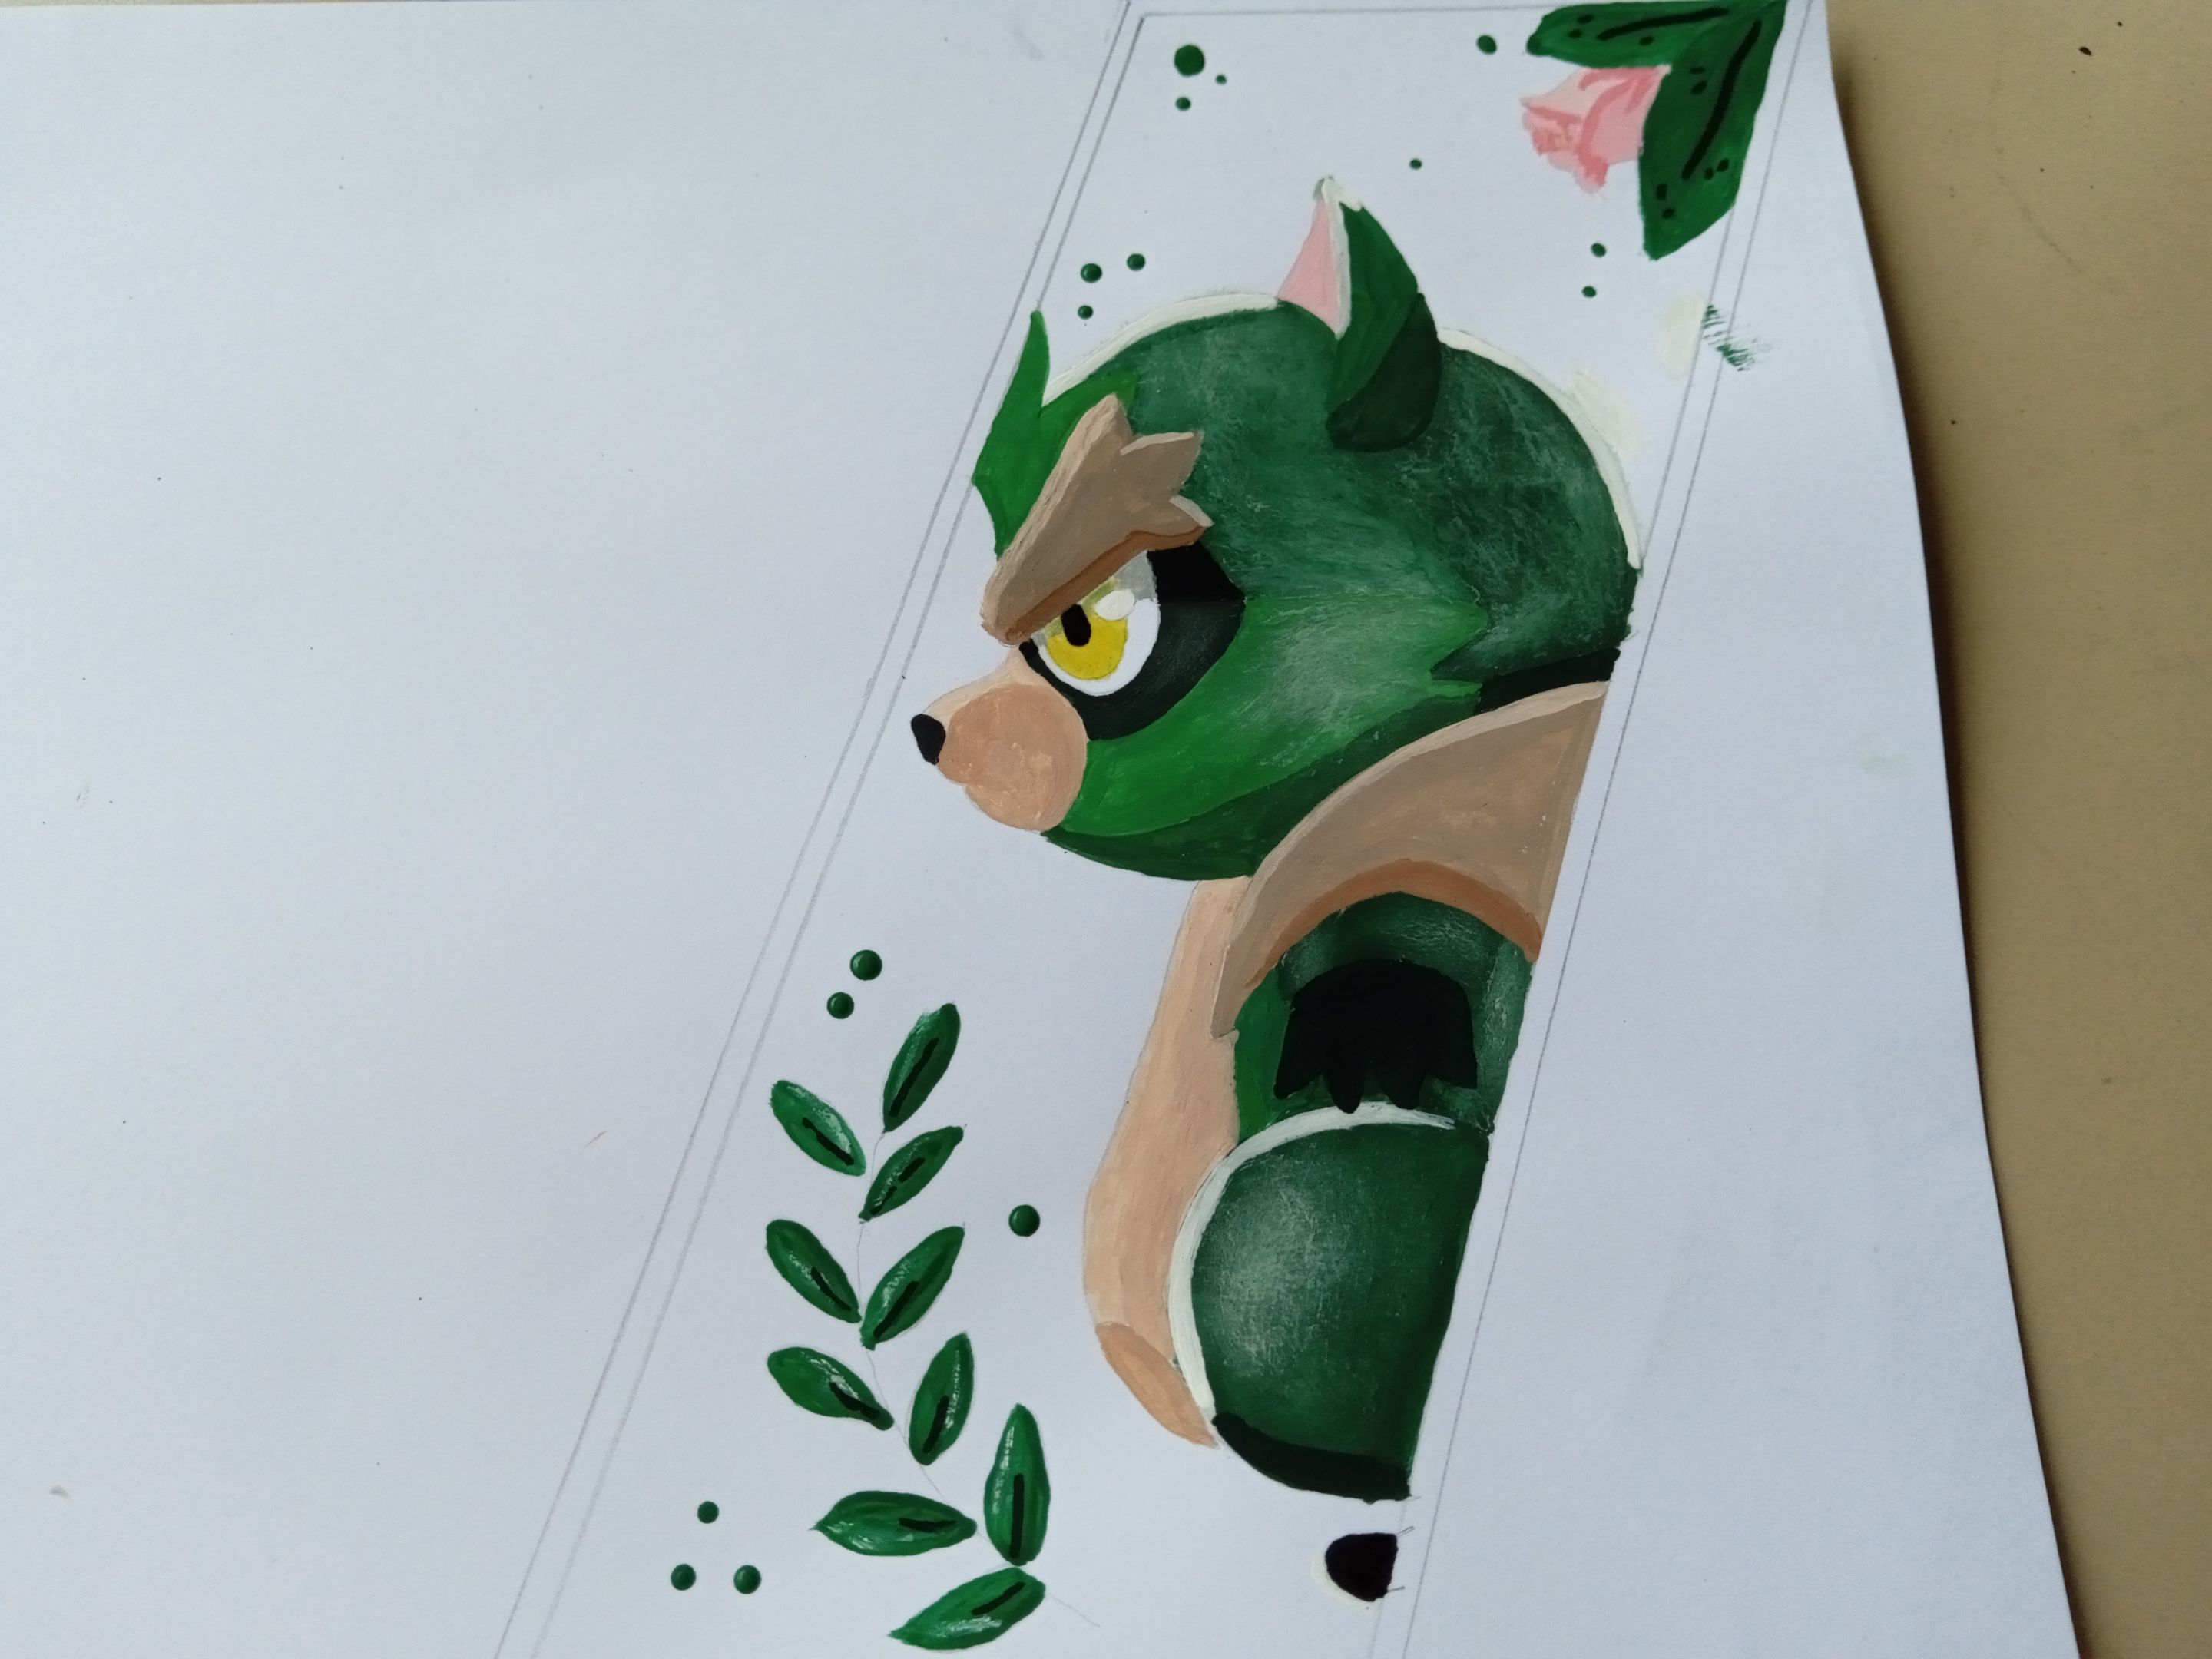
Una vez seco, tomé pintura blanca y pinté las luces más intensas en las zonas del pelaje. Para las zonas más oscuras del mapache combiné negro con verde, para crear un verde bastante intenso, luego pinté la parte del ojo y las patas. El ojo lo pinté de amarillo, la pupila con negro, pinté la sombra superior del mismo en jugando con pintura gris y la parte interna de la oreja en rosado.
- ✨ STEP 3:
Once dry, I took white paint and painted the brightest highlights on the fur areas. For the darker areas of the raccoon I combined black with green, to create a fairly intense green, then I painted the eye part and the legs. I painted the eye yellow, the pupil black, I painted the upper shadow of it in playing with gray paint and the inner part of the ear in pink.
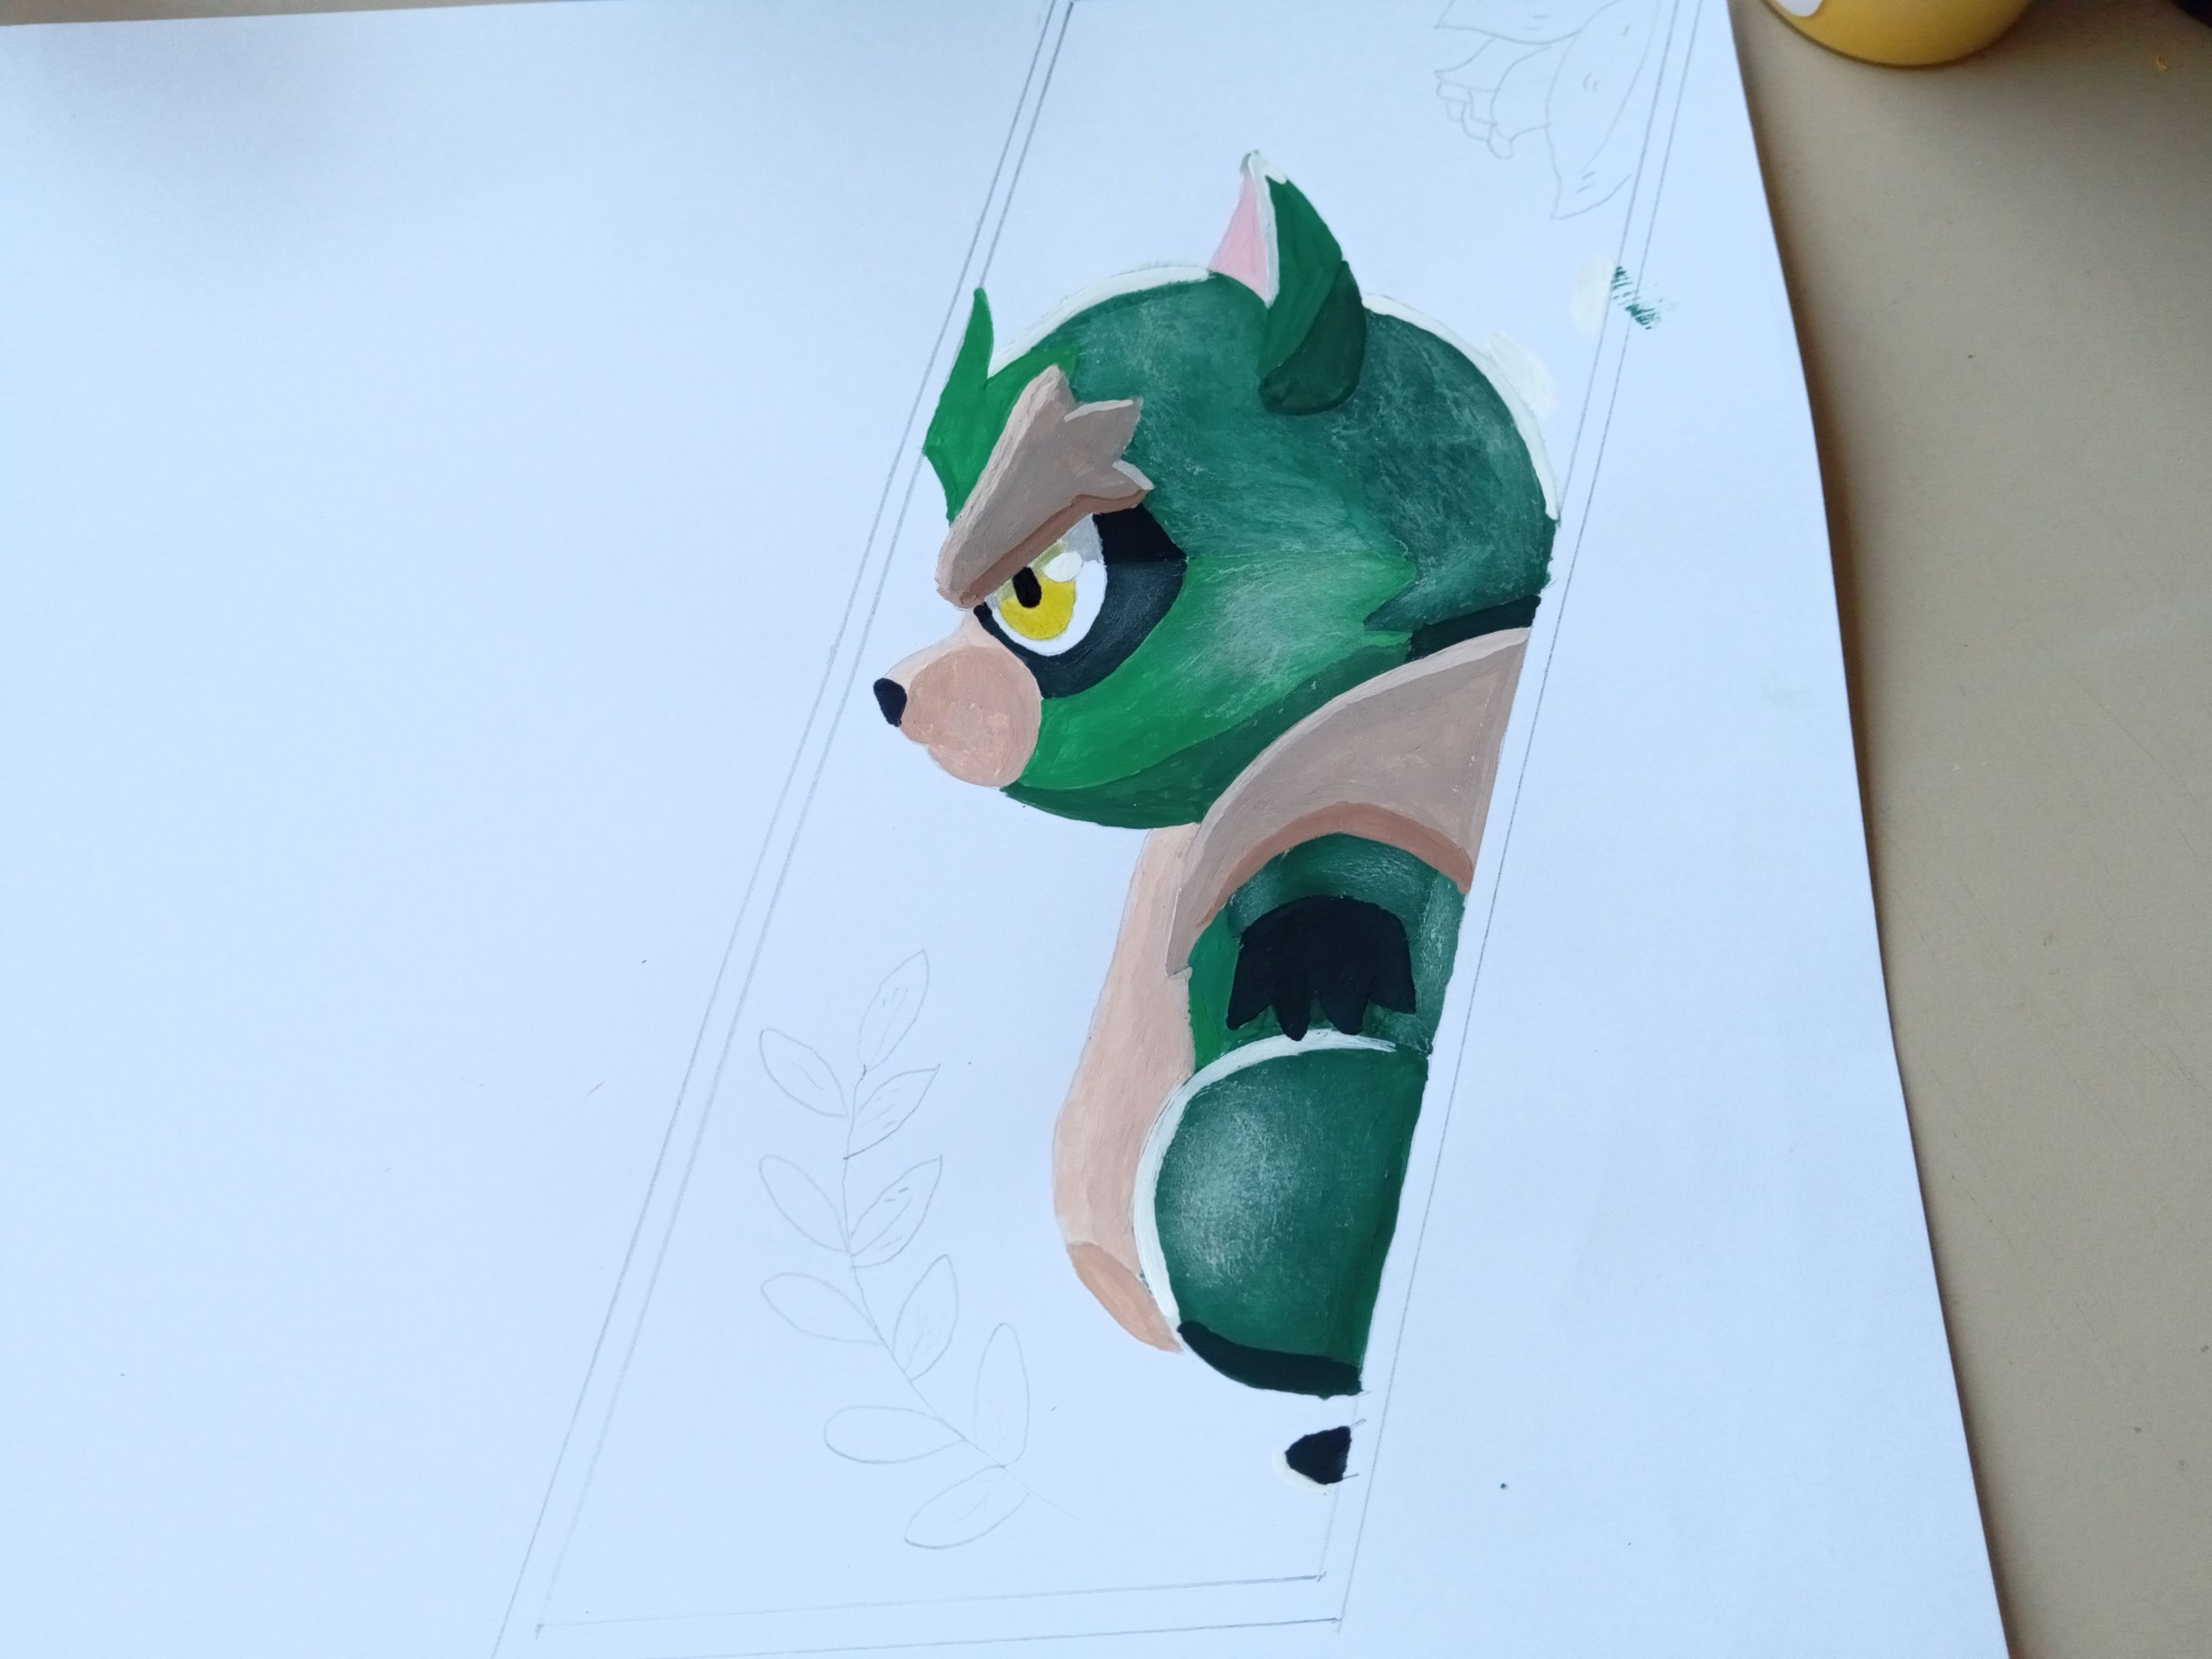
- ✨ PASO 4:
Para las partes más claras del cuerpo, en este caso la barriga y el hocico, las pinté color piel y las sombras las oscurecí con una gota de marrón. Para las zonas más oscuras que me faltaban del cuerpo, mezclé color crema, marrón y una gota de gris. Para las sombras, utilicé marrón, pinté las zonas de luz que me faltaban y la nariz de negro.
- ✨ STEP 4:
For the lighter parts of the body, in this case the belly and snout, I painted them skin color and darkened the shadows with a drop of brown. For the darker areas that I was missing on the body, I mixed cream, brown and a drop of gray. For the shadows, I used brown, I painted the light areas that I was missing and the nose black.
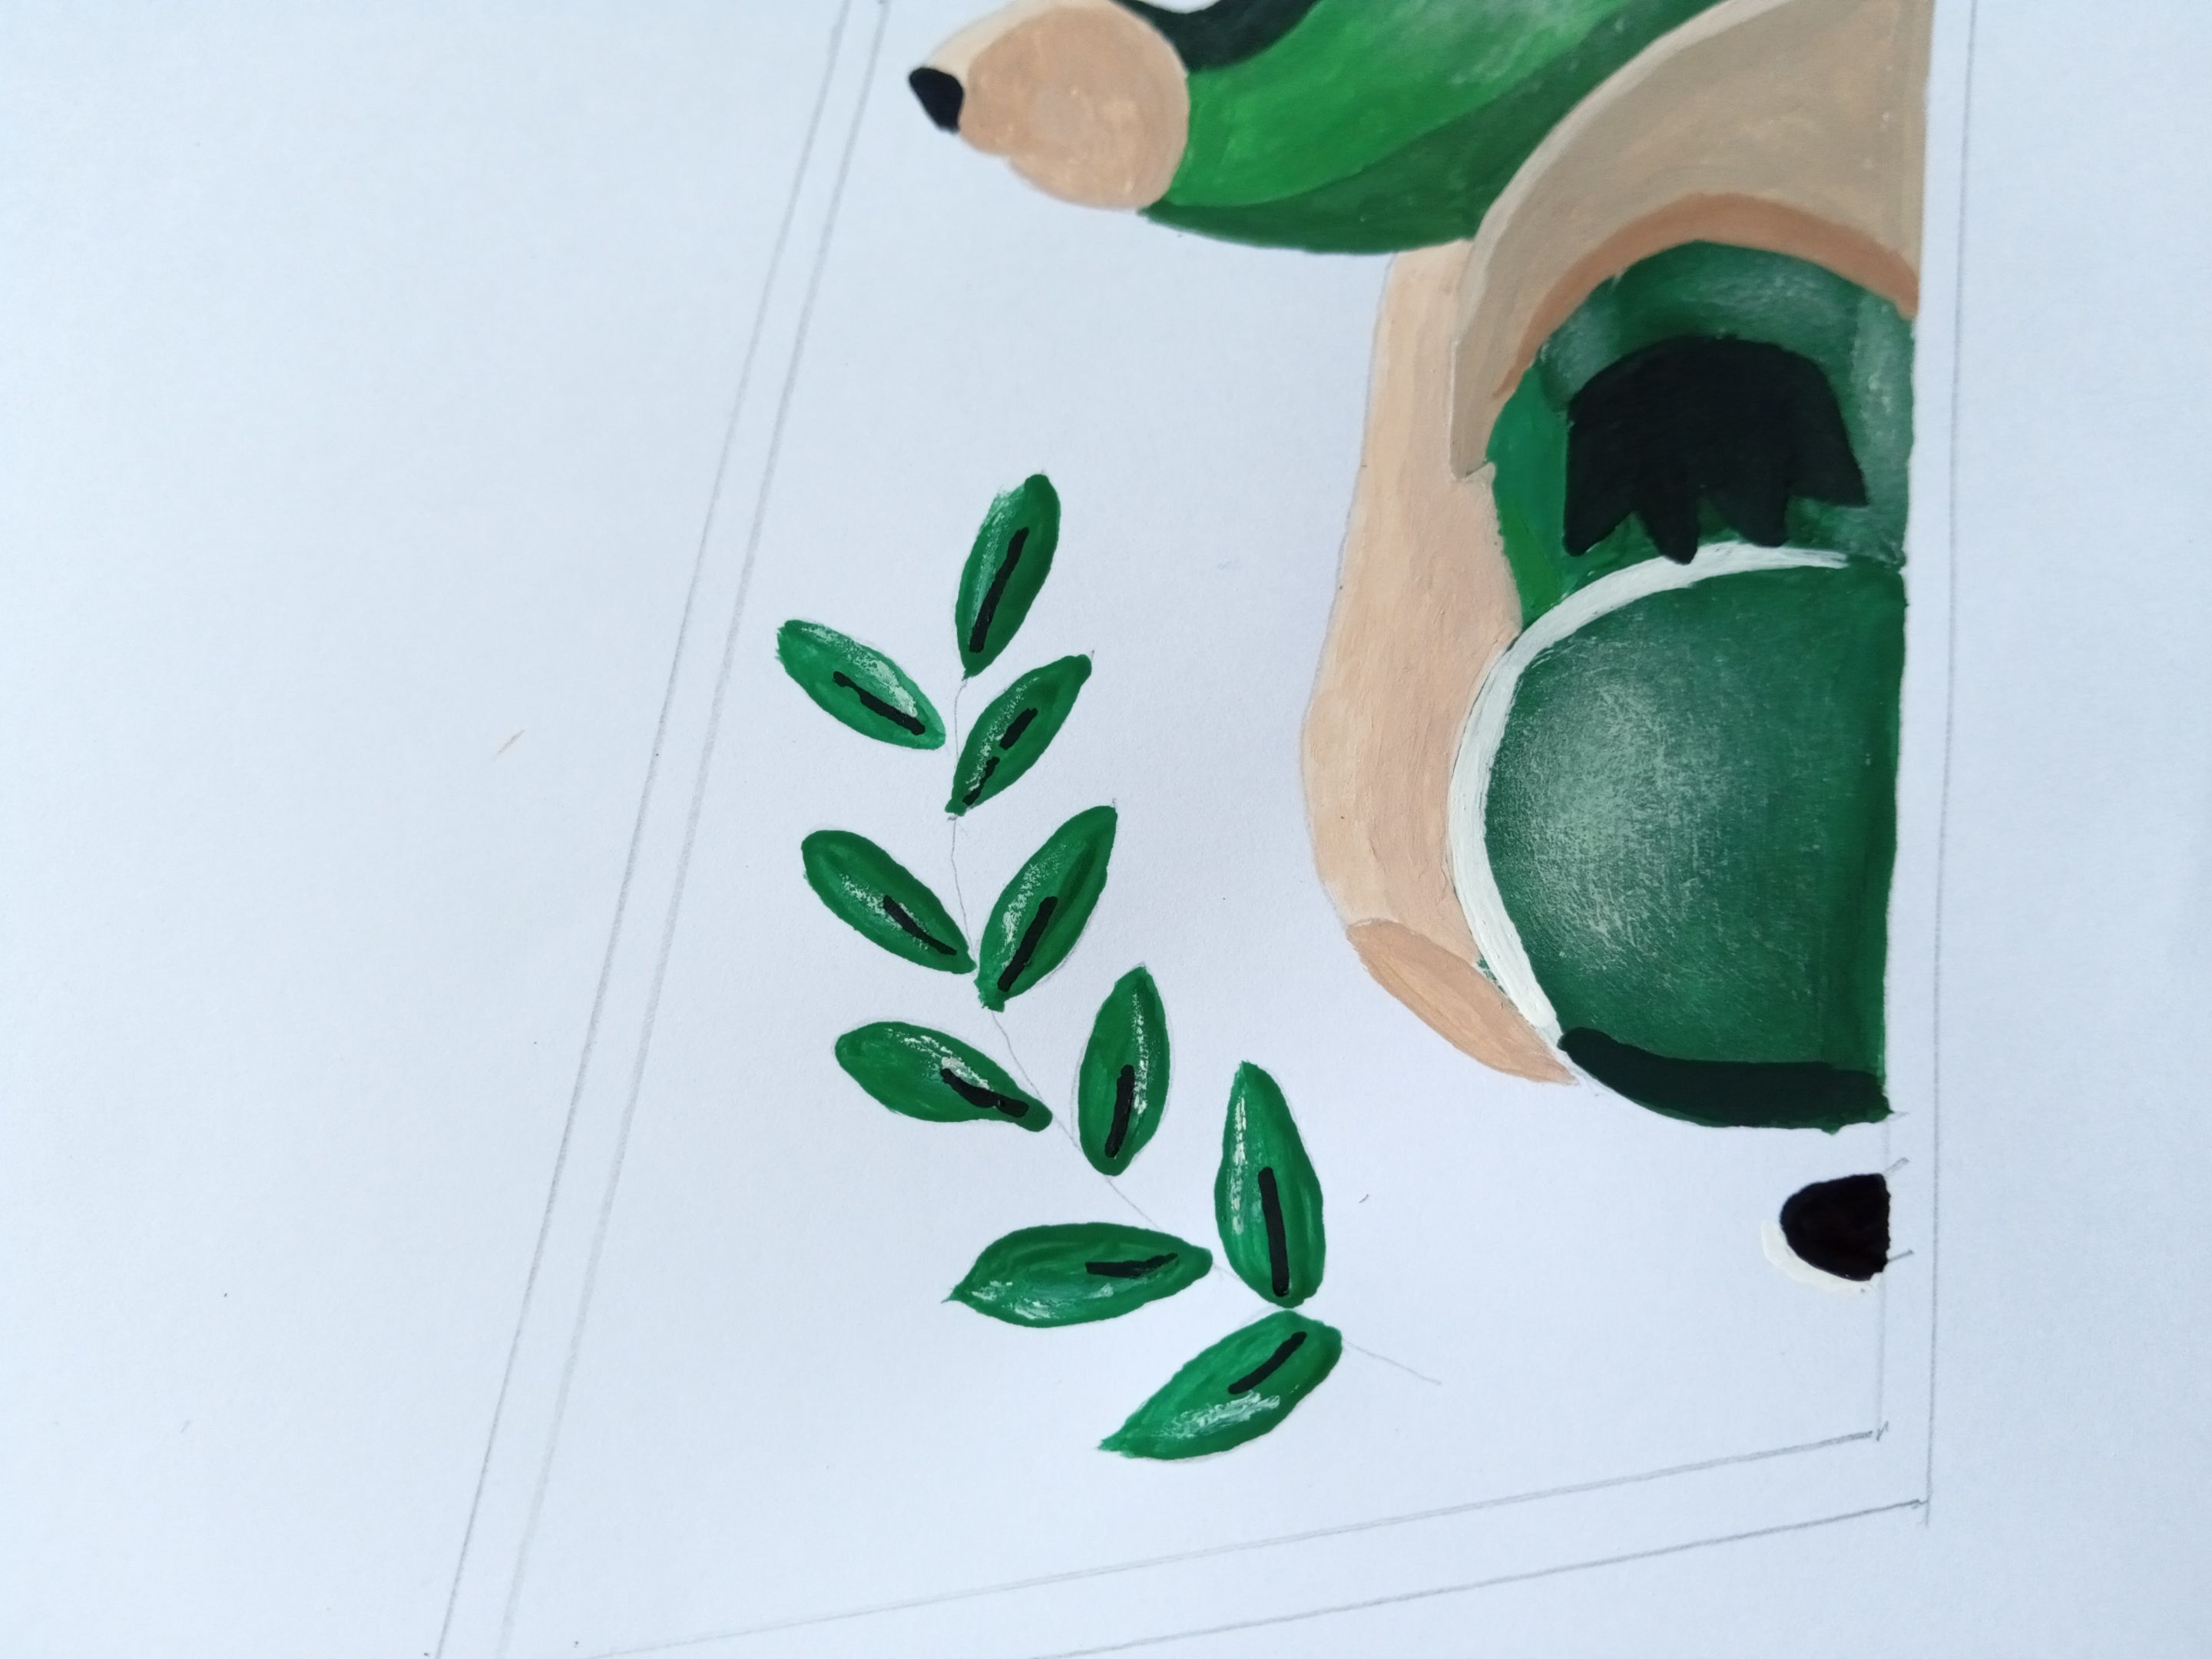
- ✨ PASO 5:
Para culminar, pinté las hojas de verde, la rosa en color rosado, las sombras y detalles con marcador negro. Finalmente, recorté el dibujo, coloreé el borde con azul y delineé el dibujo.
- ✨ STEP 5:
To finish, paint the leaves green, the rose in pink, the shadows and details with black marker. Finally, I cut out the drawing, colored the border with blue, and outlined the drawing.
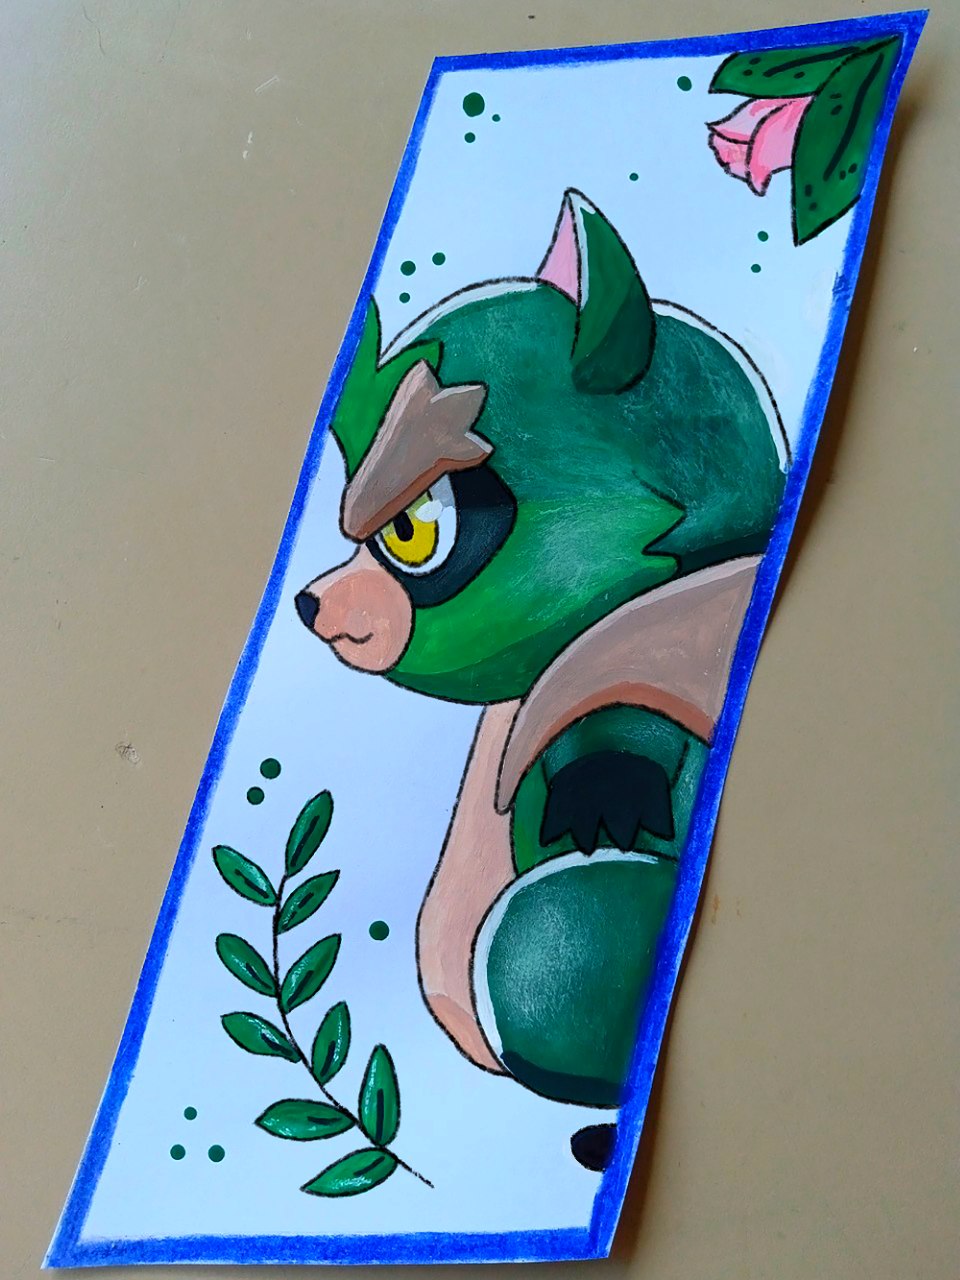
❤️ Hasta la próxima publicación.
❤️ Until the next post.

Todas las fotografías son de mi propiedad.
Separador y Fotos editadas en Canva
All photographs are my property.
Photos edited in Canva