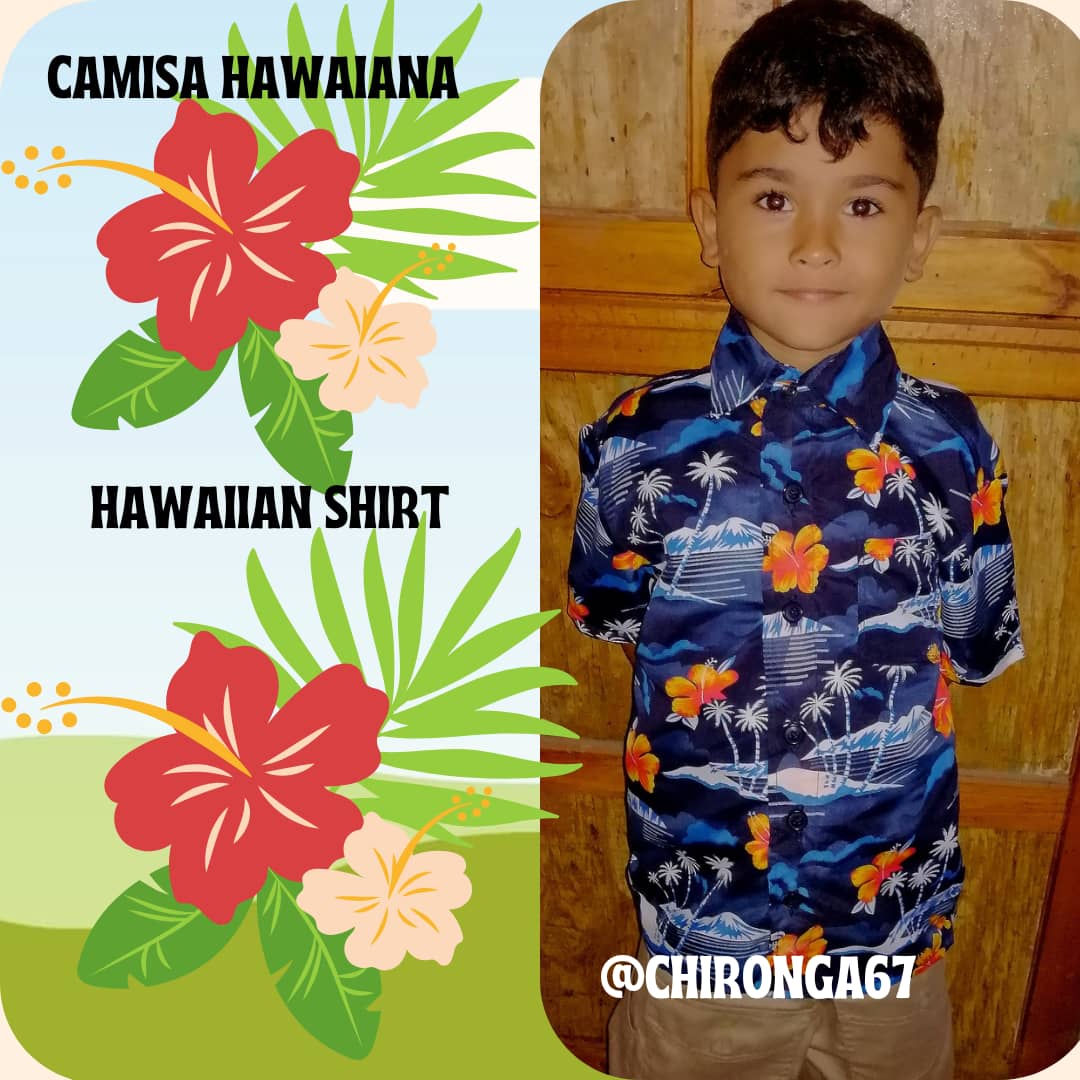

Hola amigos de esta hermosa comunidad de Hive Diy hoy les traigo la elaboración de una camisa hawaiana para un acto de mi nieto en el preescolar para su promoción, un reto para mi el cual hice con mucho amor y ese amor dio sus frutos, aquí les dejo los materiales y el paso a paso.
Hello friends of this beautiful community of Hive Diy today I bring you the elaboration of a Hawaiian shirt for an act of my grandson in preschool for his promotion, a challenge for me which I did with love and that love paid off, here I leave the materials and step by step.

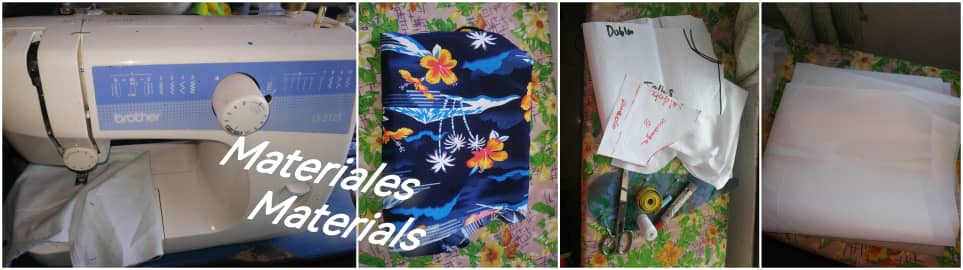
🪡 Tiza
🪡 1 metro de tela hawaiana
🪡 Hilo negro
🪡 Maquina de coser
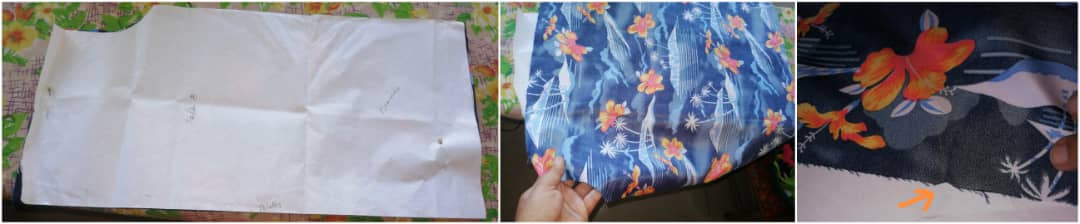
🪡 Patrón de camisa talla 8
🪡 Botones
🪡 Tijera
🪡 Pelon
🪡 Cinta métrica
🪡 Chalk
🪡 1 meter of Hawaiian cloth
🪡 Black thread
🪡 Sewing machine
🪡 Shirt pattern size 8
🪡 Buttons
🪡 Scissors
🪡 Pelon
🪡 Tape measure

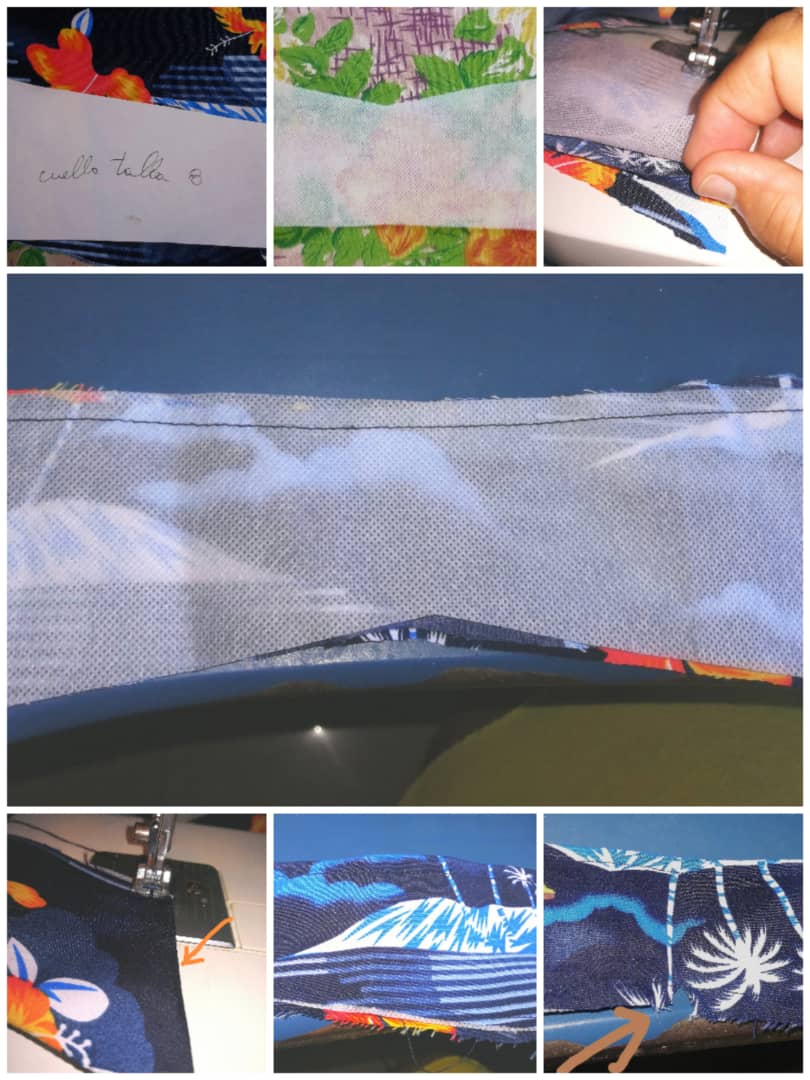
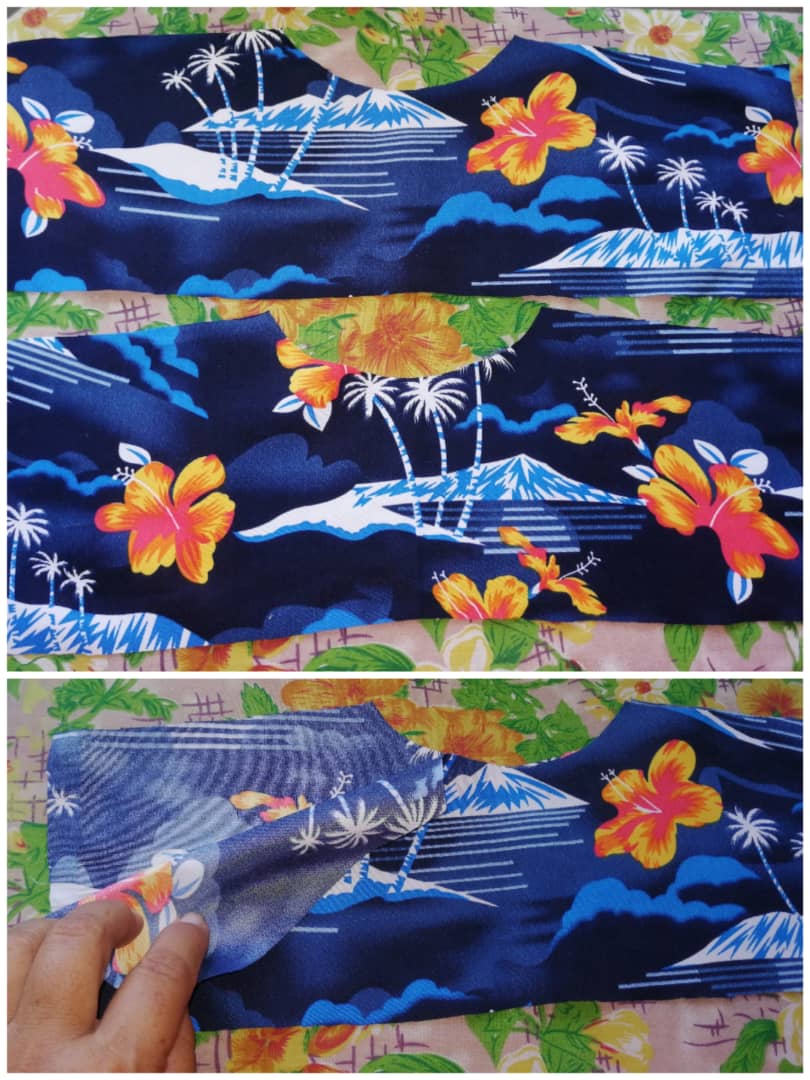
Para la elaboración del cuello pongo el patrón sobre la tela doble y corto 2 piezas y una pieza en pelón, esto es para que el cuello quede firme, luego se pone derecho con derecho y el pelón sobre uno de los lados, nunca en el medio y se procede a coser se hacen cortes en las esquinas antes de voltear para que las esquinas queden perfectas, luego se voltea y se repisa.
For the elaboration of the collar I put the pattern on the double fabric and cut 2 pieces and a piece in fur, this is so that the collar is firm, then it is put right to right and the fur on one of the sides, never in the middle and proceeds to sew cuts are made in the corners before flipping so that the corners are perfect, then flips and shelves.
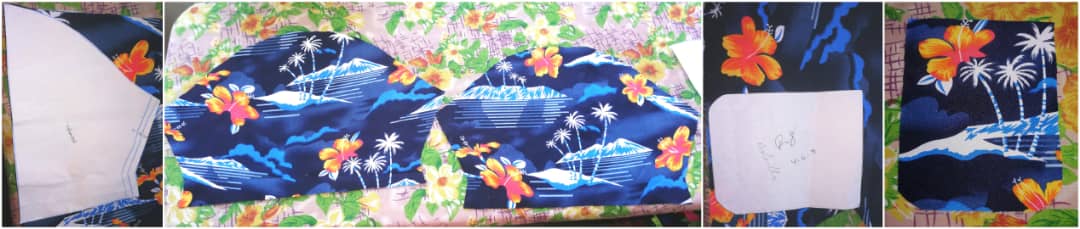
Corte la pieza delantera en la tela doble, para cortar 2 piezas.
Cut the front piece in the double fabric, to cut 2 pieces.

Corte las mangas en la tela doble y el bolsillo.
Cut the sleeves on the double fabric and the pocket.
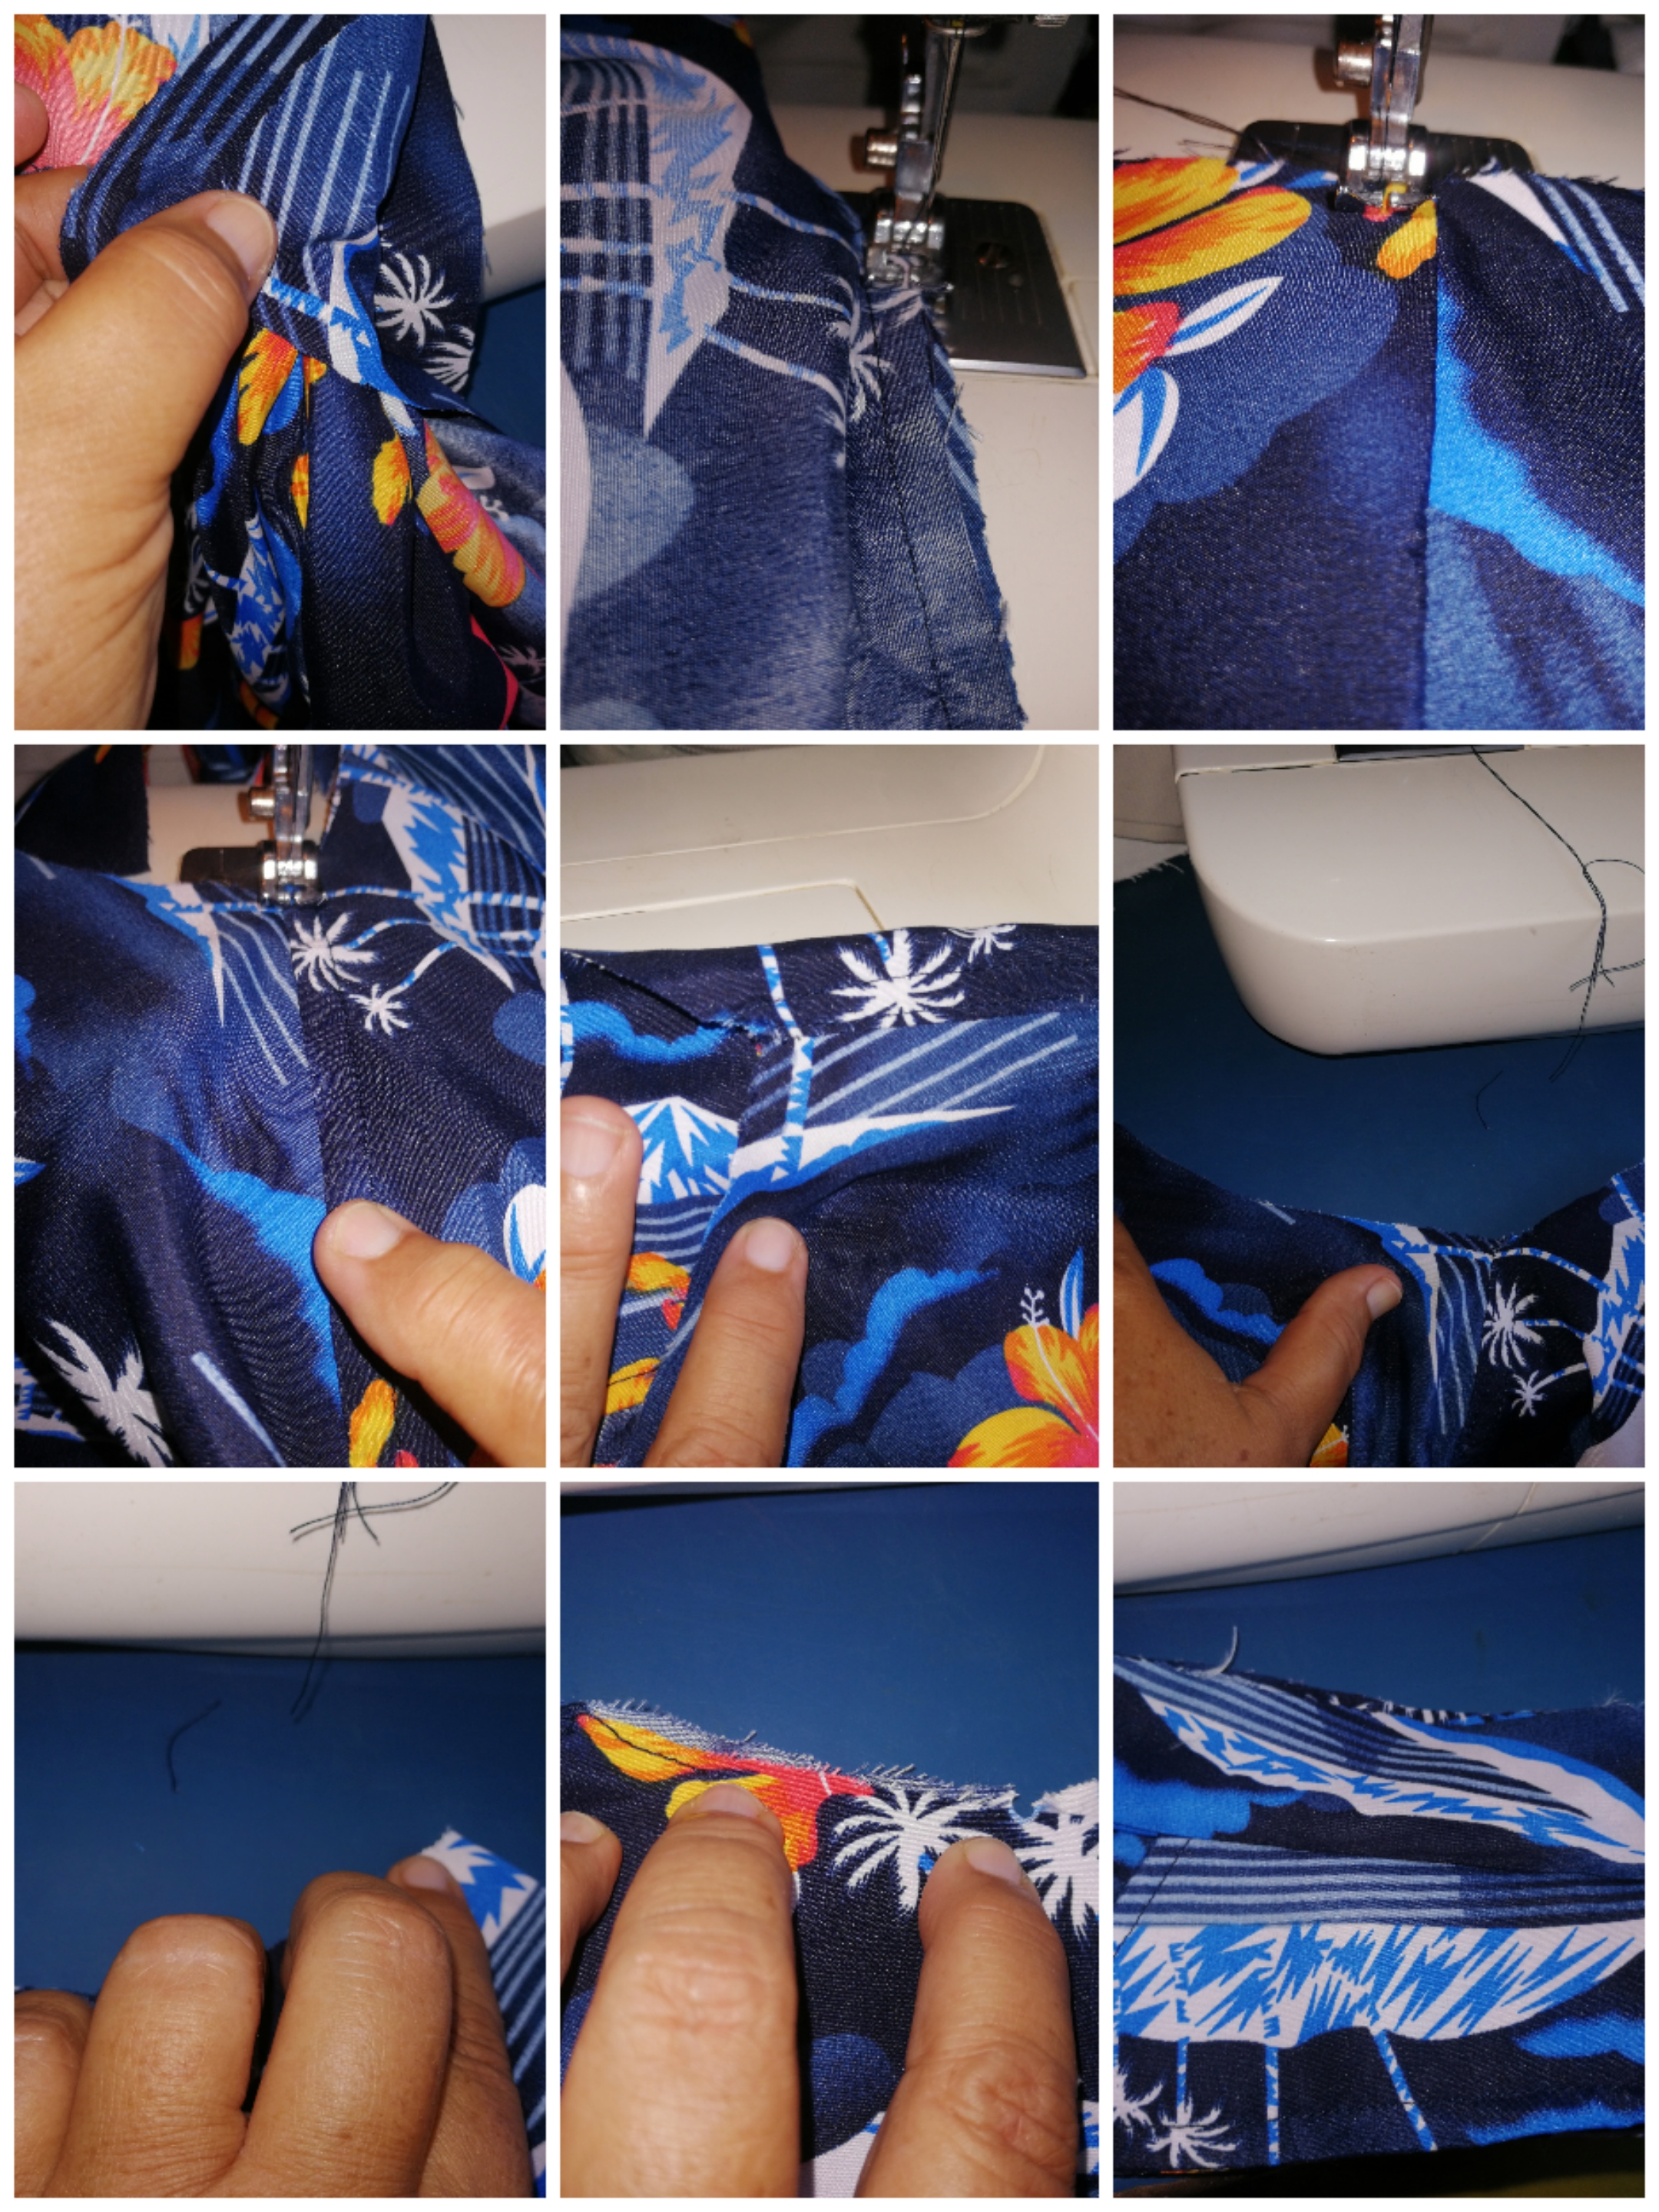
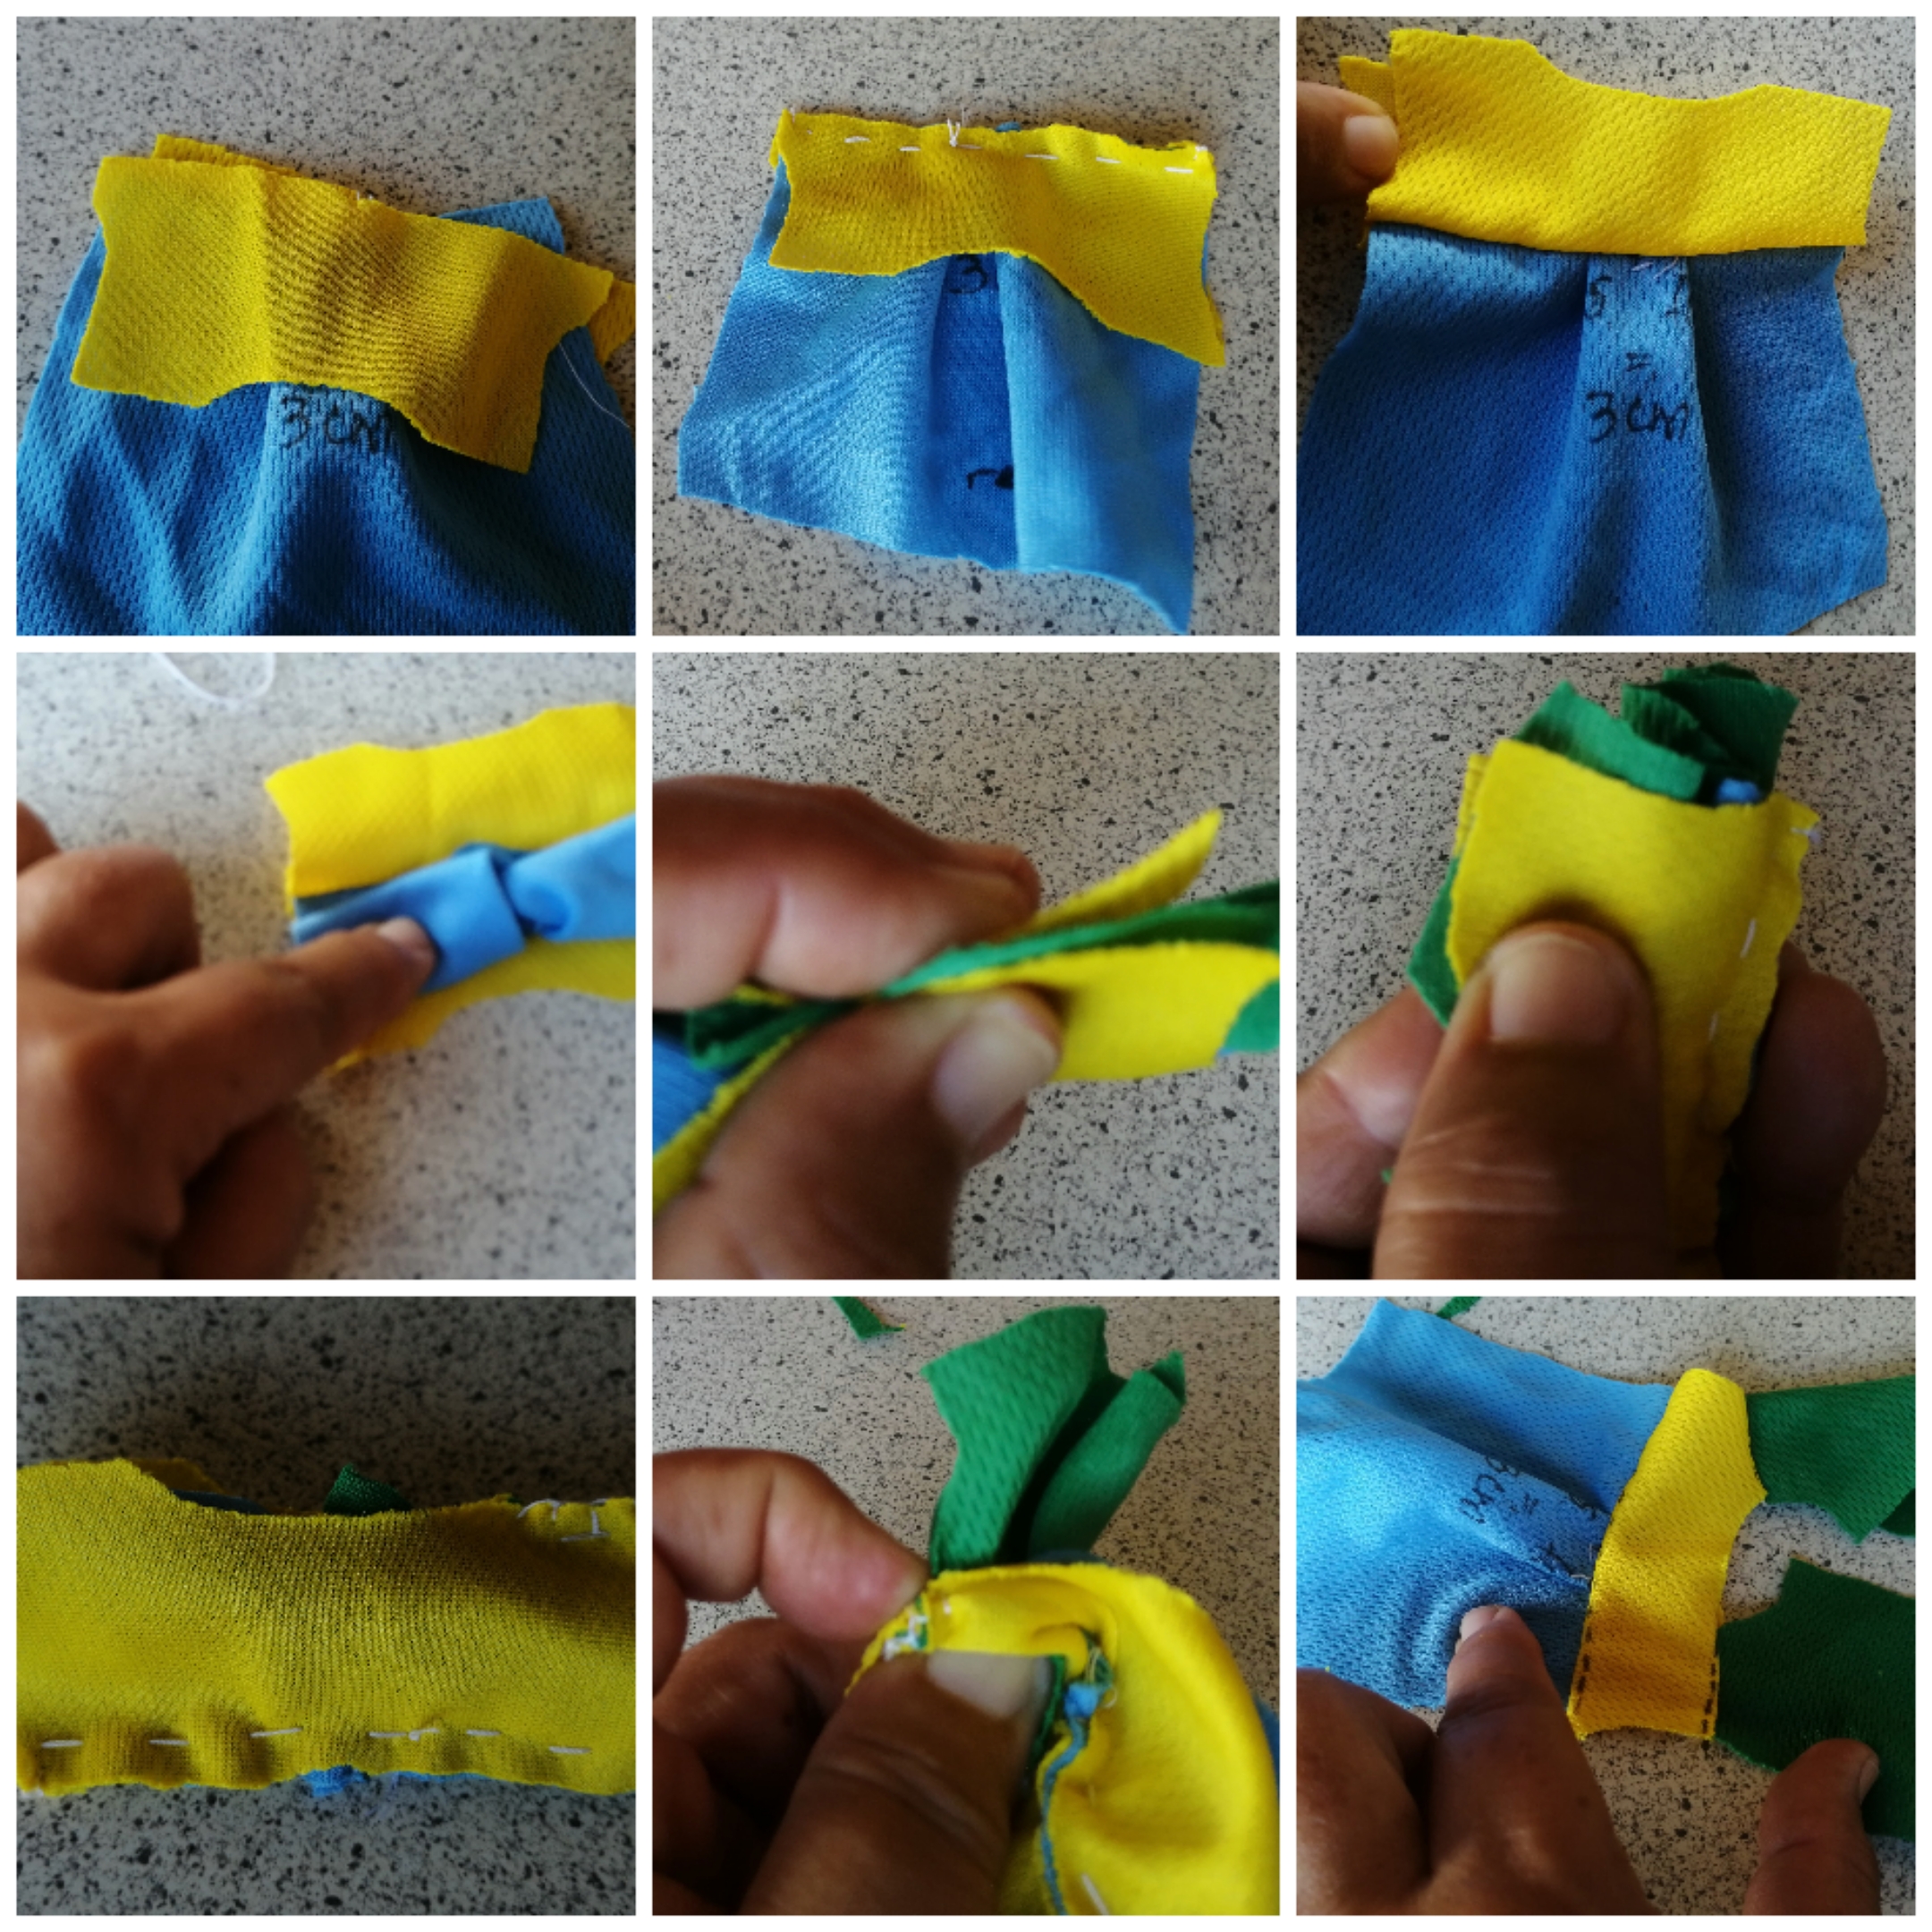
Corté el canesú, el canesú son 2 piezas se doblan a la mitad y se le hace un piquete al centro, también corte la pieza de atrás en la pieza doble, se dobla la parte trasera para marcar la mitad, se le hace un piquete y en ese piquete se marca a la derecha 1,5 cms y se hace lo mismo del lado izquierdo y se hace una pinza de 3 cms se asegura con un alfiler o con la máquina, usted ve como le gusta más que quede la pinza si hacía adentro o hacia afuera, yo la hice hacia afuera, hecho esto se mete la pieza trasera entre el canesú y se pega la pieza trasera al canesú y luego se procede a repisar el canesú en la parte de abajo.
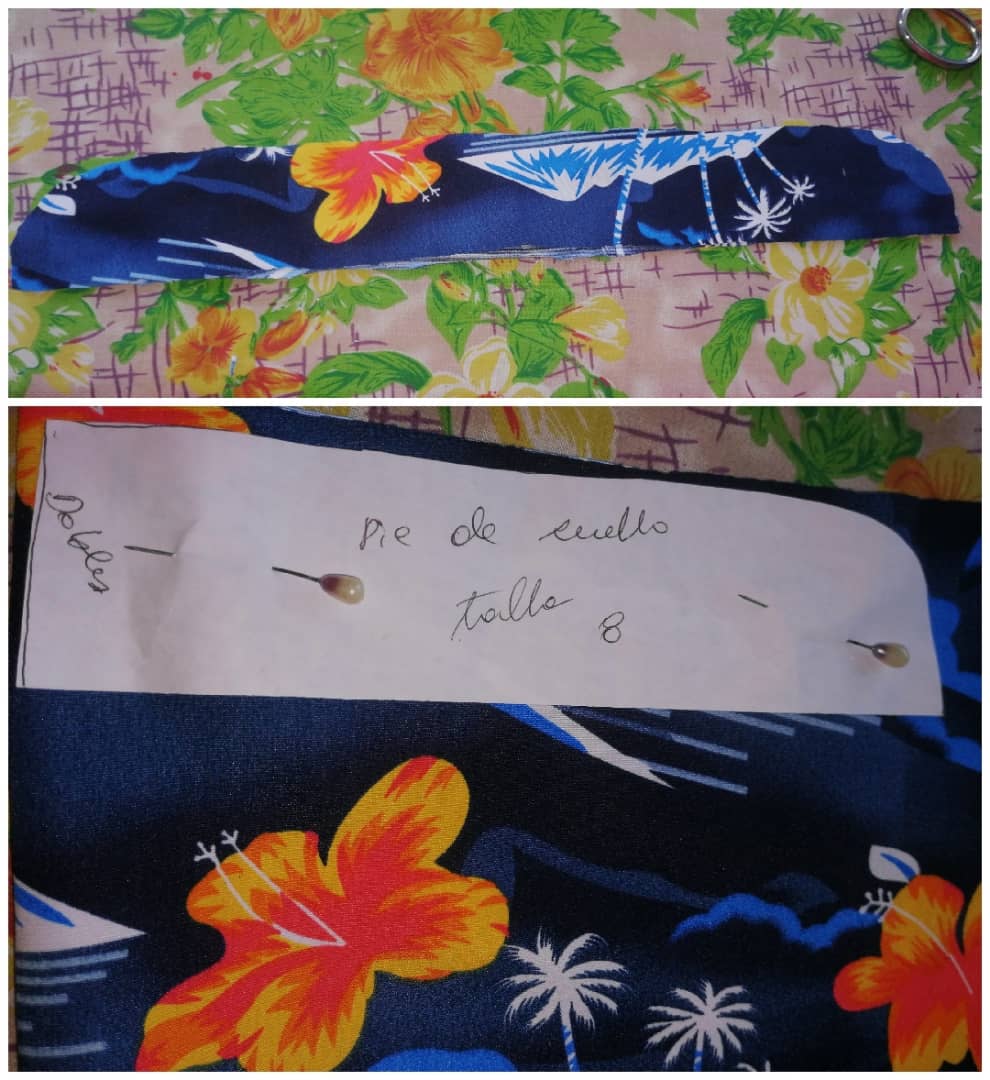
Corte el pie de cuello en la tela doble, lo doble a la mitad y le hice un piquete y hago lo mismo en el cuello esto es para que el cuello quede bien pegado, se hace el mismo procedimiento como cuando pegamos el canesú a la pieza trasera, se asegura con un alfiler para coser o se cose del medio hacia abajo, a las curvas se le hacen piquetes para que al voltear la queden bien, esta pieza se repisa después que se pegue a la camisa, doblamos a la mitad y hacemos un piquete e igual a la mitad del canesú en la parte de atrás, reservo hasta, que arme la camisa
I cut the yoke, the yoke is 2 pieces are folded in half and a picket is made in the center, also cut the back piece in the double piece, the back part is folded to mark the middle, a picket is made and in that picket is marked on the right 1,5 cms and do the same on the left side and make a 3 cms clamp, secure it with a pin or with the machine, you see how you like the clamp to be more if it is inwards or outwards, I did it outwards, once this is done put the back piece between the yoke and glue the back piece to the yoke and then proceed to smooth the yoke at the bottom.
Cut the neck foot in the double fabric, fold it in half and I made a piquete and I do the same on the neck this is so that the neck is well glued, the same procedure is done as when we glued the yoke to the back piece, it is secured with a pin to sew or sew from the middle down, to the curves we make picks so that when we turn it over, this piece will be put on a shelf after it is glued to the shirt, we fold it in half and make a picket and the same to half of the yoke in the back, I reserve until the shirt is assembled.


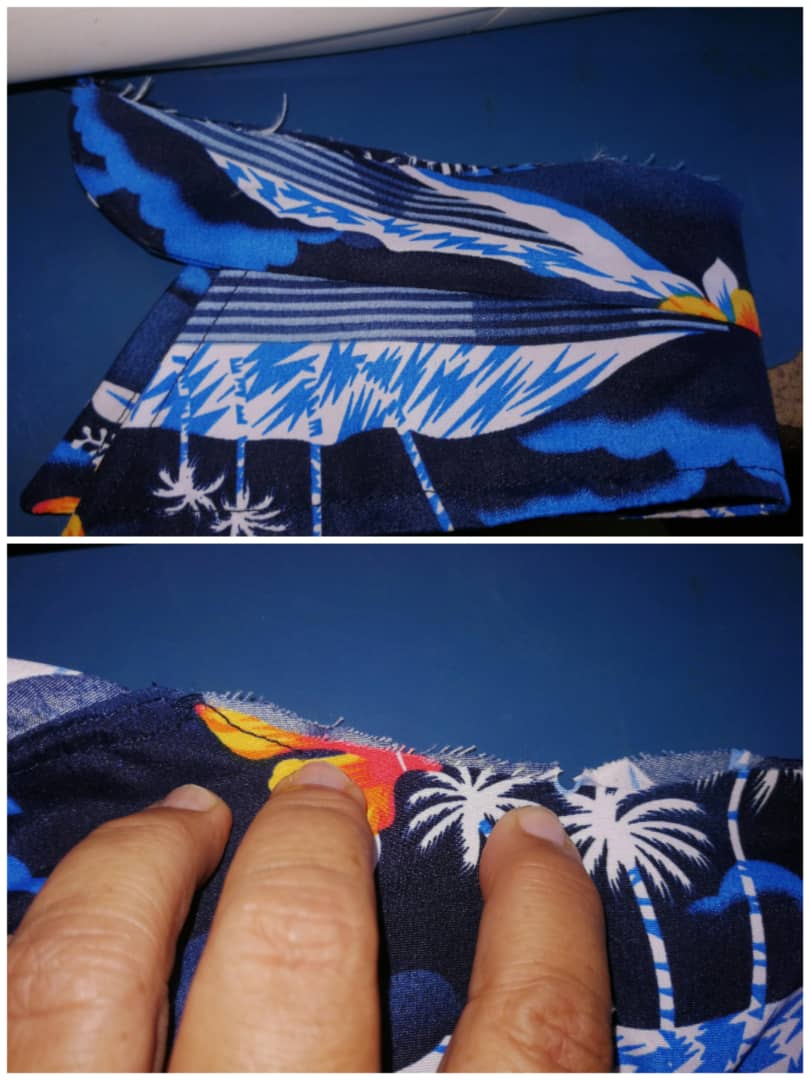
Para pegar los hombros agarre la parte delantera y coloque derecho con derecho de la delantera y el canesú (enrolle la parte trasera y las 2 delanteras y las metí dentro del canesu cuidando que la delantera quedara derecho con derecho para la parte de adelante) pase costura recta en los hombros y remate con zig-zag y saque las piezas del canesú, repise el canesú y en la parte de los hombros.
Hice un piquete en la mitad de la manga e igual en la camisa en la parte donde va la manga y puse piquete con piquete y cosí hacia abajo y después al otro lado y remate con Zig-zag y luego repise por el lado derecho y procedí a pegar la otra manga siguiendo los mismos pasos, hecho esto empecé a pegar la camisa de la unión de la manga hacia abajo y de la unión de la manga hacia el borde de la manga y remate la orilla con zig-zag.
To attach the shoulders I grabbed the front part and placed the front and the yoke right sides together (I rolled the back part and the 2 front parts and put them inside the yoke taking care that the front part was right sides together for the front part) I sewed a straight seam on the shoulders and finished with zig-zag and took out the pieces of the yoke, I repeated the yoke and on the shoulder part.
I made a picket in the middle of the sleeve and the same on the shirt in the part where the sleeve goes and I put picket with picket and sewed down and then to the other side and finished with Zig-zag and then repeat on the right side and proceeded to glue the other sleeve following the same steps, done this I started to glue the shirt from the union of the sleeve down and from the union of the sleeve to the edge of the sleeve and finished the edge with zig-zag.
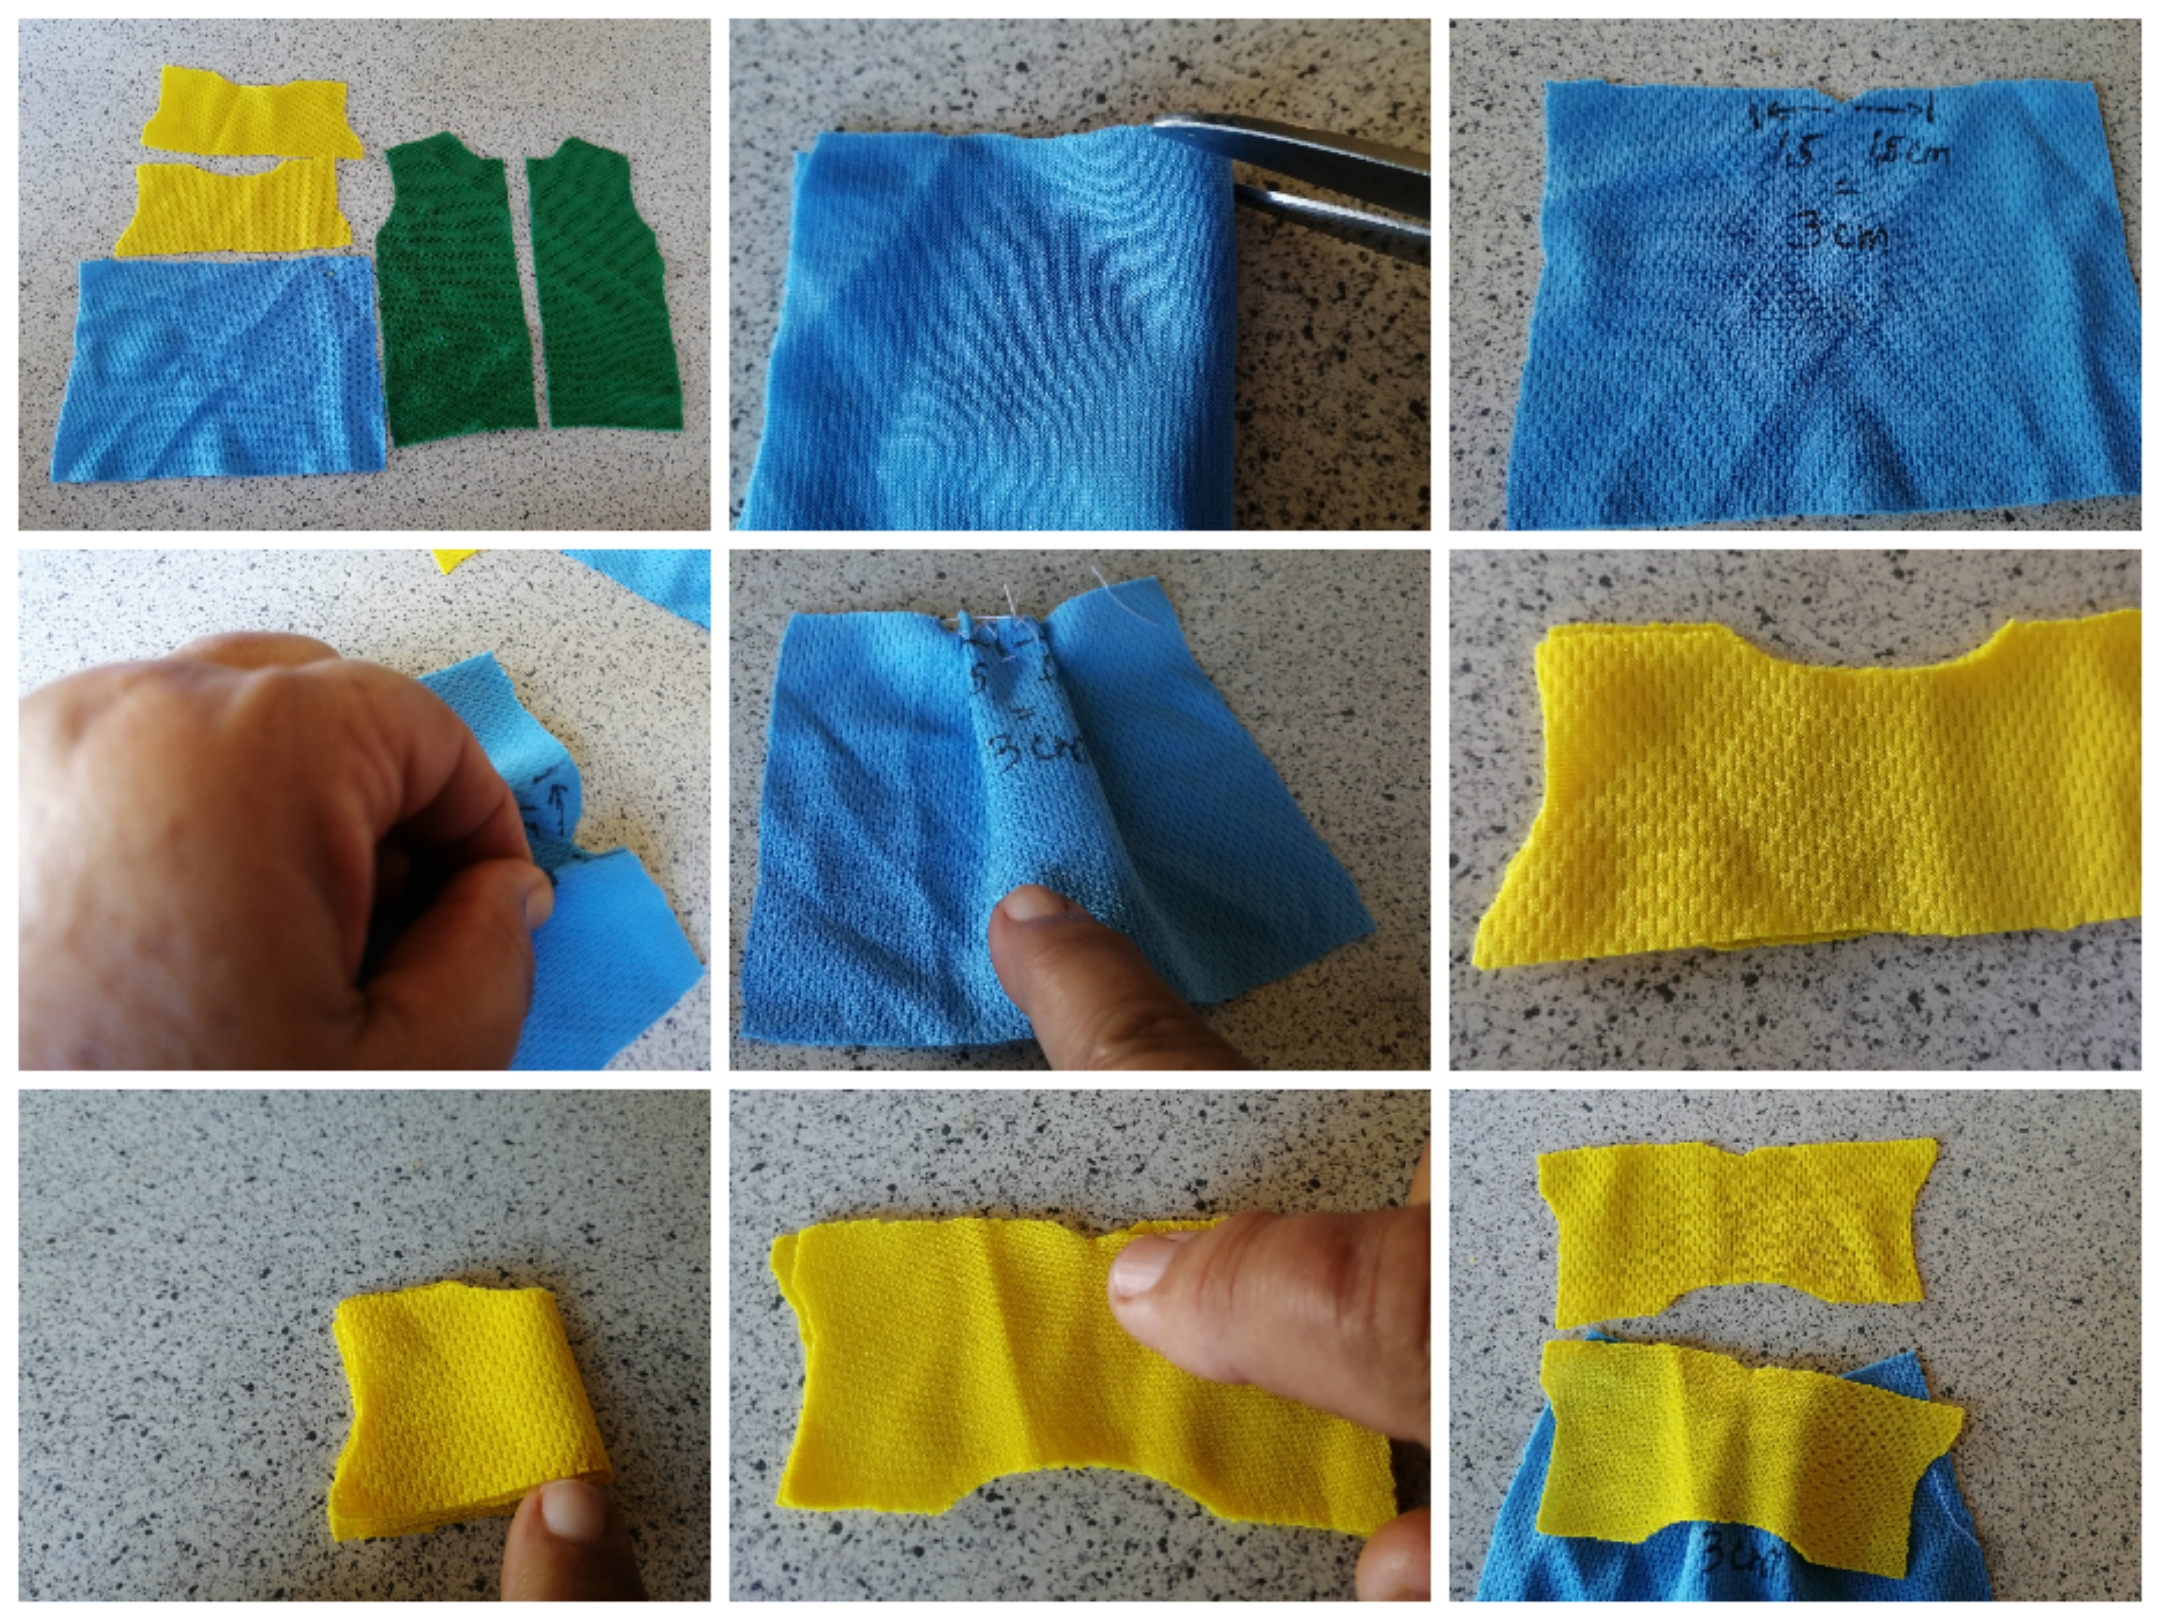
Aquí les muestro con unas piezas pequeñas y de varios colores como se arma la camisa para que lo vean más claro.
Here I show you how to assemble the shirt with some small pieces of different colors so that you can see it more clearly.
Lista la camisa procedi a pegar primero el tapa cuello en la parte de atrás y al llegar a la parte de adelante doblo los centímetros que faltan para pegar la otra tapa del borde del cuello, cuidando que el dobles del otro lado donde van los ojales mida lo mismo que donde van los botones, hecho esto repise el tapa cuello.
Hice el ruedo de la manga y después medí para hacer los ojales.
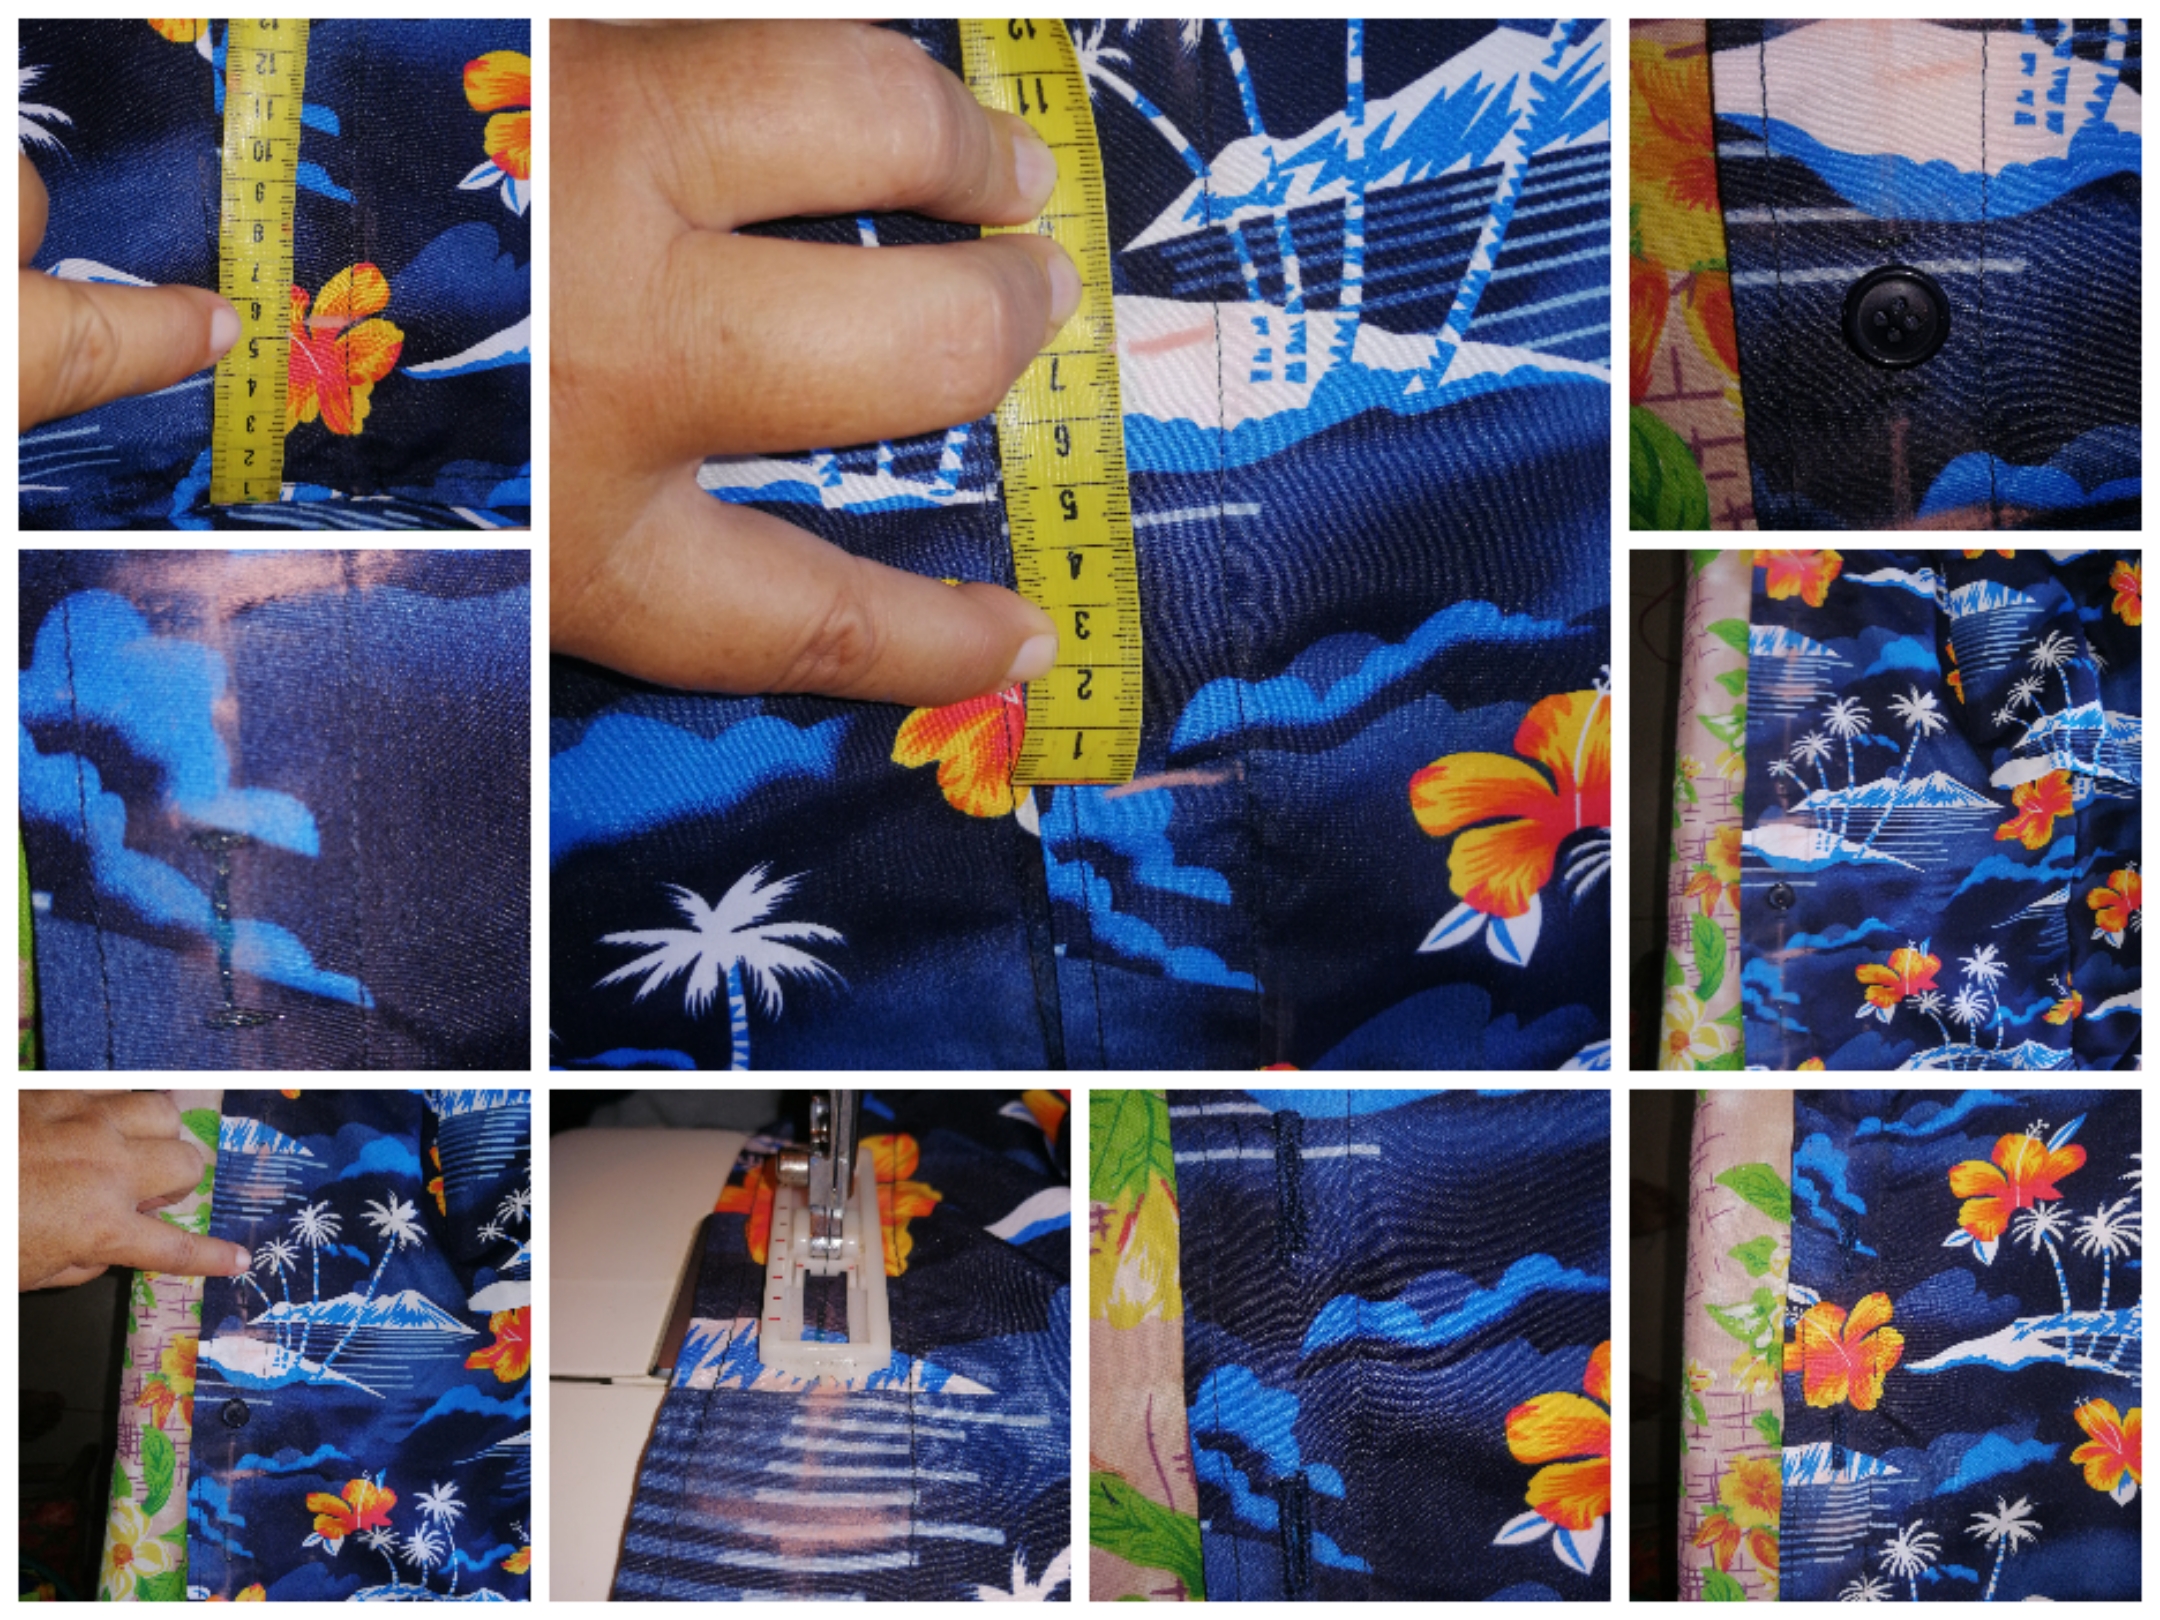
Medi el largo de la camisa, deje 5 cms de abajo hacia arriba y los centímetros que me quedaron los medí entre 7 centímetros porque es una camisa de niño.
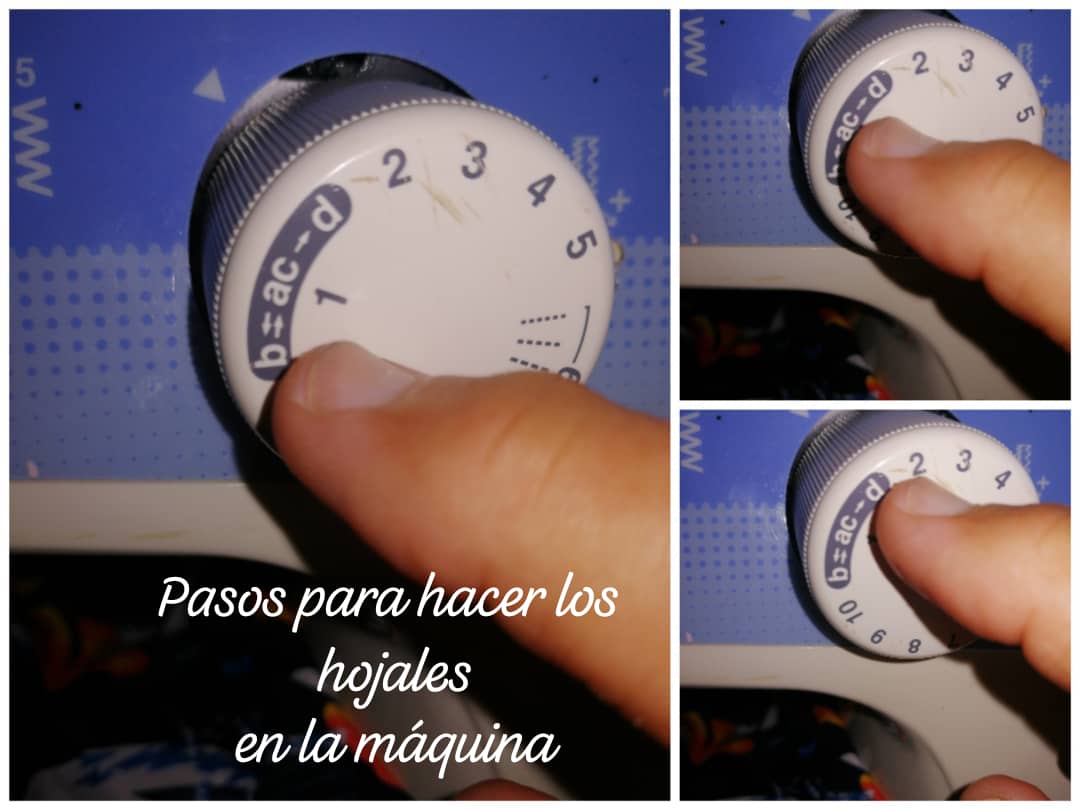
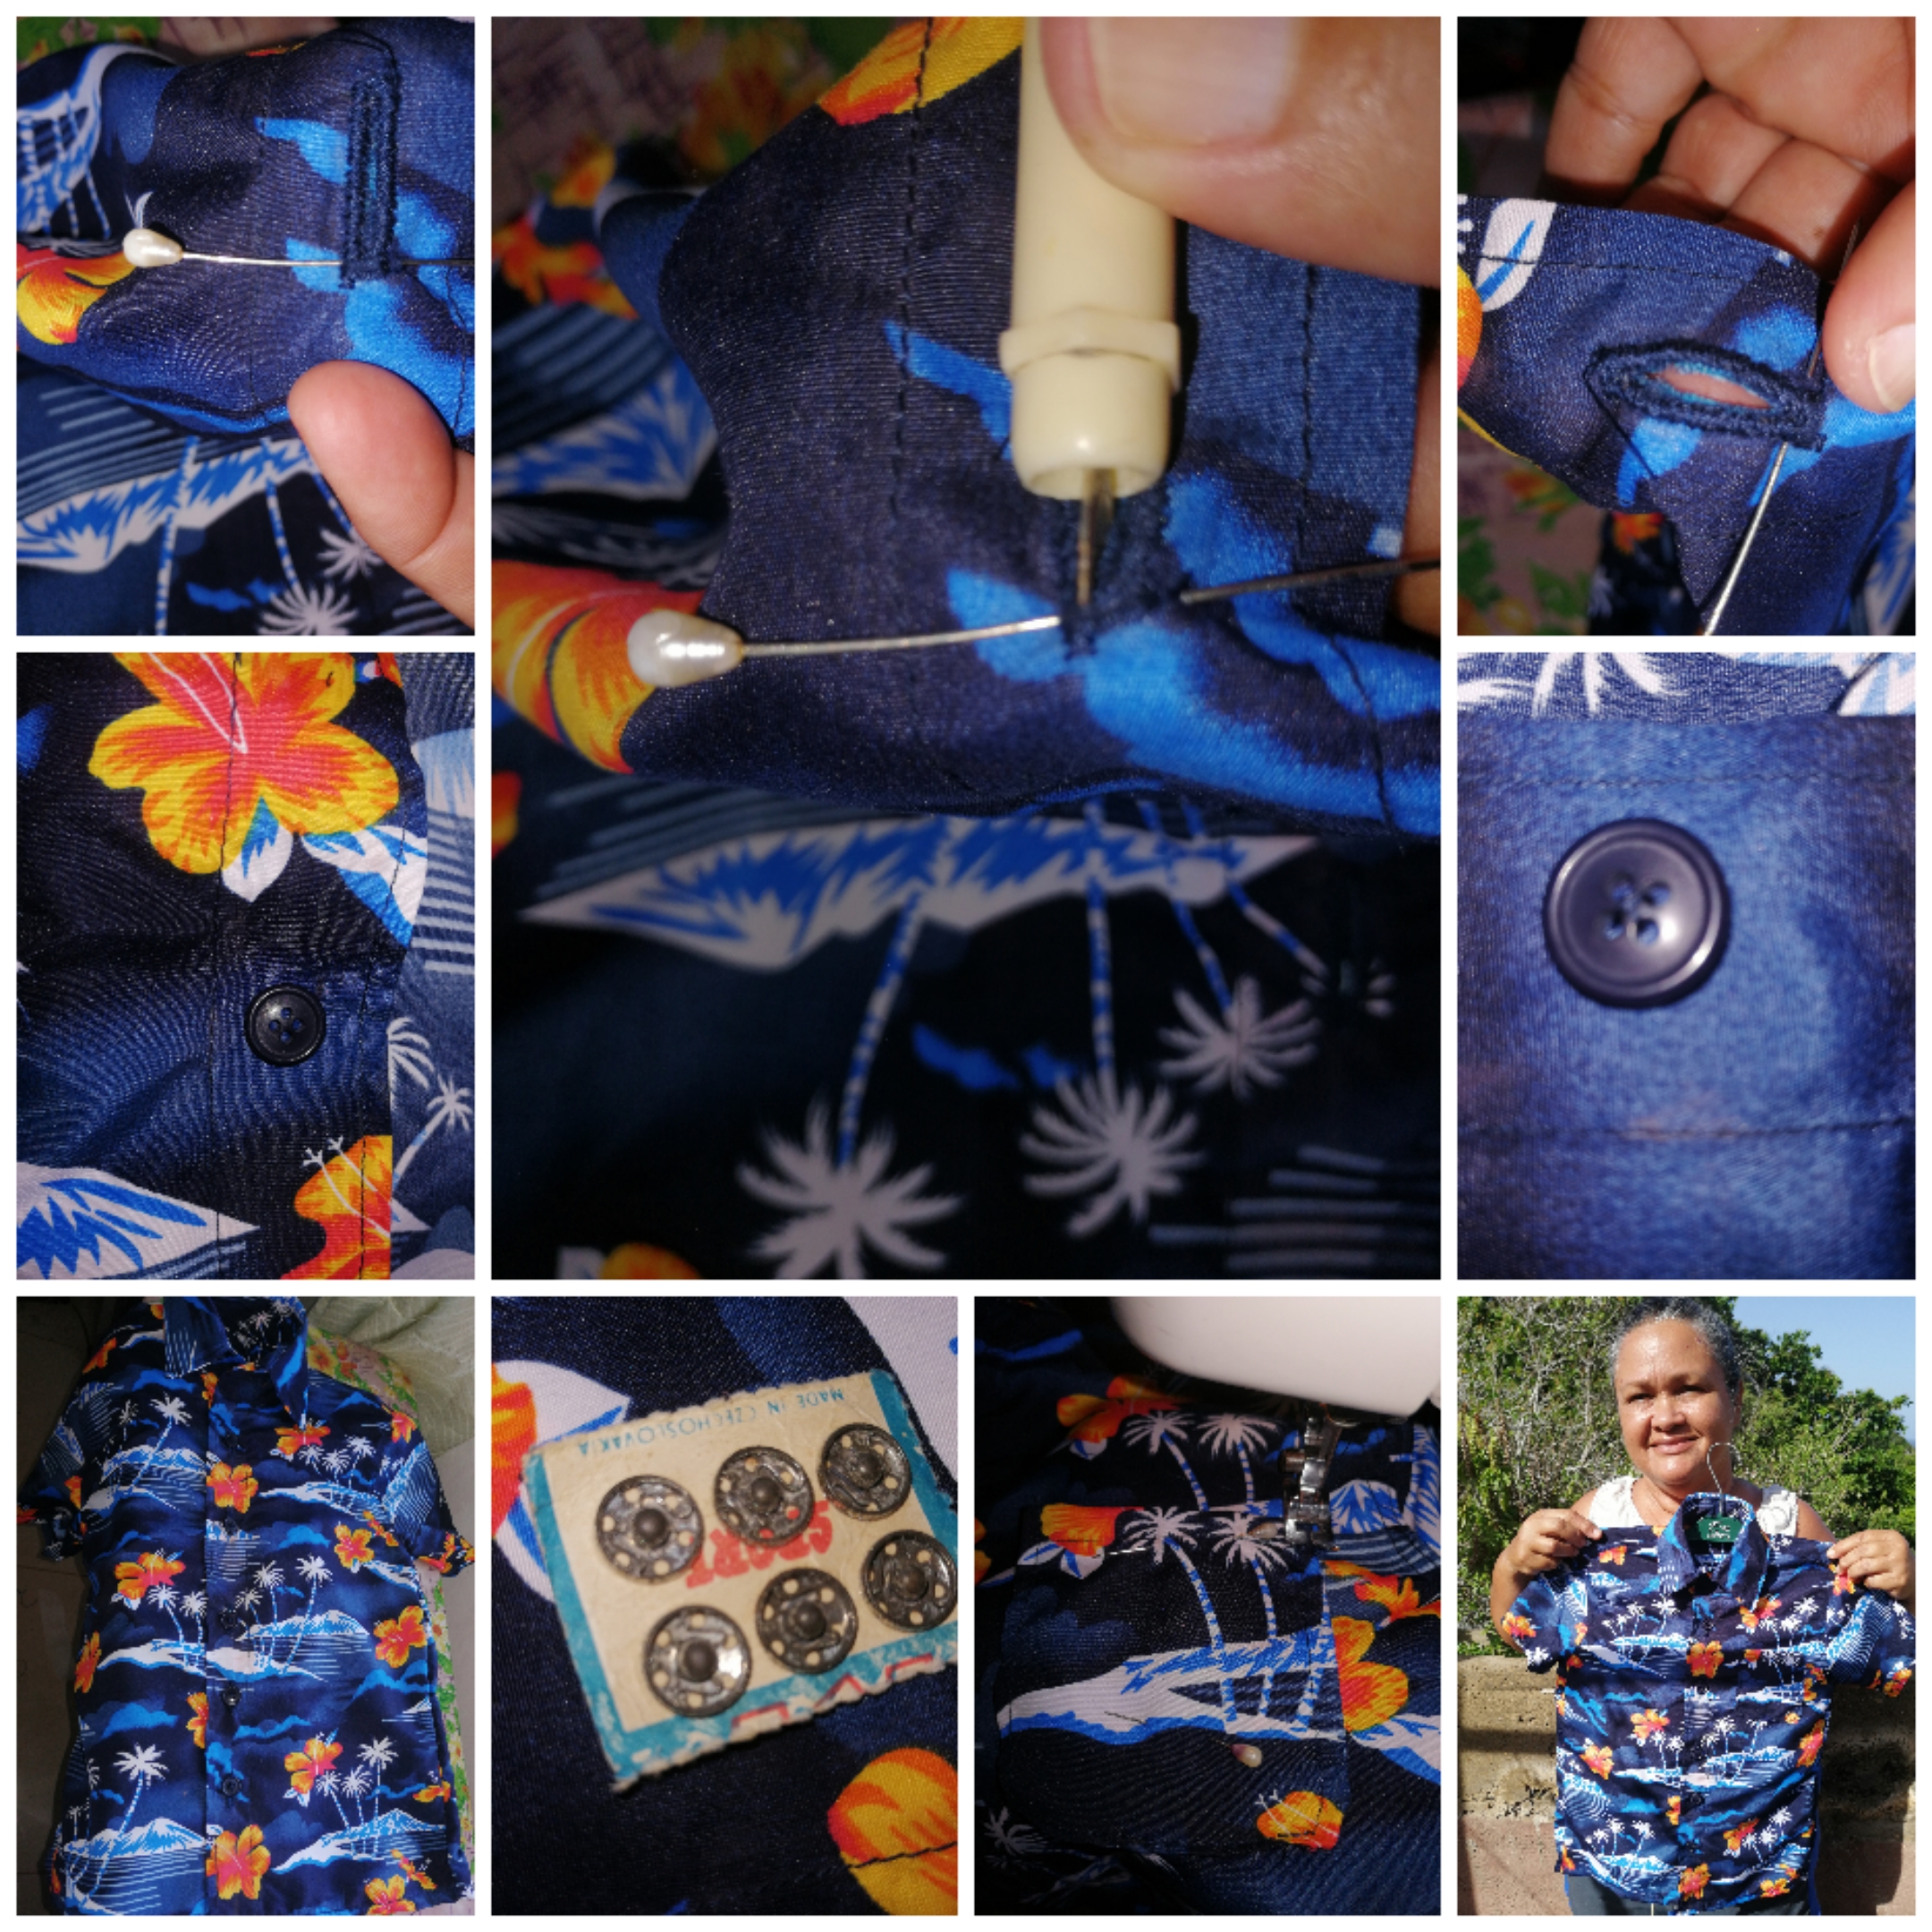
Marque la distancia de los botones para tener una guía, marque cada ojal en su sitio para que fuera más fácil, procedí a poner el pie de ojal en la maquina e hice cada ojal con cuidado, luego puse un alfiler en el inicio de cada ojal y con un desbaratador de costura procedi a abrirlos uno a uno(el alfiler es para que no se me pase el desbaratador y dañe el ojal).
Once the shirt was ready, I proceeded to glue the collar cover on the back side first and when I reached the front side, I folded the missing centimeters to glue the other collar edge cover, making sure that the fold on the other side where the buttonholes go measures the same as where the buttons go, then I repeated the collar cover.
I made the sleeve hem and then measured to make the buttonholes.
I measured the length of the shirt, I left 5 centimeters from the bottom to the top and the centimeters I had left I measured between 7 centimeters because it is a child's shirt.
I marked the distance of the buttons to have a guide, I marked each buttonhole in its place to make it easier, I proceeded to put the buttonhole foot in the machine and made each buttonhole carefully, then I put a pin at the beginning of each buttonhole and with a seam ripper I proceeded to open them one by one (the pin is so that I do not miss the ripper and damage the buttonhole).
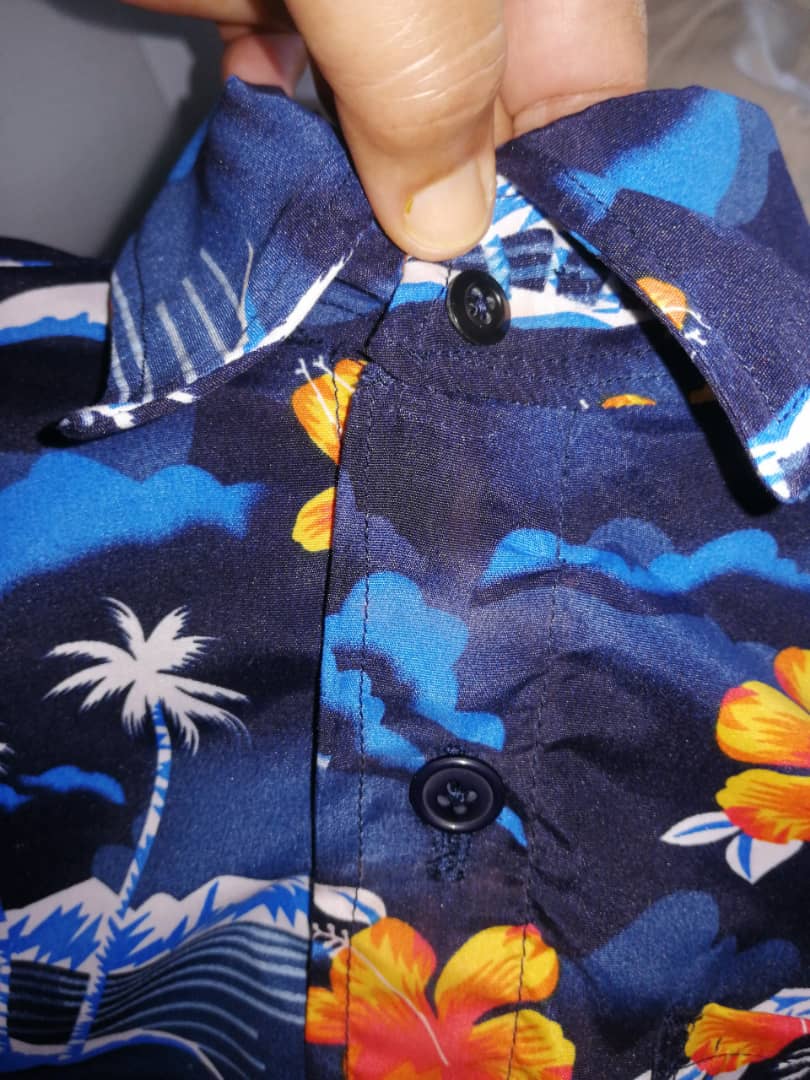
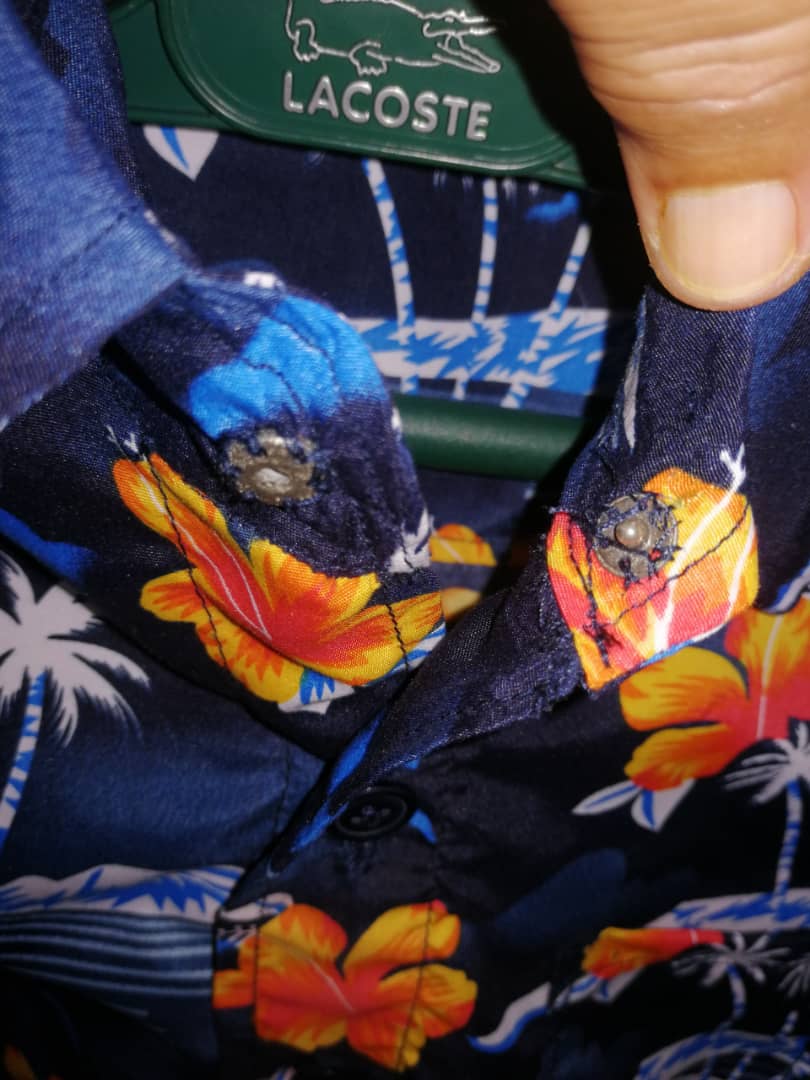
Como es de hombre los ojales se hacen en el lado izquierdo para que cruce de izquierda a derecha y los botones en el lado derecho, los ojales se hacen vertical y en el cuello horizontal, pegue un botón en el cuello de adorno porque le pegue un broche para que fuera más cómodo para mi nieto.
As it is for men, the buttonholes are made on the left side so that it crosses from left to right and the buttons on the right side, the buttonholes are vertical and the collar horizontal, I glued a button on the collar as an ornament because I glued a brooch to make it more comfortable for my grandson.
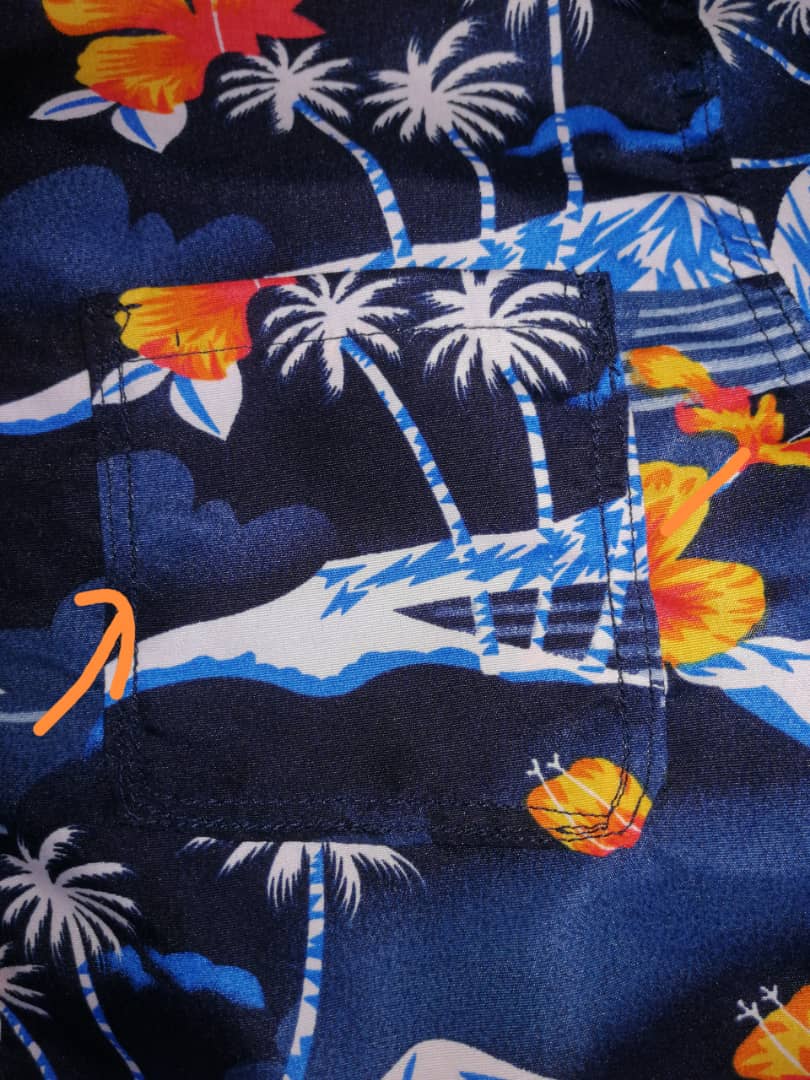
Corte el bolsillo de 10 centímetros de ancho por 14 cm de largo le hice el borde y lo puse en la camisa con un alfiler para que no se moviera y lo pegue a la camisa con una costura doble.
I cut the pocket 10 centimeters wide by 14 cm long, made the border and put it on the shirt with a pin so that it would not move and glued it to the shirt with a double seam.
Nota: El ruedo de la manga es de 2 a 2,5 centímetros y el ruedo inferior es de 1 centímetro, los botones son de 4 huecos.
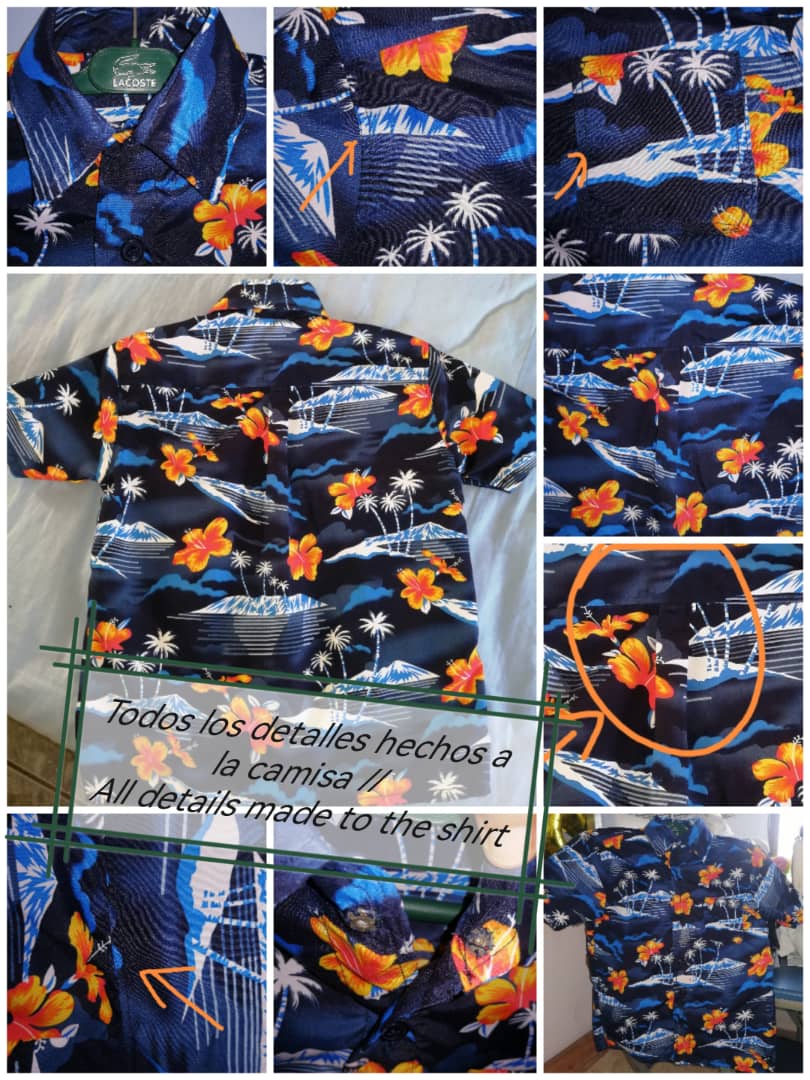
Hasta aquí mi post de hoy espero les guste la camisa qué hice con mucho amor para mi nieto cuidando cada detalle para que quedara muy hermosa, ¡mi nieto feliz¡ mi hija y mi yerno super contentos porque dijeron que quedo hermosa ¿y yo? se imaginaran, super satisfecha.
Note: The sleeve hem is 2 to 2.5 centimeters and the bottom hem is 1 centimeter, the buttons are 4 holes.
So far my post today I hope you like the shirt that I made with love for my grandson taking care of every detail to make it very beautiful, my grandson happy! my daughter and my son in law super happy because they said it was beautiful and me? you can imagine, super satisfied.

Las fotos aquí utilizadas fueron tomadas por mi con mi celular huawei mate lite20, use Deelp traductor imagen editada en canva, separador y baner hecho por mi en canva, use cool text.
The photos used here were taken by me with my cell phone huawei mate lite20, use Deelp translator image edited in canva, separator and banner made by me in canva, use cool text.