Hello everyone!
I hope you are well or trying to be well. Today I want to share a recipe with you, albeit late. Shekarbura. As you know, in this post, where I talked a little about our preparations for Navruz, I mentioned another recipe.

This recipe is much easier than baklava. Fortunately. If it were that difficult, it wouldn't be so good for my parents. Of course, you need an apparatus for this. Unfortunately, you can't do without this apparatus; otherwise, there is no point in sugarbura. You will easily see this tweezer-like tool in the video I will attach.

Firstly, we start with preparing the inside. Necessary for this;
- 500 grammes of walnut
- 400 grammes of granulated sugar
- 1 teaspoon (about 10 grammes) cardamom
Grind 500 grammes of walnuts in a food processor until they turn into powder. It is important that it becomes like flour or powder because this is an element that can even change the taste. After mixing these three ingredients, granulated sugar, walnuts and cardamom in a bowl, we can move on to our dough.
For the dough;
- 1 kilogram of flour
- 3-4 grammes of salt
- One packet (5 grams) of vanillin
- 4 grammes of dry yeast
- 100 millilitres of warm milk
- 200 grammes of clotted cream
- 3 egg yolks
- 300 grammes of melted solid fat
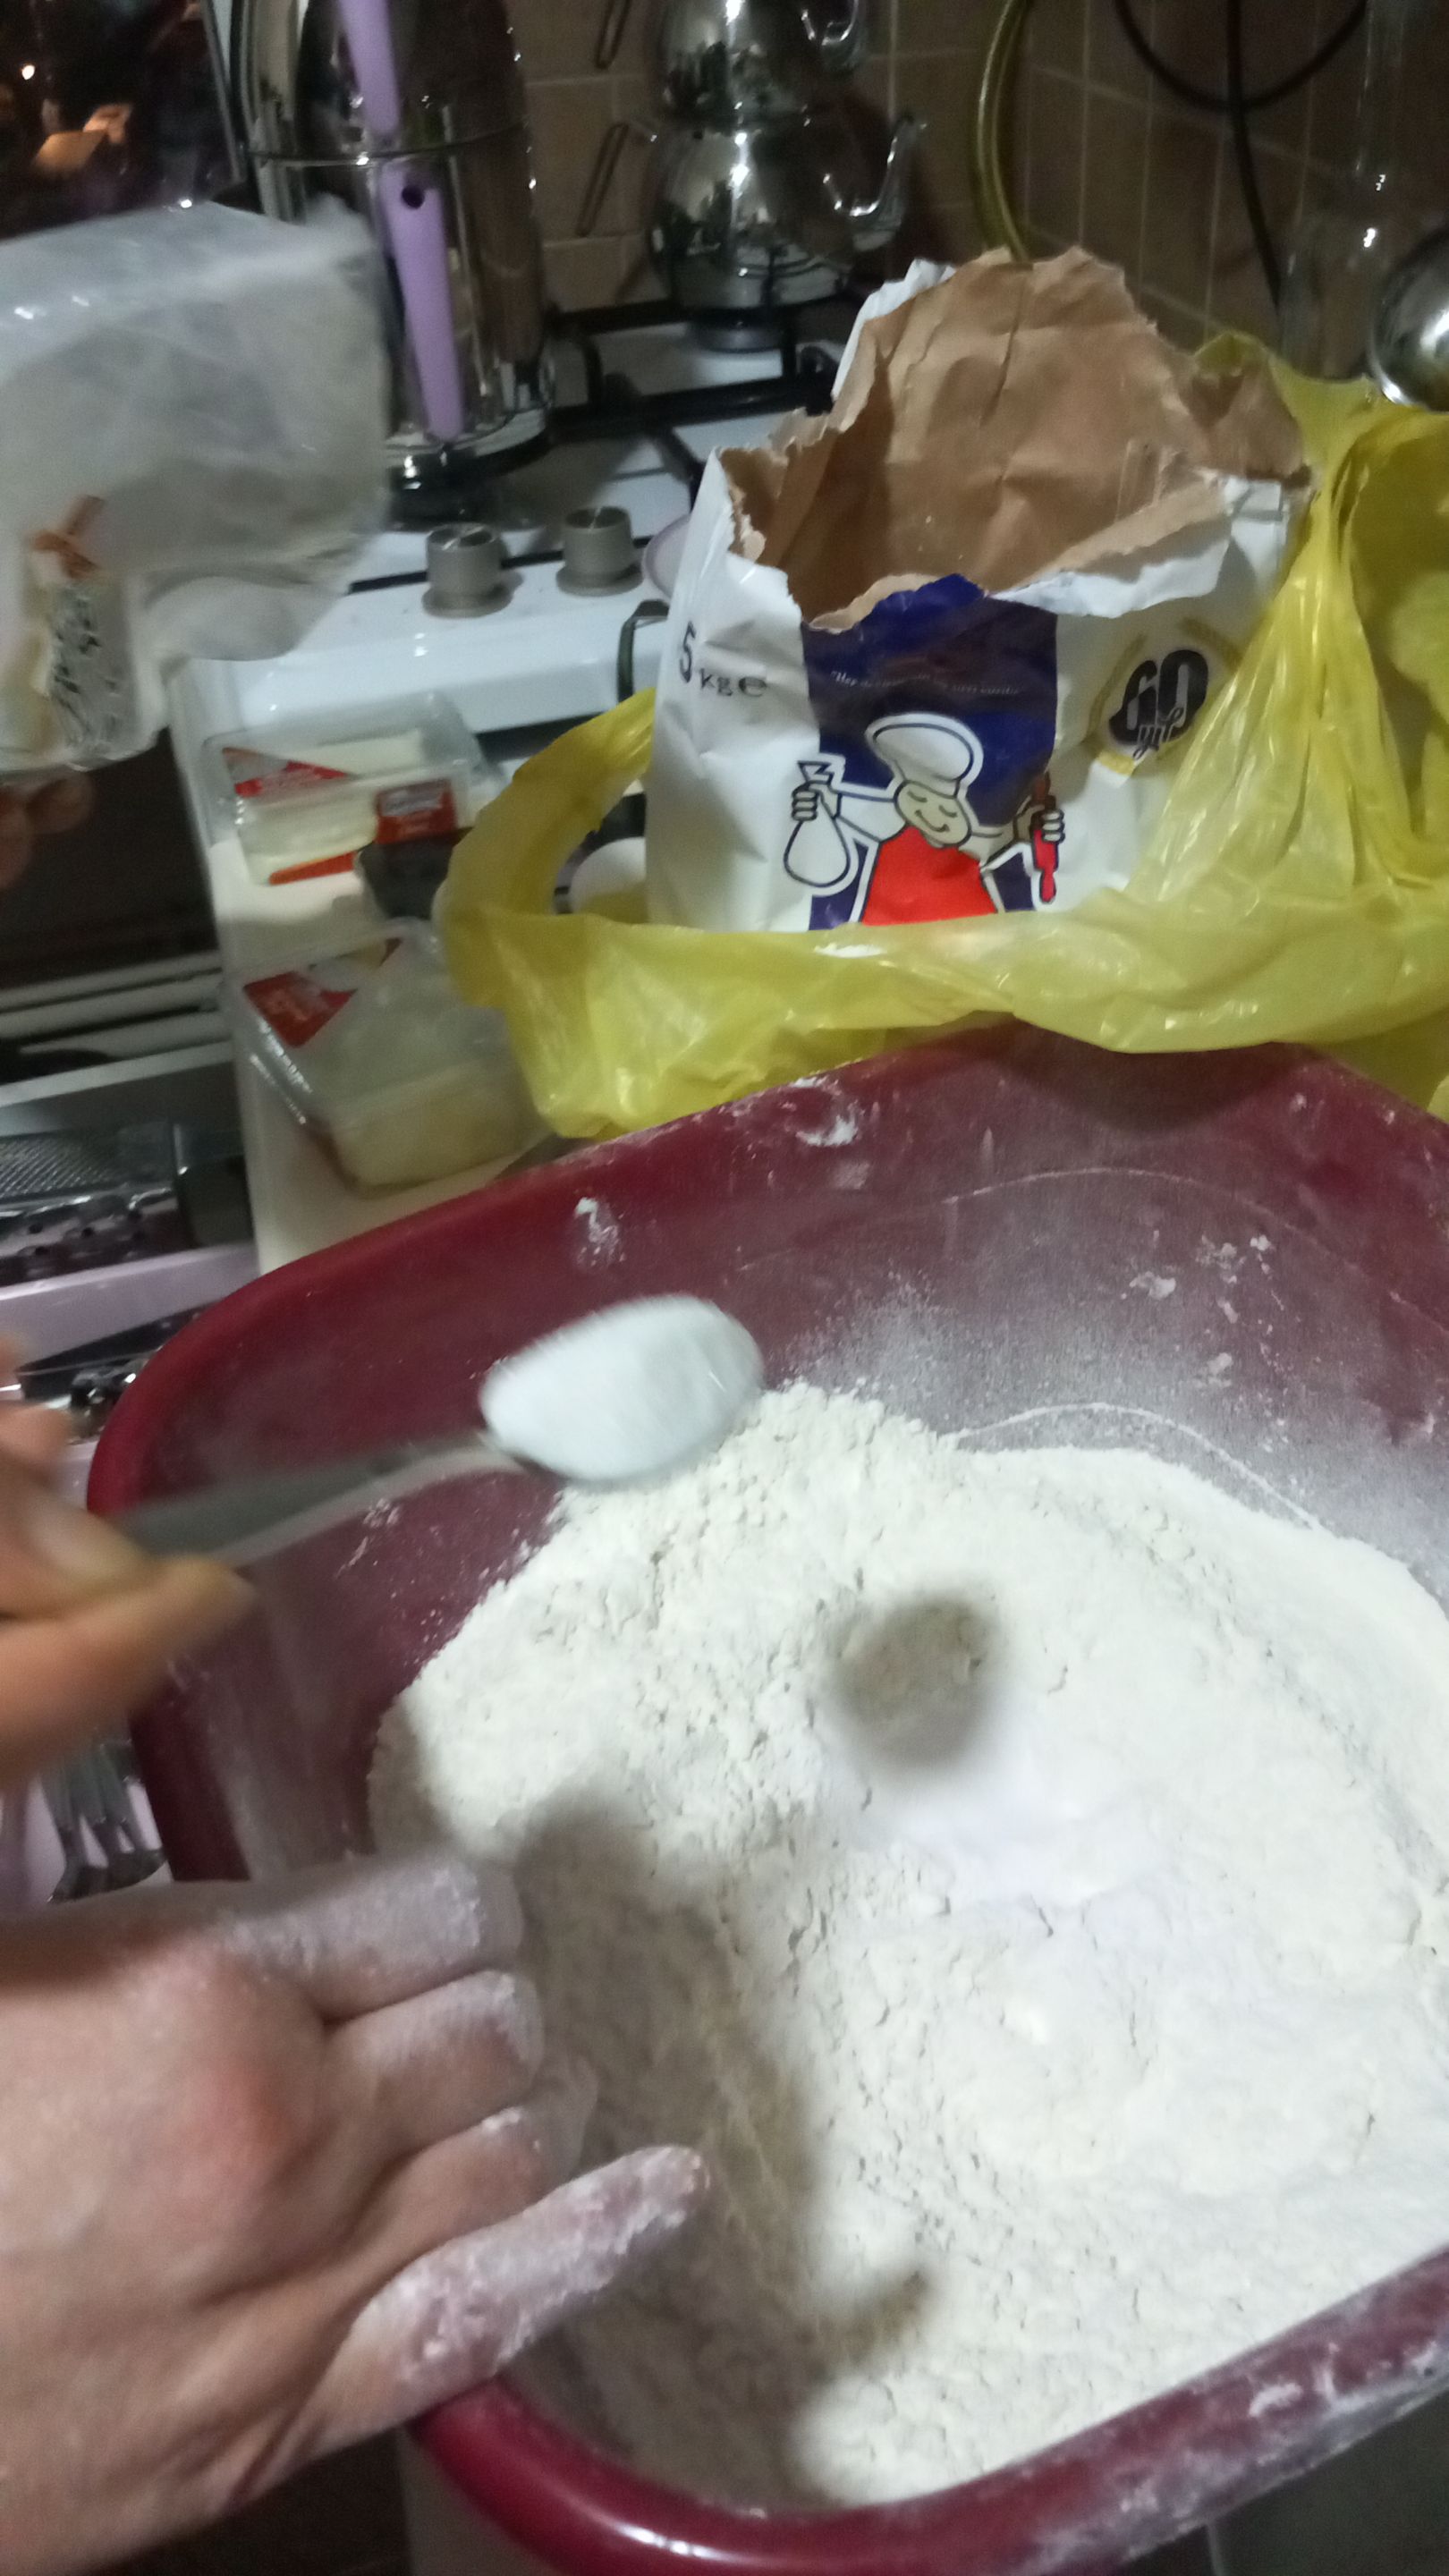
Firstly, we take the dry ingredients, flour, salt, vanillin, into a bowl and mix them. As I mentioned in the baklava recipe, first the dry ingredients and then the wet ones are added slowly. The only difference of this dough from baklava dough is that it has more flour.

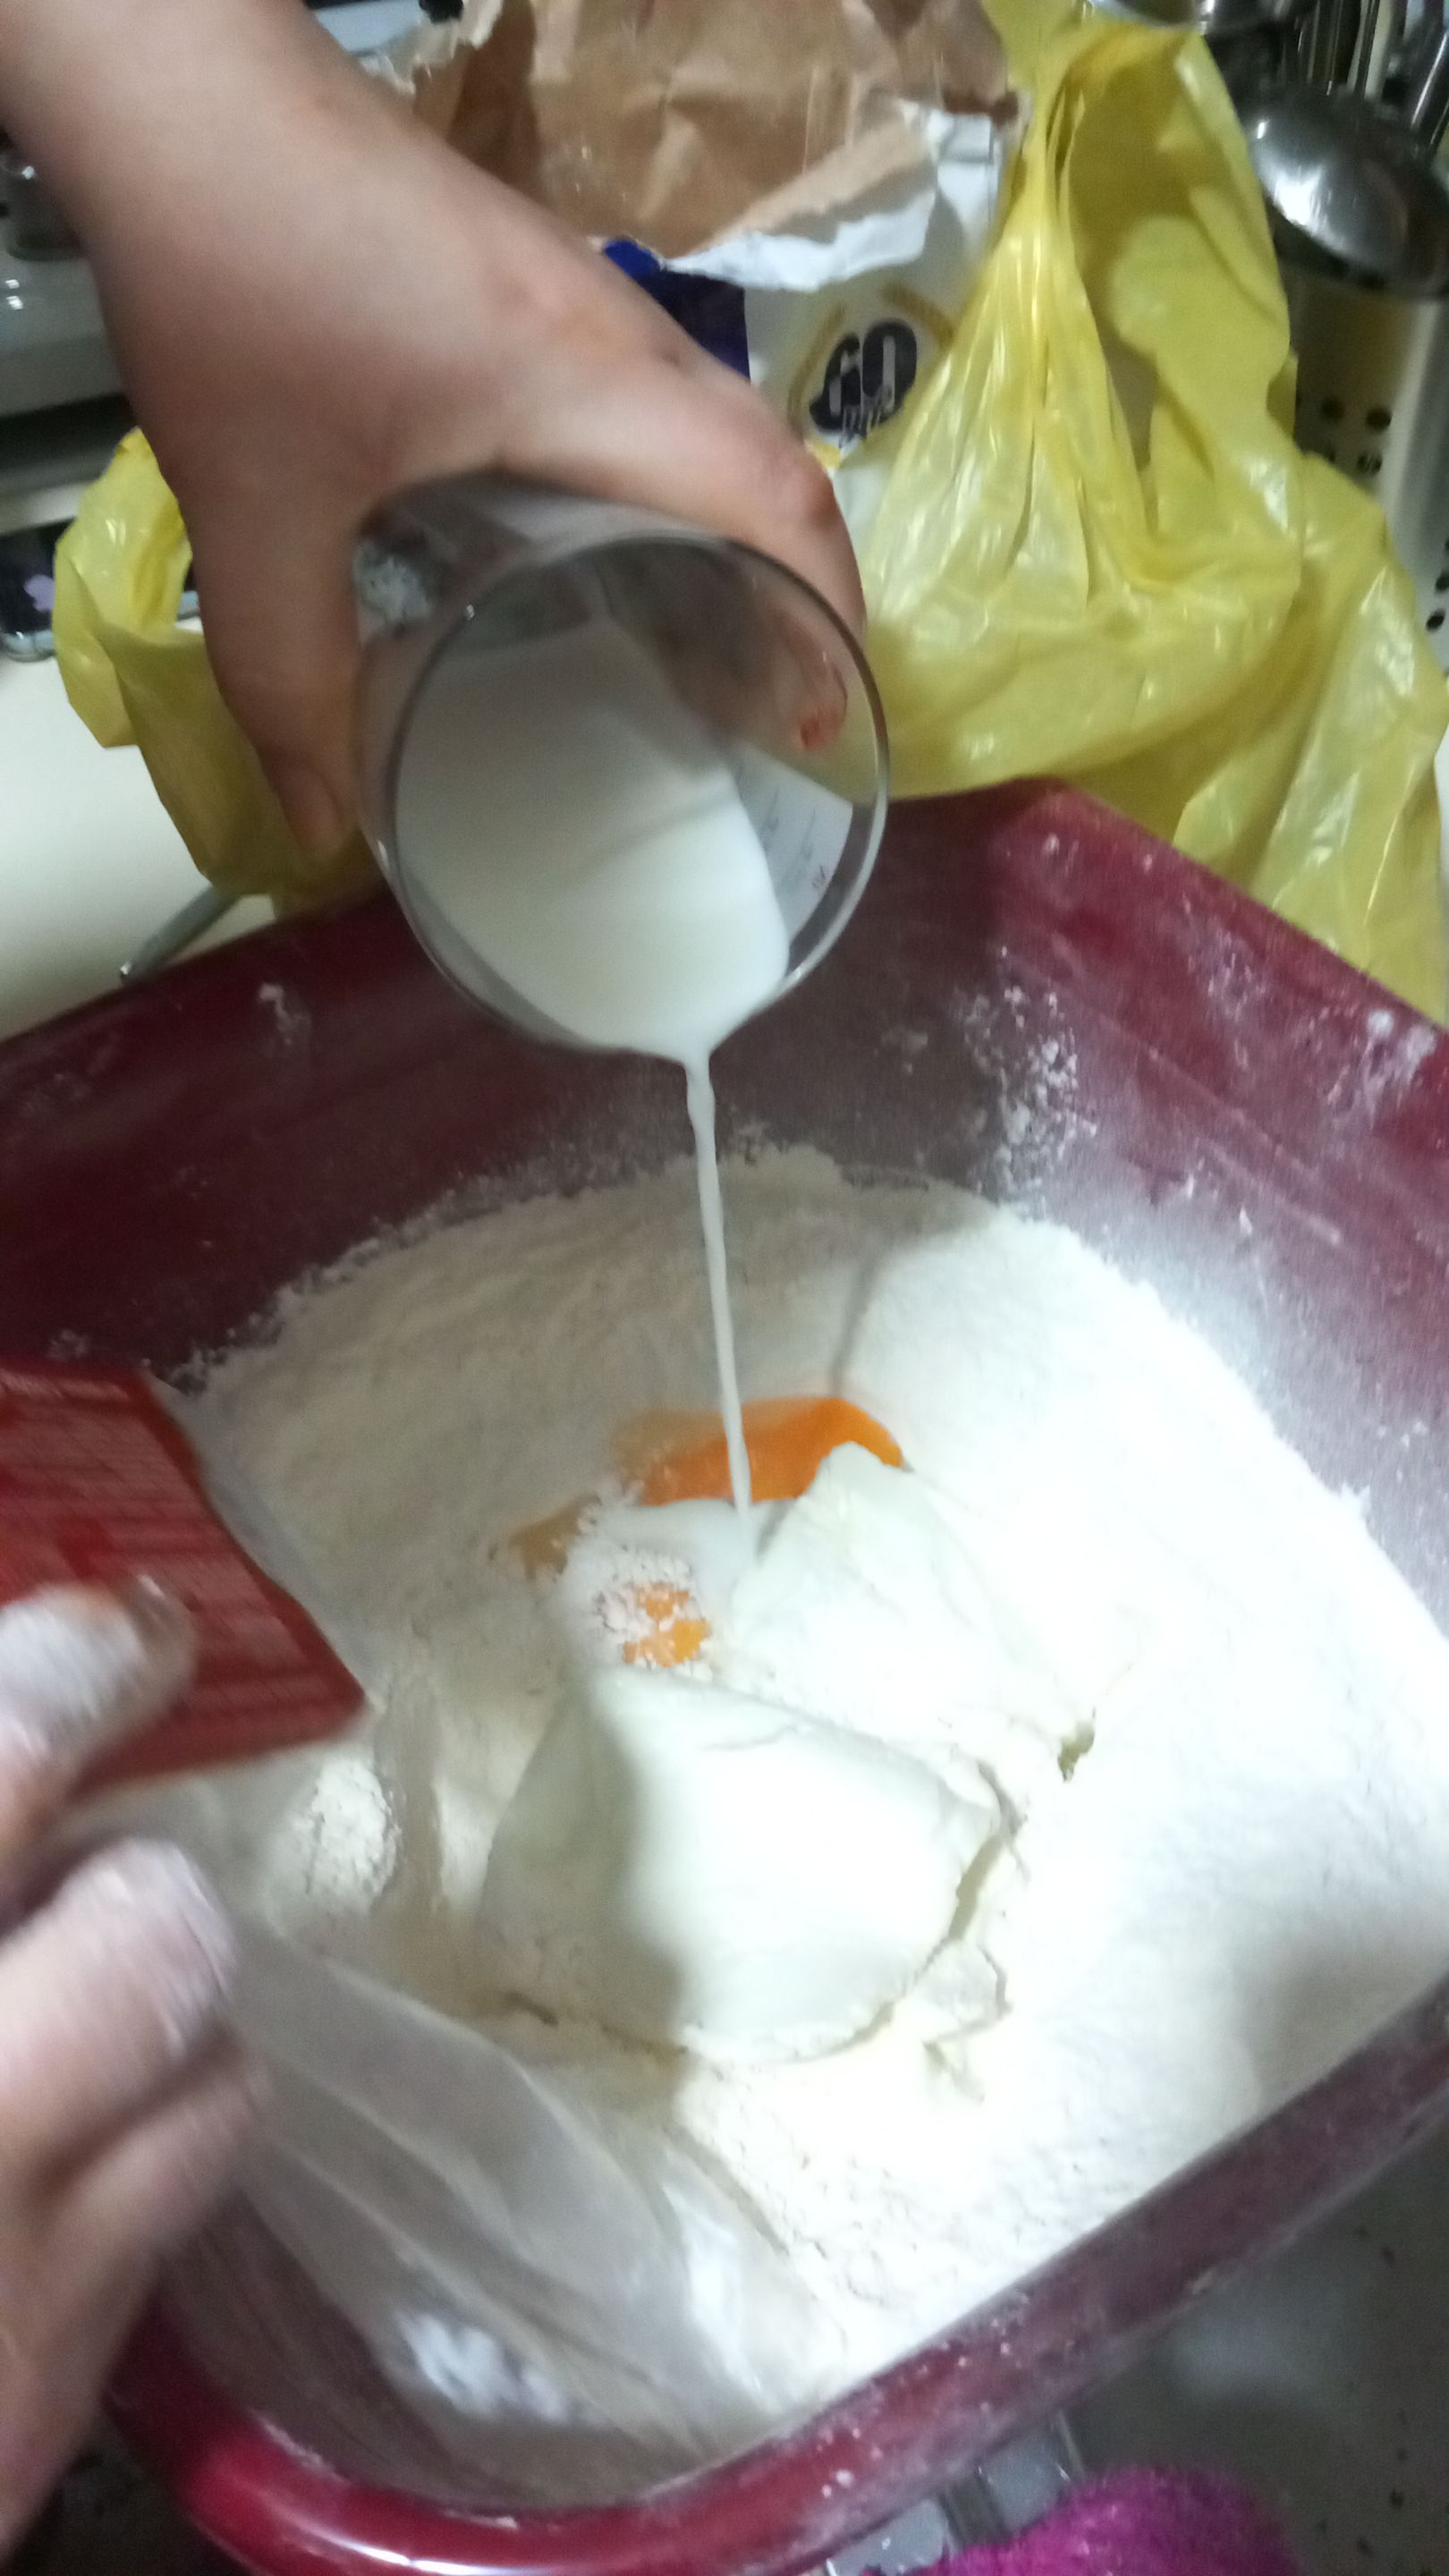
Make a well in the centre of this flour mixture and add 3 egg yolks, 300 grammes of melted shortening and 4 grammes of dry yeast mixed with about 20 millilitres and mix with a fork or a utensil.

While mixing, we continue to add a little milk. After the flour is well soaked, we start kneading and when the dough comes together, do not worry if there are cracks in the dough, this will pass, cover it and leave it to rest for 15 minutes.
Rolling the dough flat;
To prevent the dough from fermenting any longer, cut off half of it and place it in the bottom, non-freezer section of the refrigerator. Roll the remaining half into balls of 40 grammes each. The recipe for 1 kilogram of flour yields approximately 72 shekarburas. Cover the dough balls with a plastic bag and let them rest for 2-3 minutes.
After resting, roll out these pieces of dough into a circle with a diameter of about 10 centimetres, so that our sugarbura is in the shape of a half moon.
Stuffing and sealing;
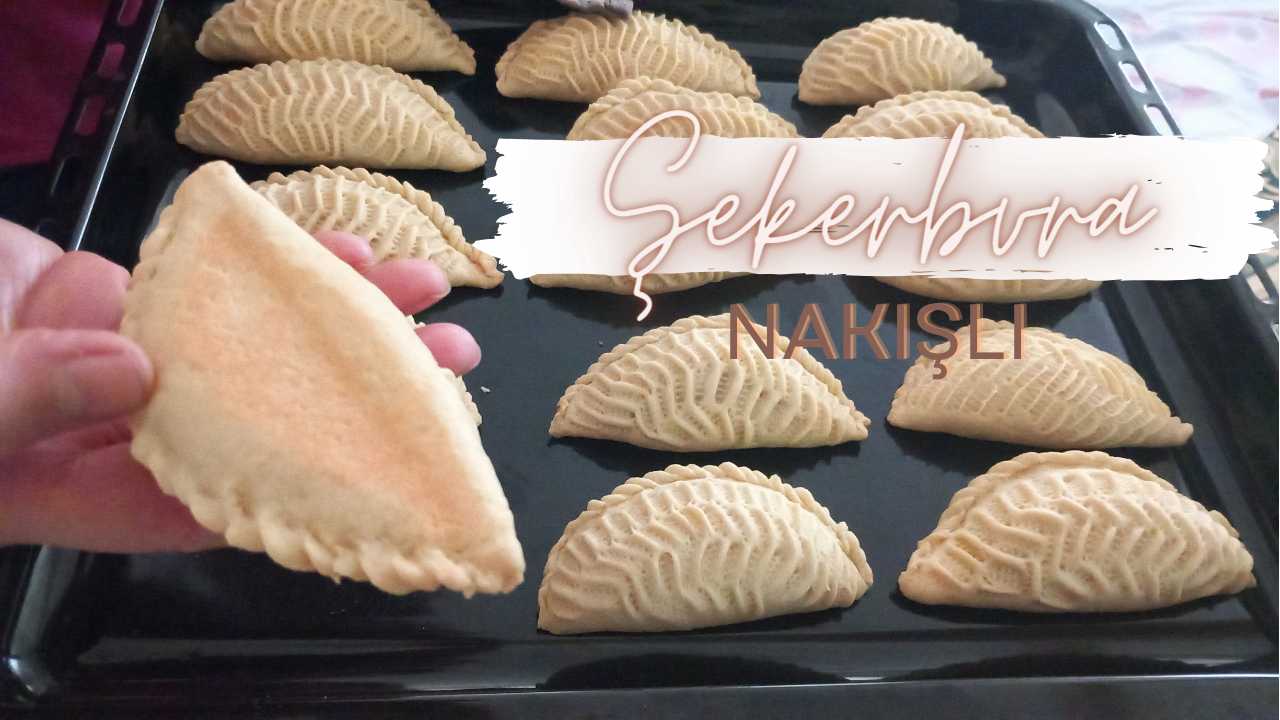
We add 3 teaspoons (approximately 60 grammes) of filling into the dough rolled out in the shape of a circle. In order to close the mouth, we need to wet the corners of the dough with water. I have a small video to share with you because I'm not sure how to describe kapama embroidery. Closing embroidery is done in this way so that it does not open and looks beautiful.
Do not remove the bag until the dough is finished so that the fermentation does not continue. If the fermentation continues, no embroidery can hold on. Also, after closing, it is necessary to make a few holes with a needle from the edges, that is, from the part that we wet with water and close it, so that the air inside does not swell. Therefore, the embroidery we will make will not deteriorate.
Embroidery;
There is a tiny tweezer-like tool you need to have for this, which you can see on the table in the video above. Right next to the plate. Unfortunately, it is very difficult to do something without these tweezers, and my mum says that her hands are already tired. They also made it together with my aunt. Which means that everything was made in pairs. That's a total of about 140 shekarburas.
Anyway. I also have a video for this embroidery. You will see that it is a very cute way of decorating.
https://www.youtube.com/shorts/Tqcr-xrqny0
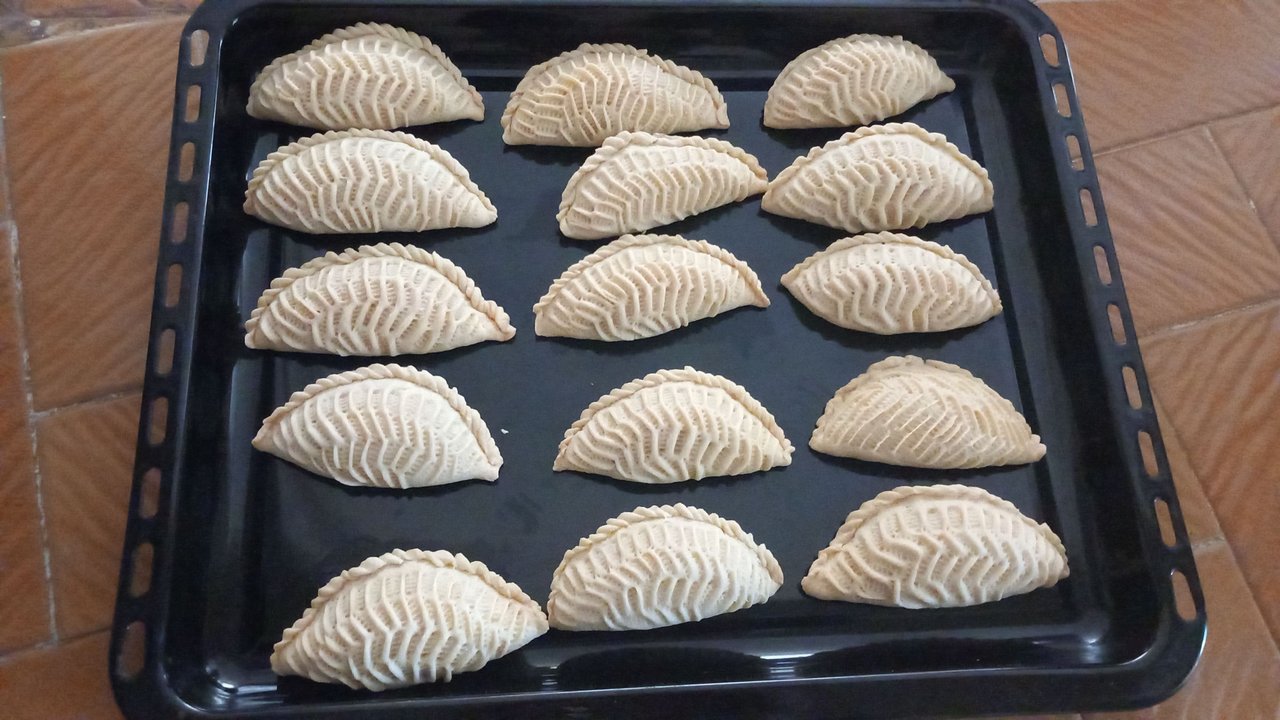
Baking;
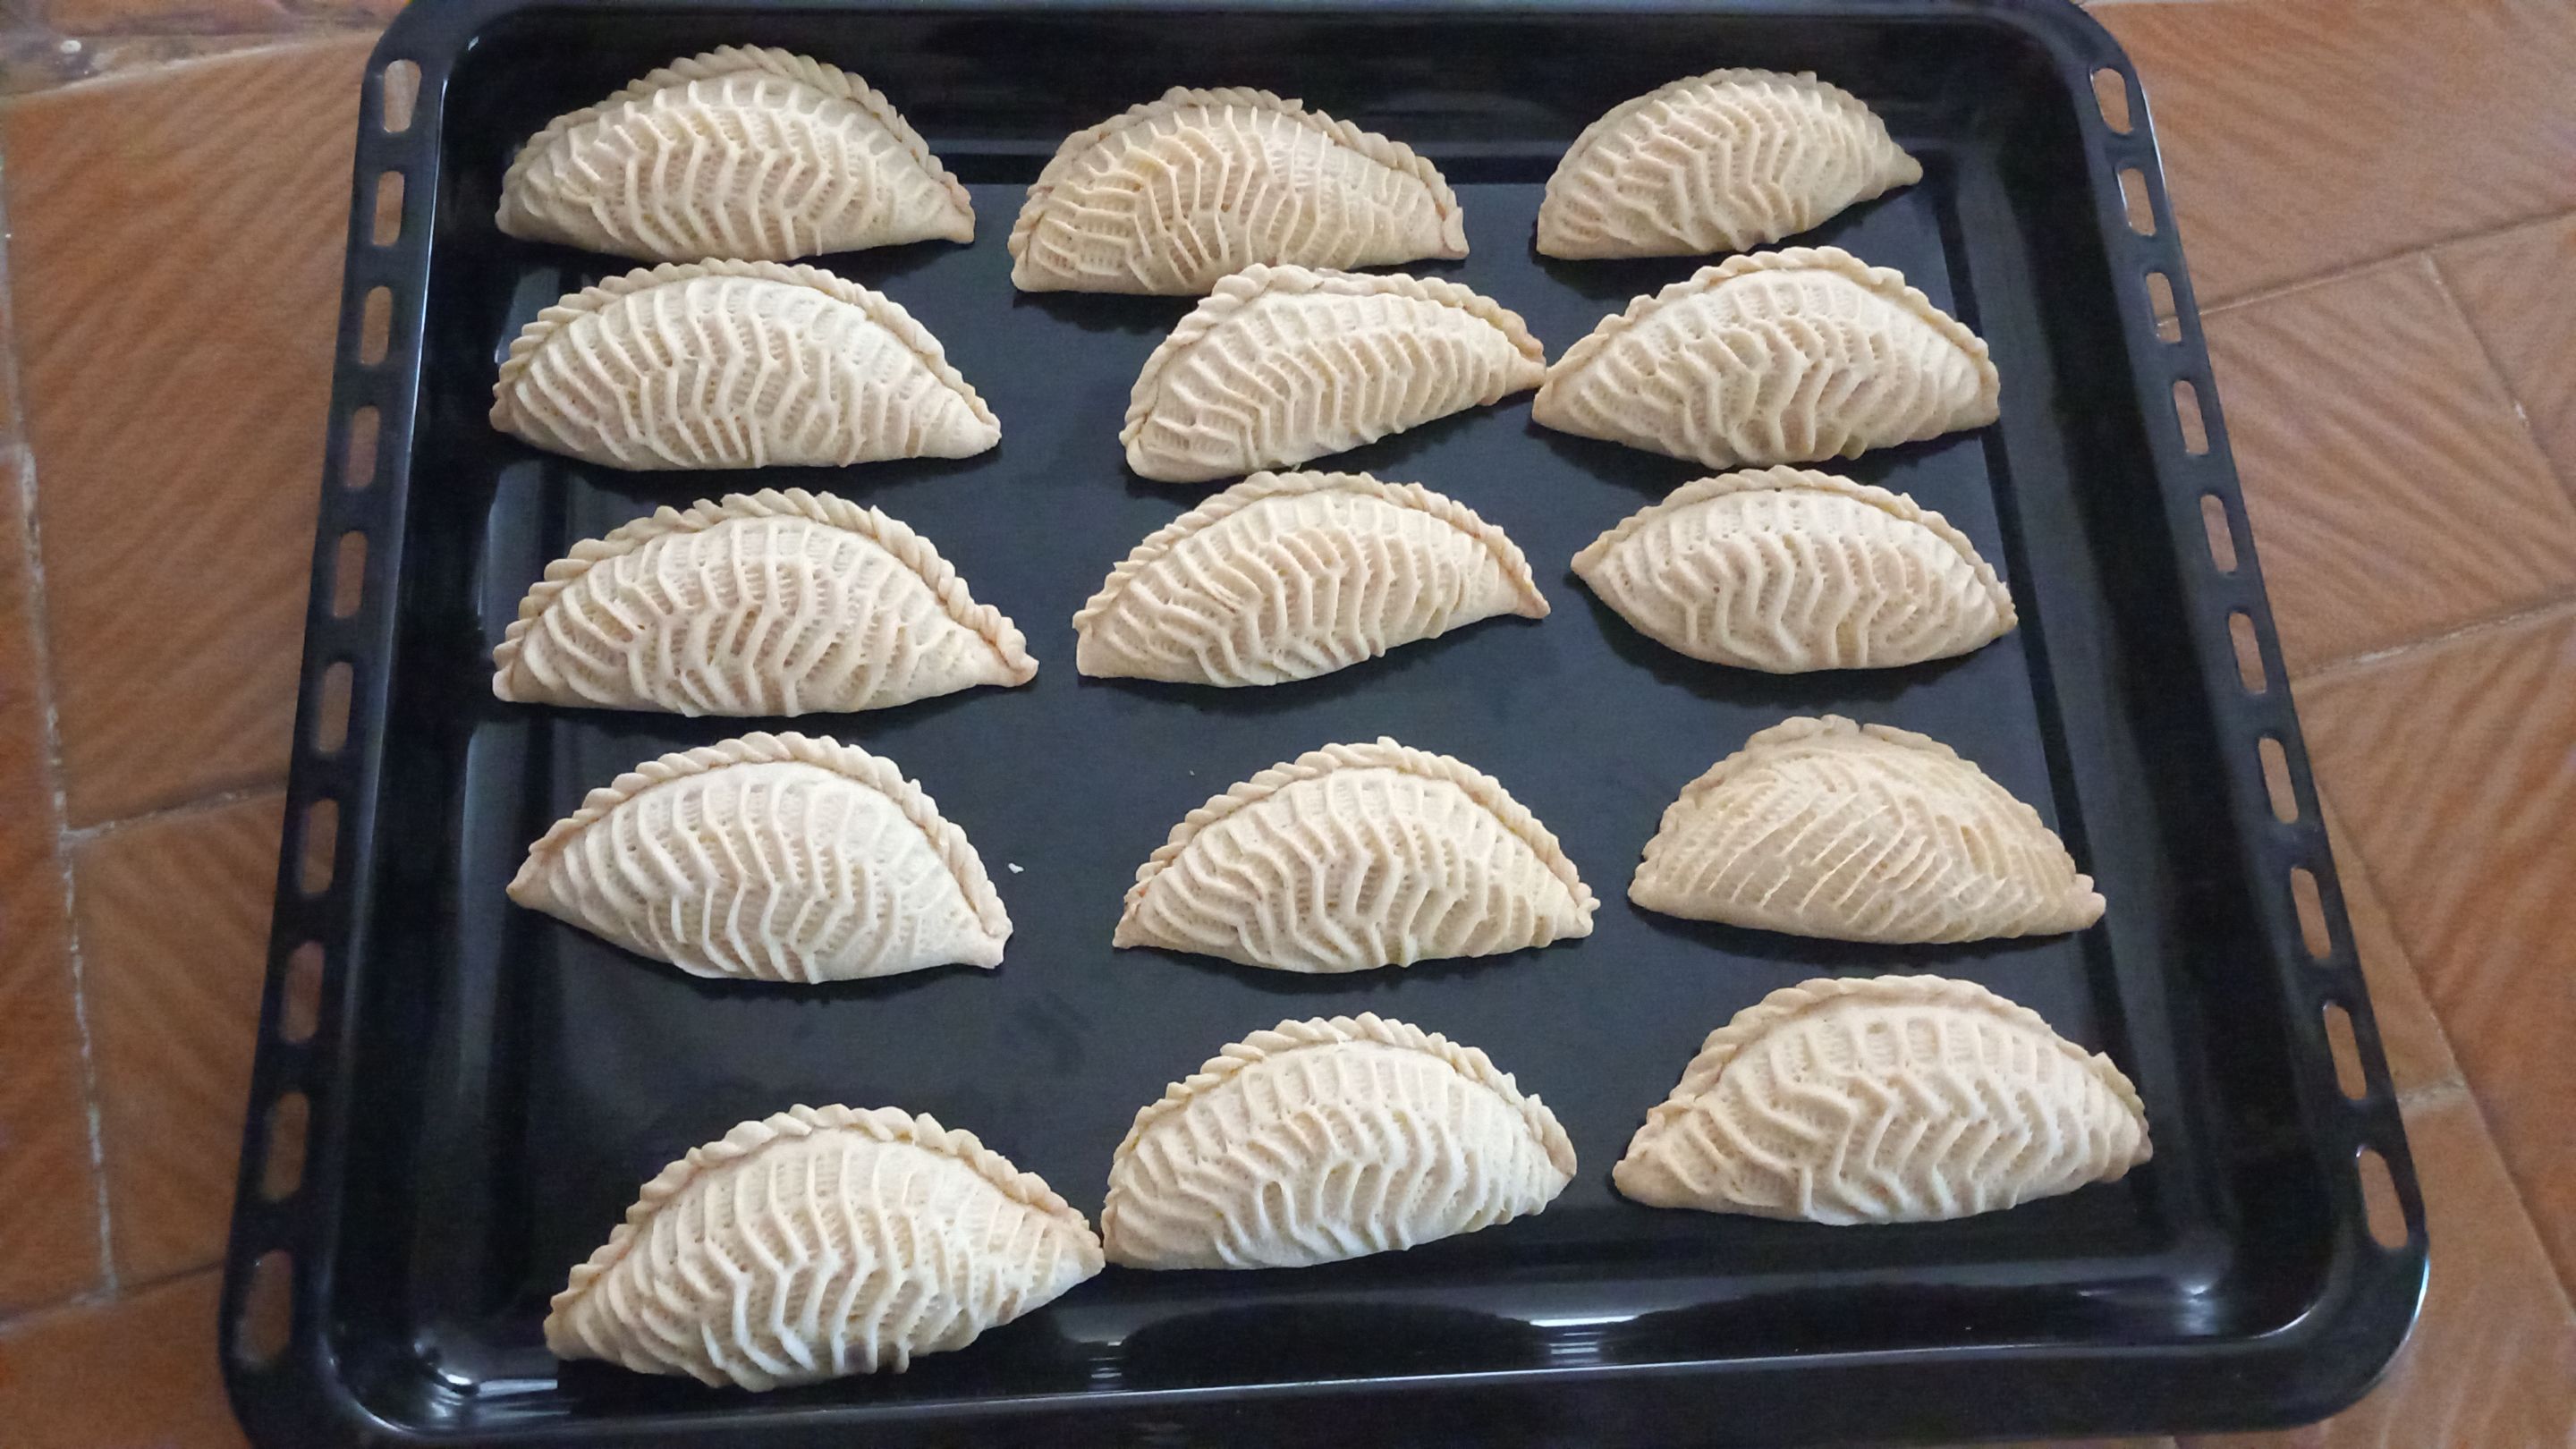
One tray takes approximately 15 pieces of shekerbura. We leave them on the tray on which we spread greaseproof paper for about 15 minutes, uncovered, so that the embroidery on them dries and stays (important).
After these processes, we make holes with the needle again, trying not to spoil the embroidery. The reason for this is that there is no air inside again.
After doing these, it is necessary to bake in a preheated oven, on the lowest oven, at 120 degrees for 30-35 minutes, observing carefully. In order for the Shekarburas to remain white, they should not be too browned.

Yes, these were the shekarburas we made, or rather, I sat and ate baklava while they were making them. I must say they were quite delicious. Difficult to make, but not at all difficult to eat. Also, a covered box with a lid would be better, if you store them, you can eat them for weeks without spoiling.
That's all from me for today, see you in the next recipe.
Take care of yourself, stay healthy and happy and please remember that;
You are the only one of you.


Herkese merhabaa!
Umarım iyisinizdir ya da iyi olmaya çalışıyorsunuzdur. Bugün sizinle geç de olsa bir tarif paylaşmak istiyorum. Şekerbura. Malum Navruz için hazırlıklarımızdan az da olsa bahsettiğim bu postta başka bir tariften daha bahsetmiştim.
Bu tarif baklavaya göre çok daha kolay. Neyse ki. Eğer bu da o kadar zor olsaydı bizimkiler için durum gerçekten de iyi olmayacaktı. Tabii bunun için bir aparata ihtiyaç var. Bu aparat olmadan olmuyor ne yazık ki yoksa şekerburanın bir anlamı kalmıyor. Bu cımbız gibi aleti ekleyeceğim videoda rahatlıkla göreceksiniz.
İlk önce içini hazırlamak ile işimize başlıyoruz. Bunun için gerekli olanlar;
- 500 gram ceviz
- 400 gram toz şeker
- 1 çay kaşığı (yaklaşık 10 gram) kakule
500 gram cevizi toz hâline gelene kadar robottan geçiriyoruz. Un gibi olması ya da toz hâline gelmesi önemli çünkü bu tadını bile değiştirebilecek bir unsur. Bu üç malzemeyi de, toz şeker, ceviz ve kakule, bir kapta karıştırdıktan sonra hamurumuza geçebiliriz.
Hamur için;
- 1 kilogram un
- 3-4 gram tuz
- Bir paket (5 gram) vanilin
- 4 gram kuru maya
- 100 mililitre ılık süt
- 200 gram kaymak
- 3 yumurta sarısı
- 300 gram erimiş katı yağ
İlk önce kuru malzemeleri, un, tuz, vanilin, bir kaba alıp karıştırıyoruz. Baklava tarifinde de değindiğim gibi ilk önce kurular sonra ıslaklar yavaş yavaş ekleniyor. Bir de tabi bu hamurun baklava hamurundan tek farkı daha fazla un olması.
Bu un karışımının ortasına bir oyuk açarak bu oyuğun içerisine 3 yumurta sarısını, 300 gram erimiş katı yağı ve yaklaşık 20 mililitre ile karıştırılmış 4 gram kuru mayayı ekliyoruz ve biraz çatal veya bir gereç yardımı ile karıştırıyoruz.
Karıştırırken az az sütü eklemeye devam ediyoruz. Un iyice ıslandıktan sonra yoğurmaya başlıyoruz ve hamur toparlandığında, hamurda çatlaklar olursa merak etmeyin bu geçecek, üzerini kapatıp 15 dakikalığına dinlenmeye bırakıyoruz.
Hamurun açılışı;
Hamurun daha fazla mayalanmaması için yarısını kesip buzdolabının dondurucu olmayan, alt kısmına, bölümüne yerleştiriyoruz. Kalan yarısını ise 40'ar gramlık toplar hâline getiriyoruz. 1 kilogramlık un tarifinden yaklaşık 72 tane şekerbura çıkıyor. Top hâline getirip toparladığımız hamurların üzerini plastik bir poşetle kapatıp 2-3 dakika dinlendiriyoruz.
Dinlendirdikten sonra bu hamur parçalarını yaklaşık 10 santimetre çapında daire şeklinde açıyoruz ki şekerburamız yarım ay şeklinde olsun.
İç doldurma ve kapama;
Avcumuza aldığımız daire şeklinde açılmış hamurun içerisine 3 tatlı kaşığı (yaklaşık 60 gram) iç harcı ekliyoruz. Ağzını kapatmak için ise hamur köşelerini su ile ıslatmamız gerekiyor. Kapama nakışının nasıl tarif edileceğinden emin olamadığım için minik bir videom var sizinle paylaşacak. Kapama nakışı böyle yapılıyor ki hem açılmasın hem de güzel görünsün.
Açmış olduğunuz hamurlar bitene kadar üzerindeki poşeti kaldırmayın ki mayalanma devam etmesin. Mayalanma devam ederse hiçbir nakış üzerinde tutamaz. Bir de kapattıktan sonra kenarlarından yani su ile ıslatıp kapattığımız kısmından iğne ile birkaç delik açmak gerekiyor ki içerisinde hava kalıp şişmesin. Dolayısıyla da yapacağımız nakış bozulmasın.
Nakış;
Bunun için sahip olmanız gereken minik bir cımbız benzeri alet var ki yukarıdaki videoda masanın üzerinde görebilirsiniz. Tabağın hemen yanında. Bu cımbız olmadan ne yazık ki bir şeyleri yapmak çok zor ki annem de zaten ellerinin yorulduğundan bahsediyor. Bir de kendisi teyzemle birlikte yaptılar. Ki bu da her şeyden çifter çifter yapıldı demek oluyor. Yani toplamda 140 civarı şekerbura.
Neyse. Bu nakış için de bir videom bulunuyor. Göreceksiniz ki oldukça da şirin bir süsleme şekli.
https://www.youtube.com/shorts/Tqcr-xrqny0
Pişirme;
Bir tepsi yaklaşık olarak 15 adet şekerbura alıyor. Bunları yağlı kağıt serdiğimiz tepside, üzerindeki nakışları kuruyup kalması için (önemli), üzeri açık bir şekilde yaklaşık 15 dakika bekletiyoruz.
Bu işlemlerden sonra iğne ile tekrar nakışları bozmamaya çalışarak delikler açıyoruz. Bunun sebebi yine içerisinde hava kalmaması.
Bunları yaptıktan sonra daha önceden ısıtılmış fırında, en alt gözde, 120 derecede 30-35 dakika süresince dikkatli bir şekilde gözlemleyerek pişirmek gerekiyor. Şekerburaların bembeyaz kalması için fazla kızarmaması gerekiyor.
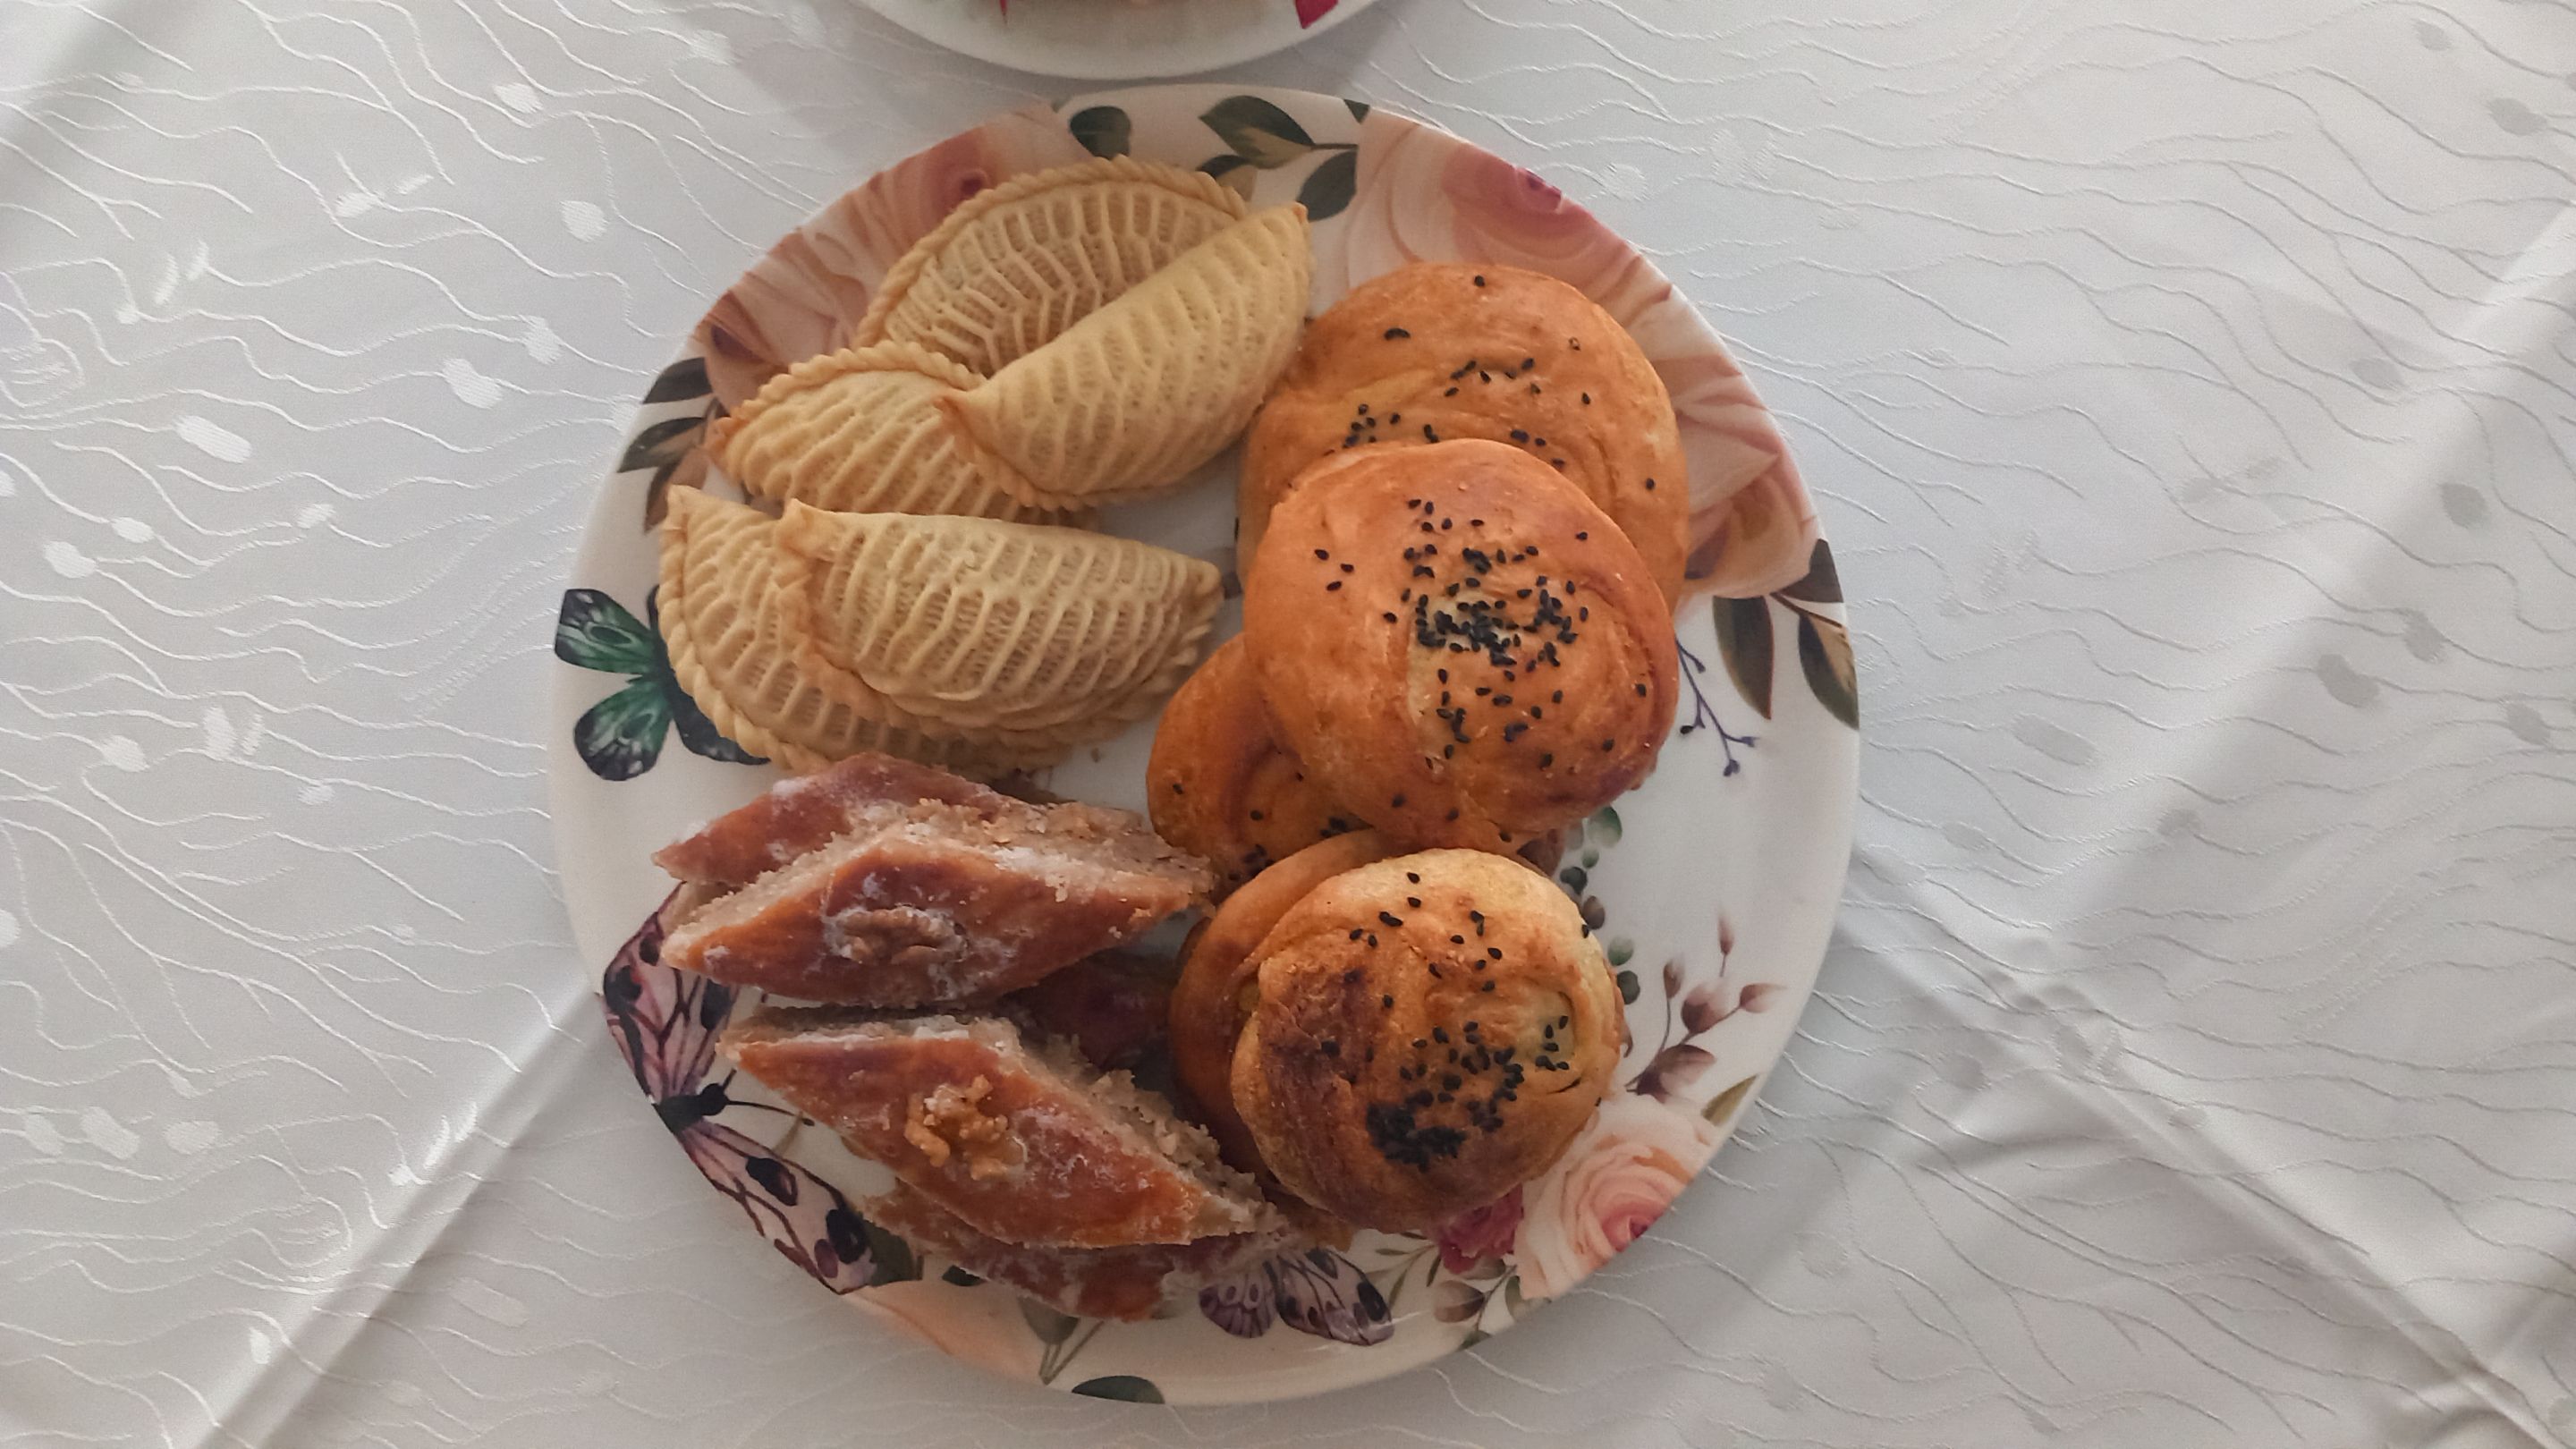
Evet, bizim yaptığımız, daha doğrusu onlar yaparken benim oturup baklava yediğim şekerburalar bunlardı. Oldukça lezzetli olduklarını da söylemeliyim. Yapması zor ama yemesi hiç de değil. Bir de üzeri kapalı, kapaklı bir kutu daha iyi olur, saklarsanız haftalarca bozulmadan yiyebilirsiniz.
Bugünlük de benden bu kadar, bir sonraki tarifte görüşmek üzere.
Kendinize dikkat edin, sağlıkla ve mutlulukla kalın ve lütfen unutmayın ki;
Bu dünyada sizden başka bir tane daha yok.

Bütün fotoğraflar ve videolar aksini iddia etmediğim sürece benim tarafımdan, akıllı telefonumla çekilmiştir.
All photos and videos are taken by me, with my smart phone unless otherwise stated.
All of my content is written in Turkish first and then with the help of translators and dictionaries below translated in English.
https://www.seslisozluk.net
https://www.deepl.com/translator
P.S. If you know English AND Turkish, I do that too... If you see a translation discrepancy that was on purpose. I did think this is as proper as I could do. Because there are many differences between these languages.
Not: Hem Türkçe hem de İngilizce biliyorsanız, ben de biliyorum... Eğer çeviri farklılığı görürseniz bunun bilinçli olduğunu bilin lütfen. Bunu yapabileceğim en uygun şekilde yaptığımı düşünüyorum. Çünkü bu iki dil arasında çok fazla fark var.