¡Bienvenido a mi blog!
Welcome to my blog!
Buenas noches , feliz Martes a todos los miembros de esta linda comunidad , como lo es #needleworkmonday, nuevamente haciendo mis proyectos, tejer es mi pasión, me desestresa, me siento libre. Deseo que pasen una noche excelente , descansen para recargar las pilas y puedan levantarse temprano para ir a trabajar , bueno, los que tienen trabajo , los que no, que duerman hasta tarde.
Good evening , happy Tuesday to all members of this nice community , as it is #needleworkmonday , again doing my projects , knitting is my passion , it de-stresses me , I feel free. I wish you have an excellent night , rest to recharge your batteries and you can get up early to go to work , well, those who have work , those who do not, sleep late.
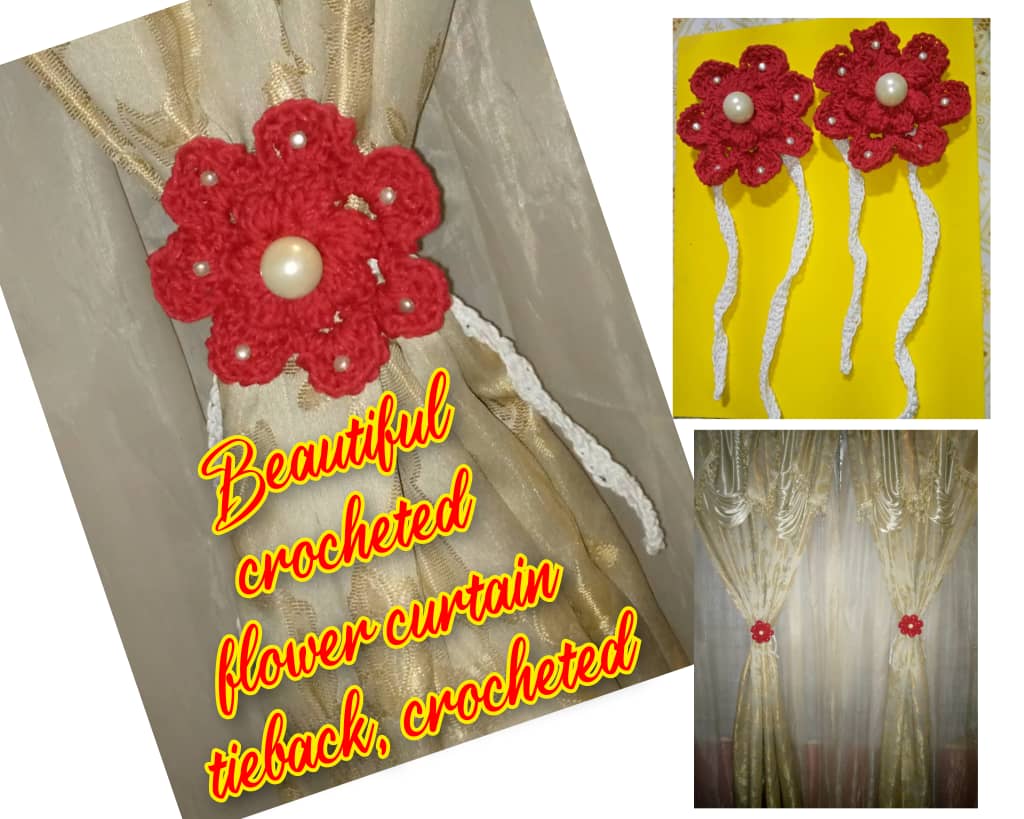
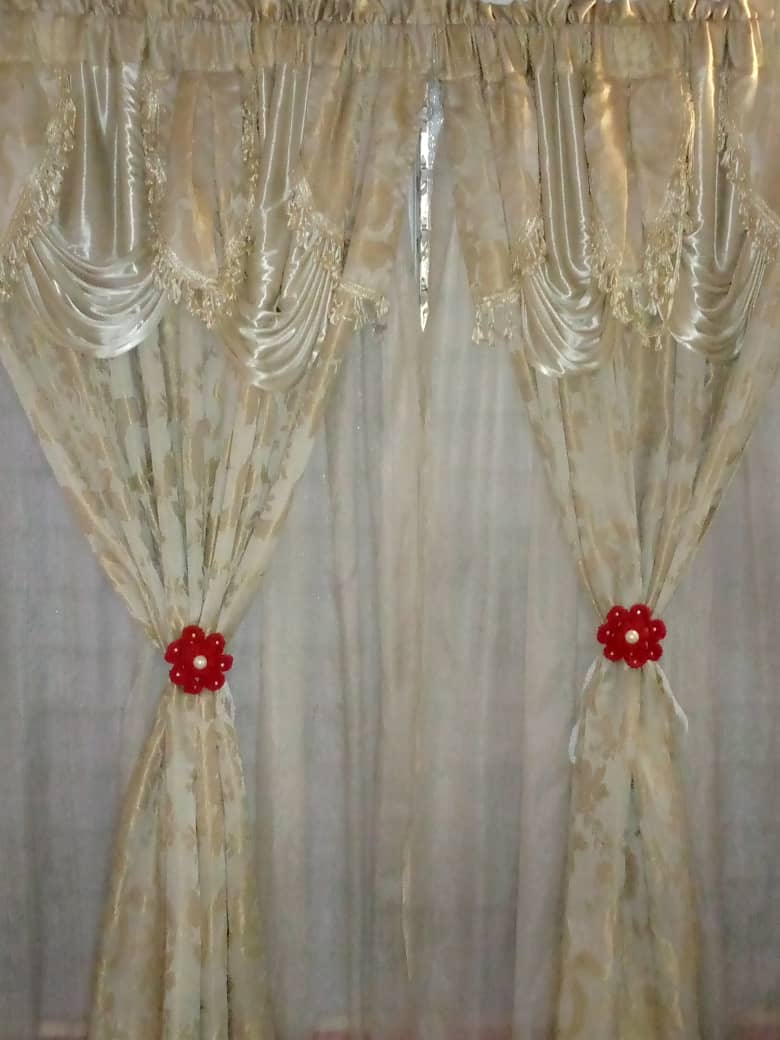
Hoy quiero mostrar a través de un tutorial , como realizar un hermoso sujeta cortina tejido a crochet en forma de flor. Es un tejido fácil de hacer, son puntos básicos lo que se necesita , como: Puntos bajos, altos dobles y puntos deslizados, espero que les gusten y se motiven a tejer ,sus cortinas siempre quedarán muy lindas.
Today I want to show through a tutorial, how to make a beautiful crochet knitted curtain clip in the shape of a flower. It is an easy to make knitting, basic stitches are what you need, such as: low stitches, double high stitches and slipped stitches, I hope you like them and are motivated to knit, your curtains will always be very nice..
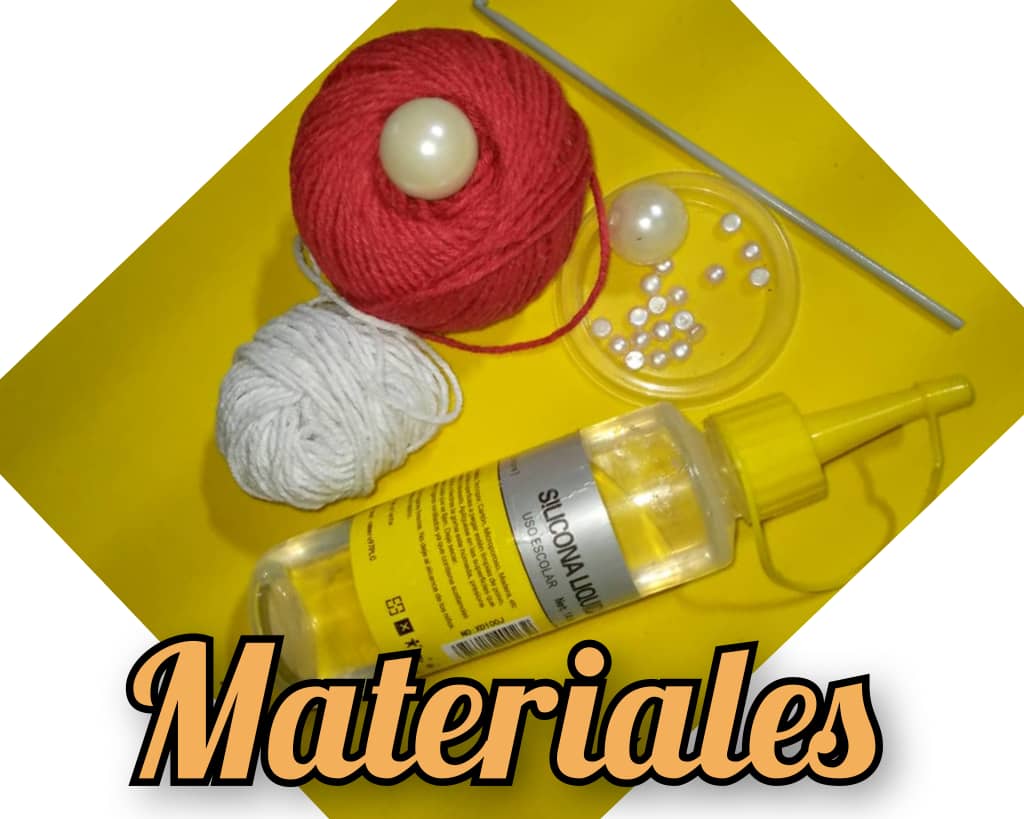
Materiales para la realización de los sujeta cortina tejido:
- Hilo de tejer rojo y blanco.
- Aguja de 3 mm
- Tijera
- Aguja lanera.
- Silicona líquida.
- Perlas grandes blancas y perlas pequeñas chatas.
Materials for the realization of the woven curtain holders:
- Red and white knitting yarn.
- 3 mm needle
- Scissors
- Wool needle.
- Liquid silicone.
- Large white beads and small flat beads.
Paso a paso para la realización del sujeta cortina tejido:
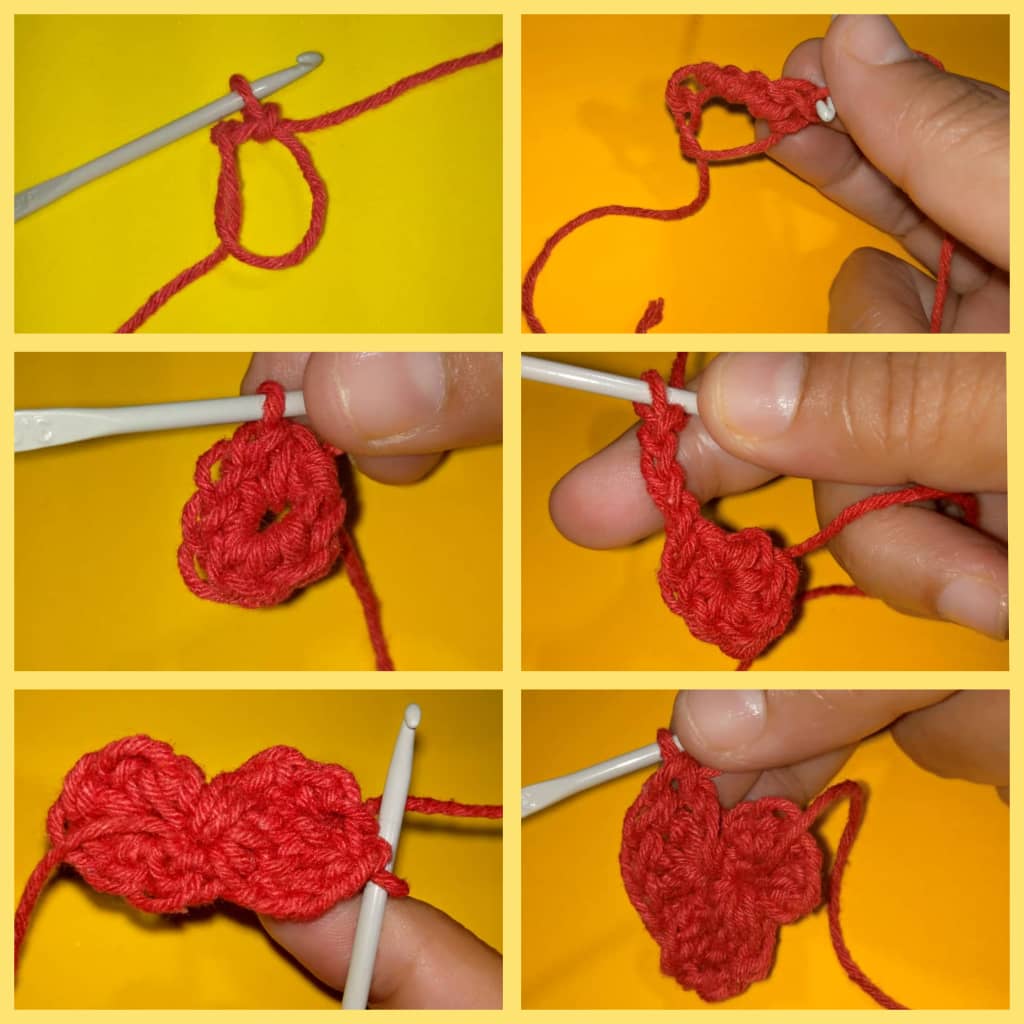
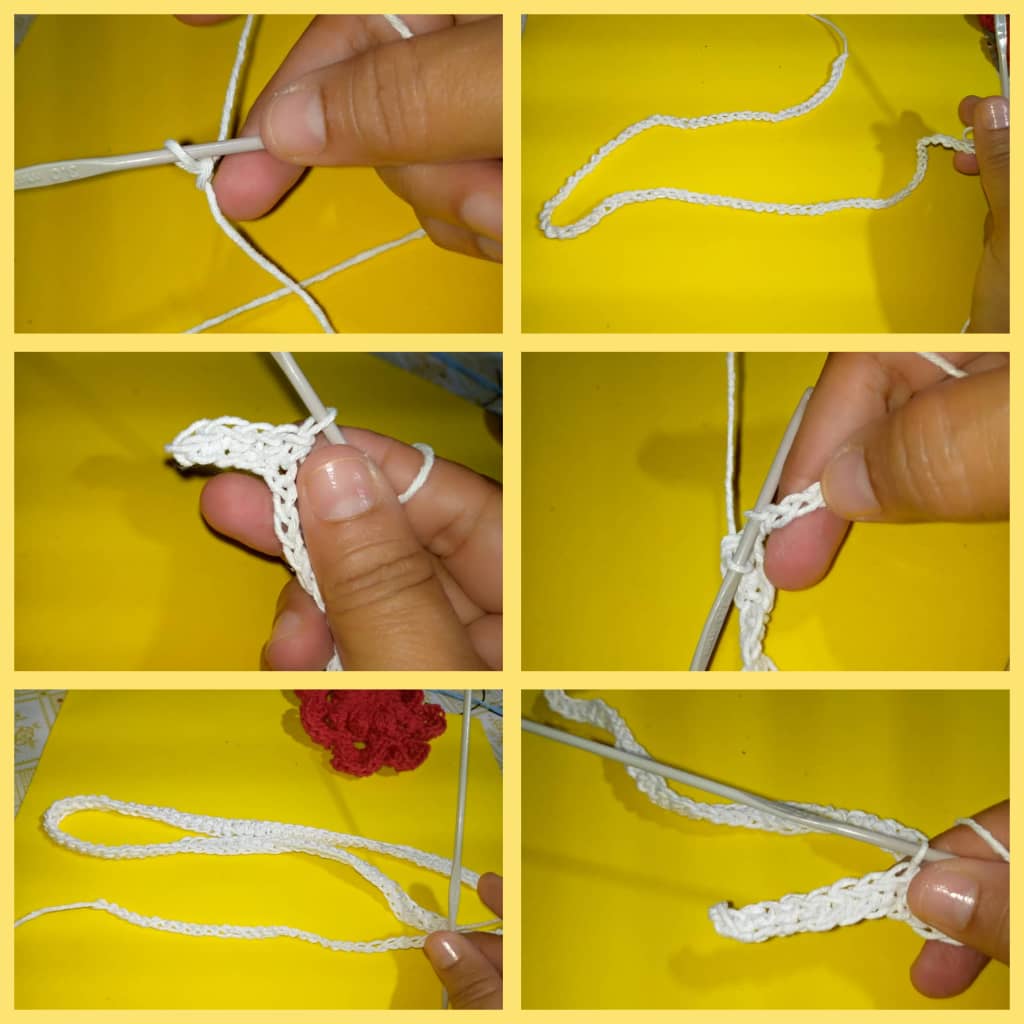
- Lo primero que haremos para realizar el tejido, tomamos el hilo rojo y la aguja , hacemos un anillo mágico y dentro del anillo mágico metemos 7 puntos bajos.Cerramos con un punto deslizados, jalamos para el hueco del centro no se vea.
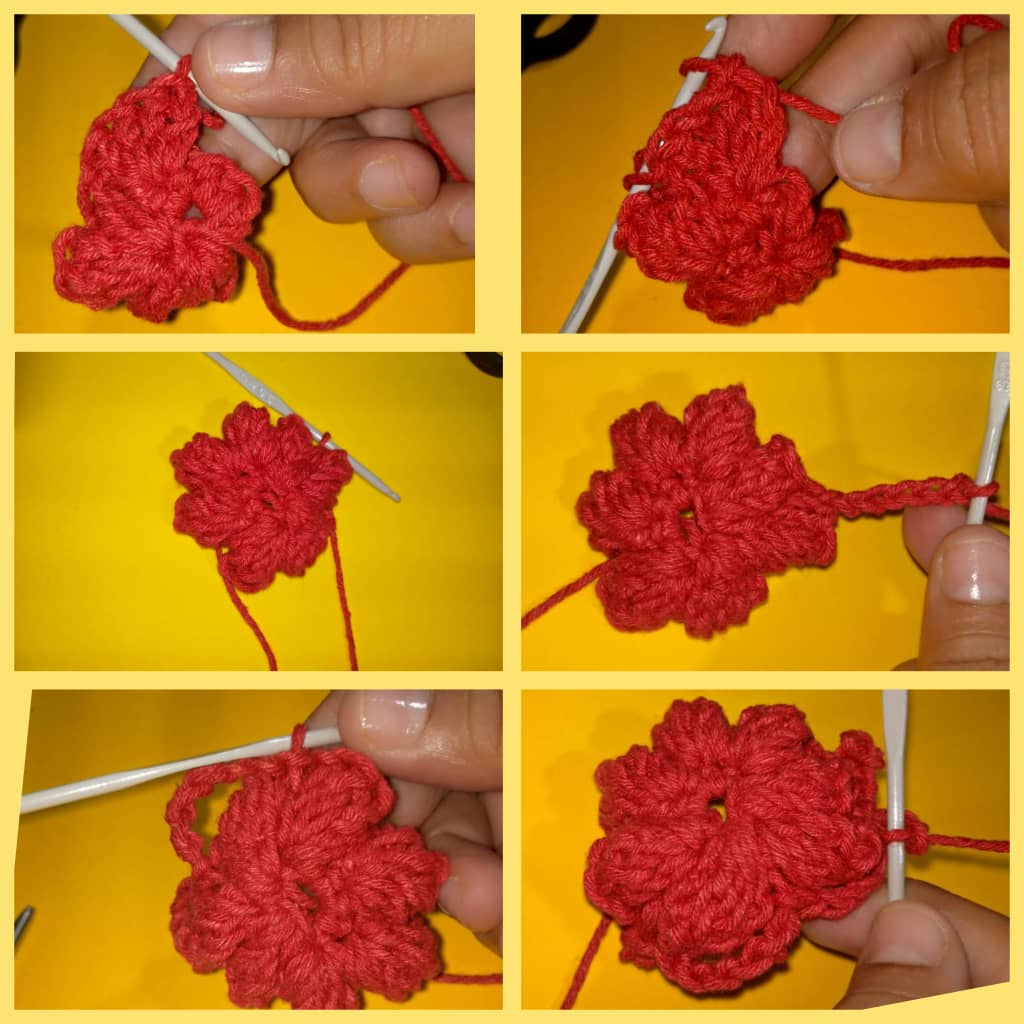
- Levantamos una cadena de 3 y en ese mismo punto metemos 5 puntos altos dobles incluyendo las 3 cadenas que levantamos, para un total de 6 puntos altos dobles , luego tomamos el primer punto de la primera cadena que hicimos junto con el último punto del último punto alto dobles y hacemos un punto deslizado. Así mismo haremos 7 de la misma manera , estos vendrían a hacer los pétalos de la flor.
Step by step for the realization of the knitted curtain clip:
- The first thing we will do to make the knitting, we take the red yarn and the needle , we make a magic ring and inside the magic ring we put 7 low stitches.We close with a slipped stitch, we pull so the hole in the center is not visible.
- Pick up a chain of 3 and in that same stitch we put 5 double crochet stitches including the 3 chains we picked up, for a total of 6 double crochet stitches, then we take the first stitch of the first chain we made together with the last stitch of the last double crochet stitch and make a slip stitch. In the same way we will make 7 in the same way , these would come to make the petals of the flower.
- Teniendo los 7 pétalos tejidos , procedemos a realizar los otros pétalos restantes y más grandes.
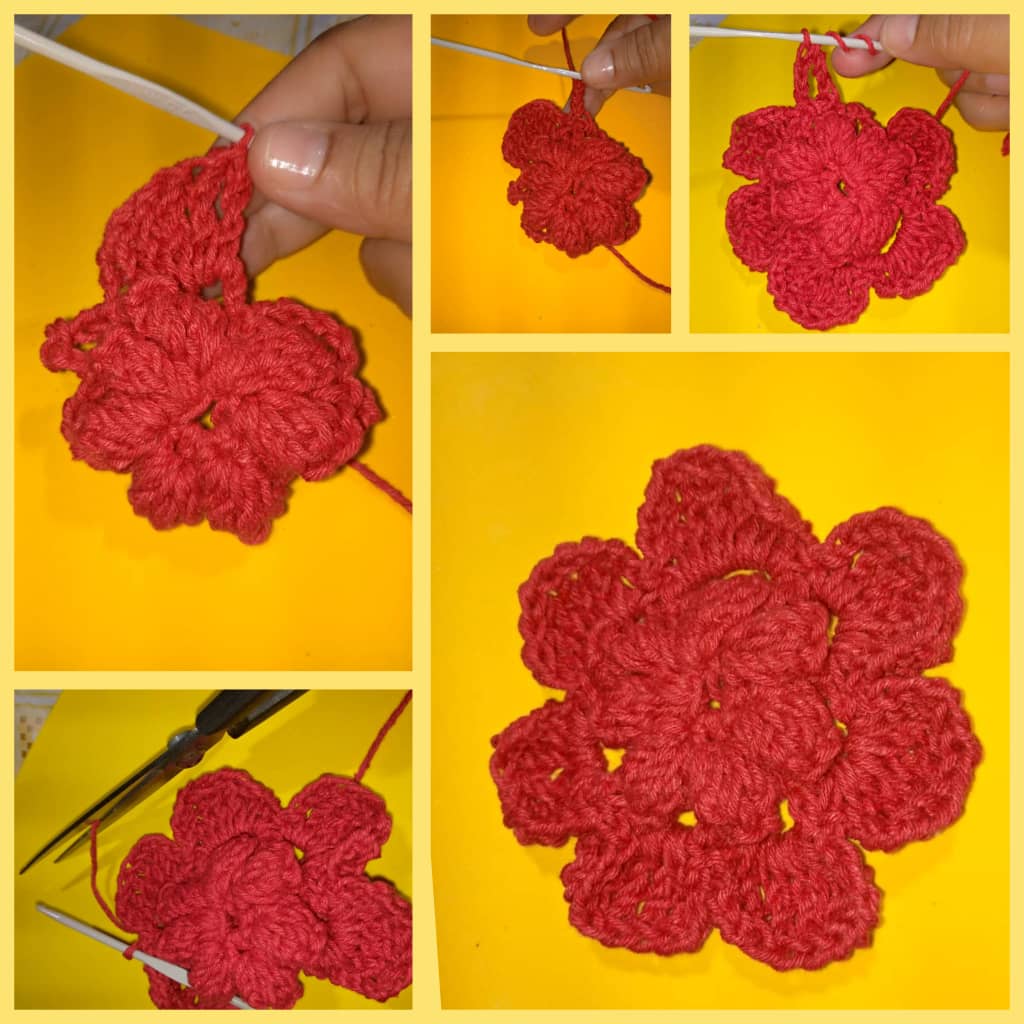
- Dónde terminamos el último pétalo, allí levantamos una cadena de 6 y con un punto deslizado lo introducimos al final del primer pétalo, luego levantamos otra cadena de 6 y lo introducimos en donde termina el otro pétalo, debemos terminar con un punto deslizado, así vamos a realizar 7 puntos de 6 cadenetas .
- Having the 7 petals knitted, we proceed to make the other remaining and larger petals.
- Where we finish the last petal, there we lift a chain of 6 and with a slipped stitch we introduce it at the end of the first petal, then we lift another chain of 6 and introduce it where the other petal ends, we must finish with a slipped stitch, so we are going to make 7 stitches of 6 chains.
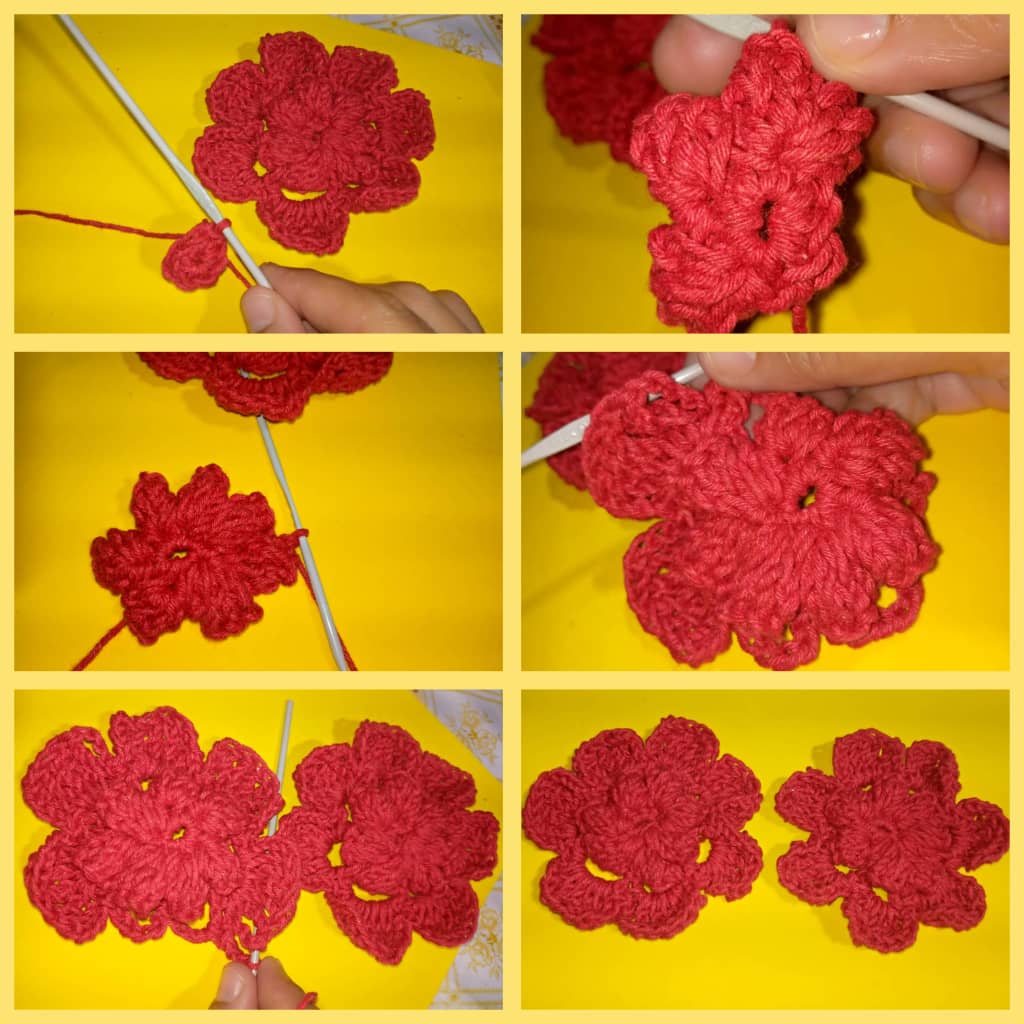
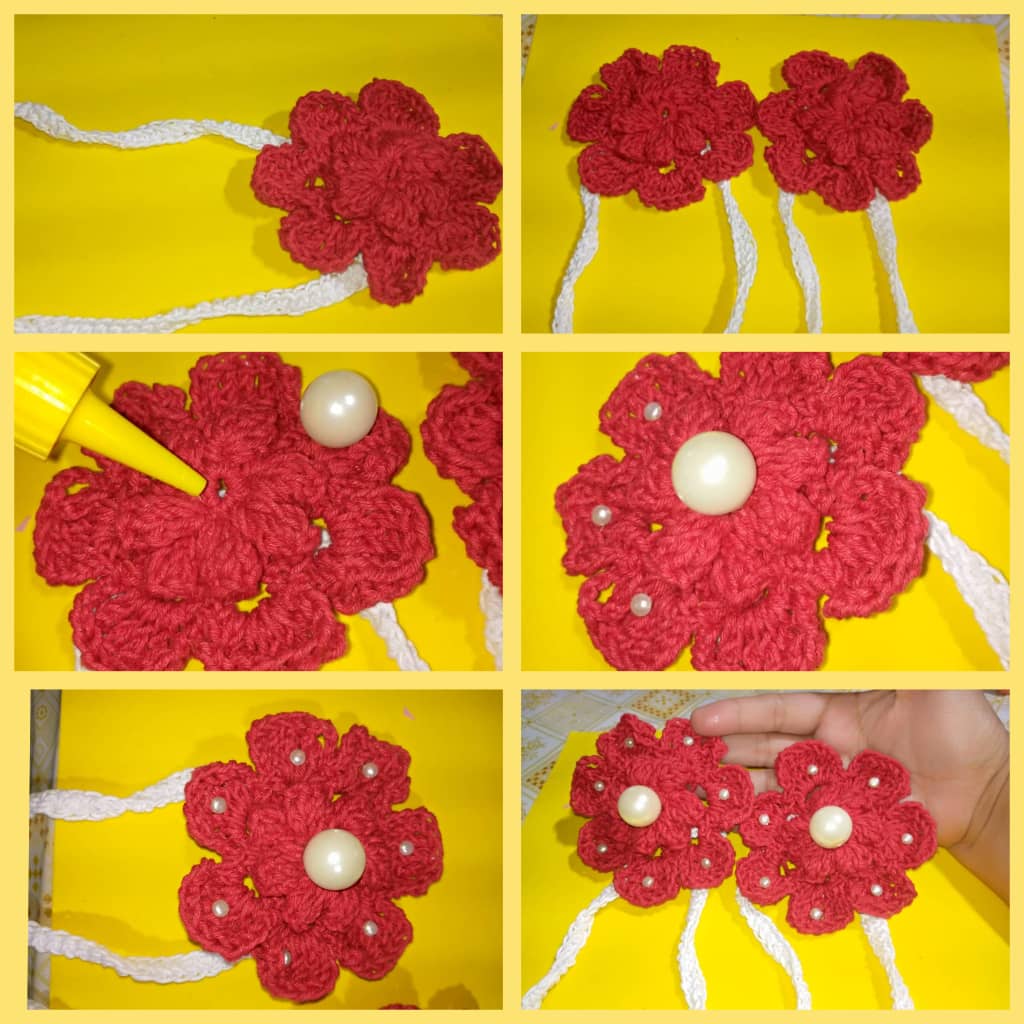
- Levantar una cadena de 4 luego meter en el espacio que hizo las 6 cadenas , 5 puntos altos dobles y para terminar el pétalo, levantar 4 cadena y terminar con punto deslizados en ese mismo espacio.De la misma manera va a hacer 6 pétalos más.Cortar el hilo excedente con la tijera.
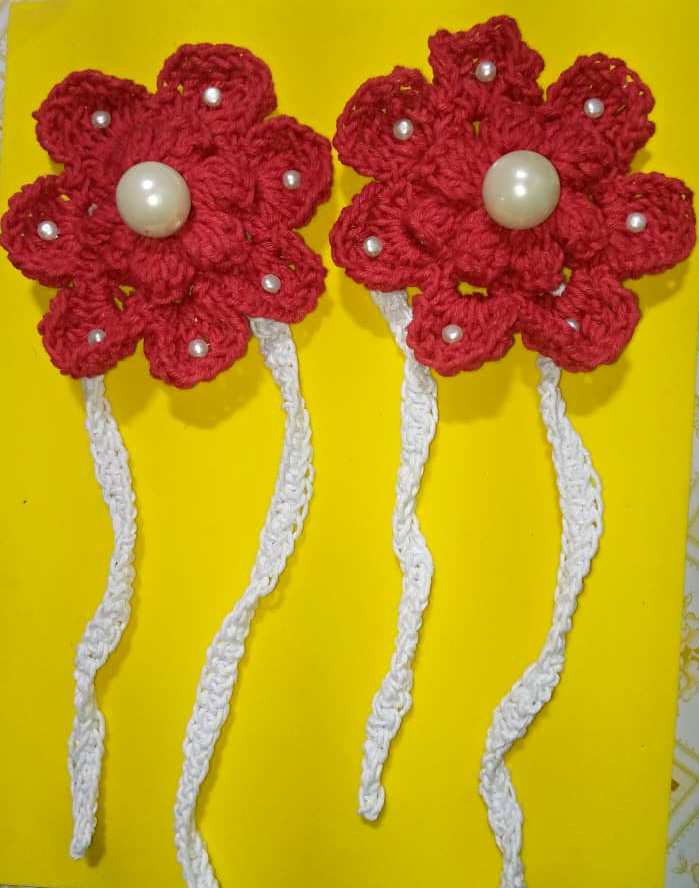
- Realizar la otra flor de la misma manera.
- Pick up a chain of 4 then tuck in the space you made the 6 chains , 5 double high stitches and to finish the petal, pick up 4 chain and finish with slipped stitch in that same space.in the same way you will make 6 more petals.cut the excess yarn with the scissors.
- Perform the other flower in the same way.
- Para realizar la cuerda que va a sujetar la flor, levantar 130 cadenas y puntos bajos en cada espacio.
- Con la aguja lanera coser la flor y la cuerda .
- To make the rope that will hold the flower, raise 130 chains and low stitches in each space.
- With the wool needle, sew the flower and the cord.
- Ahora para adornar la flor, pegar en el centro con silicona líquida la perla grande y en cada pétalo pegar las perlas chatas.
- Now to decorate the flower, glue the large pearl in the center with liquid silicone and glue the flat pearls on each petal.
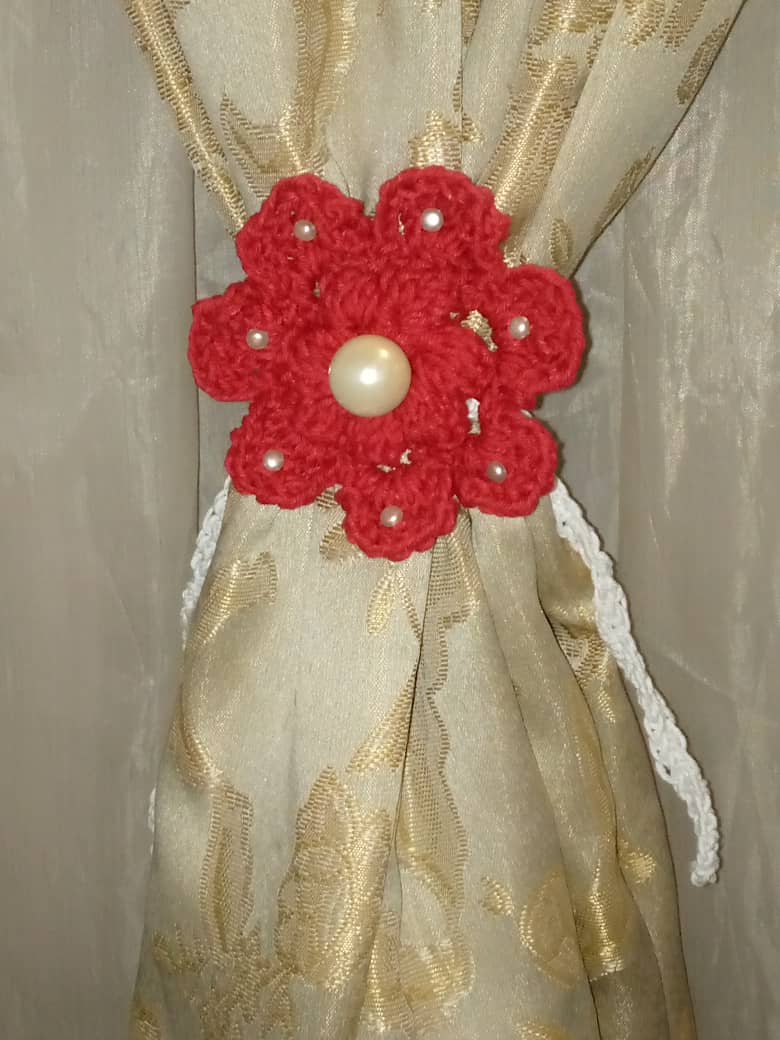
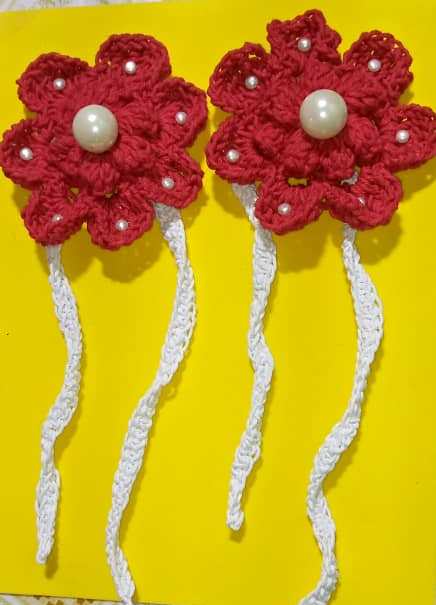
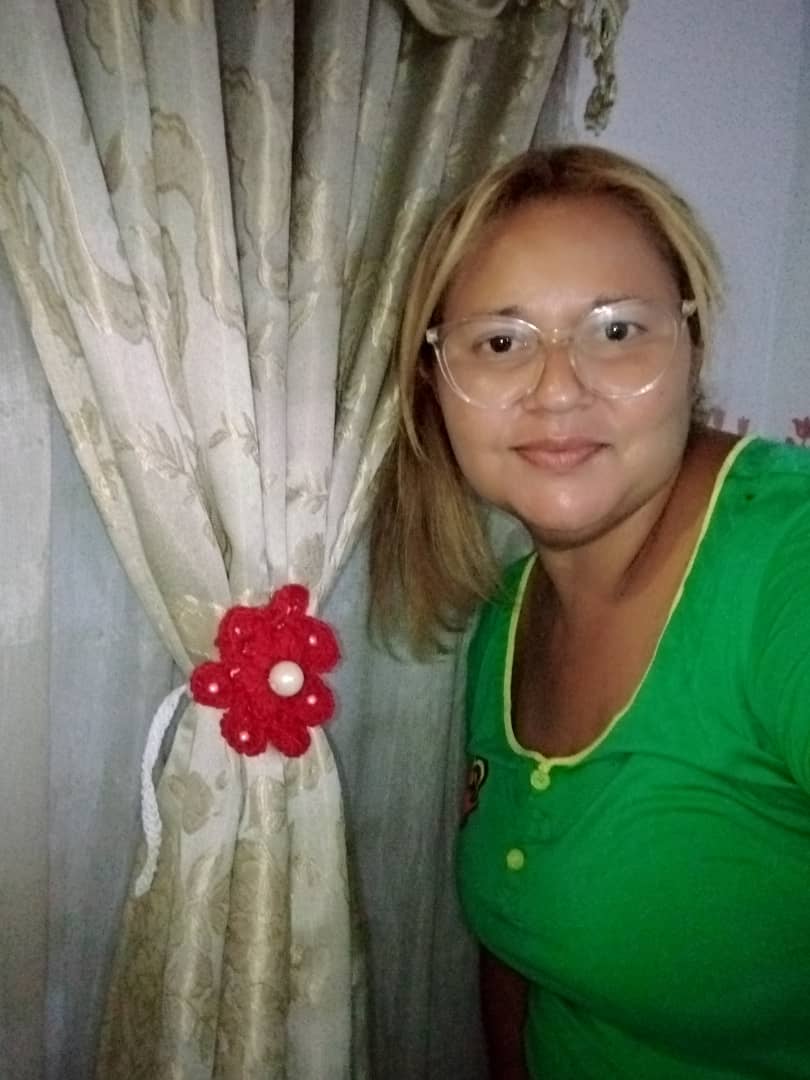
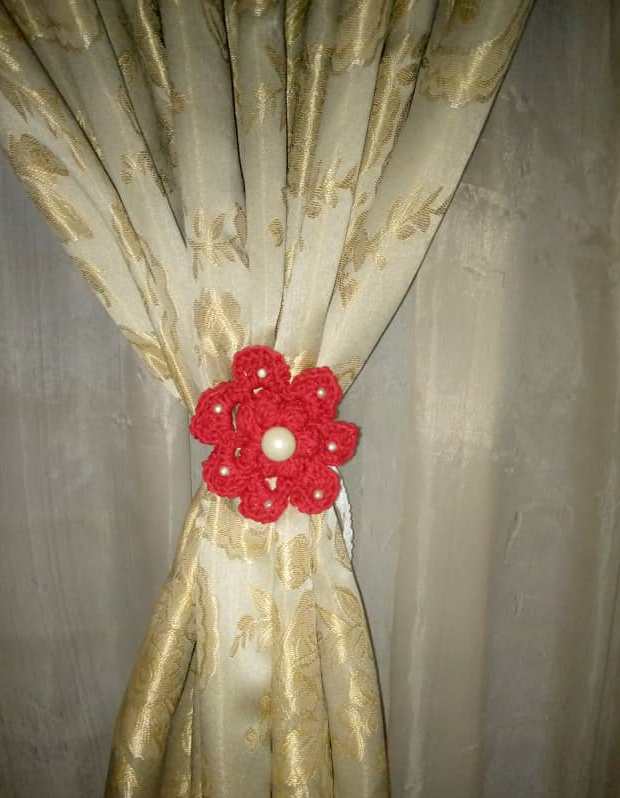
Aquí podemos ver el resultado final del sujeta tela en forma de flor tejido a crochet.
Here we can see the final result of the crocheted flower-shaped fabric holder.
Gracias por leer y comentar el post , espero que sea de su agrado, lo realicé con todo el amor del mundo. Muchas bendiciones.
Las fotos son mías, tomadas con teléfono Infinix , editada con incollage y traducidas con DEEPL.
Thank you for reading and commenting on the post, I hope you like it, I made it with all the love in the world. Many blessings.
The photos are mine, taken with Infinix phone, edited with incollage and translated with DEEPL.