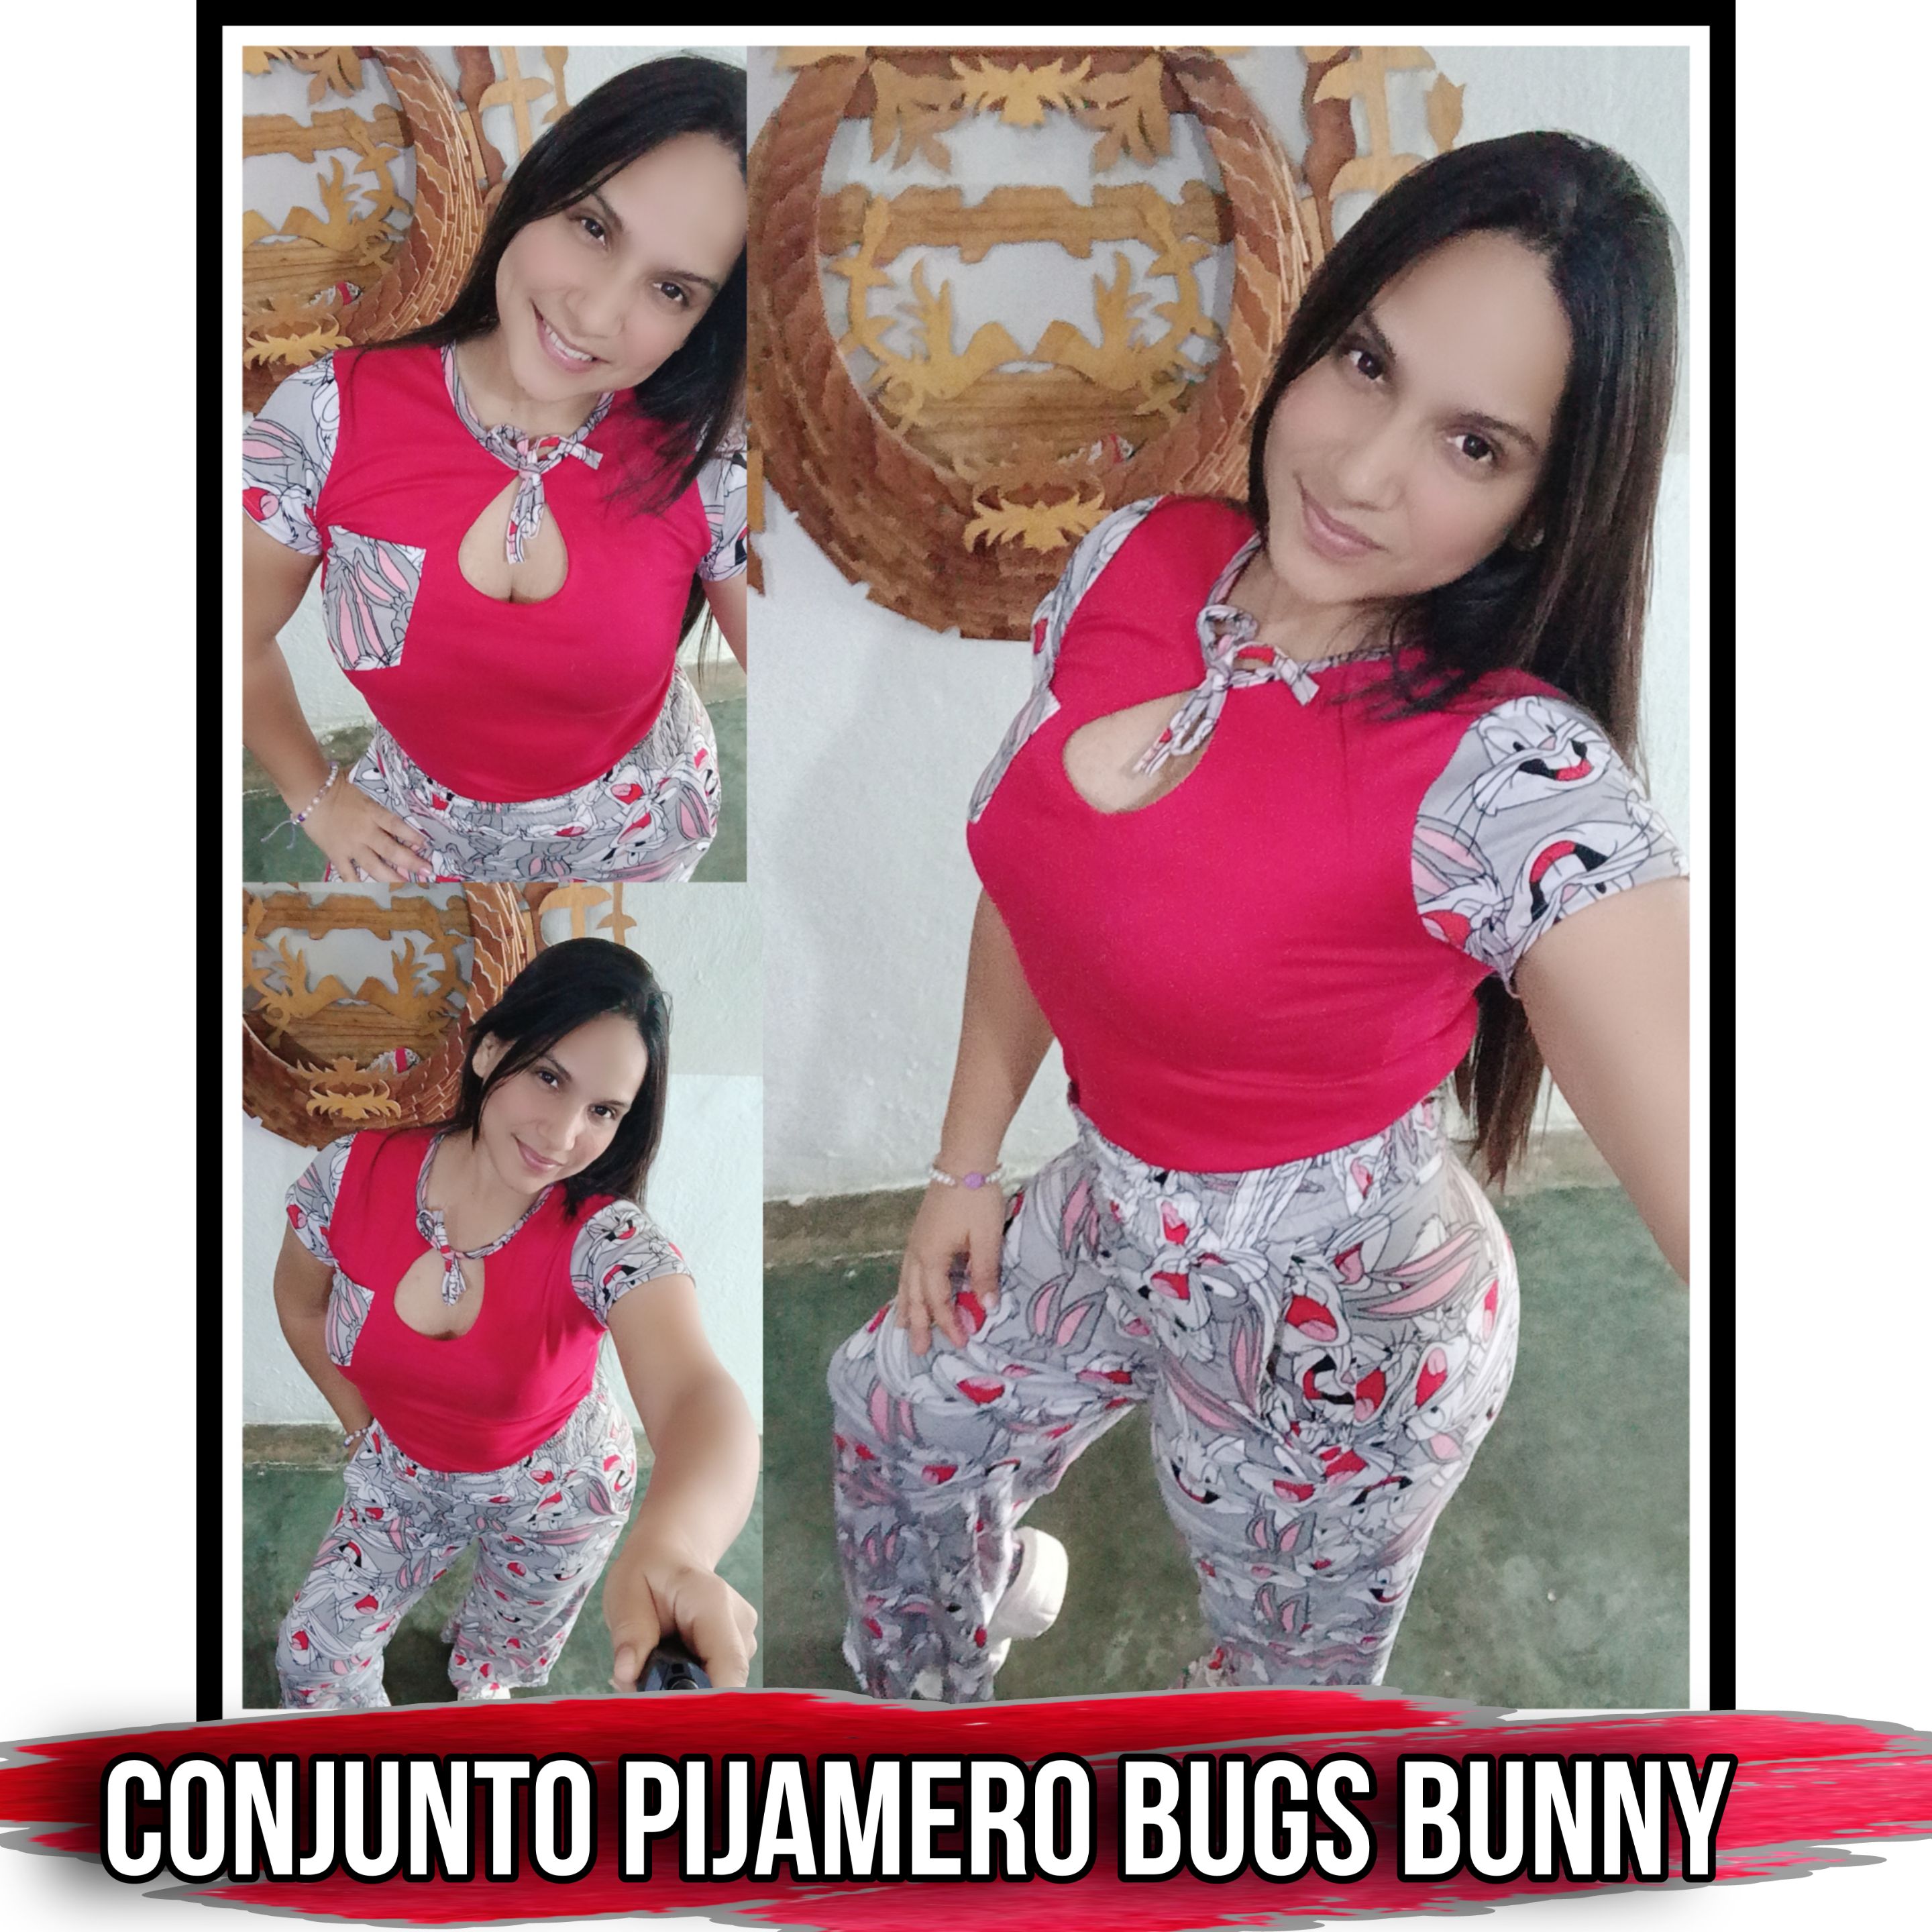
Hola, hola apreciados amigos de ésta creativa colmena, deseo que se encuentren bien, disfrutando de un excelente inicio de semana. Es para mi un gran gusto volver a saludarlos y estar en un nuevo #Needleworkmonday con ustedes. Soy el tipo de mujer que se arriesga a probar las tendencias que salen al mercado en el mundo de la moda, claro, siempre y cuando no vayan en contra del respeto y la dignidad; Es sabido que dependiendo de la ocasión, usamos un tipo o estilo de ropa, aunque en estos tiempos lo cómodo es lo favorito, sobre todo cuando vamos a realizar algún tipo de diligencias o realizar compras, mientras más cómodo es mejor, y de eso se trata el proyecto de hoy, la confección de un conjunto pijamero, con tematica de Bugs Bunny, siguiendo la moda "NBN", que significa: Netflix-Bagutte-Netflix, haciendo referencia a los parisino quienes hacían una pausa en la plataforma, para ir por el pan y luego regresar para continuar viendo lo que habían pausado. Esta moda se ha vuelto una de mis favoritas para ir por el pan, a la farmacia, al mercado o para ir al centro a hacer las compras semanales. Te invito a que me acompañes en éste paso a paso, enfocado específicamente en la confección de la camisa, ya que el proceso del pantalón, lo he mostrado en anteriores tutoriales.
Hello, hello dear friends of this creative hive, I hope you are well, enjoying an excellent start of the week. It is for me a great pleasure to greet you again and to be in a new #Needleworkmonday with you. I am the kind of woman who risks to try the trends that come out in the fashion world, of course, as long as they do not go against respect and dignity; It is known that depending on the occasion, we use a type or style of clothing, although in these times the comfortable is the favorite, especially when we go to do some kind of errands or shopping, the more comfortable the better, and that is what today's project is about, the making of a pajama set, with Bugs Bunny theme, following the fashion "NBN ", which means: Netflix-Bagutte-Netflix, referring to the Parisians who would pause the platform, to go get bread and then come back to continue watching what they had paused. This trend has become one of my favorite ways to get bread, go to the pharmacy, to the market or to go downtown to do the weekly shopping. I invite you to join me in this step-by-step, focused specifically on the making of the shirt, since the process of the pants, I have shown in previous tutorials.

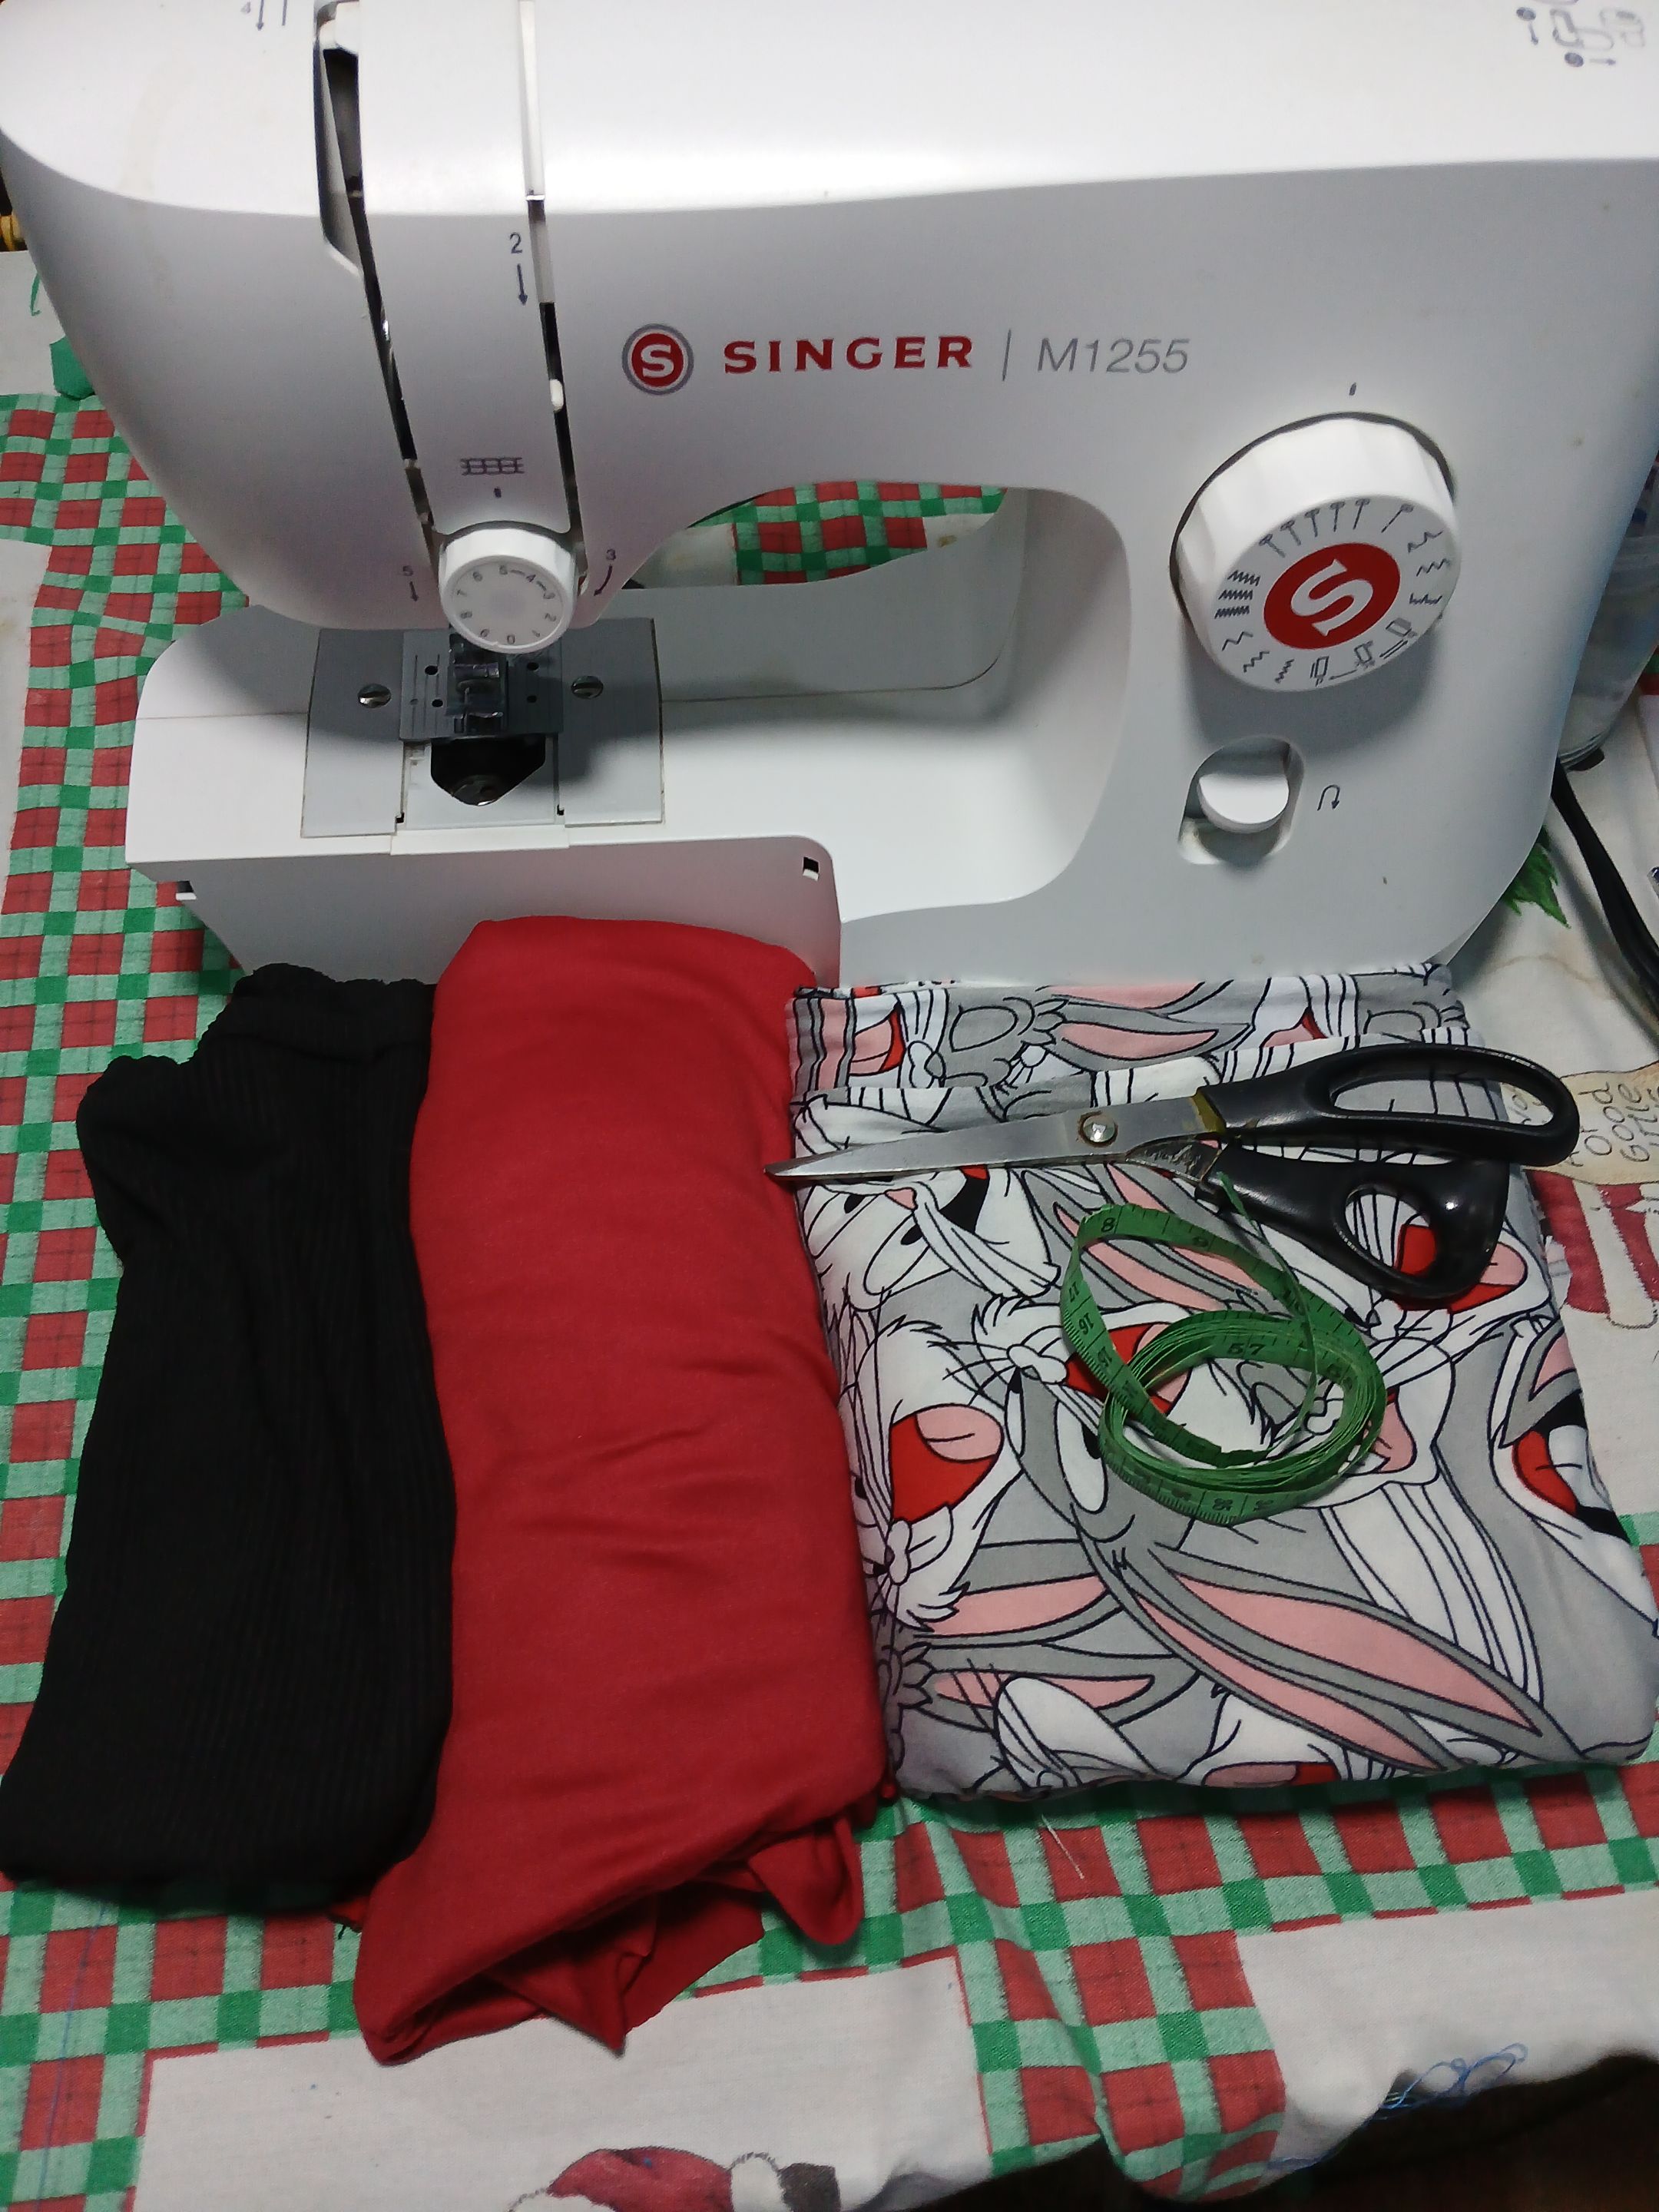
- 75cm de tela microdurazno roja.
- 1.50 metros de tela microdurazno estampada de Bugs Bunny.
- Camisa de preferencia para el patrón.
- Patrón de manga.
- Elástico de 6cm de ancho.
- Tijeras.
- Cinta métrica.
- Máquina de coser.
- 75cm of red microdurazno fabric.
- 1.50 meters of Bugs Bunny printed micro-denim fabric.
- Shirt of choice for the pattern.
- Sleeve pattern.
- 6cm wide elastic.
- Scissors.
- Tape measure.
- Sewing machine.

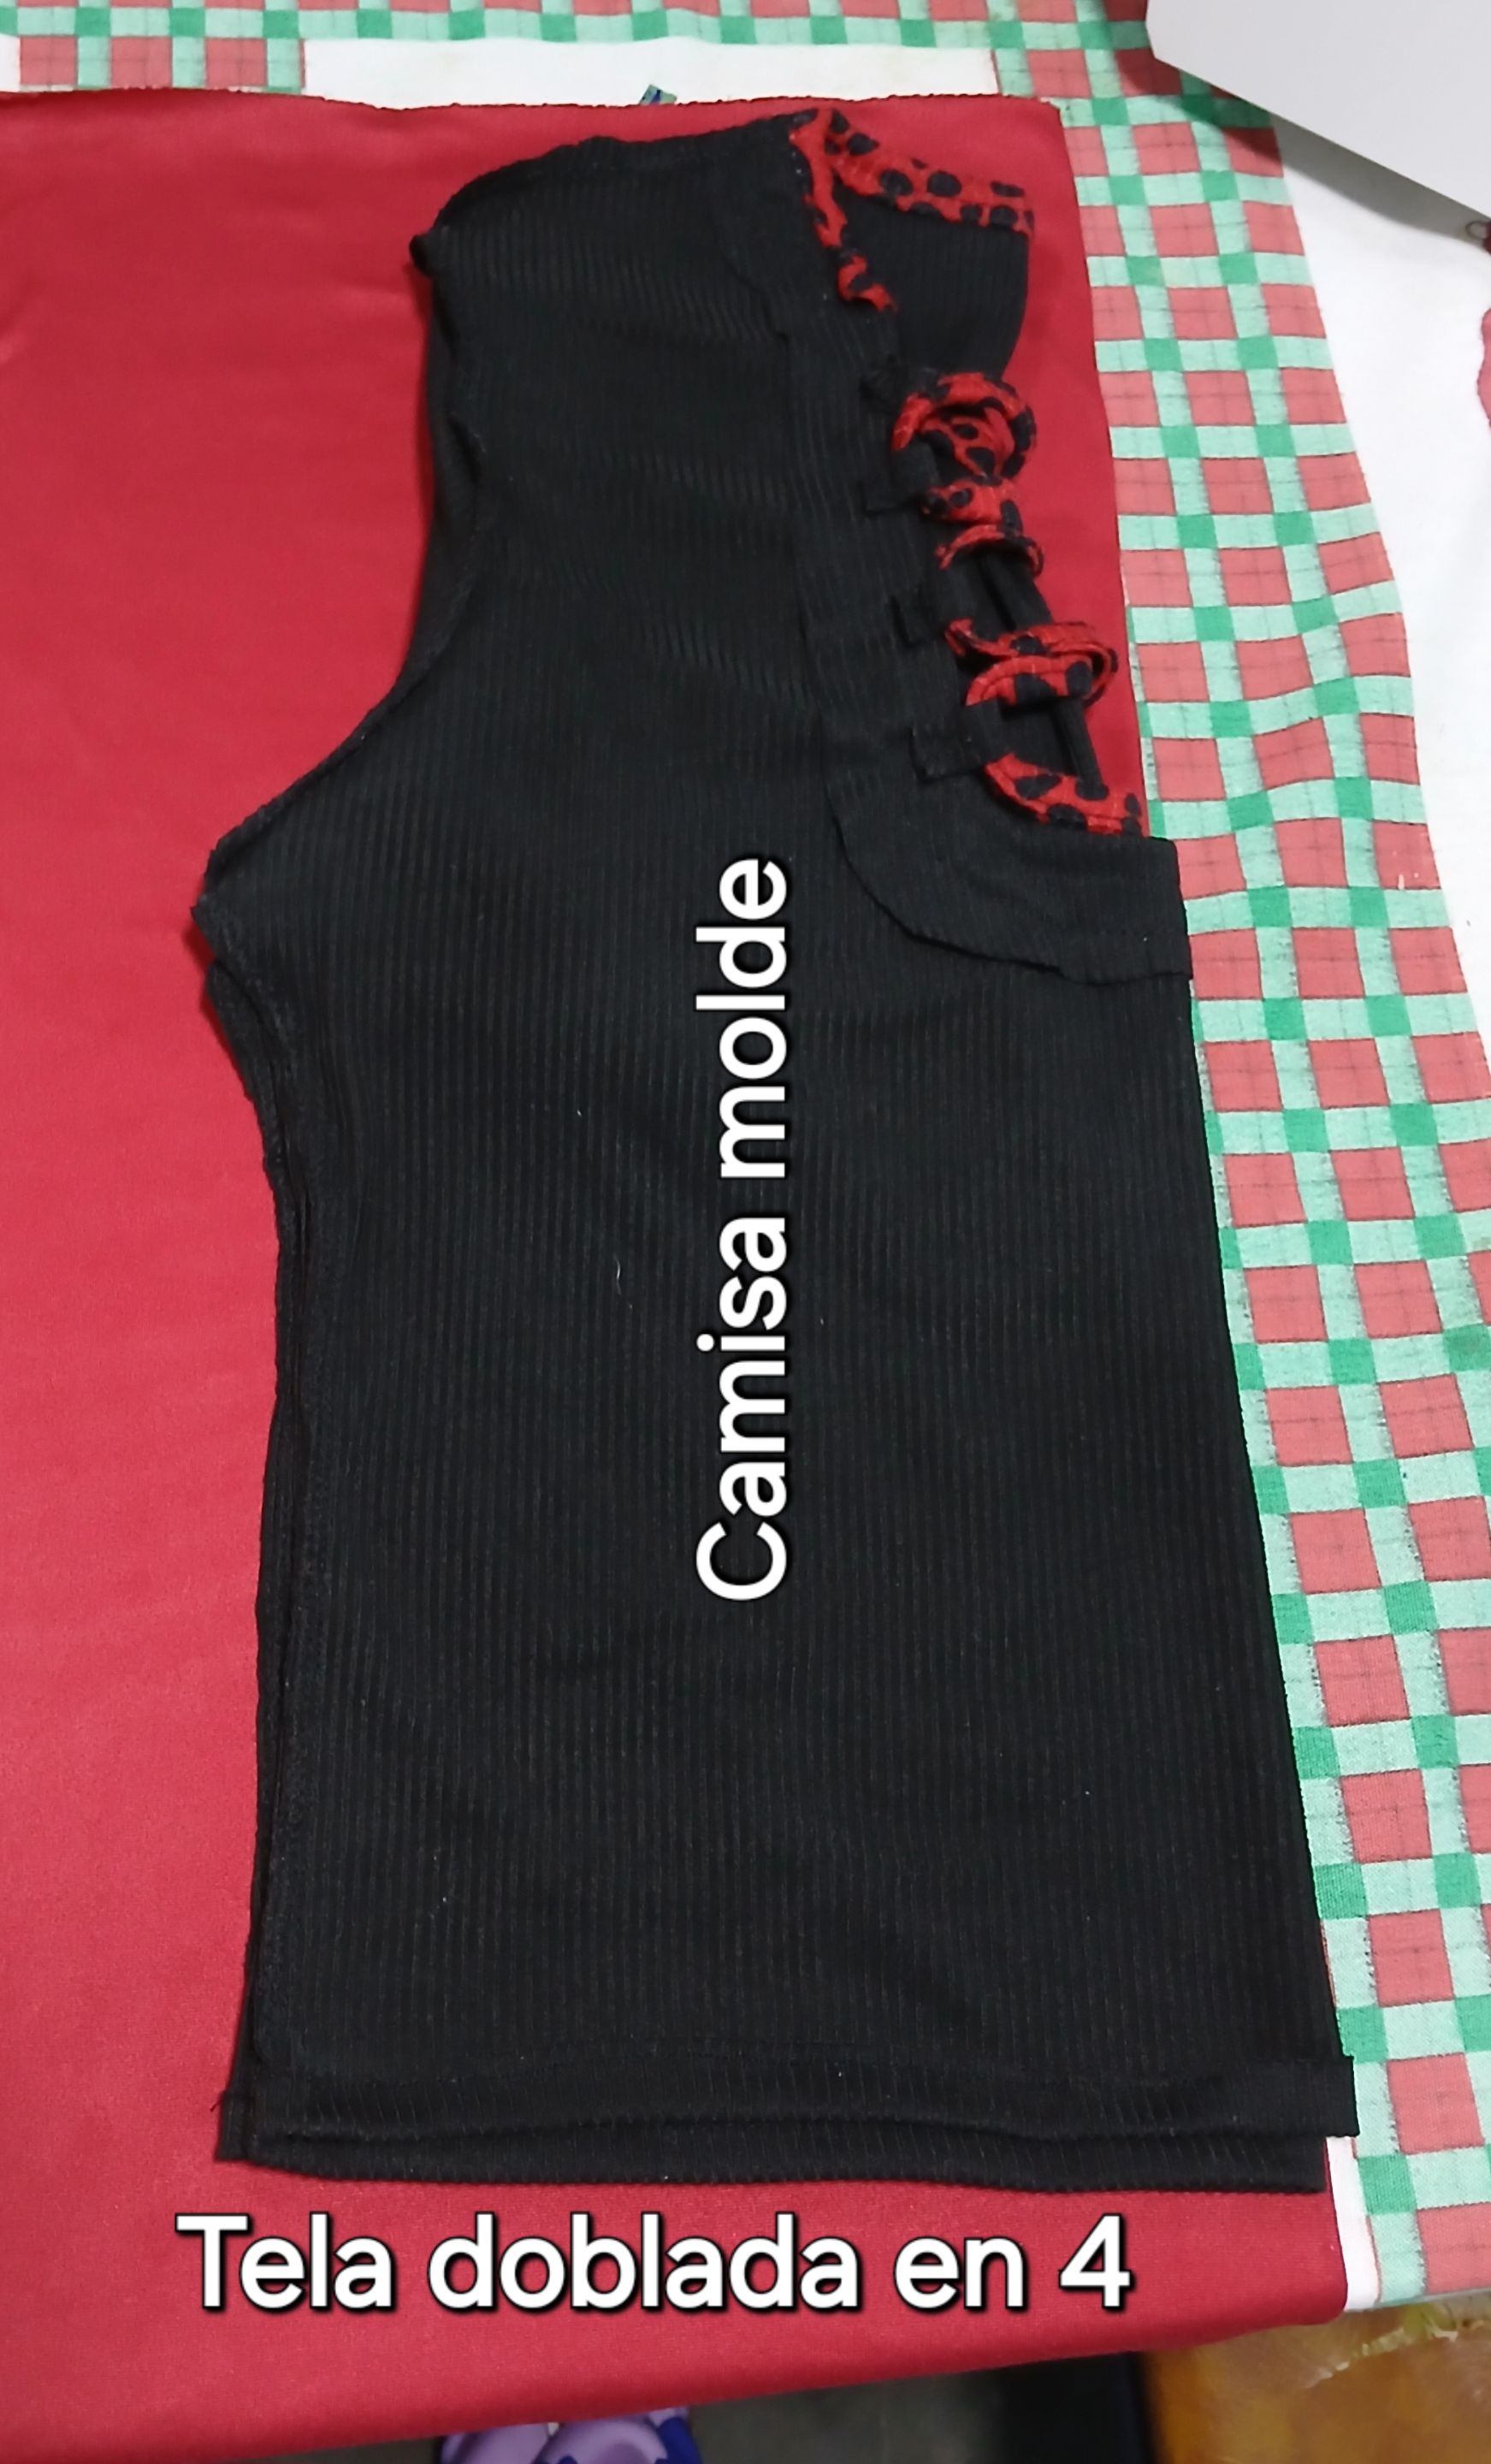
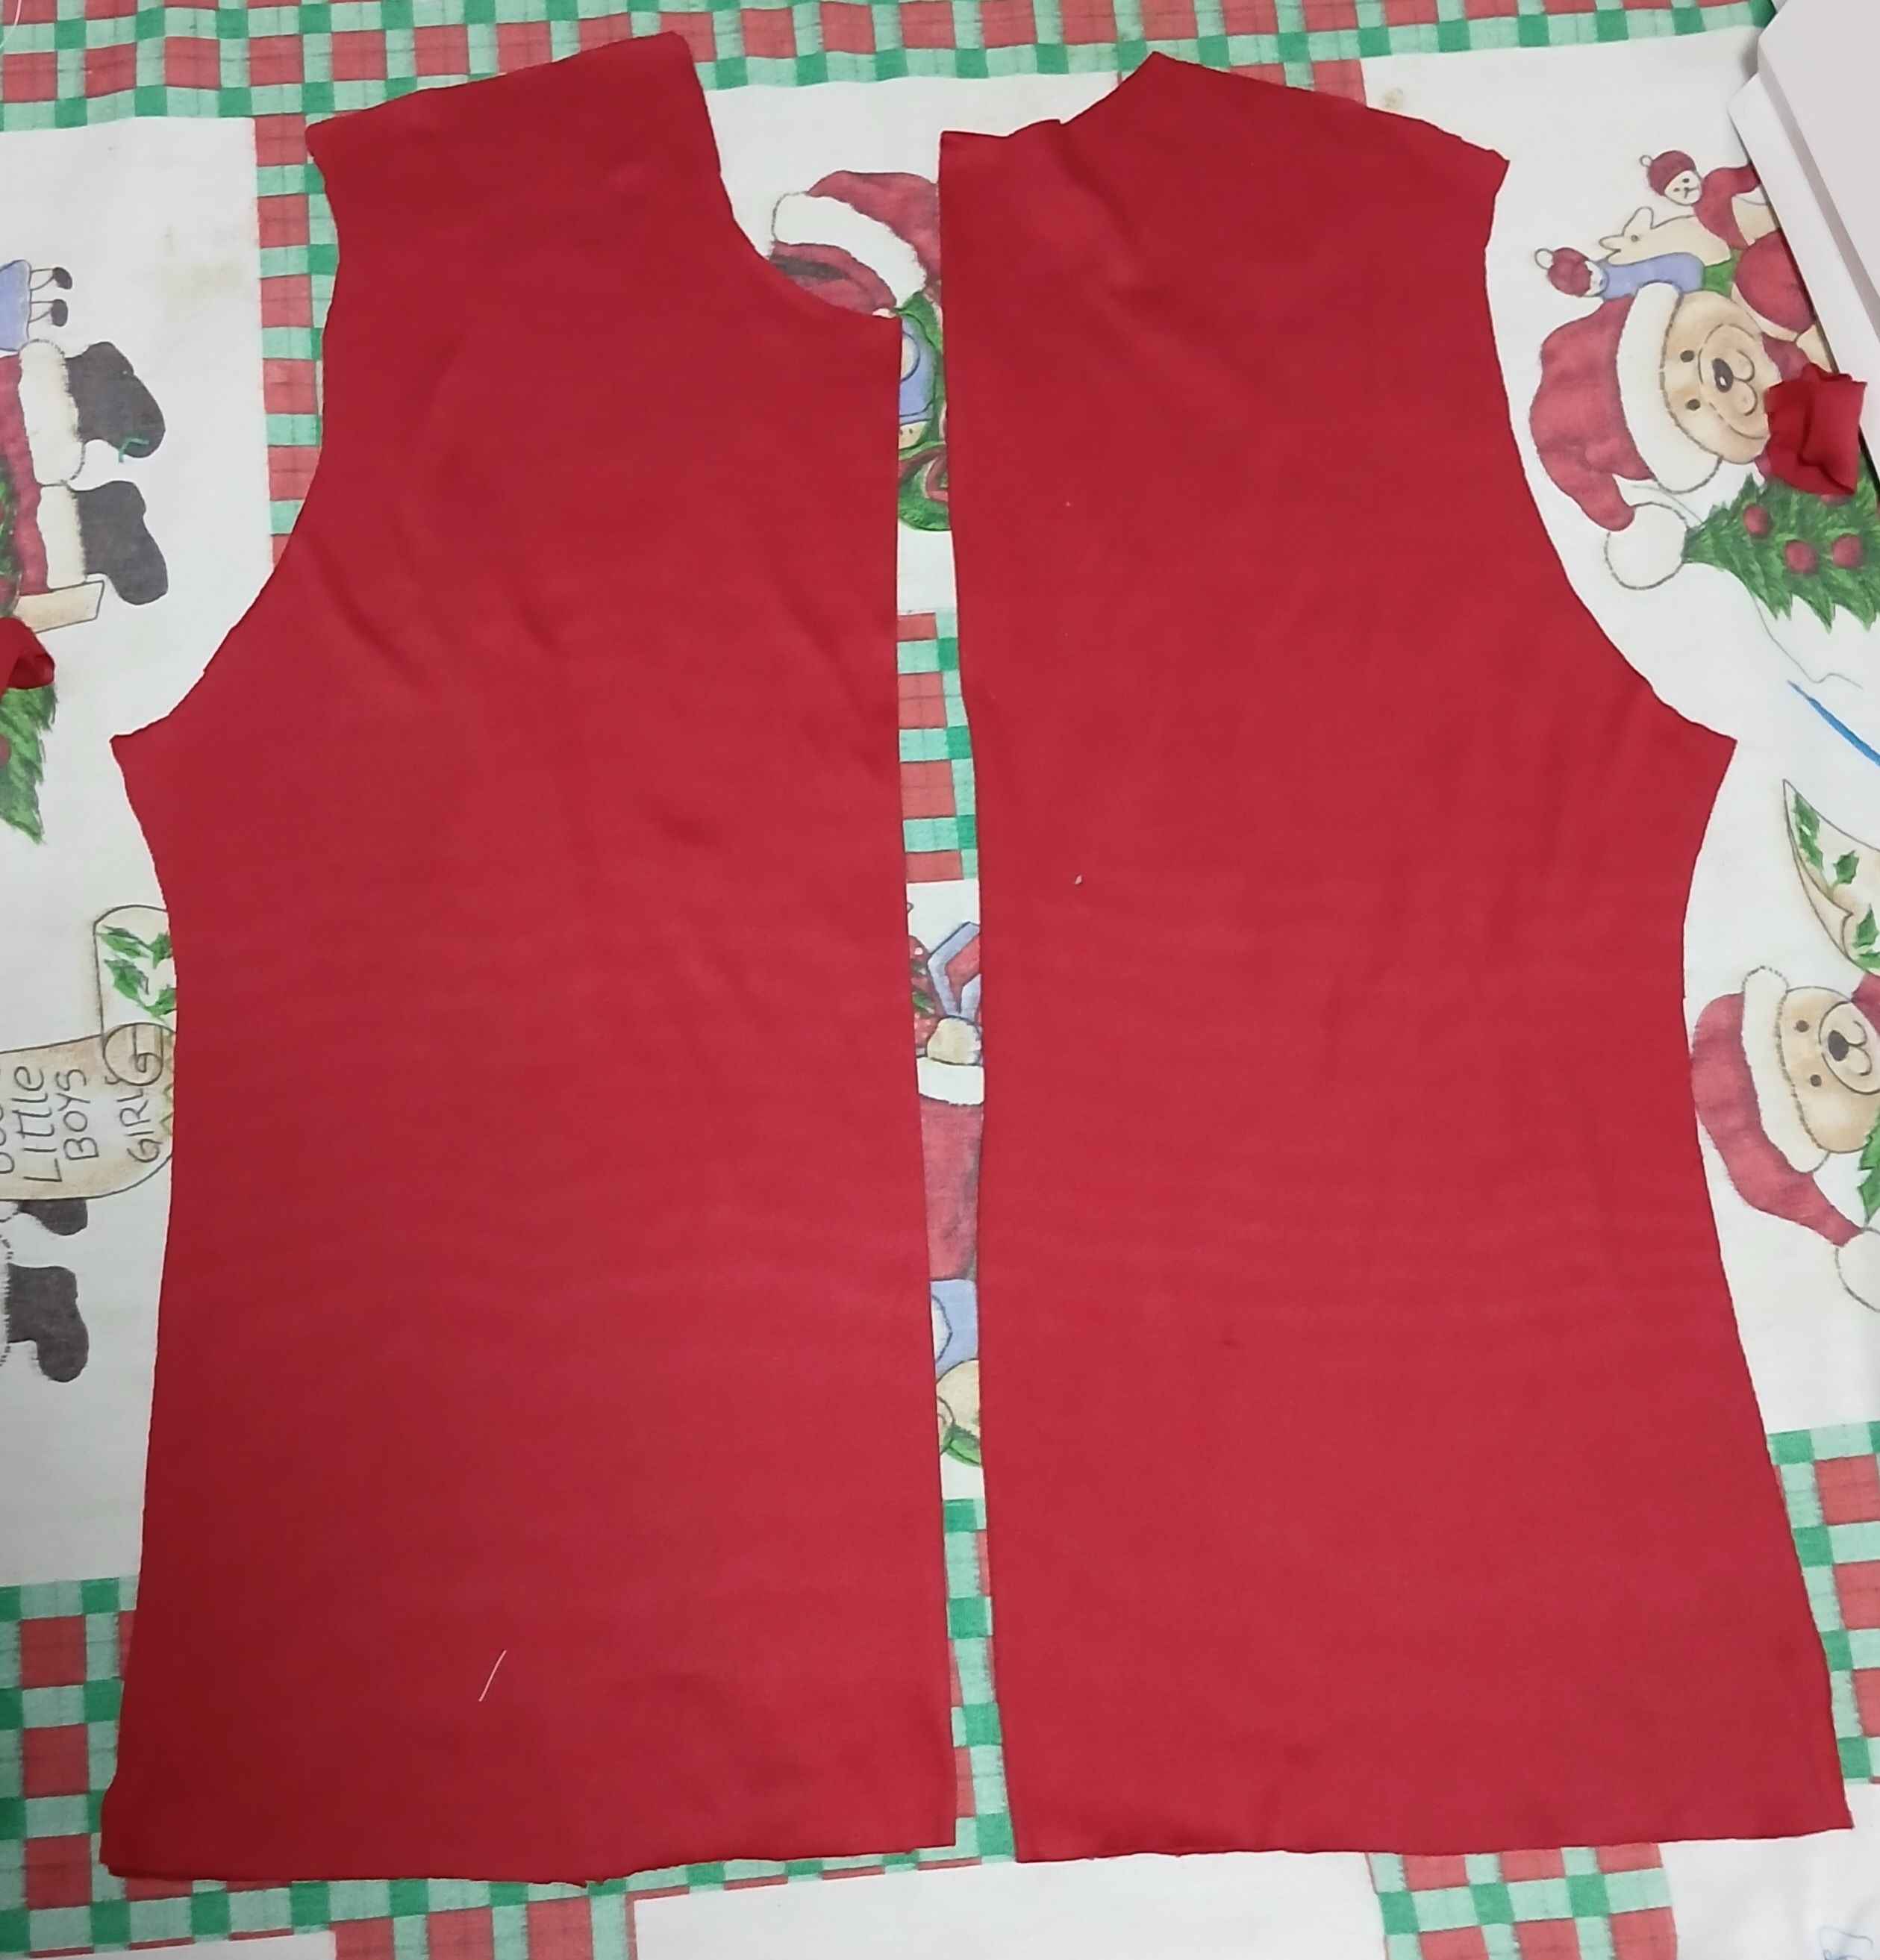
Para comenzar con la confección de éste cojunto Pijamero enfocado específicamente en la blusa que acompaña al pantalón; Utilíce cómo molde una camisa básica de mi preferencia y la coloqué sobre la tela roja doblada en 4, para sacar 2 piezas iguales, que serán la delantera y la trasera, esto es para realizar el trabajo un poco más rápido.
To start with the making of this Pijamero set focused specifically on the blouse that goes with the pants; I used as a mold a basic shirt of my preference and placed it on the red fabric folded in 4, to get 2 equal pieces, which will be the front and the back, this is to make the work a little faster.
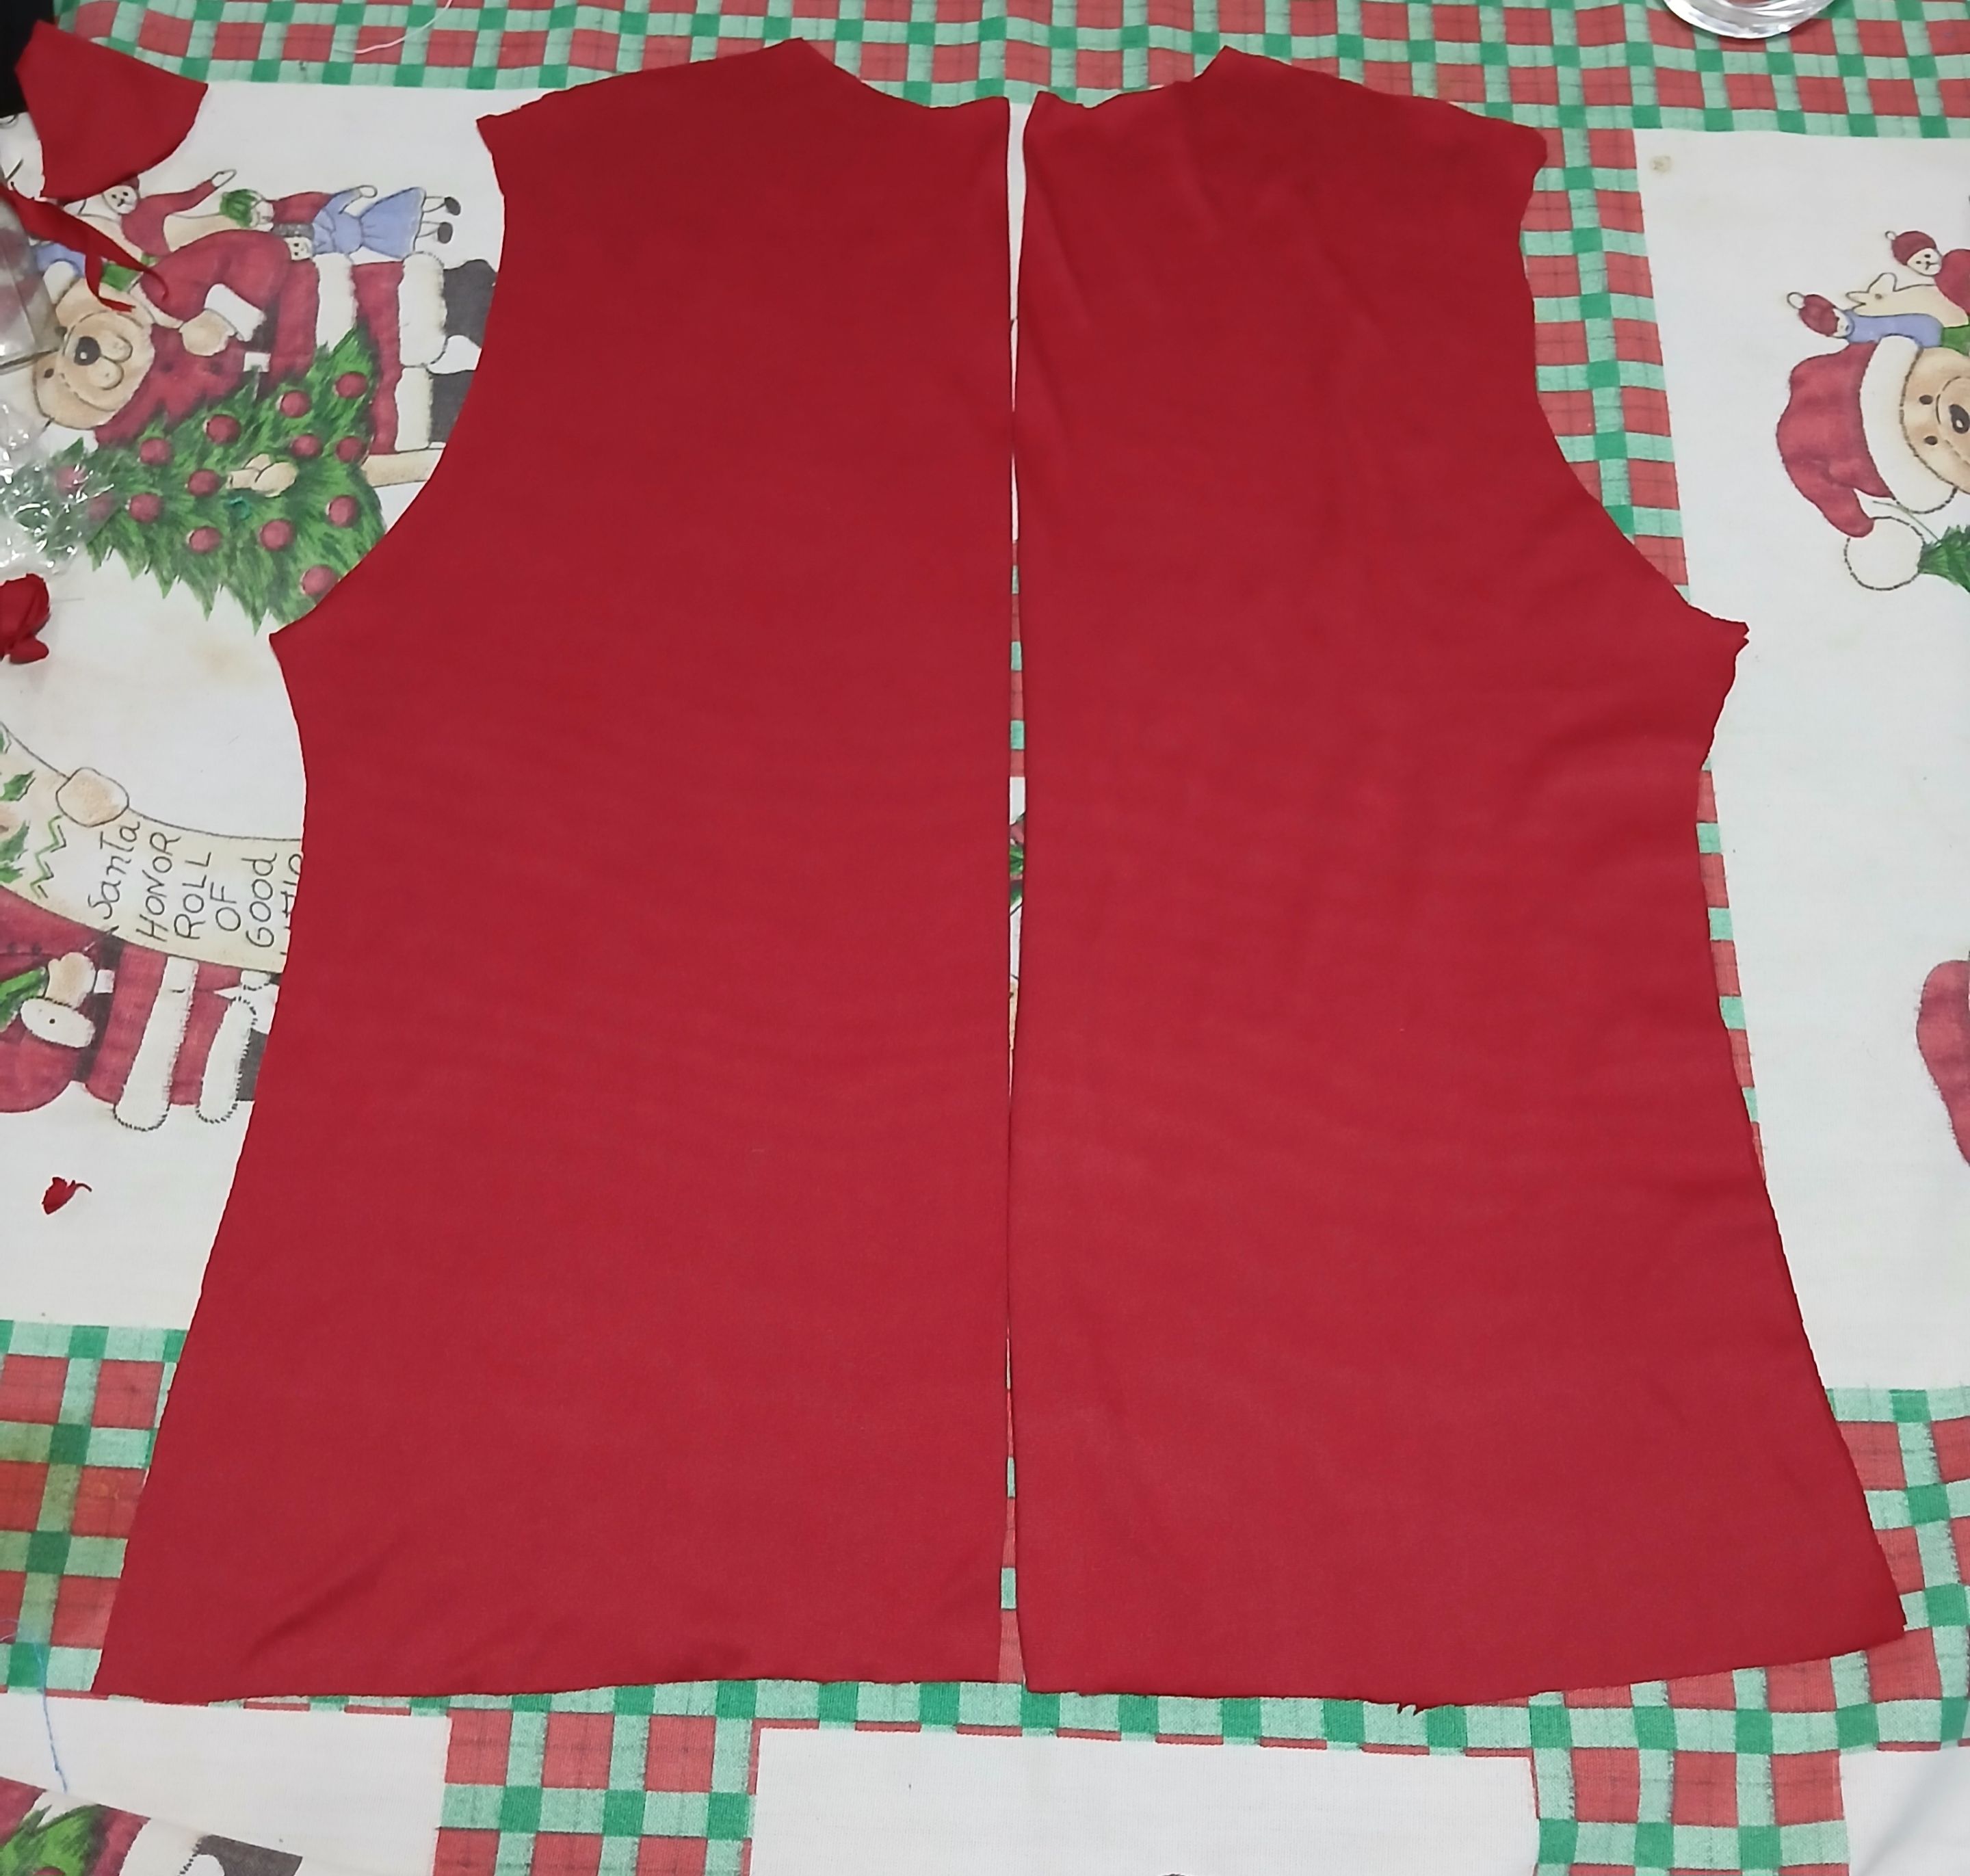
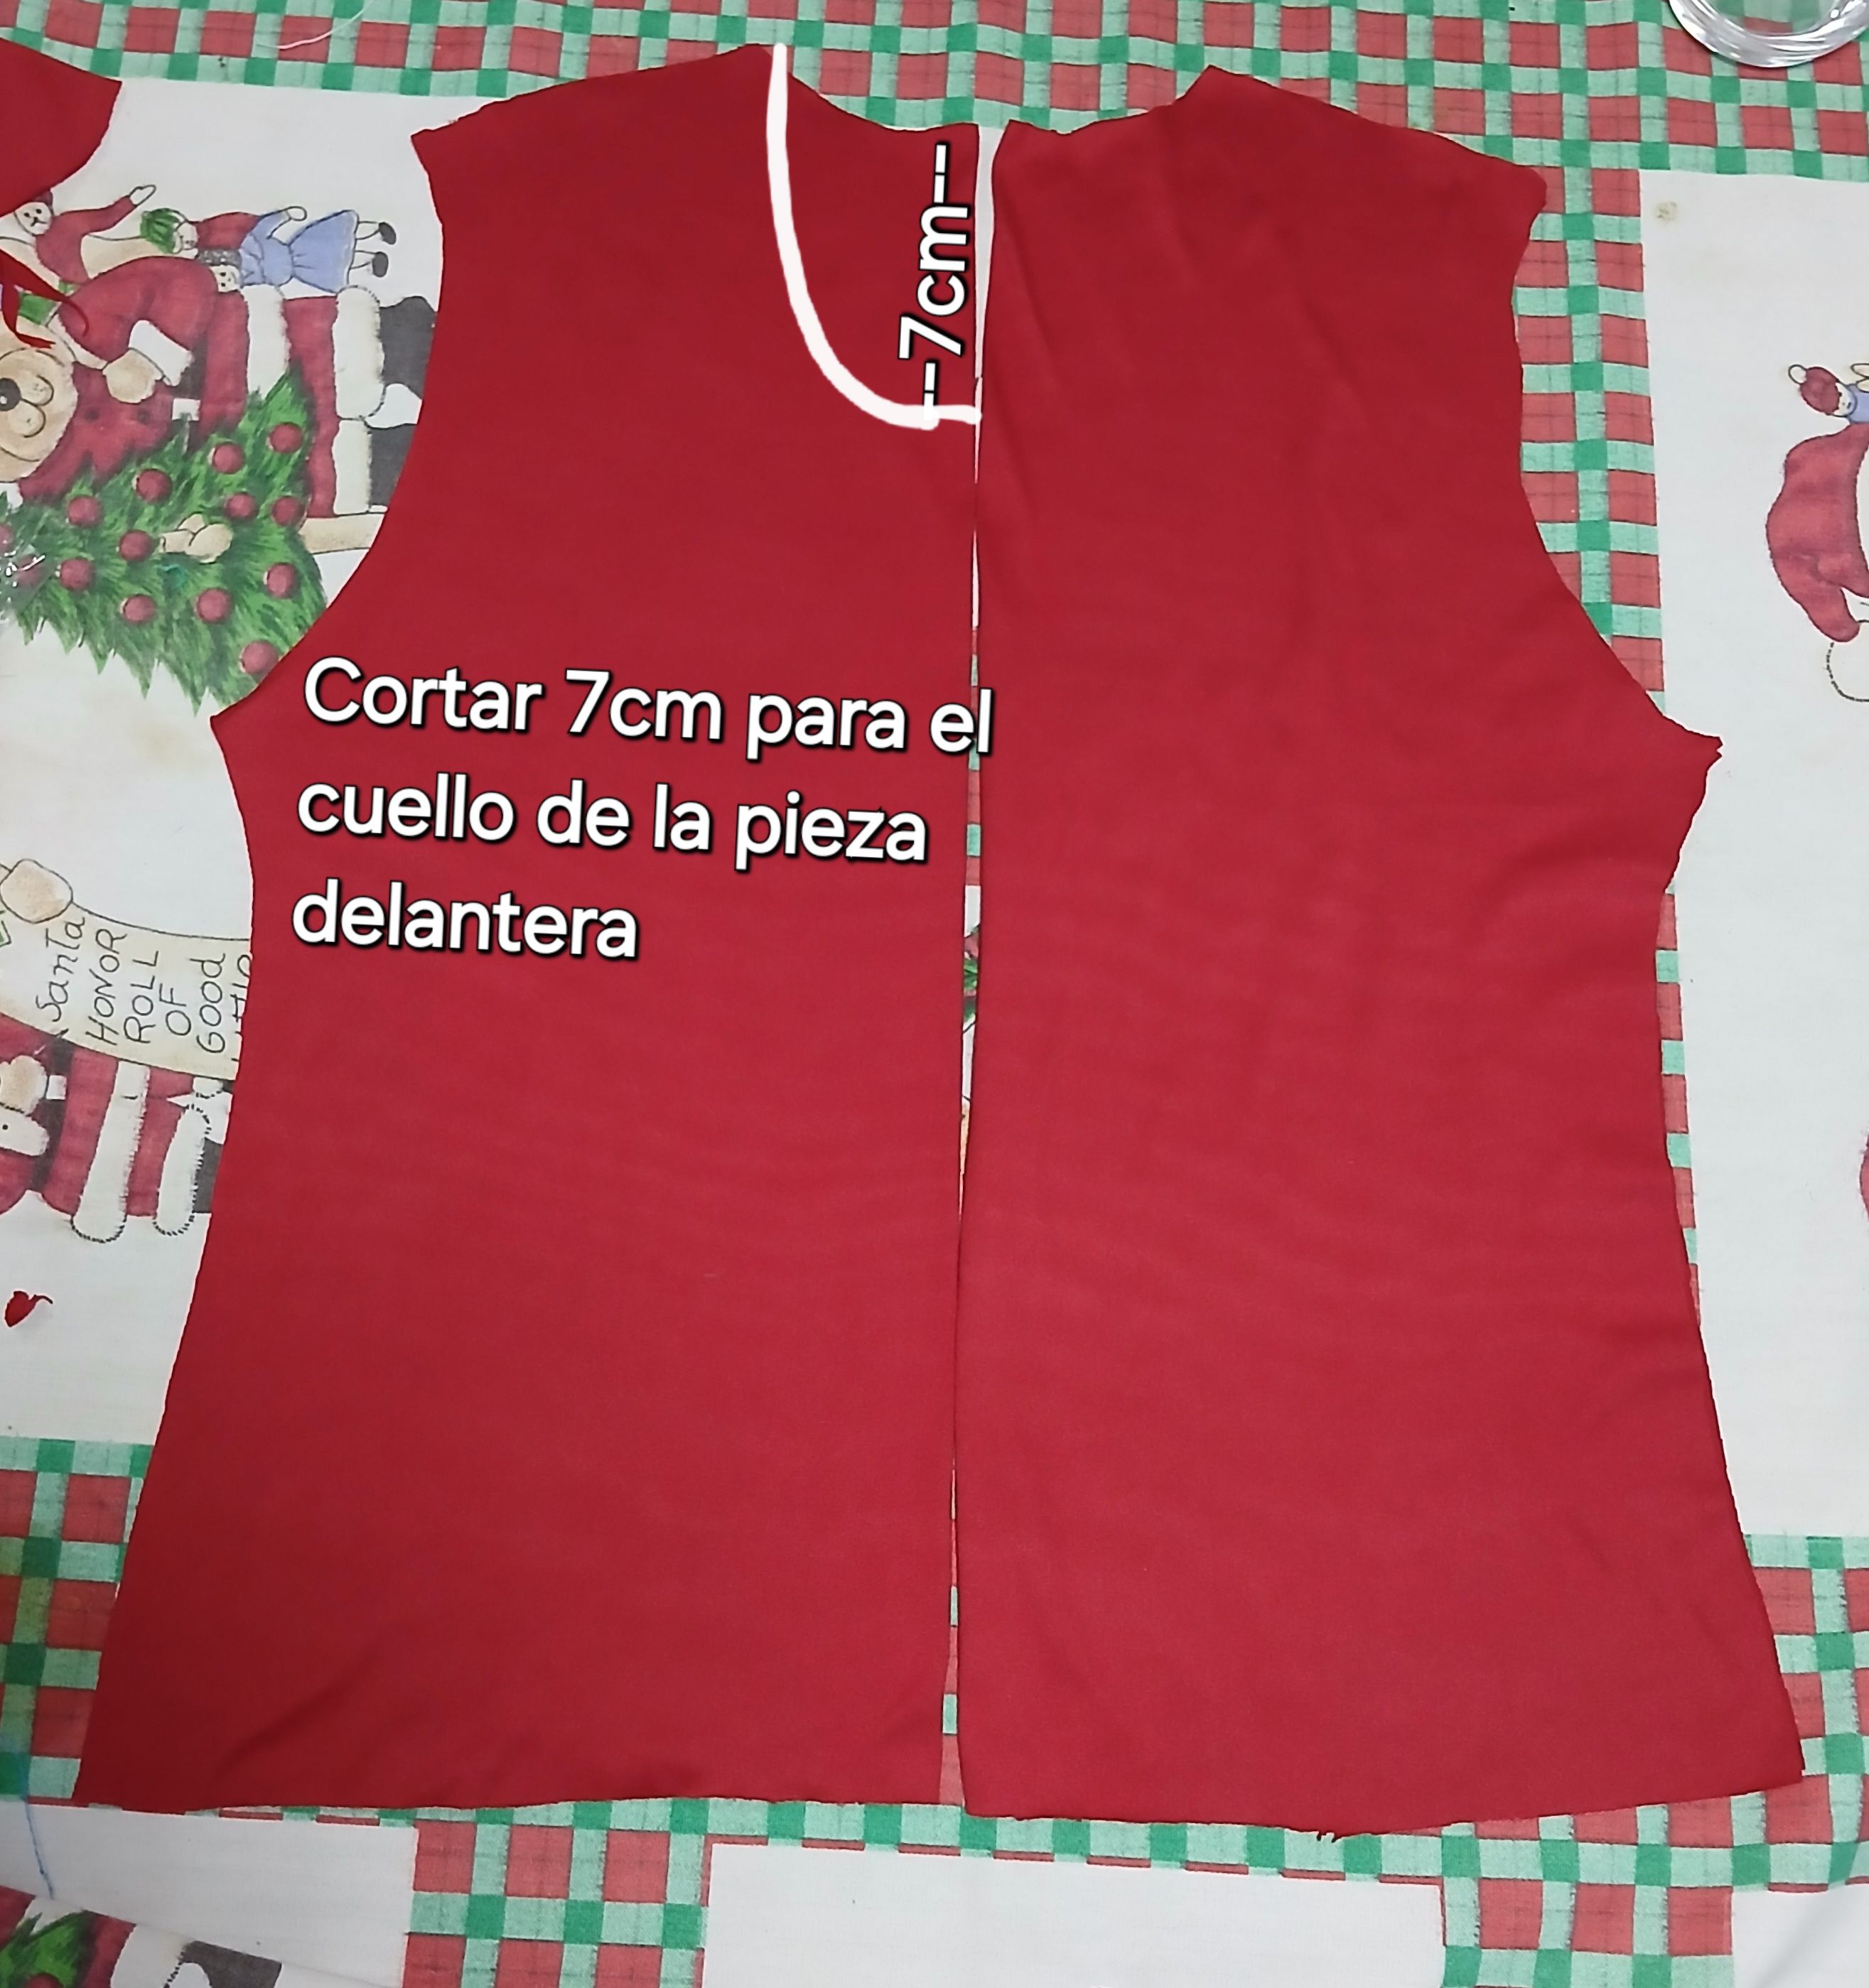
Luego de haber sacado las dos piezas, procedí a tomar una de ellas, para que sea la pieza delantera y en la parte del cuello baje 7 cm más para el escote.
After removing the two pieces, I proceeded to take one of them, to be the front piece, and in the neck part I lowered 7 cm more for the neckline.
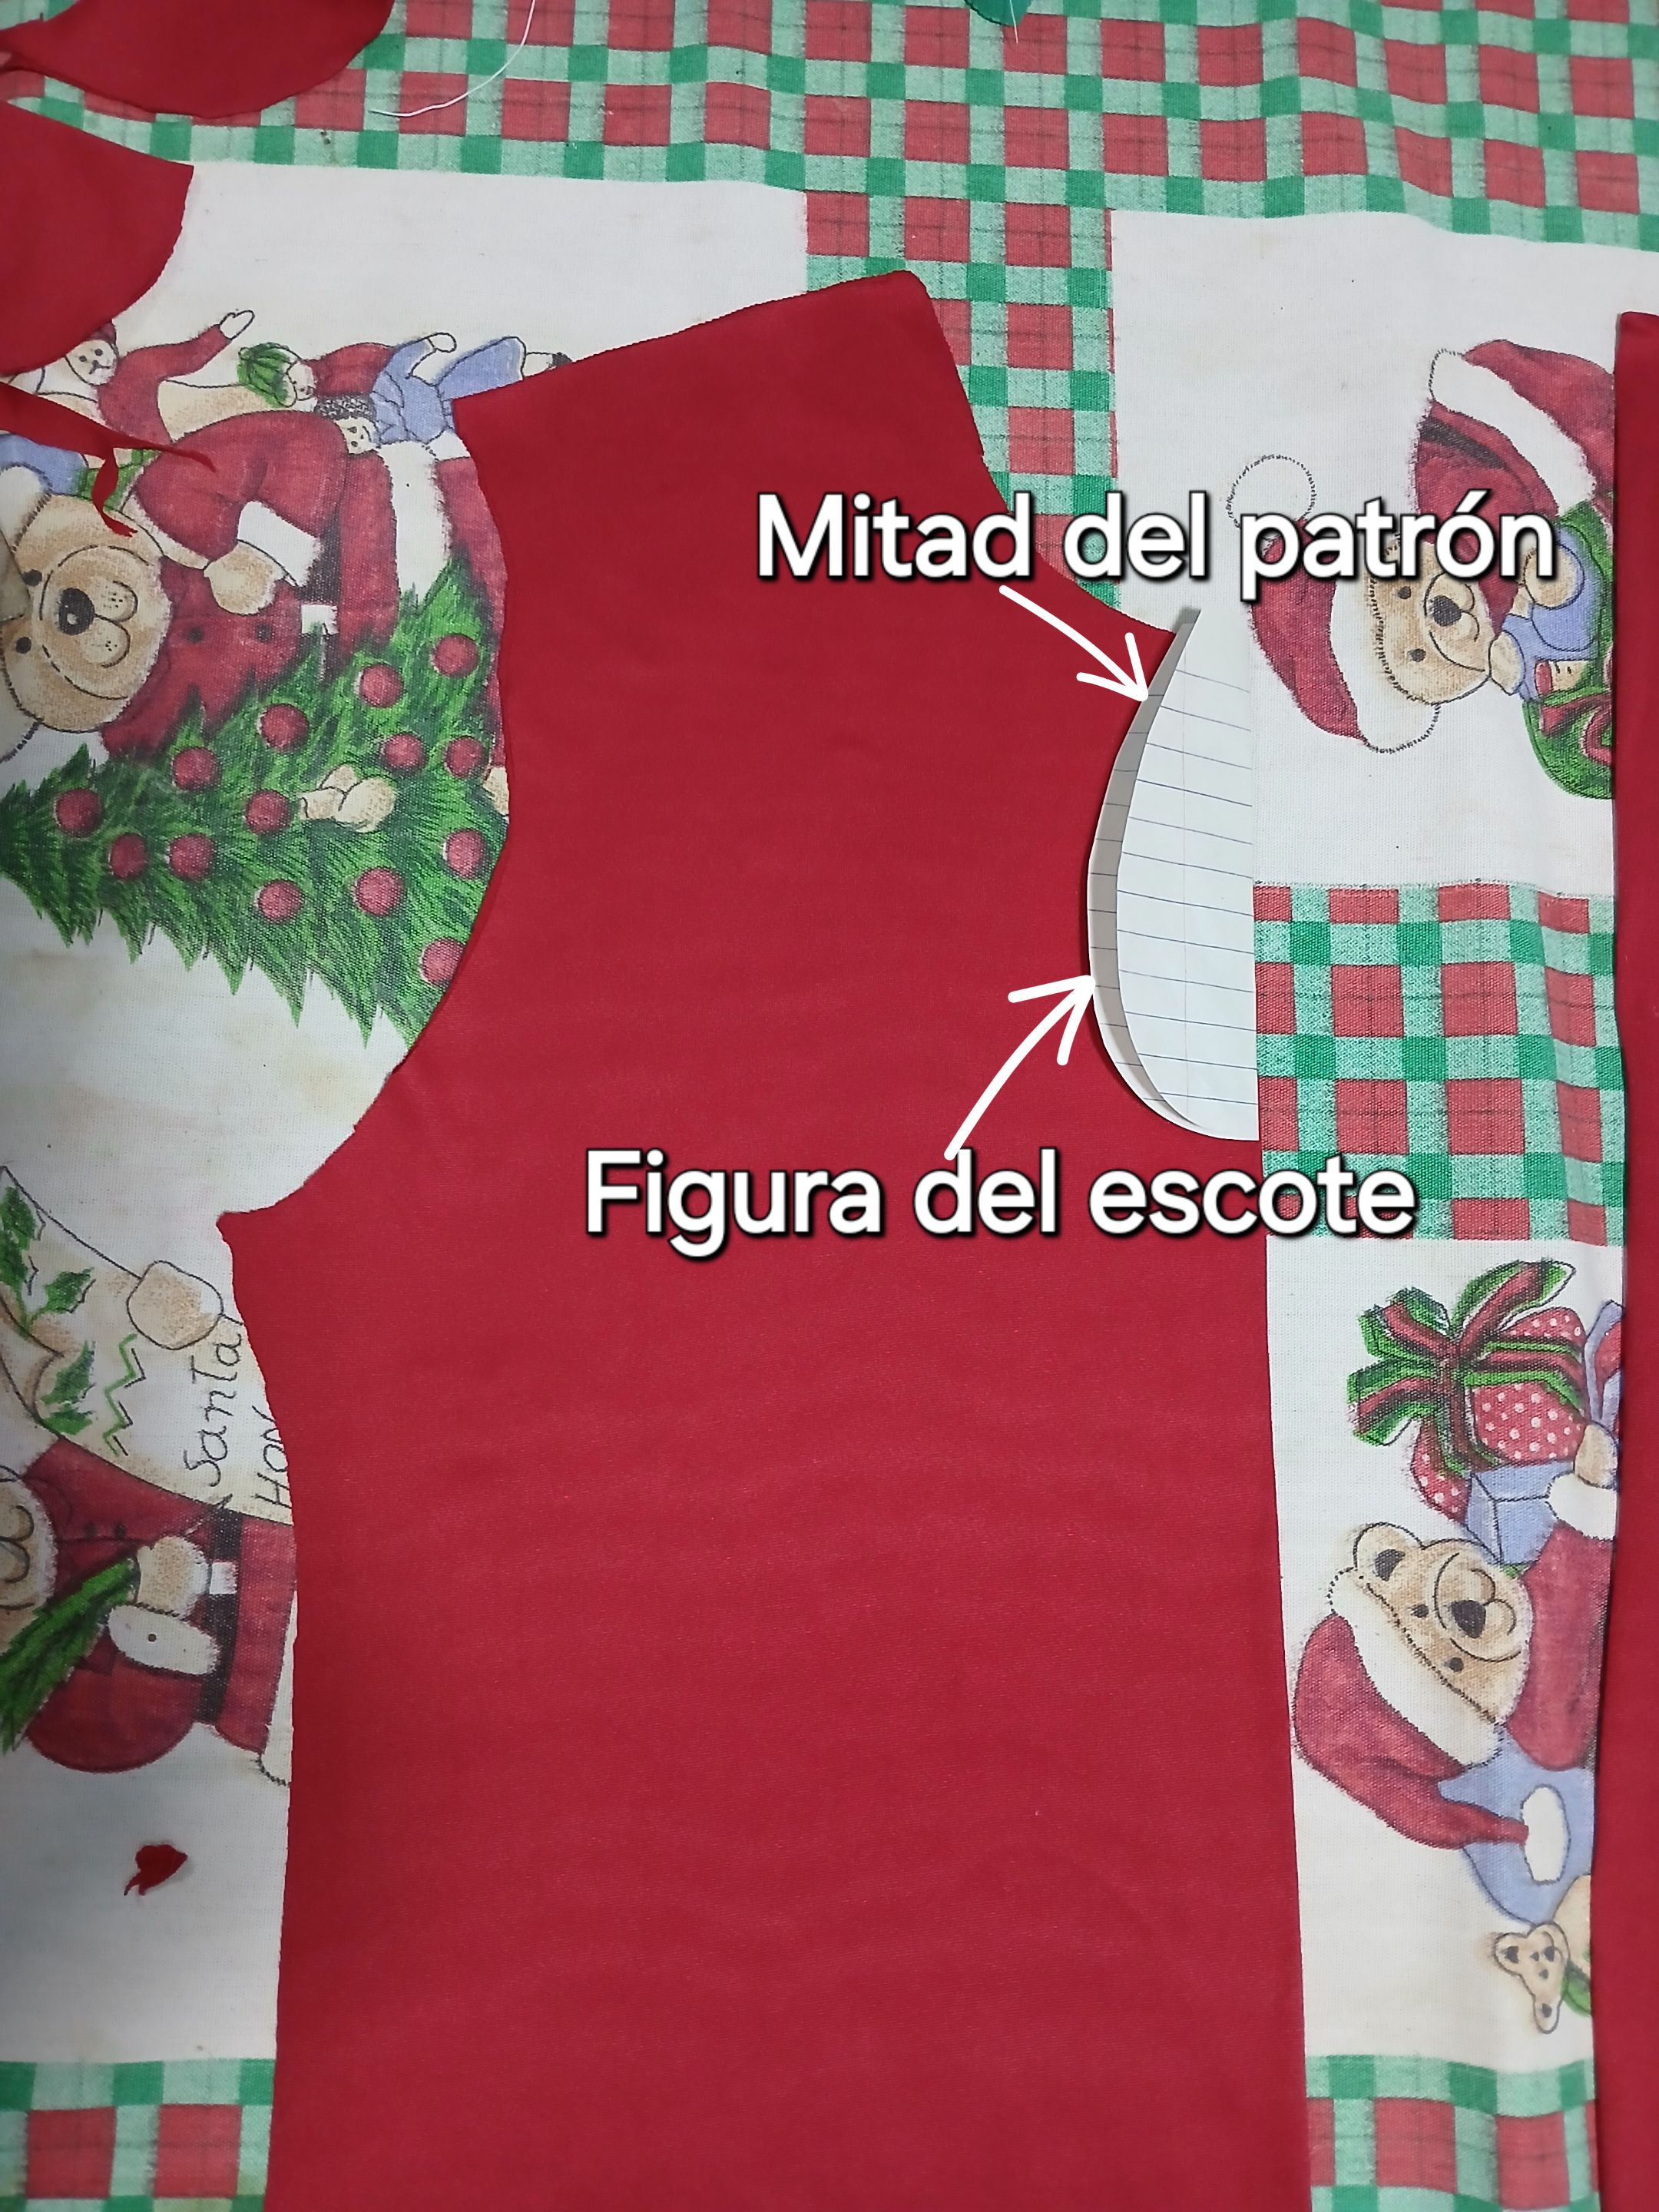
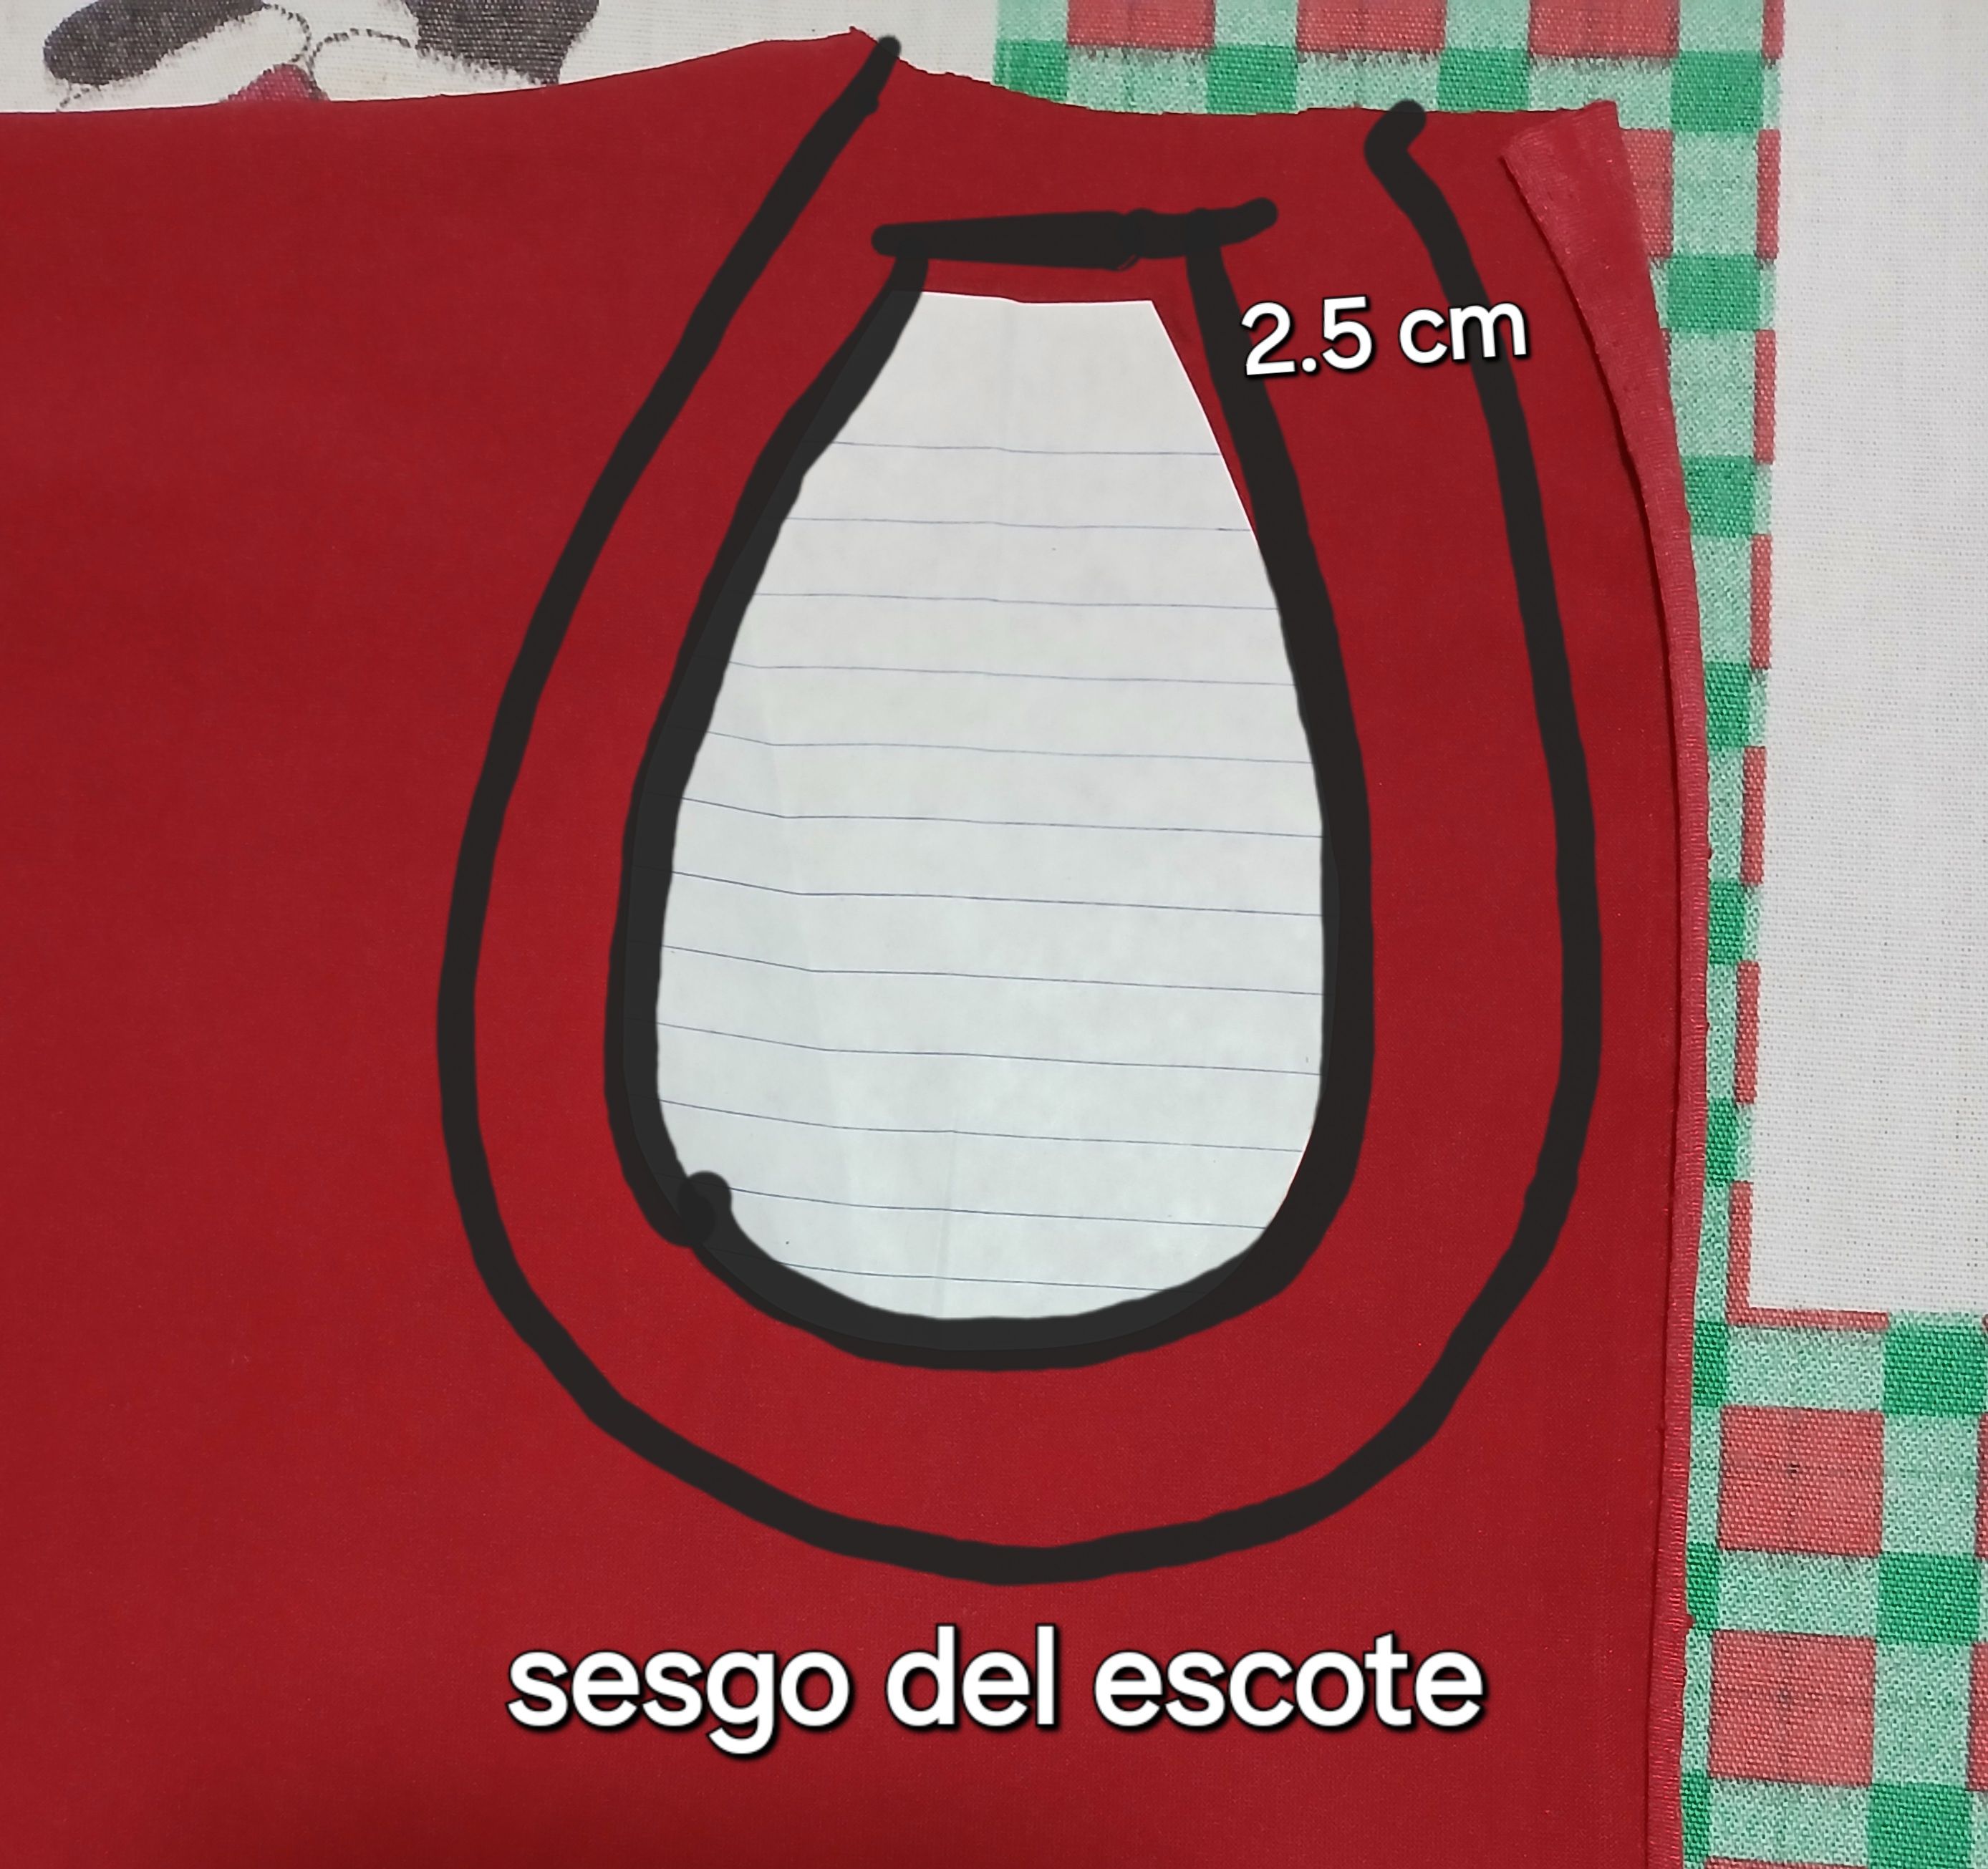
Seguidamente corté un pequeño pedazo de papel en forma de gota, Y lo coloqué doblado por la mitad sobre la pieza delantera, también doblada por la mitad para realizar un corte siguiendo la figura. Esa sería el diseño del escote.
Next I cut a small piece of paper in the shape of a drop, and placed it folded in half over the front piece, also folded in half to make a cut following the figure. That would be the neckline design.
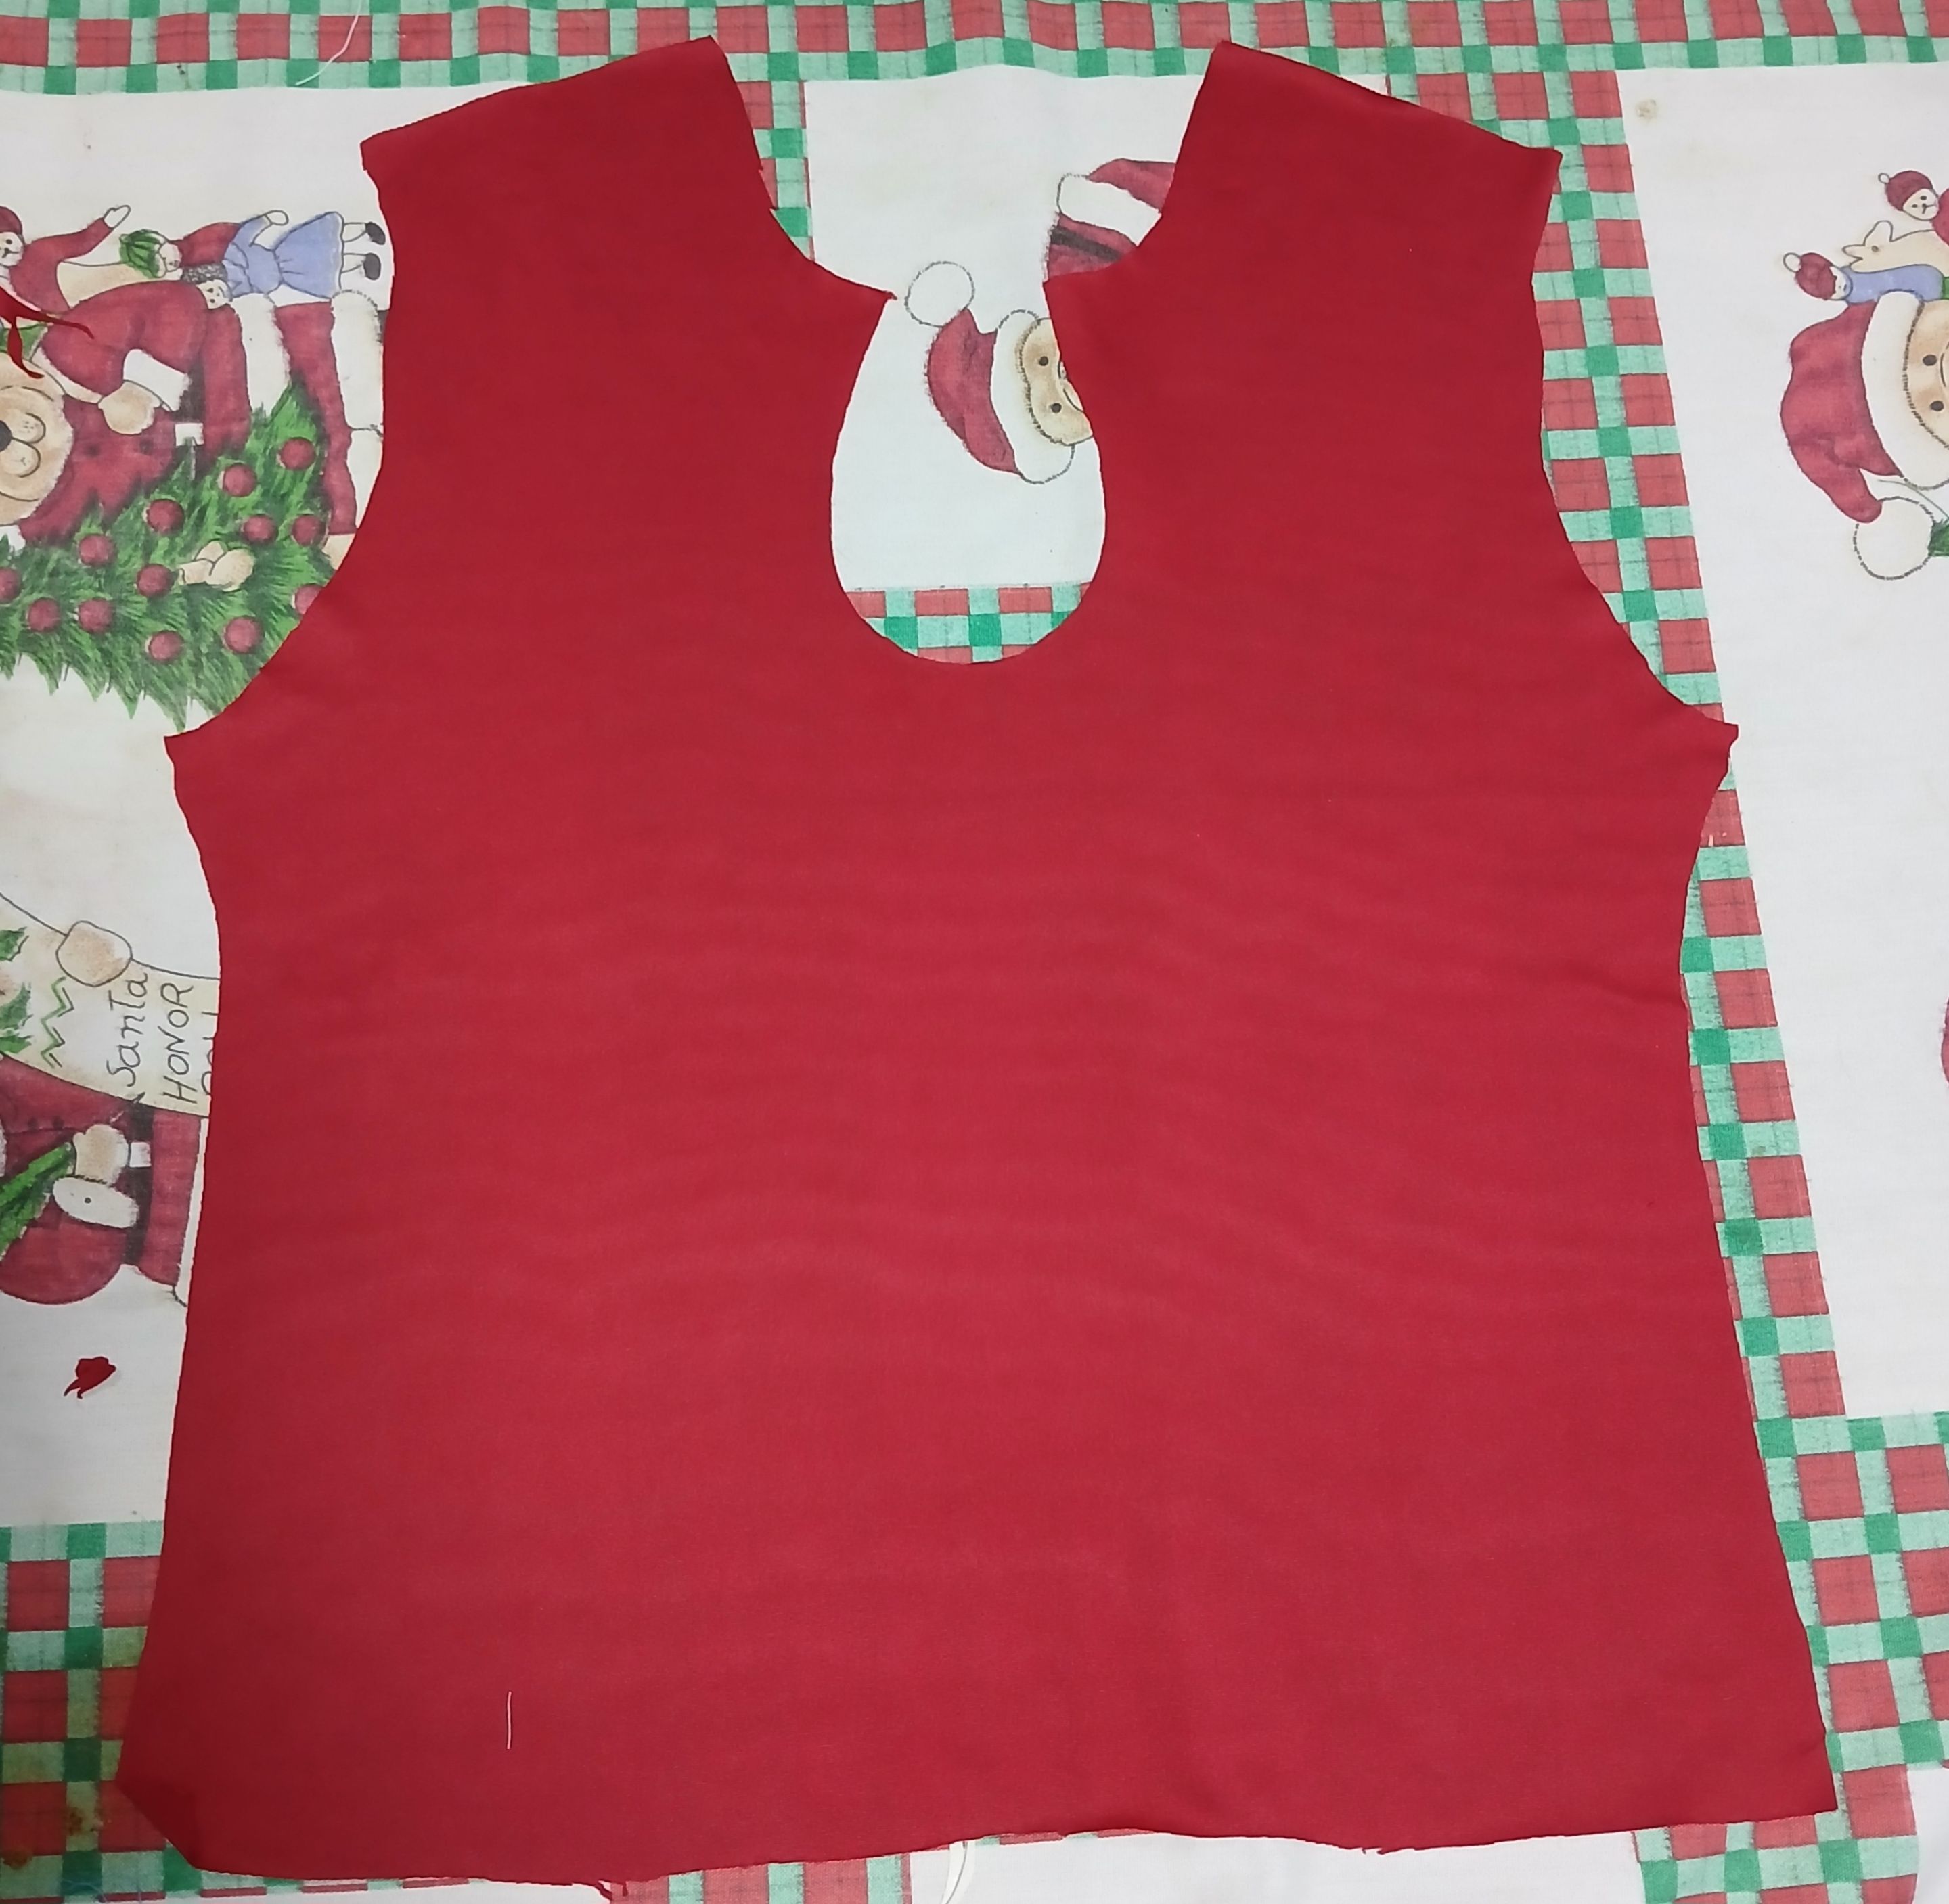
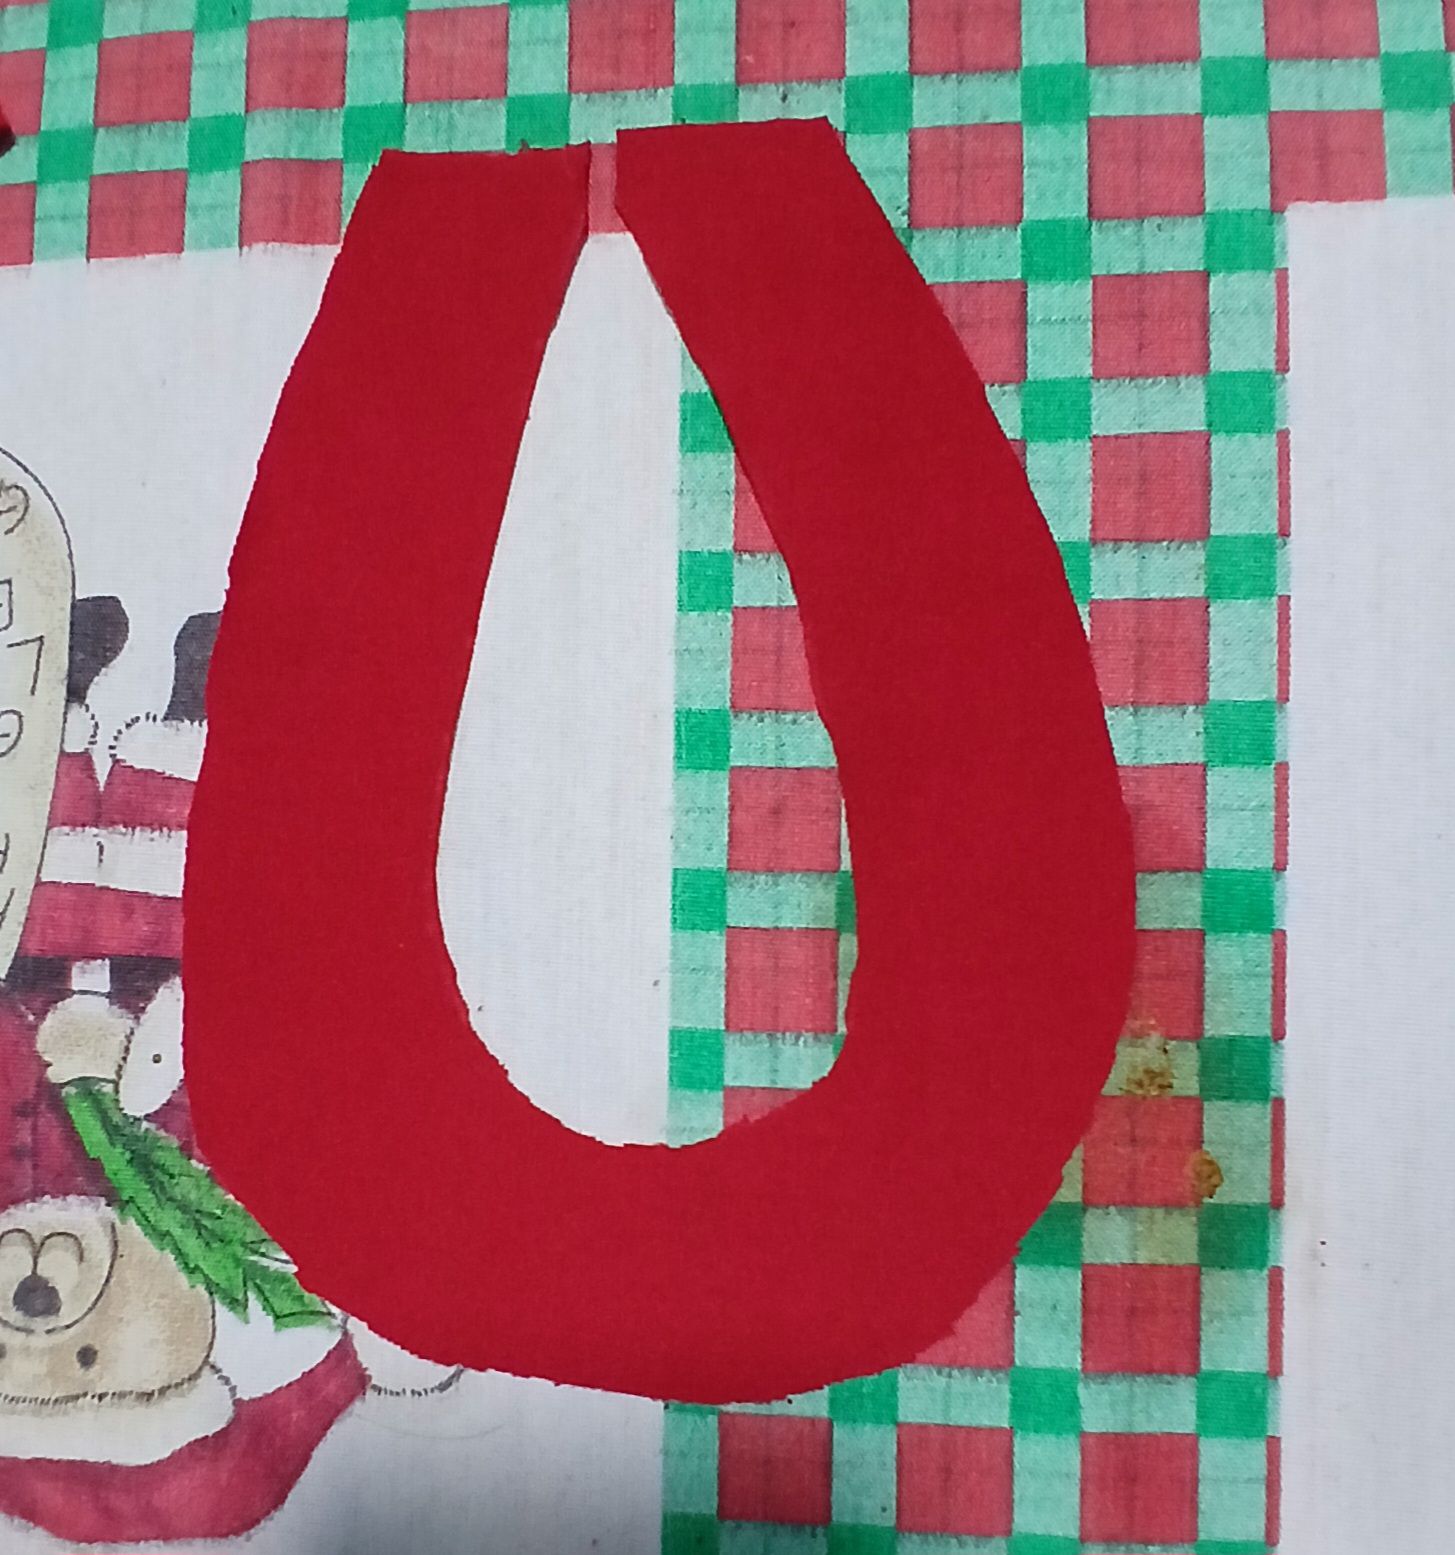
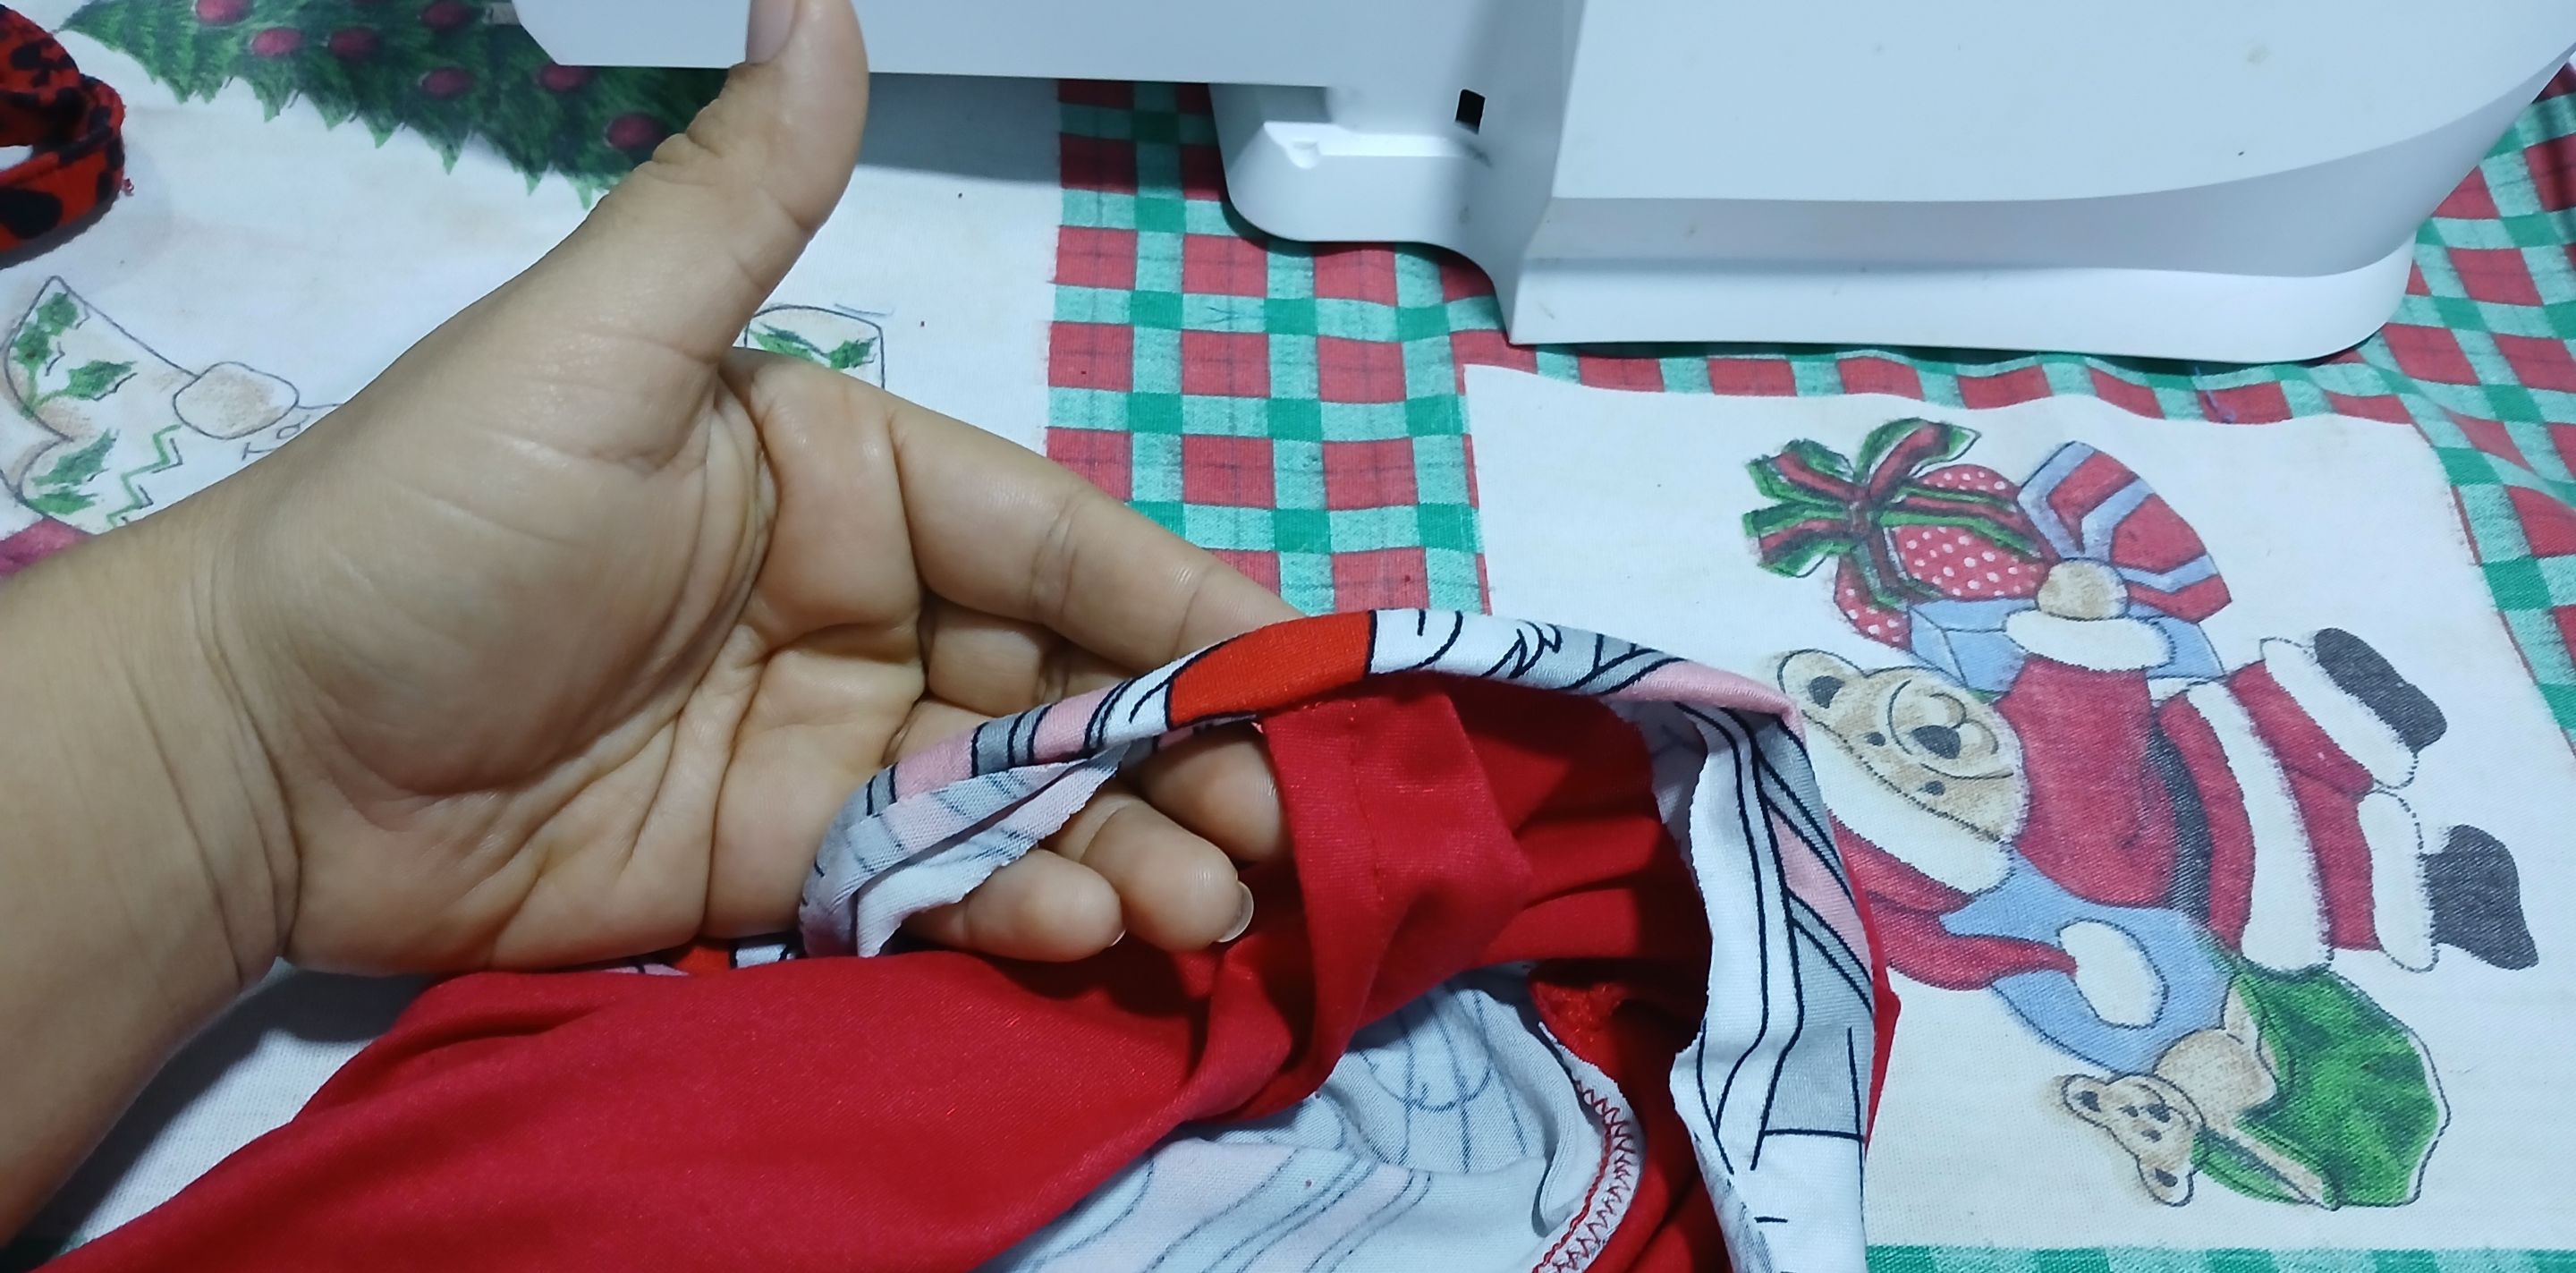
Una vez realizado el escote en forma de gota, procedí a cortar 1 pequeño retazo de tela del mismo color, siguiendo la forma de la gota en el centro y marcando la misma figura 2.5 cm más
afuera, la coloqué haciendo coincidir las orillas de la figura y pasé costura. Esto es para hacer el ruedo del diseño del escote.
Once the drop-shaped neckline was made, I proceeded to cut 1 small piece of fabric of the same color, following the shape of the drop in the center and marking the same figure 2 cm further
out, I placed it matching the edges of the figure and sewed the seam. Once the drop-shaped neckline is made, I proceeded to cut 1 small piece of fabric of the same color, following the shape of the drop in the center and marking the same figure 2 cm
outside, I placed it matching the edges of the figure and sewed. This is to make the neckline design.

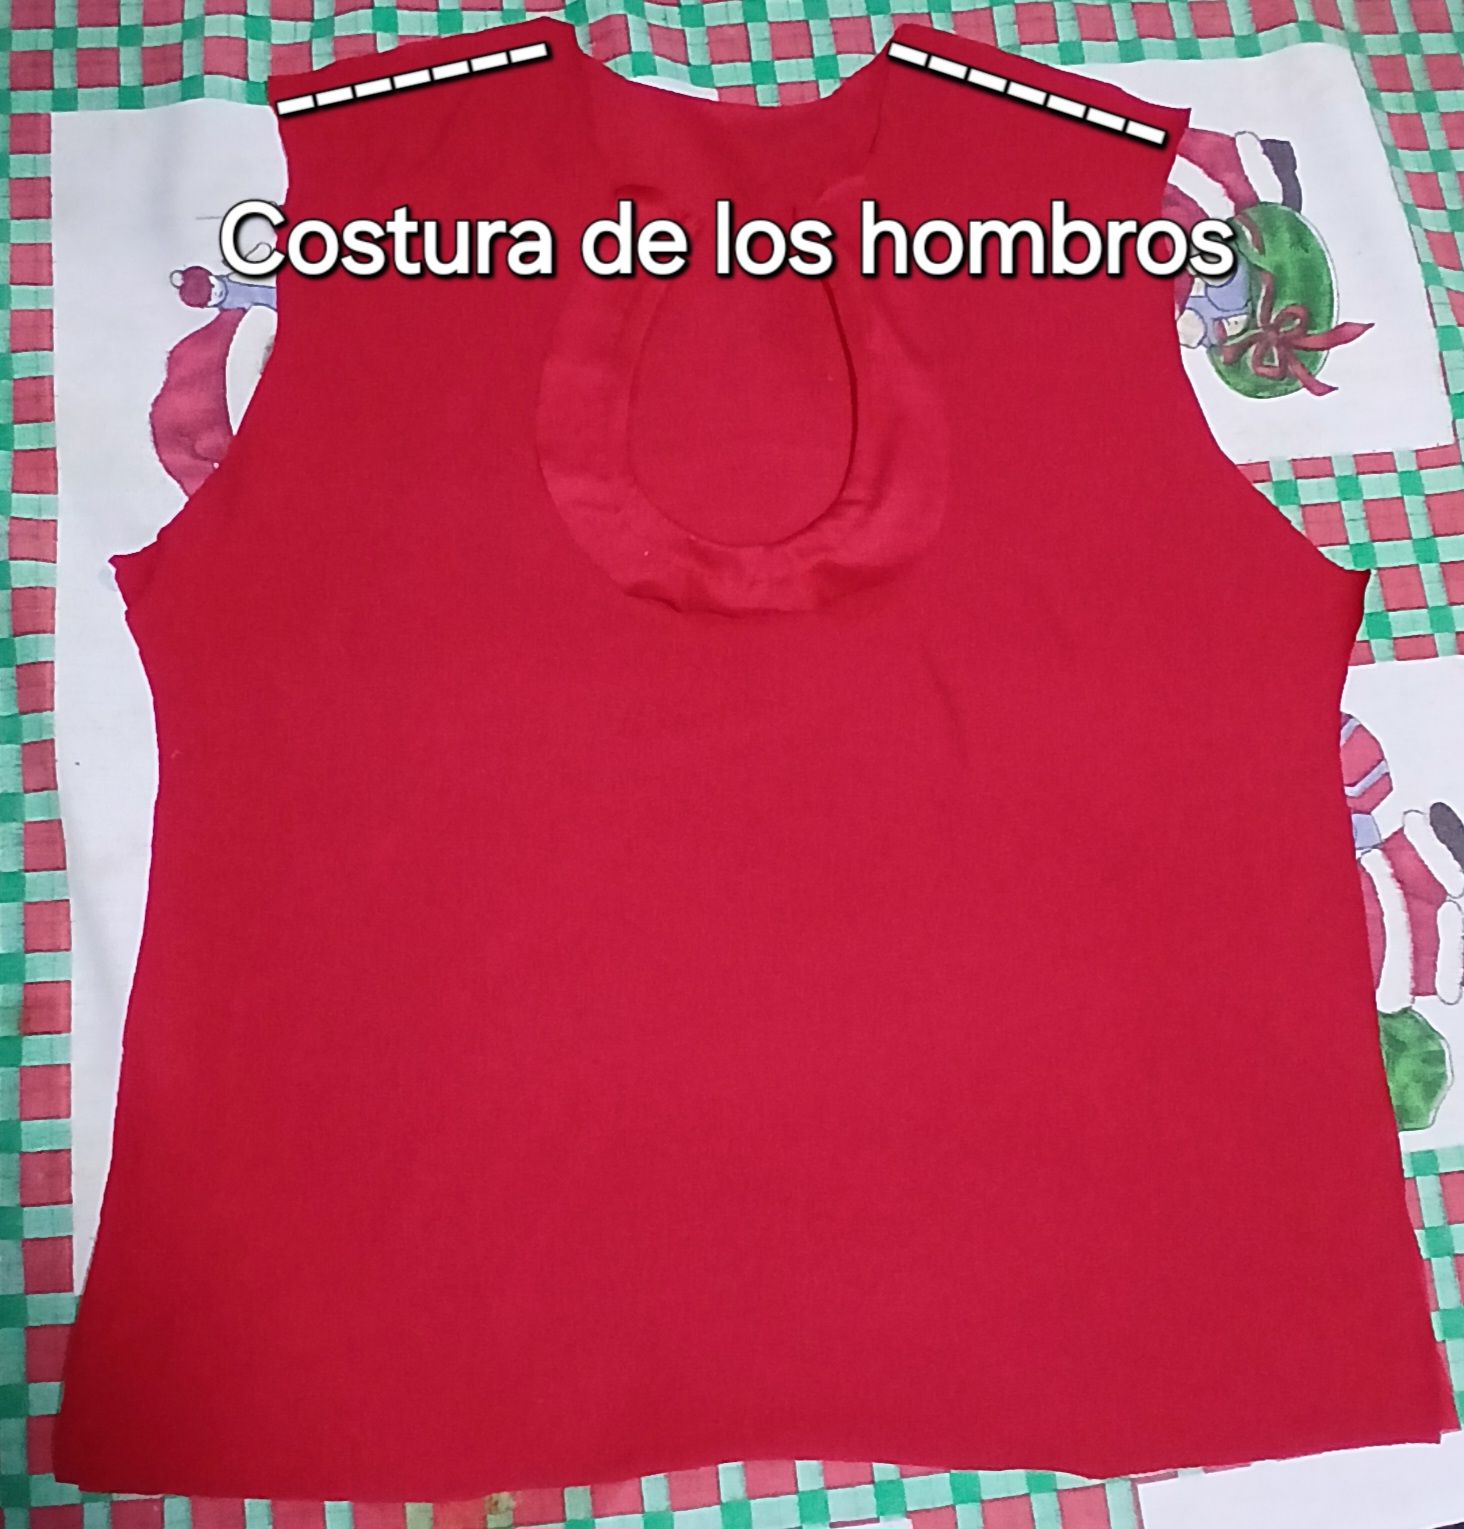
Cuando terminé el ruedo del escote, procedí a colocar la pieza trasera sobre la delantera con sus derechos enfrentados, y pasé costura por los hombros.
When I finished the neckline hem, I proceeded to place the back piece on top of the front piece with the right sides facing each other, and sewed across the shoulders.
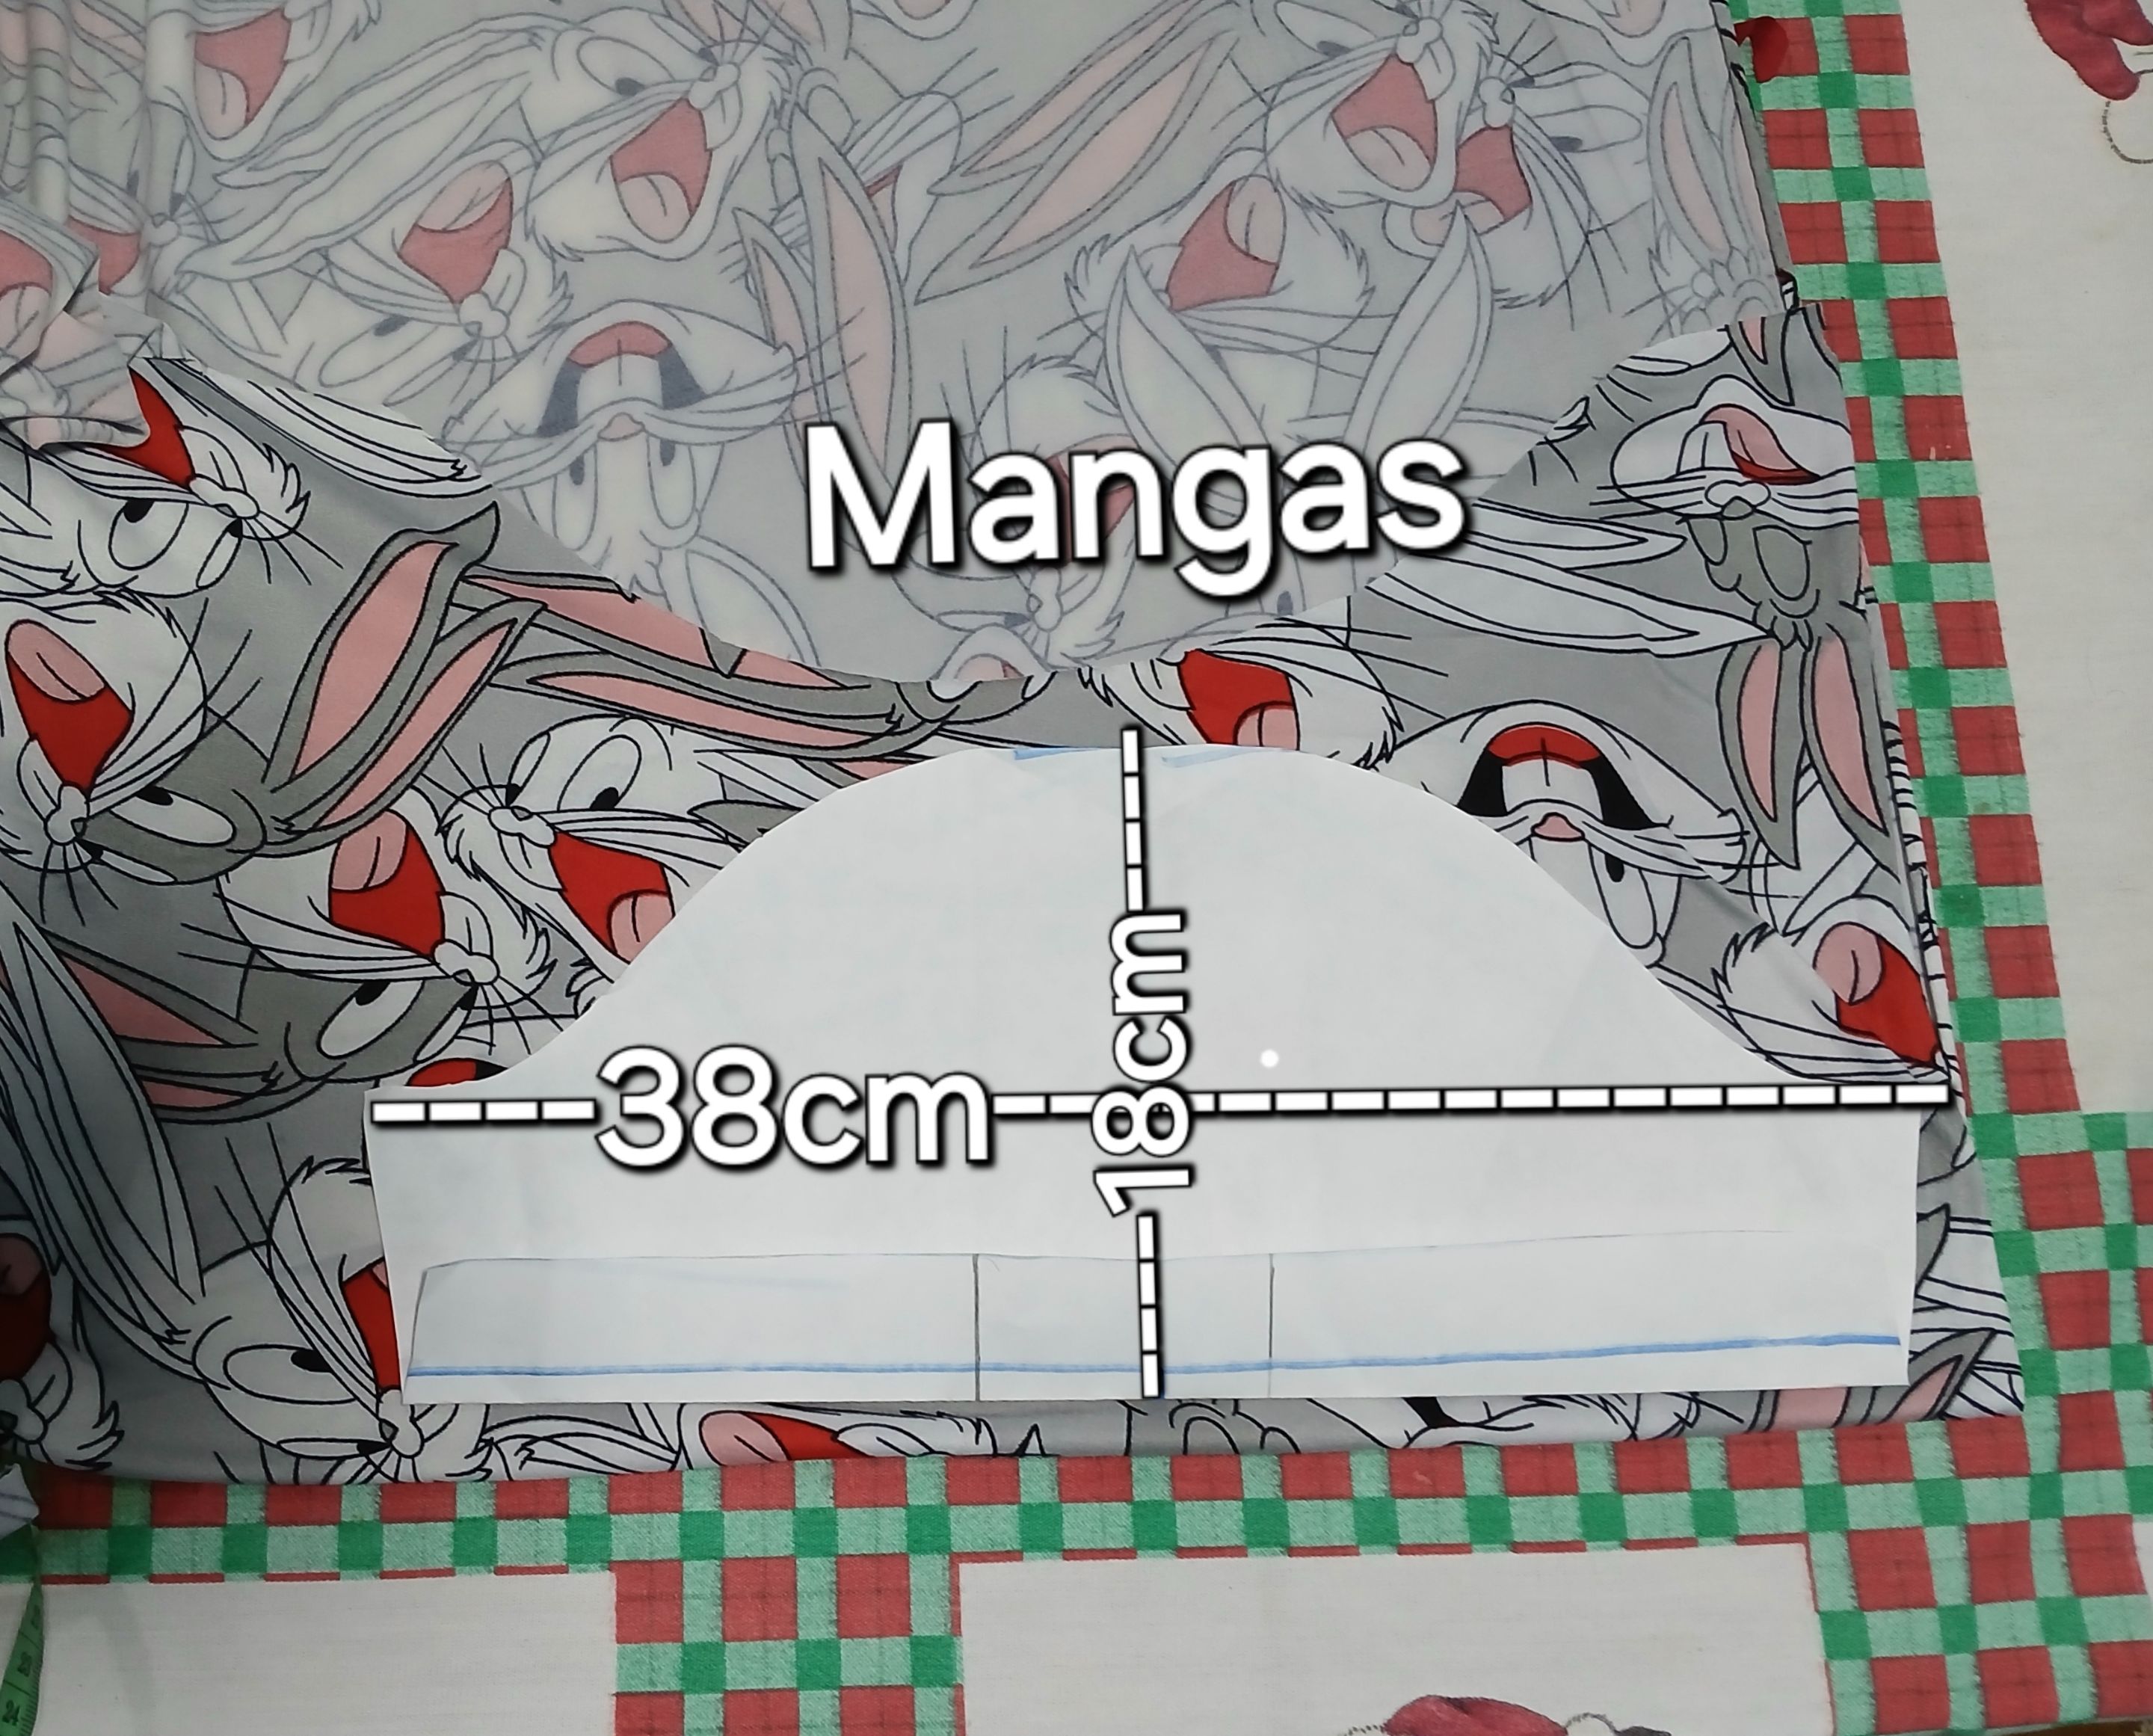
Posteriormente saqué el patrón de las mangas sobre la tela estampada de bugs Bunny, las cuales cosí por todo el recorrido de la sisa de la camisa abierta.
I then drew the pattern for the sleeves on the bugs Bunny print fabric, which I sewed all the way around the armhole of the open shirt.
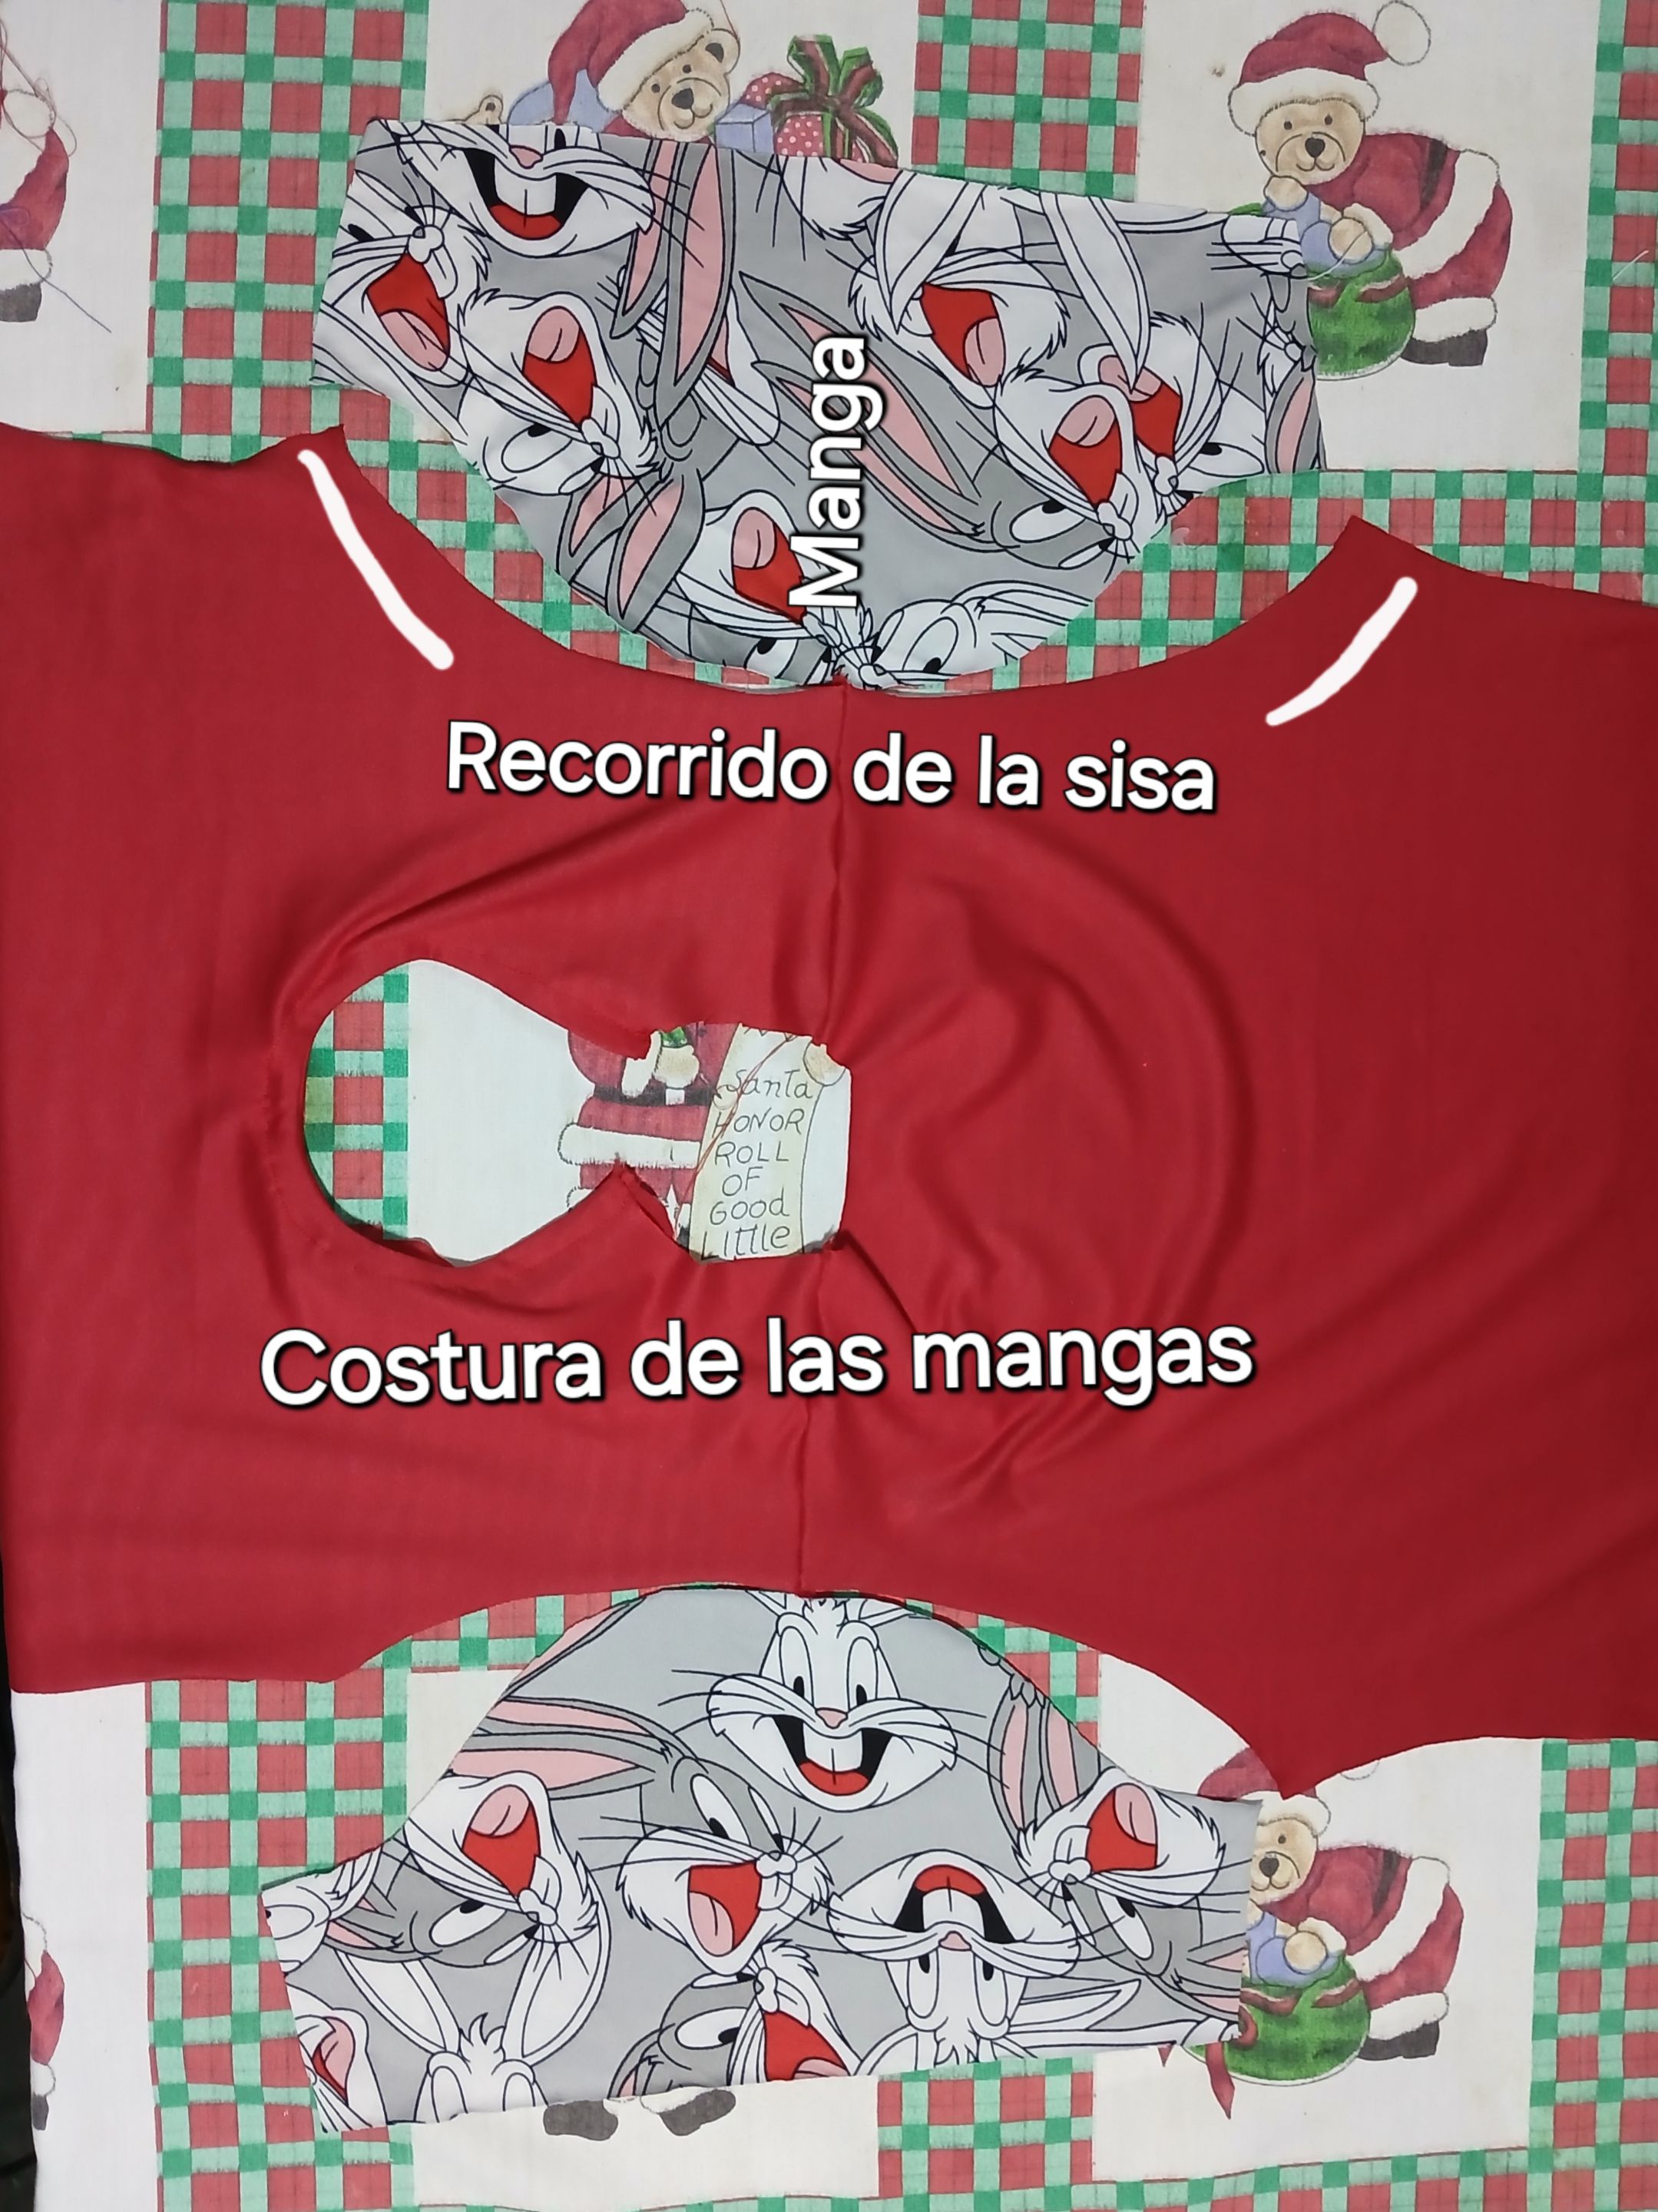
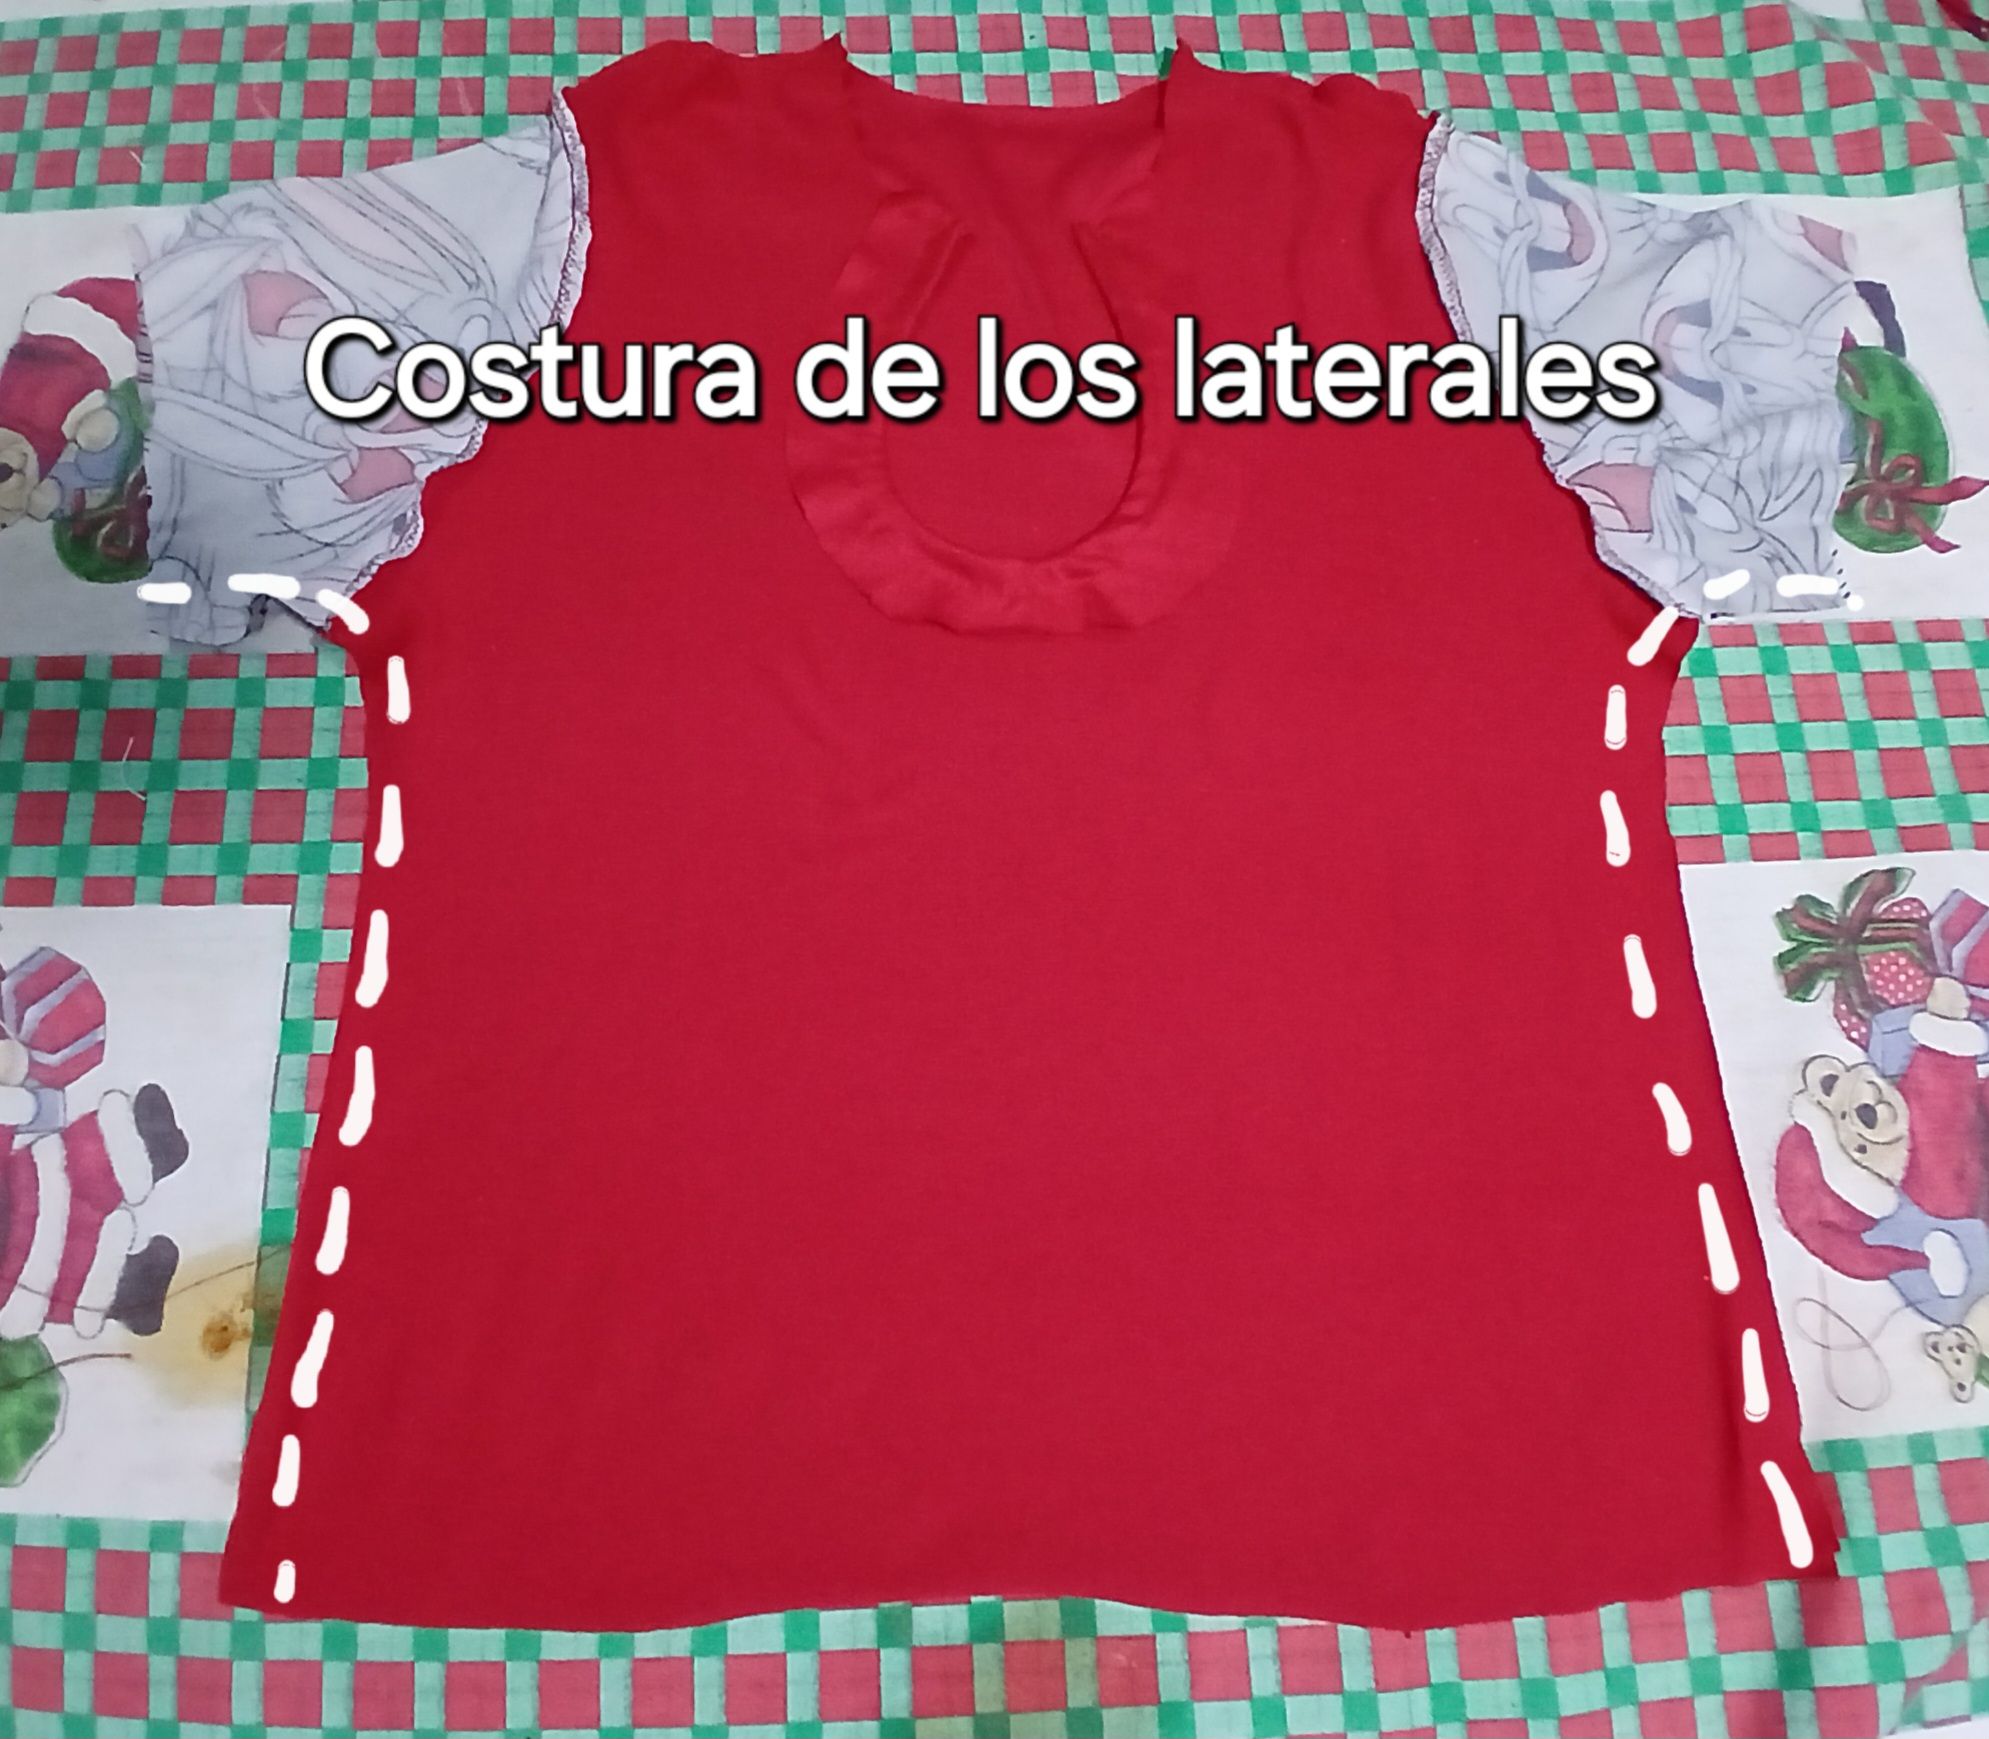
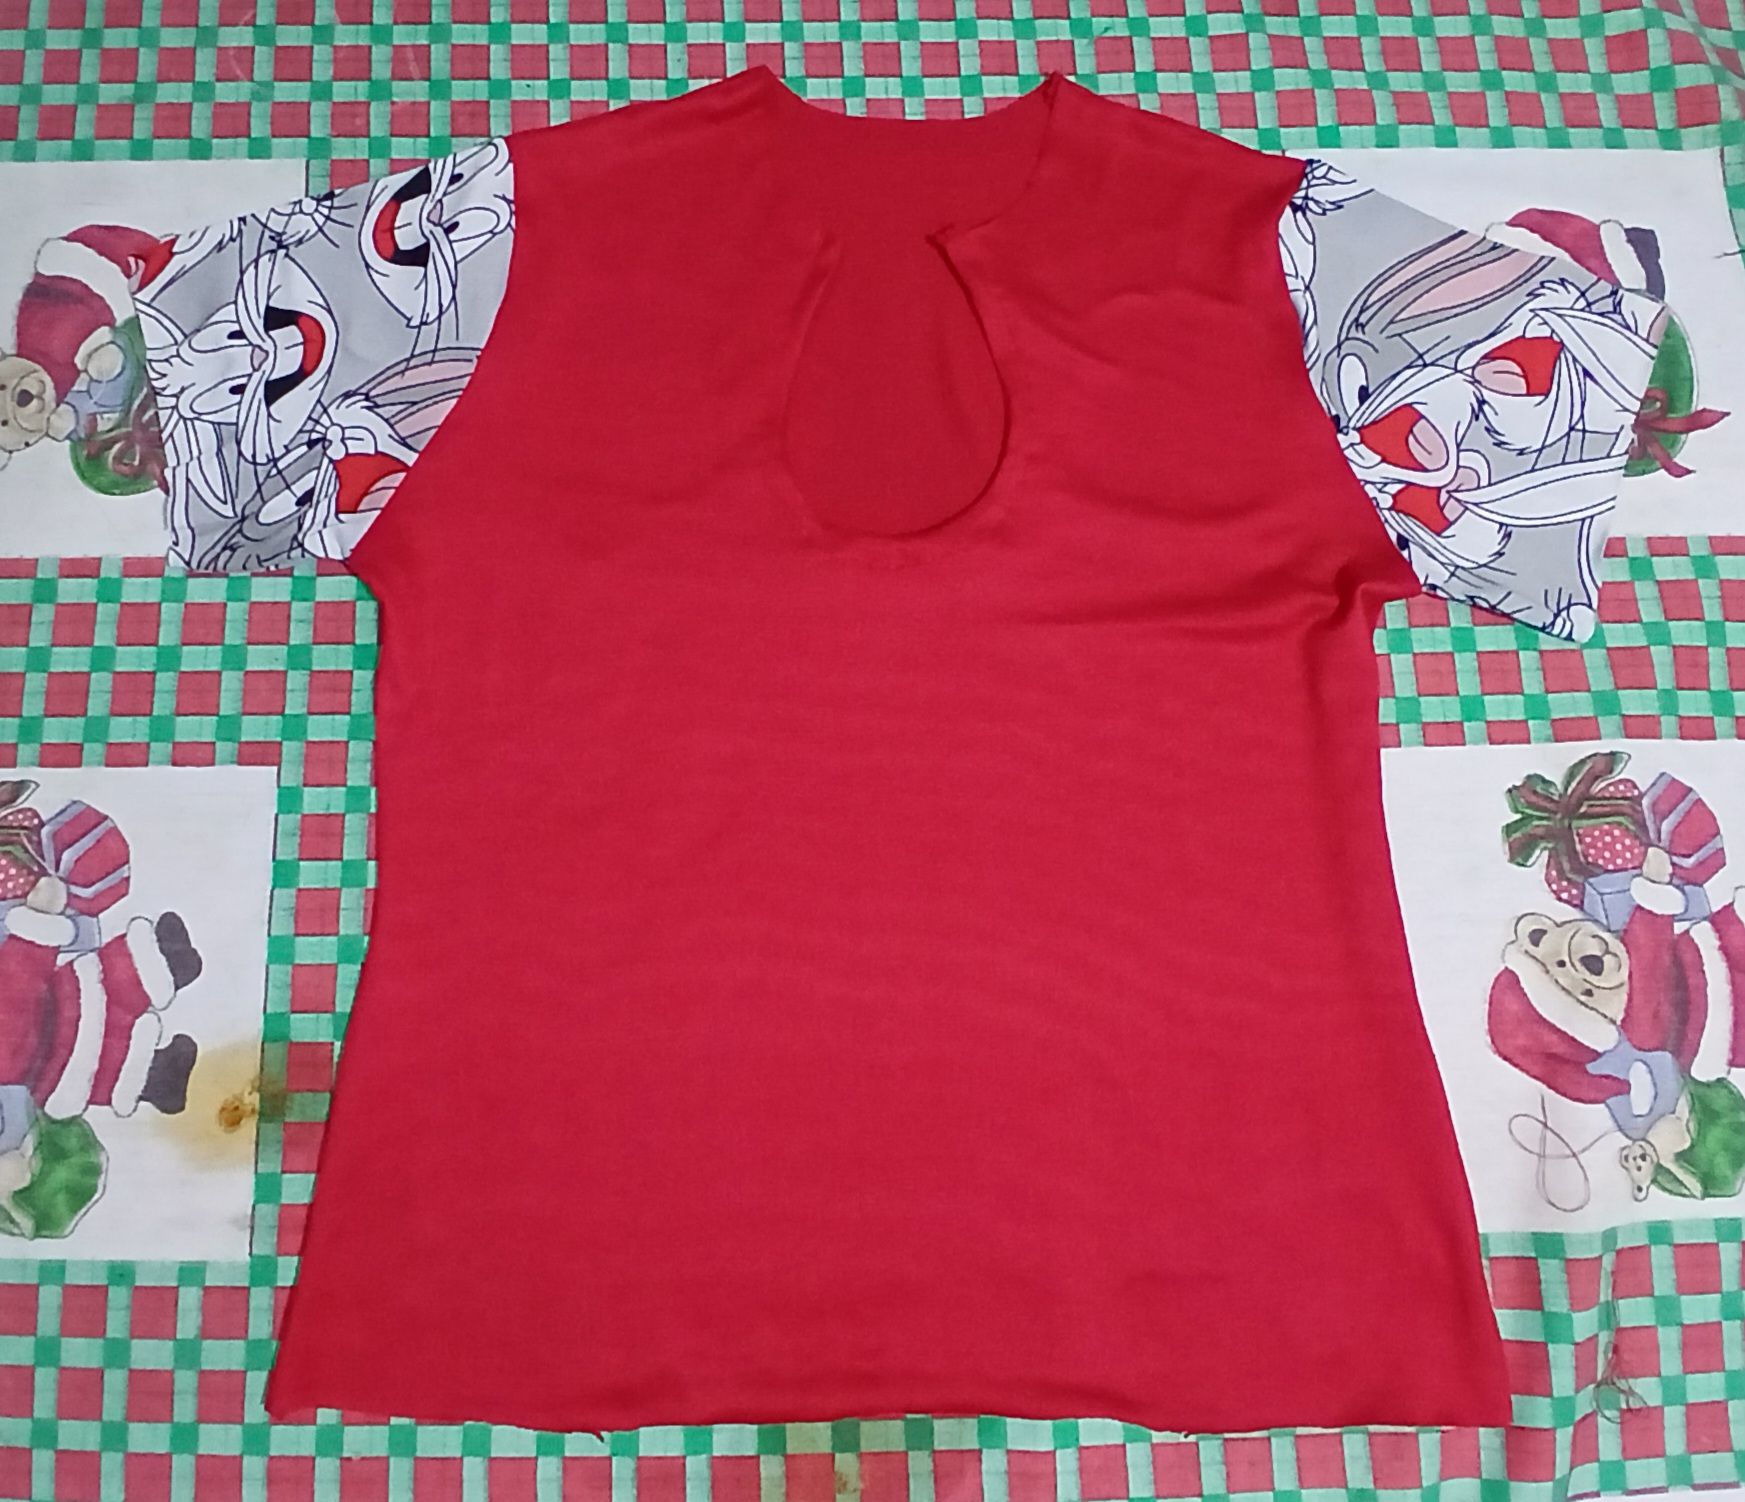
Luego de haber colocado las mangas, procedí a coser los laterales para cerrar la camisa.
After attaching the sleeves, I proceeded to sew the sides to close the shirt.
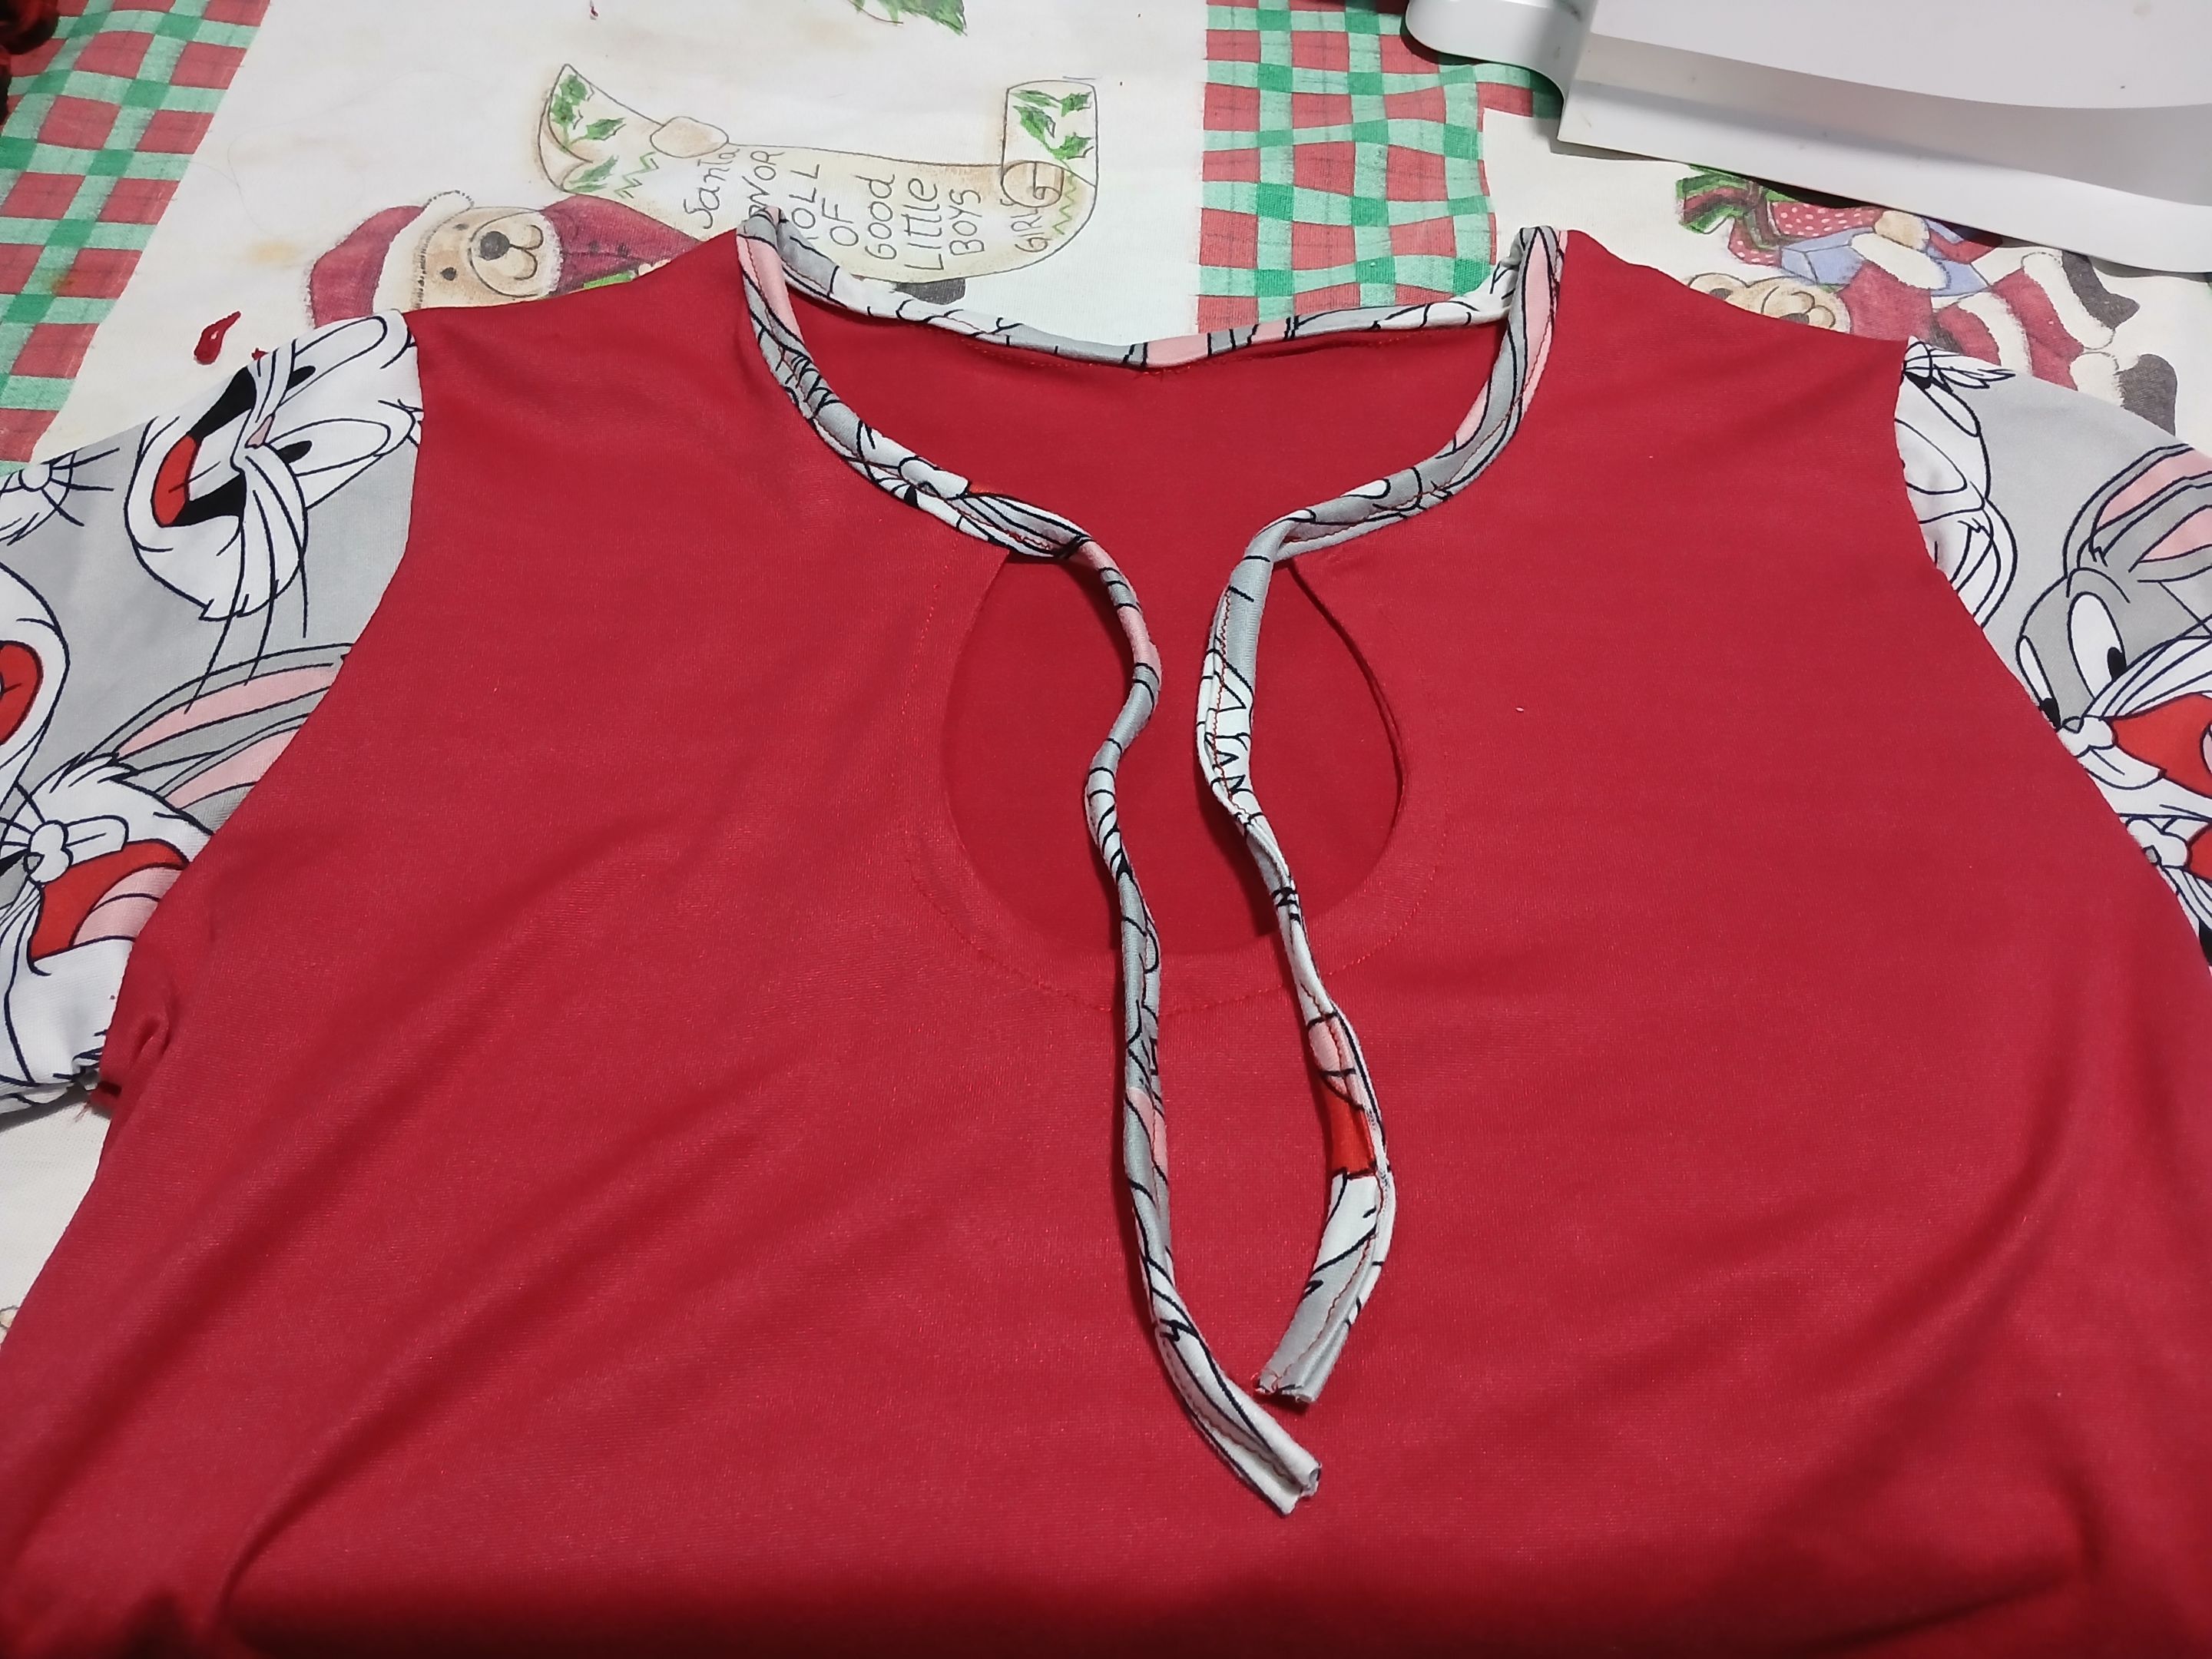
Después corté una tira de tela del tamaño del contorno del cuello, más el largo deseado de la tira sobrante para ajustar el cuello.
I then cut a strip of fabric to the size of the neck circumference, plus the desired length of the excess strip to fit the neck.
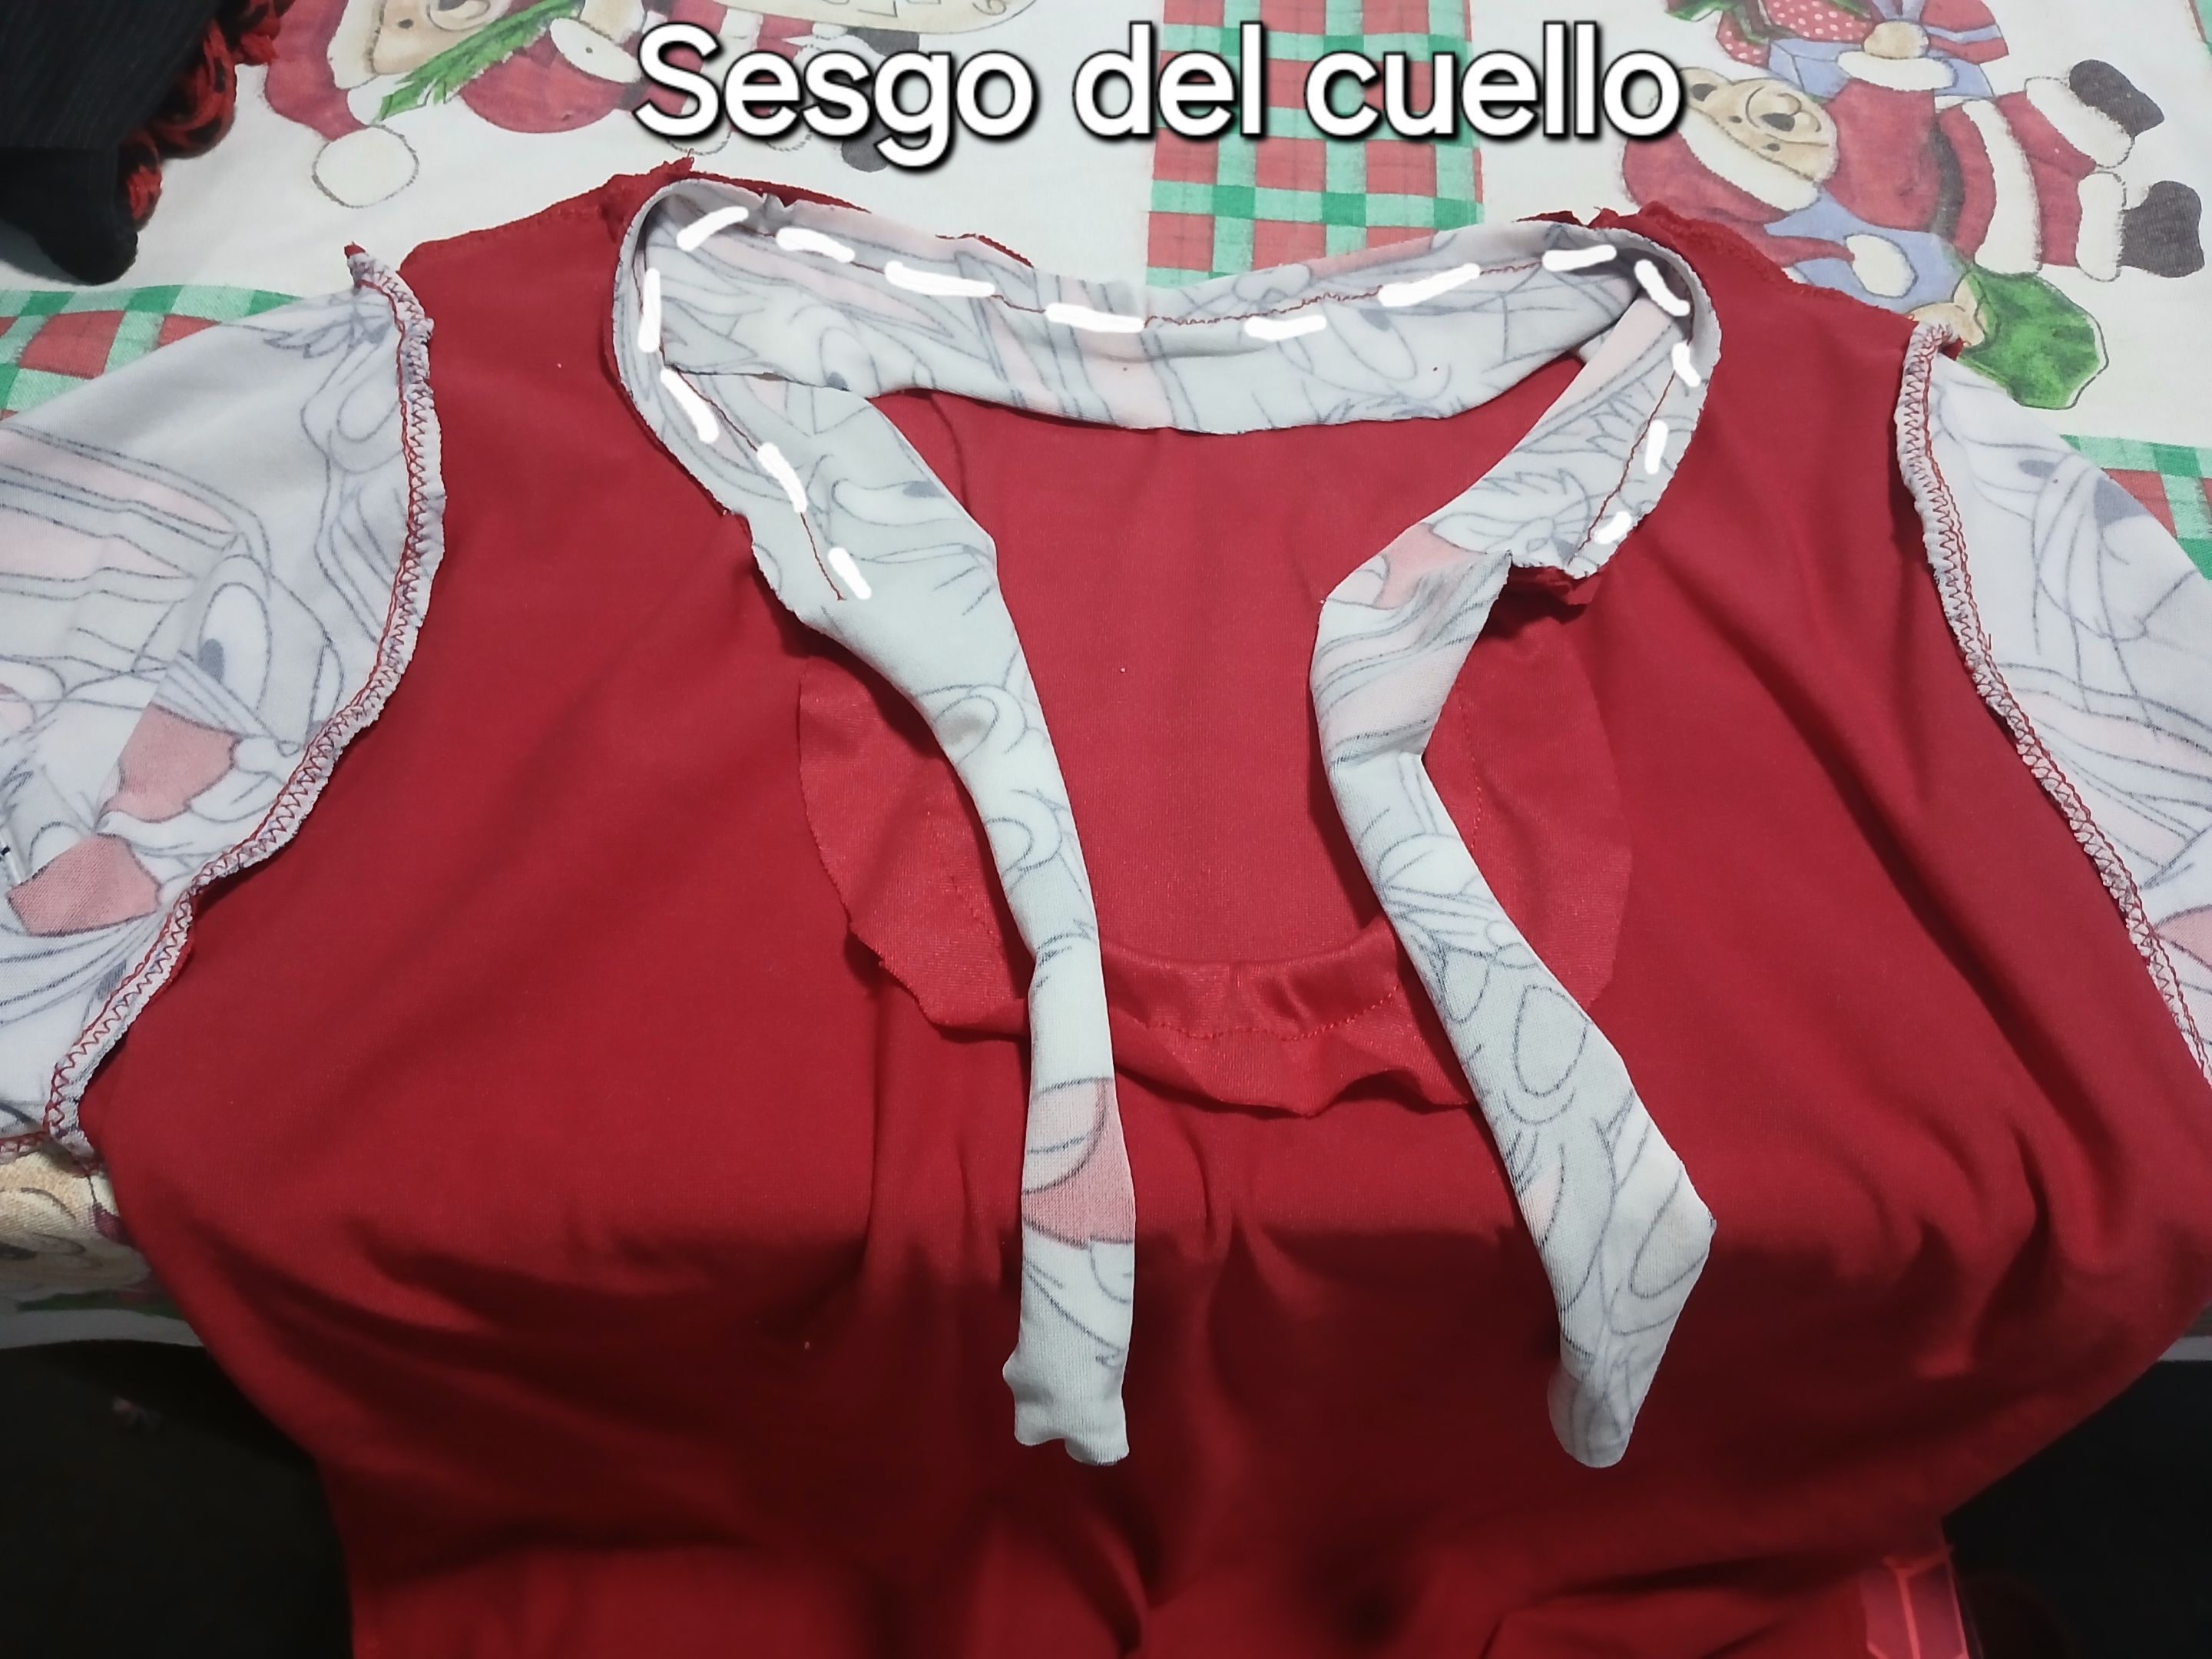
Luego hice el dobladillo del sesgo del cuello, desde la punta del largo del sesgo hasta la otra punta.
Then I hemmed the neck bias, from the tip of the bias length to the other end.
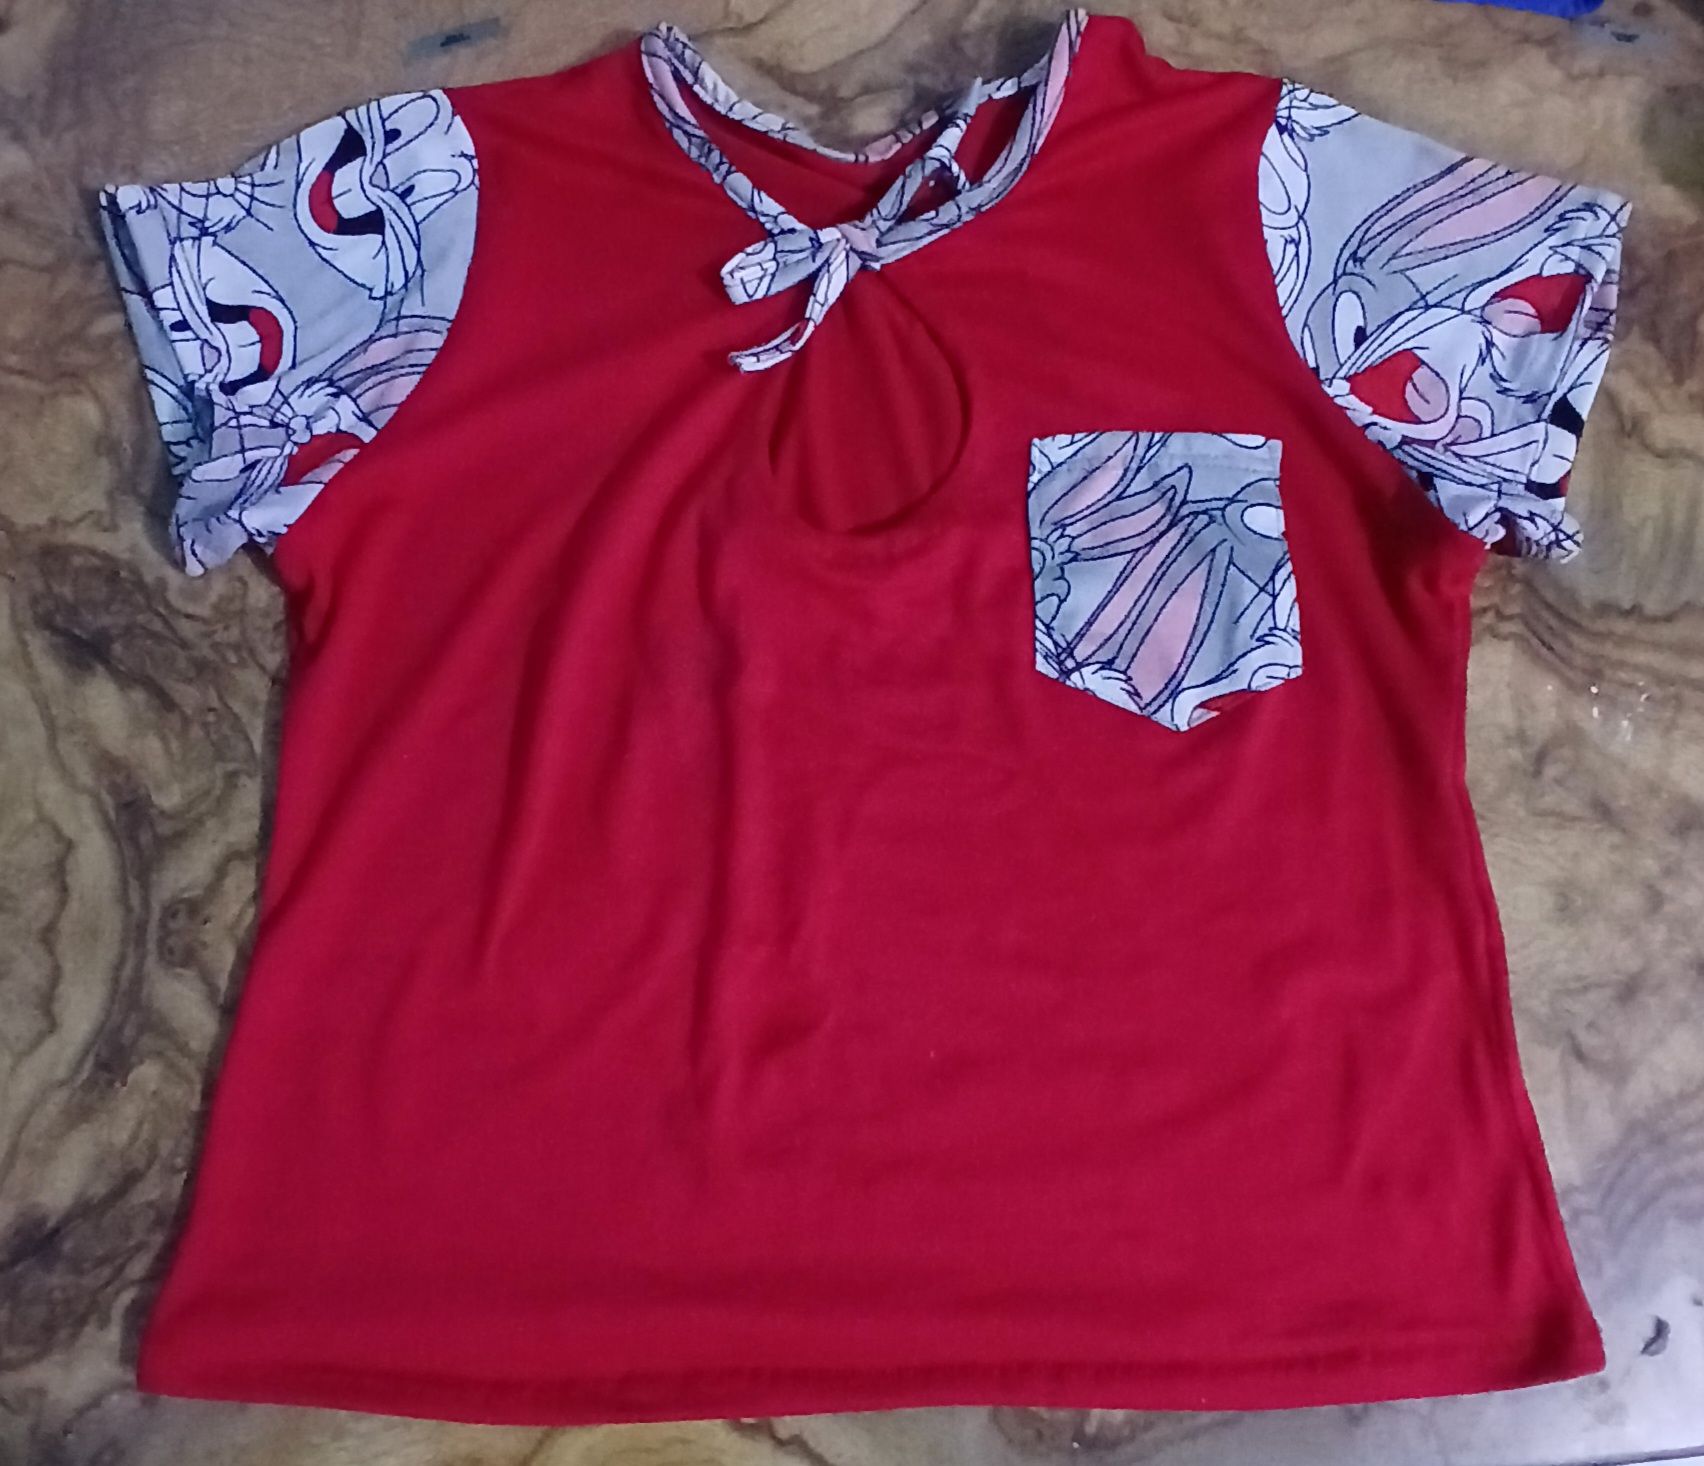
Para terminar con la camisa, realicé el ruedo de las mangas, el ruedo del contorno de cintura y un bolsillo.
To finish the shirt, I made the hem of the sleeves, the hem of the waistband and a pocket.
El pantalón ya lo había realizado con anterioridad, utilizando la tela microdurazno de Bugs Bunny, con un diseño de pretina alta y ruedo ancho.
I had made the pants before, using Bugs Bunny micro-denim fabric, with a high waistband and wide hem design.


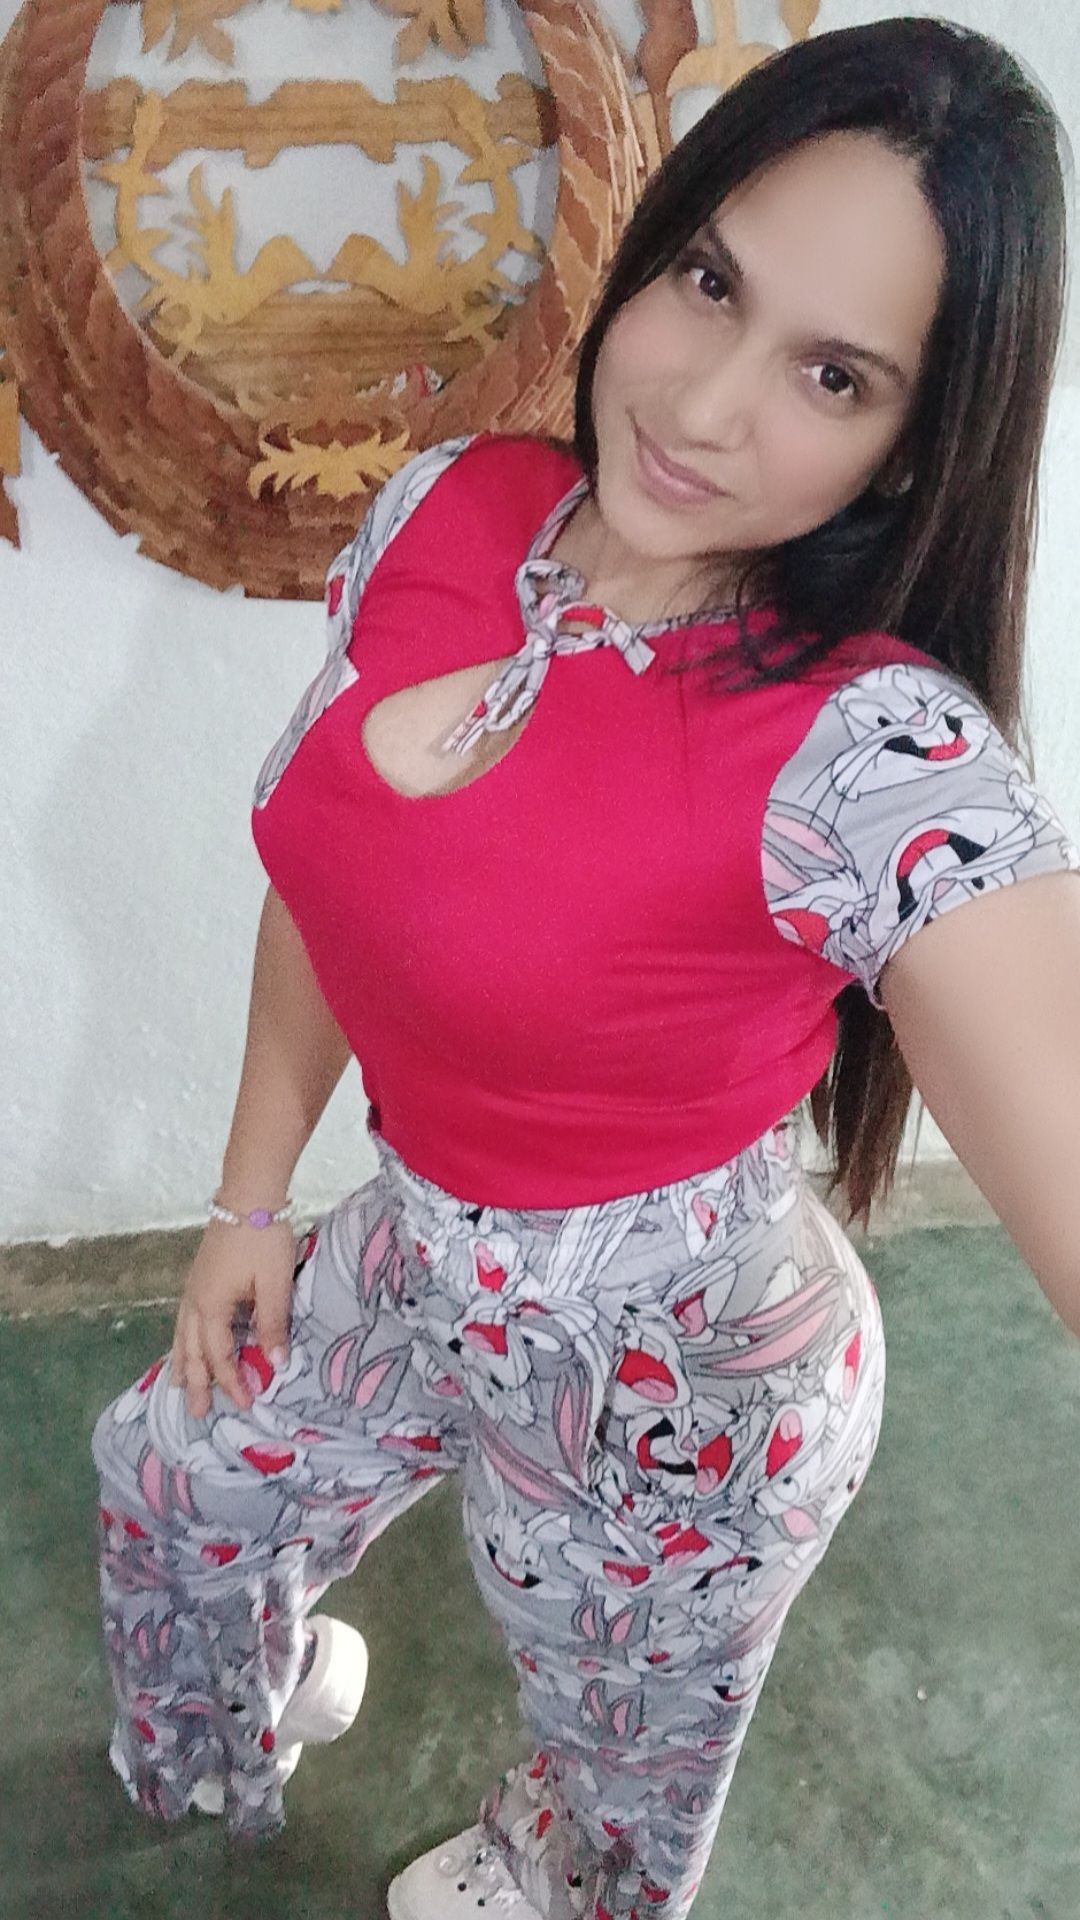
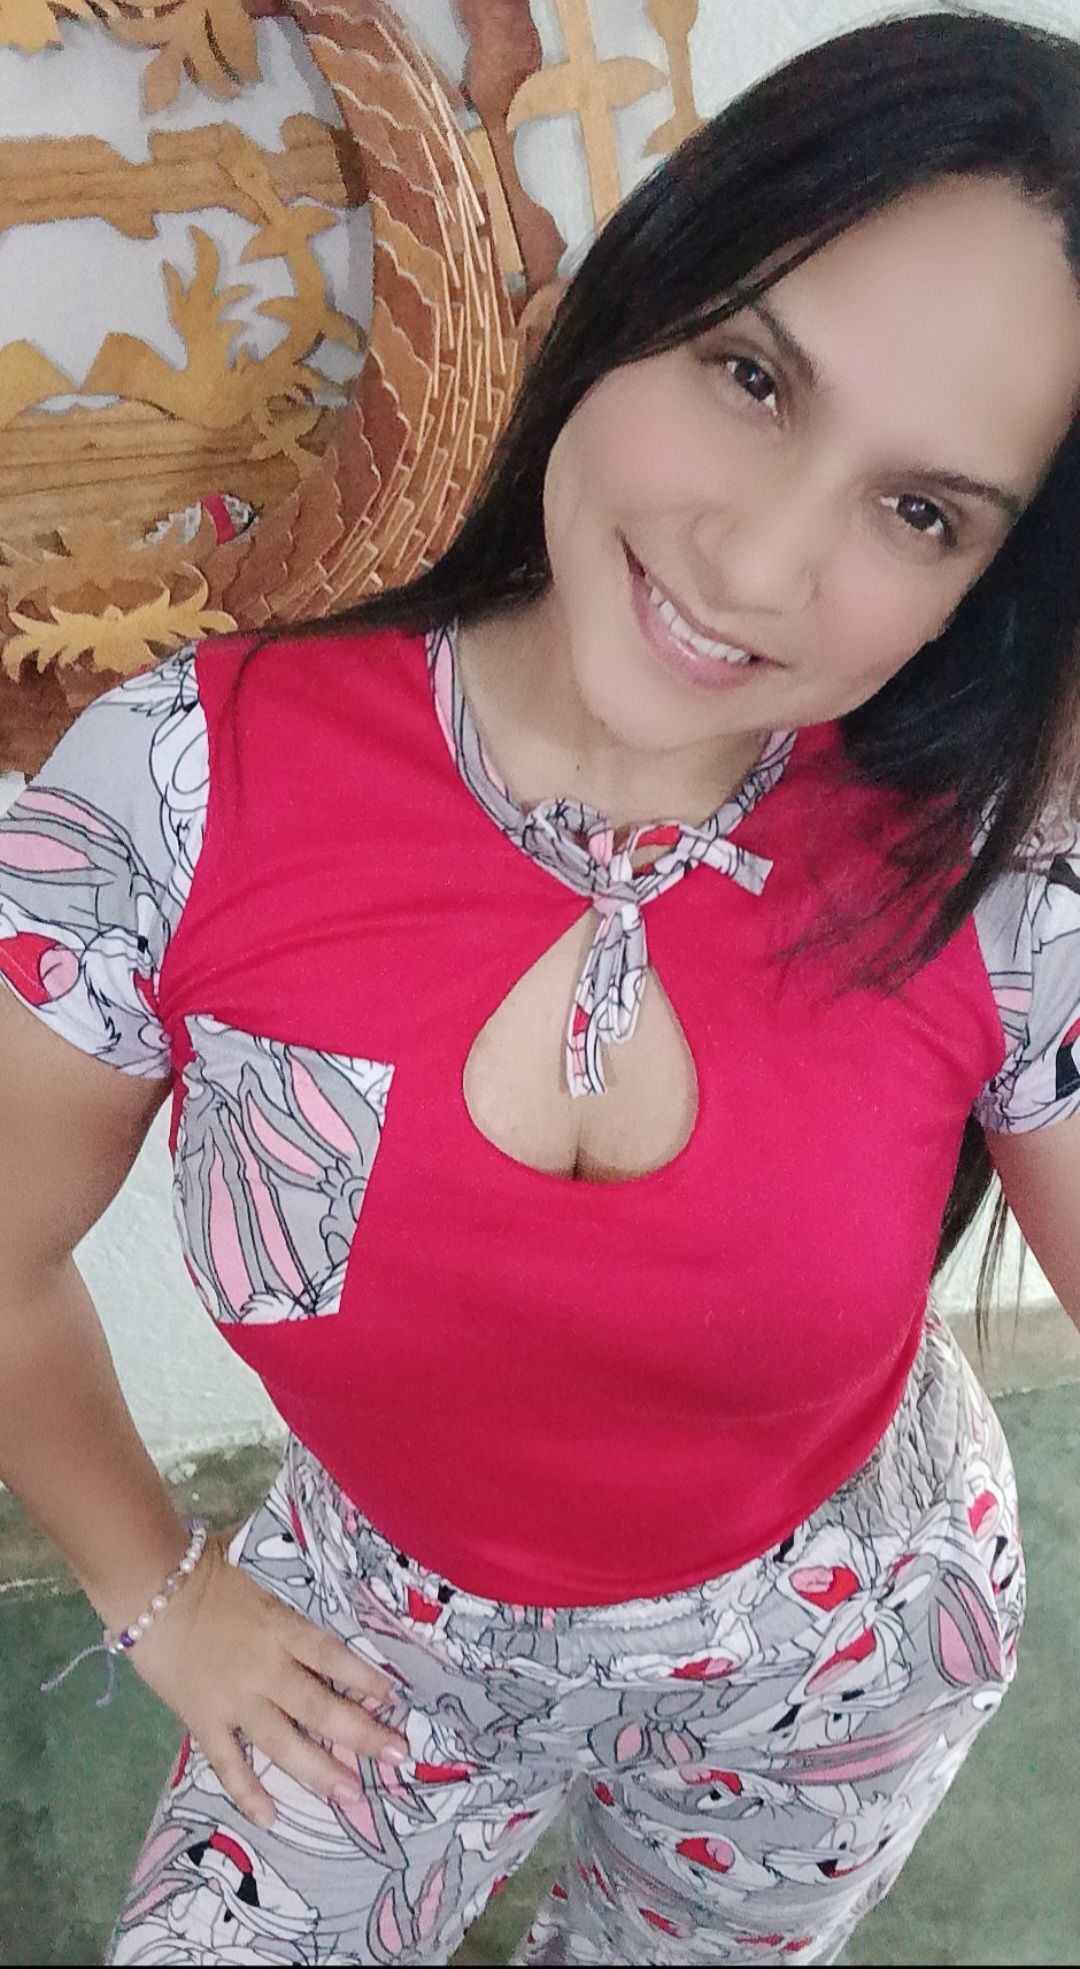
Y asi luce éste conjunto pijamero, el cual podemos llevar con tenis, sandalias y hasta con cross. Espero te haya gustado éste cómodo atuendo y el tutorial sea de mucha utilidad. Saludos y bendiciones apreciados amigos 🙏🏻🙂
*And this is what this pajama set looks like, which can be worn with sneakers, sandals and even cross sneakers. I hope you liked this comfortable outfit and the tutorial will be very useful. Greetings and blessings, dear friends 🙏🏻🙂 *.