Saluditos mis Artistas Creativos de las Manualidades y la Joyería, mis mejores deseos para todos y que las bendiciones que los riegue sean de éxito y prosperidad, en estos días estoy sumamente atareada motivo por el cual me encuentro medio complicada para presumir mis creaciones 🤭 en realidad estás celebraciones de este día de mañana que aquí en Venezuela celebramos el Día de la Juventud, y el próximo catorce el maravilloso día del Amor y la Amistad me tienen hasta el tope pero feliz de ver como todavía se festeja con bombos y platillos está fecha y es que el encanto a pesar de que Claudio El Grande mando a degollar al pobre Valentín no pasa y está festividad cada catorce de febrero es una oportunidad para demostrar el cariño y el amor entre los seres humanos. Bueno, bueno en esta ocasión traigo para ustedes la elaboración de unos bonitos y poco comunes colgantes hechos para unos amigos que me comentaron como este año no quisieron dar ni recibir el popular Osito sino que optaron por unos delicados pececitos que a pesar de no estar dentro de una burbuja se ven muy tiernos en verdad.
Ahora les invito a seguir leyendo el paso a paso para que vean cómo los hice.
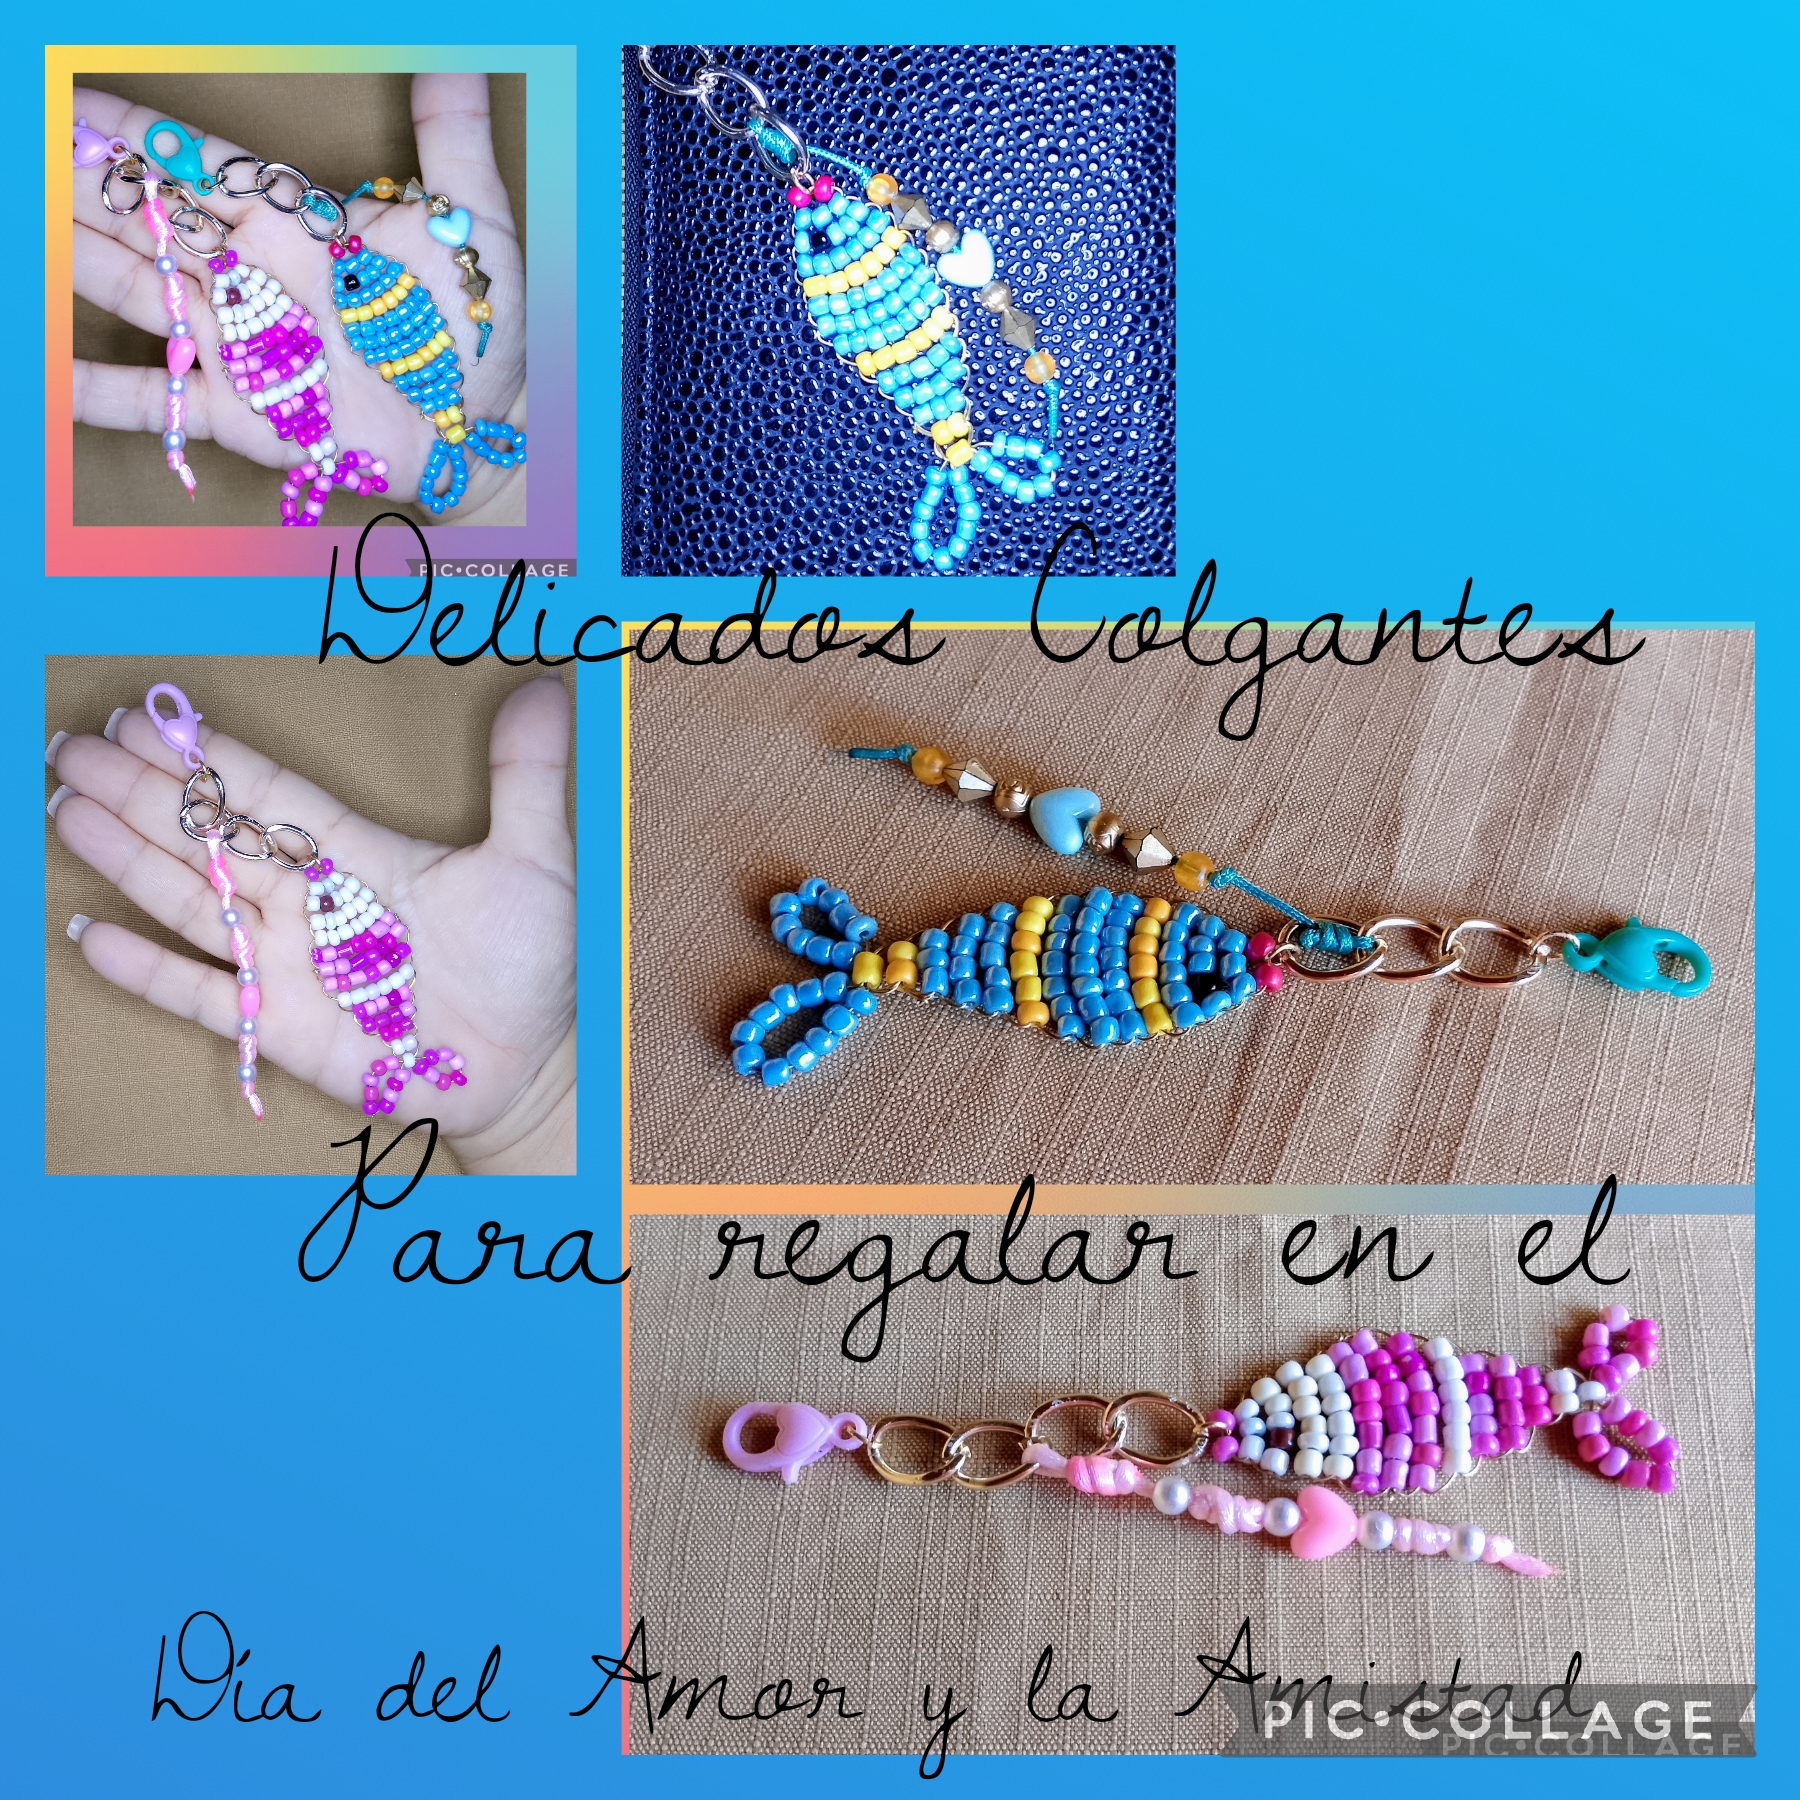
Greetings my Creative Artists of Crafts and Jewelry, my best wishes to all and may the blessings that shower you be of success and prosperity, these days I am extremely busy which is why I find myself a bit complicated to show off my creations 🤭 in reality these celebrations of this day tomorrow that here in Venezuela we celebrate Youth Day, and the next fourteenth the wonderful day of Love and Friendship have me up to my neck but happy to see how this date is still celebrated with great fanfare and the charm despite the fact that Claudius the Great ordered poor Valentine to be beheaded does not pass and this holiday every February 14 is an opportunity to show affection and love between human beings. Well, well, this time I bring you the creation of some pretty and unusual pendants made for some friends who told me that this year they did not want to give or receive the popular Teddy Bear but instead opted for some delicate little fish that despite not being inside a bubble look really cute.
Now I invite you to continue reading the step by step so you can see how I made them.
MATERIALES USADOS EN SU ELABORACIÓN:
✓ Mostacillones azules
✓ Mostacillones amarillos.
✓ Mostacillones rojos.
✓ Mostacillones blancos.
✓ Mostacillones fucsia en dos tonalidades.
✓ Alambre de bisutería de cinco.
milímetros.
✓ Cadena dorada de eslabones grandes.
✓ Cierre tipo caiman turquesa.
✓ Cuatro argollas pequeñas.
✓ Un corazón azul .
✓ Abalorios.
✓ Cordón cola de serpiente turquesa.
✓ Un corazón rosado.
✓ Cordón cola de rata rosado.
✓ Tres perlas blancas.
✓ Un cierre tipo caiman rosado.
✓ Encendedor.
✓ Tijeras.
✓ Pinzas.
✓ Dos mostacillones negros.
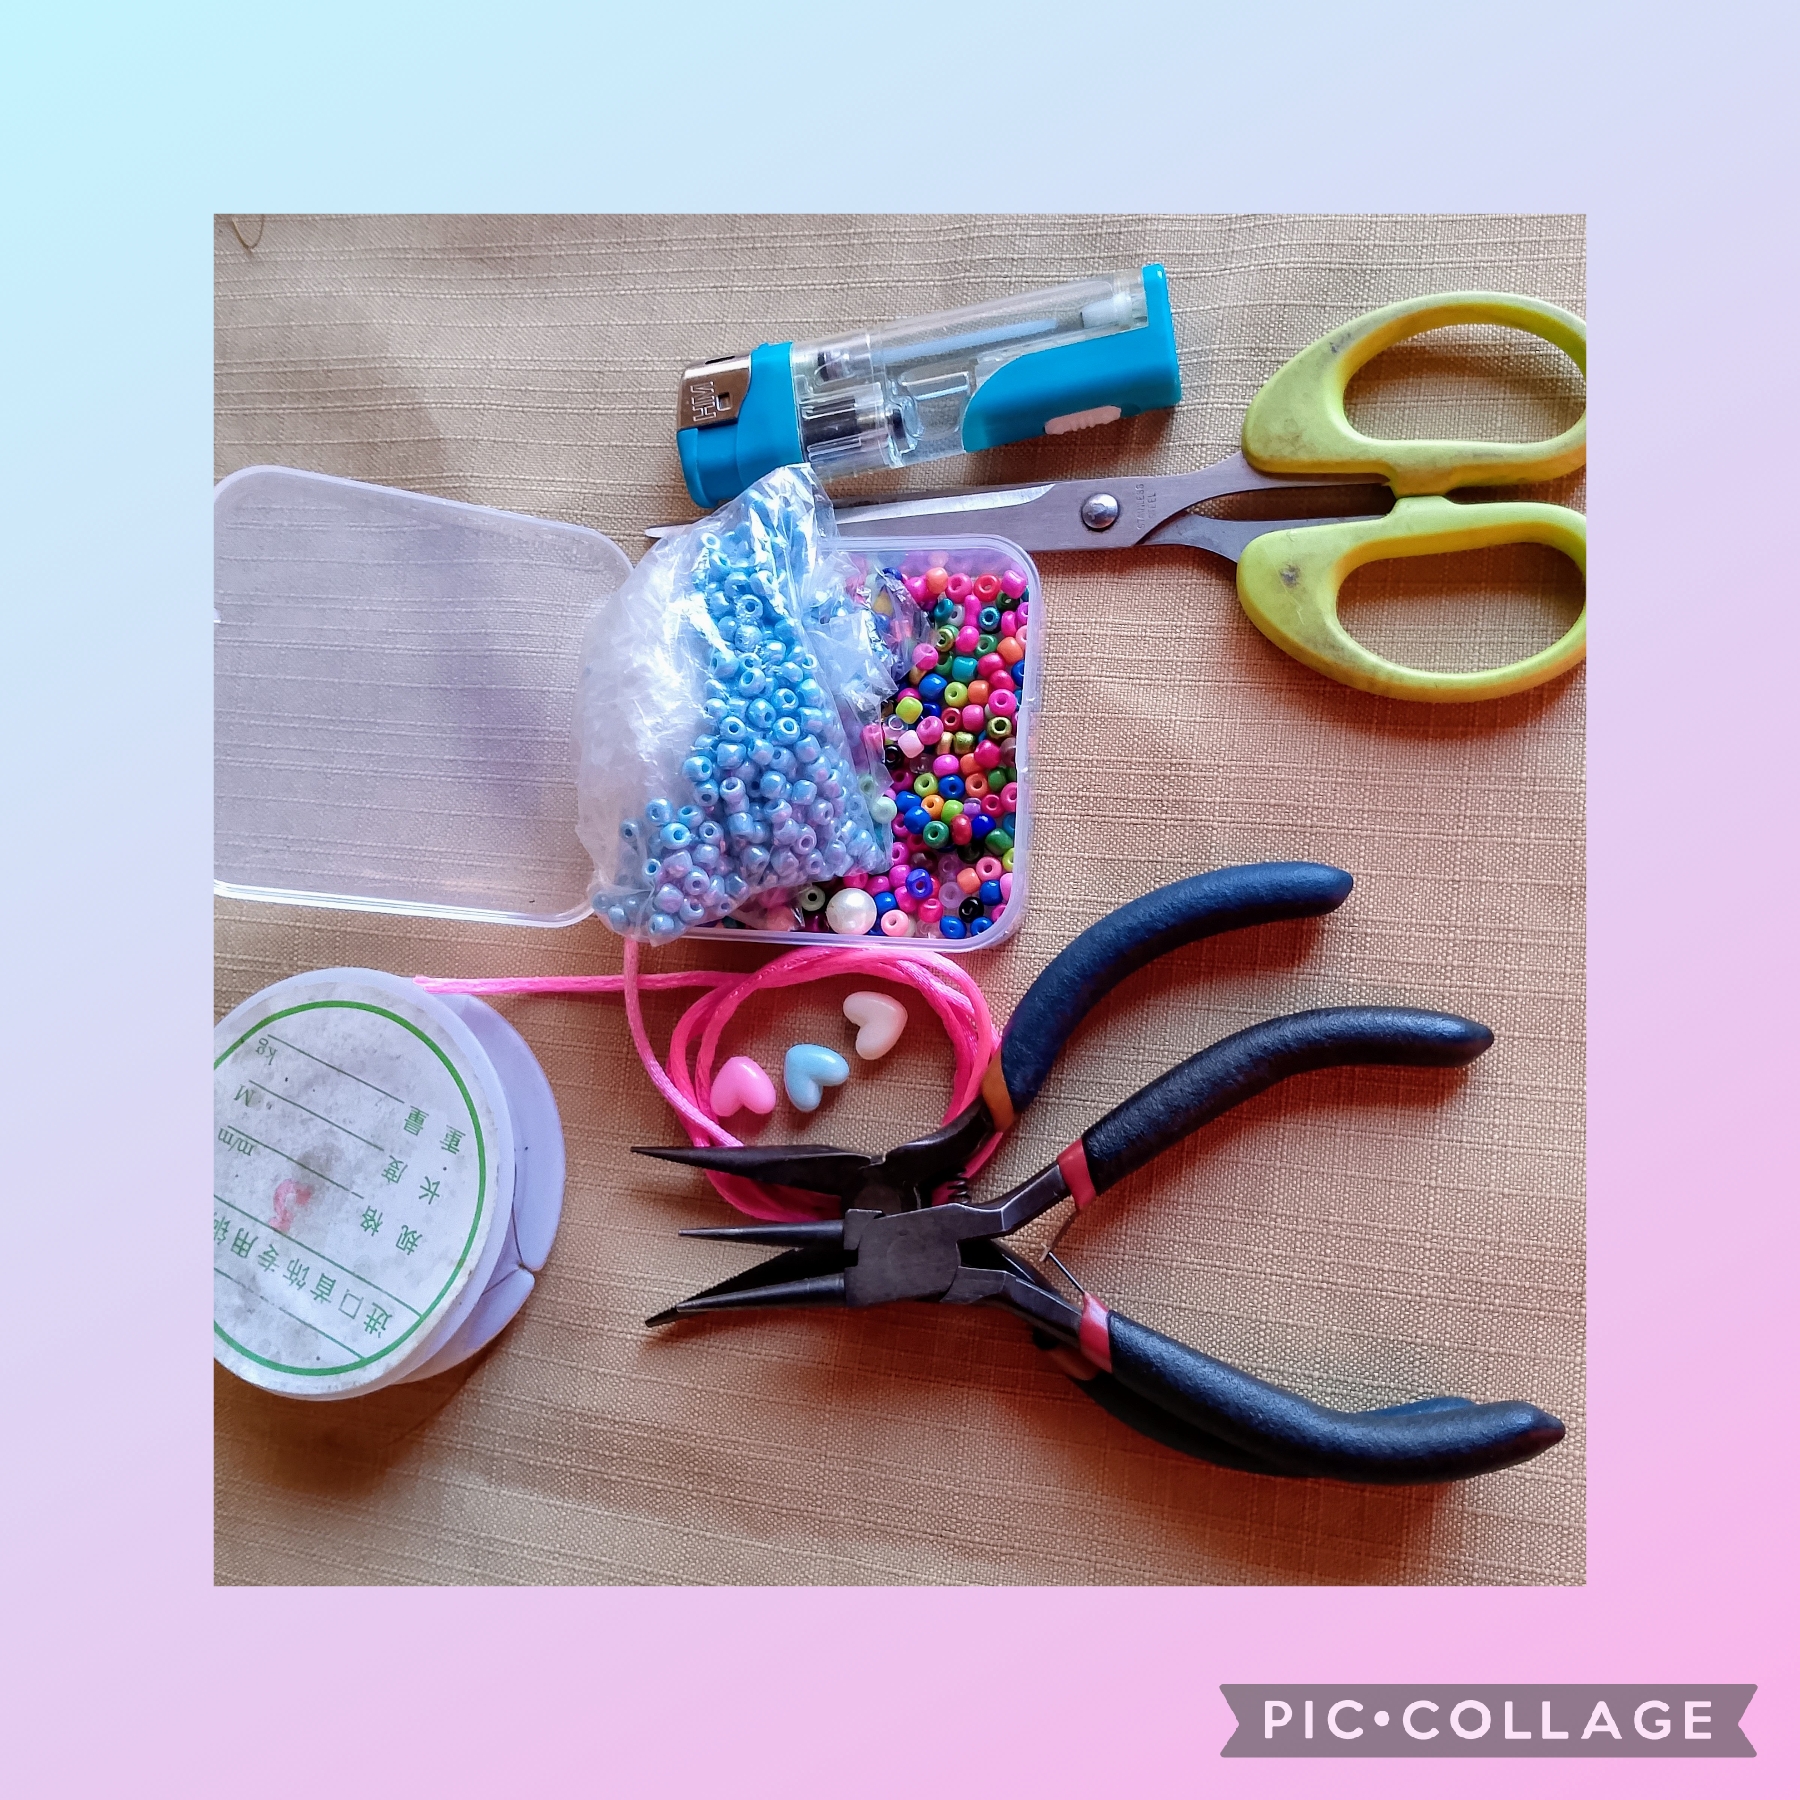
MATERIALS USED IN ITS PREPARATION:
✓ Blue seed beads
✓ Yellow seed beads.
✓ Red seed beads.
✓ White seed beads.
✓ Fuchsia seed beads in two shades.
✓ Five millimeter jewelry wire.
✓ Large-link gold chain.
✓ Turquoise alligator clasp.
✓ Four small rings.
✓ A blue heart.
✓ Beads.
✓ Turquoise snake tail cord.
✓ A pink heart.
✓ Pink rat tail cord.
✓ Three white pearls.
✓ A pink alligator clasp.
✓ Lighter.
✓ Scissors.
✓ Tweezers.
✓ Two black beads.
PASOS CON LOS QUE REALICE SU ELABORACIÓN:
PRIMER PASO:
Comienzo elaborando el pececito de color azul: uso la pinza de corte, mido con la regla setenta centímetros del alambre de bisutería y corto, doblo a la mitad uniendo las puntas para luego insertar por una punta dos mostacillones rojos y tres azules, con la otra punta cruzo los tres mostacillones azules así; ahora inserto por una punta un mostacillón azul, uno negro y tres azules que cruzo con la otra punta, inserto de nuevo por una punta seis mostacillones azules que cruzo con la otra punta de esta manera:
STEPS WITH WHICH I CARRIED OUT ITS PREPARATION:
FIRST STEP:
I begin by making the little blue fish: I use the cutting pliers, I measure seventy centimeters of the jewelry wire with the ruler and cut, I fold it in half joining the ends and then insert two red beads and three blue ones through one end, with the other end I cross the three blue beads like this; now I insert one blue bead, one black bead and three blue ones through one end that I cross with the other end, I insert again six blue beads through one end that I cross with the other end like this:
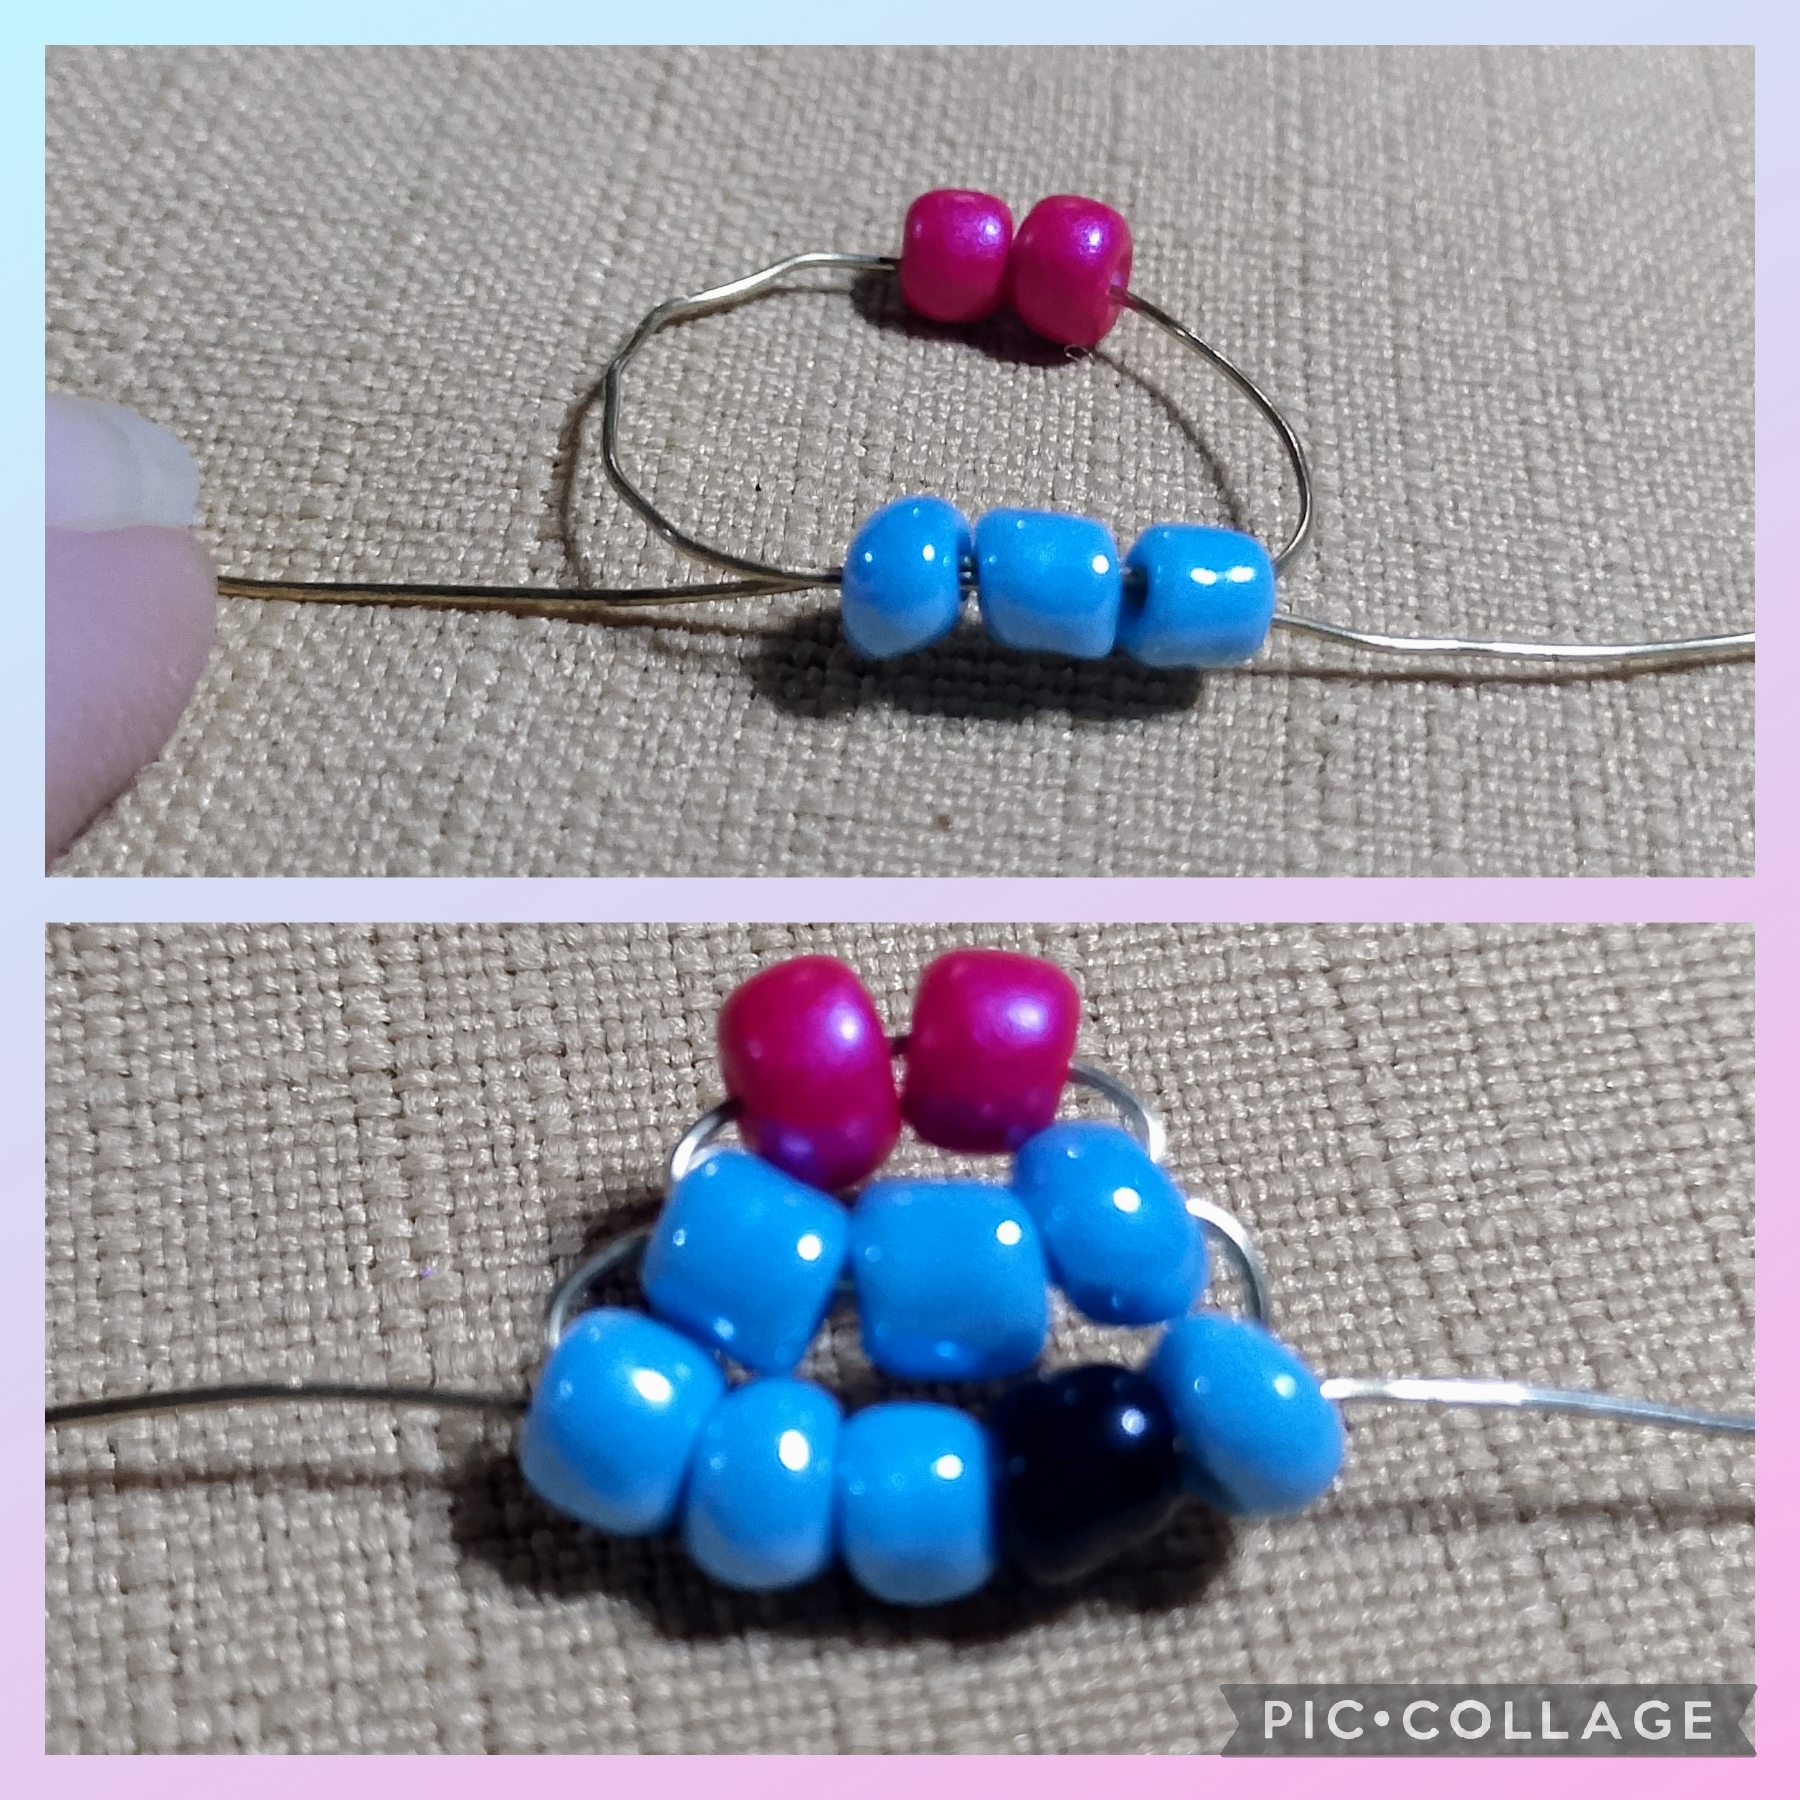
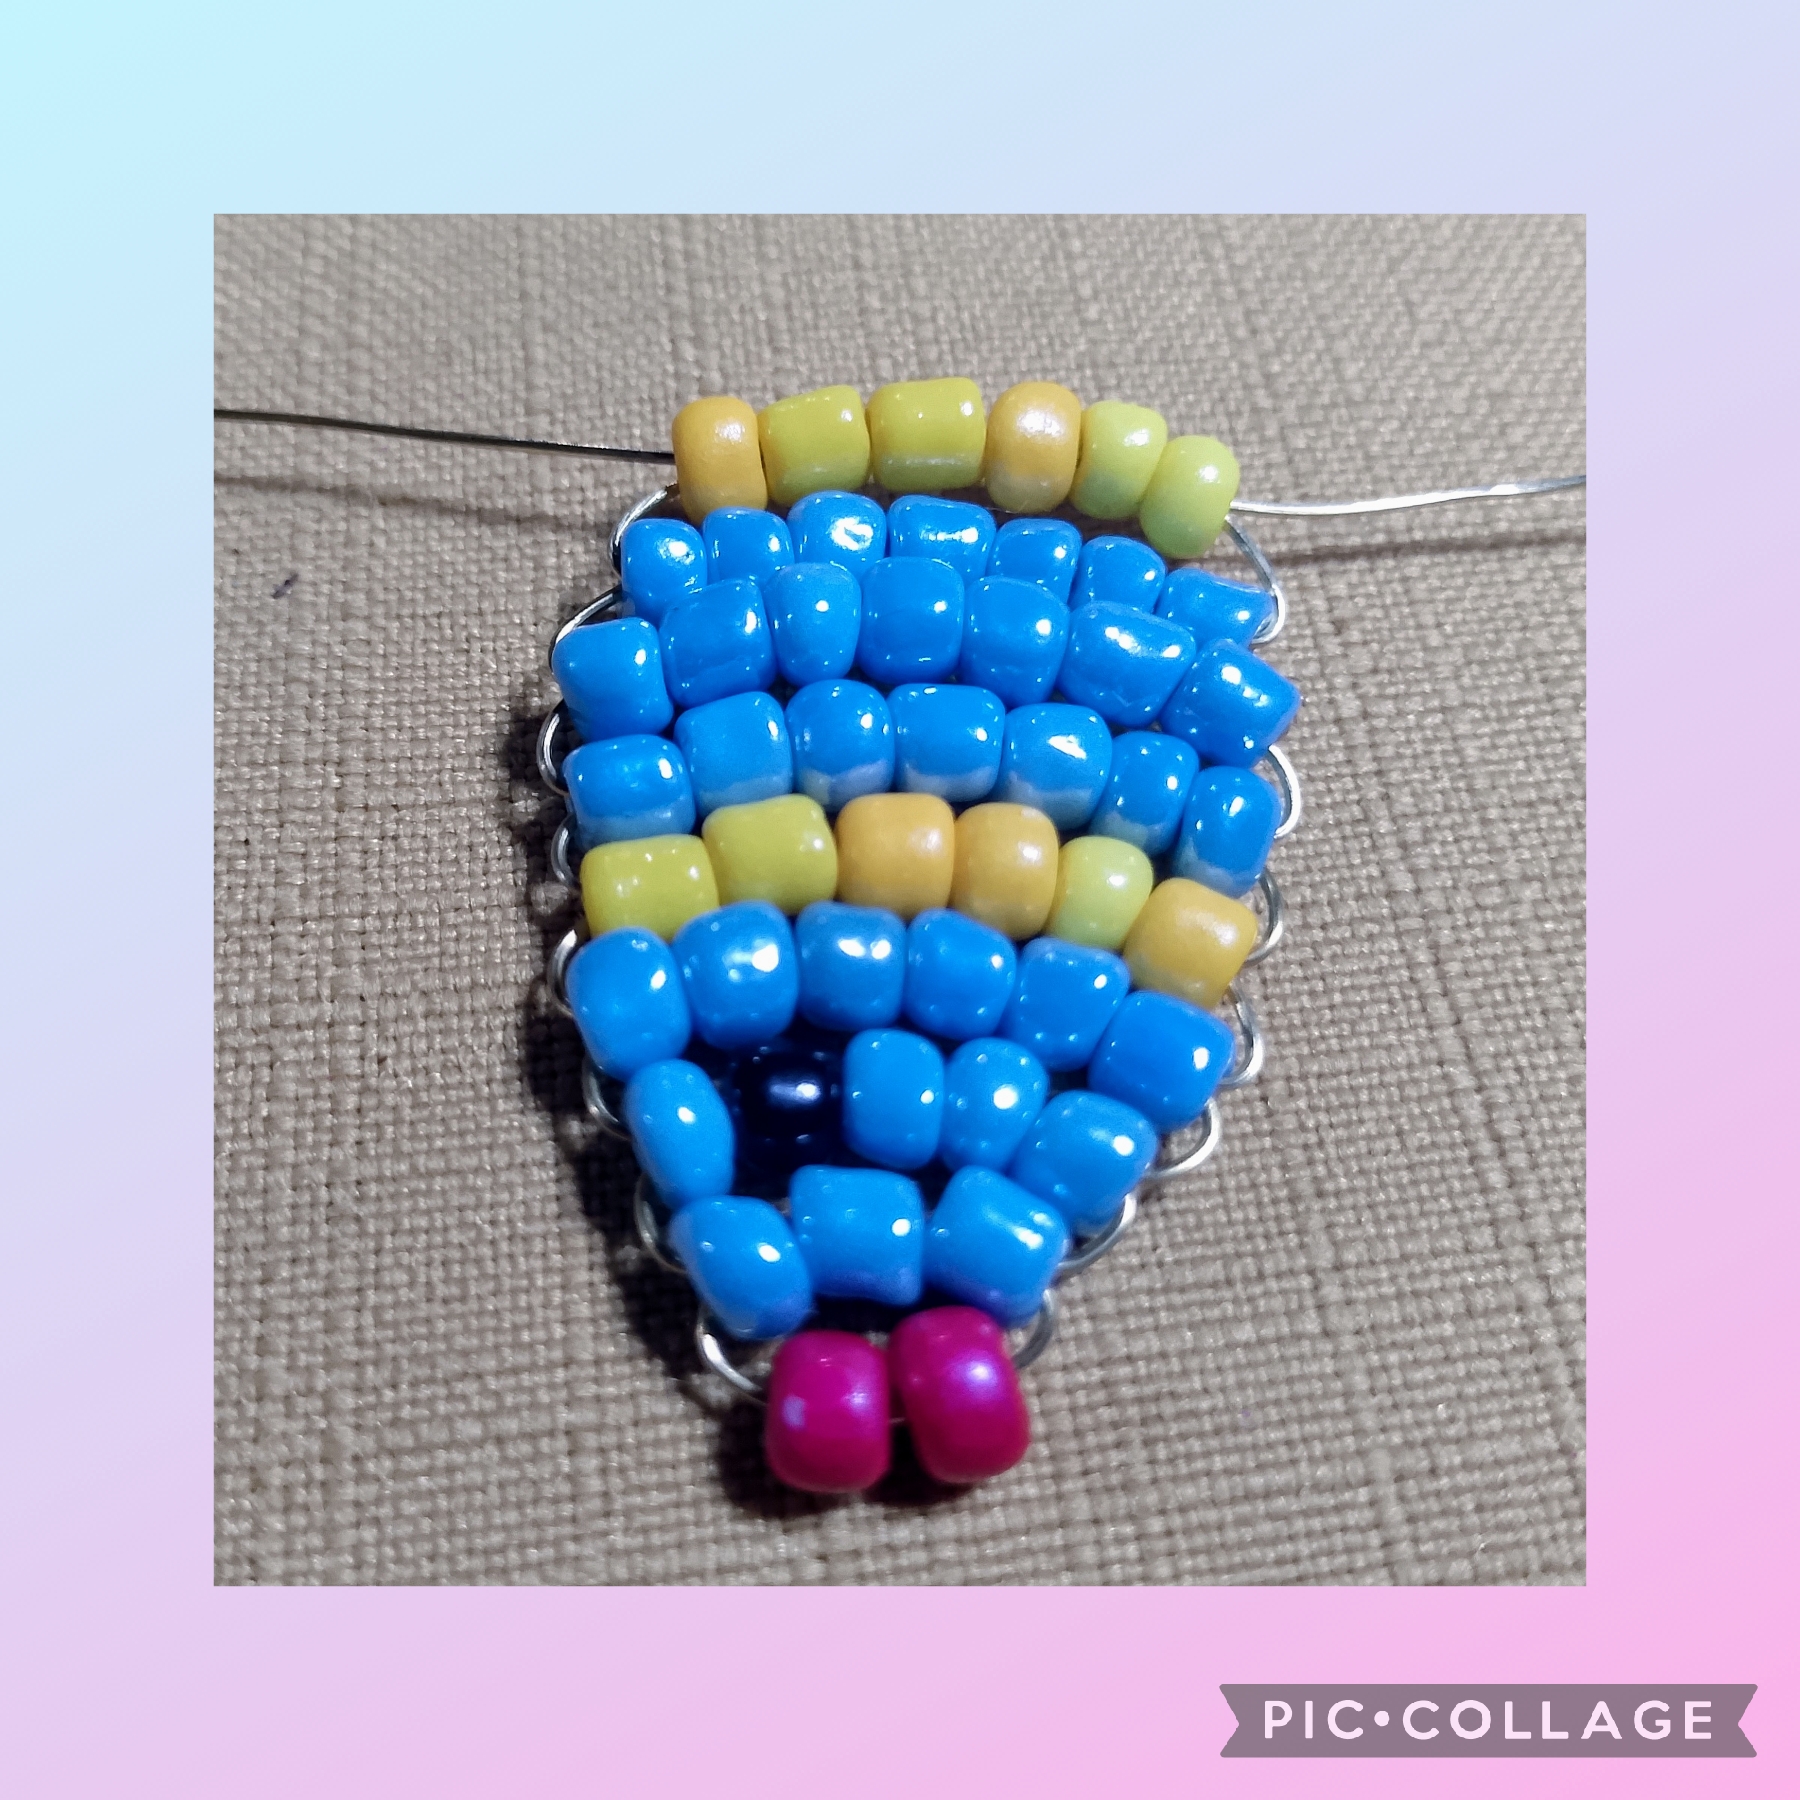
SEGUNDO PASO:
En este paso después de haber insertado los seis mostacillones azules, en la siguiente vuelta inserto seis amarillos, sigo la próxima vuelta y en esa inserto siete mostacillones azules por una punta que cruzo con la otra punta y realizó dos vueltas más iguales, en esta vuelta disminuyo la labor insertando solo seis mostacillones amarillos y los cruzo así:
SECOND STEP:
In this step, after having inserted the six blue beads, in the next round I insert six yellow ones, I continue the next round and in that one I insert seven blue beads through one point that I cross with the other point and make two more equal rounds, in this round I decrease the work by inserting only six yellow beads and I cross them like this:
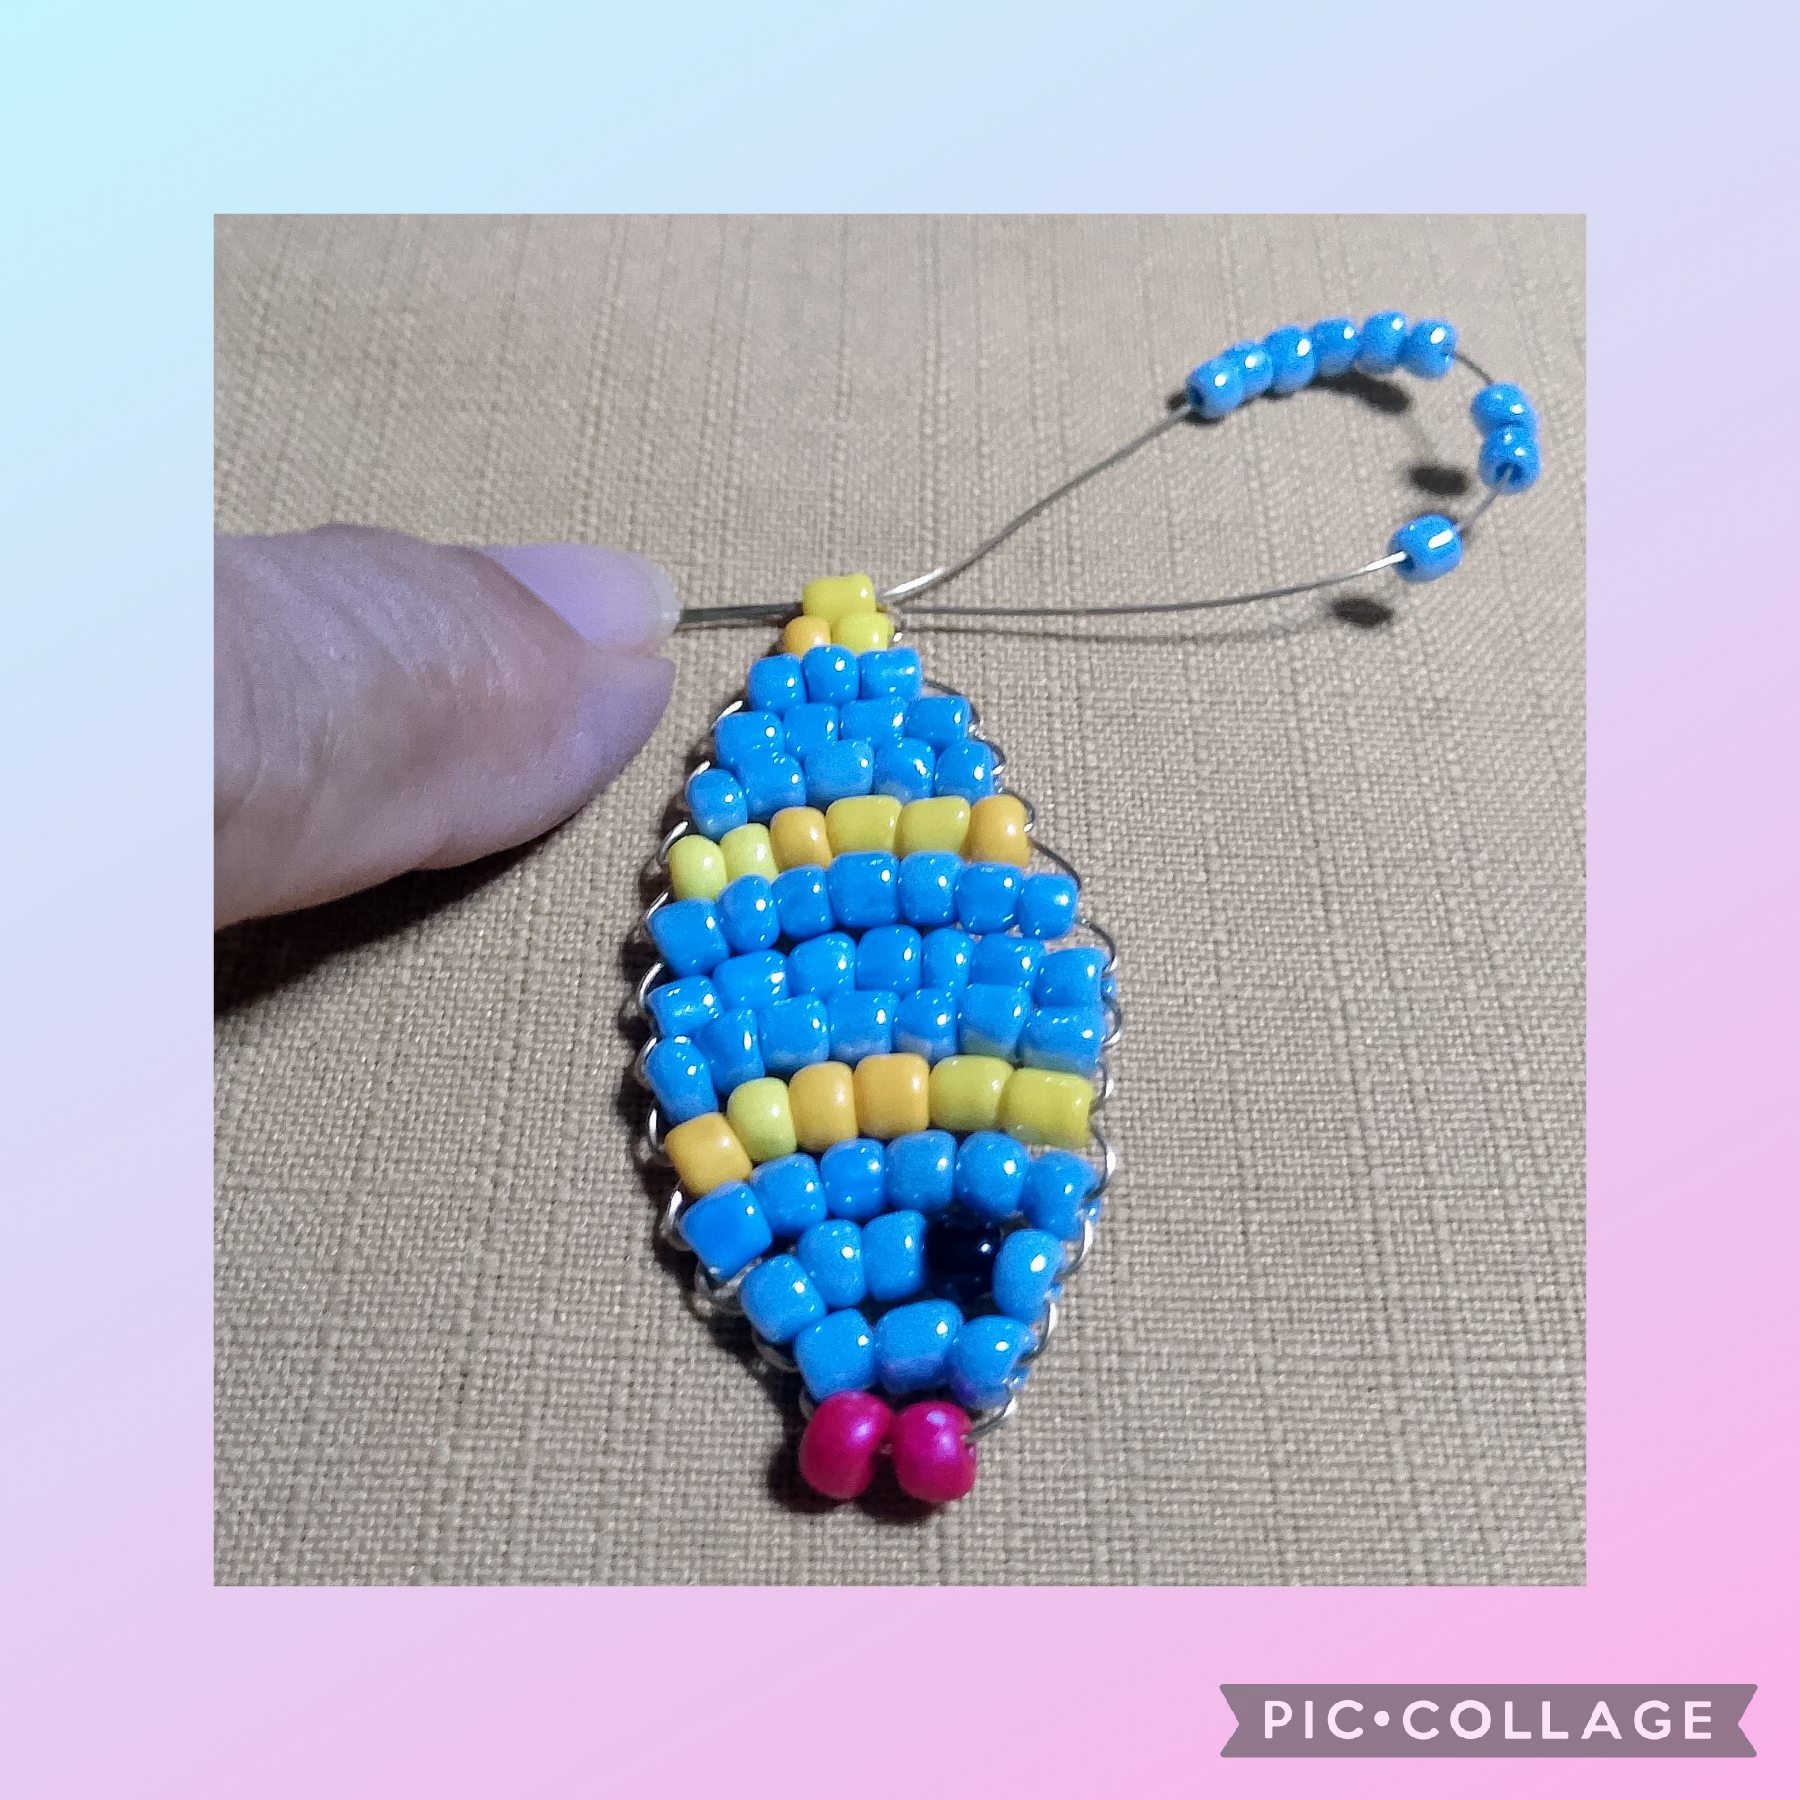
TERCER PASO:
Continúo y en este paso inserto una vuelta de cinco mostacillones azules, hago otra vuelta con cuatro mostacillones azules,y una tercera vuelta con tres mostacillones azules. Ahora en esta vuelta inserto dos mostacillones amarillos, y termino con una vuelta de un solo mostacillón amarillo, aquí cruzo las puntas así.
THIRD STEP:
I continue and in this step I insert a row of five blue beads, I make another row with four blue beads, and a third row with three blue beads. Now in this row I insert two yellow beads, and I finish with a row of a single yellow bead, here I cross the ends like this.
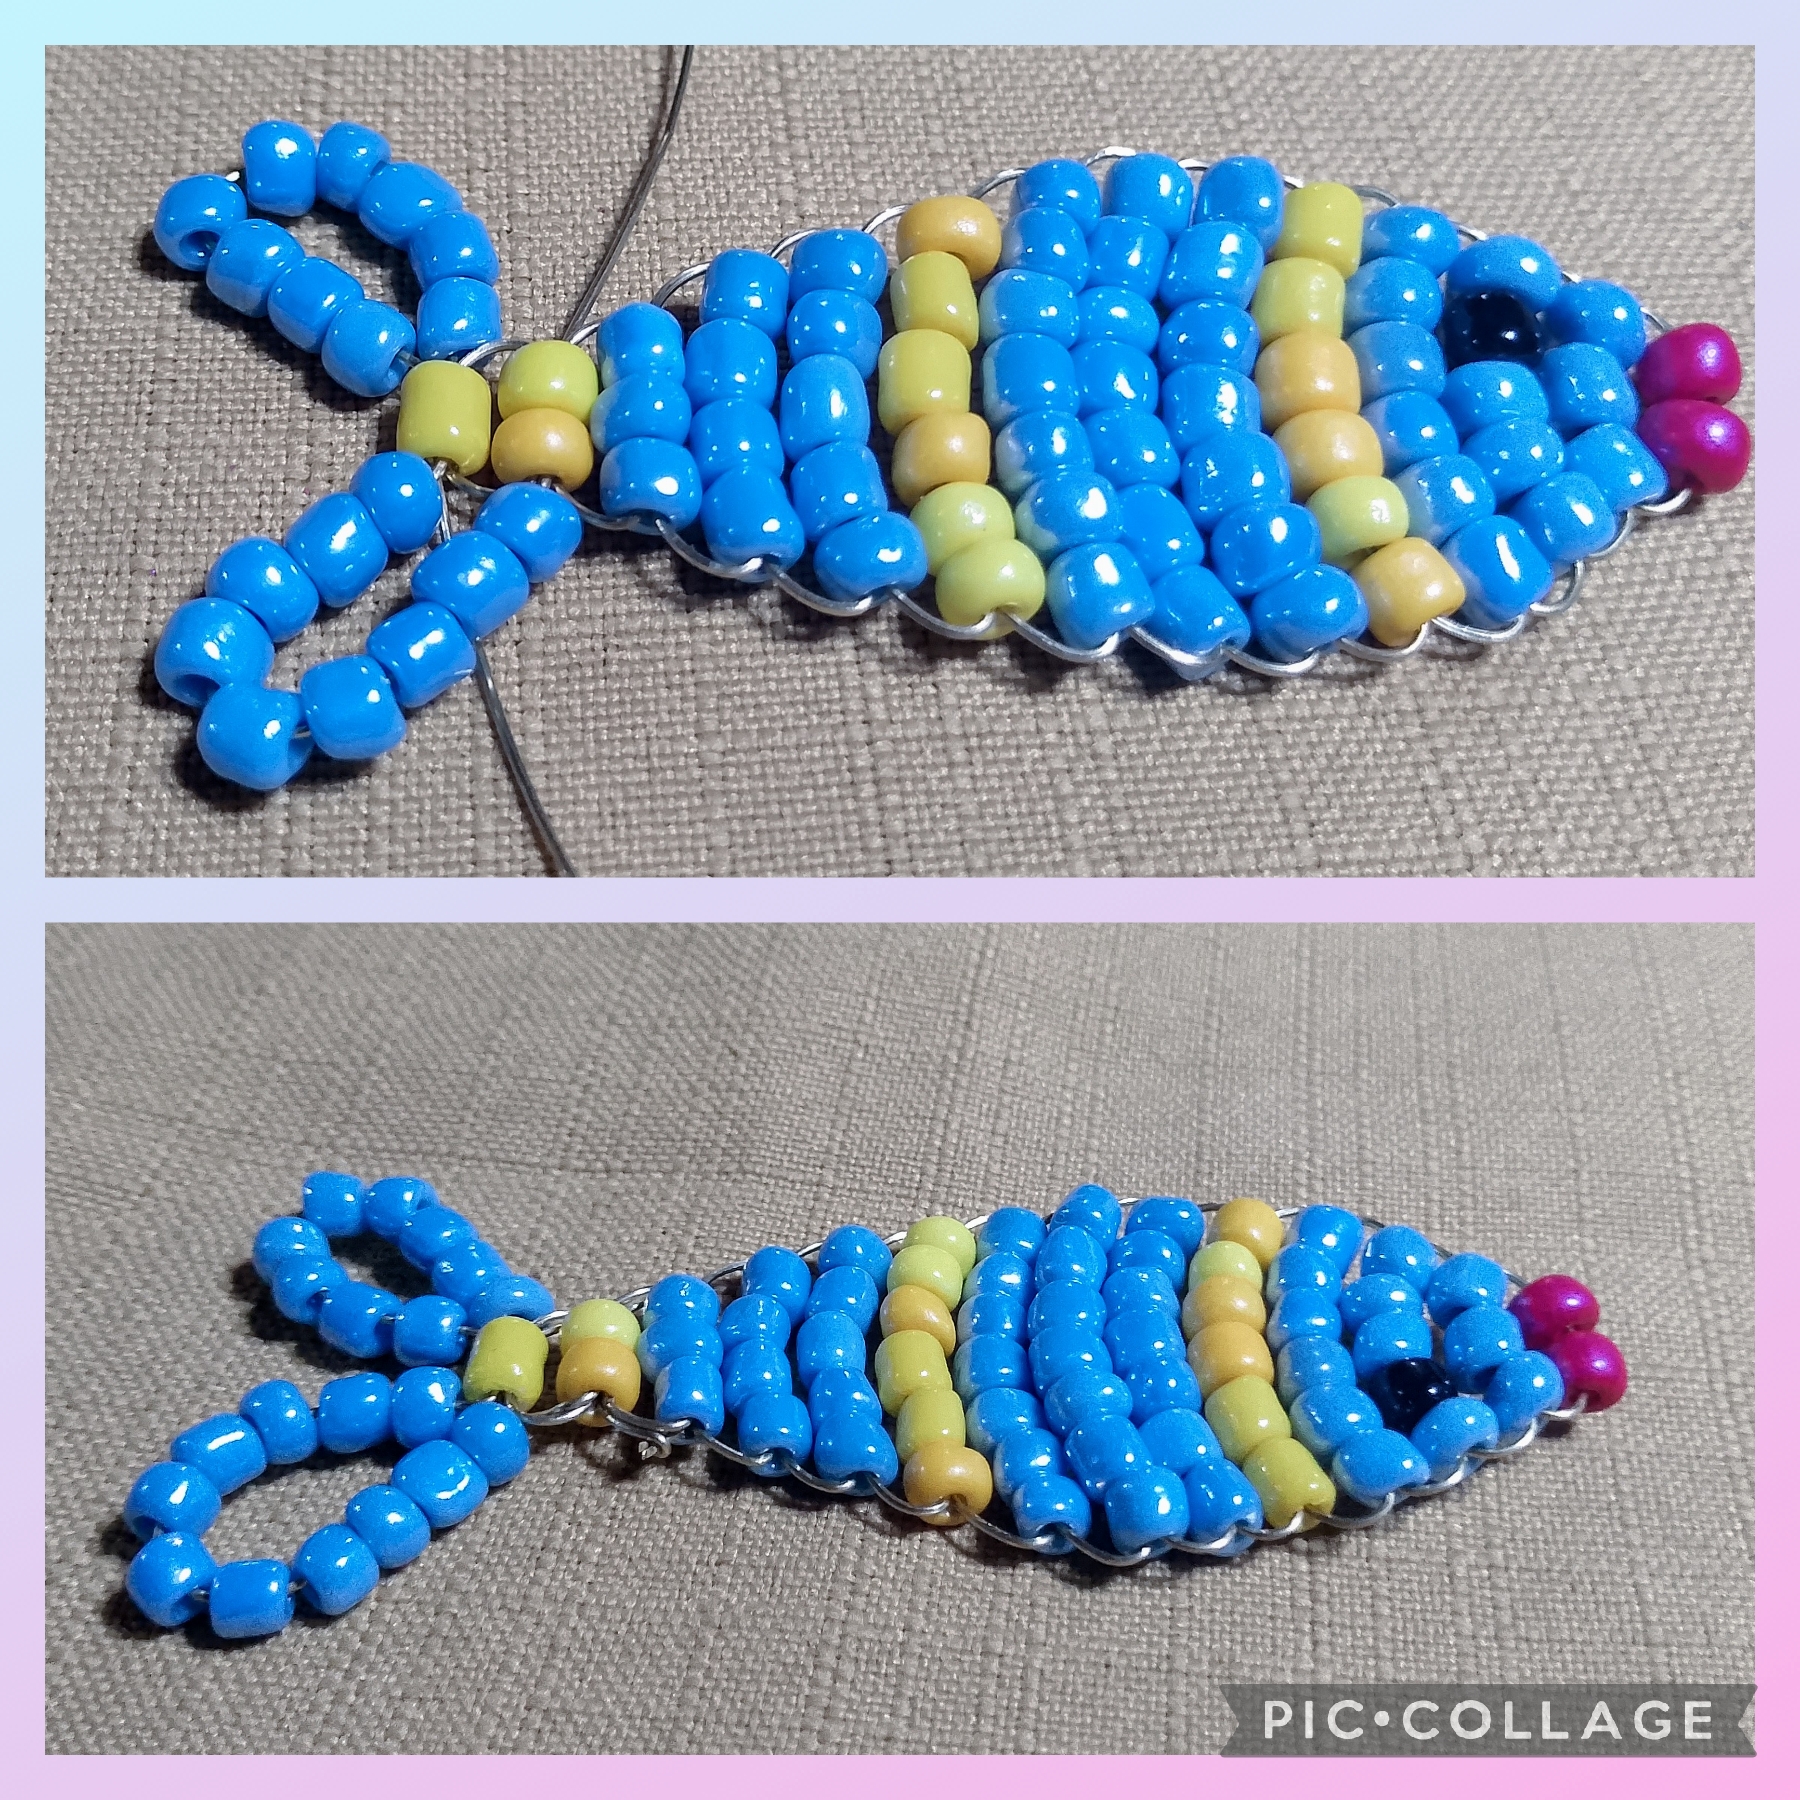
CUARTO PASO:
Aquí en este paso trabajo la cola del pez, y lo voy hacer con alambres separados: en una punta inserto once mostacillones azules y la cruzo por el mostacillón amarillo último de la punta, este mismo procedimiento lo hago del otro lado pero aquí inserto solo nueve mostacillones para que la cola tenga un mejor efecto, ahora tomo la punta de los alambres y los voy pasando de nuevo por los mostacillones en forma ascendente hasta perder todo el alambre halo bien fuerte para asegurar y uso la pinza de corte para quitar los excesos del alambre.
STEP FOUR:
Here in this step I work on the tail of the fish, and I'm going to do it with separate wires: at one end I insert eleven blue beads and cross it with the last yellow bead at the end, I do this same procedure on the other side but here I insert only nine beads so that the tail has a better effect, now I take the tip of the wires and I pass them again through the beads in an ascending manner until I lose all the wire, I pull it tightly to secure it and I use the cutting pliers to remove the excess wire.
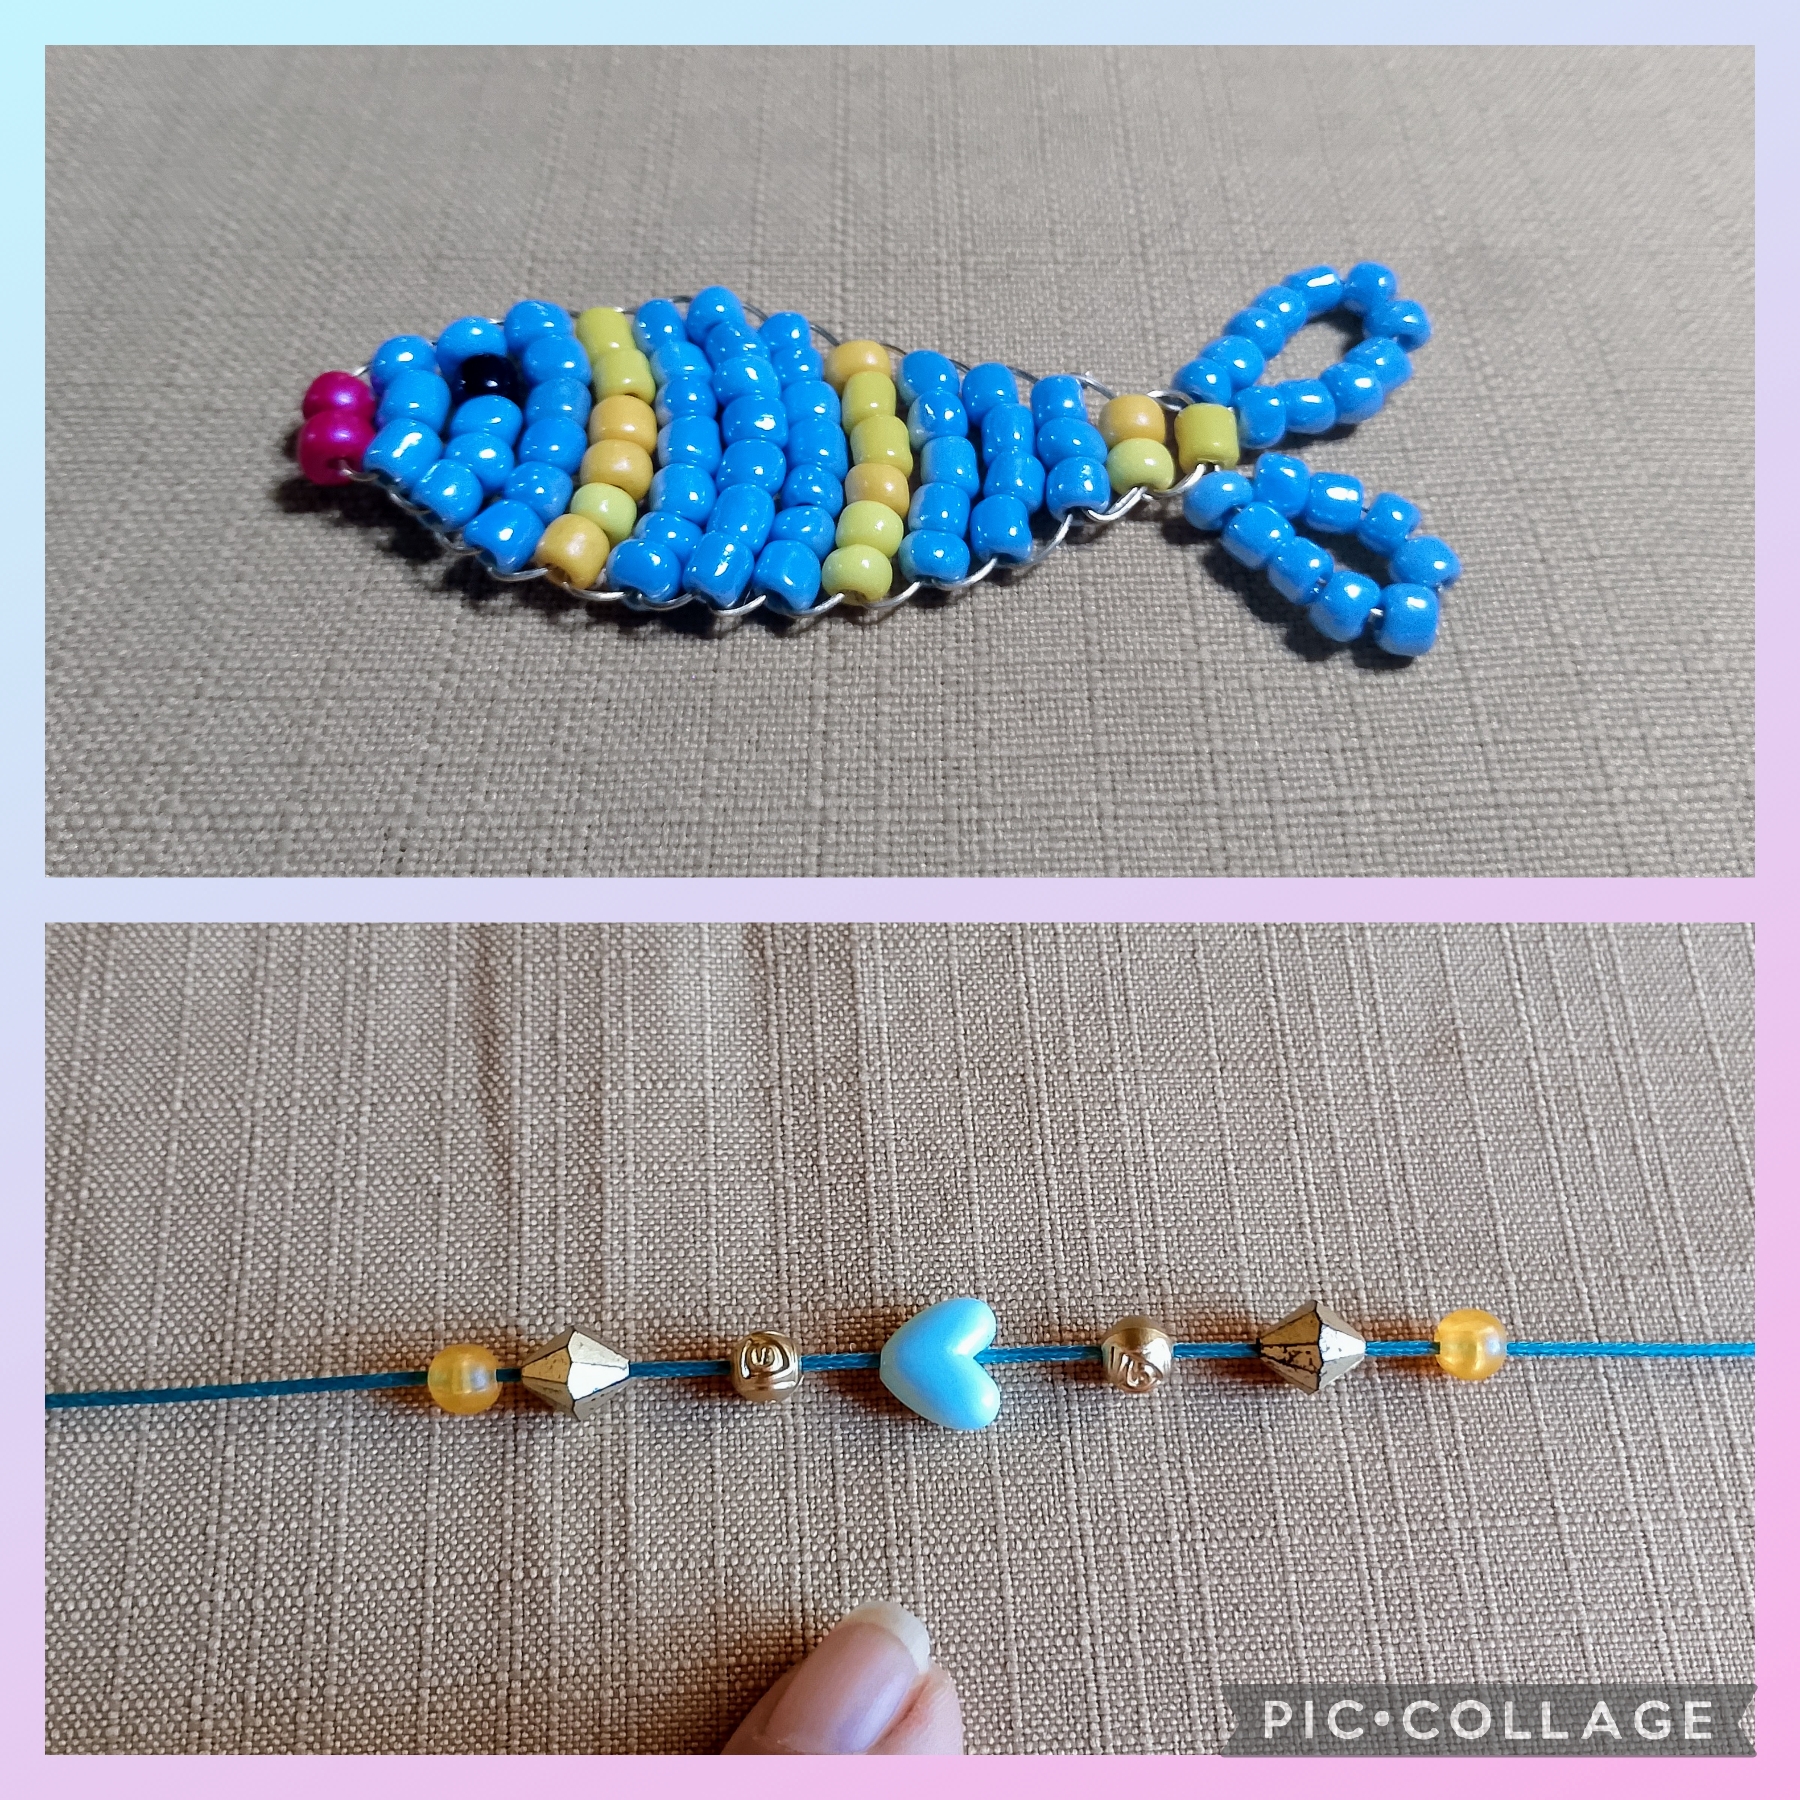
QUINTO PASO:
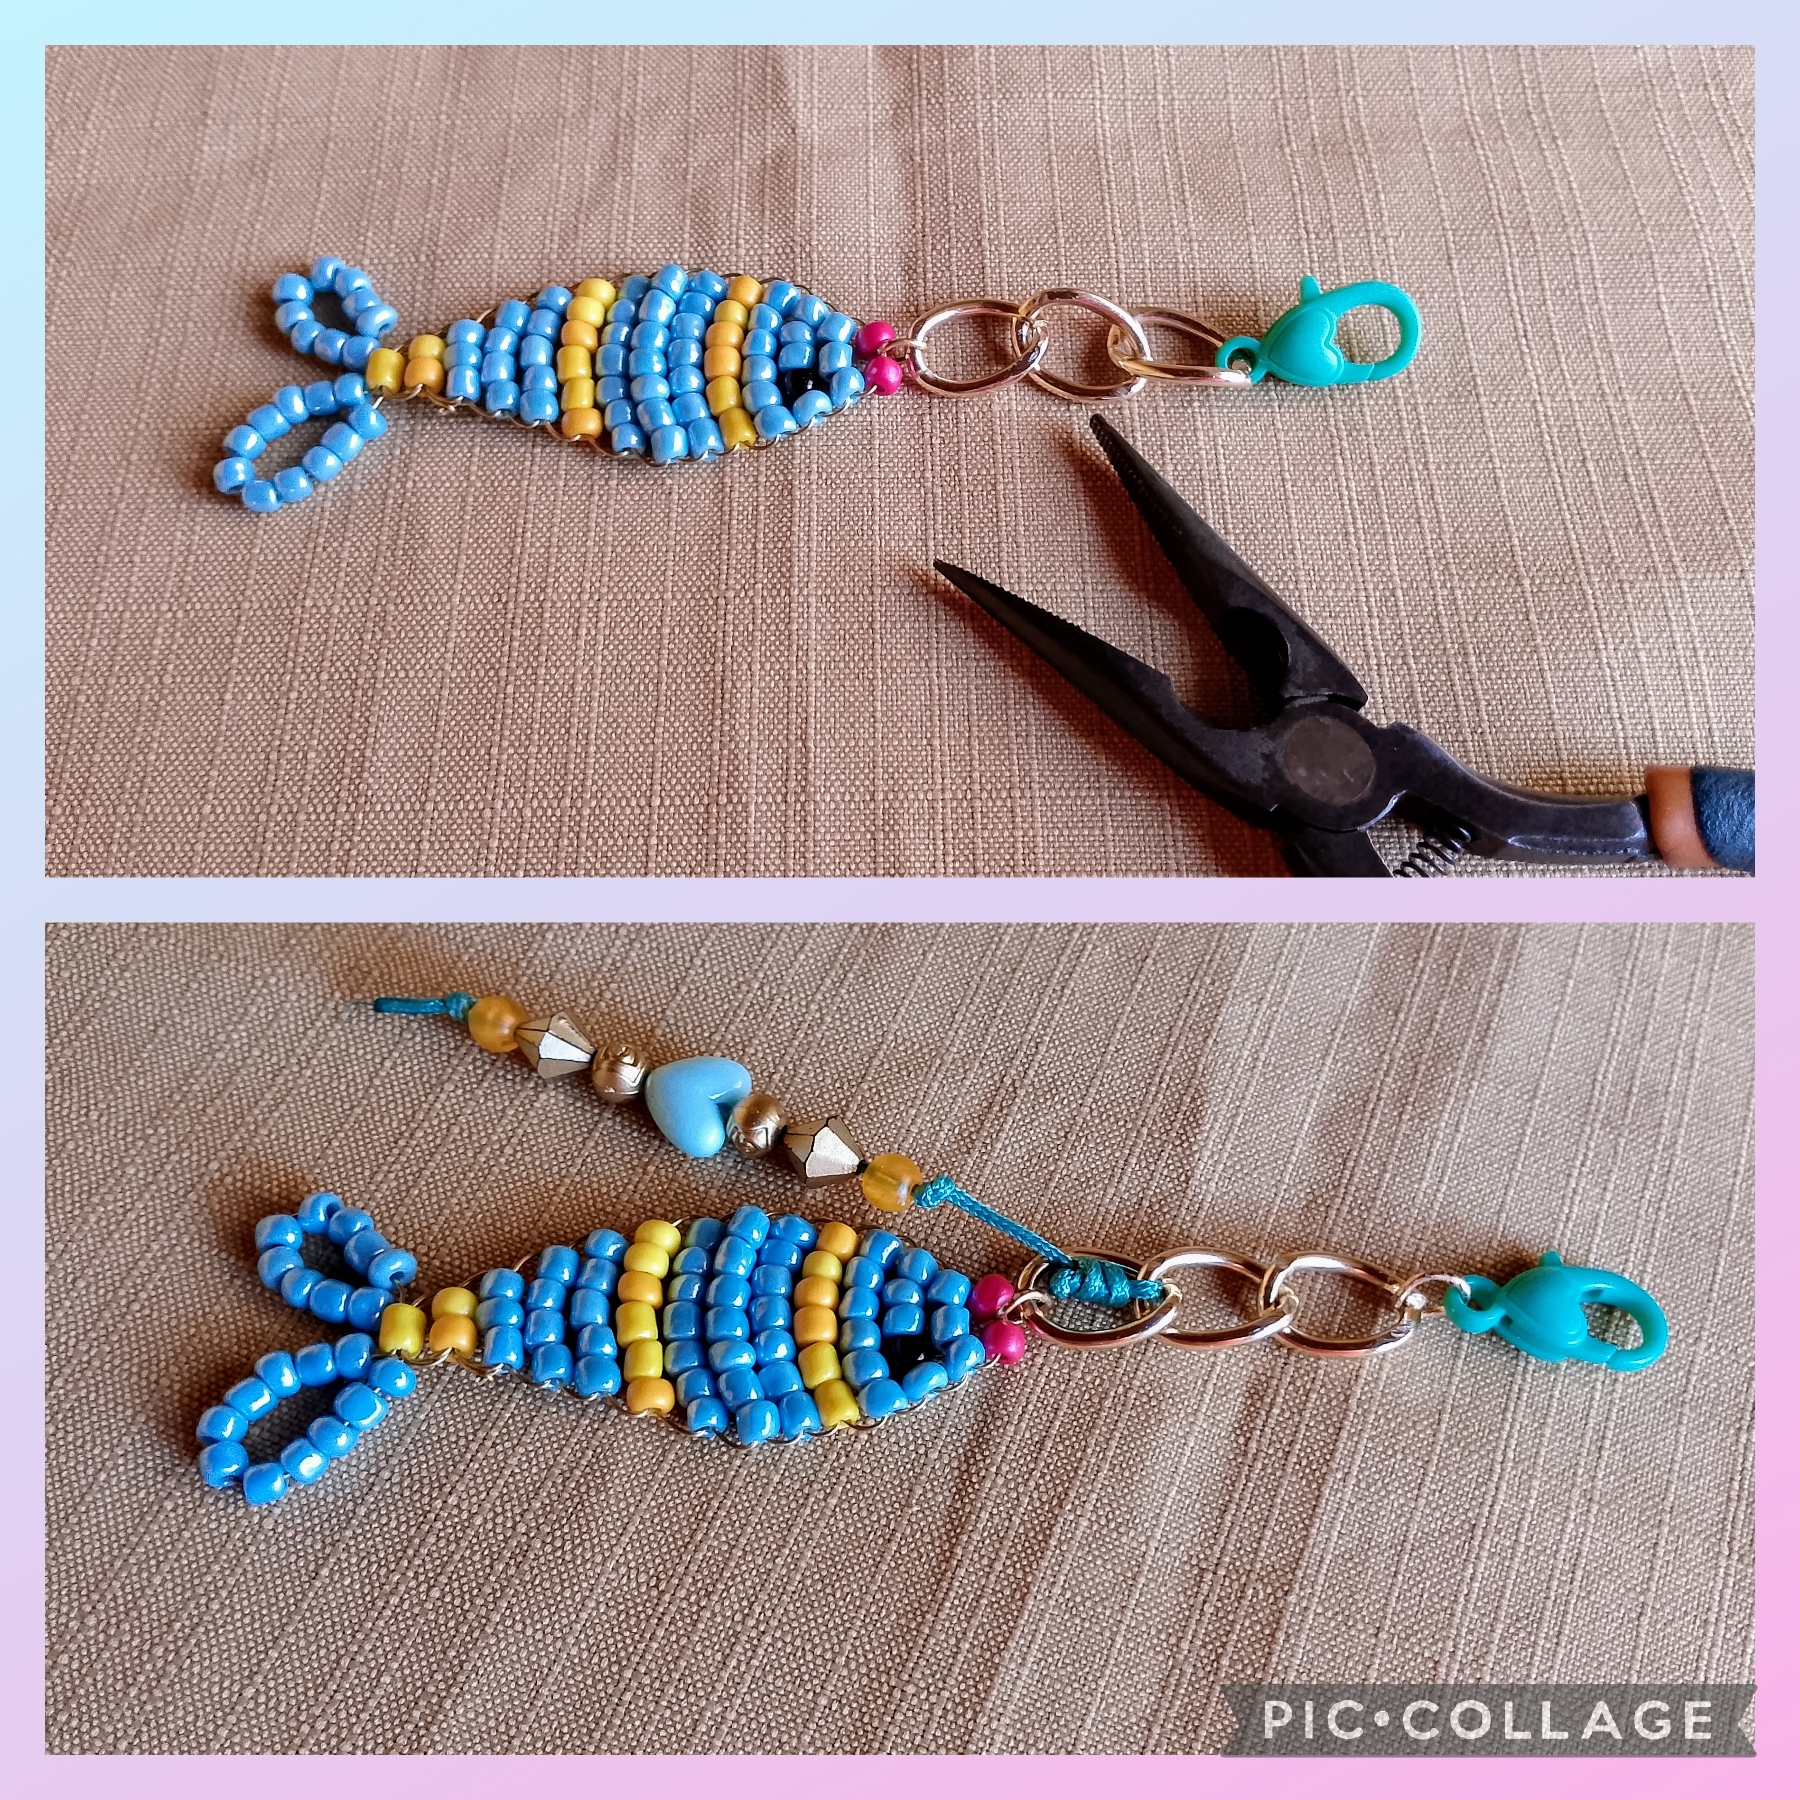
Ahora uso este paso colocar los terminales del colgante coloco una argolla pequeña en la boca del pez donde pongo tres eslabones grandes de cadena dorada, en el último eslabón pongo otra argollita y coloco el cierre tipo caiman color azul turquesa, luego en el segundo eslabón de la cadena pongo un pequeño colgante que realicé con anterioridad como muestro en foto asegurando con un nudo Franciscano de esta manera.
FIFTH STEP:
Now I use this step to place the pendant terminals. I place a small ring in the mouth of the fish where I put three large links of gold chain. On the last link I put another small ring and place the turquoise blue alligator clasp. Then on the second link of the chain I put a small pendant that I made previously as I show in the photo, securing it with a Franciscan knot in this way.
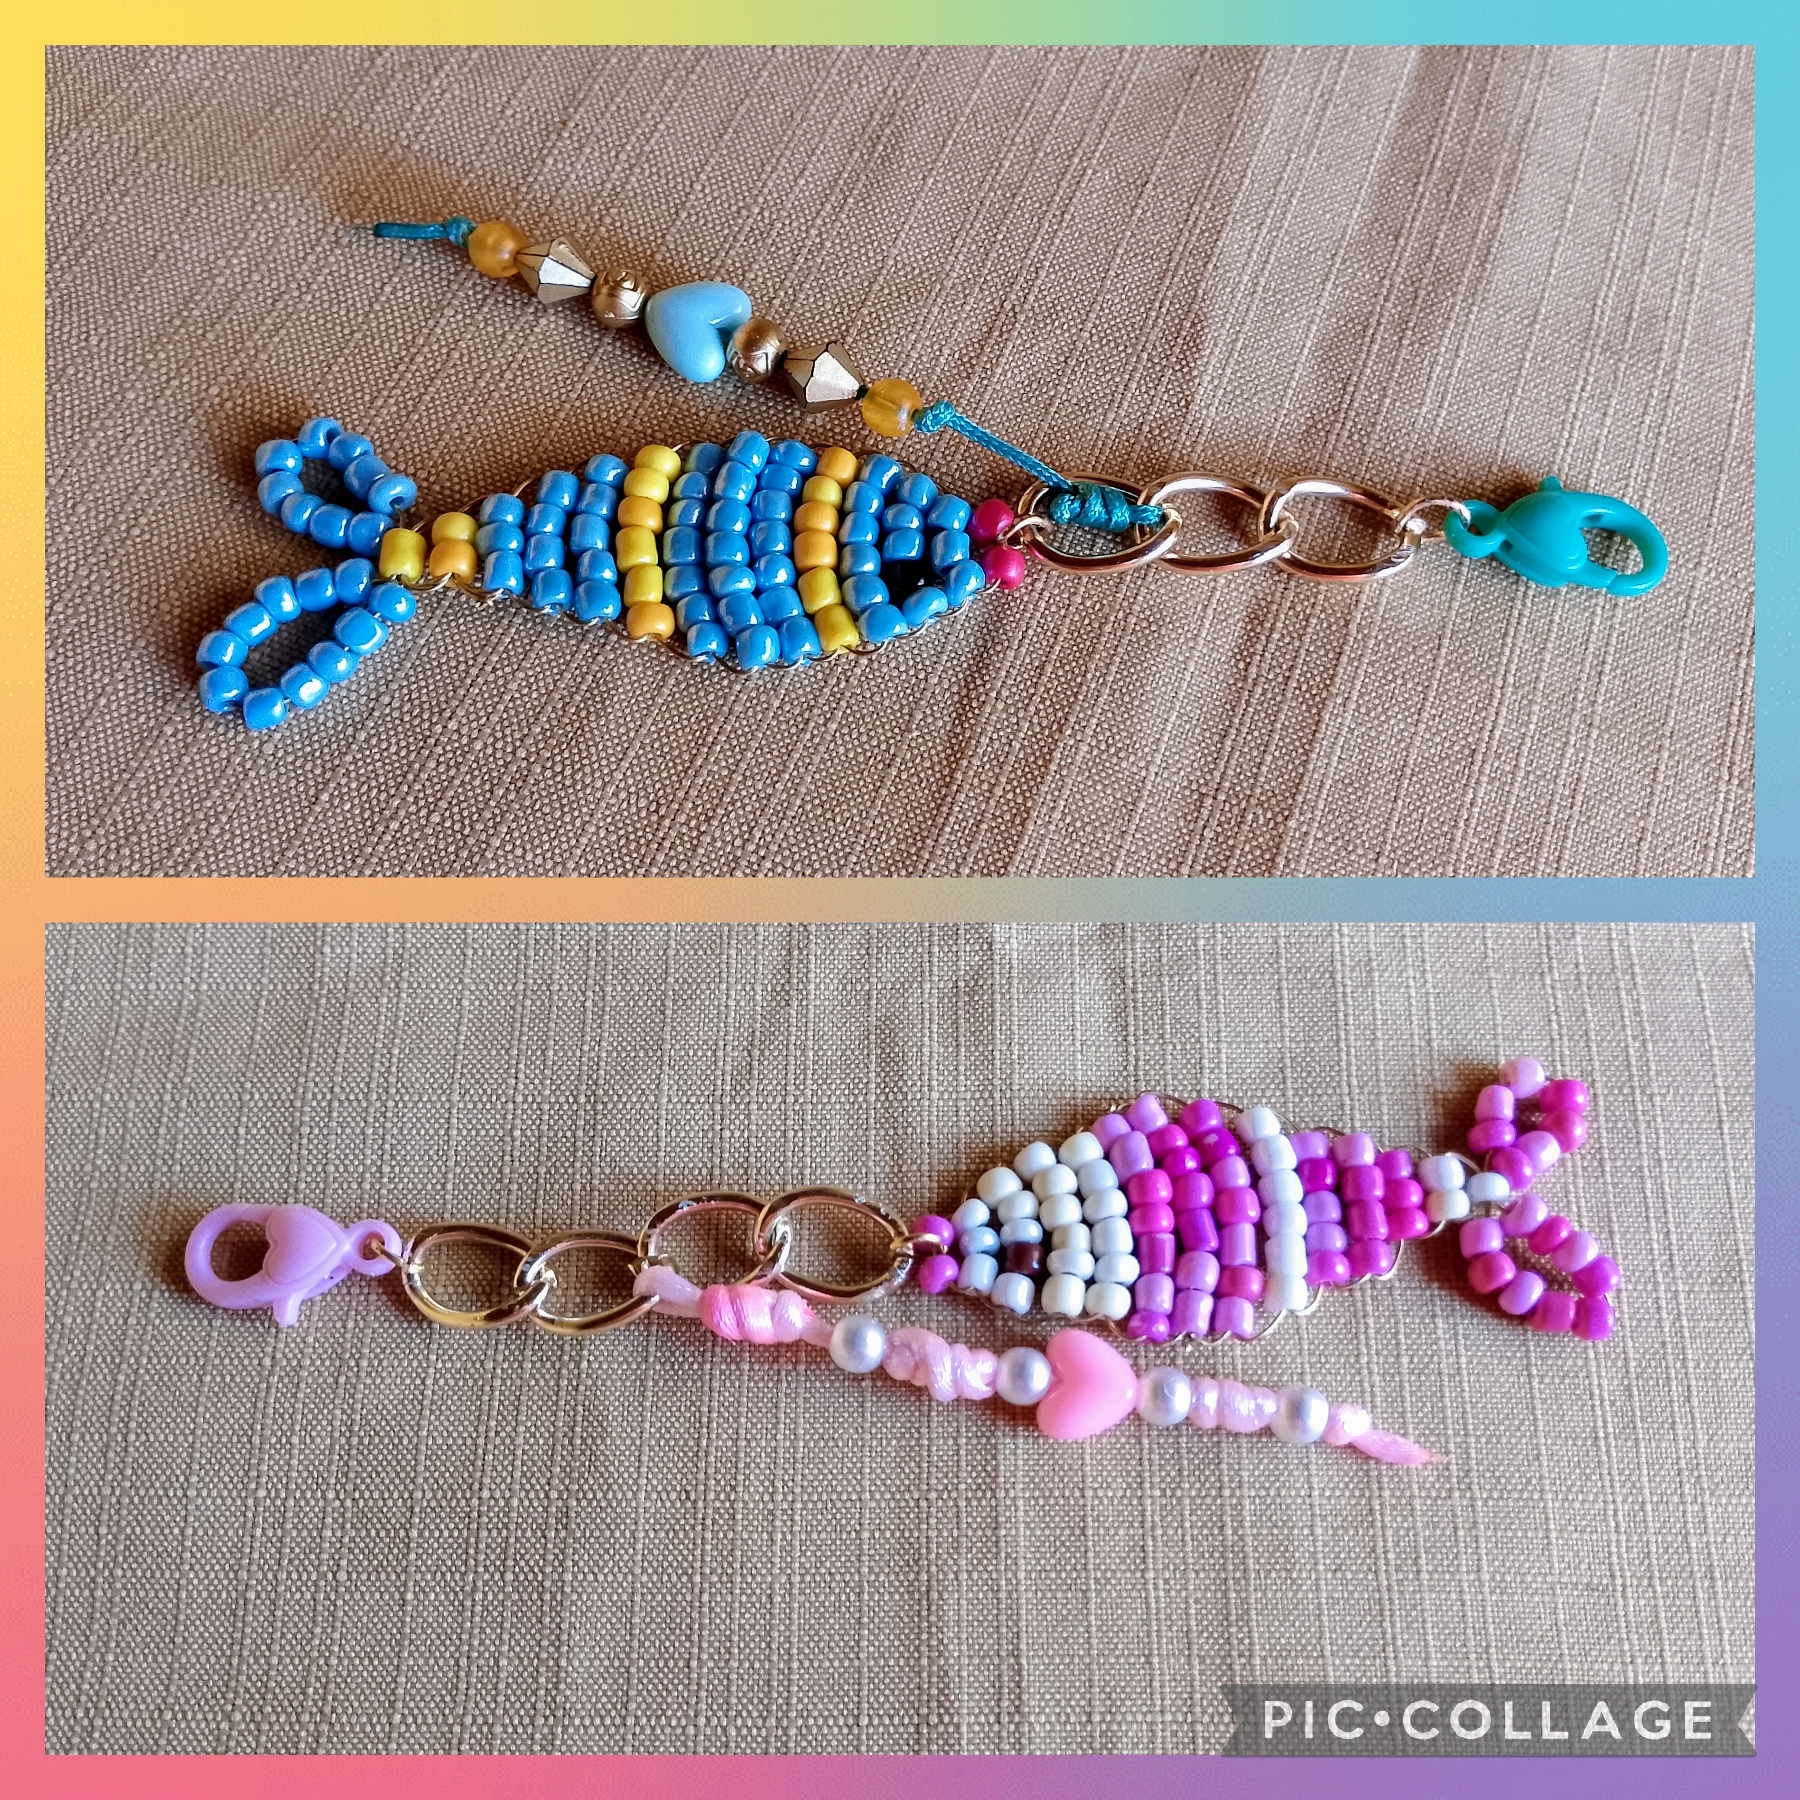
Artistas Creativos de las Manualidades y la Joyería este es el resultado final de mi proyecto en este día, realicé dos colgantes casi iguales con pequeñas diferencias como es el colgante del pez rosa que lo hice con perlas y nudo Franciscano y la variación del color porque uno es para la jovencita y el otro para un jovencito (ellos lo pidieron así) espero que les guste y me comenten que les pareció, a mí me encantó esta manualidad, que tengan un lindo día de la juventud y nos vemos en la próxima, bye bye.
Creative Artists of Crafts and Jewelry this is the final result of my project on this day, I made two almost identical pendants with small differences such as the pink fish pendant that I made with pearls and a Franciscan knot and the color variation because one is for the young girl and the other for a young boy (they asked for it that way) I hope you like it and tell me what you think, I loved this craft, have a nice youth day and see you next time, bye bye.

Las imágenes y redacción de este tutorial son de mi exclusiva propiedad, las fotos fueron tomadas con mi teléfono celular Tecno Spark Go 20 y las edite con una aplicación gratis del mismo.
Para traducir texto use Google traductor
The images and writing of this tutorial are my exclusive property, the photos were taken with my Tecno Spark Go 20 cell phone and I edited them with a free application of the same.
To translate text use Google translator