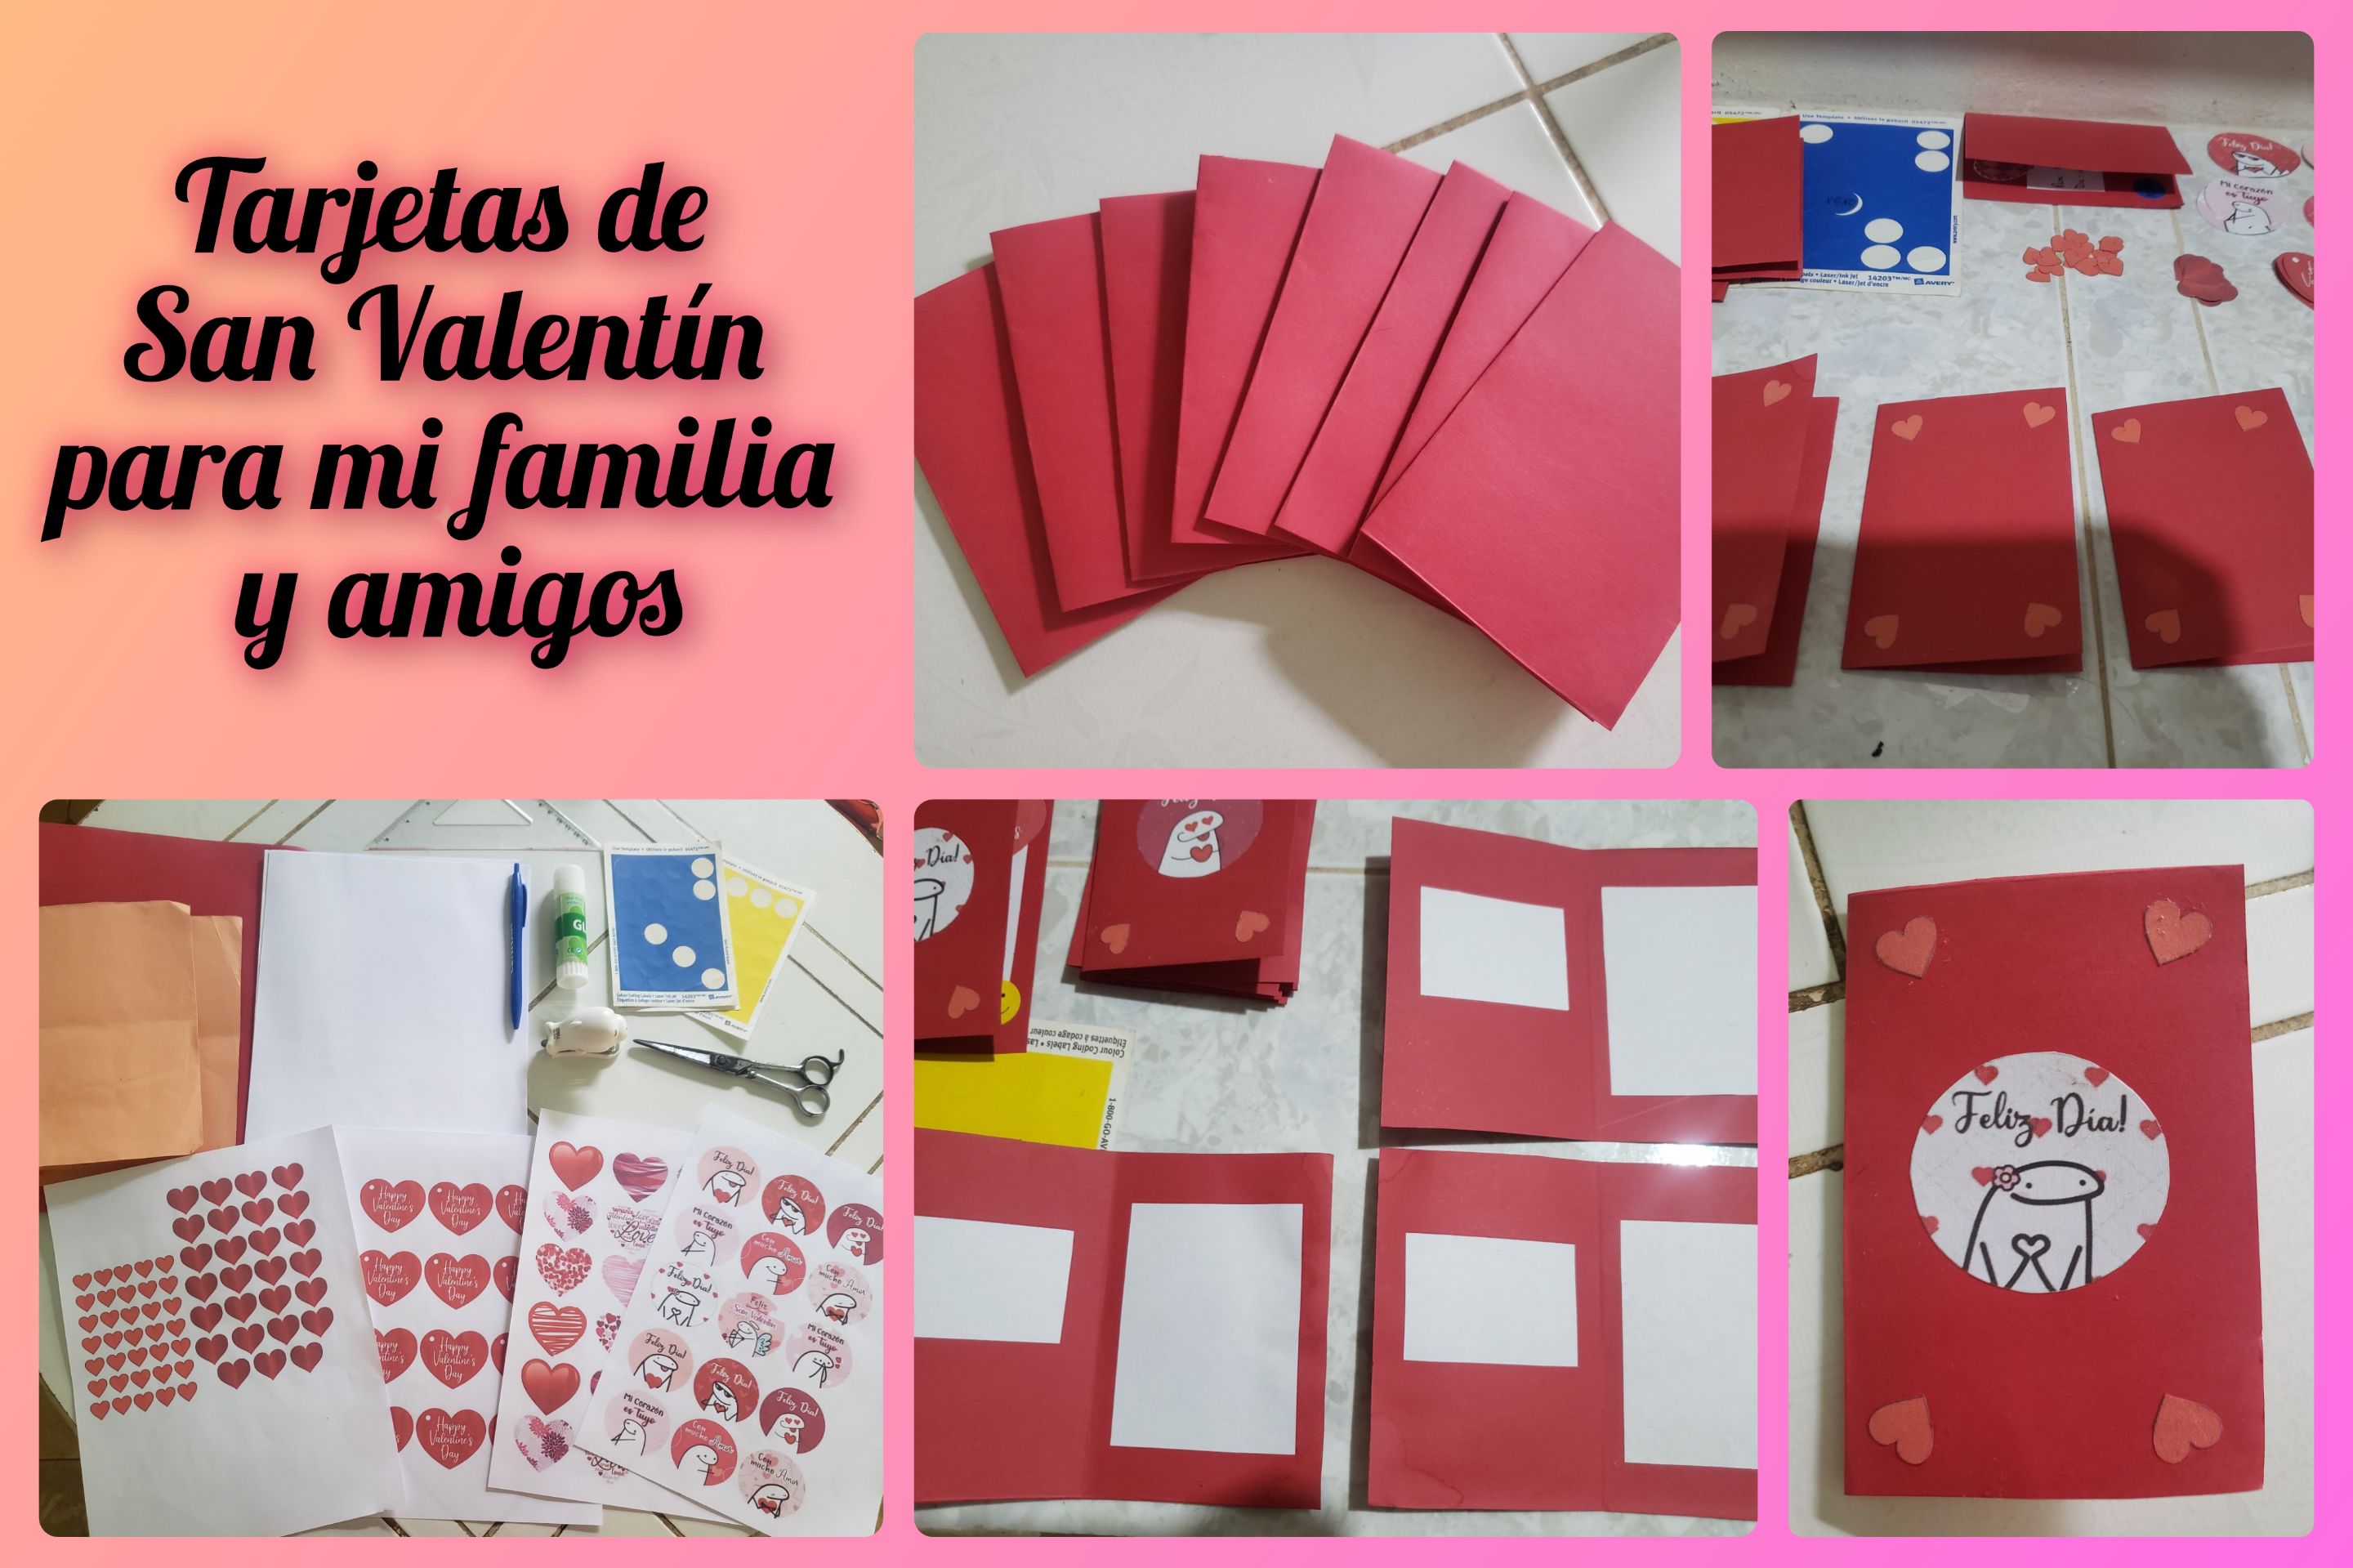
Hola amigos de esta bonita y creativa comunidad, ya mañana es 14 de febrero y estaremos celebrando el día del amor y la amistad. En este día tan especial a todos nos encanta recibir regalos, así sea un pequeño detalle nos pone muy contentos y nos alegra el día. Es por eso que decidí hacer estas tarjetas para regalar a mis familiares y amigos y demostrarles cuánto los quiero, pues tomarse el tiempo para hacer algo así tiene mucho más valor que comprarles algo, ¿no creen? ¡Empecemos!
Hello friends of this beautiful and creative community, tomorrow is February 14 and we will be celebrating the day of love and friendship. On this special day we all love to receive gifts, even a small detail makes us very happy and makes our day. That's why I decided to make these cards to give to my family and friends and show them how much I love them, because taking the time to do something like this has much more value than buying them something, don't you think? Let's get started!

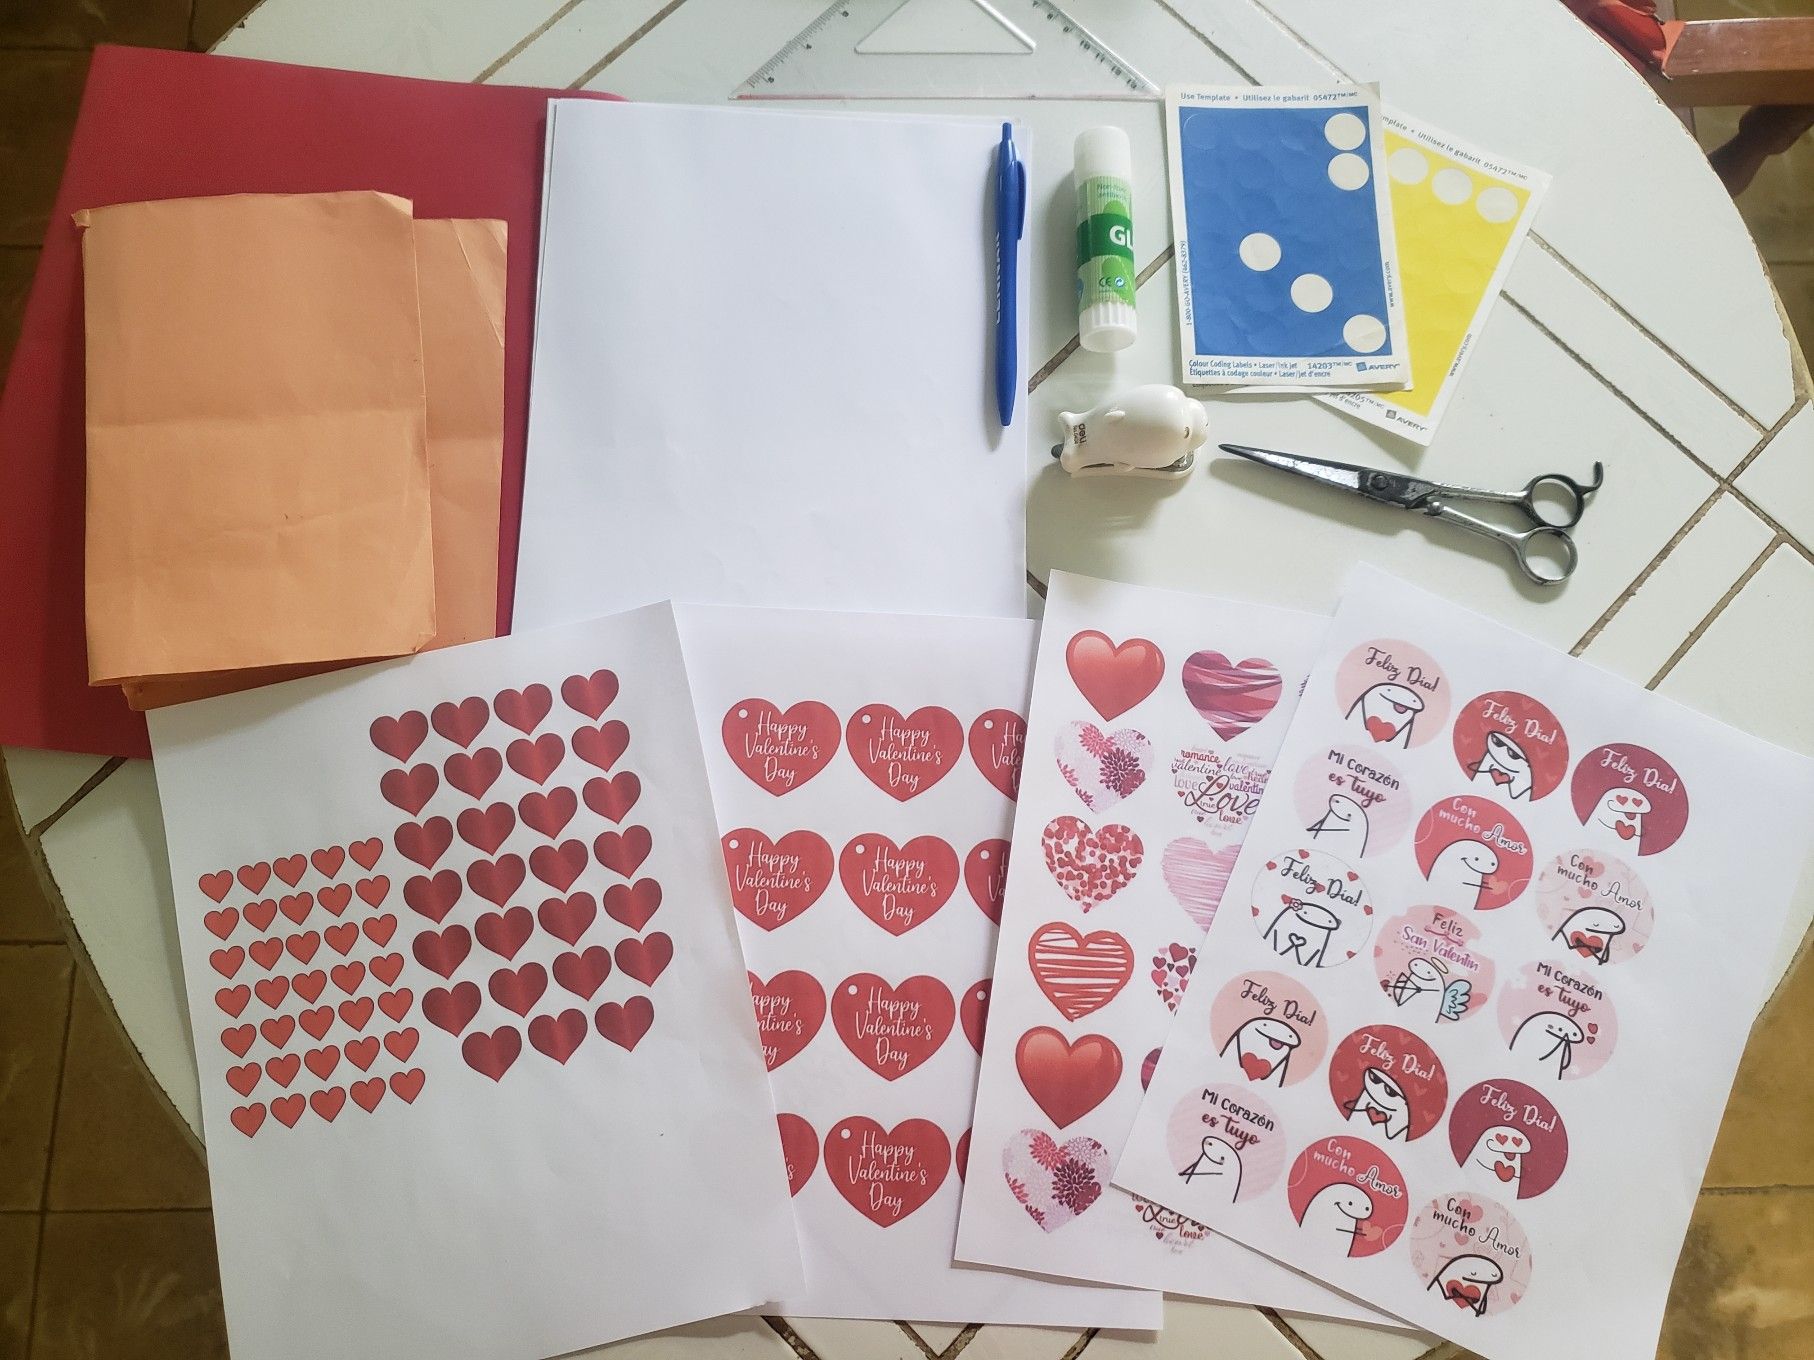
MATERIALES // MATERIALS
- Cartulina roja // Red cardboard
- Papel blanco // White paper
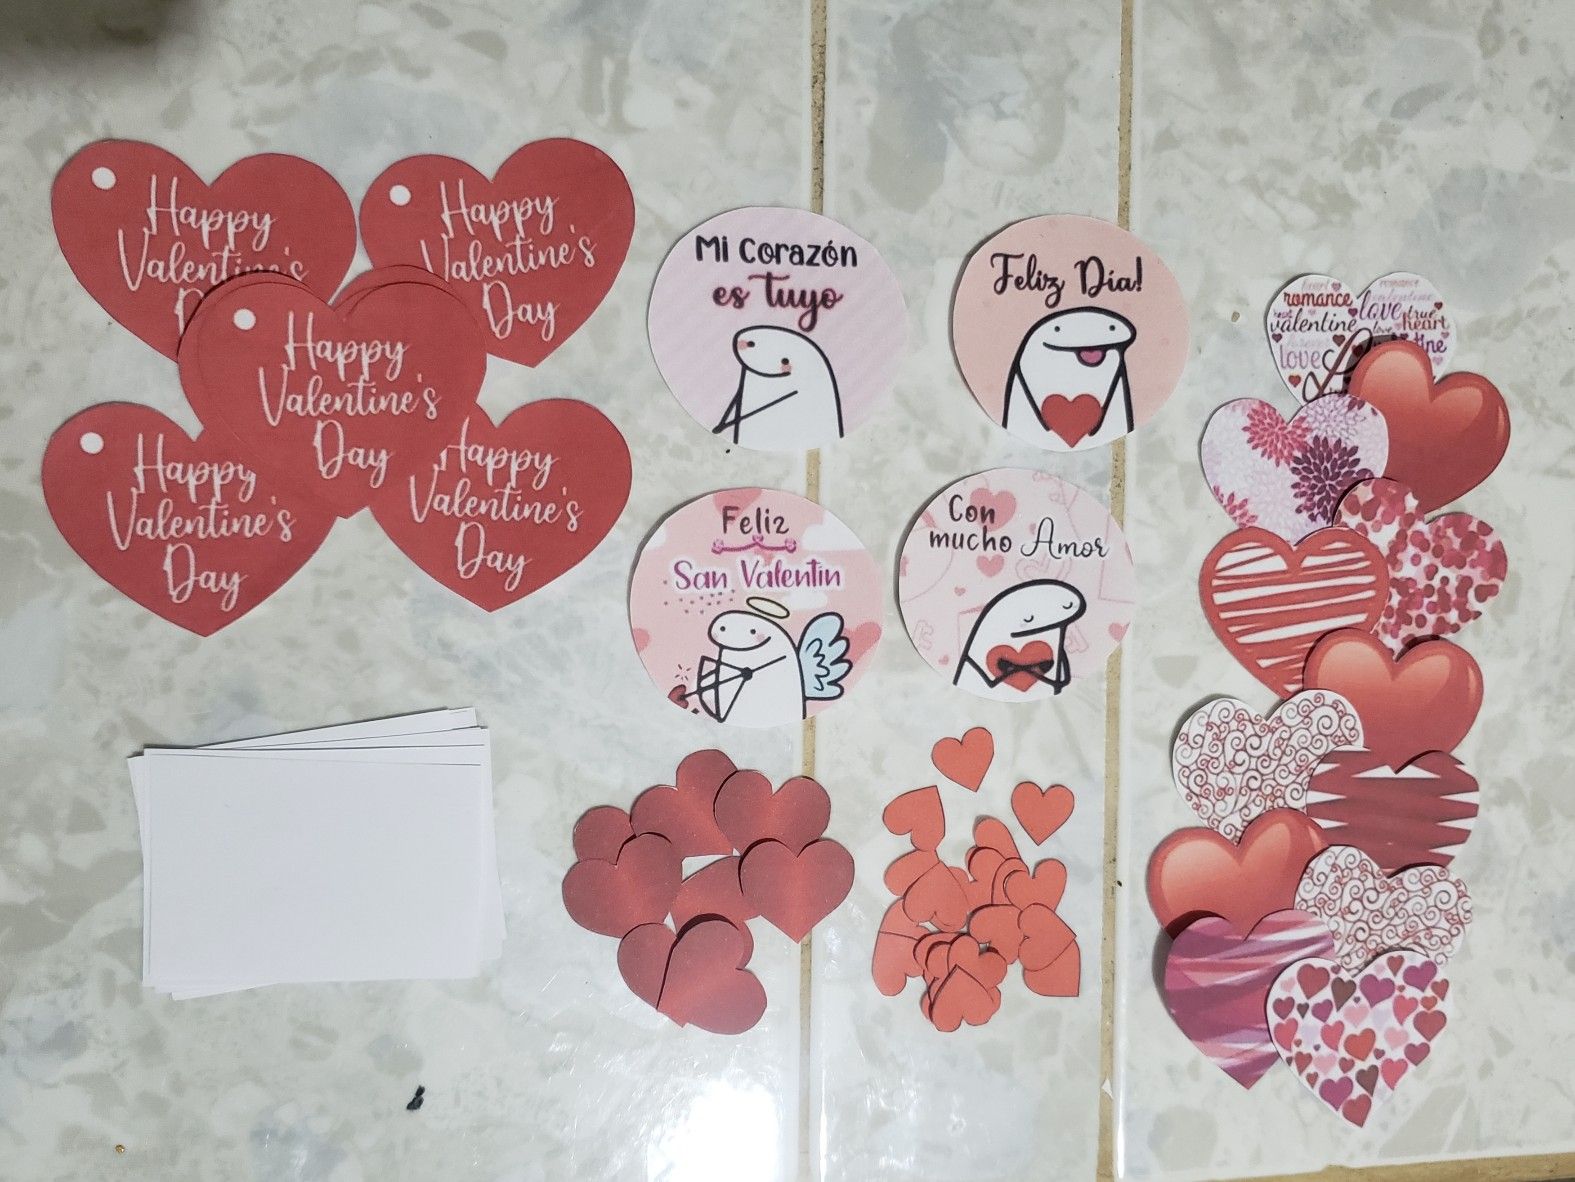
- Corazones impresos // Print hearts
- Stickers de Flork impresos // Print Flork stickers
- Pegatinas amarillas // Yellow stickers
- Tijeras // Scissors
- Goma de pegar // Glue
- Lapicero negro // Black pen

Paso a paso // Step by step
A continuación les mostraré como hice las tarjetas siguiendo unos pocos pasos. Al principio no tenía idea de cómo iban a ser, pero me dejé llevar por mi instinto y resultaron muy bonitas.
Next I will show you how I made the cards following a few steps. At first I had no idea what they were going to look like, but I went with my instinct and they turned out beautifully.

Paso 1 // Step 1
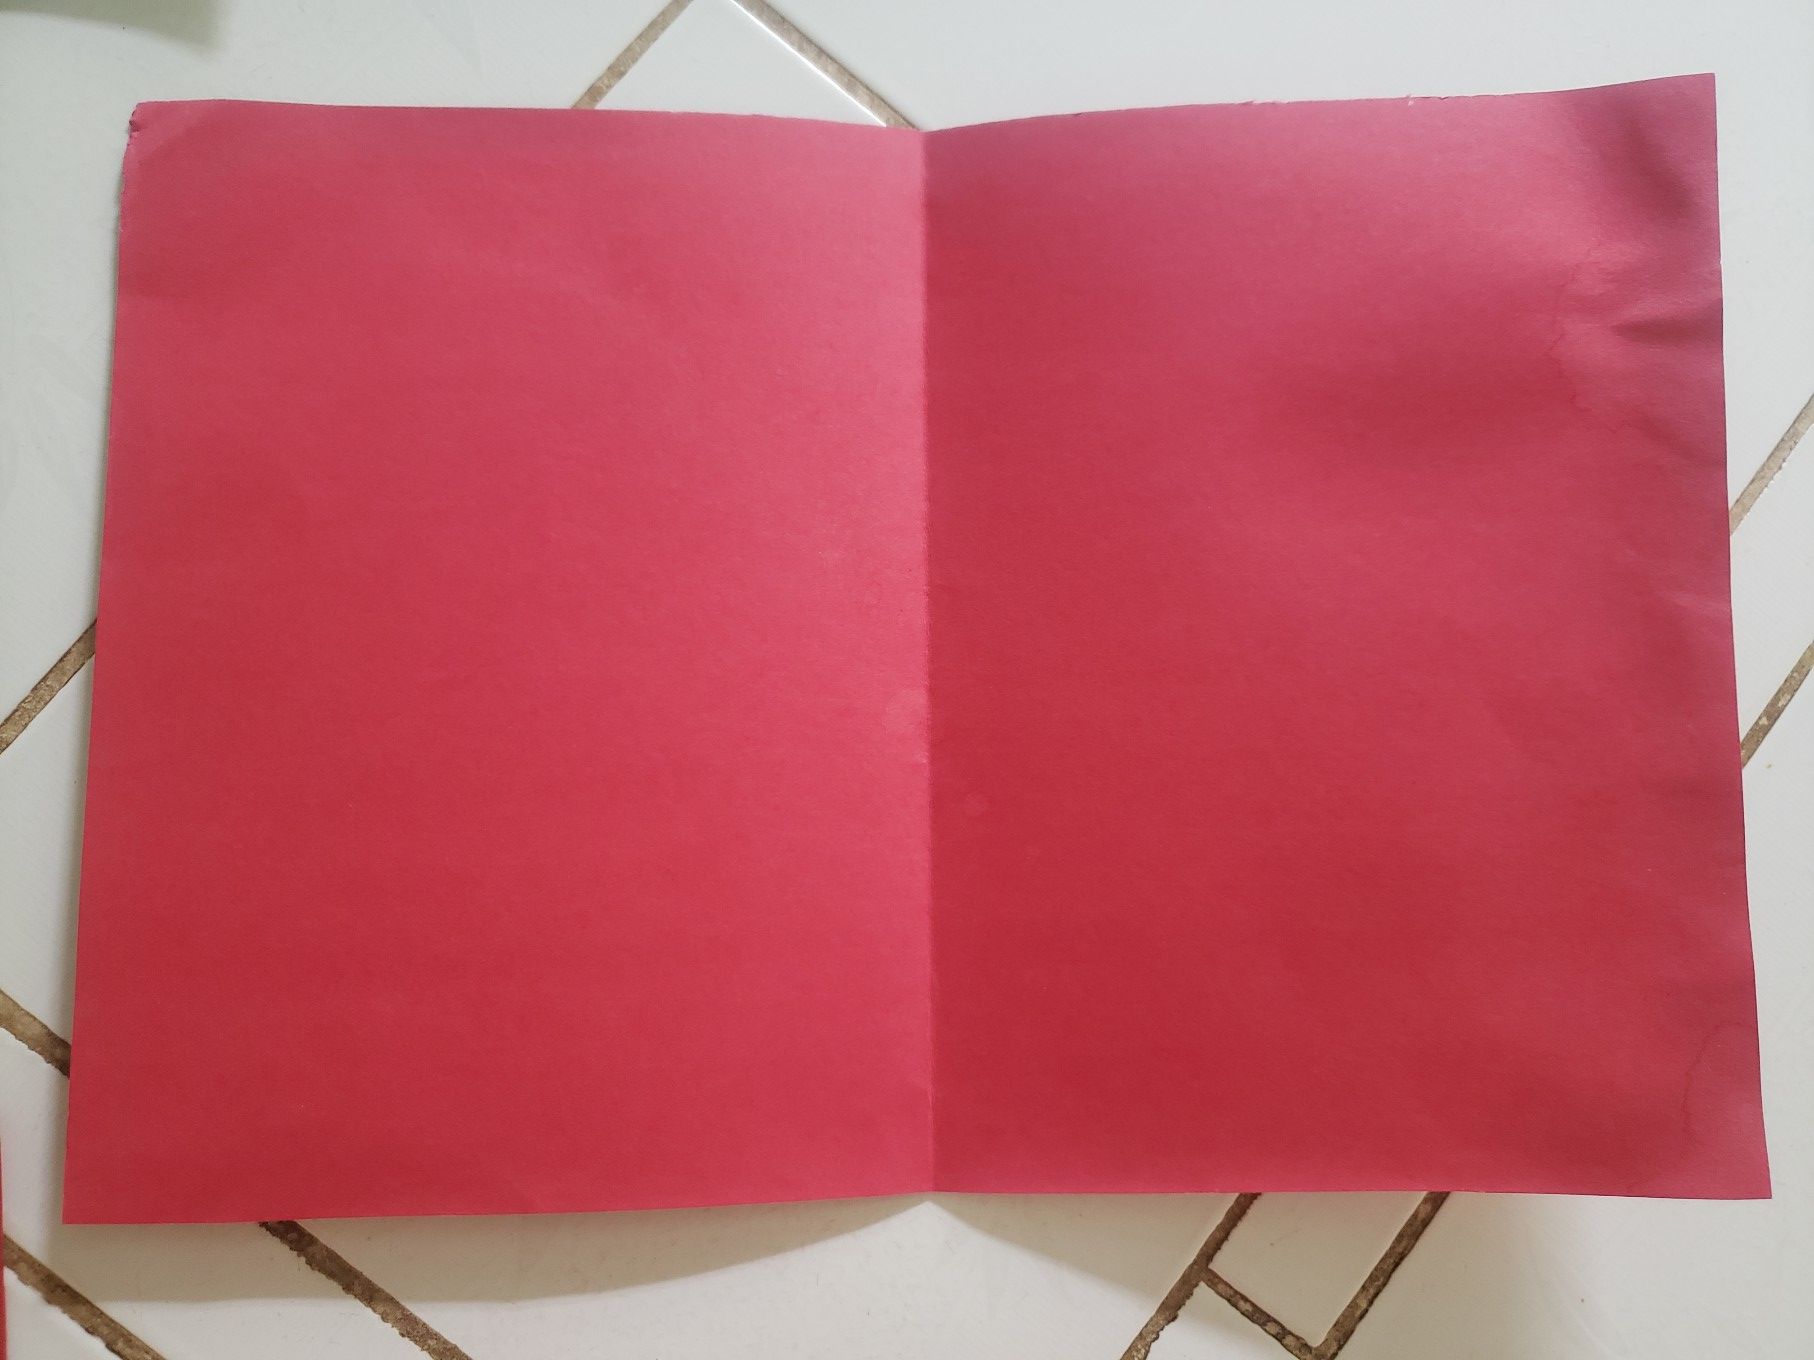
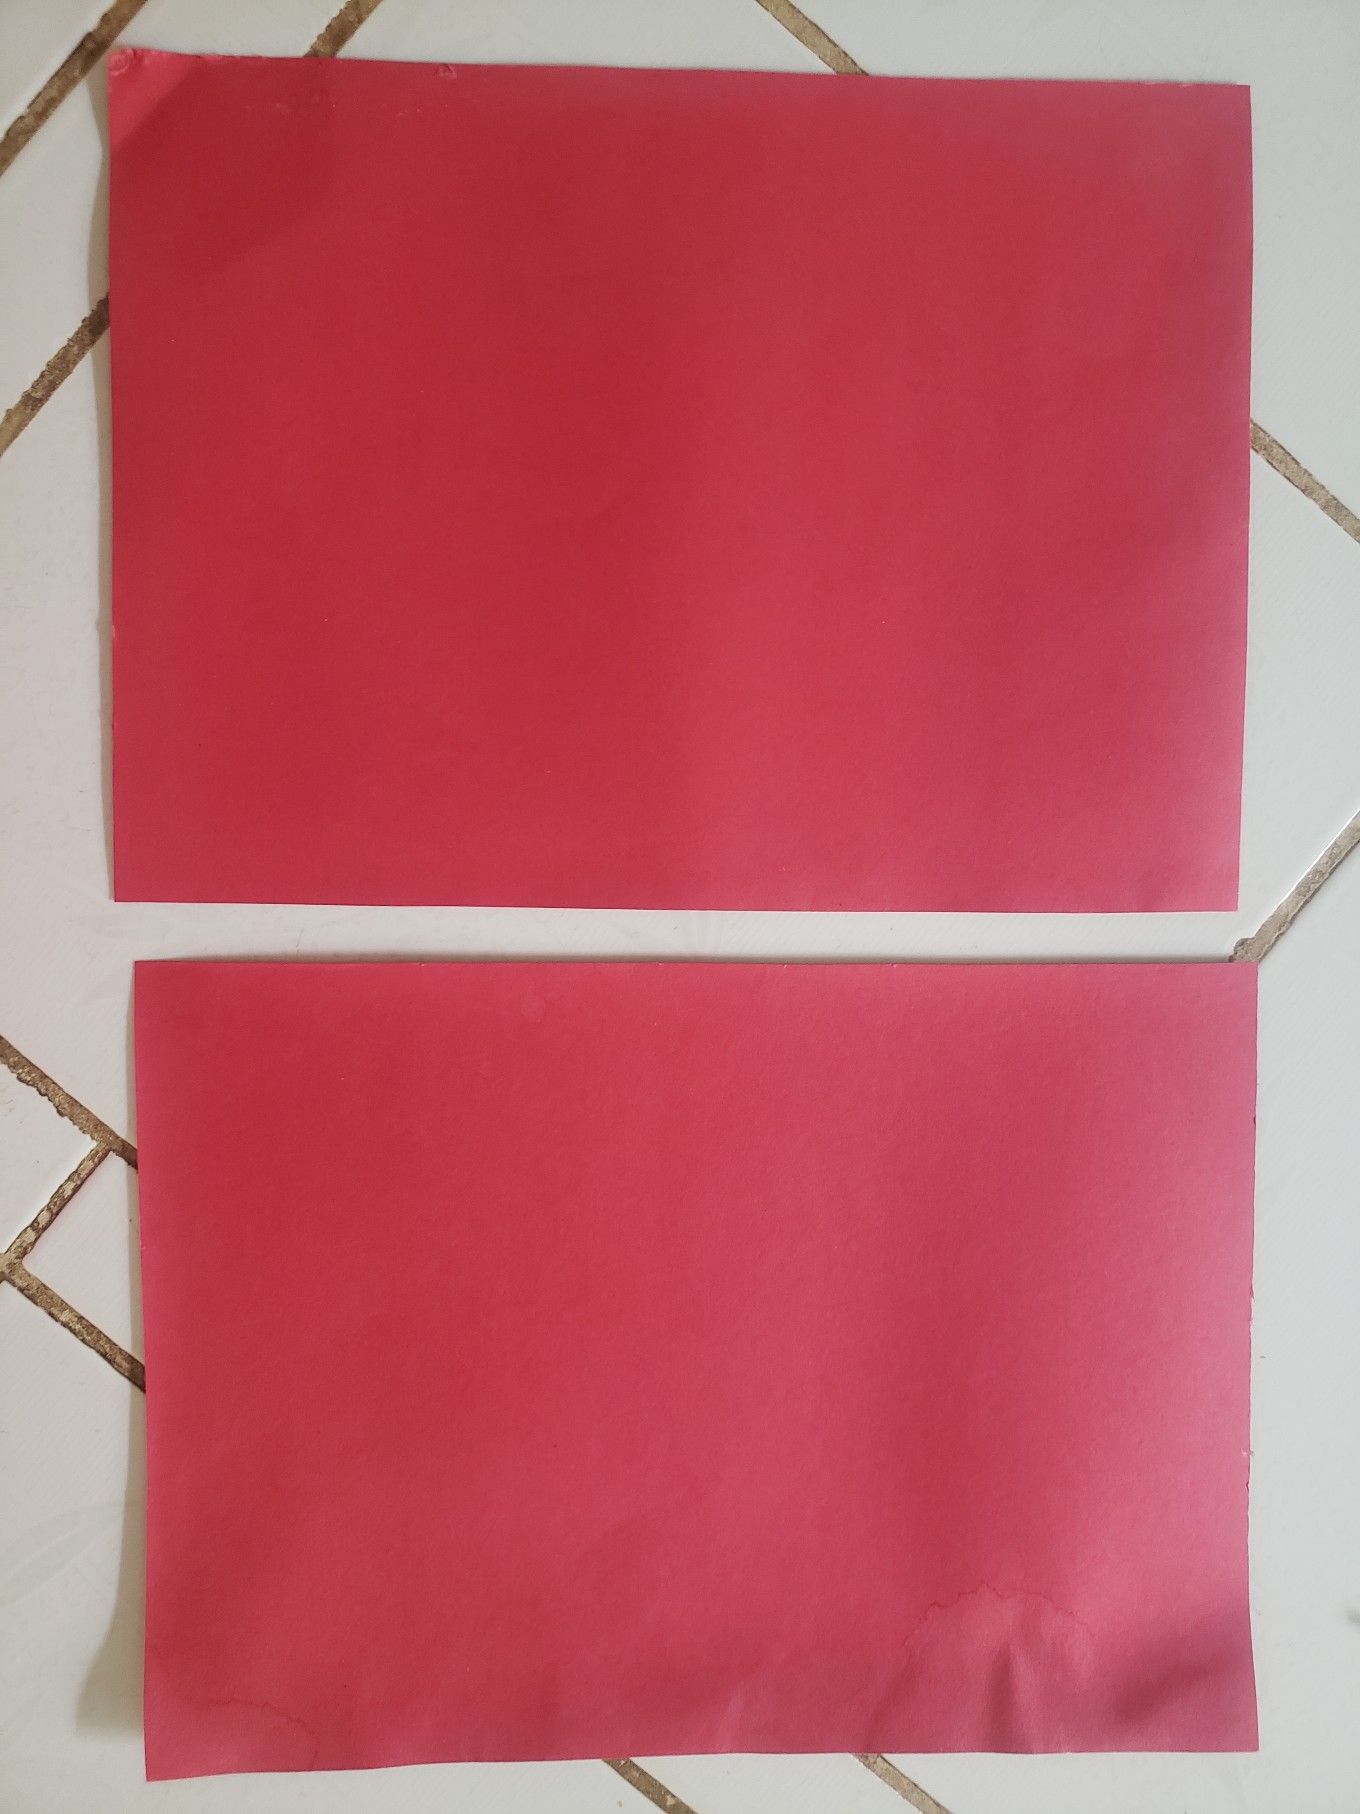
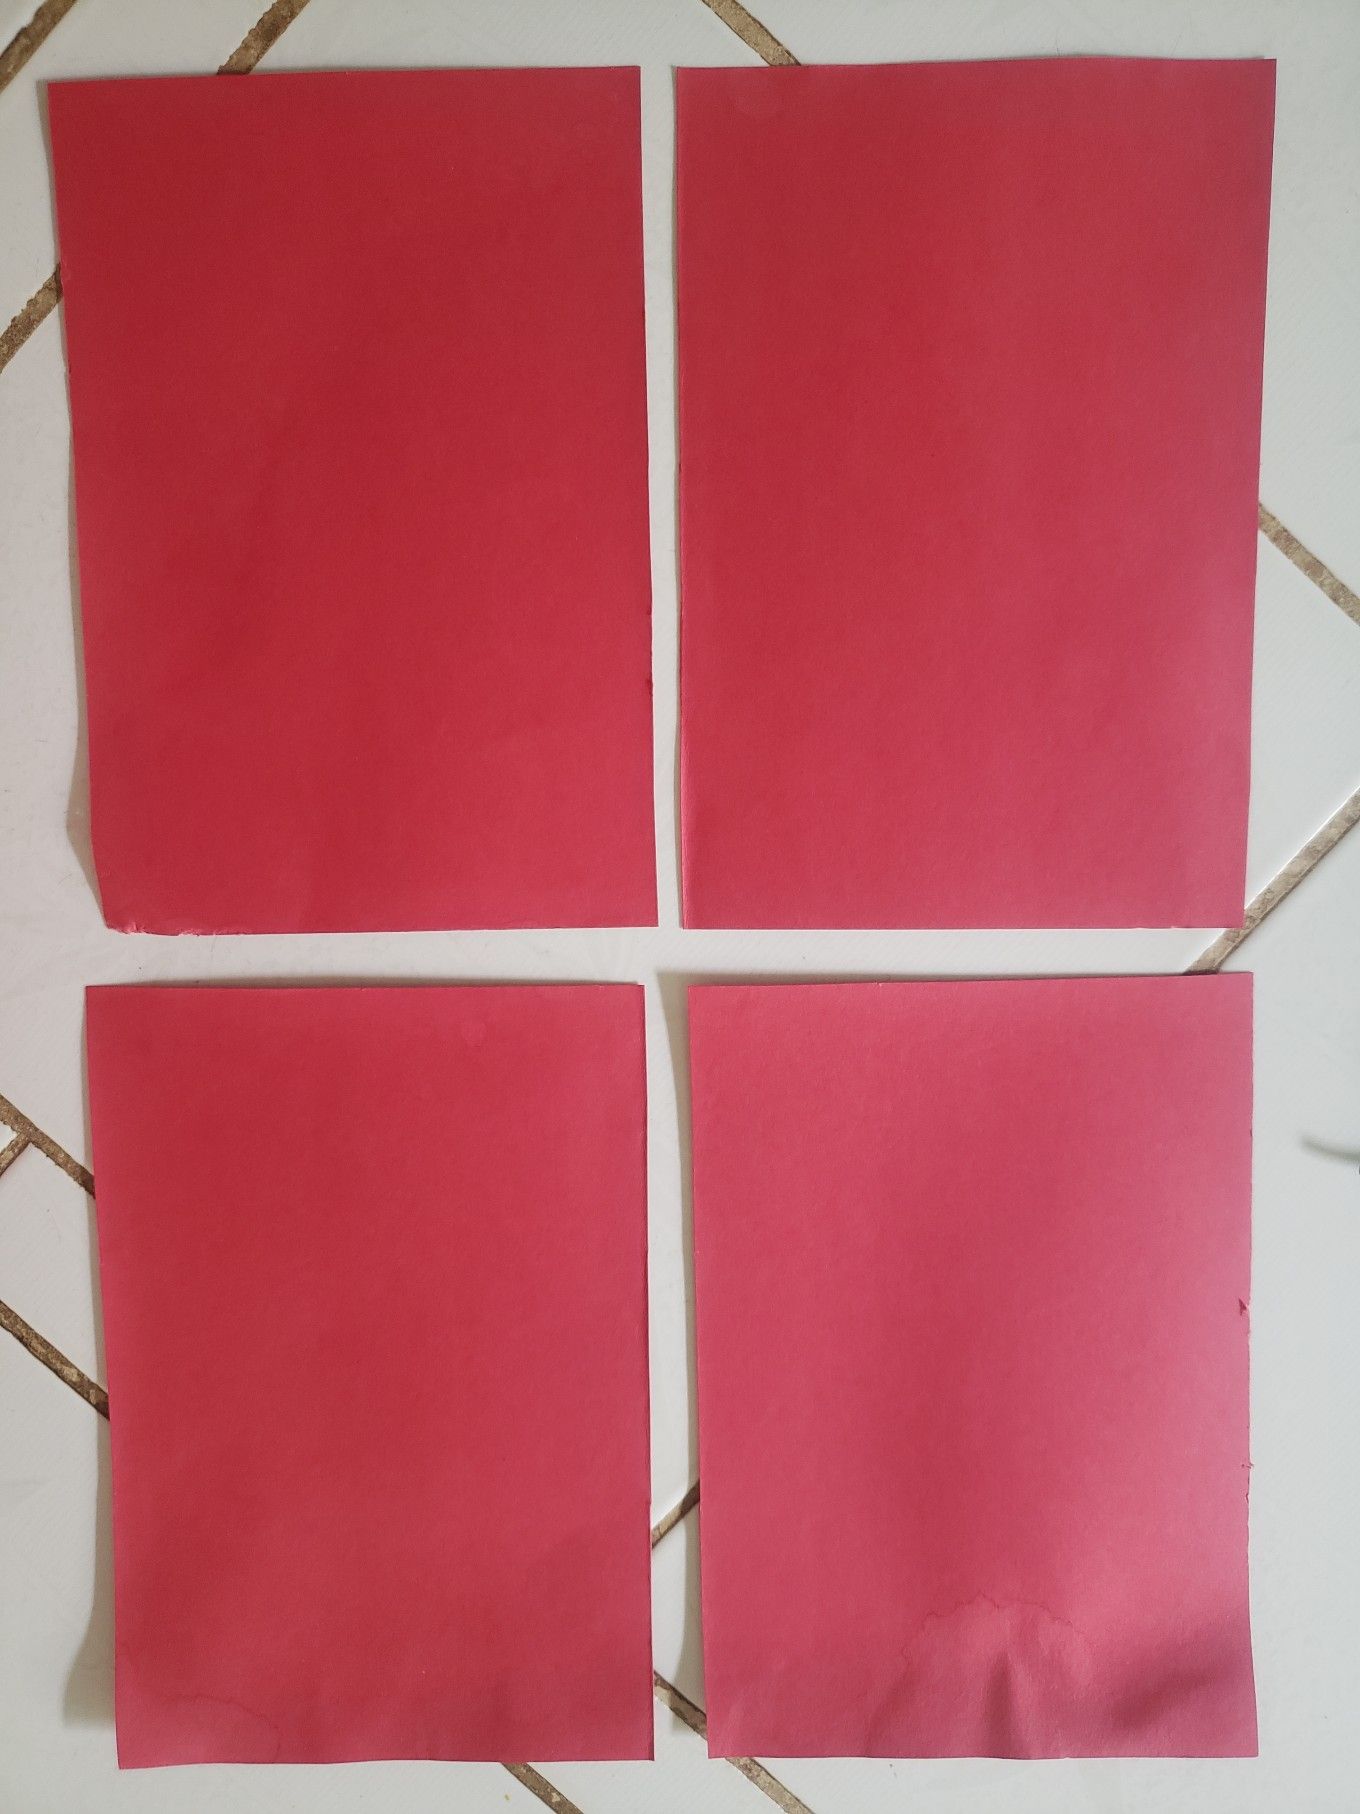
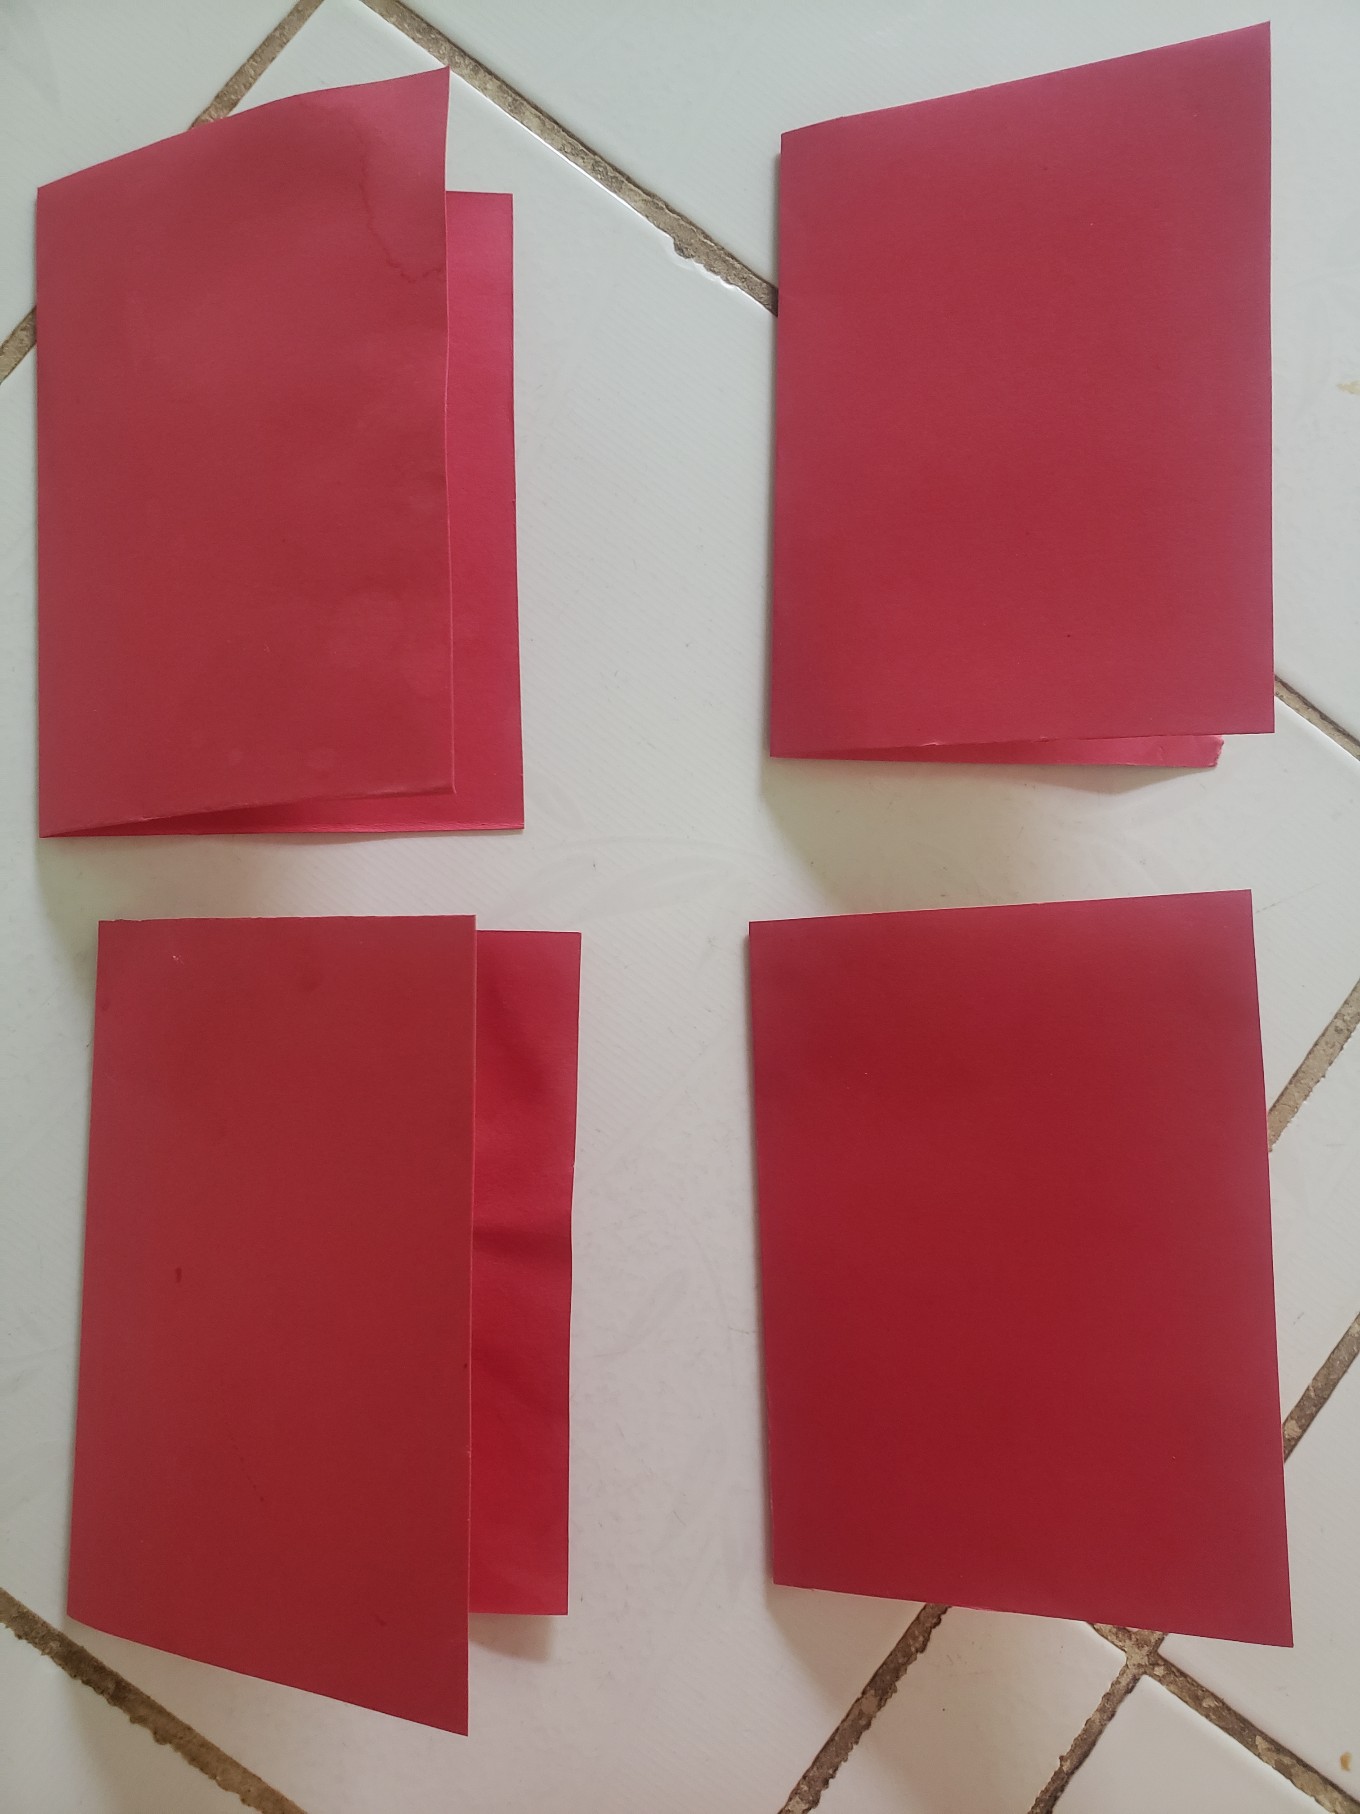
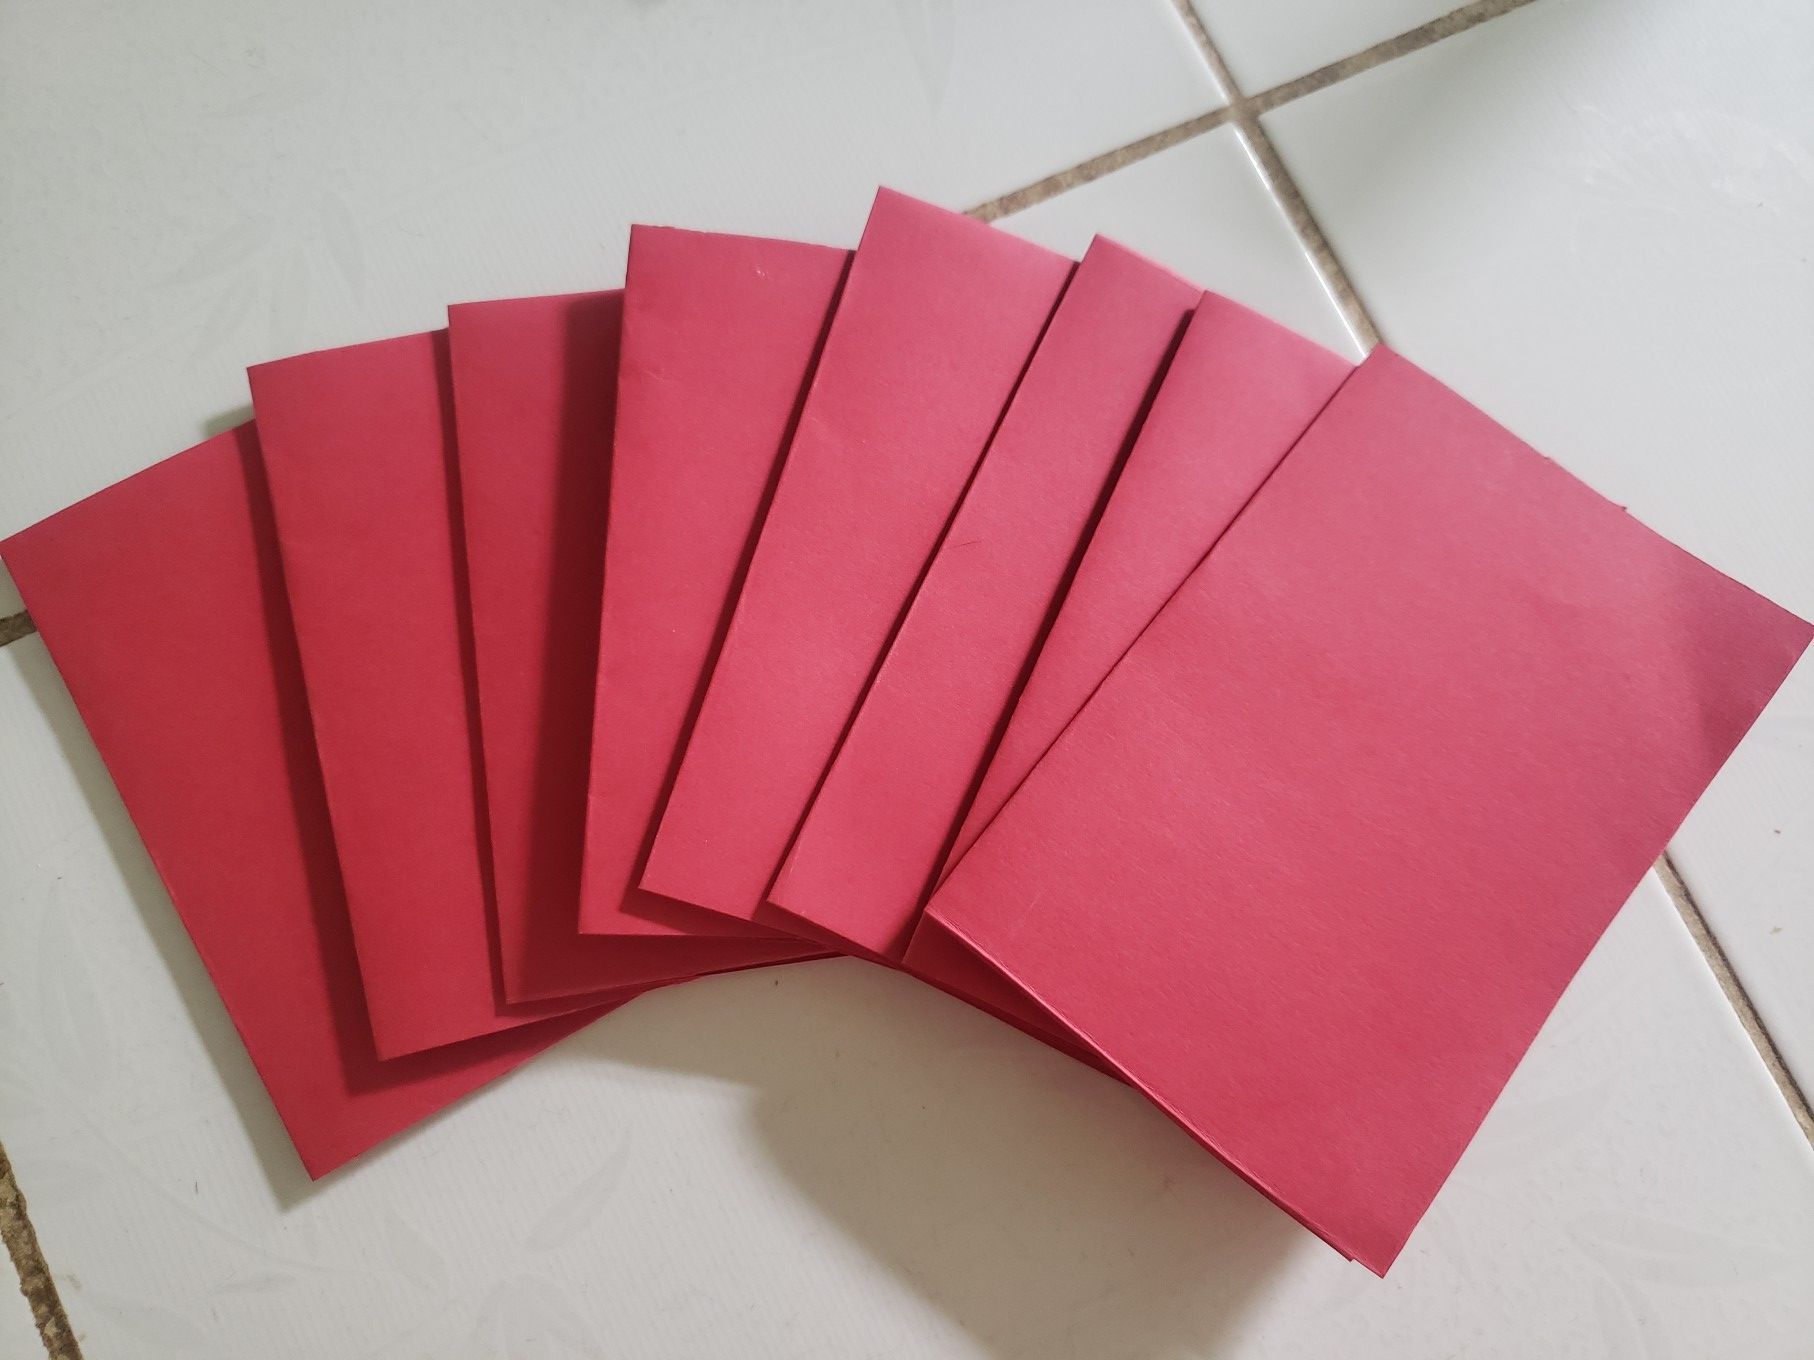
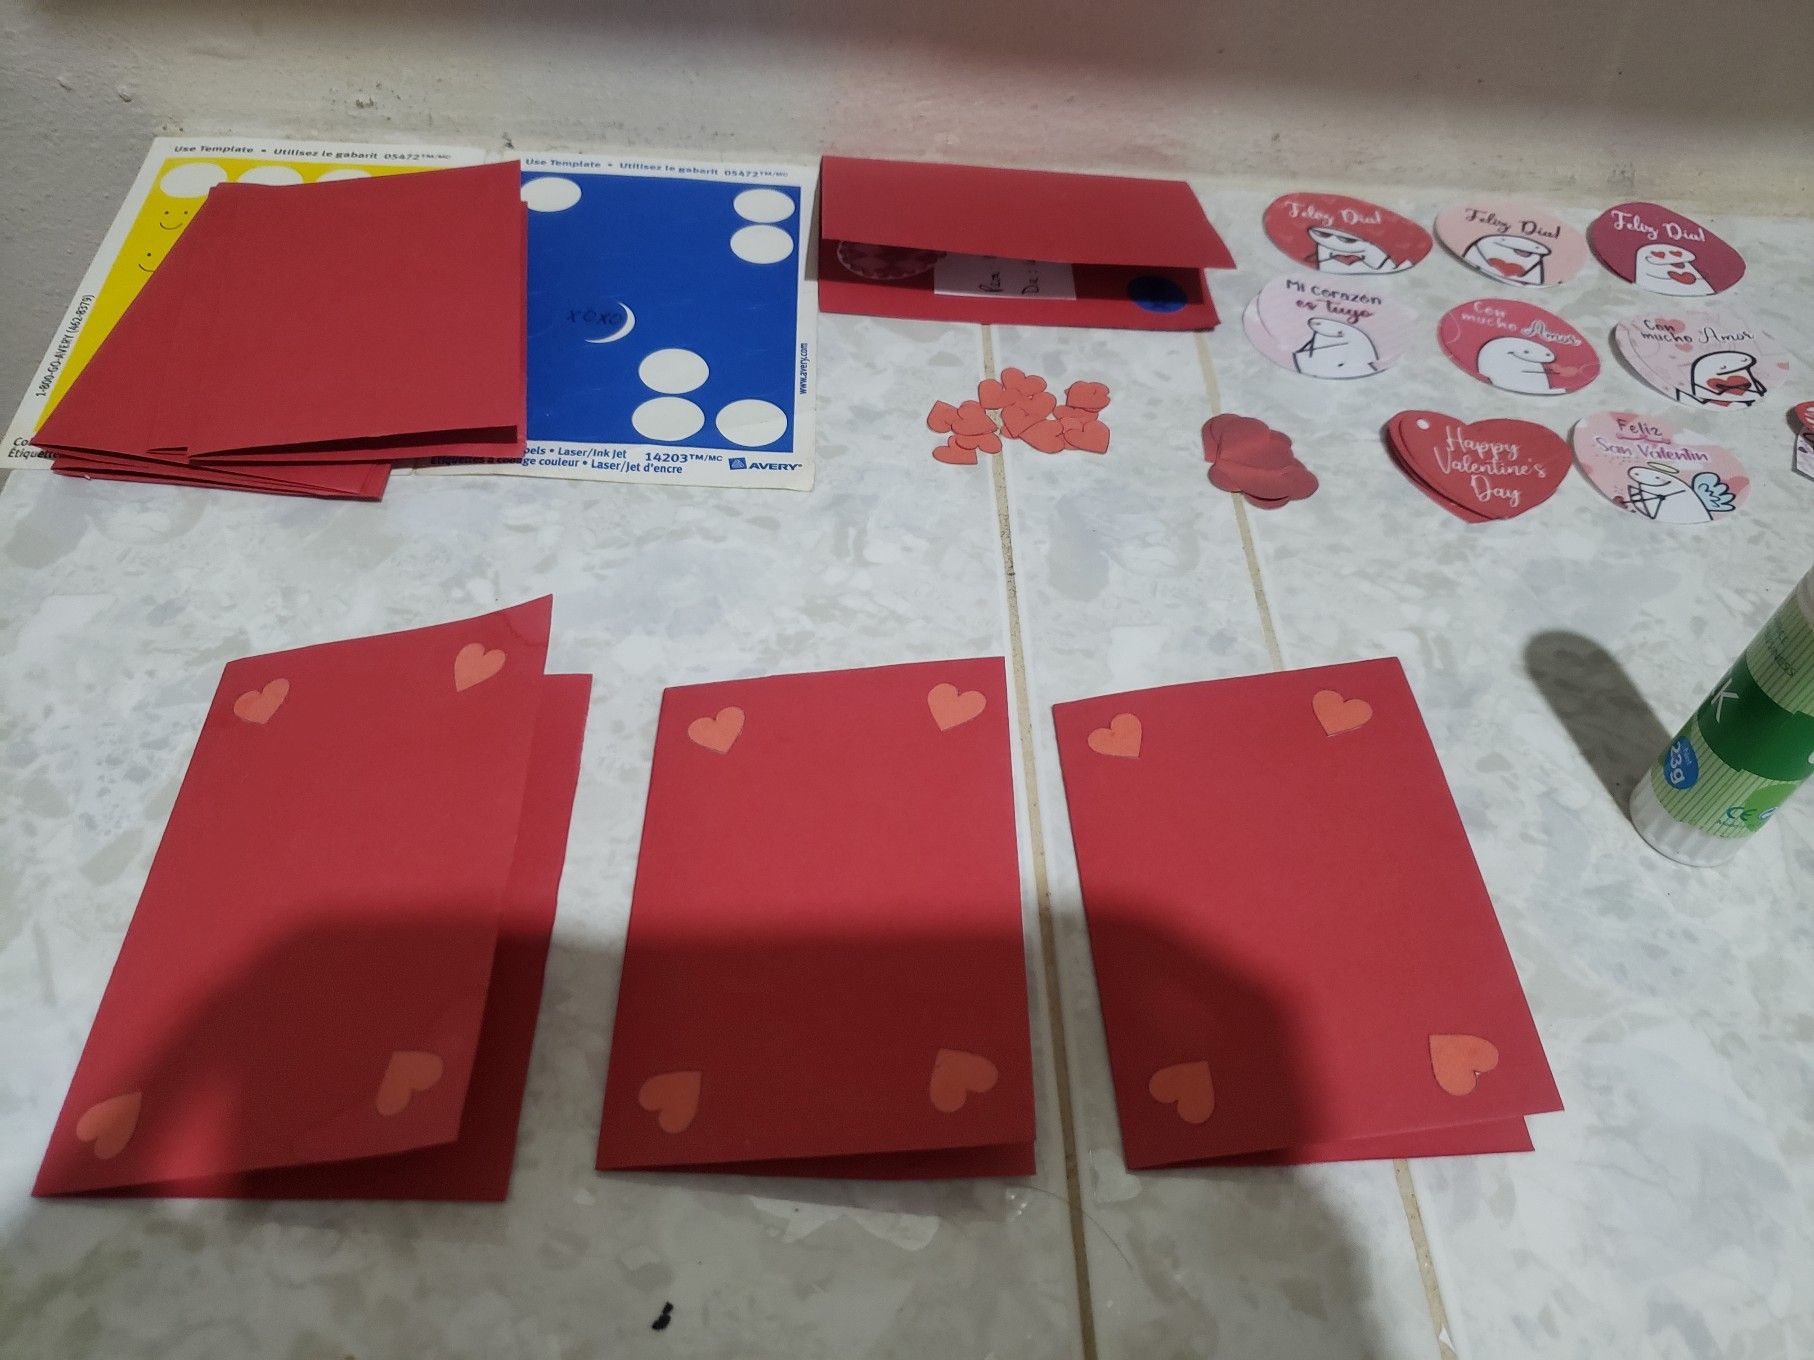
Doblamos la cartulina roja a la mitad y cortamos. A su vez, cada mitad la cortamos en 4 partes para luego doblarlas en forma de tarjetas. De esta forma tendremos 8 tarjetas para decorar.
We fold the red cardboard in half and cut. In turn, we cut each half into 4 parts and then fold them in the shape of cards. In this way we will have 8 cards to decorate.
 |  |  |
|---|
Paso 2 // Step 2
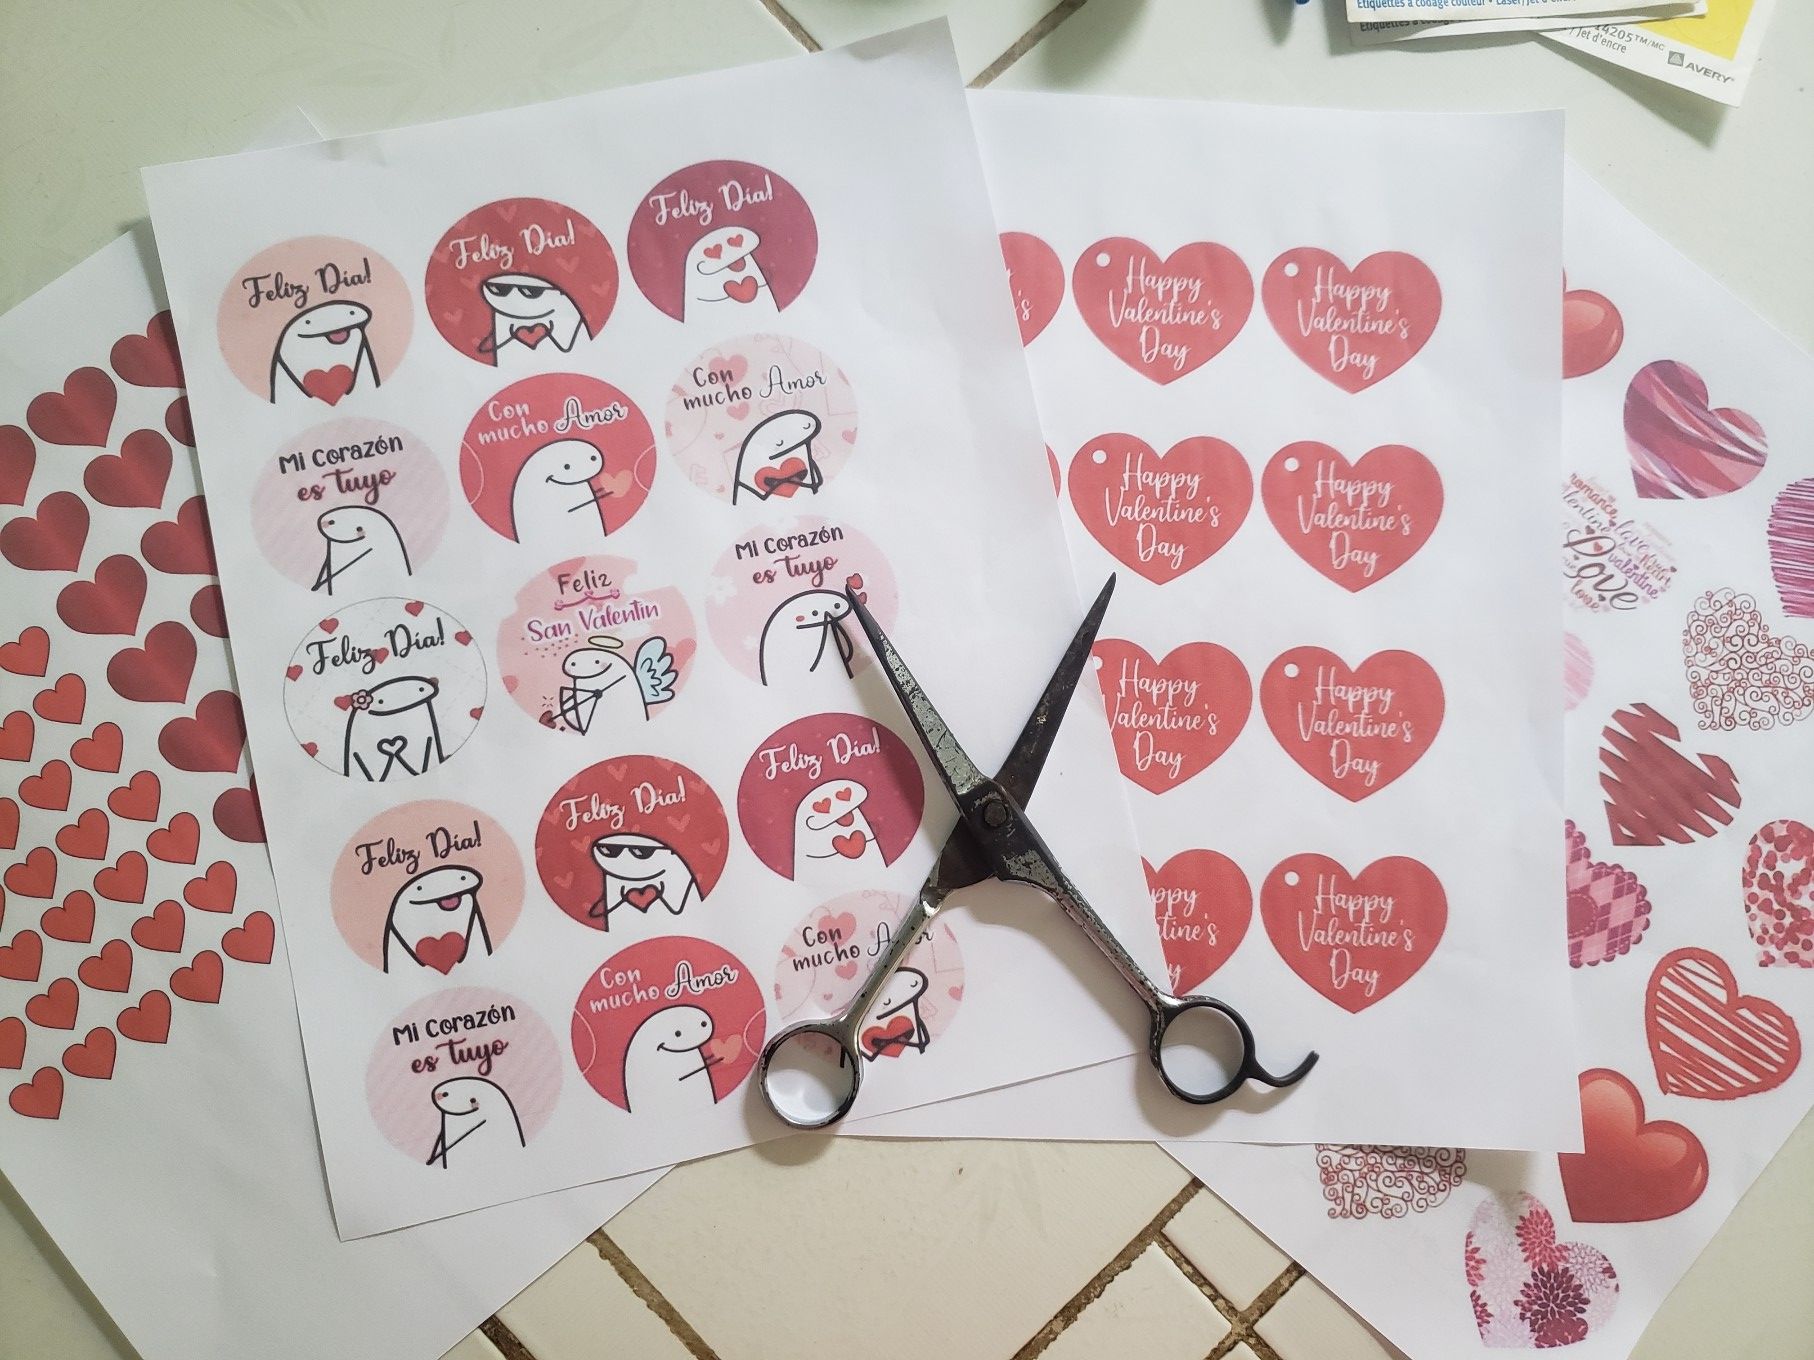
Lo siguiente es recortar todos los corazones y figuras que imprimí, además de varios rectángulos de papel blanco. Todo esto lo vamos a utilizar en la decoración de las tarjetas.
The next step is to cut out all the hearts and shapes that I printed, plus several rectangles of white paper. We are going to use all of this to decorate the cards.
Paso 3 // Step 3
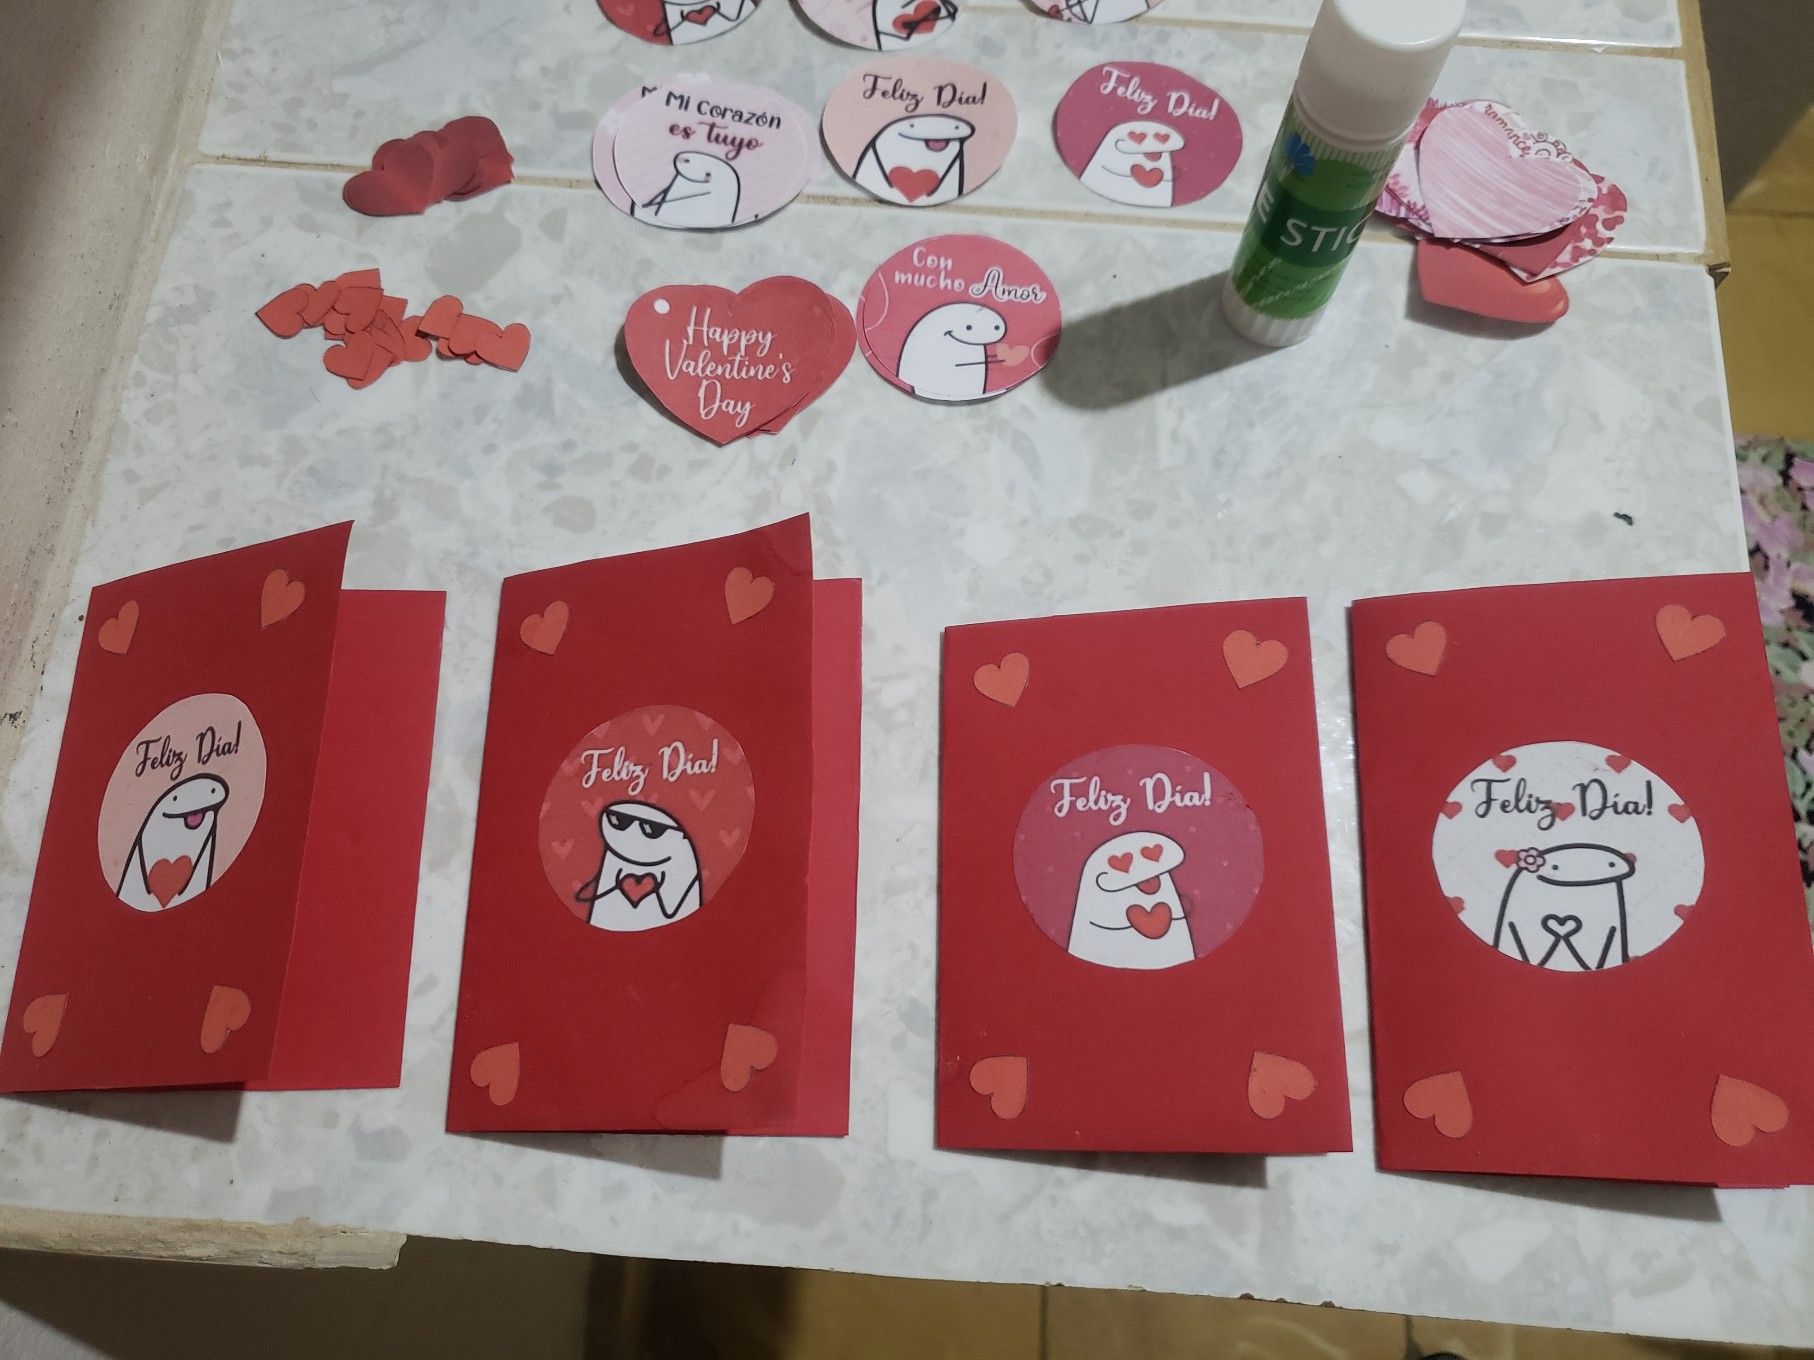
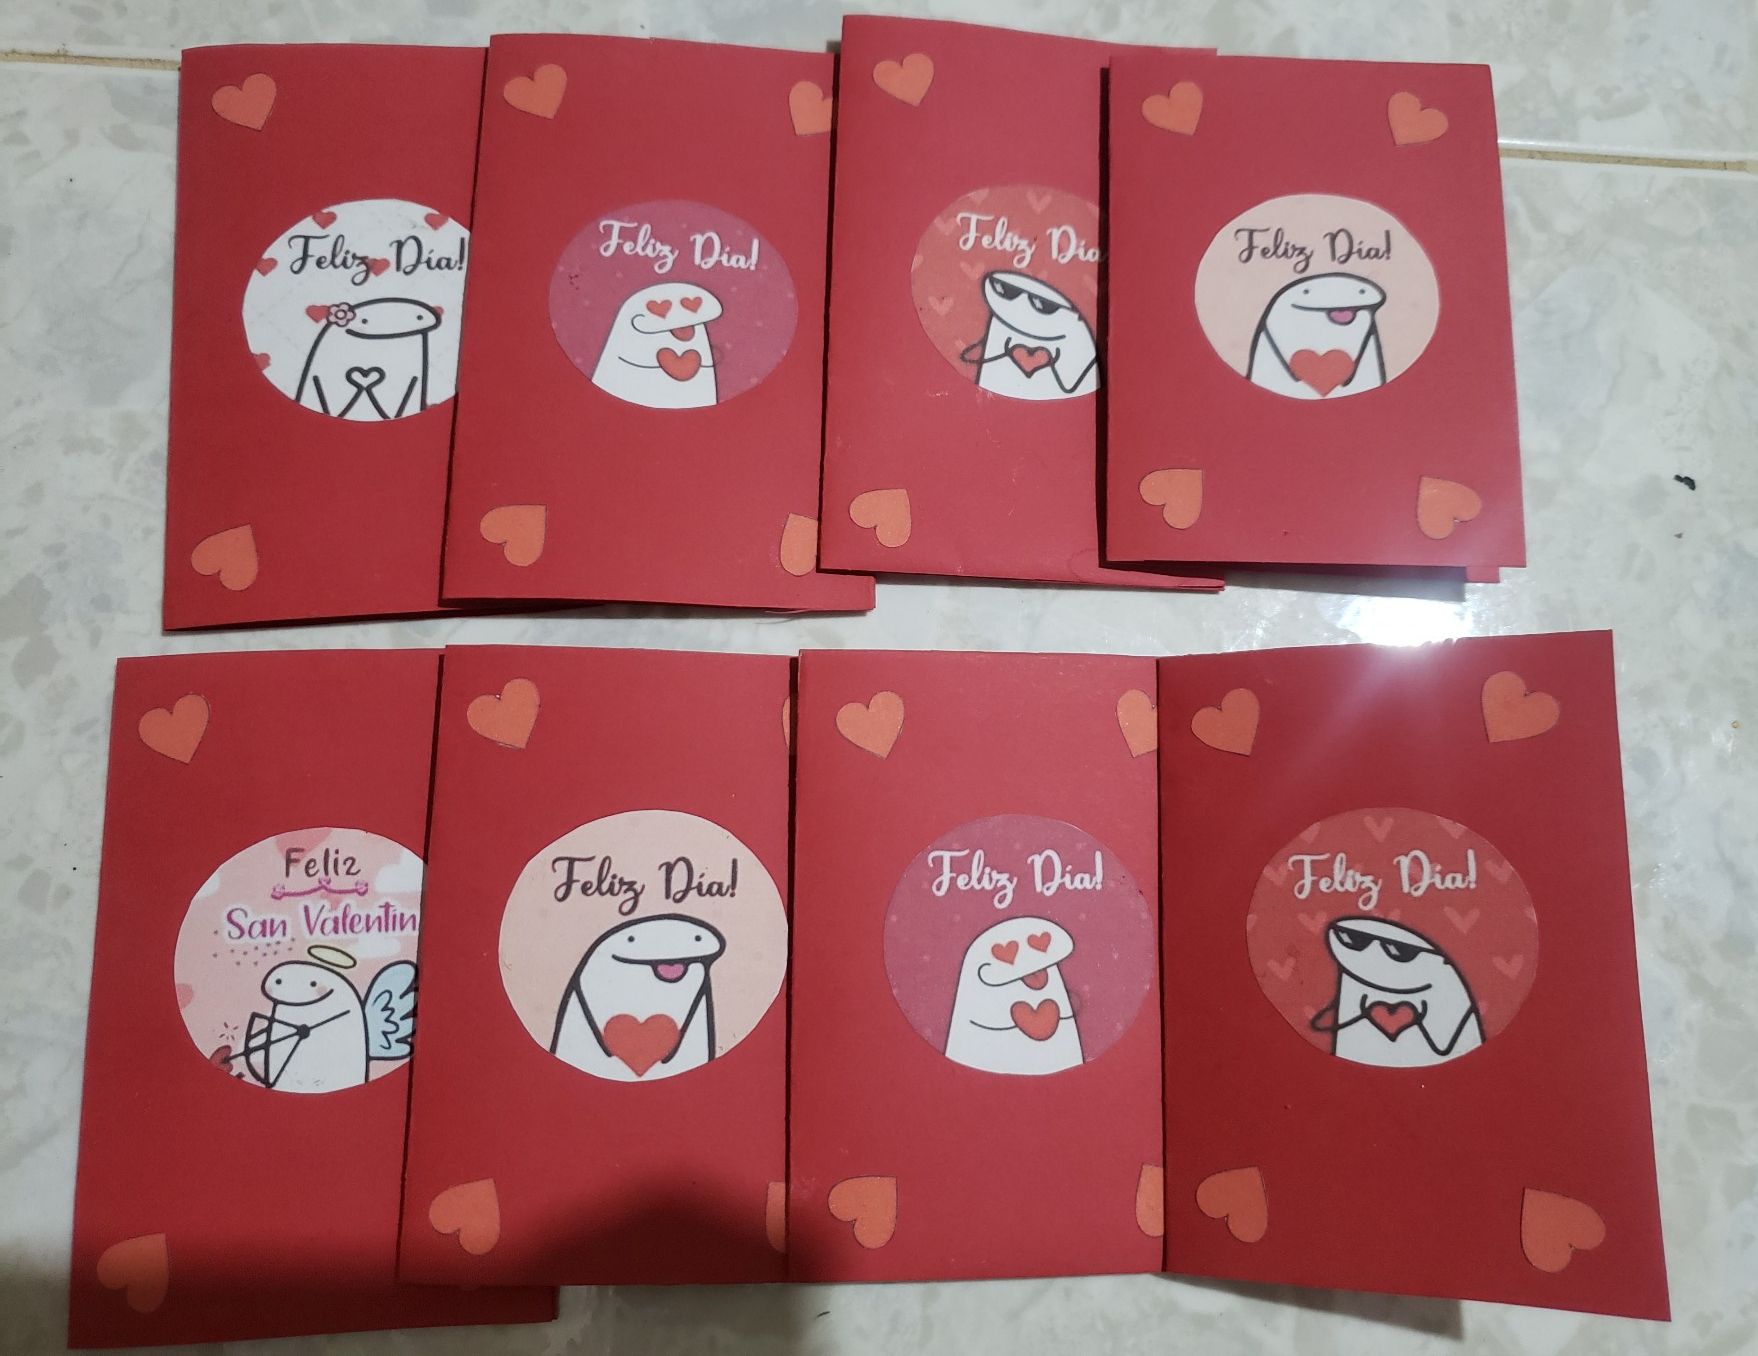
En este paso vamos a decorar la portada de nuestras tarjetas. Empecé pegando unos pequeños corazones en las cuatro esquinas y en el medio de cada una pegué un sticker de Flork, pues me parecen muy chulos y todos traen el mensaje de "Feliz Día", el cuál es el motivo de las tarjetas, felicitar a mis seres queridos en este día tan especial y desearles un feliz día.
In this step we are going to decorate the cover of our cards. I started by gluing small hearts in the four corners and in the middle of each one I glued a Flork sticker, because I think they are very cool and they all have the message "Happy Day", which is the reason for the cards, to congratulate my loved ones on this special day and wish them a happy day.
Paso 4 // Step 4
A continuación pasamos a decorar el interior de nuestras tarjetas, que como les dije al principio no sabía exactamente que hacer con todos esos materiales o como me iba a quedar el diseño, así que simplemente me dejé llevar por mi instinto y disfruté de este proceso creativo. Por supuesto, como es un regalo quería que me quedara todo bien bonito.
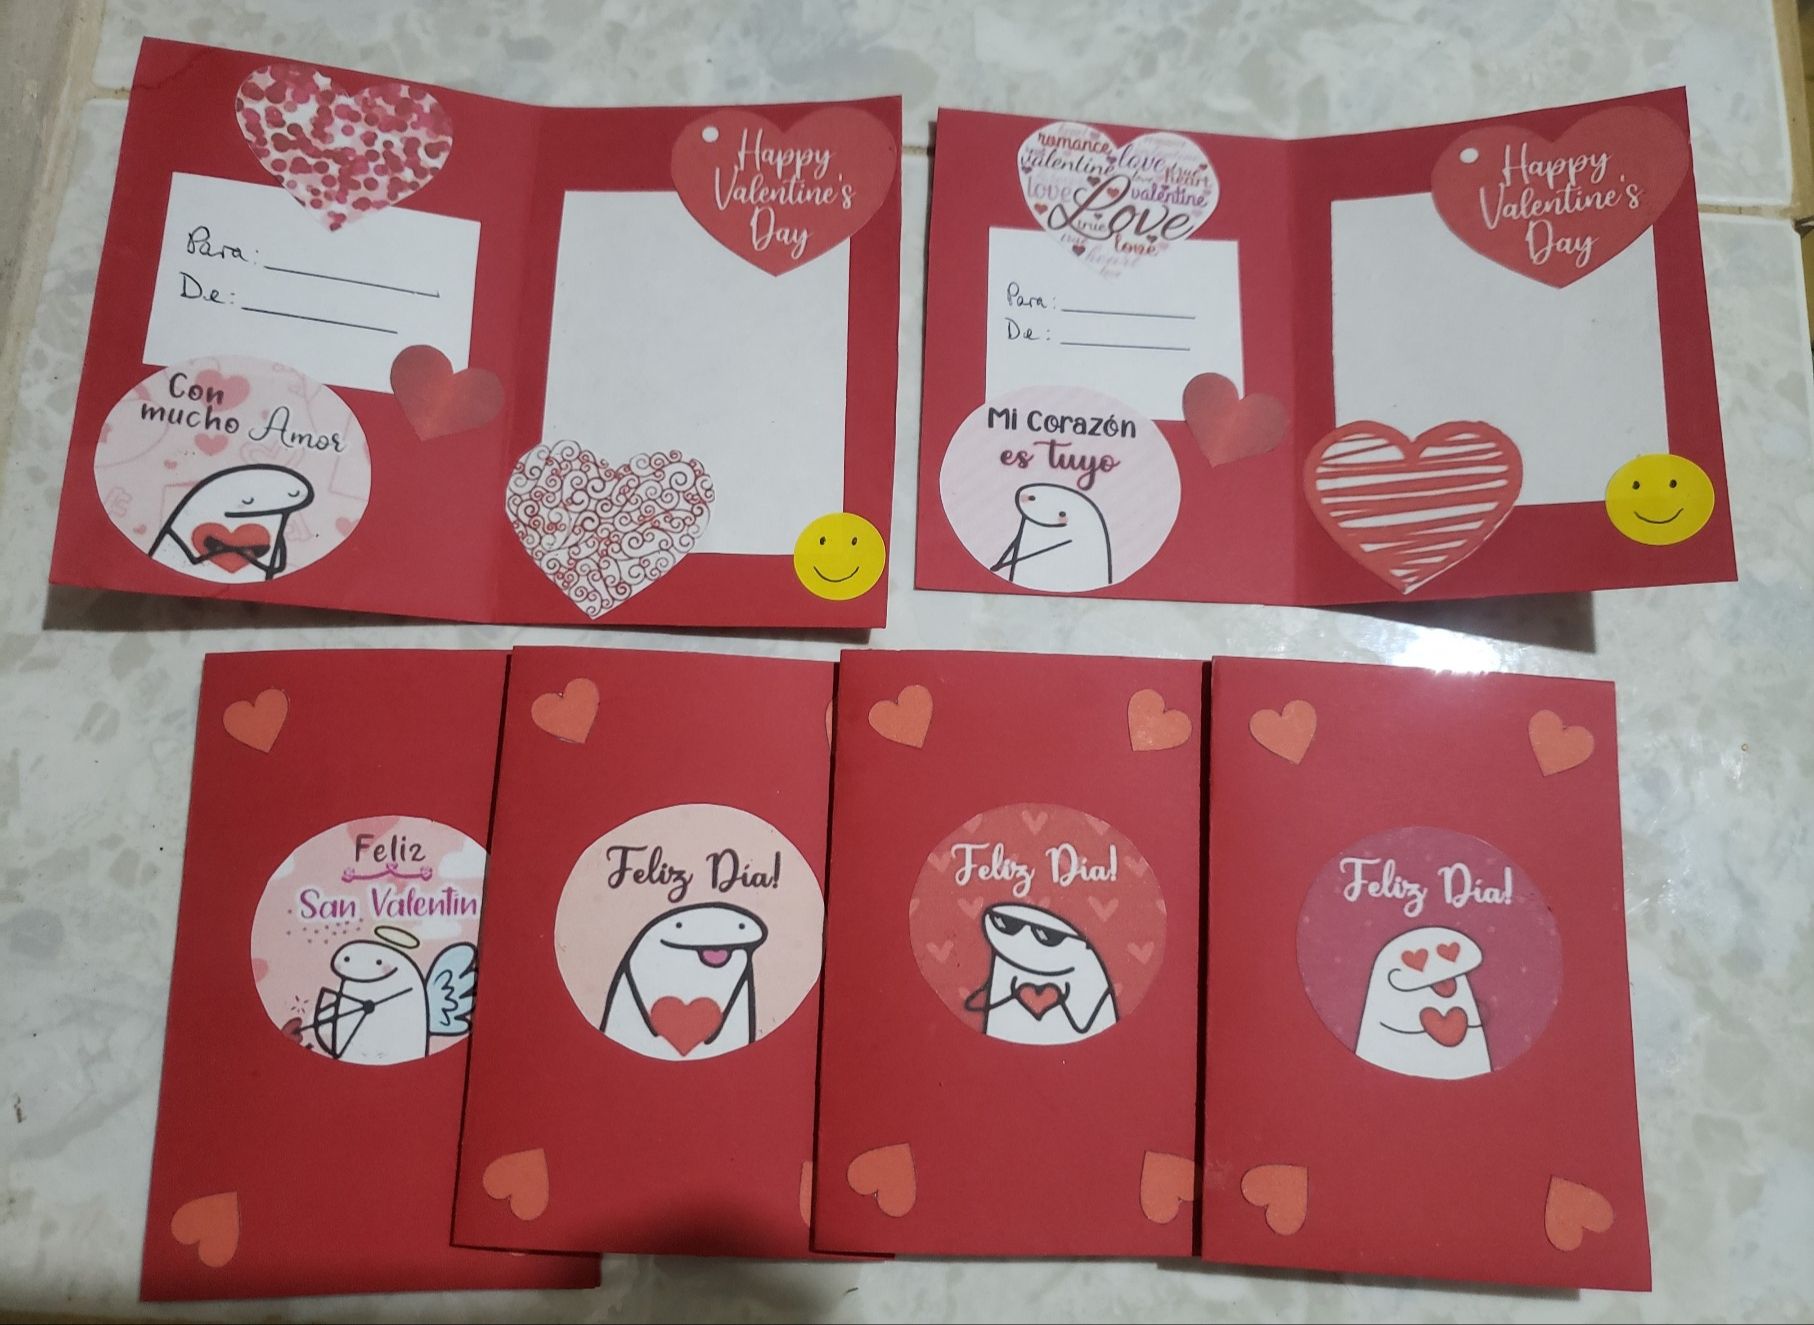
Lo primero que hice fue pegar los rectángulos de papel blanco. En la parte derecha puse el más grande, ya que ahí es donde vamos a escribir nuestro mensaje, puede ser un "Te quiero" o un "Te amo" o algo más extenso si lo prefieres. El de la izquierda es para poner hacia quien va dirigido, o sea, como en una tarjeta postal.
Then we to decorate the inside of our cards, which as I told you at the beginning I didn't know exactly what to do with all those materials or how the design was going to look like, so I just went with my instinct and enjoyed this creative process. Of course, since it's a gift I wanted it to look nice.
The first thing I did was to glue the white paper rectangles. On the right side I put the biggest one, since that is where we are going to write our message, it can be an "I love you" or an "I like you" or something more extensive if you prefer. The one on the left is to put who it is addressed to, that is, as in a postcard.

Luego empezamos a decorarla con los corazones de diferentes tipos y tamaños como mejor nos parezca, esta es la parte más divertida y cada cual puede hacerlo como quiera. Yo traté de usar el mismo diseño en todas las tarjetas, pueden ver que en la parte derecha superior a todas les puse el corazón más grande que dice: "Happy Valentine's Day" y en la parte izquierda seguí usando los stickers de Flork que traían otros mensajitos de amor.
Then we start decorating it with the hearts of different types and sizes as we see fit, this is the most fun part and everyone can do it the way they want. I tried to use the same design on all the cards, you can see that on the upper right side I put the biggest heart that says: "Happy Valentine's Day" and on the left side I kept using the Flork stickers with other love messages.
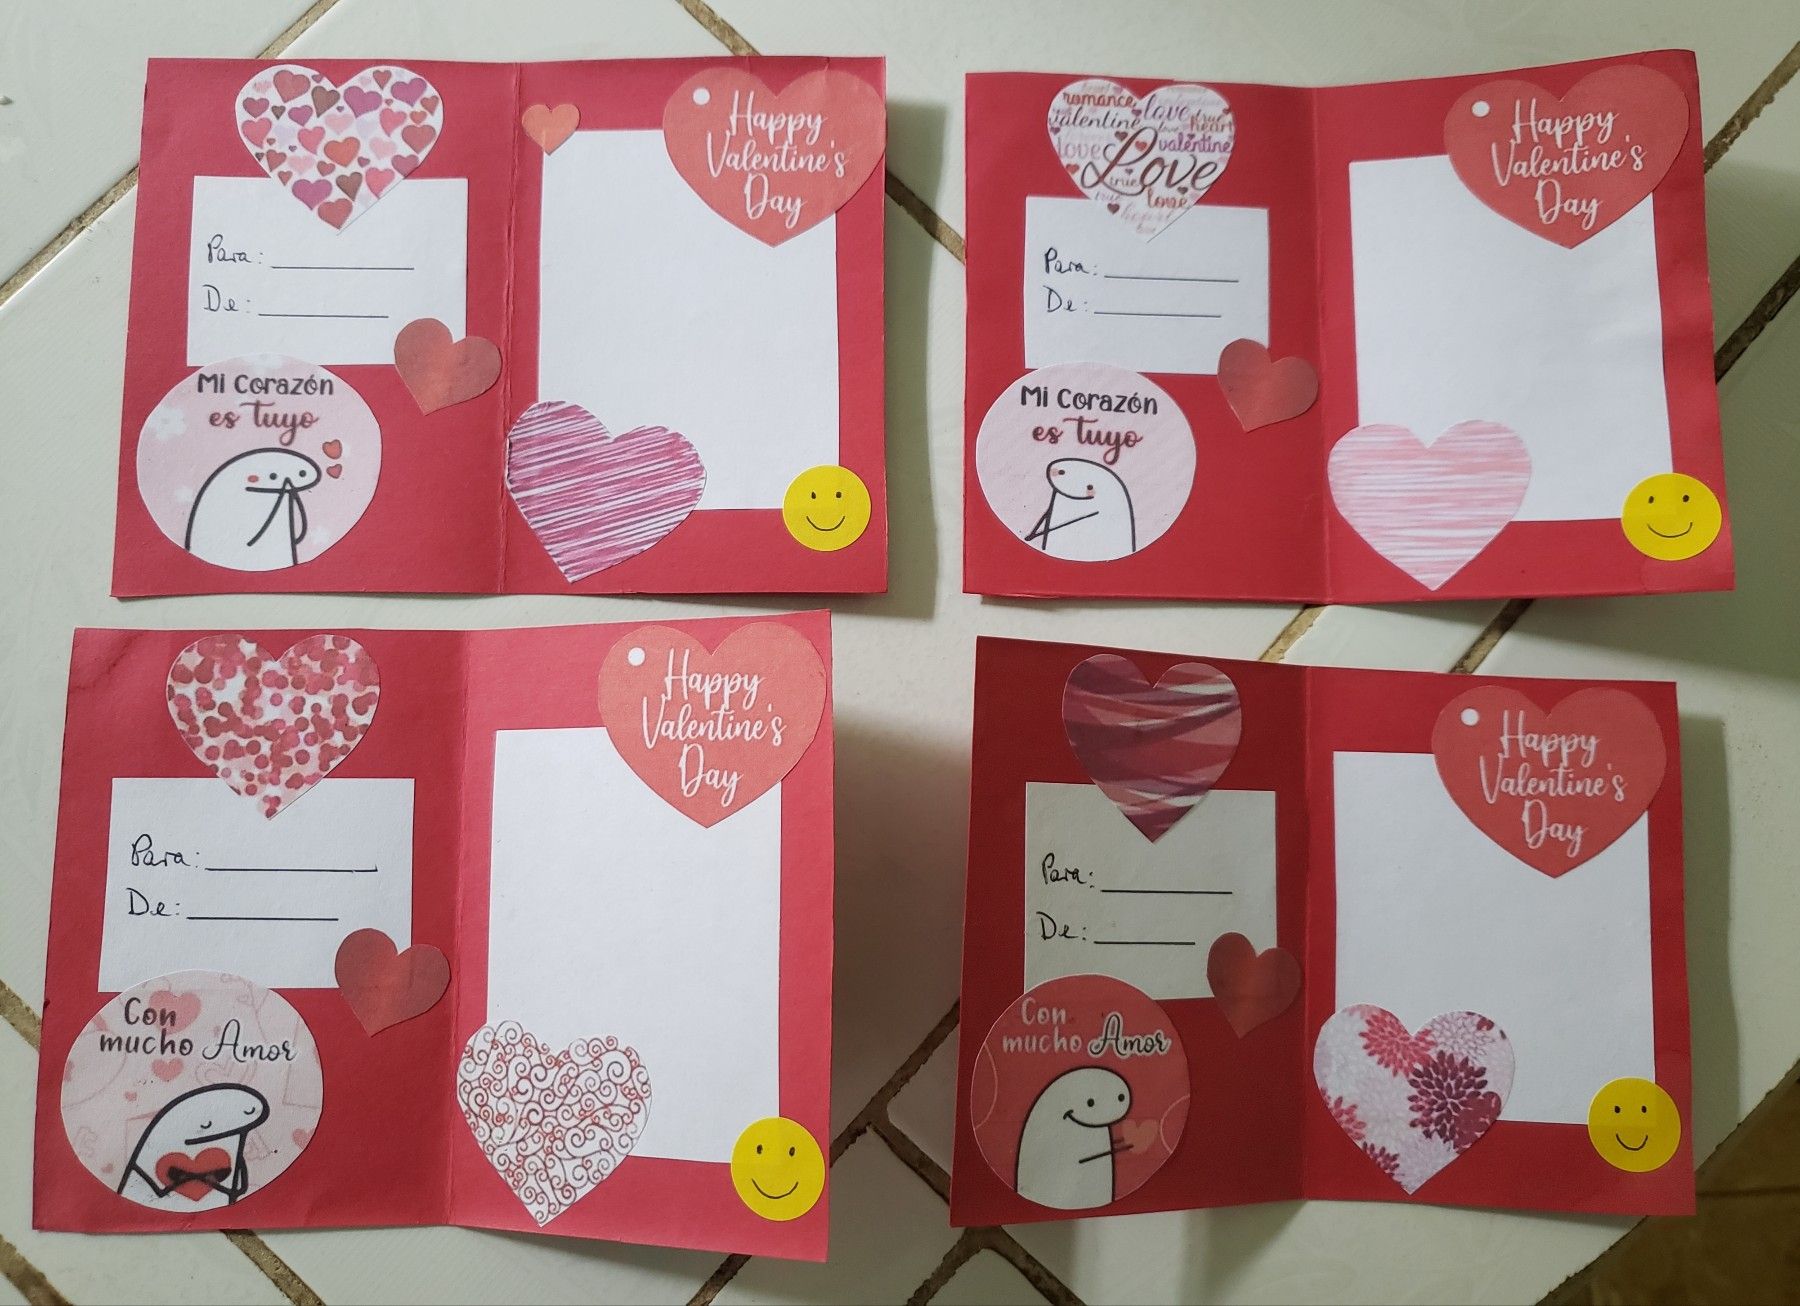
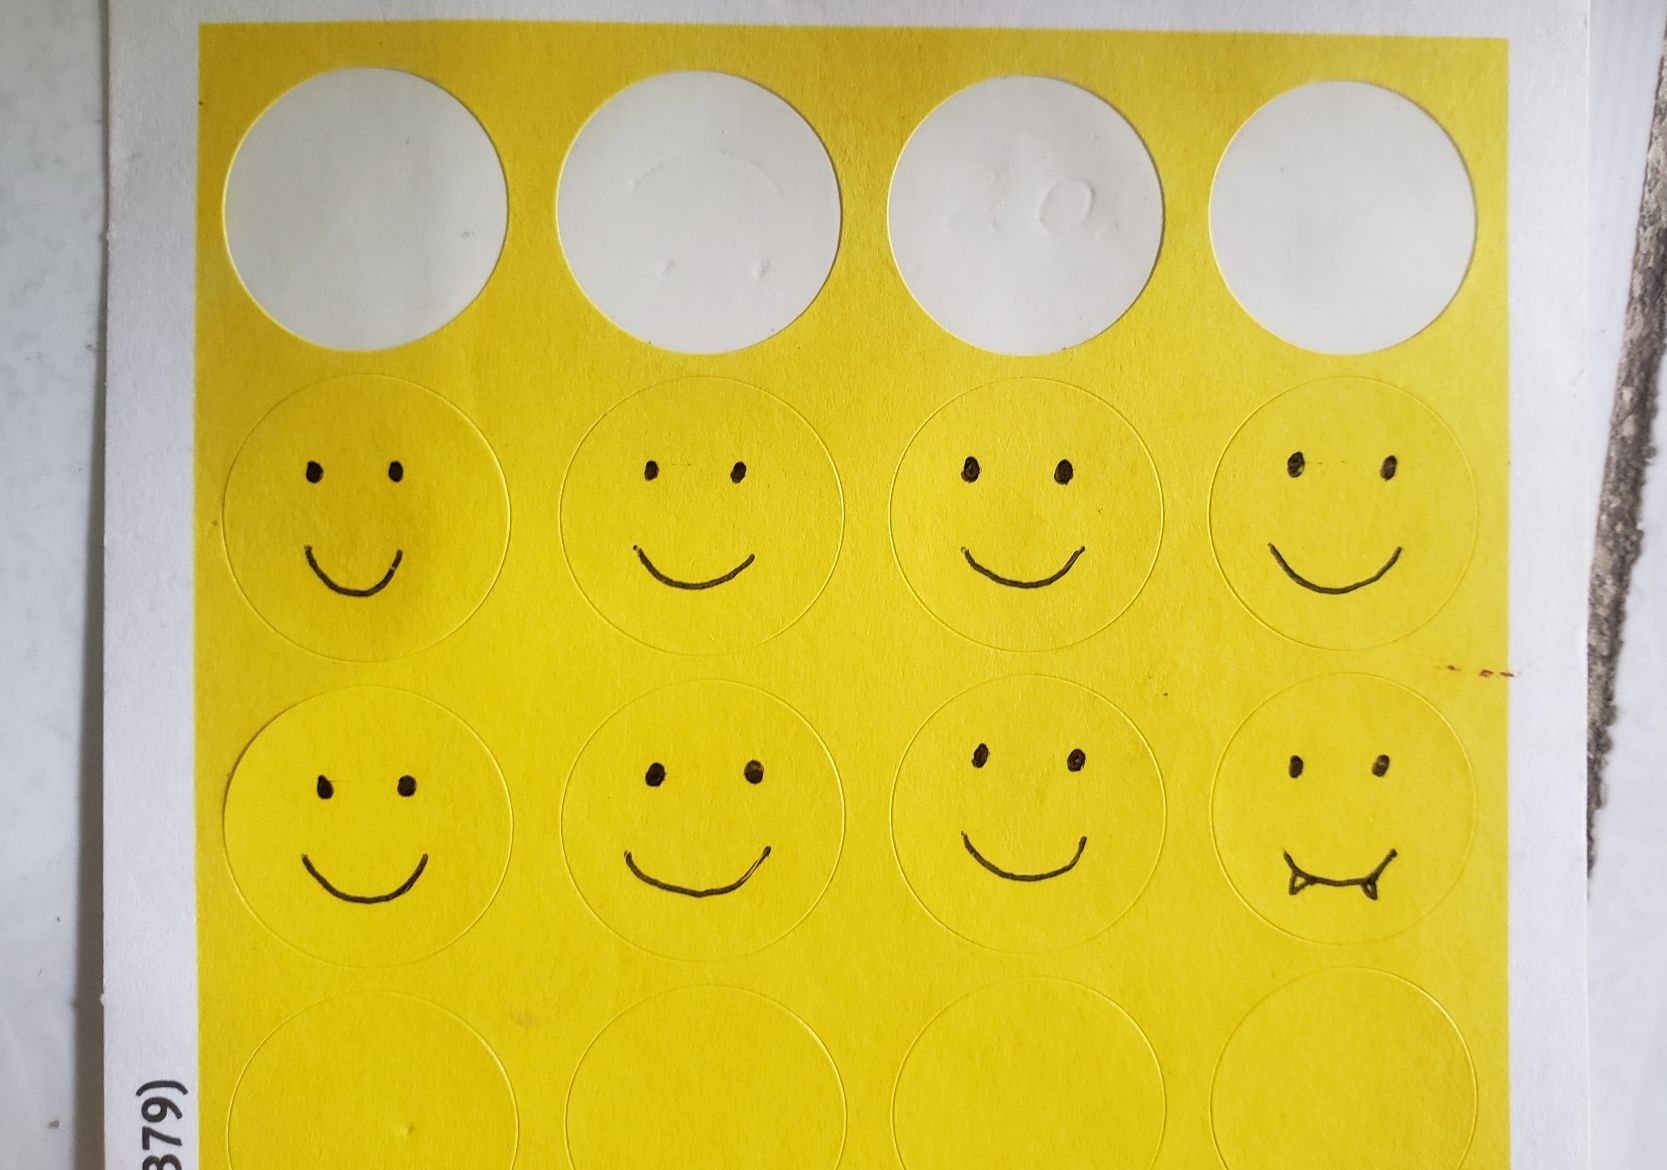
Para las caritas sonrientes utilicé las pegatinas amarillas y con el lapicero negro le dibujé la carita. Sé que no quedaron perfectas, pero lo importante es divertirse en todo momento 🙂.
For the smiley faces I used the yellow stickers and with the black pencil I drew the smiley face. I know they were not perfect, but the important thing is to have fun at all times 🙂.
El resultado // The result
El resultado son estas hermosas tarjetas de San Valentín que podré regalarle a mis familiares y amigos y una especial para mí esposo también. Me divertí mucho haciéndolas, yo crecí viendo programas como Art Attack o Mister Maker y siempre trataba de hacer las manualidades con lo que tenía a mano.
En fin, espero que les haya gustado y que se animen a tratar de hacer unas ustedes tambien y que se diviertan en el proceso.
¡Feliz Día de San Valentín!
The result are these beautiful Valentine's Day cards that I will be able to give to my family and friends and a special one for my husband too. I had a lot of fun making them, I grew up watching shows like Art Attack or Mister Maker and I always tried to make the crafts with what I had at hand.
Anyway, I hope you liked them and that you are encouraged to try to make some of your own and have fun in the process.
Happy Valentine's Day!
Créditos:
- Todas las fotos fueron tomadas con mi teléfono Samsung Galaxy S9.
- Gifs tomados de gifsanimados.org.
- Banner y separador de texto creados en Canva.
- Íconos de redes sociales por @theoneblog.
Créditos:
- All pictures were taken with my Samsung Galaxy S9 phone.
- Gifs taken from gifsanimados.org.
- Banner and text divider created in Canva.
- Social media icons by @theoneblog.
 |  |  |
|---|---|---|