Good morning my friends from this creative community, today we woke up here with a very tasty cold, I already longed for these days when it would be cold here in my town and apparently it will continue that way because we are already in the winter season, these occasions are perfect to sit down and knit with a delicious cup of coffee or hot chocolate, I have a project in mind what I will do when the friito is official here I want to knit a nice scarf I hope I get inspired to do it later.🤭
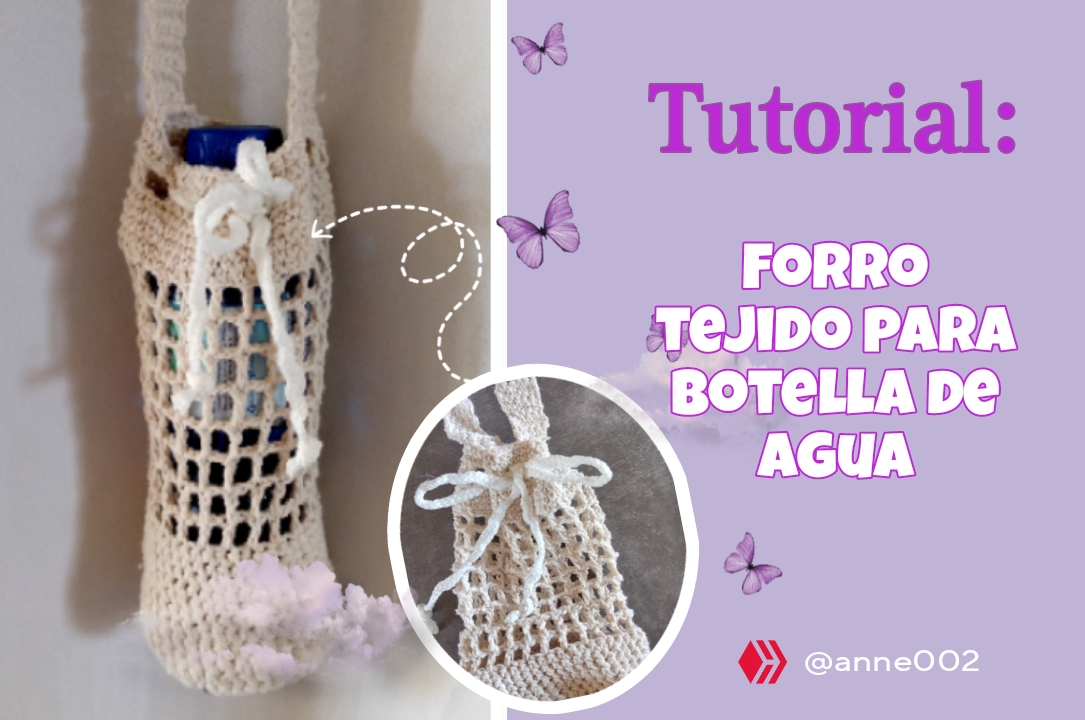
In today's tutorial I have brought you a cute thermos or woven water bottle holder that is very comfortable to go out and carry our bottle on your shoulder, we always don't find where to put it or we don't want to carry it in our bag so that our things don't get wet, well this is a practical option to carry it, I invite you to stay with me and see how simple it is, I tell you that I don't know how to knit much nor am I an expert in the art of knitting although I like it and would like to do many more things as amiguris I am Starting now to practice so I said let's try to weave this idea that I had in mind for my bottle, so let's go.
🧶Materiales que he usado:🧶
Materials i used :
- Hilo para tejer de tu preferencia en color
- Tijeras
- Aguja de tejer punta delgada
- Cordón
- Knitting yarn of your choice in color
- Scissors
- Thin point knitting needle
- Lanyard
💜(Pasos a seguir.)💜
(Steps to follow)
Paso 01
Step 01
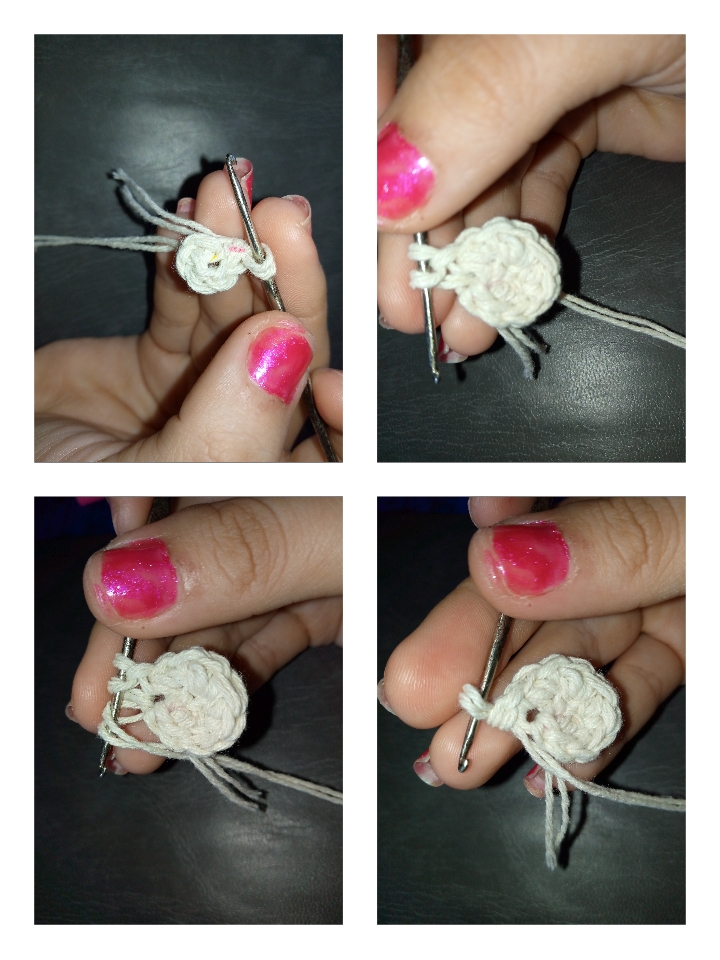
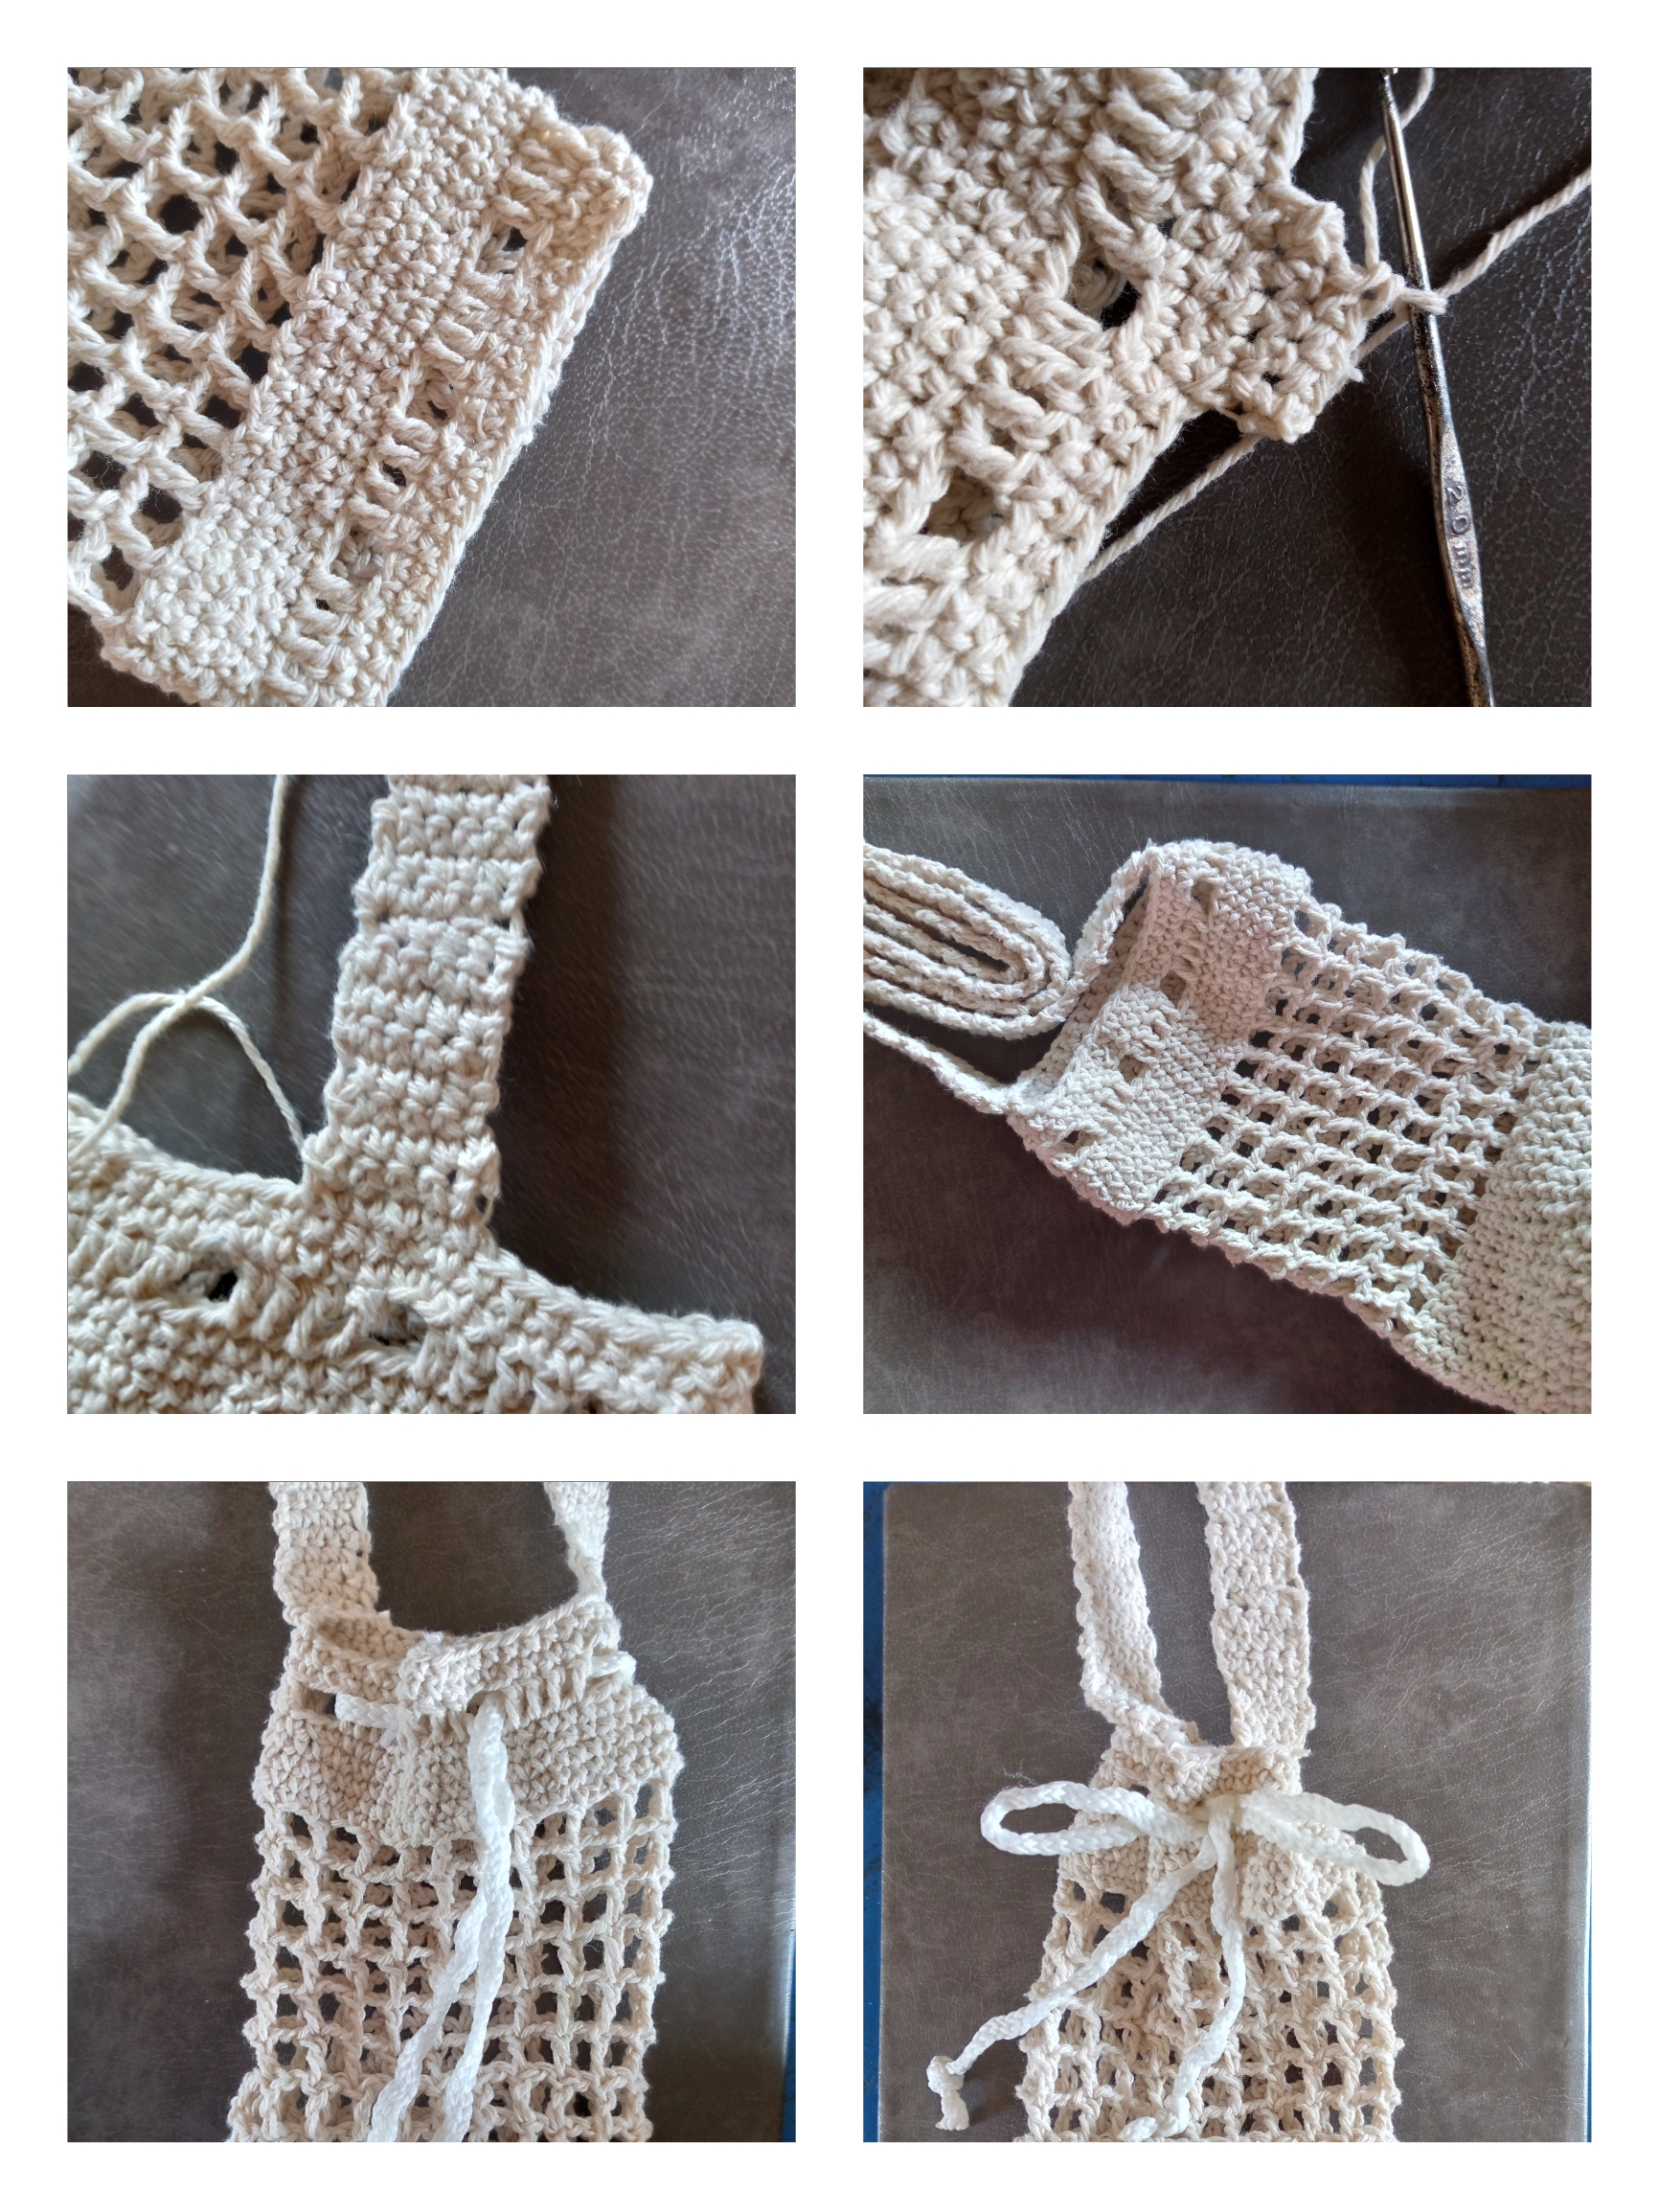
I started in a very simple way since, as I mentioned before, I don't know how to knit much at an expert level like you, but there I am slowly learning my loves. I started making a simple chain of 6 stitches, then I joined it to form a circle. This is what I did. We will use it to make our round base, then I started to knit a double crochet with a row and so I go until I complete the circle of the size we want. Remember this is for a bottle. You can knit the base larger if you plan to use it for a thermos. .
Paso 02
Step 02
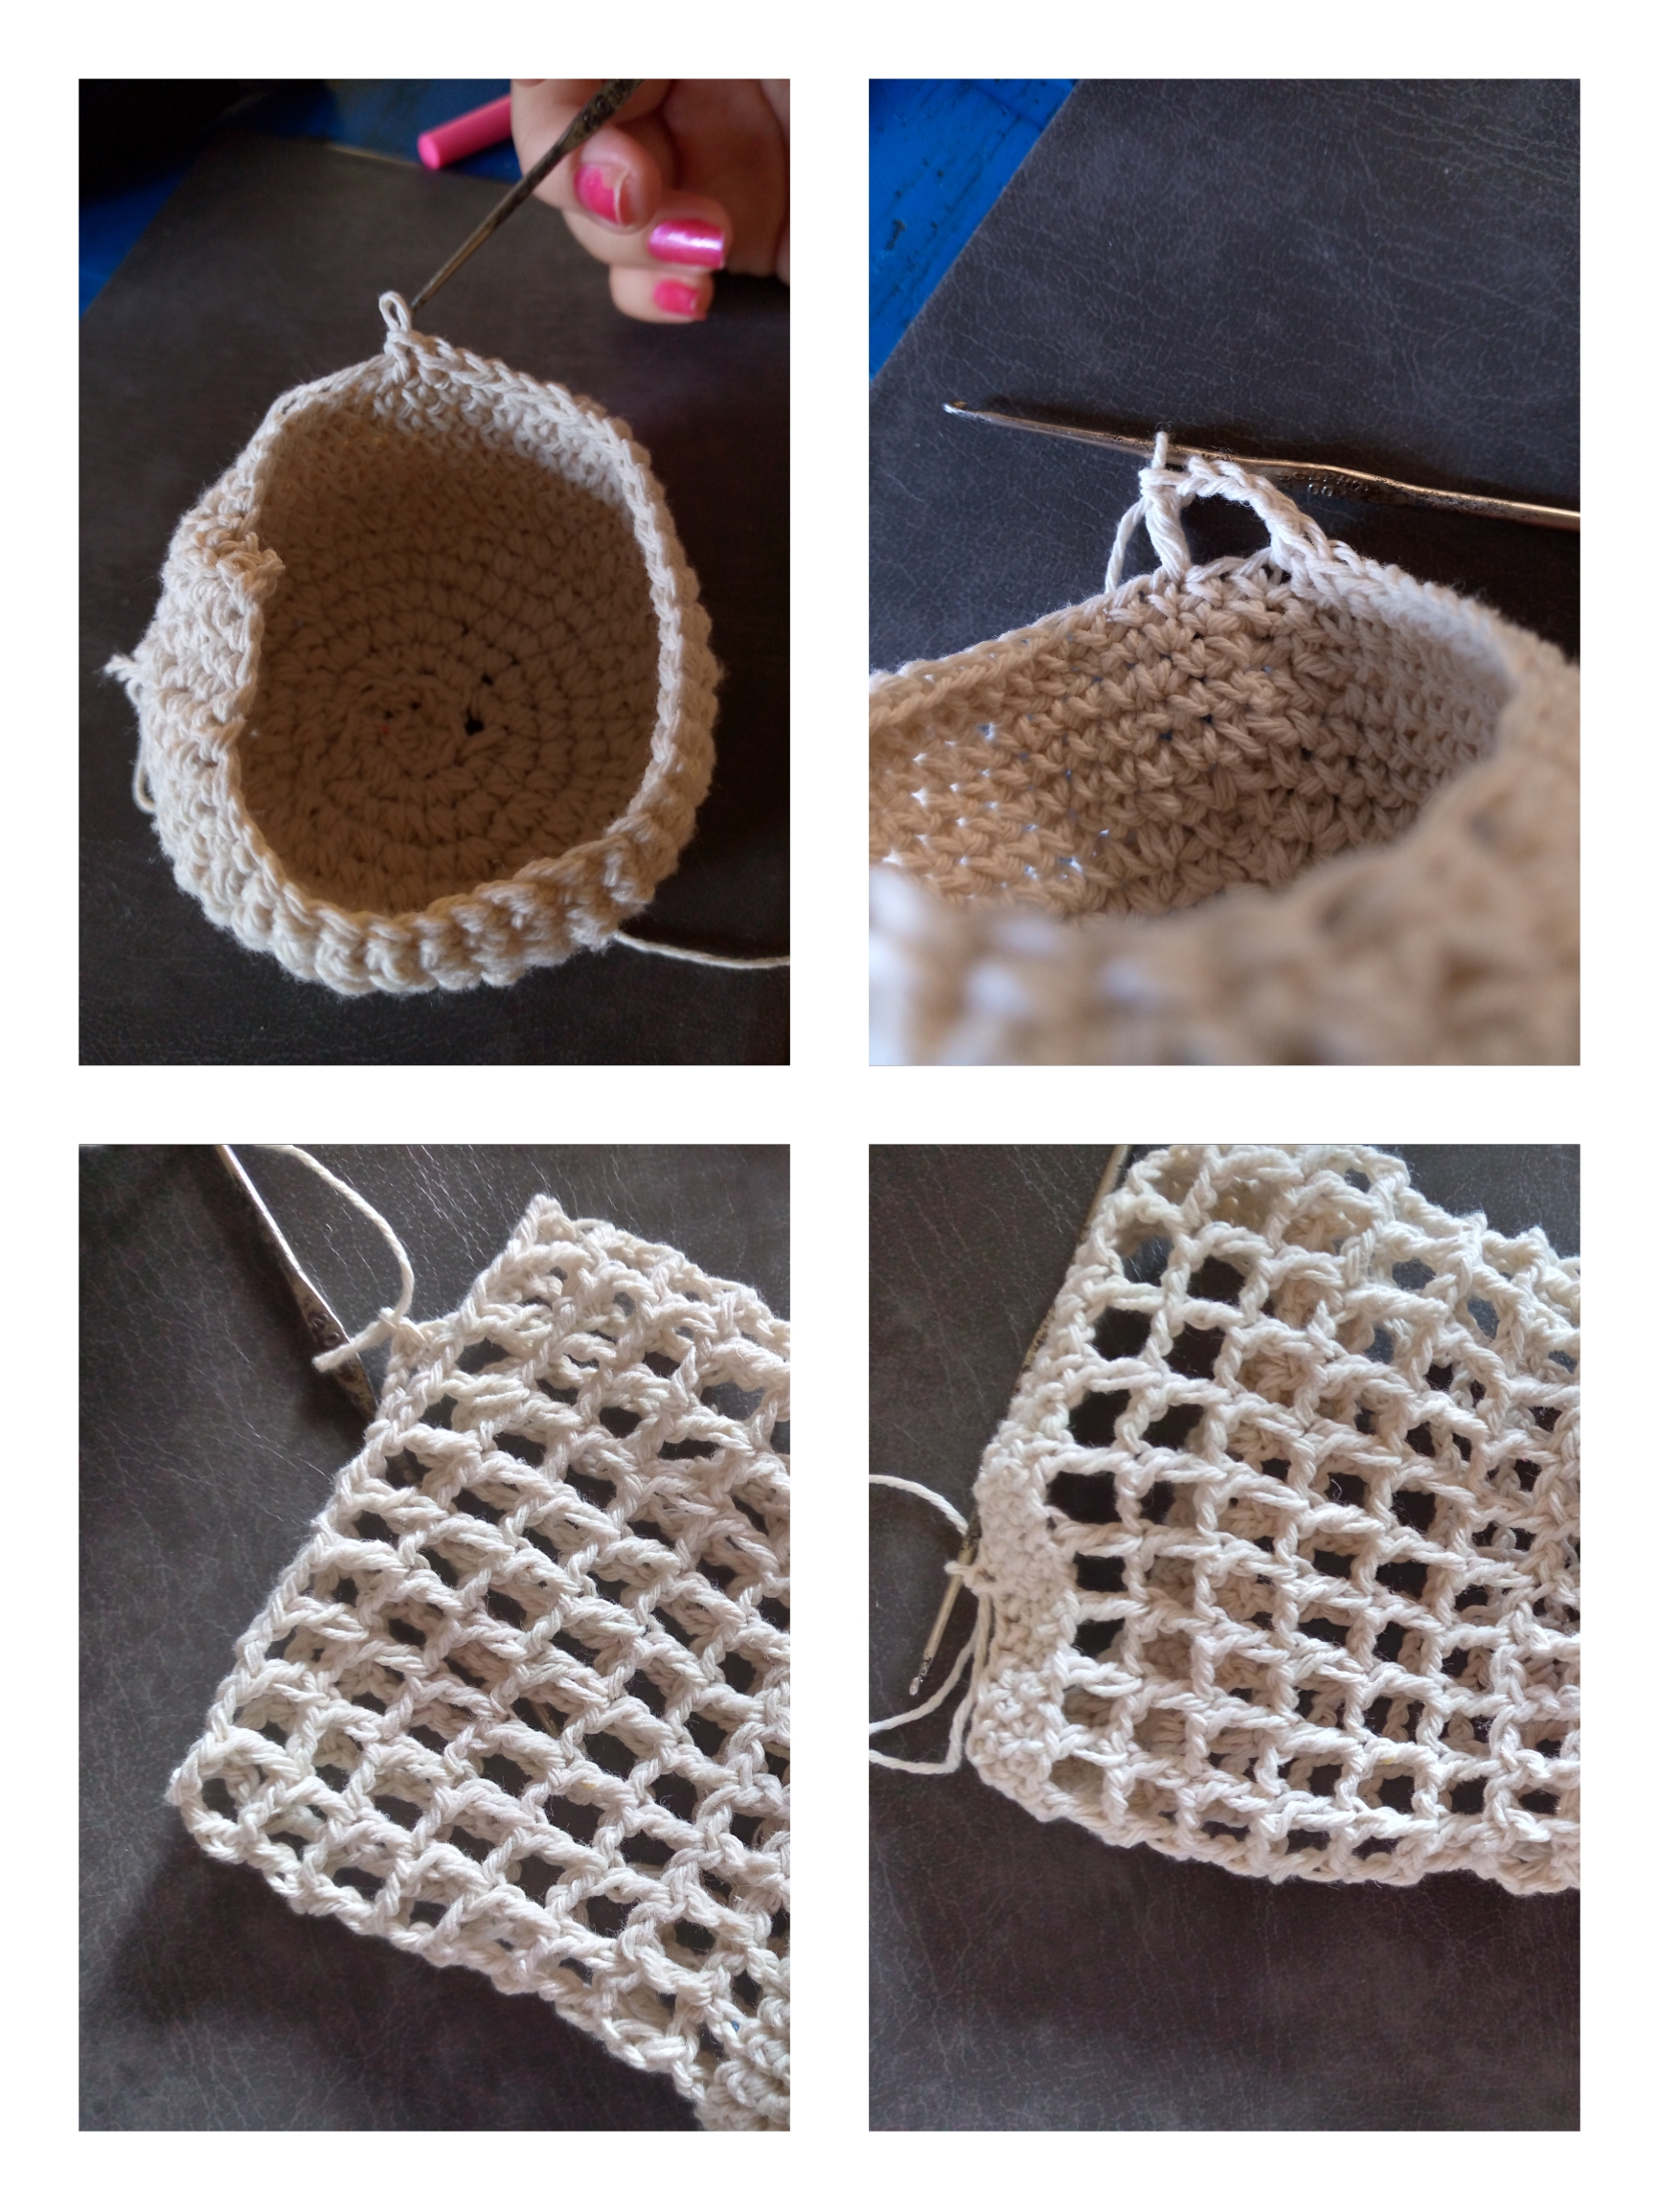
Once we have woven the base we move on to knitting the top piece with a basic stitch. We have adjusted the stitch a little so that it does not take the shape of a basket and we knit 15 lines upwards with a basic stitch and then weave the mosaic stitch or as See below the checkered stitch.

Paso 03
Step 03
To make the mosaic stitch we start by making a small chain of 6 stitches and we skip two holes and insert the needle and make a stitch with 2 rows so we go through each square we make 2 stitches we skip 2 and put it through the hole, and so we continue the sequence for each point, if you don't understand it you can see it here in the image that I leave below.
Paso 04
Step 04
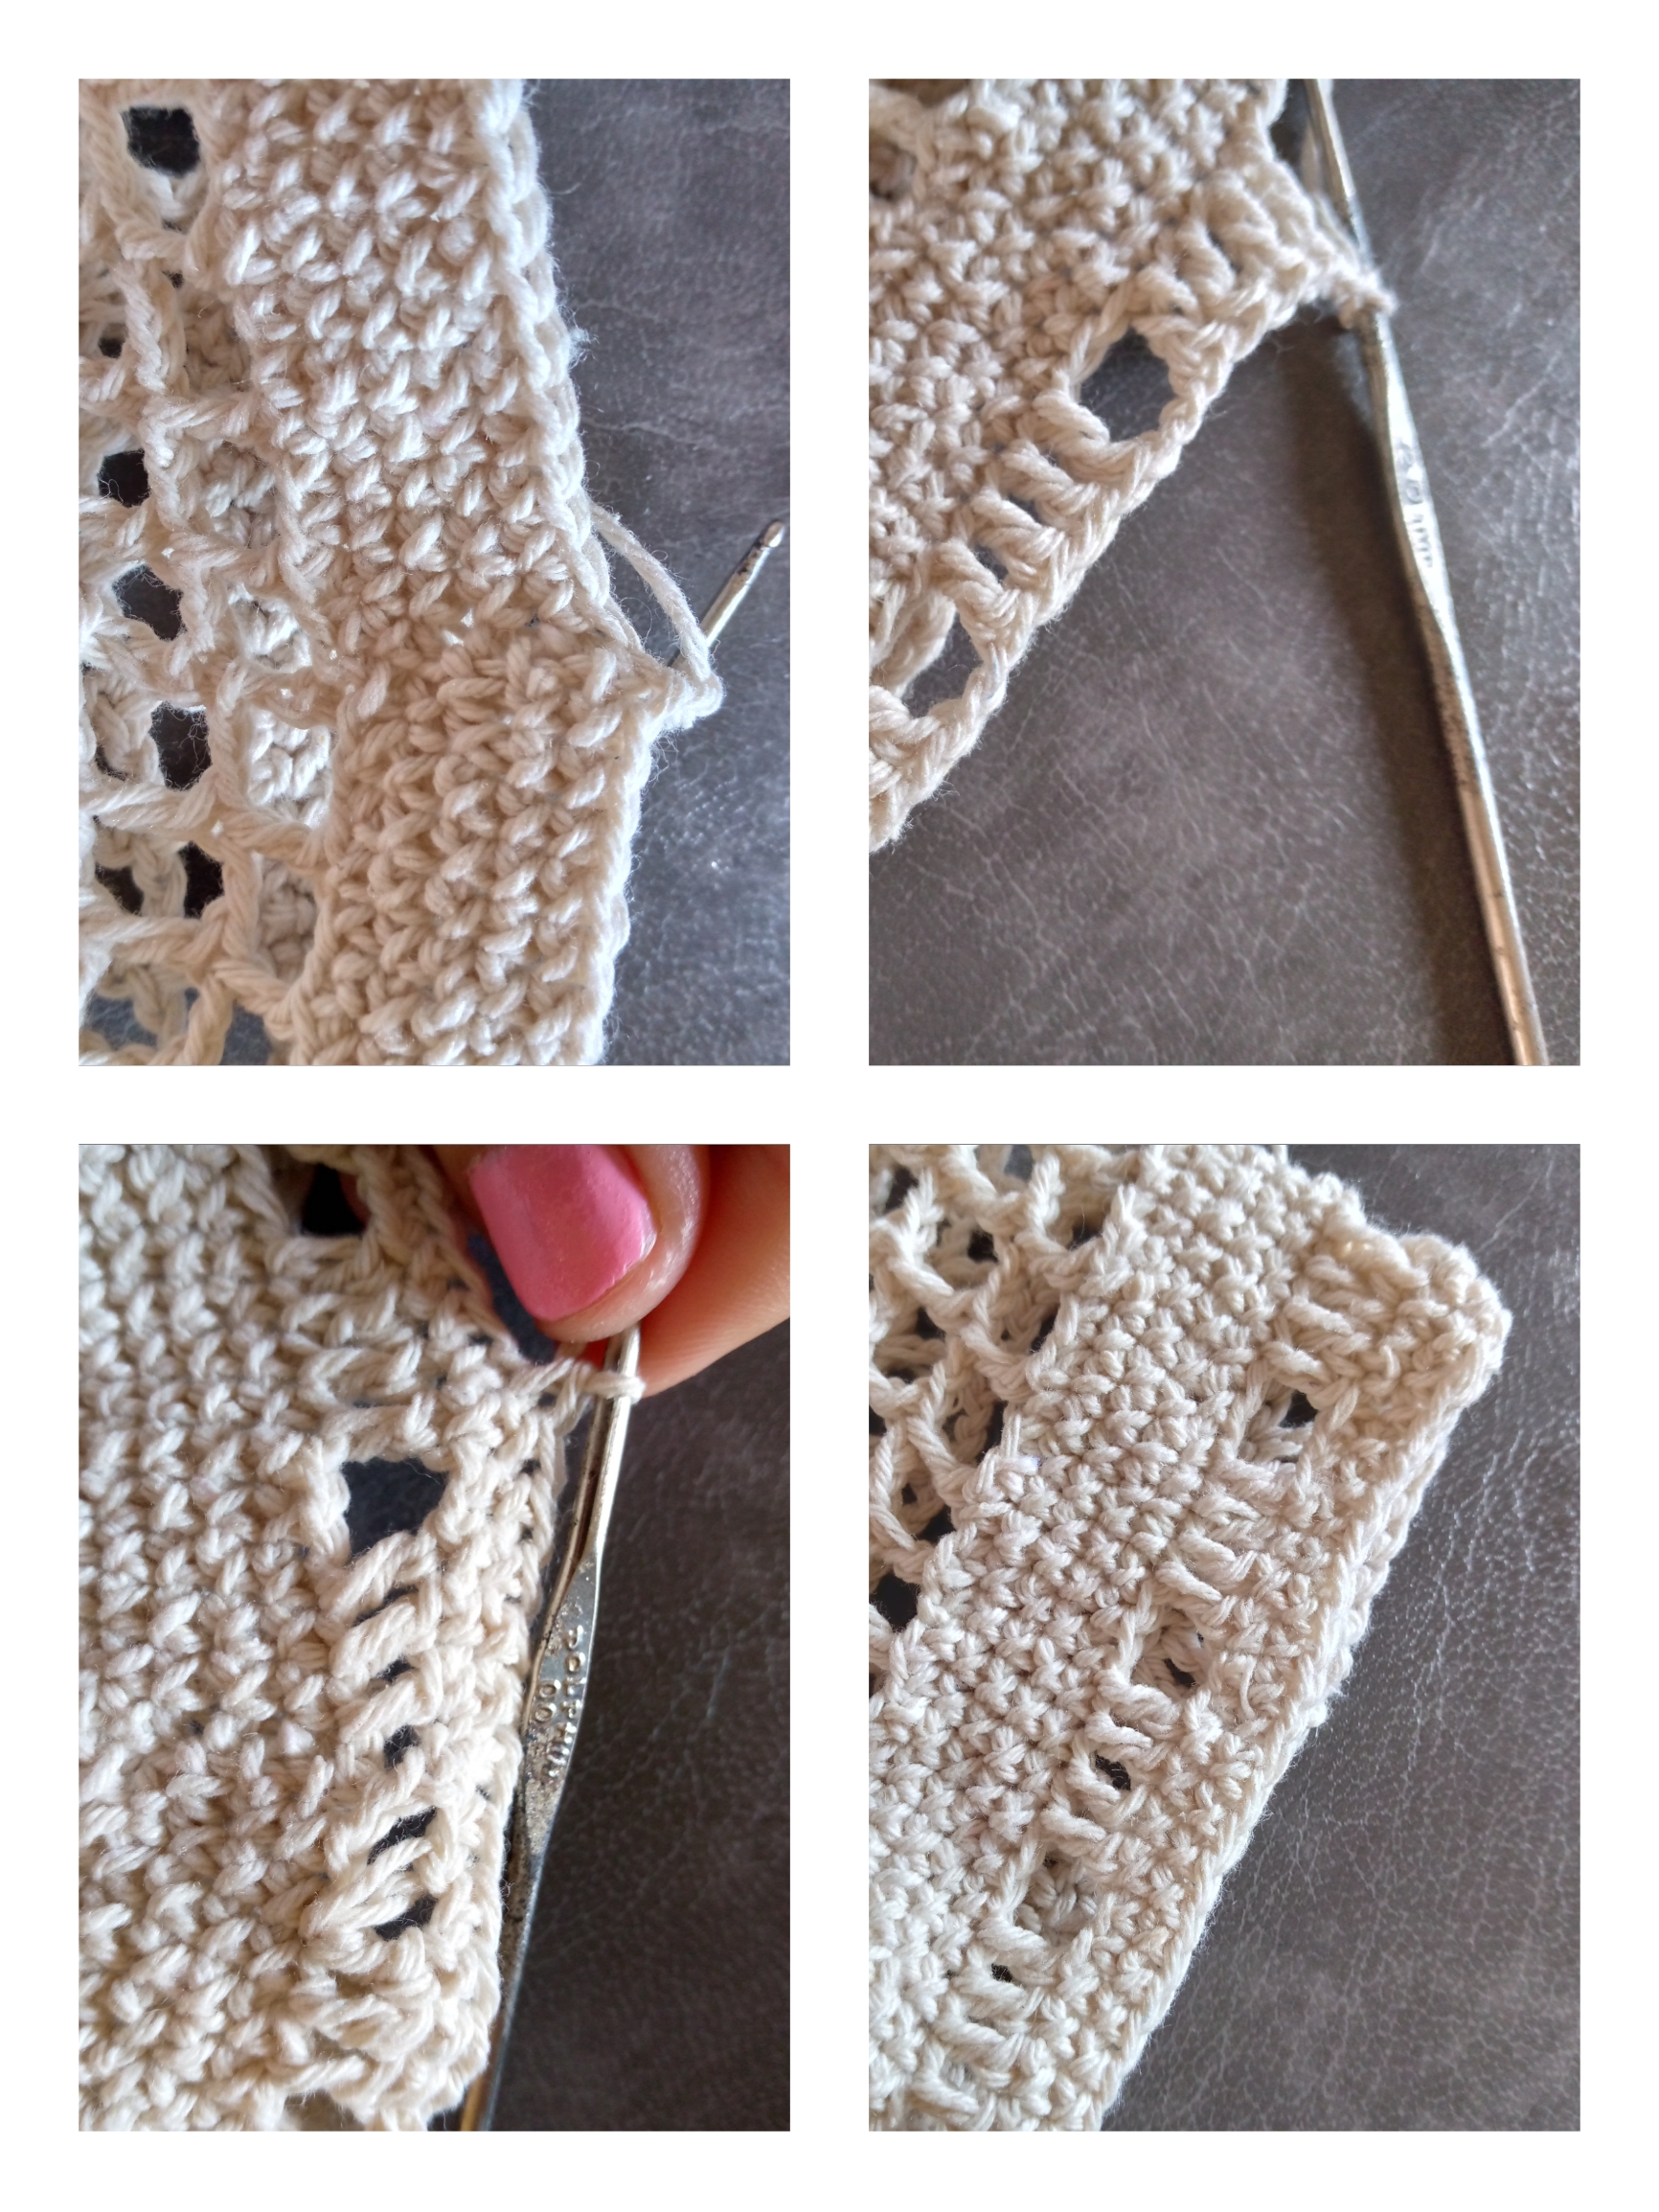
After finishing making the lines with the mosaic stitch (you can knit the length you want of your lining in this part, in this case I placed 8 lines in mosaic stitch or squares) we are going to start knitting again with basic stitch 5 lines upwards then we go on to make the ribbon through which we will pass the cord we make the 2 stitch that we use to make the mosaic fabric, and the sequence is as follows we knit 4 stitches and leave 2 holes without knitting and we knit again the 4 stitches so we follow the sequence and close with 2 lines of basic stitch. In this way we finish the bag and we will move on to knitting the rope.
Paso 05
Step 05
To knit the rope for the lining of our bottle, we measure the middle and we can mark the middle with chalk and we begin to knit a stitch of 2, we knit 5 stitches and we go on to knit up another 5 and we follow the sequence vertically to form our rope, I leave you here how many lines I used for the length (90 cm when we get to the end we finish the fabric and cut we insert the cord through the ribbon loop that we made and adjust we cut the length we want from our cord and in this way our cord is finished water bottle liner.
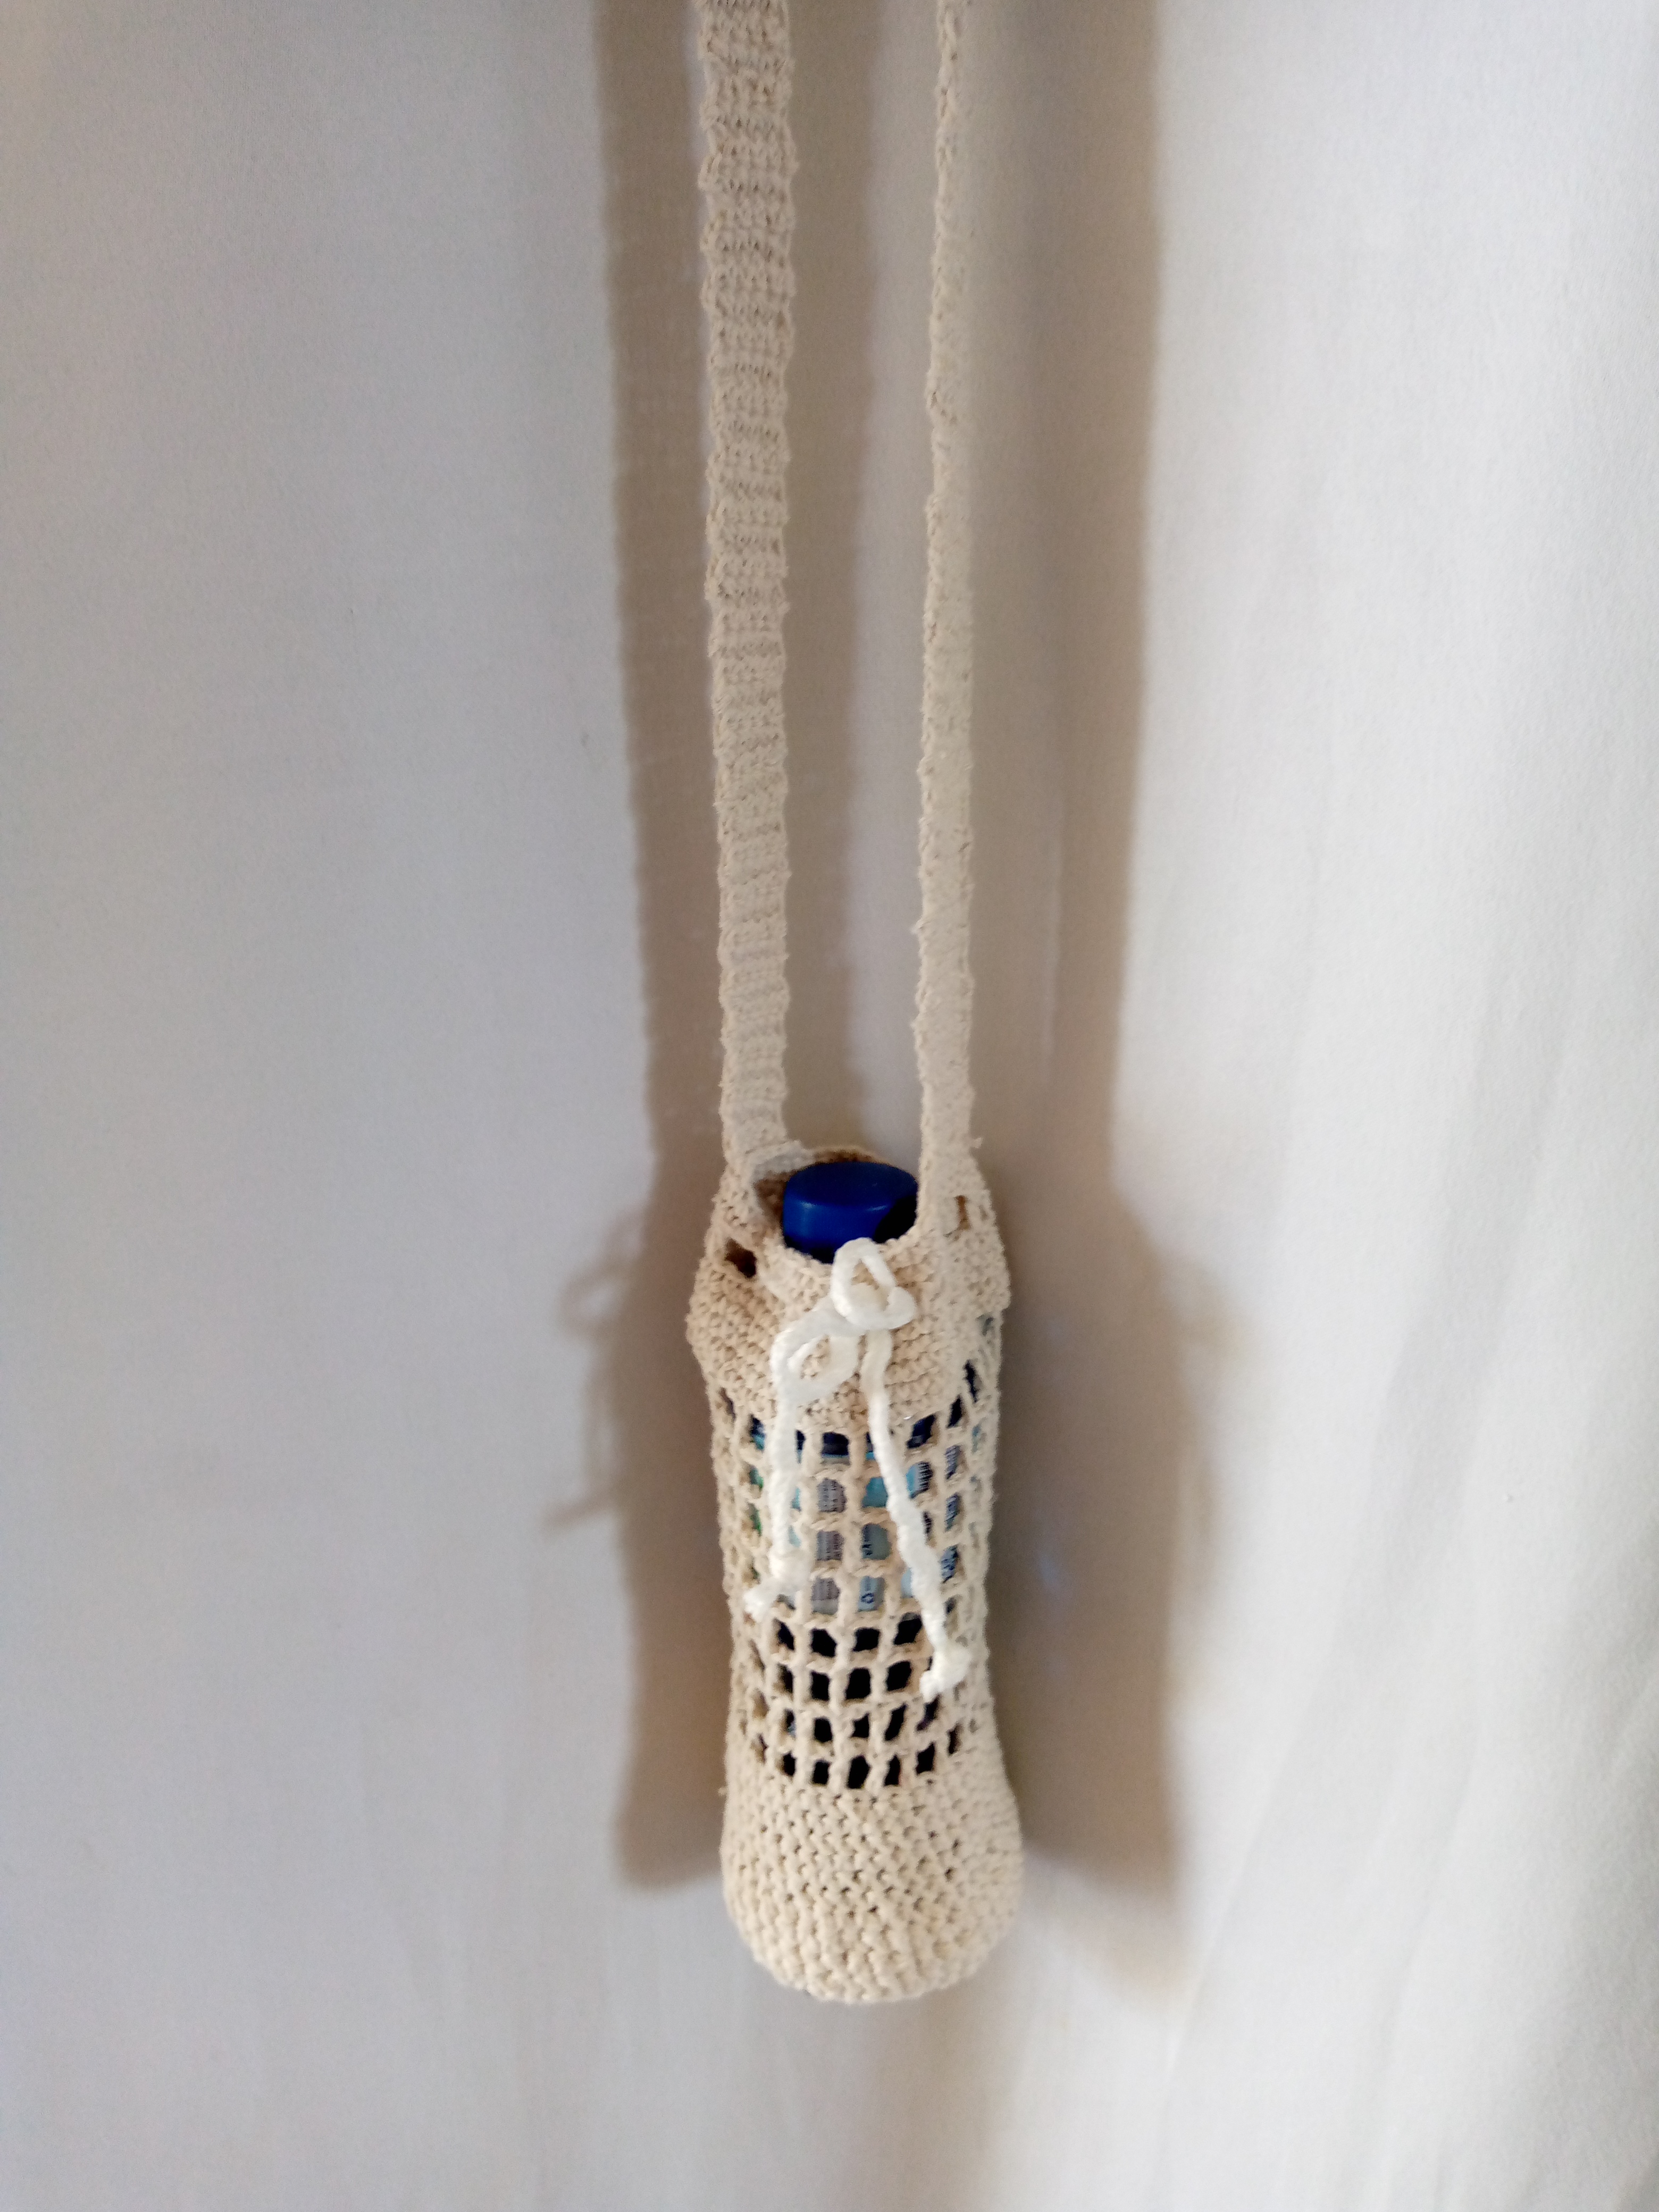
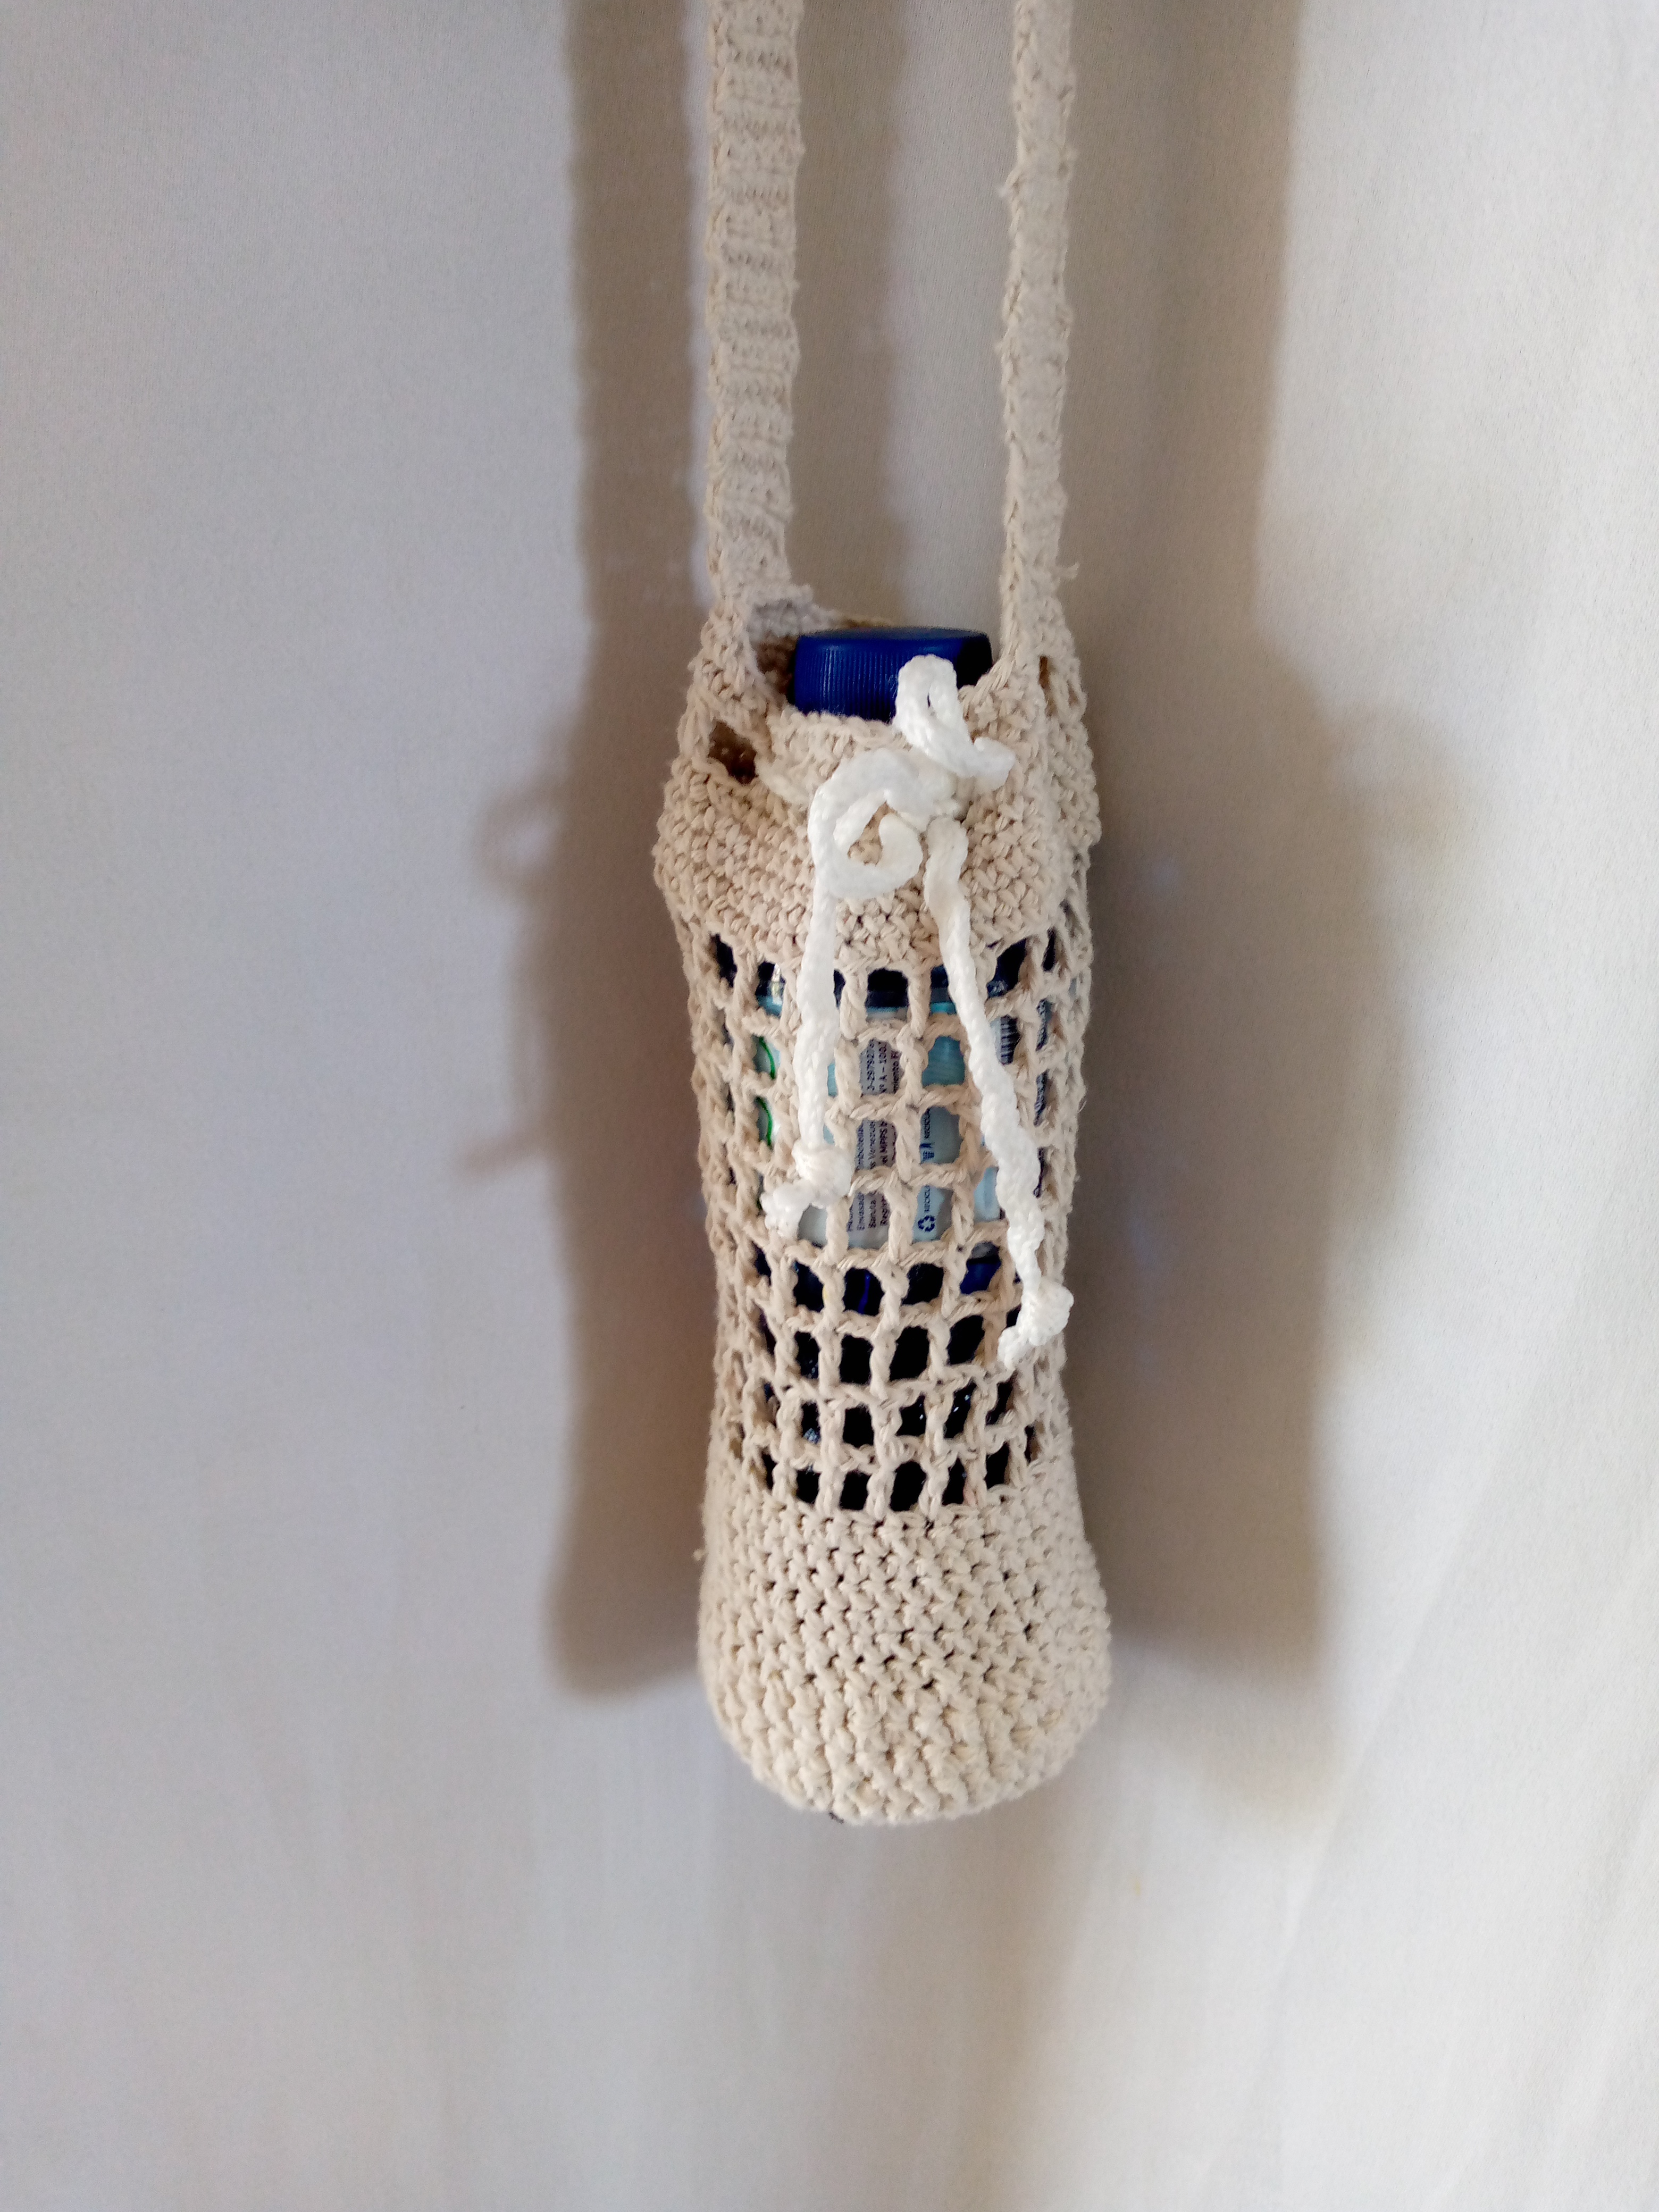
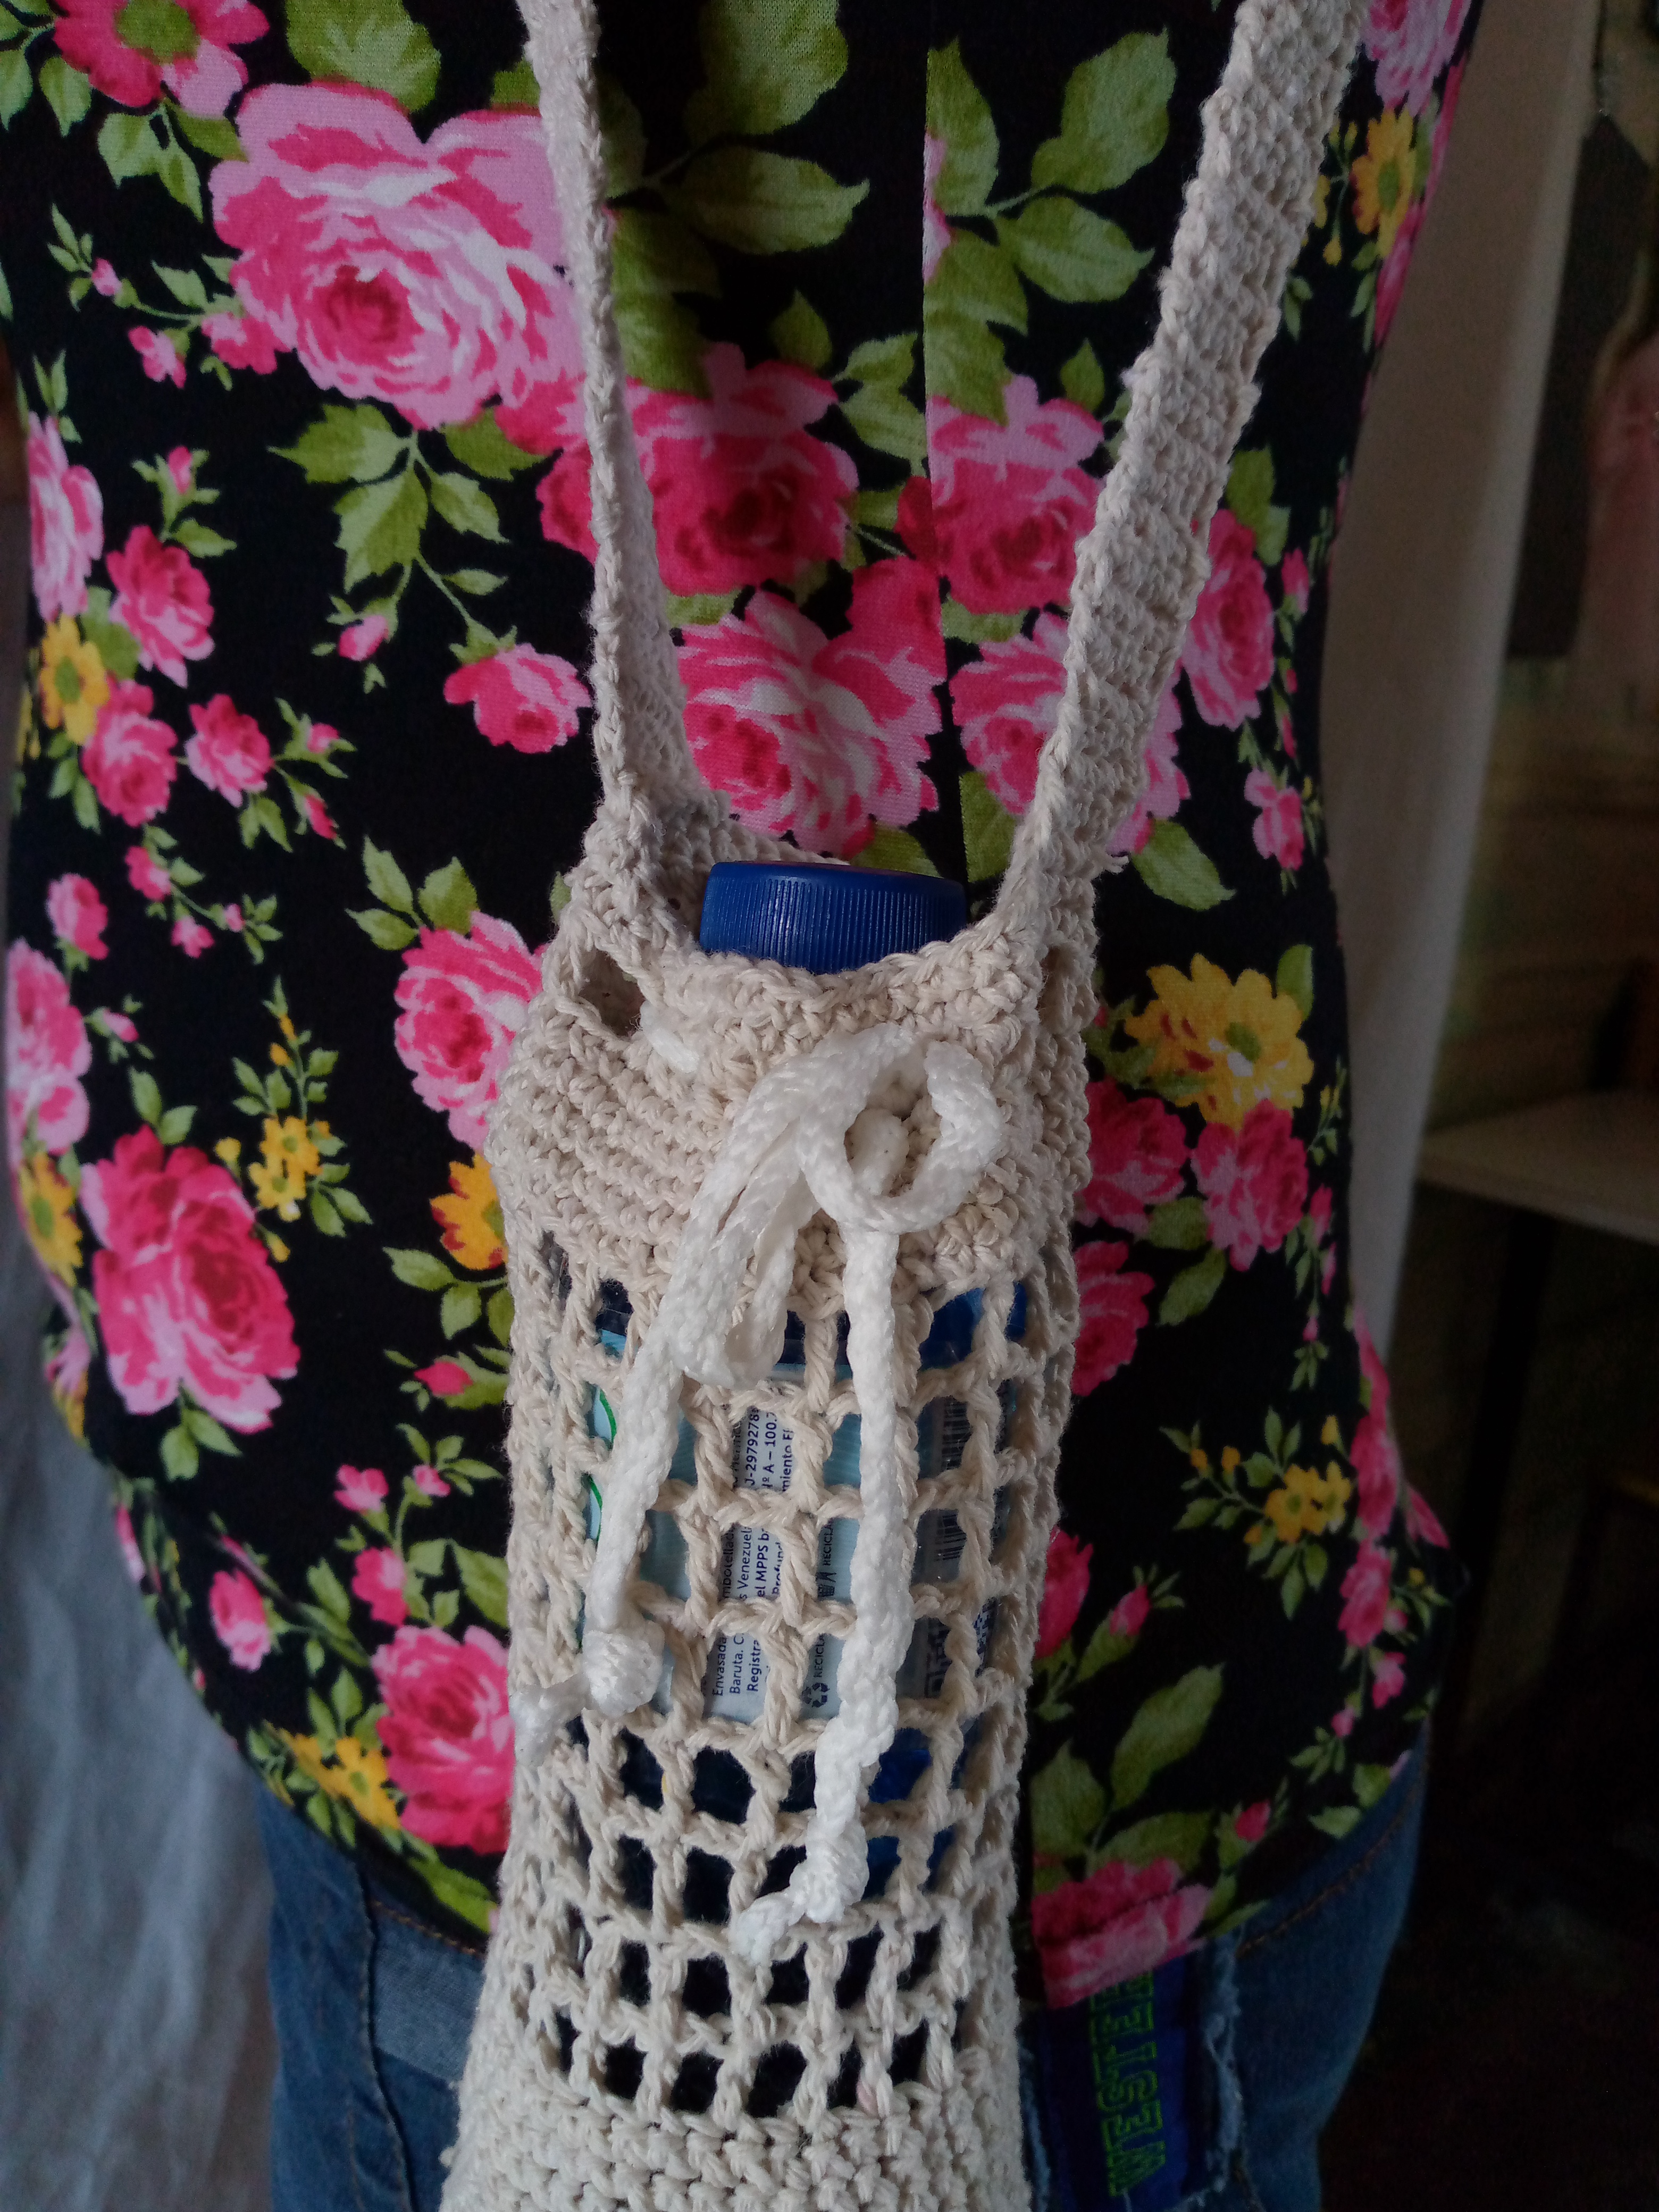
💜Resultado💜
Resultado
¿Que tal les ha parecido?espero les haya gustado mucho ,estaba pensando que podrían hacerlo completo y con un hilo de lana más grueso ,como ustedes gusten ustedes dejen volar su imaginación si piensan realizarlo y cualquier cosa pueden dejar sus lindos comentarios de qué tal si les ha parecido o si han realizado este tipo de forro tejido,les dejo a continuación fotos del resultado y me despido de ustedes con un lindo y cariñoso abrazo salus y bendiciones.🧶🪡💜
What did you think? I hope you liked it a lot. I was thinking that you could do it completely and with a thicker wool thread. Whatever you like, let your imagination run wild if you plan to do it and if you want, you can leave your nice comments about it. If you like it or if you have made this type of woven lining, I leave you below photos of the result and I say goodbye to you with a nice and affectionate hug, greetings and blessings.