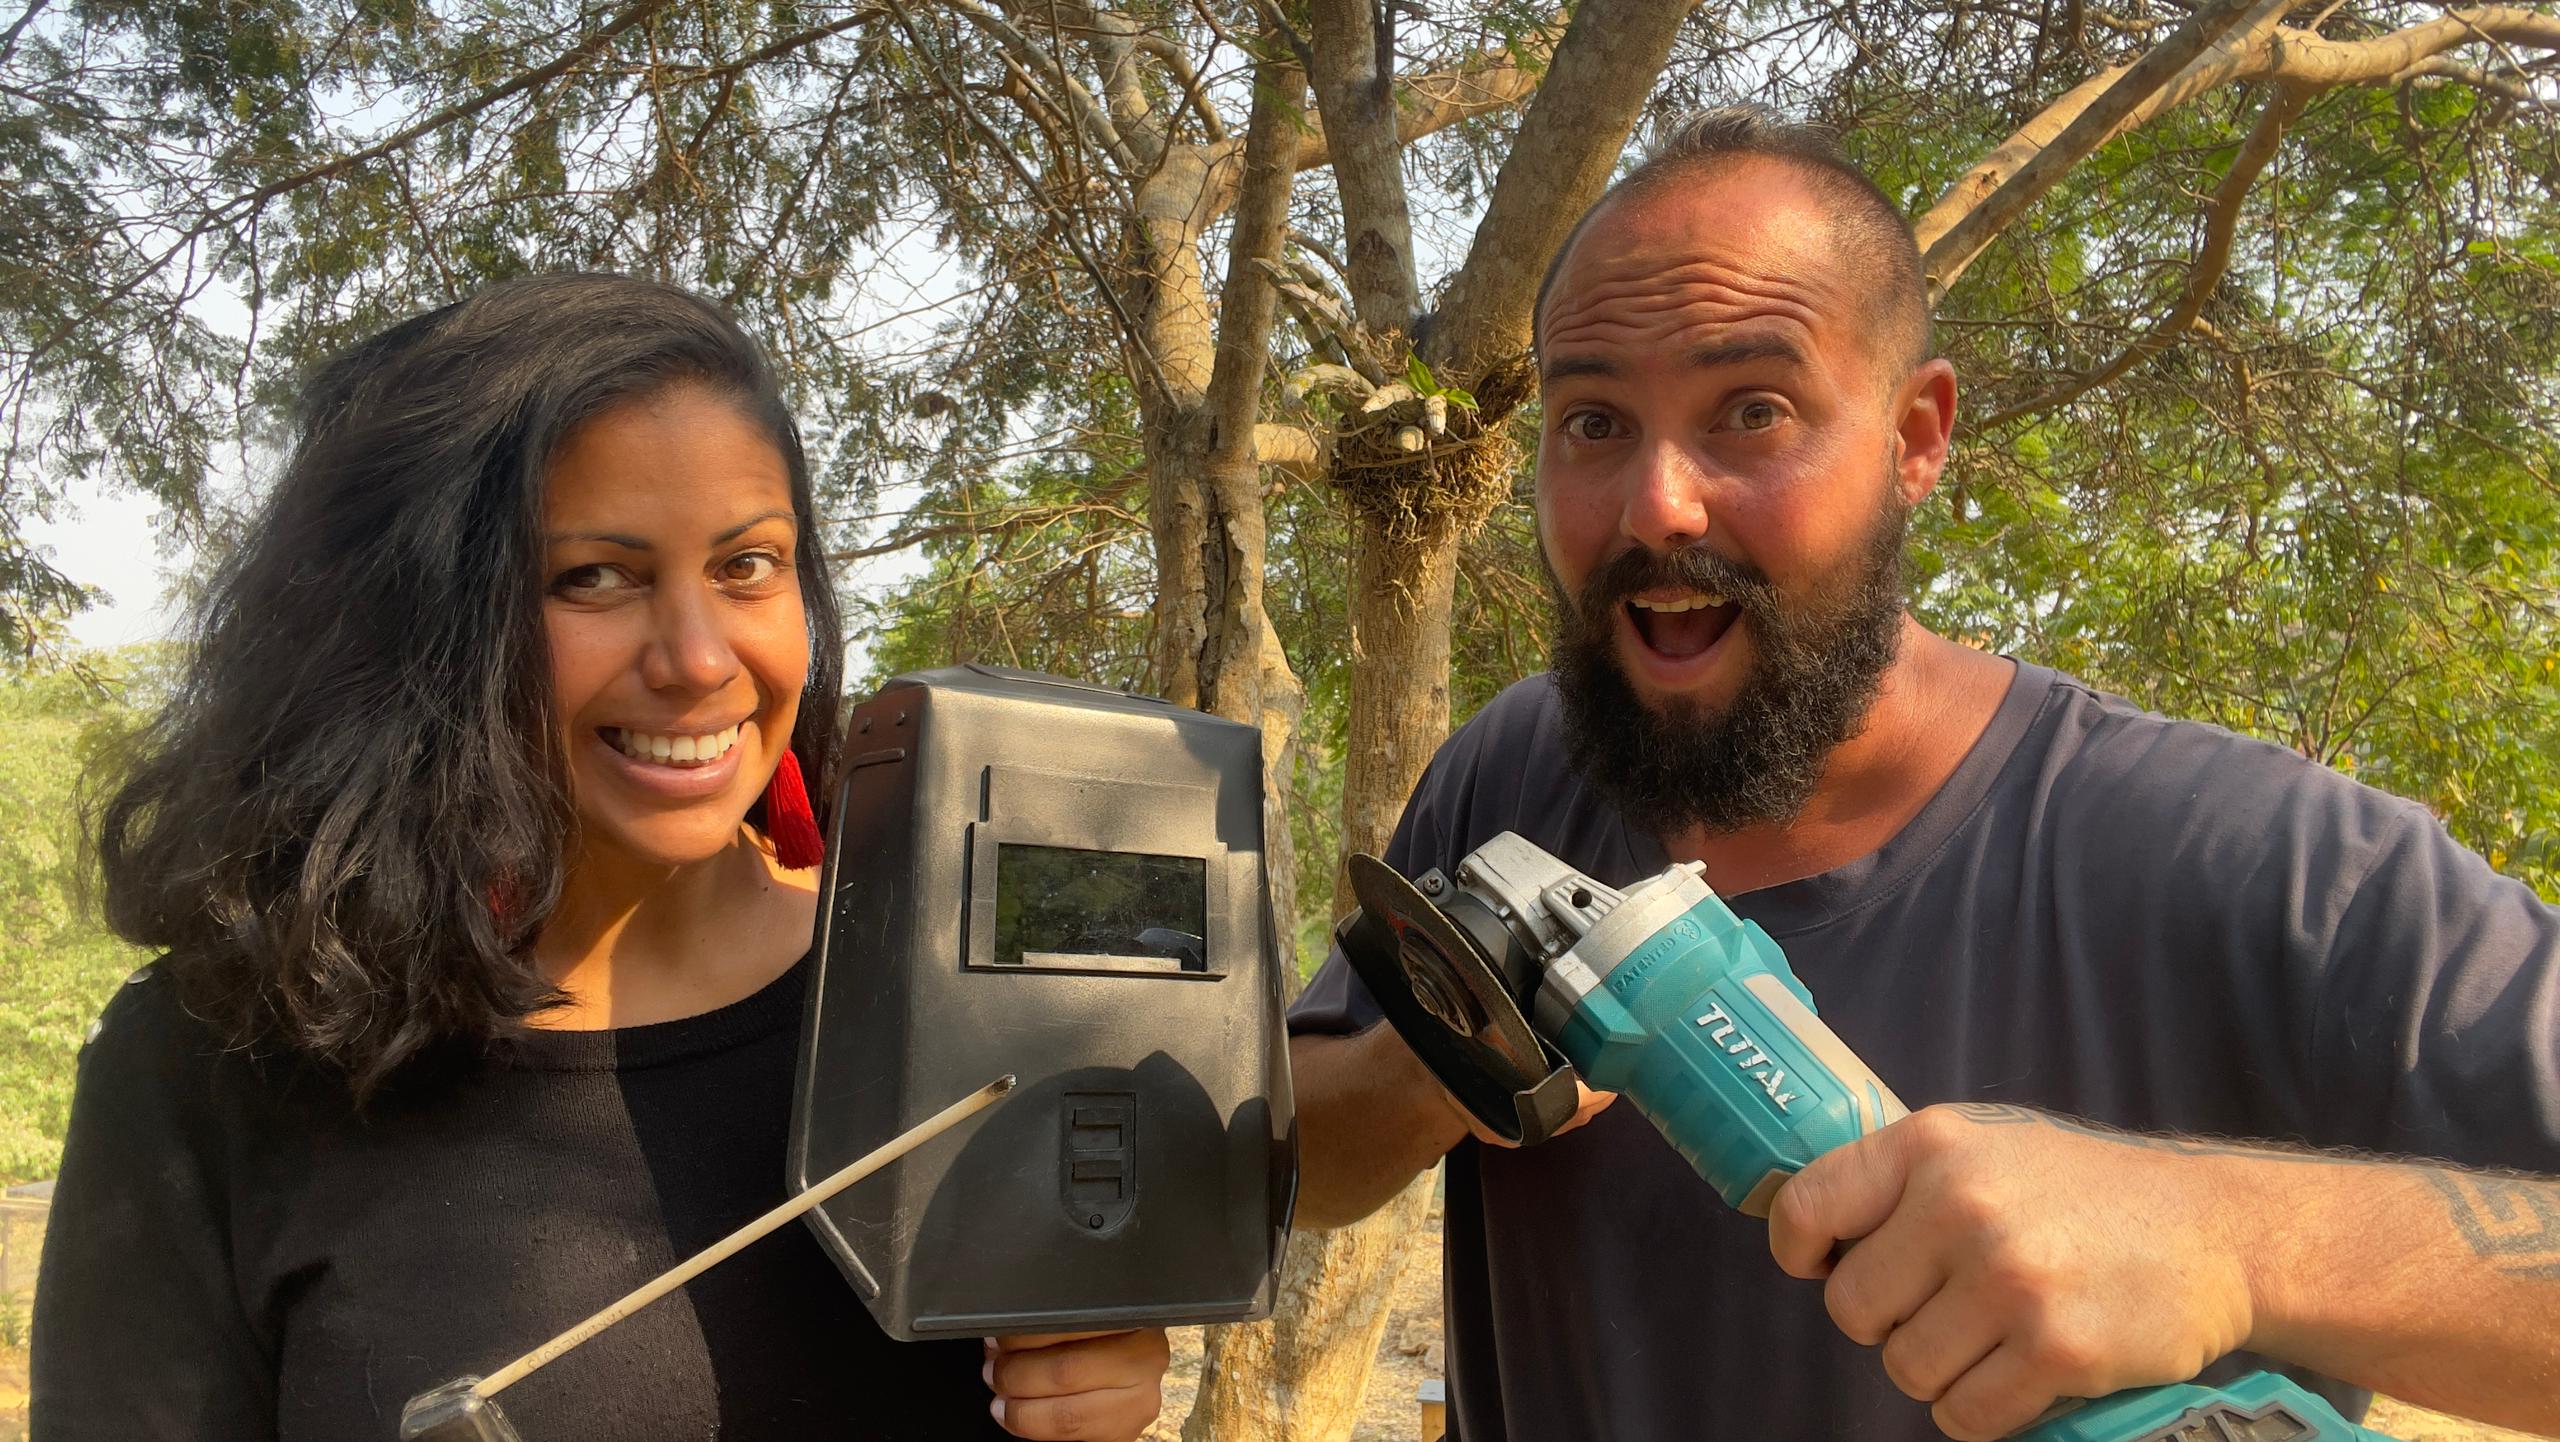
Hello DIY lovers, since a little over 1 year ago a great adventure started, something that was a dream we gave paths so we are in the middle of a great challenge of life, which is to build my own ecological and intelligent house in Container Architecture together with my life partner.
This has been really challenging for us, as we had no previous knowledge of construction, which has led to new learning challenges on a daily basis.
We are really pleased with the progress we are making, it hasn't been perfect but we have managed to find solutions to every stumbling block and using our ingenuity, we have been doing it ourselves and today's post is an example of that.
This is how we made this tool for construction and planting.
We were in the process of extending our container house to build our bathroom and dressing room, but the construction tool we had was too heavy for us... well especially for me, who is a little over 1.50 meters tall.... hehehehe.
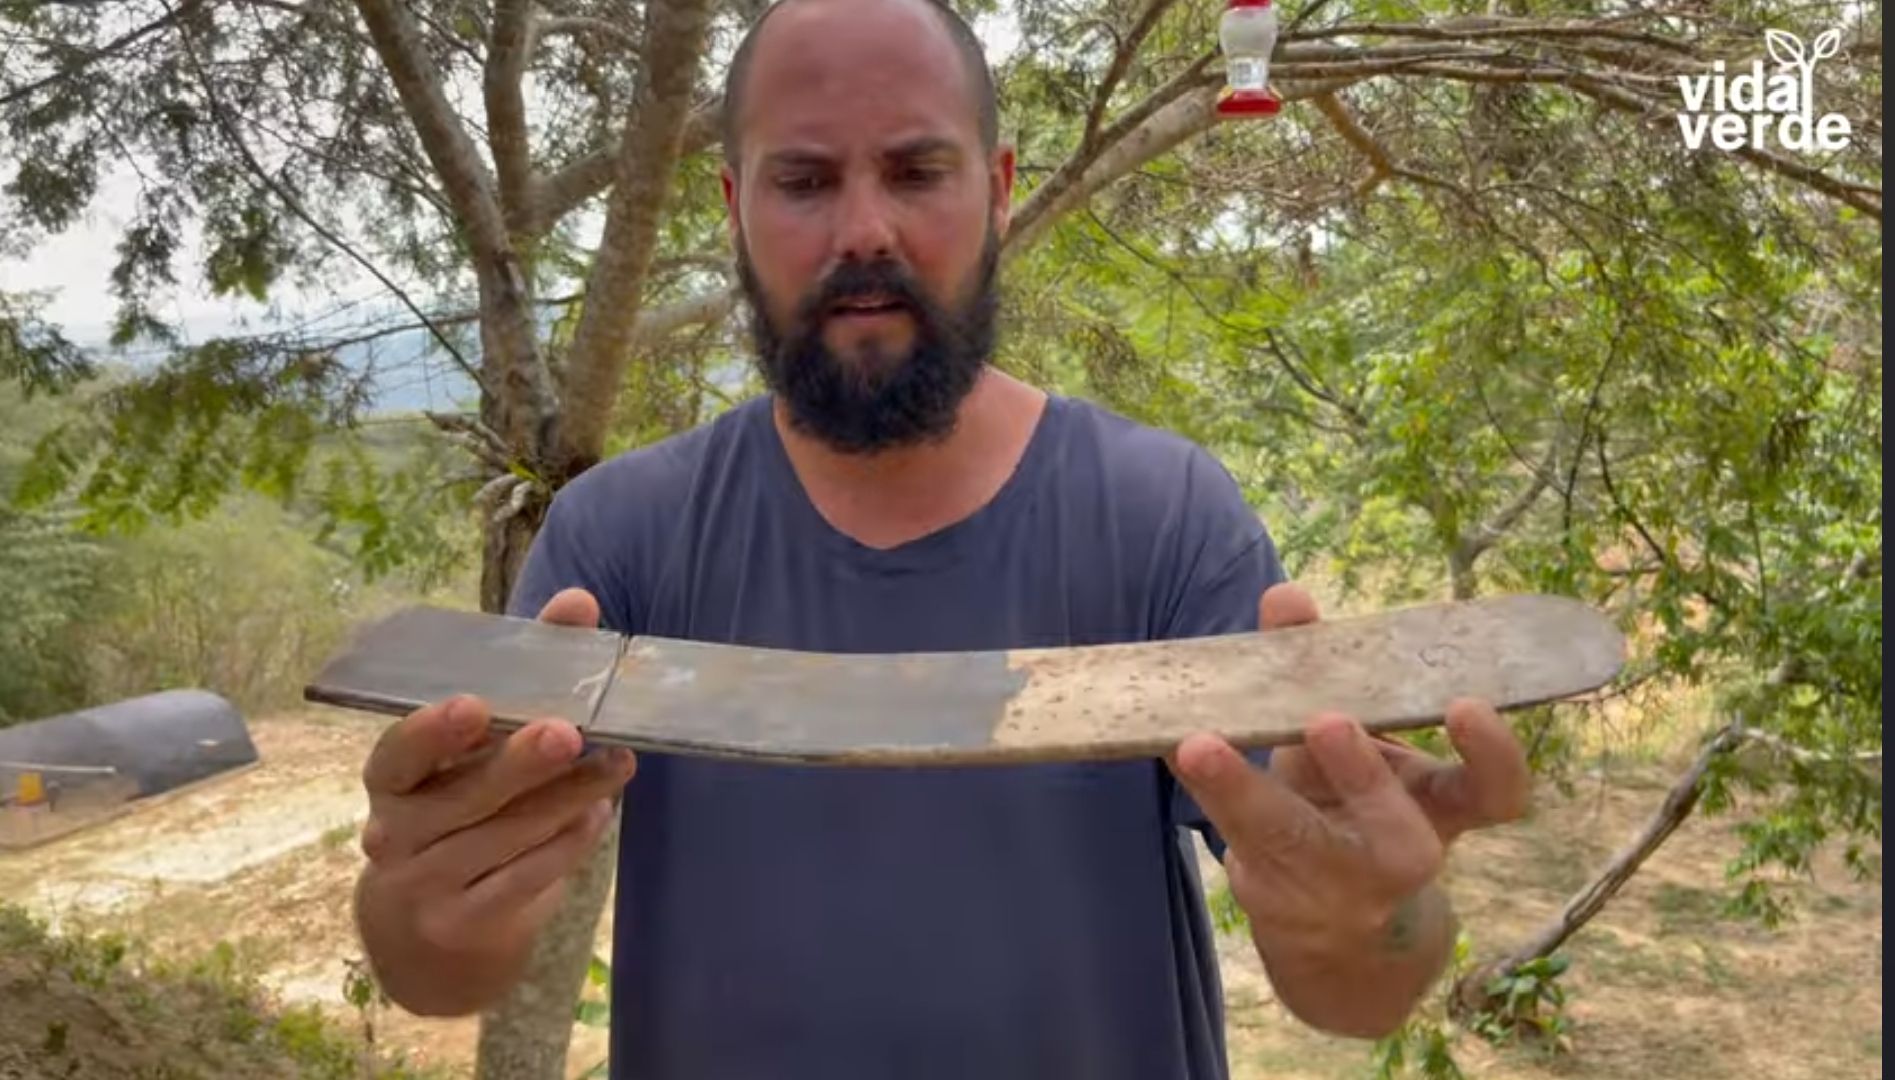
A friend lent us one he made, we loved it because it is super light and he gave us the recycled materials to make it, today I will tell you how we made this construction tool to dig earth with recycled materials.
Recycled Materials
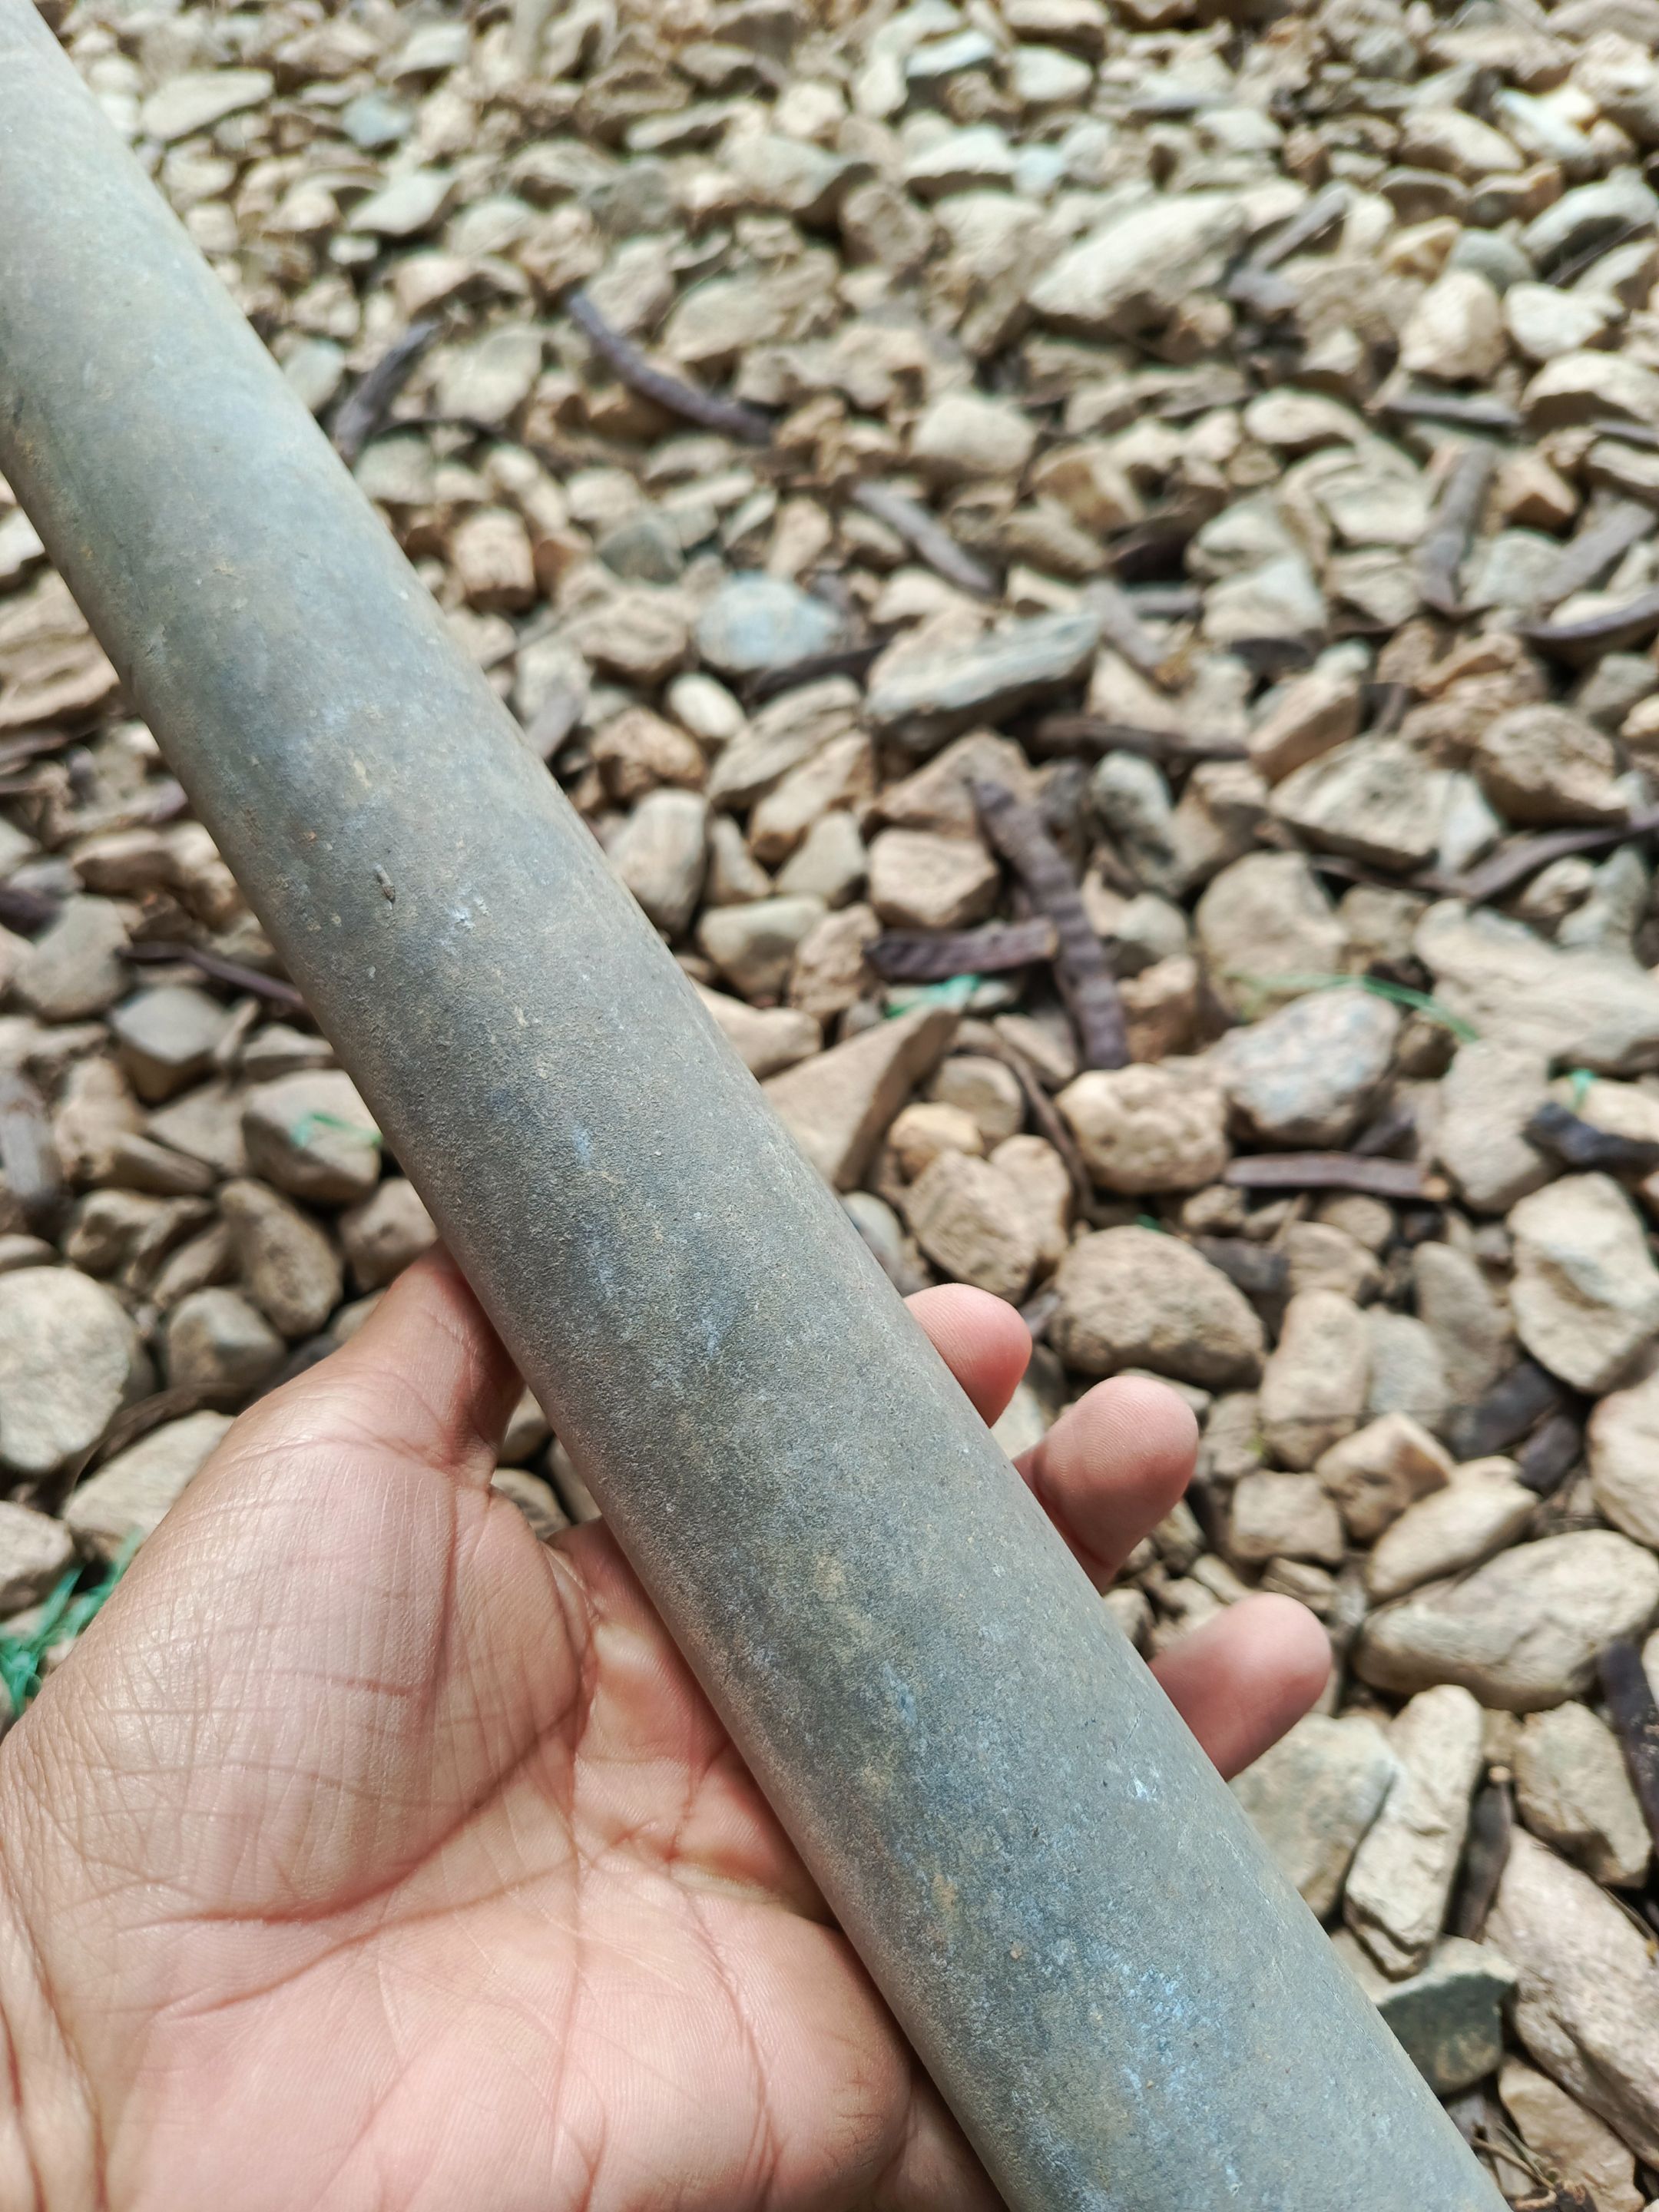
1 Circular tube
1 Trolley crossbow
Tools and supplies
Grinder
Cutting disc
Polishing disc
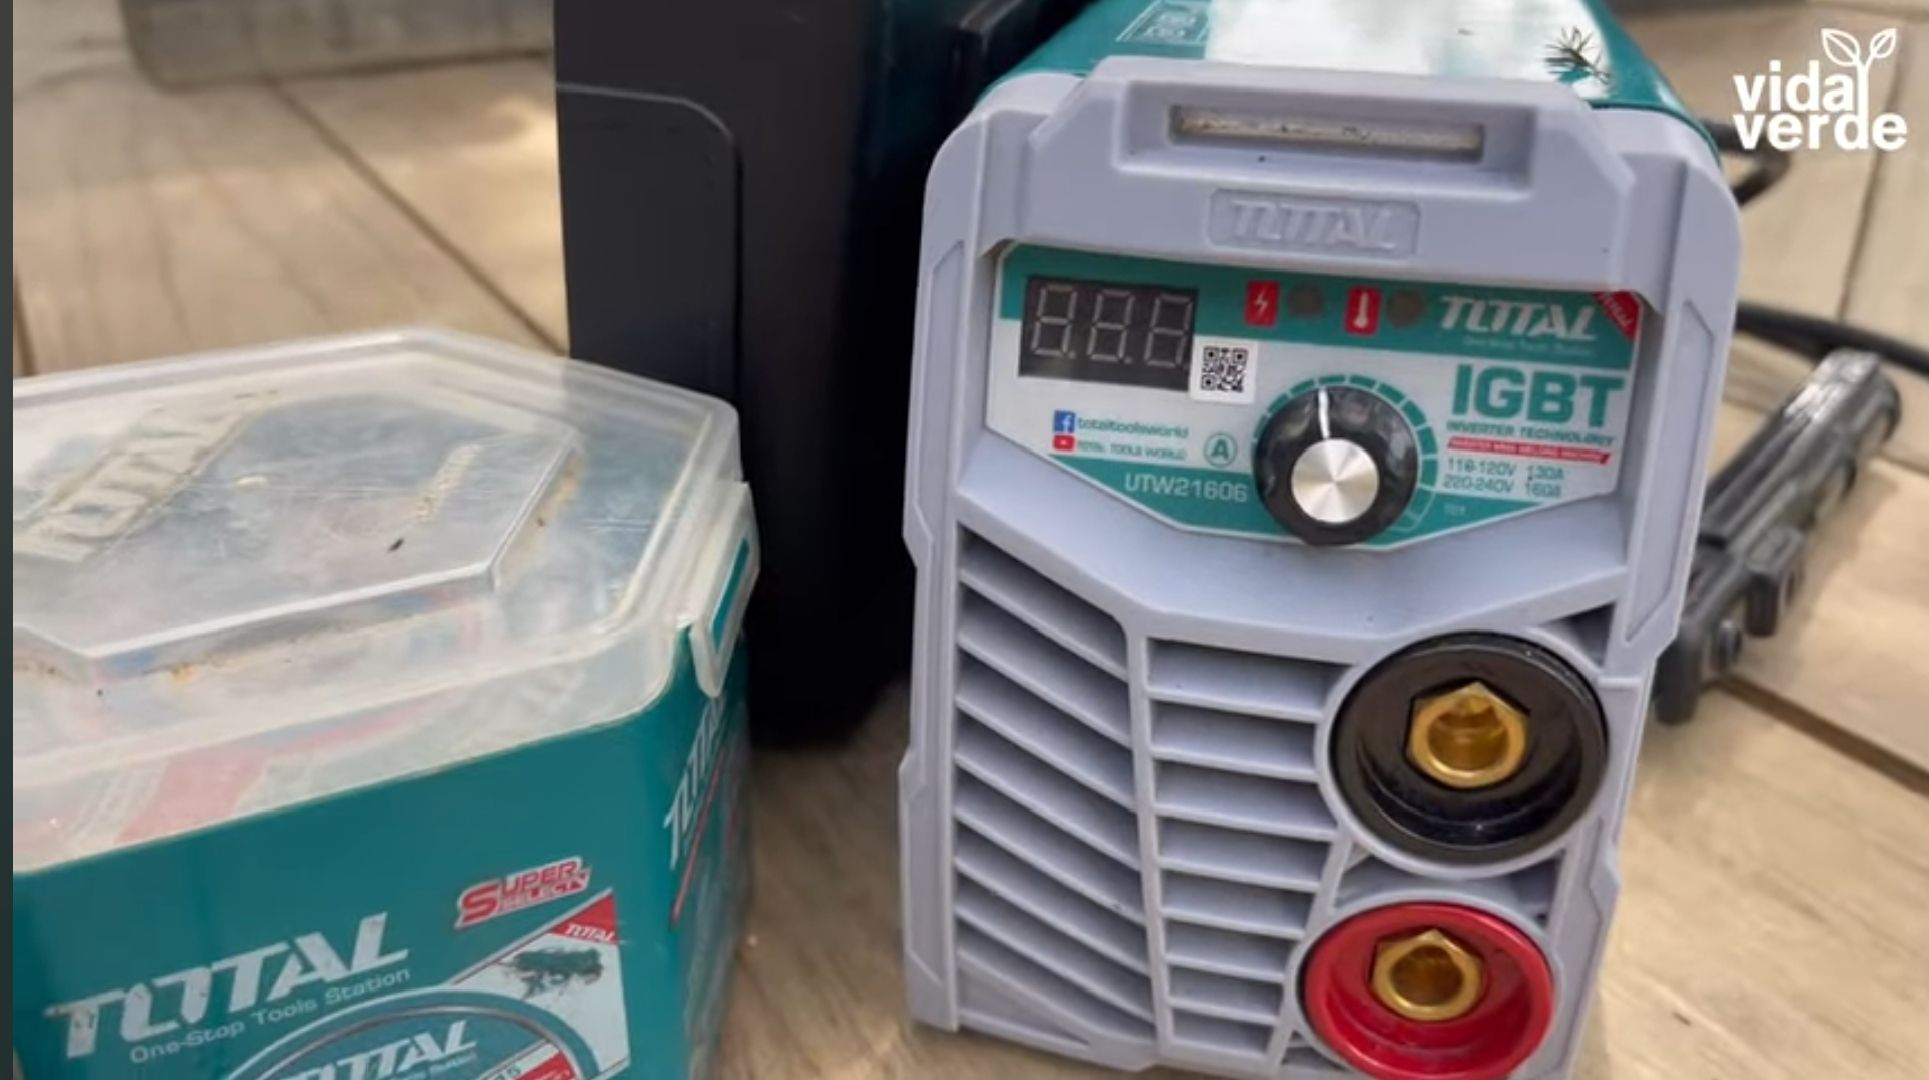
Welding machine
Electrodes 6015
Protective glasses
Gloves
Metal paint in my case I used
In our case it was a galvanised steel pipe, these are the typical pipes used in the installation of fences in public areas such as parks and sports fields.
Once we had all the necessary tools and supplies we got down to work.
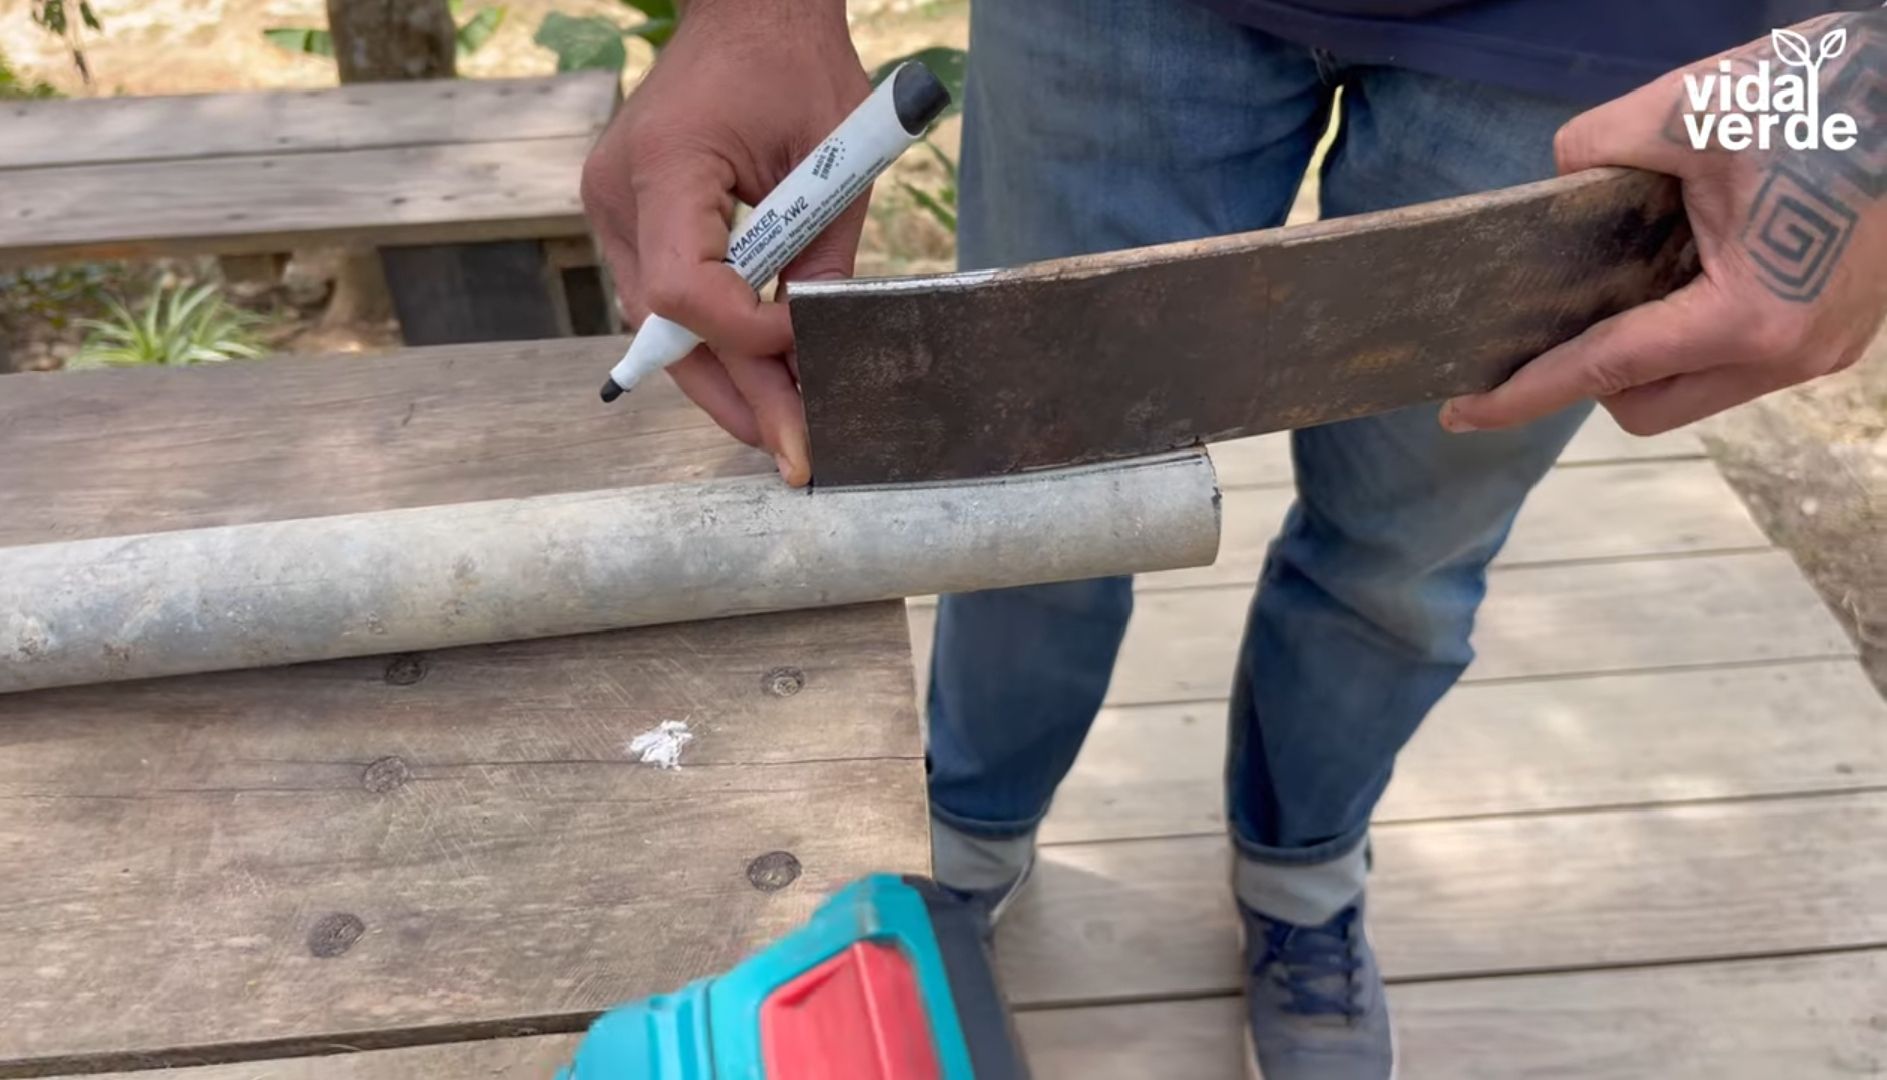
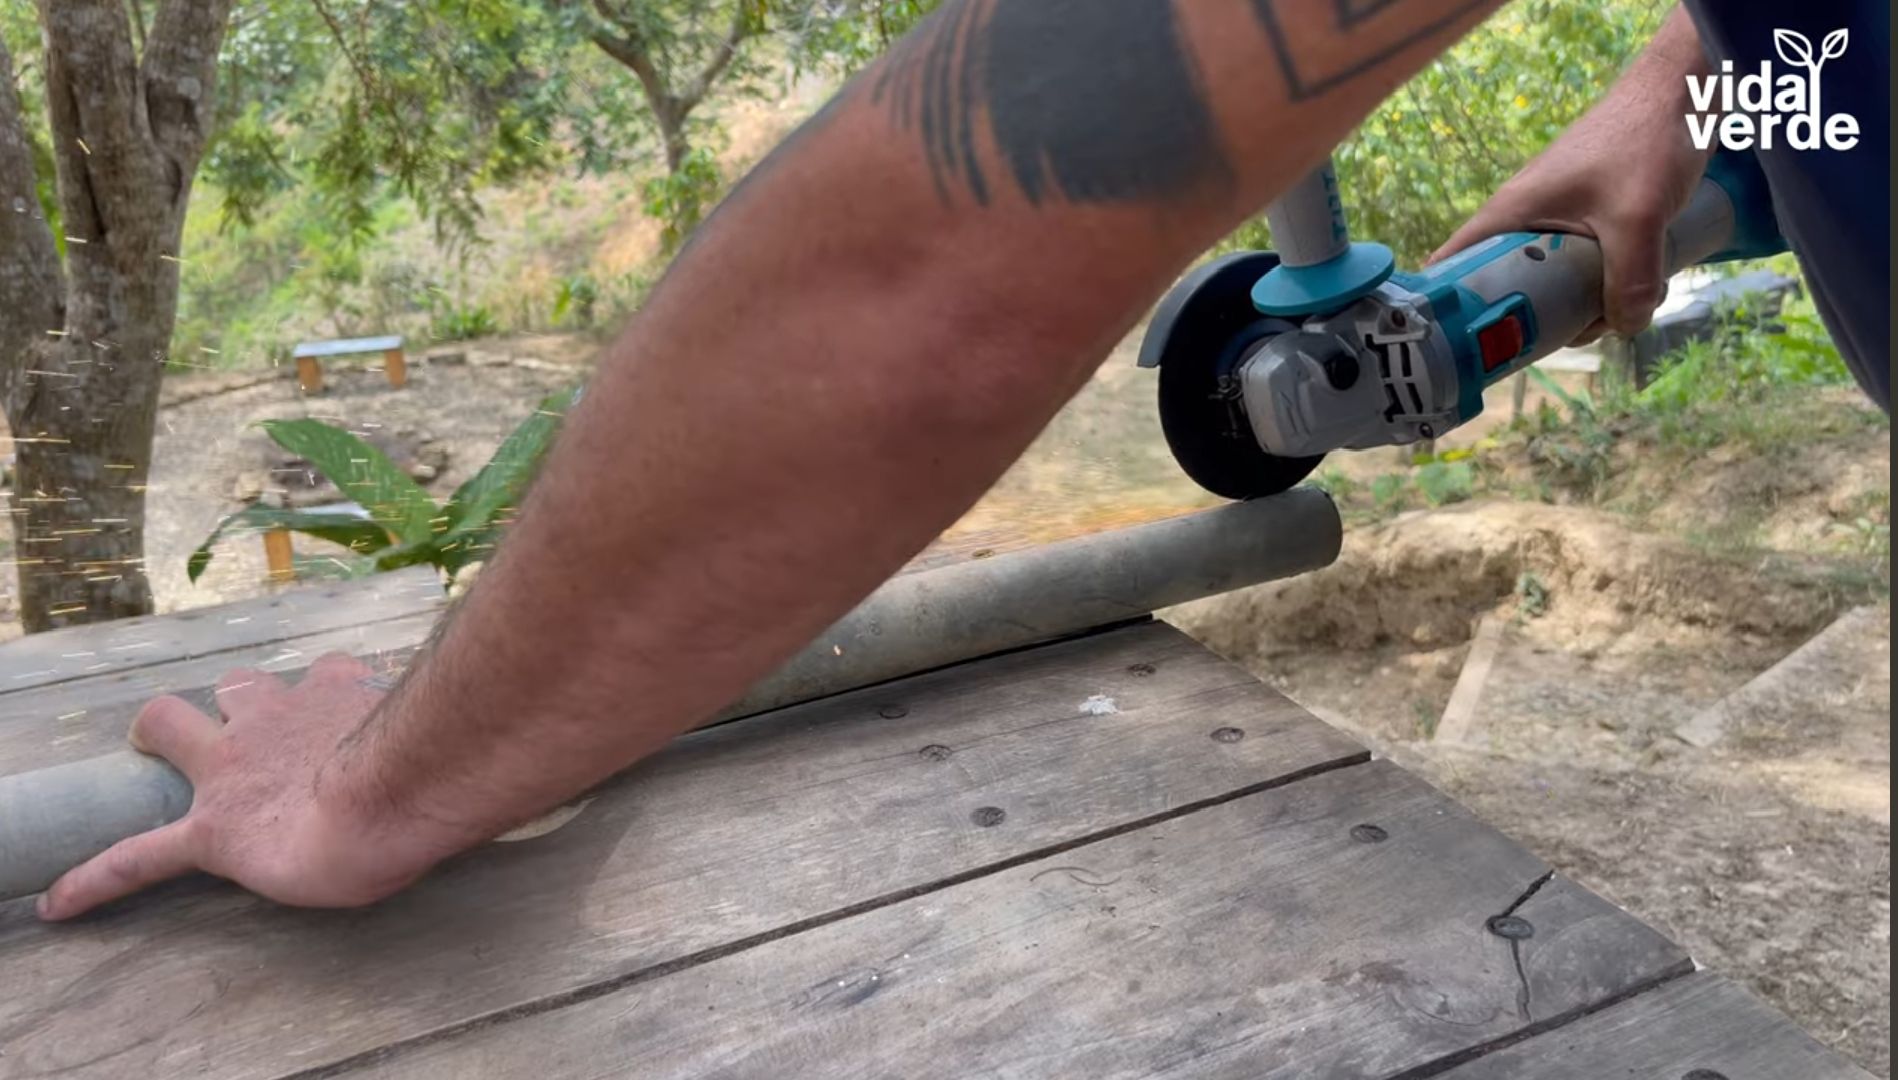
We started by measuring and cutting the size of the bar we needed.
Cutting
We cut it to 1.50 mt, everyone should do it according to their height, leaving it at a comfortable level for its use.
Then we mark and measure the cuts where the crossbow will be embedded on both sides.
Welding
We welded them with a Total Tools inverter machine at 90 amps with 6015 electrode.
Guided by the table that is easily found on the web that tells you what type of amperage you should use, depending on the electrode you have and the millimetres of the material to be welded.
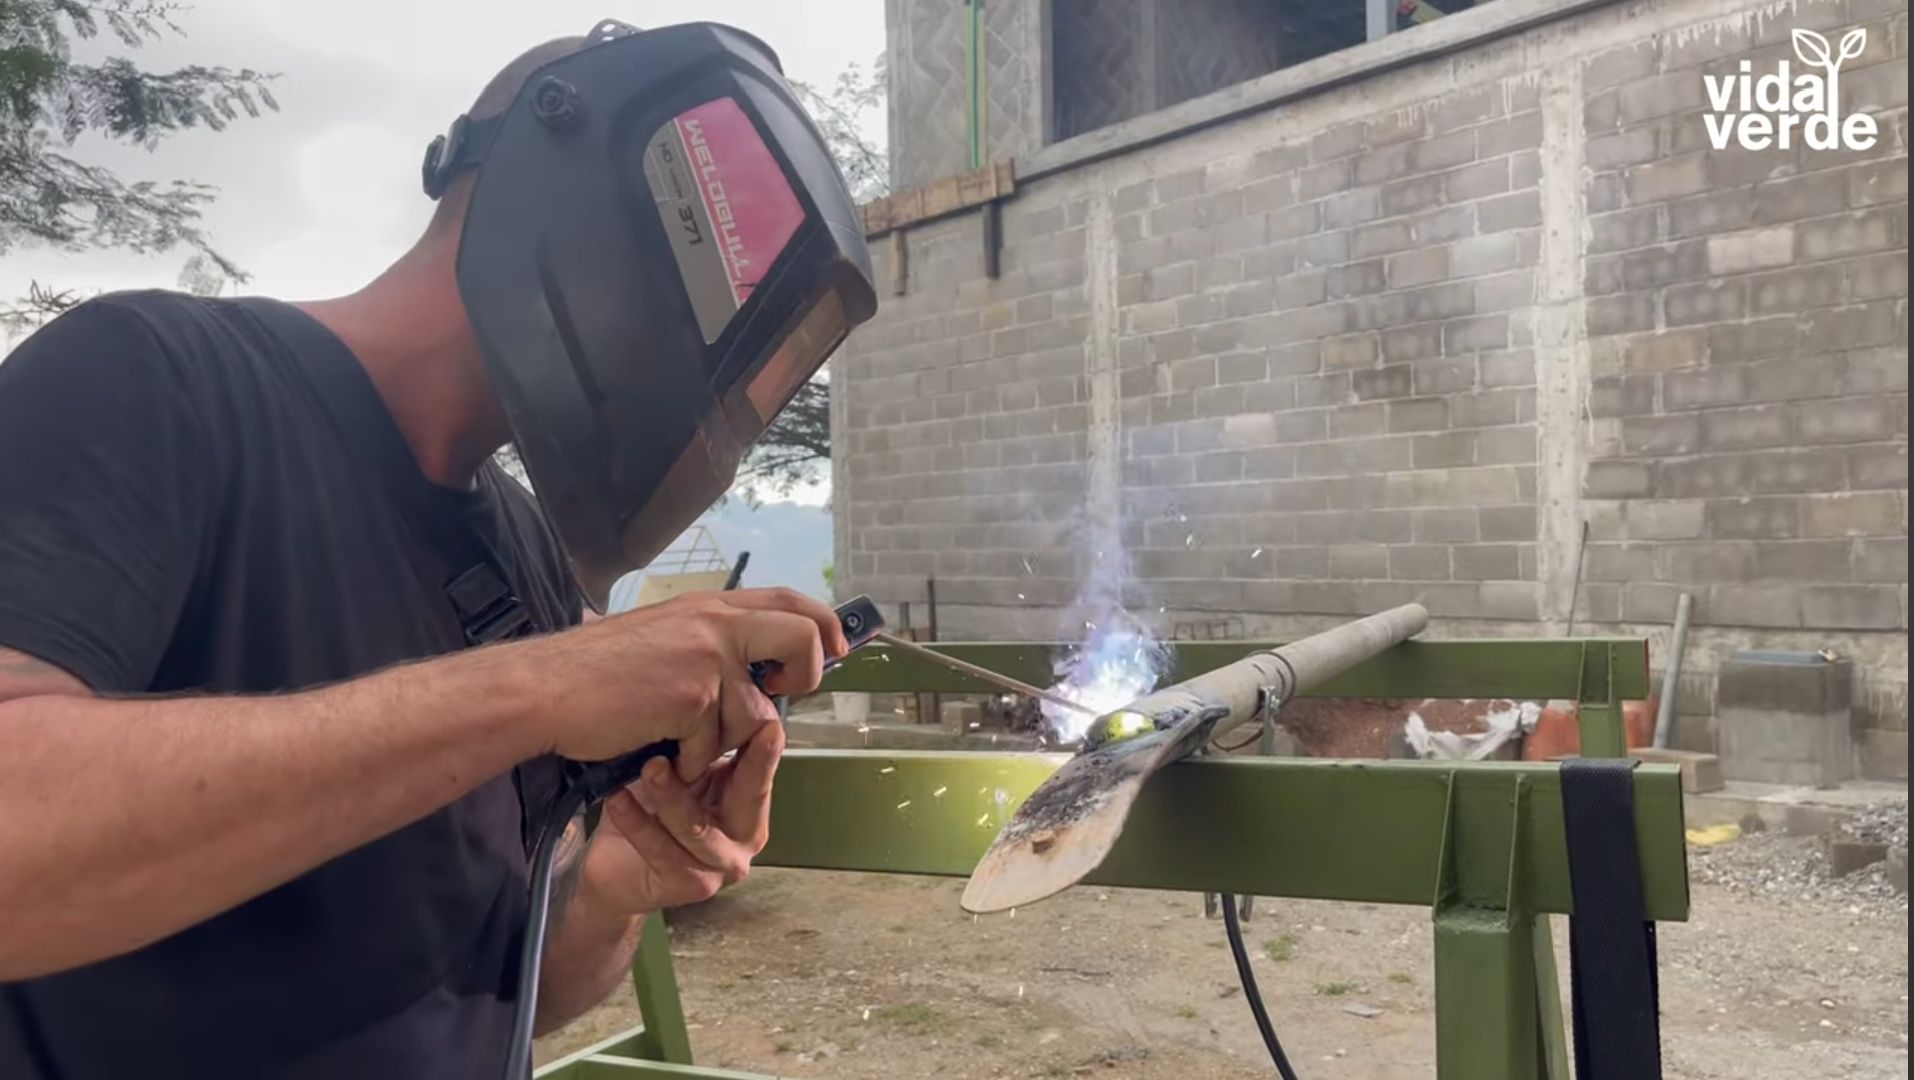

As I said before we are not experts and less in welding, but we have been investigating learning and above all daring, for the type of use that we will give to the bar we do not worry about giving some more aesthetics to the welding, but if you have roughing discs and more practice surely it will be nicer.
The important thing is that it is functional and that the tool doesn't fall apart when you use it, as it happened to us with one we bought with a wooden body, which broke when we used it.

Our tool passed the test perfectly.
It is already in use and we are really happy with it, as it will not only be used for construction but also for planting our trees in the Agro Bosque.
Finally I put some paint on it, as it will be in direct contact with the soil we decided to paint it with a 2 in 1 primer.
Here I also leave you the video so you can see even more of the details that I tell you here, this video is in Spanish, I hope to find out soon how to translate from YouTube the videos to other languages so you can enjoy it with subtitles included.
I hope you are also making use of those materials that are ready to be recycled, my wishes is that this post will be useful to make your own tool.
The capture of the photos are from the YouTube video of our authorship.
Hicimos nuestra Barra Reciclando ♻️ ESP
Hola amantes bricolaje desde hace un poco más de 1 año inició una gran aventura, algo que era un sueño le dimos caminos así que estamos en medio de un gran reto de vida , que es la construir mi propia casa ecológica e inteligente en Arquitectura de Container junto a mi compañero de vida.
Esto ha sido realmente algo retador para nosotros, ya que no teníamos grandes conocidos previos de construcción, lo que nos ha llevado a tener nuevos retos de aprendizaje a diario.
Estamos realmente complacidos con los avances que damos, estos no han salido perfectos pero hemos logrado dar soluciones a cada tropiezo y usando el ingenio, hemos venido haciéndolo nosotros mismos y está publicación de hoy es ejemplo de ello.
Así hicimos está herramienta para la construcción y siembra
Estábamos en pleno proceso de extender nuestra casa container para construir nuestro baño y vestier, pero la herramienta de construcción que teníamos era muy pesada para nosotros...bueno sobre todo para mí , que mido un poco más de 1.50 metri ... jejeje.
Un amigo nos prestó una hecha por el , nos encantó ya que es súper liviana y nos regaló los materiales reciclados para hacerlo, hoy les contare en como hicimos está herramienta de construcción para escavar tierra con materiales de reciclaje.
Materiales Reciclados
1 Tubo circular
1 Ballesta de carro
Herramientas e insumos
Esmeril
Disco de corte
Disco de pulir
Máquina de Soldar
Electrodos 6015
Lentes de protección
Guantes
Pintura para metal en mi caso use
En nuestro caso fue un tubo de acero galvanizado ,estos son los típicos tubos que se usan en la instalación de cerca en áreas públicas como parques y canchas deportivas.
Al tener todas las herramientas e insumos necesarios pusimos manos a la obra.
Iniciamos por medir y cortar el tamaño que necesitamos de la barra .
Cortes
Está la cortamos a 1.50 mt, cada quien debe hacerlo según su estatura dejándolo a un nivel cómodo para su uso.
Luego pasamos a marcar y medir los cortes de dónde iria incrustada la Ballesta de ambos lados.
Soldadura
Nosotros los soldados con una máquina inverter de Herramientas Total a 90 amperios con electrodo 6015.
Guiandos por la tabla que se encuentra fácilmente en la web que te indica que tipo de amperaje debes usar, según el electrodo que tengas y los milimetros del material a soldar.
Cómo dije antes no somos expertos y menos en soldadura, pero hemos ido investigando aprendiendo y sobre todo atreviendonos, por el tipo de uso que le daremos a la barra no nos preocupamos por darle algo más de estética a la soldadura, pero si tienes discos desbaste y mayor práctica seguro te quedará más lindo.
Lo importante es que sea funcional y que al usarlo no se te desarme la herramienta, como nos pasó con una que compramos con cuerpo de madera, que al usarla se partió.
Nuestra herramienta pasó la prueba perfectamente.
Ya está en uso y estamos realmente felices con ella, ya que no solo será usada para la construcción sino también para la siembra de nuestro arboles en el Agro Bosque.
Por último le coloque pintura, ya que estara en contacto directo con la tierra decidimos pintarla con un fondo 2 en 1 .
Aquí les dejo también el vídeo para qué puedan ver aún más los detalles que aquí les cuento, este video esta en español, espero descubrir pronto como lograr traducir desde YouTube los videos a otros idiomas para que puedan disfrutarlo con subtitulos incluidos.
Espero que ustedes también le estén dando uso a esos materiales que están listo para ser reciclados,mis deseos es que este post les sea útil para hacer su propia herramienta.
Los capture de las fotos son del video de YouTube de nuestra autoría.
Carmen Victoria Turmero
| I am audiovisual producer, nature lover, creator of the Ecovillage and Community Vida Verde , passionate about travel and architecture. |  |
|---|