ENGLISH VERSION
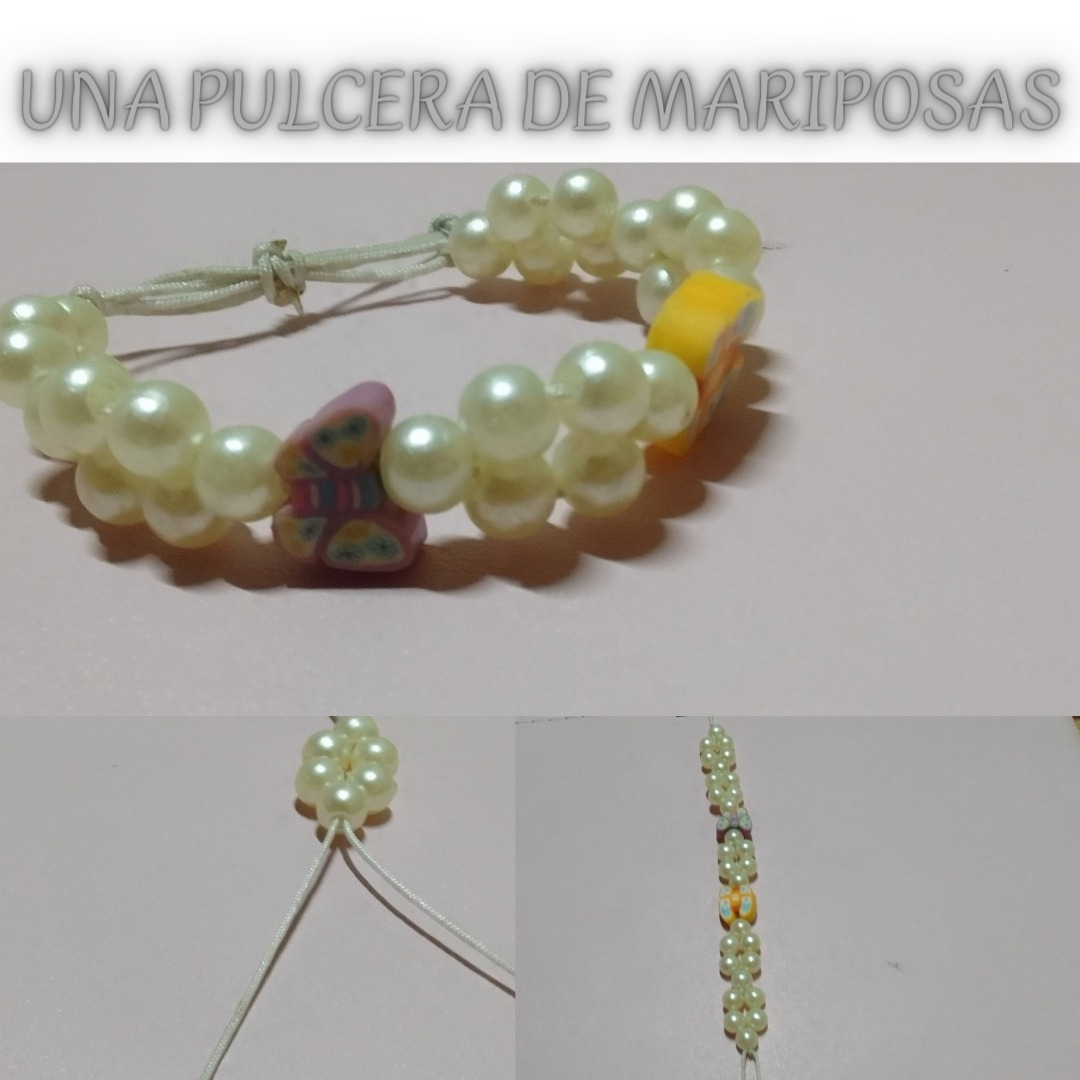
Hello everyone, today I have the pleasure of posting again in this beautiful #Jewelry community and this time I do it with a beautiful pearl and butterfly bracelet.
MATERIALS
It is very easy and simple to make, you only need 20 cm of white Chinese thread, white pearls and butterfly decorations.
FIRST STEP
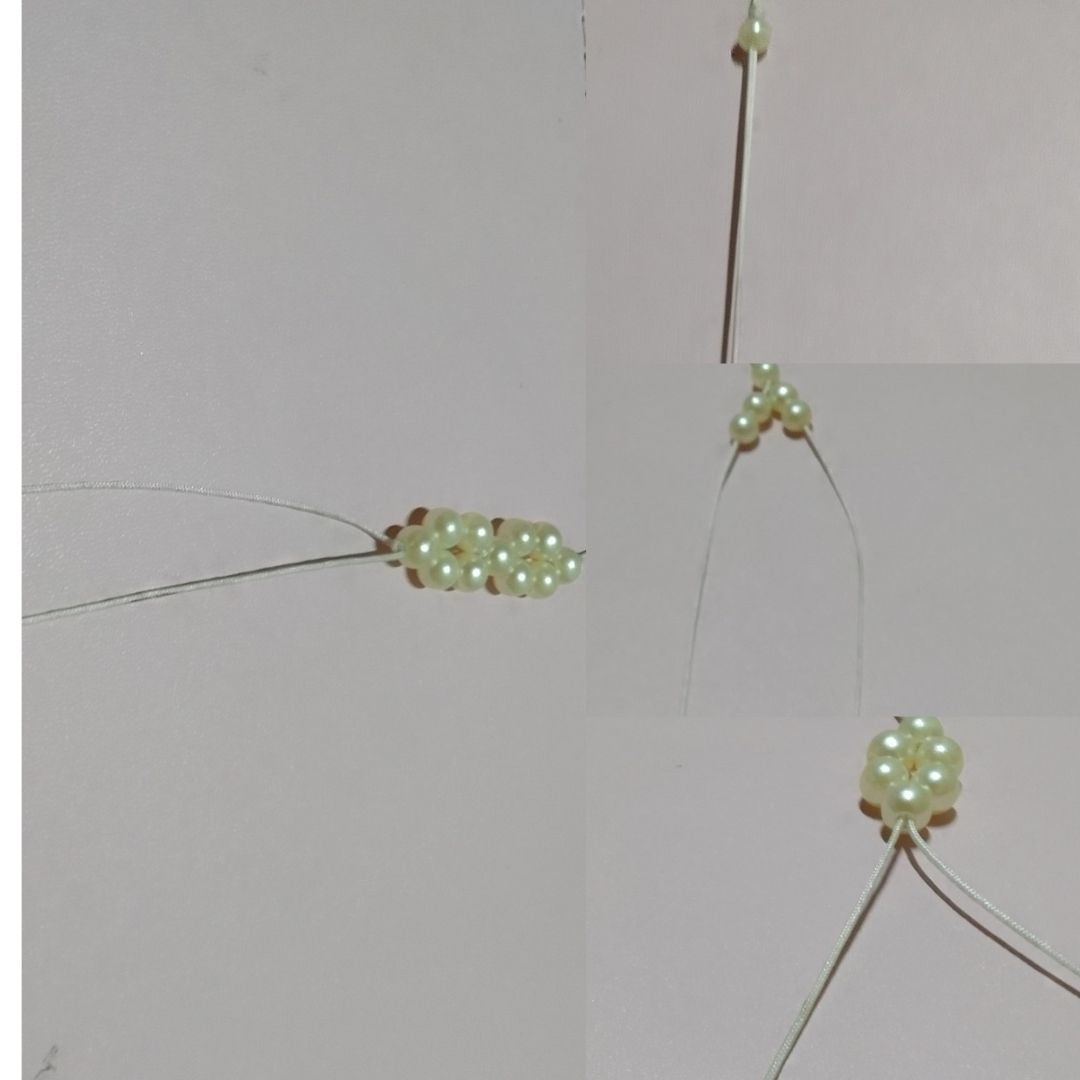
The first thing we are going to do is take the 20 centimeters of white Chinese thread and we are going to divide it in half, thus having two pieces of white Chinese thread of 10 cm each, we are going to join it and we are going to tie a knot then we will to fix to our workplace with the help of a clip.
SECOND STEP
The next thing we are going to do is take a pearl and pass it through the two threads, then we will take another 2 pearls, these we will pass only through one thread, the one on the right side. We are going to take another 2 more pearls and we are going to pass them through the thread on the left side. And to finish we are going to pass another bead again through the two threads to ensure that it does not move from the place. We are going to tie a small simple knoet.
THIRD STEP
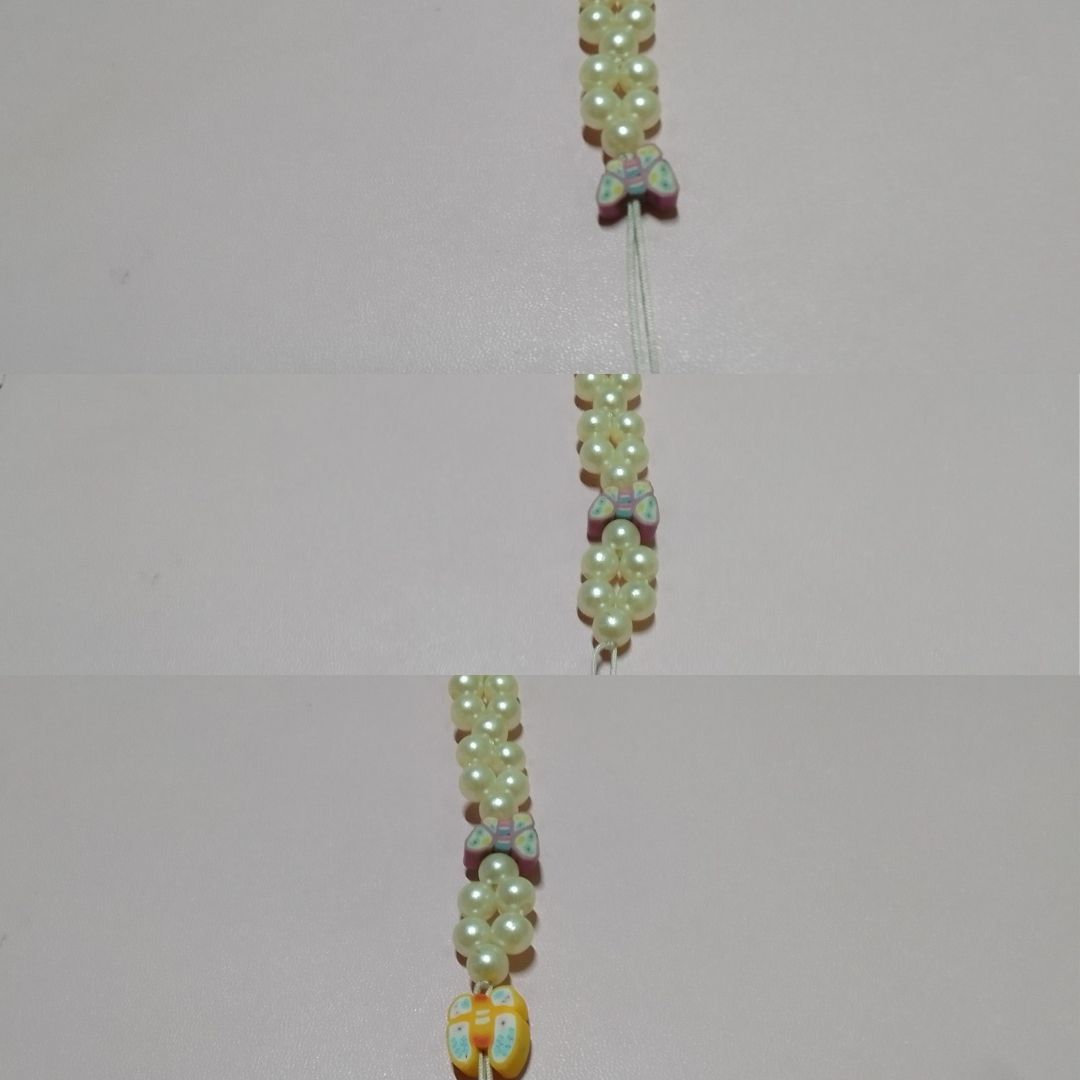
We repeat this procedure one more time in the same way, then we place a butterfly ornament, which we are going to pass through and we repeat the procedure for the pearls. We will take a pearl and we will pass it through the two threads. Then we will take two more pearls that we will pass. Through the right thread we will do the same in hell we will pass two more pearls and to finish we pass a pearl through the two threads again, we make a simple knot again so that it does not move. We place the other butterfly ornament and we are going to pass it through the two threads.
FOURTH STEP
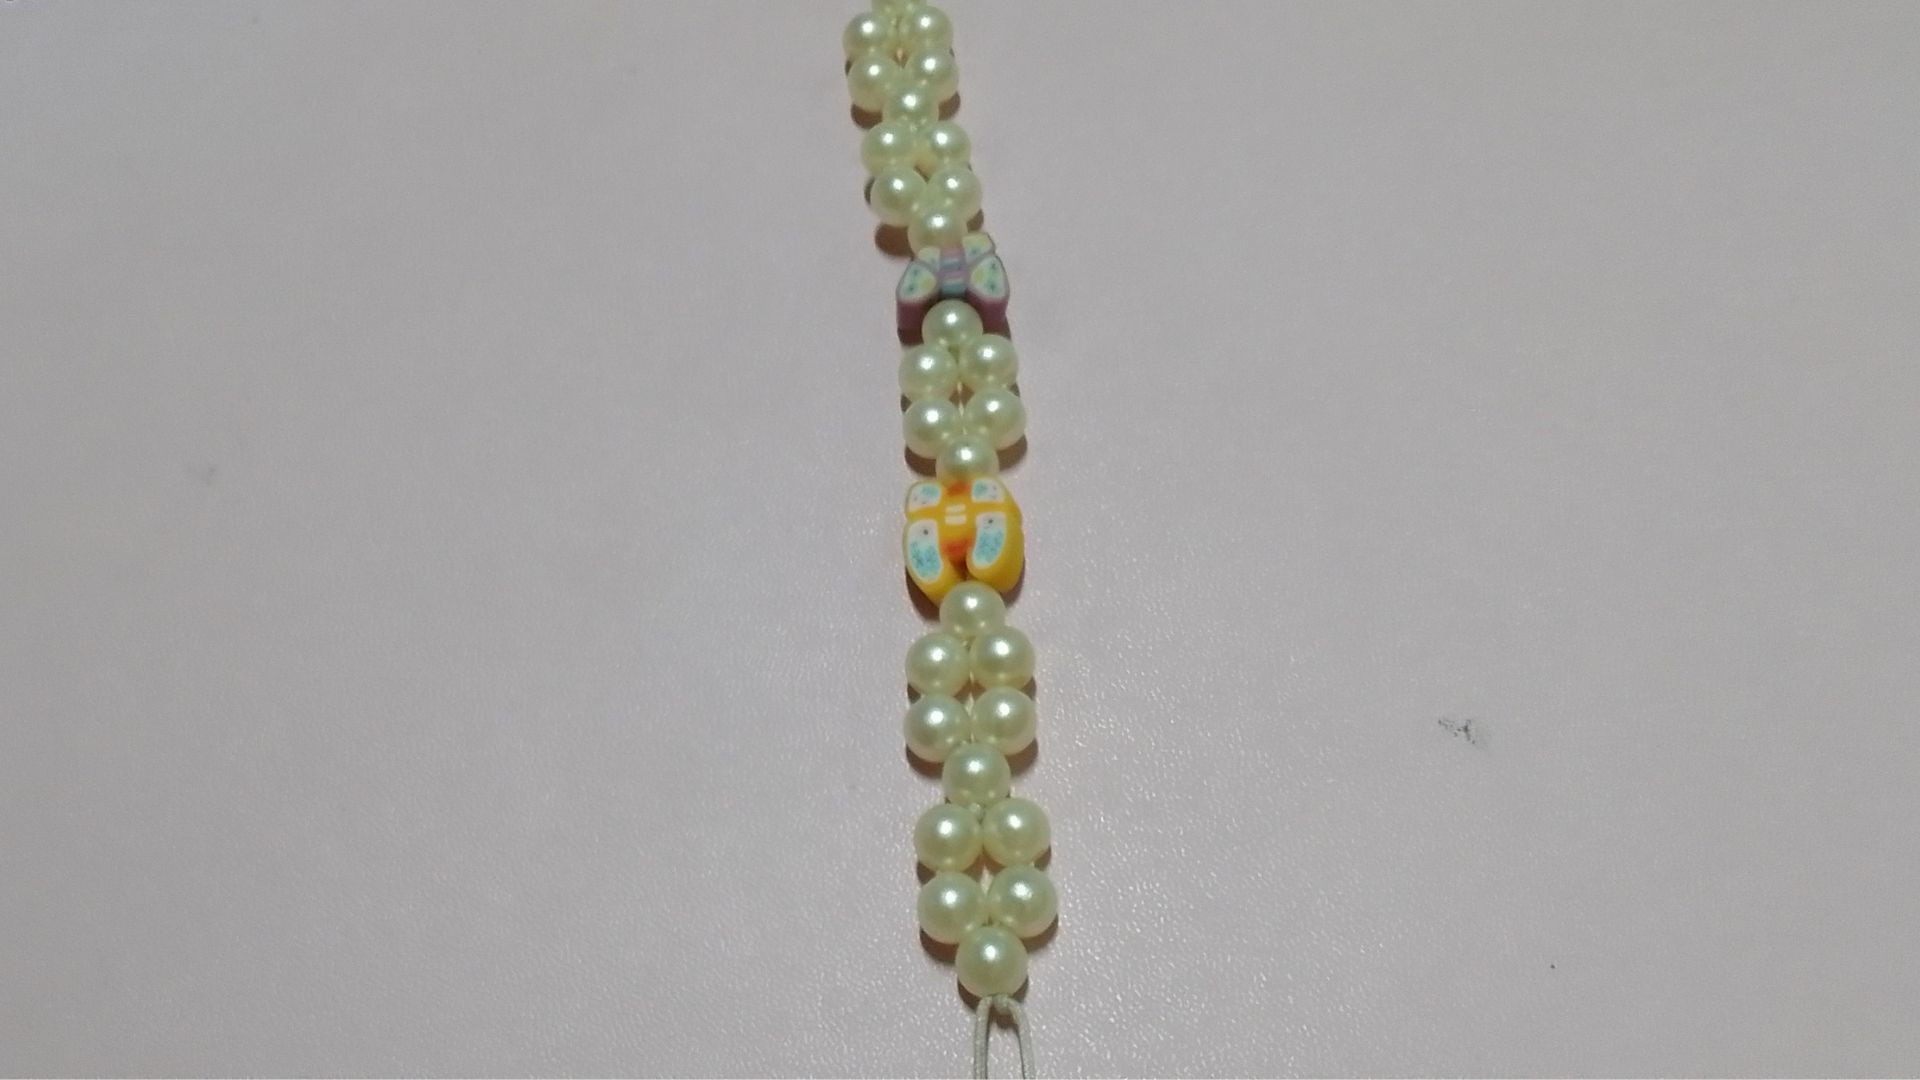
To finish the decoration of the bracelet, we repeat the pearl procedure twice and our decoration is done.
FIFTH STEP
To finish the pulse, we are going to make the closure. We are going to take the two ends that we had left over and we are going to put it in the shape of a cross, converting the two ends into the central threads. We are going to take a 5 cm piece and we are going to pass it under the central threads we will make a knot and we will begin to knit with the flat knot we take the thread on the right and pass it over it then we take the thread on the left and pass it over the one on the right then under the central thread and we take it out Through the space left on the right we press and there is our first point. We will do the same procedure but this time with the left thread we are going to pass it over the central thread leaving a space then we will take the right thread and pass it over the left thread below the central one and we will take it out Through the space left on the left we press and we now have our closure.
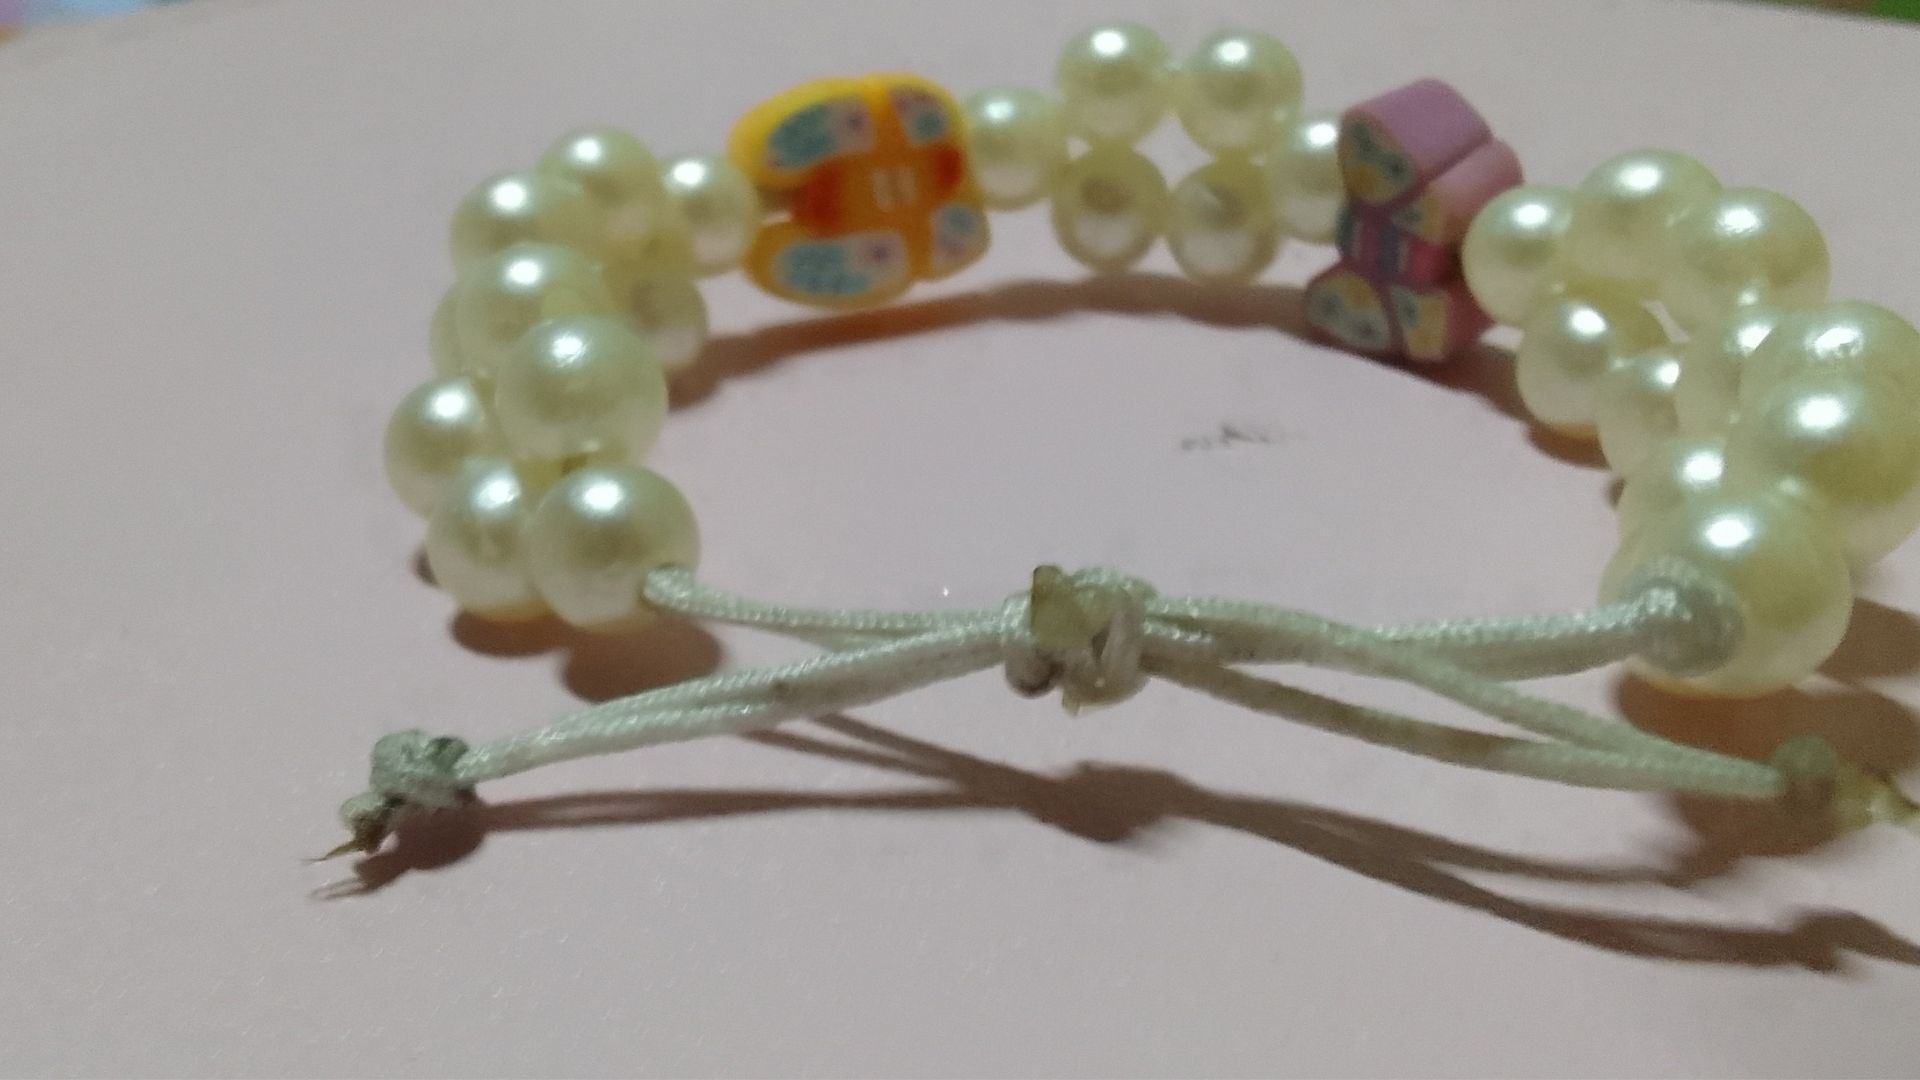
This was the result of my work, I hope you like it as much as I do.

The photos were taken by my Samsung Galaxy A 03 Core phone and edited in canva
The text was translated by Deepl
VERSIÓN EN ESPAÑOL
Hola a todos hoy tengo el placer de publicar nuevamente en esta hermosa comunidad de #Jewelry y esta vez lo hago con una hermosa pulcera de perlas y de mariposas.
MATERIALES
Es muy fácil y sencilla de hacer solo se necesita 25 cm de hilo chino blanco , perlas blancas y los adornos de mariposas
PRIMER PASO
Lo primero que vamos a hacer es tomar 20 centímetros de hilo chino blanco y lo vamos a dividir a la mitad teniendo así dos pedazos de hilo chino blanco de 10 cm cada uno lo vamos a unir y le vamos a hacer un nudo dejando un espacio de la punta de 2.50 cm ,luego lo vamos a fijar a nuestro lugar de trabajo con ayuda de una presilla.
SEGUNDO PASO
Lo siguiente que vamos a hacer es tomar una perla y pasarla por los dos hilos luego tomaremos otras 2 perlas estas las pasaremos solamente por un hilo el del lado derecho vamos a tomar otras 2 perlas más y le vamos a pasar por el hilo del lado izquierdo y para terminar vamos a volver a pasar otra perla nuevamente por los dos hilos para asegurar que no se mueva del lugar le vamos a hacer un pequeño nudo simple.
TERCER PASO
Repetimos este procedimiento una vez más de la misma forma luego colocamos un adorno de mariposa el cuál vamos a pasar por los 2 hilos y luego de esto volvemos a repetir el procedimiento de las perlas tomaremos una perla y la vamos a pasar por los dos hilos luego tomaremos dos perlas más que pasaremos por el hilo derecho haremos lo mismo en el hilo izquierdo pasaremos otras dos perlas más y para terminar volvemos a pasar una perla por los dos hilos hacemos nuevamente un nudo simple para que no se mueva. Colocamos el otro adorno de mariposa y lo vamos a pasar por los dos hilos.
CUARTO PASO
Para terminar el adorno de la pulcera volvemos a repetir el procedimiento de las perlas dos veces y ya está nuestro adorno realizado.
QUINTO PASO
Para terminar la pulsa vamos a hacer el cierre vamos a tomar los dos extremos que nos sobraron y le vamos a poner en forma de cruz convirtiendo los dos extremos en los hilos centrales tomaremos un pedazo de 5 cm y lo vamos a pasar por debajo de los hilos centrales haremos un nudo y comenzaremos a tejer con el nudo plano tomamos el hilo de la derecha y lo pasamos por encima del hilo central luego tomamos el hilo de la izquierda y lo pasamos por encima del de la derecha después por debajo del hilo central y lo sacamos por el espacio que nos quedó en la derecha apretamos y ya está nuestro primer punto. Haremos el mismo procedimiento pero esta vez con el hilo de la izquierda lo vamos a pasar por encima del hilo central dejando un espacio luego tomaremos el hilo de la derecha y lo pasaremos por encima del hilo de la izquierda , por debajo del hilo central y lo sacaremos por el espacio que nos quedó en la izquierda apretamos y ya tenemos nuestro cierre.
Este fue el resultado de mi trabajo espero que les guste tanto como a mí. Solo me queda desearles a todos un feliz día
Las fotos fueron tomadas por mi teléfono Samsung Galaxy A 03 Core y editadas en canva
El texto fue traducido por Deepl