¡Bienvenidos a mi blog!
¡Welcome to my blog!
Buenas noches amigos del arte :tejido a crochet y de esta linda comunidad #needleworkmonday, espero que se encuentren bien junto a su familia. Muchas bendiciones.
Good evening friends of the art :crochet and this beautiful community #needleworkmonday, I hope you are well with your family. Many blessings.
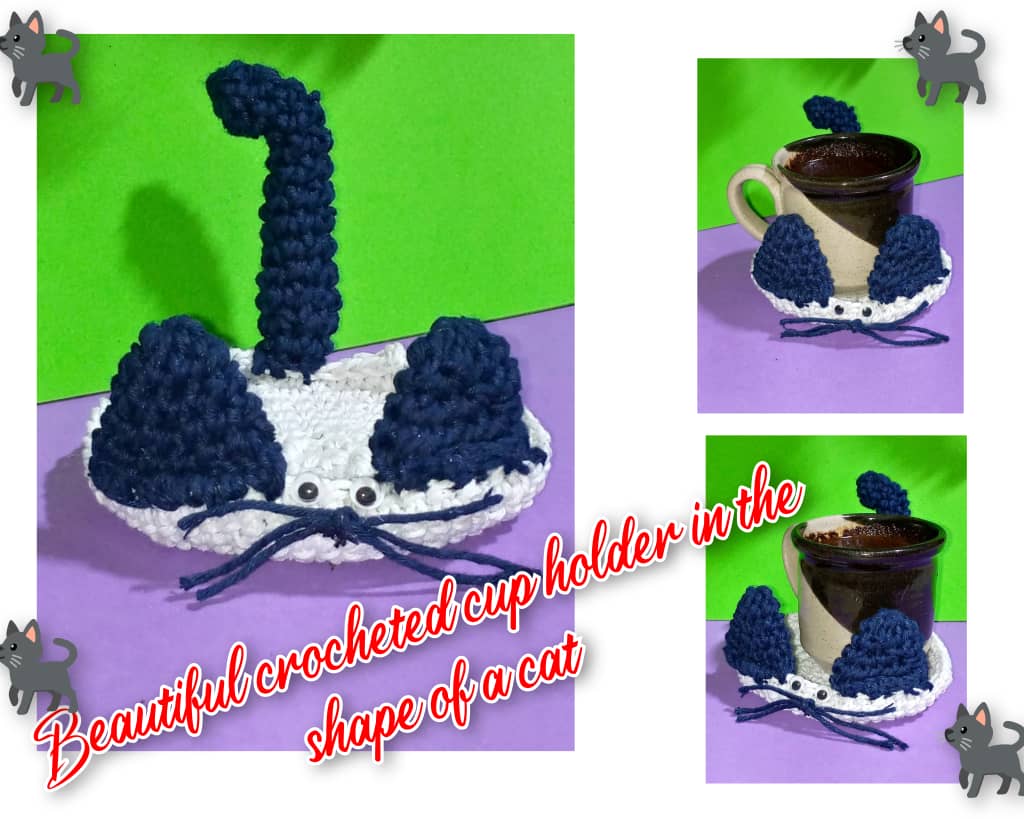
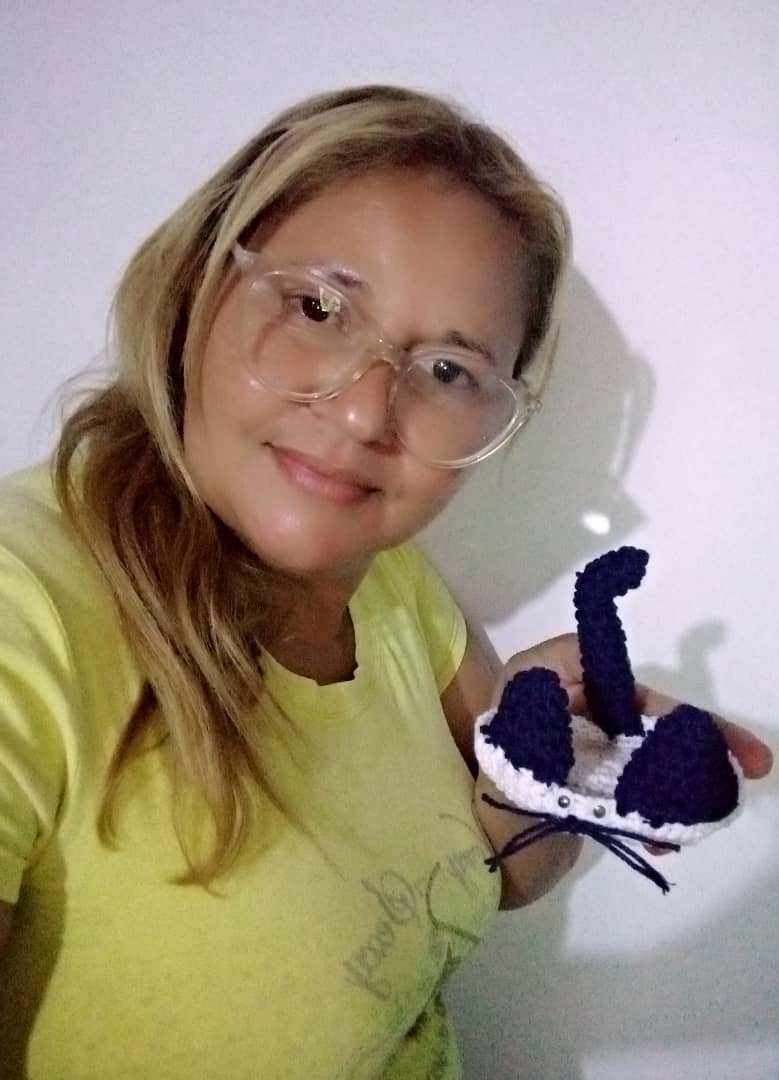
Hoy traigo un proyecto muy lindo , fácil y muy coqueto,: porta taza tejido en forma de gato.
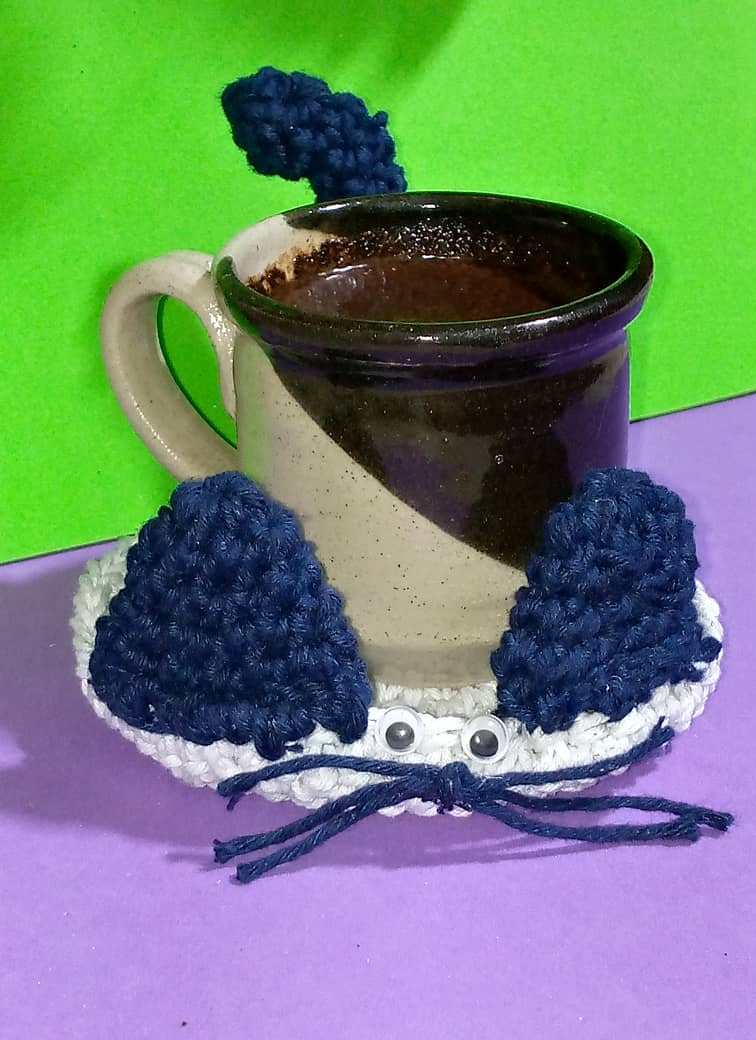
Este porta taza es especial para colocar nuestras tazas o vasos, a la hora de deleitar un rico café, chocolate , café con leche o cualquier tipos de bebidas calientes o frías.Ademas sirve de adorno, espero que sea de su agrado y lo realicen.
Mi porta taza tiene forma de gato ya que amo mucho a los animales y los gatos son unos de ellos. No permito que le hagan maldad a un animal. Sin más nada que decir , manos a la obra.
Today I bring you a very cute, easy and very cute project: a woven cup holder in the shape of a cat.
This cup holder is special to place our cups or glasses, at the time of delighting a rich coffee, chocolate, coffee with milk or any type of hot or cold drinks, it also serves as an ornament, I hope you like it and make it.
My mug holder is shaped like a cat because I love animals and cats are one of them. I do not allow them to do evil to an animal. Without further ado, let's get to work.
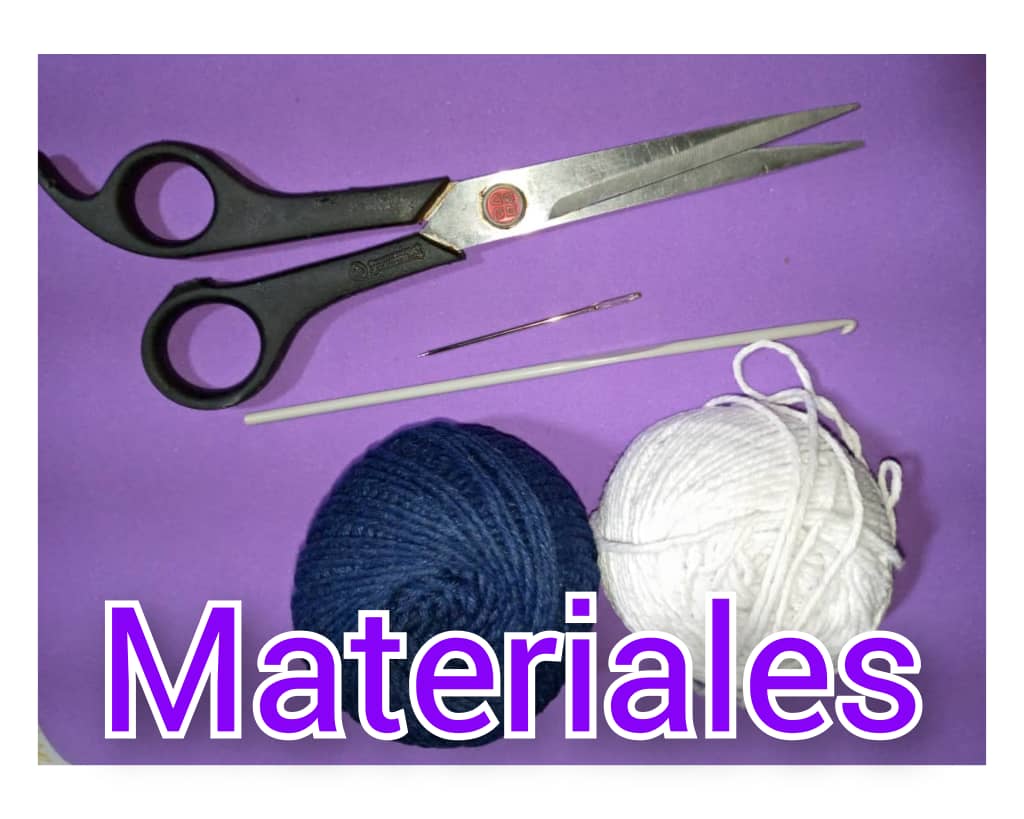
Los materiales a utilizar para la realización del hermoso porta taza en forma de gato:
- Hilo para tejer de colores : blanco y azul oscuro.
- Aguaj para tejer , número 3.
- Aguja lanera.
- Ojos movibles.
- Silicona líquido.
- Tijera.
- Alfiler.
The materials to be used for the realization of the beautiful cup holder in the shape of a cat:
- Colored knitting yarn : white and dark blue.
- Knitting needle, number 3.
- Knitting needle.
- Movable eyes.
- Liquid silicone.
- Scissors.
- Pin.
Paso a paso para la realización del porta taza en forma de taza tejida:
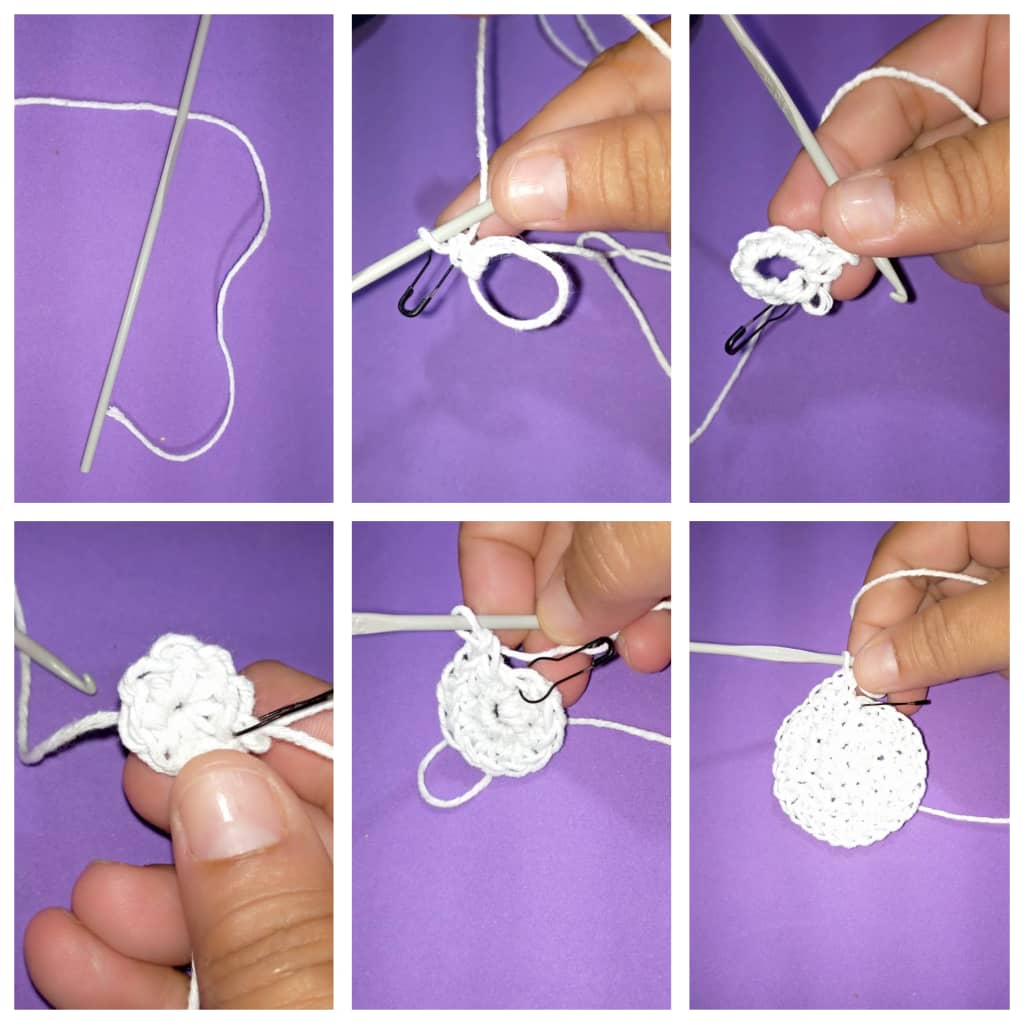
- Lo primero que debemos hacer es, tomar el hilo blanco, hacer un anillo mágico, dentro del anillo meter 6 puntos bajos , cuando se haga el primer punto bajo colocar un alfiler ese será la marca para continuar la otra vuelta. Cerrar la primera vuelta.
- Para comenzar a realizar la segunda vuelta, sacamos el alfiler y hacemos un punto bajo, este sería el primer punto , luego en el mismo punto hacer otro (aumento) luego en todos los puntos hacer aumentos , está vuelta debe tener 12 puntos
- Todas las vueltas terminan antes de la marca o del alfiler, todos los puntos son bajos.
- Para la tercera vuelta: comenzar desde donde está el alfiler,sería un punto bajo, luego un aumento ,en el siguiente punto, un punto bajo y otro aumento, así sería la secuencia hasta terminar la vuelta un total de 21 puntos bajos.
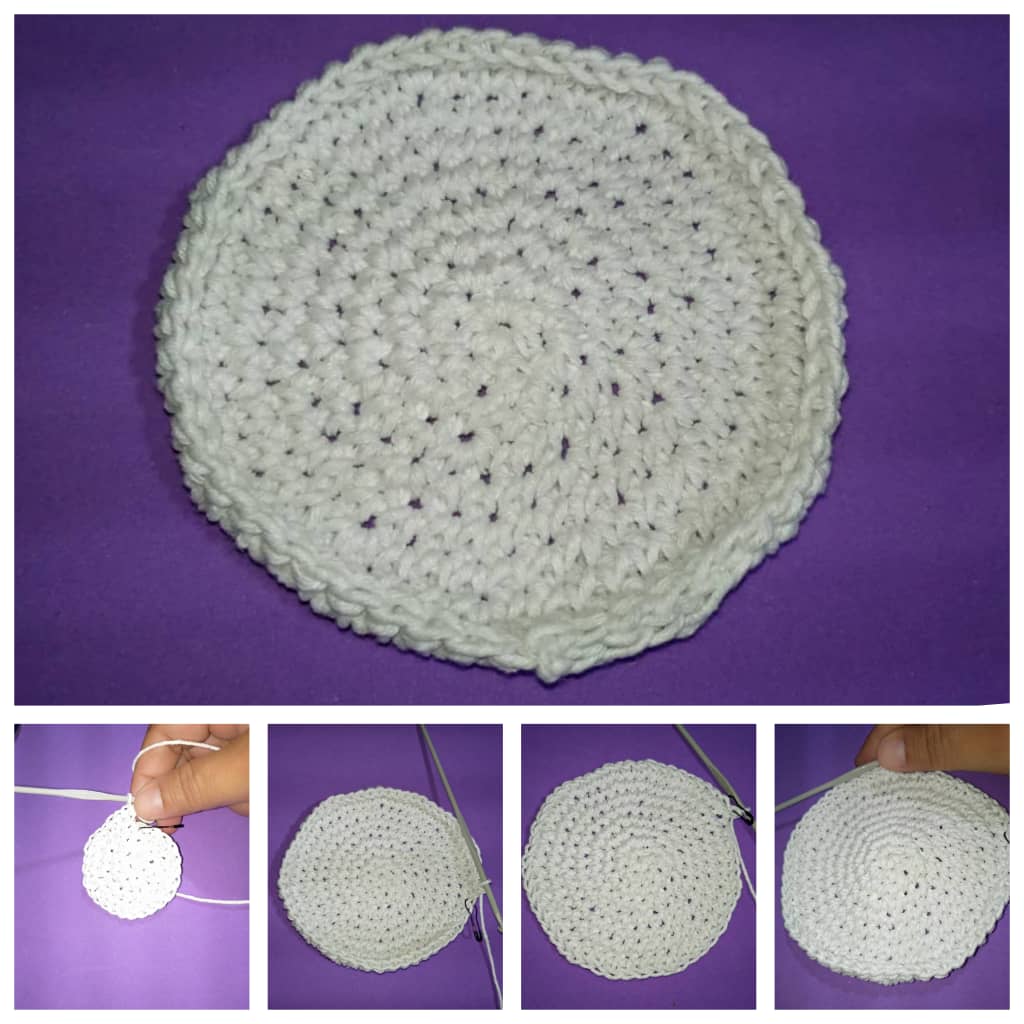
- Para la cuarta vuelta: serían dos puntos bajos y un aumento. En total 28 puntos.
- Para la quinta vuelta: serían tres puntos bajos y un aumento, para un total de 35 puntos bajos.
- Para la vuelta 6, serían 4 puntos bajos y un aumento.Serian 42 puntos.
- Para la 7 vuelta, se hará lo mismo que la vuelta 6 y de esta manera se hará la parte de abajo del porta taza.
Step by step for the realization of the cup holder in the shape of a knitted cup:
- The first thing we must do is, take the white yarn, make a magic ring, inside the ring put 6 low stitches , when the first low stitch is made place a pin that will be the mark to continue the other round. Close the first round.
- To begin to make the second round, remove the pin and make a single crochet, this would be the first stitch, then in the same stitch make another one (increase) then in all the stitches make increases, this round should have 12 stitches.
- All the rows end before the marker or the pin, all the stitches are single crochet.
- For the third row: start from where the pin is, it would be a single crochet, then an increase, in the next stitch, a single crochet and another increase, this would be the sequence until the end of the row a total of 21 single crochets.
- For the fourth row: two single crochet and one increase. In total 28 stitches.
- For the fifth row: three single crochets and one increase, for a total of 35 single crochets.
- For the 6th row: 4 single crochets and an increase, for a total of 42 stitches.
- For the 7th row, we will do the same as in row 6 and in this way we will make the bottom part of the cup holder.
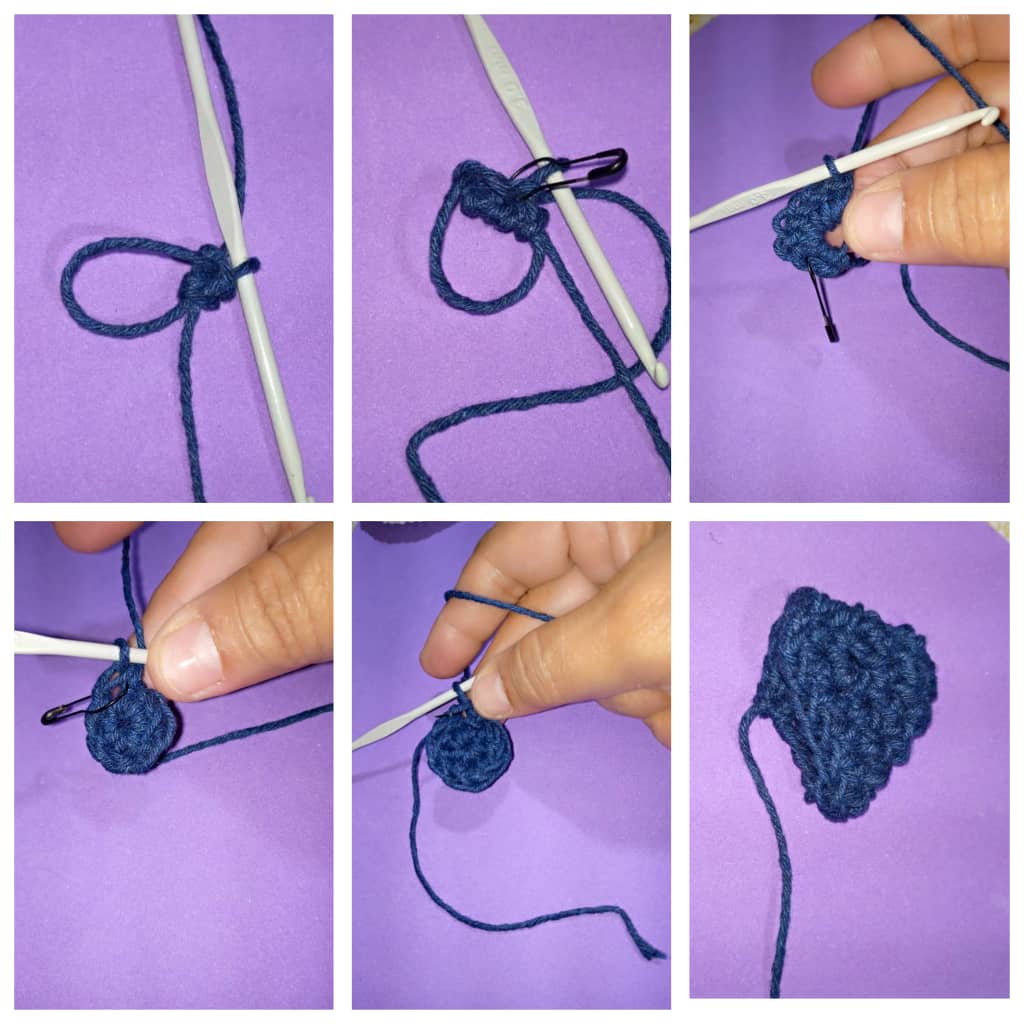
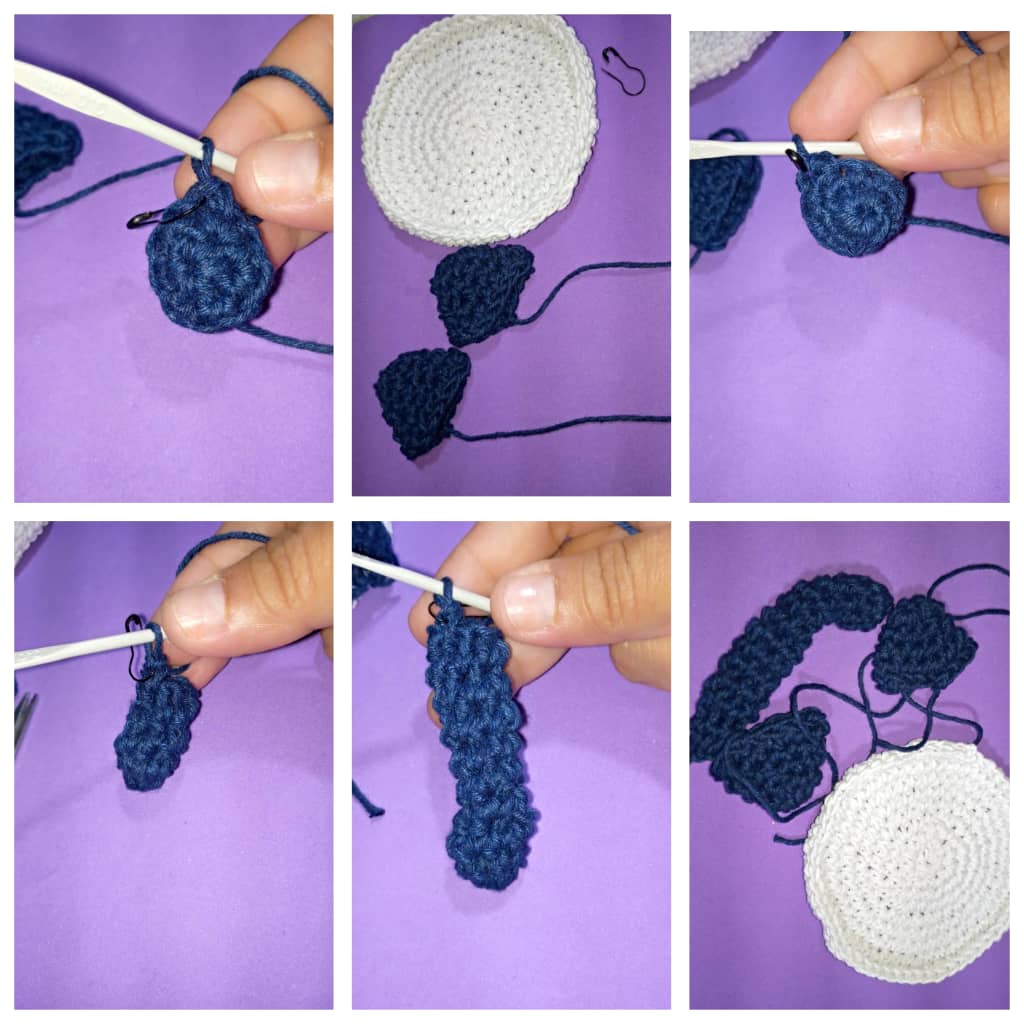
- Ahora vamos a tejer las orejas del gato:
- Con el hilo azul y la aguja hacemos un anillo mágico ,dentro del anillo metemos 6 puntos bajos, marcando siempre con un alfiler el primer punto que vayamos a tejer en cada vuelta.
- Luego para la segunda vuelta ,metemos dos puntos en cada punto. Para un total de 12 puntos bajos.
- Para la tercera vuelta, tres puntos bajo y un aumento para un total de 16.
- Para la cuarta vuelta, cuatro puntos bajos y un aumento, así es la secuencia hasta terminar la vuelta.
- Para la 5 vuelta , 5 puntos bajos y un aumentó, total 19 puntos bajo.
- De la misma manera se teje la otra oreja.
- Now we are going to knit the cat's ears:
- With the blue yarn and the needle we make a magic ring ,inside the ring we put 6 low stitches, always marking with a pin the first stitch that we are going to knit in each round.
- Then for the second row, we put two stitches in each stitch. For a total of 12 single crochet stitches.
- For the third row, three single crochet and one increase for a total of 16.
- For the fourth row, four single crochet and one increase, this is the sequence until the end of the row.
- For the 5th row, 5 single crochets and an increase, total 19 single crochets.
- The other ear is knit in the same way.
- Para hacer el rabo del gato, hacemos un anillo mágico y metemos 6 puntos bajos. Así seguimos con la misma secuencia hasta llegar a la vuelta 12.
- Recortar los excesos de hilo con las tijeras.
- To make the cat's tail, we make a magic ring and cast on 6 single crochet stitches. Continue in the same sequence until you reach the 12th row.
- Trim the excess yarn with the scissors.
- Por último pegar con silicona los ojos movibles y los bigotes. Y ya está listo el hermoso gato tejido
- Finally glue the movable eyes and whiskers with silicone. And the beautiful knitted cat is ready.
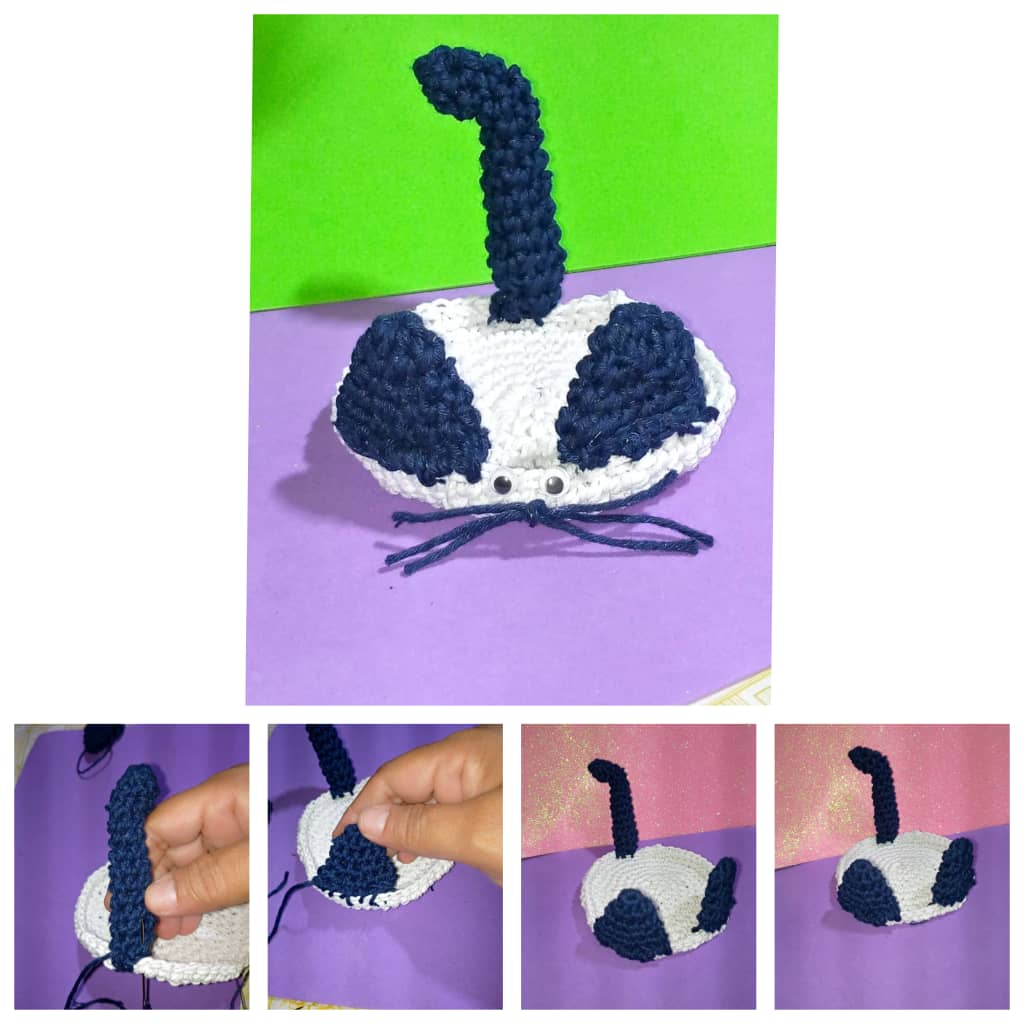
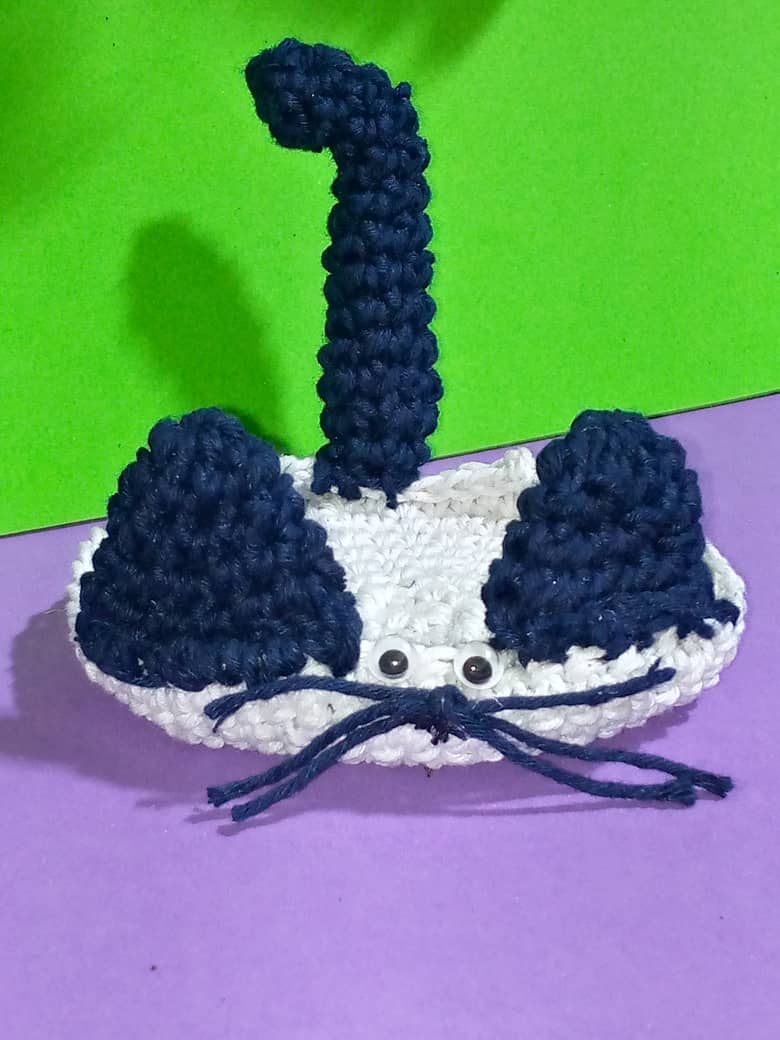
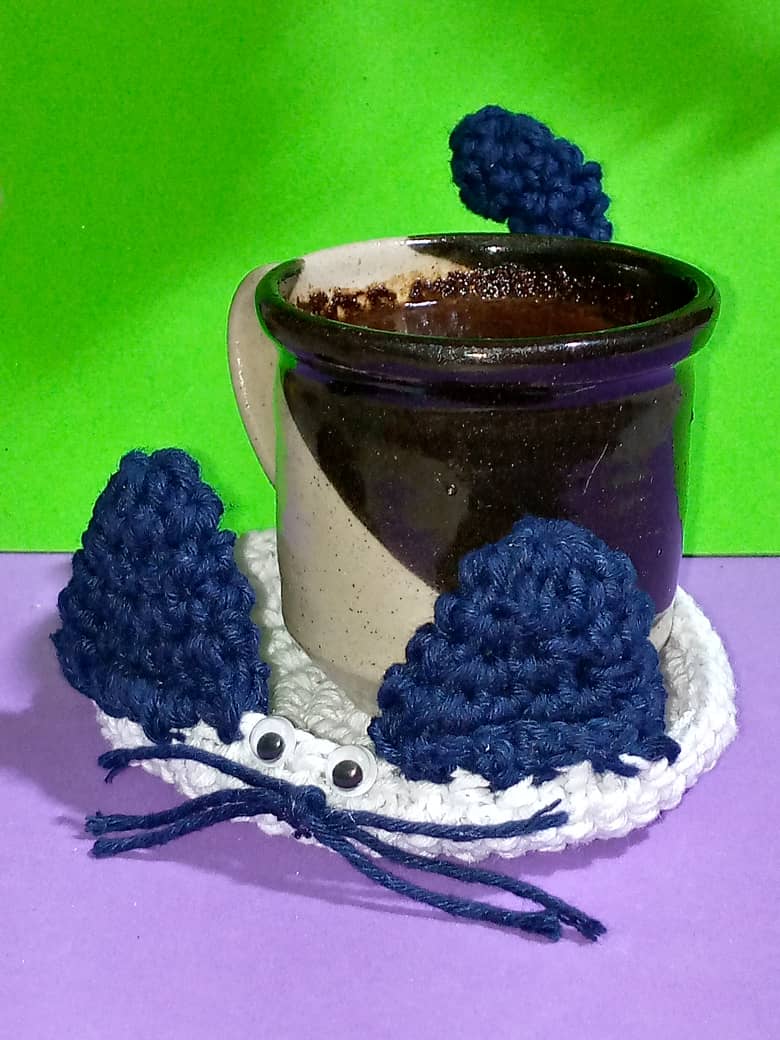
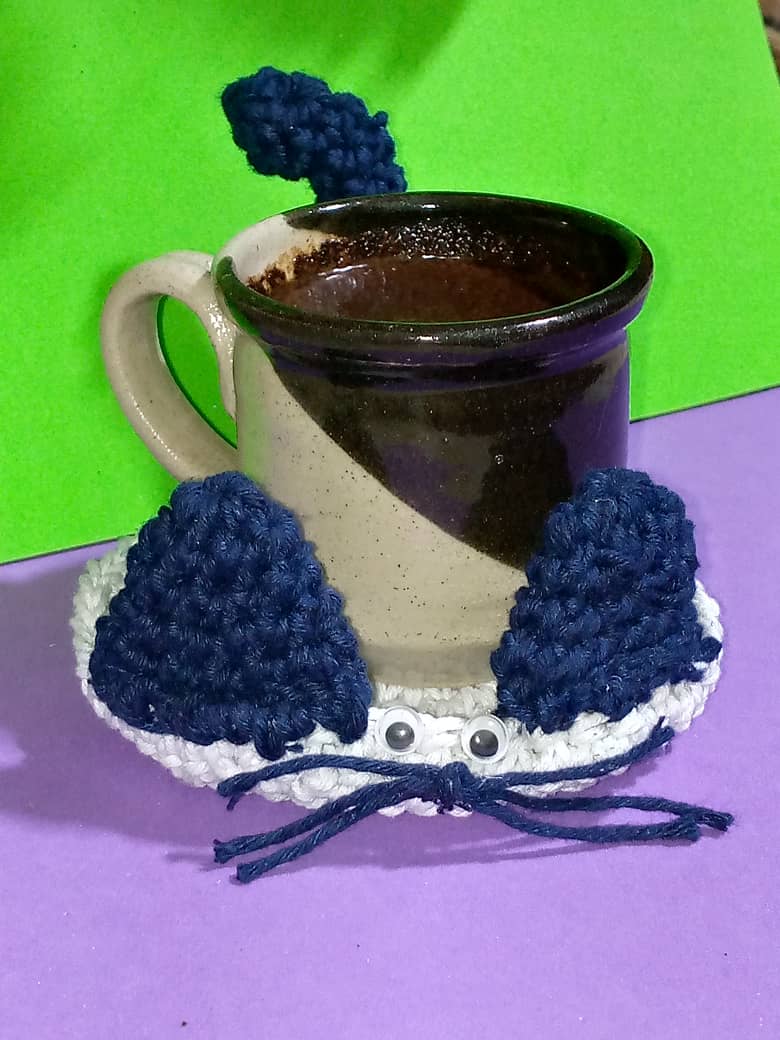
Resultado final del hermoso porta taza tejida en forma de gato.
End result of the beautiful woven cup holder in the shape of a cat.
Gracias por leer y comentar mi post, espero sea de su agrado , muchas bendiciones y hasta la próxima.
Las fotos son mías ,tomada con teléfono Infinix, editadas con incollage y traducido con DEPL.
Thank you for reading and commenting on my post, I hope you like it, many blessings and see you next time.
The photos are mine, taken with Infinix phone, edited with incollage and translated with DEPL.