
[ENG]
Greetings dear friends. Today I share with you a recipe that has as protagonist a vegetable that I like very much and that is very versatile in the kitchen, it is the zucchini. I have tried it in salads and stews, however, this time I wanted to give a different twist to the usual preparations and decided to make this recipe, mini zucchini sandwiches that were really delicious. My mother often liked to prepare this recipe, but instead of zucchini she used her favorite vegetable, eggplant. I wanted to remember one of her recipes, only I made a change with the protagonist of this work
The recipe is quite simple and quick, especially we can enjoy these snacks in a light dinner or between meals. The filling consisted of small slices of ham and paisa cheese. If you prefer, you can use some kind of yellow cheese to accentuate the flavor. These mini sandwiches do not go alone, after assembling them I breaded them in flour, beaten egg and breadcrumbs, I loved the result, I hope you do too.
Ingredients
- 1 large zucchini
- 3 Slices of ham
-3 Slices of paisa cheese
- 2 teaspoons salt
- 1 egg
- 4 tablespoons all-purpose flour
- 5 tablespoons bread crumbs
- Oil for frying
-Wooden chopsticks and absorbent paper

Preparation
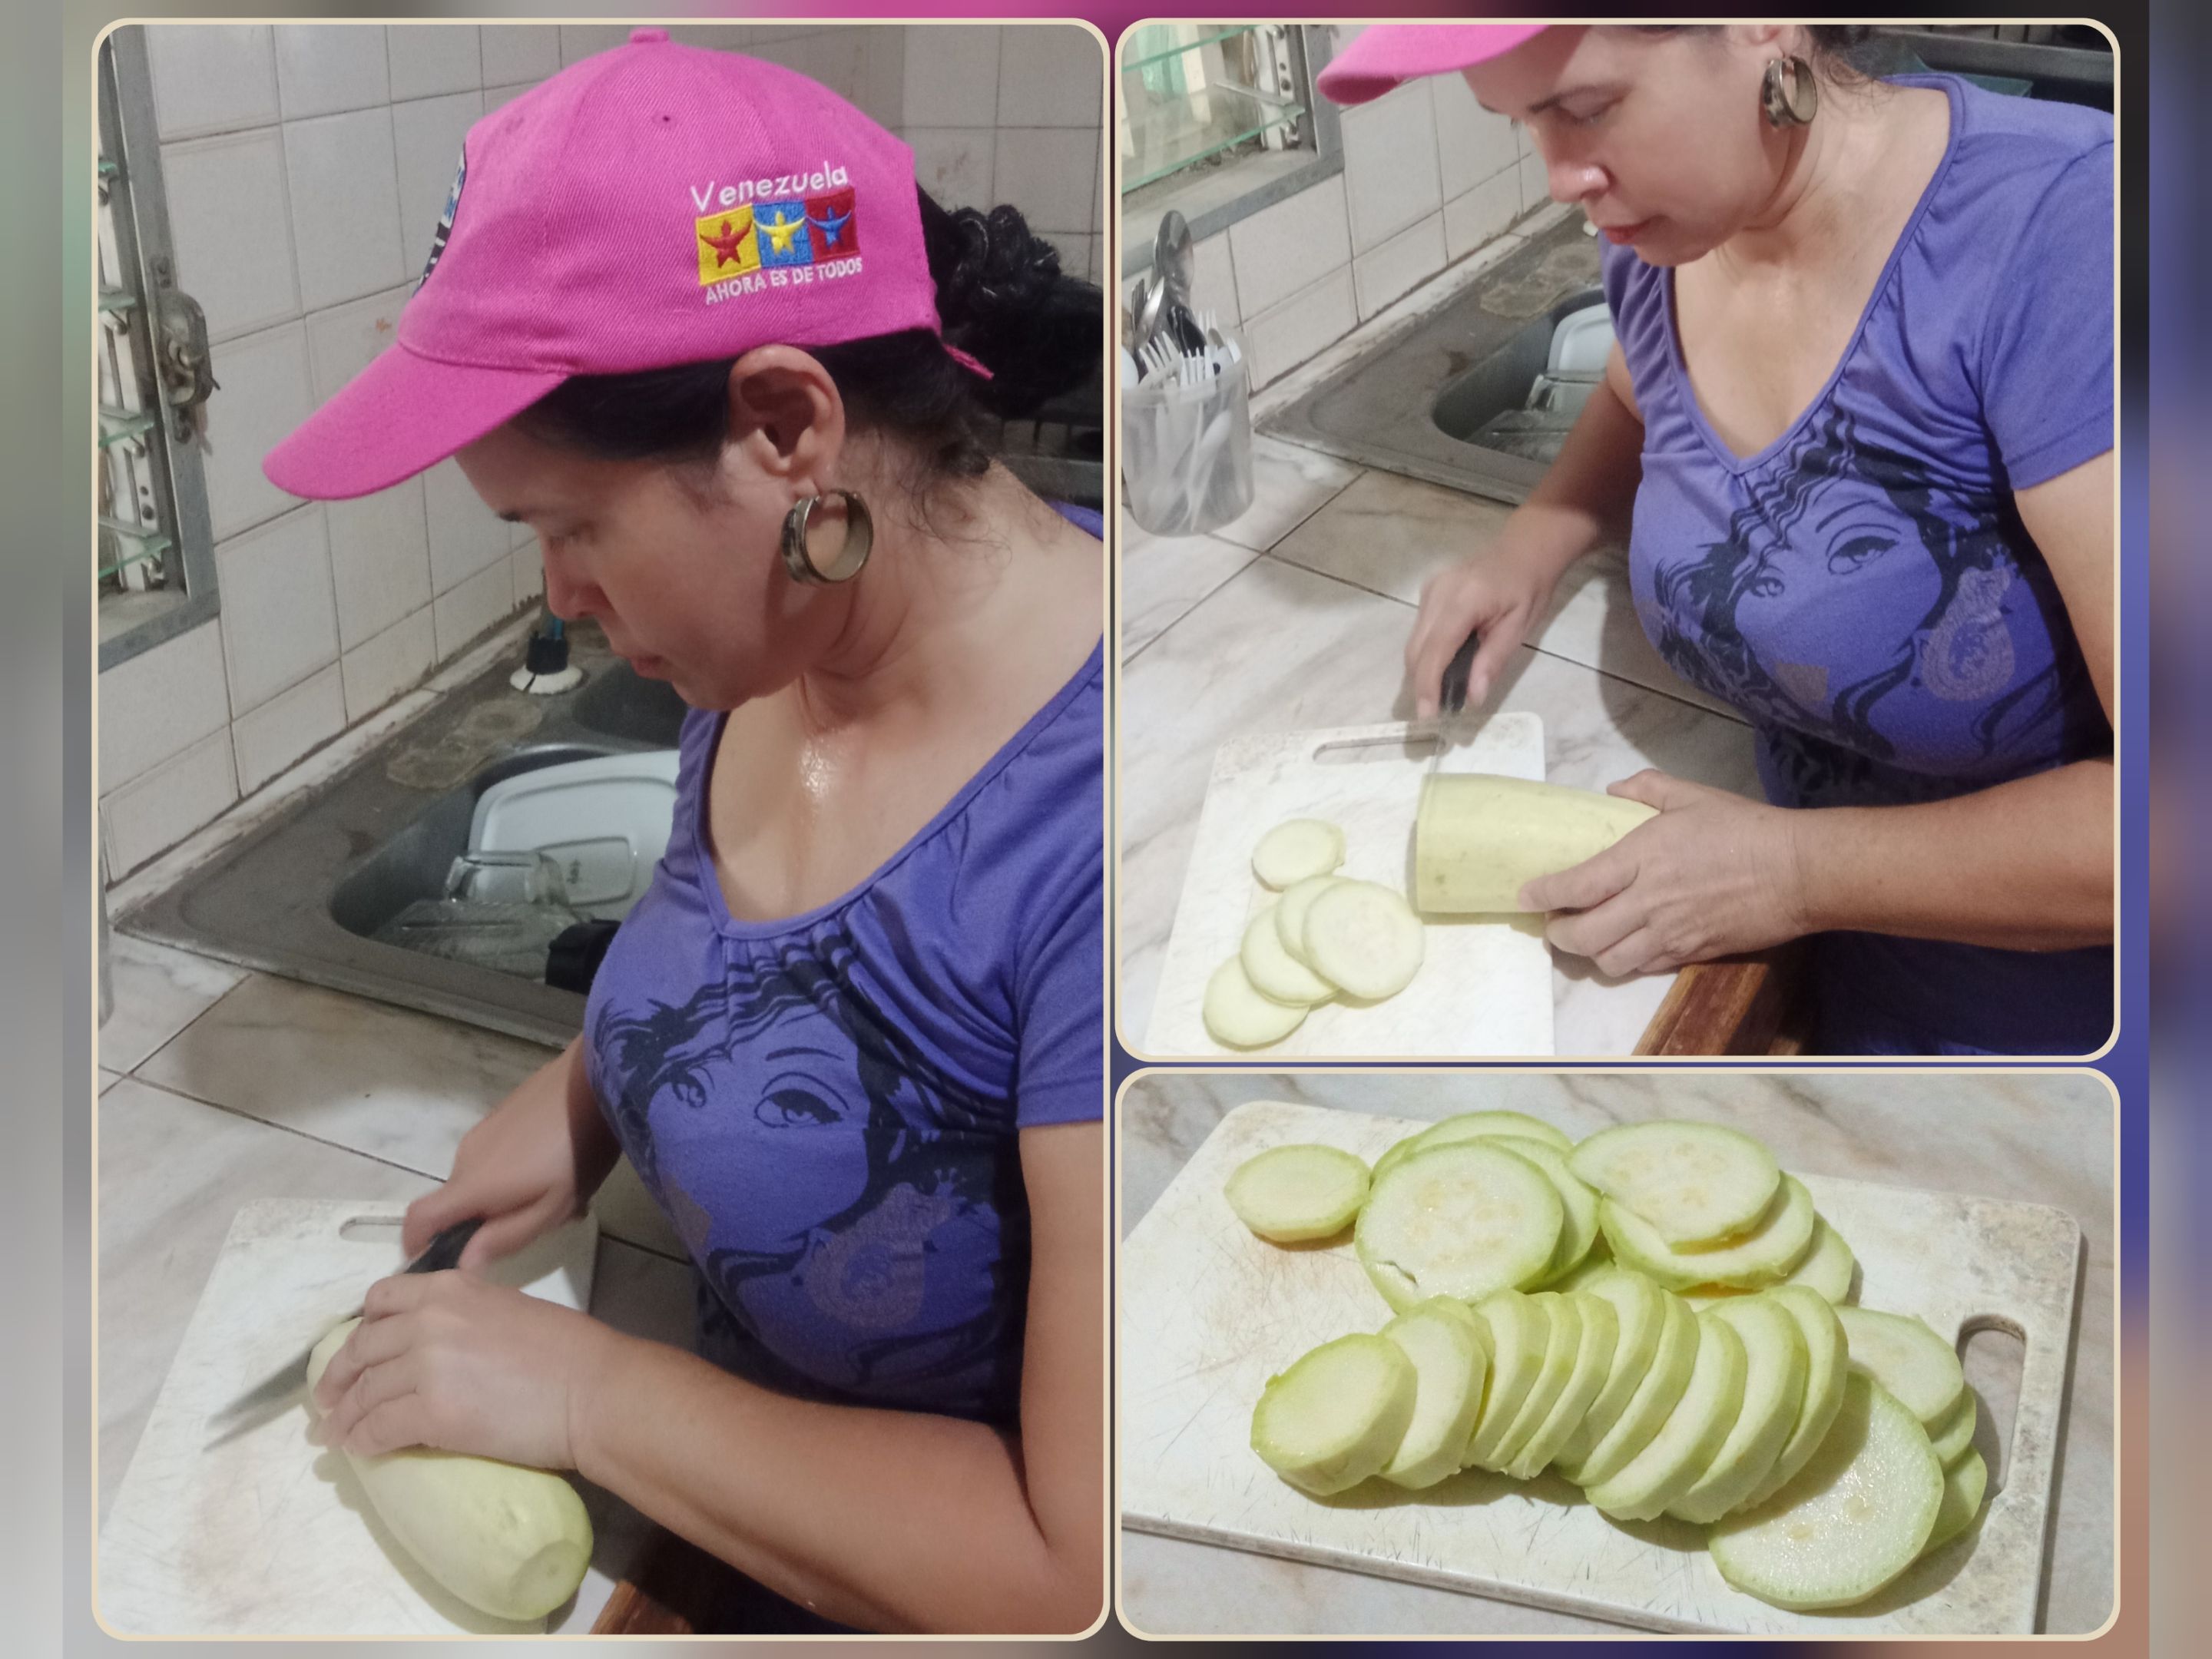
1.-. Wash the zucchini and then cut it into slices.
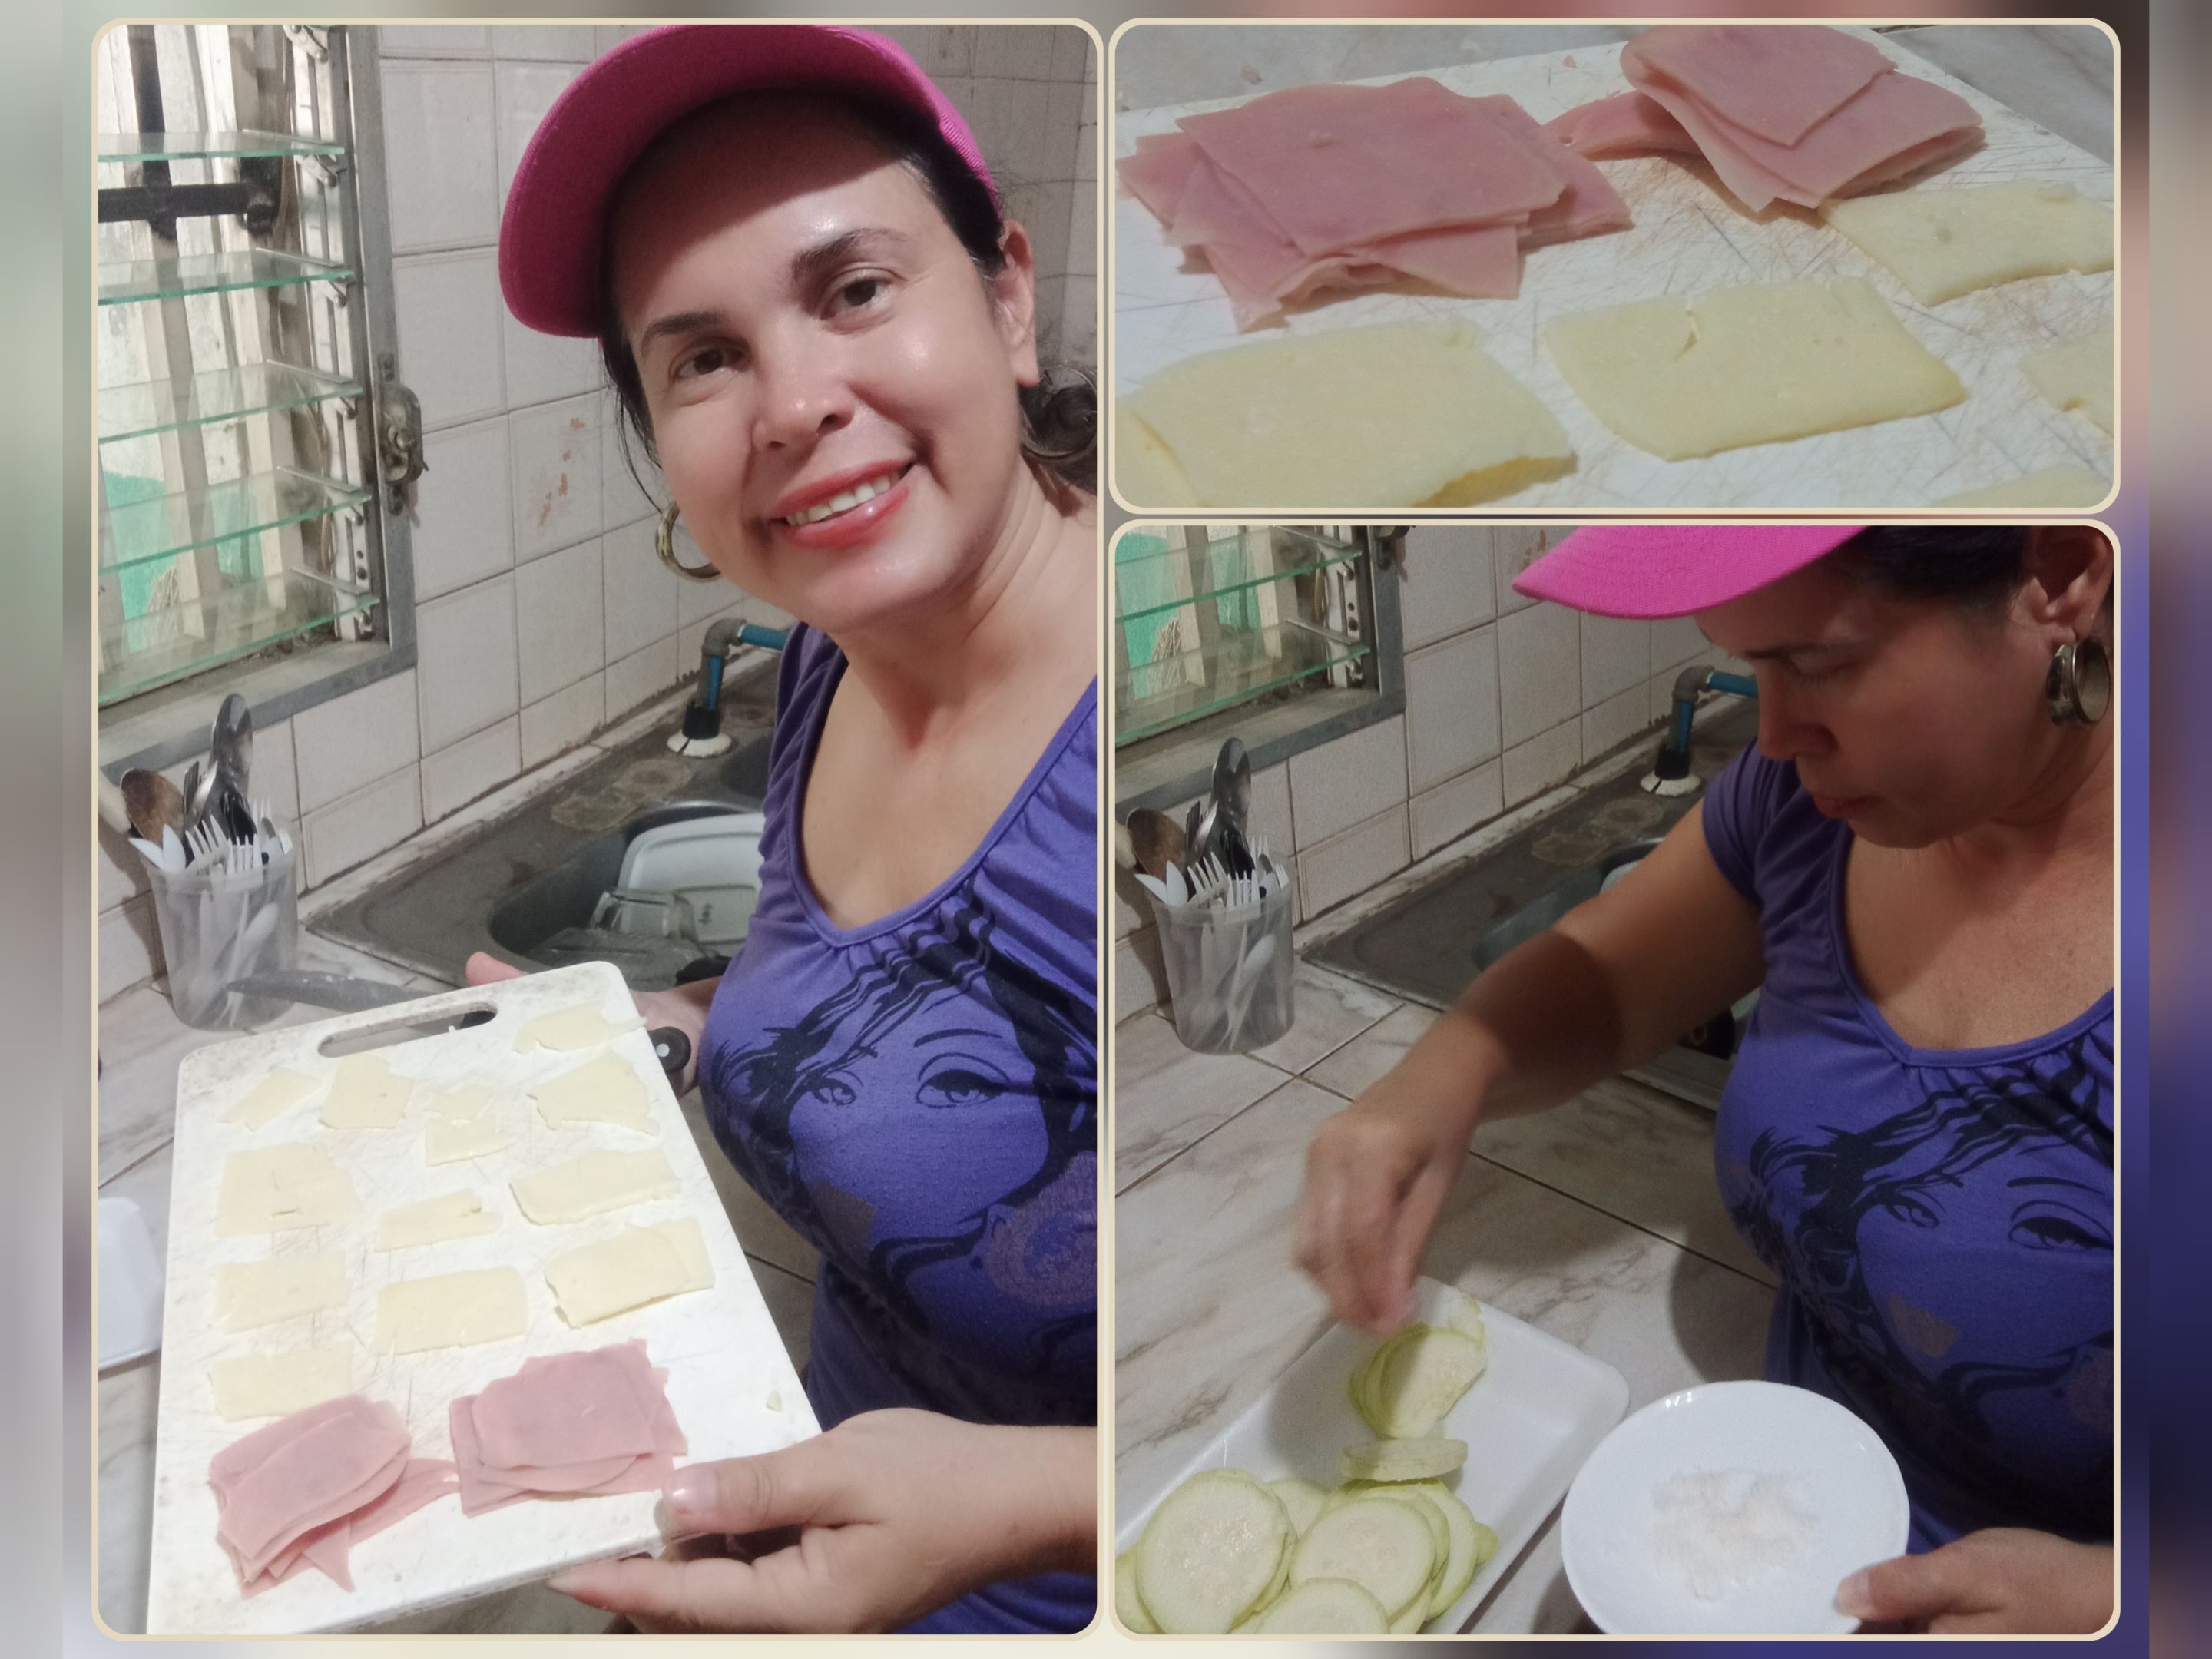
2.- Then, we cut the slices of ham and cheese adapting them to the zucchini slices. In addition, we season with salt to taste the slices of our vegetable.
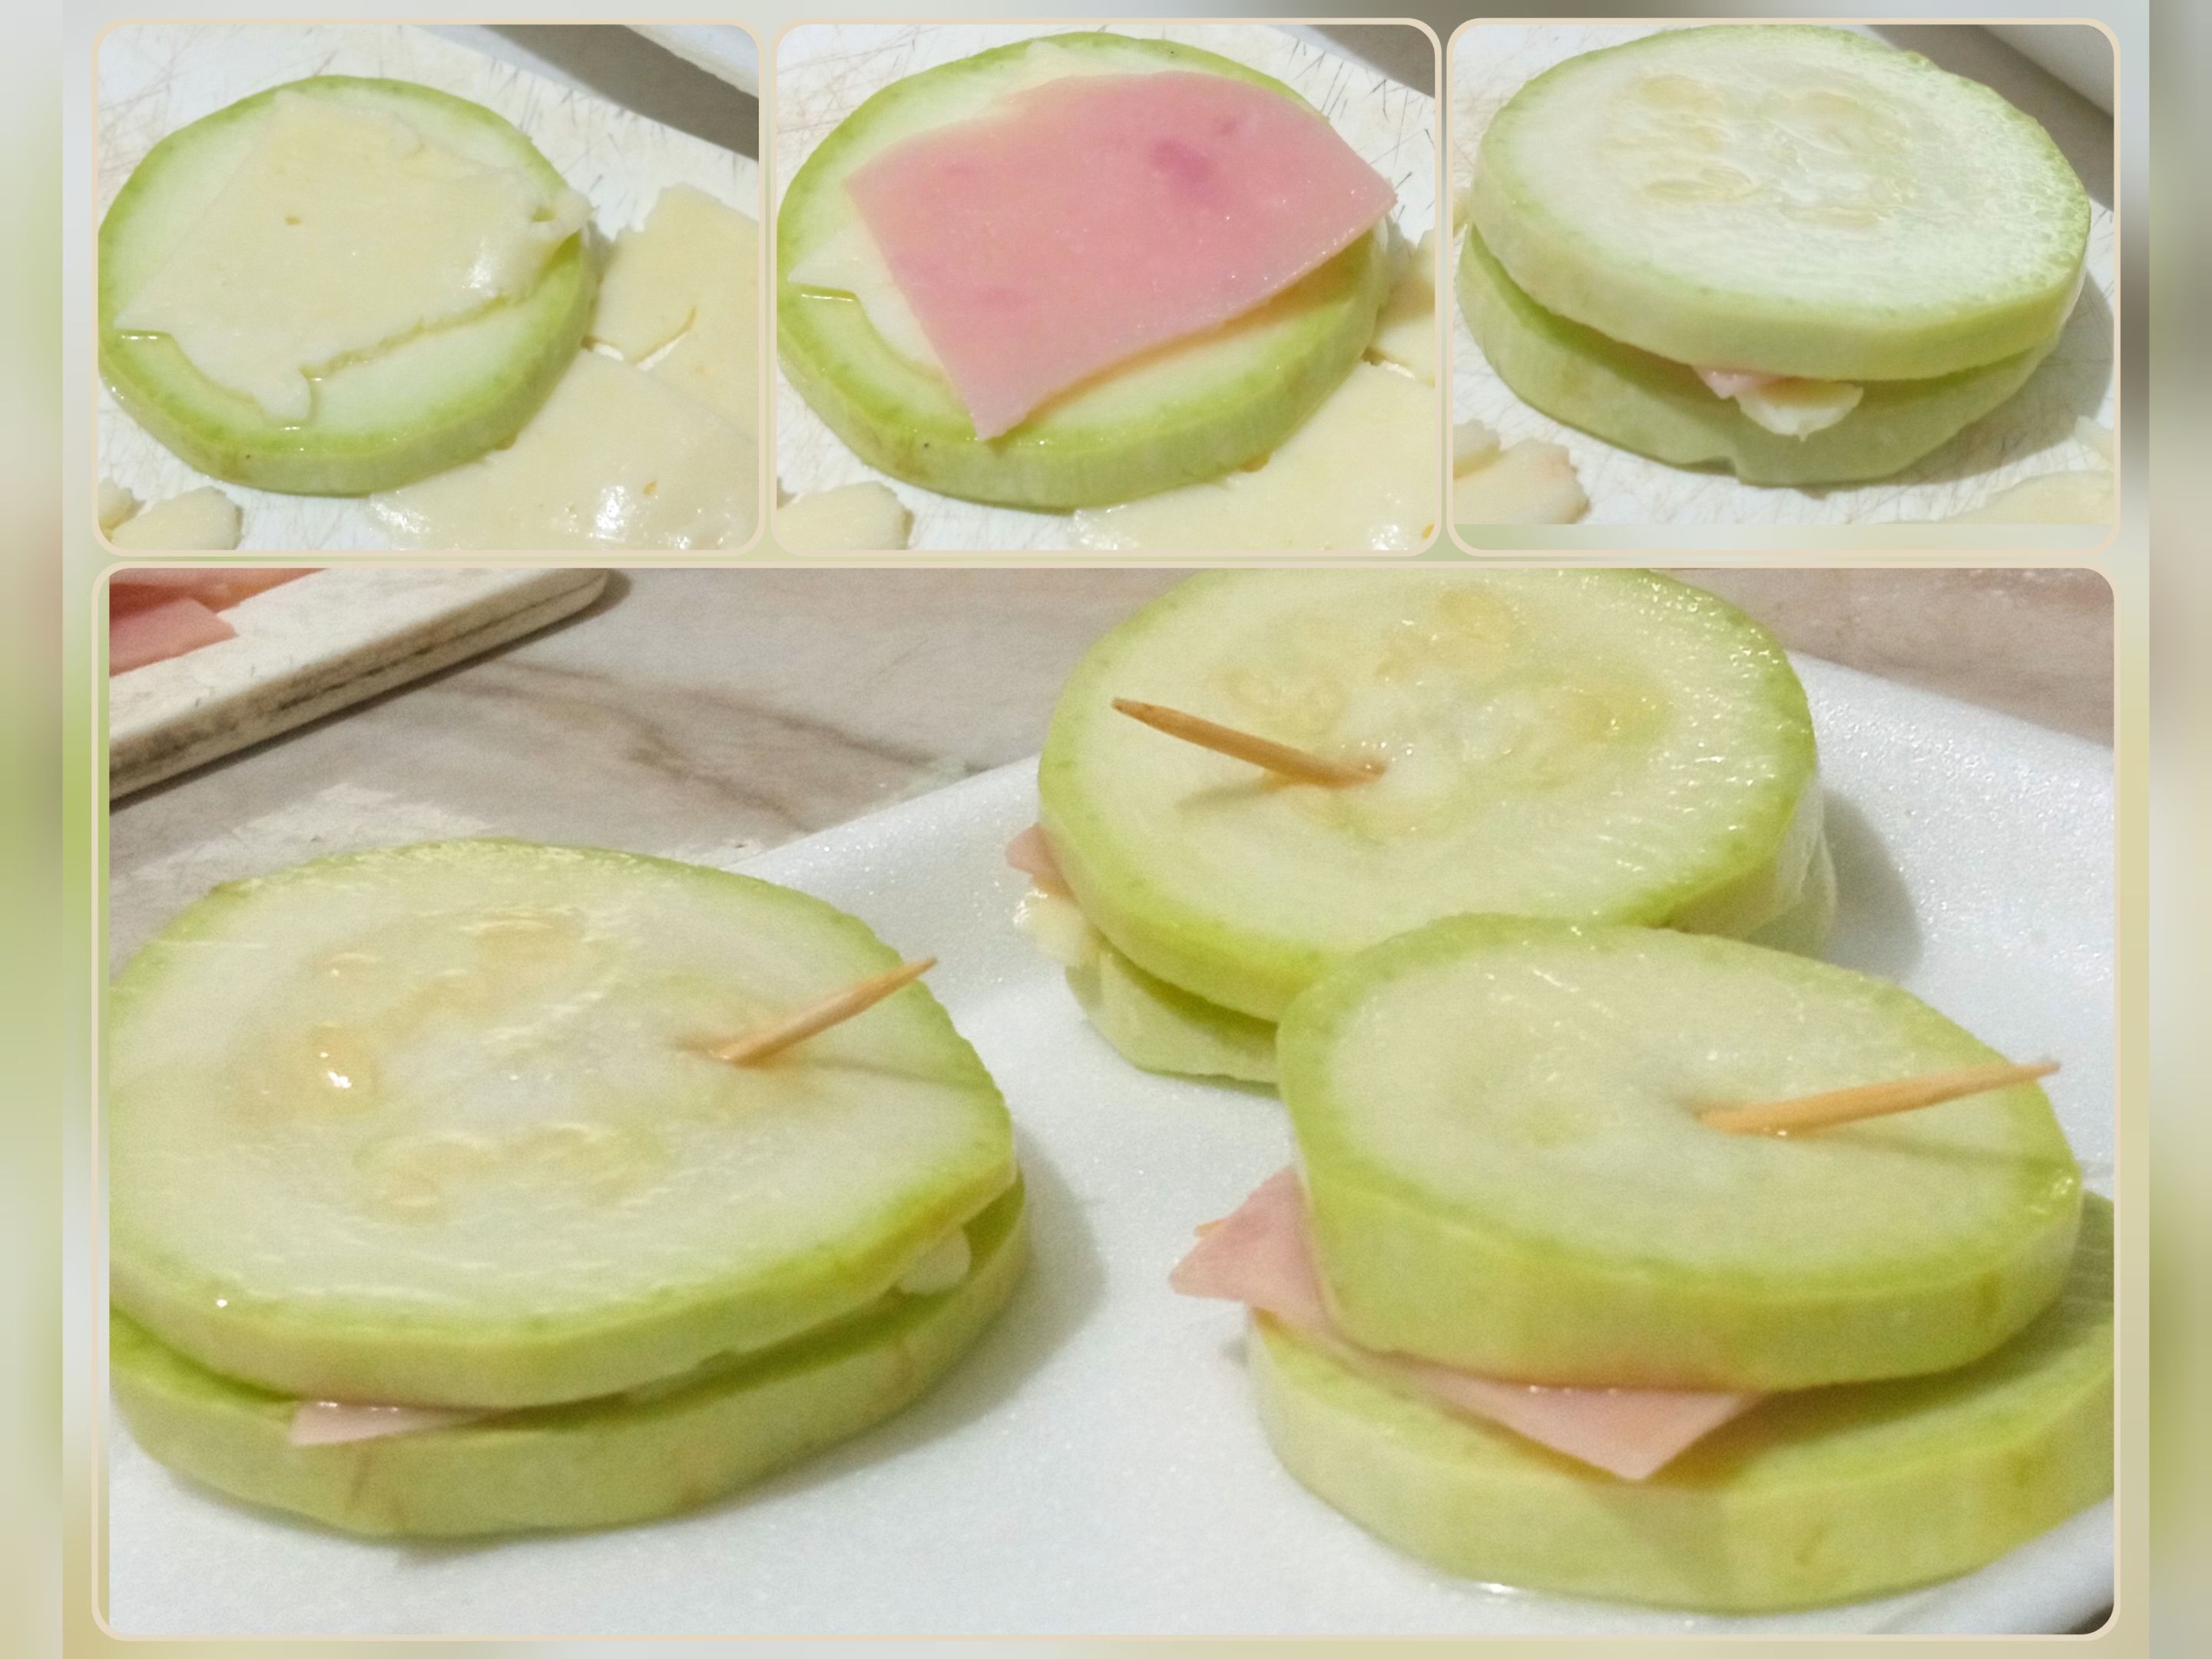
3.- We begin to assemble our zucchini sandwiches, placing the slices of ham and cheese on one slice, close with another and to prevent the filling from coming out, we secure it with a wooden toothpick.
4.- Then we start the breading procedure, first we beat the egg and add a little bit of salt. We organize the rest of the ingredients by placing them in containers according to the indicated amounts of wheat flour and bread crumbs. Dip the zucchini slice in wheat flour, then in the beaten egg and finally in the bread crumbs. Repeat this step until all the slices are breaded.
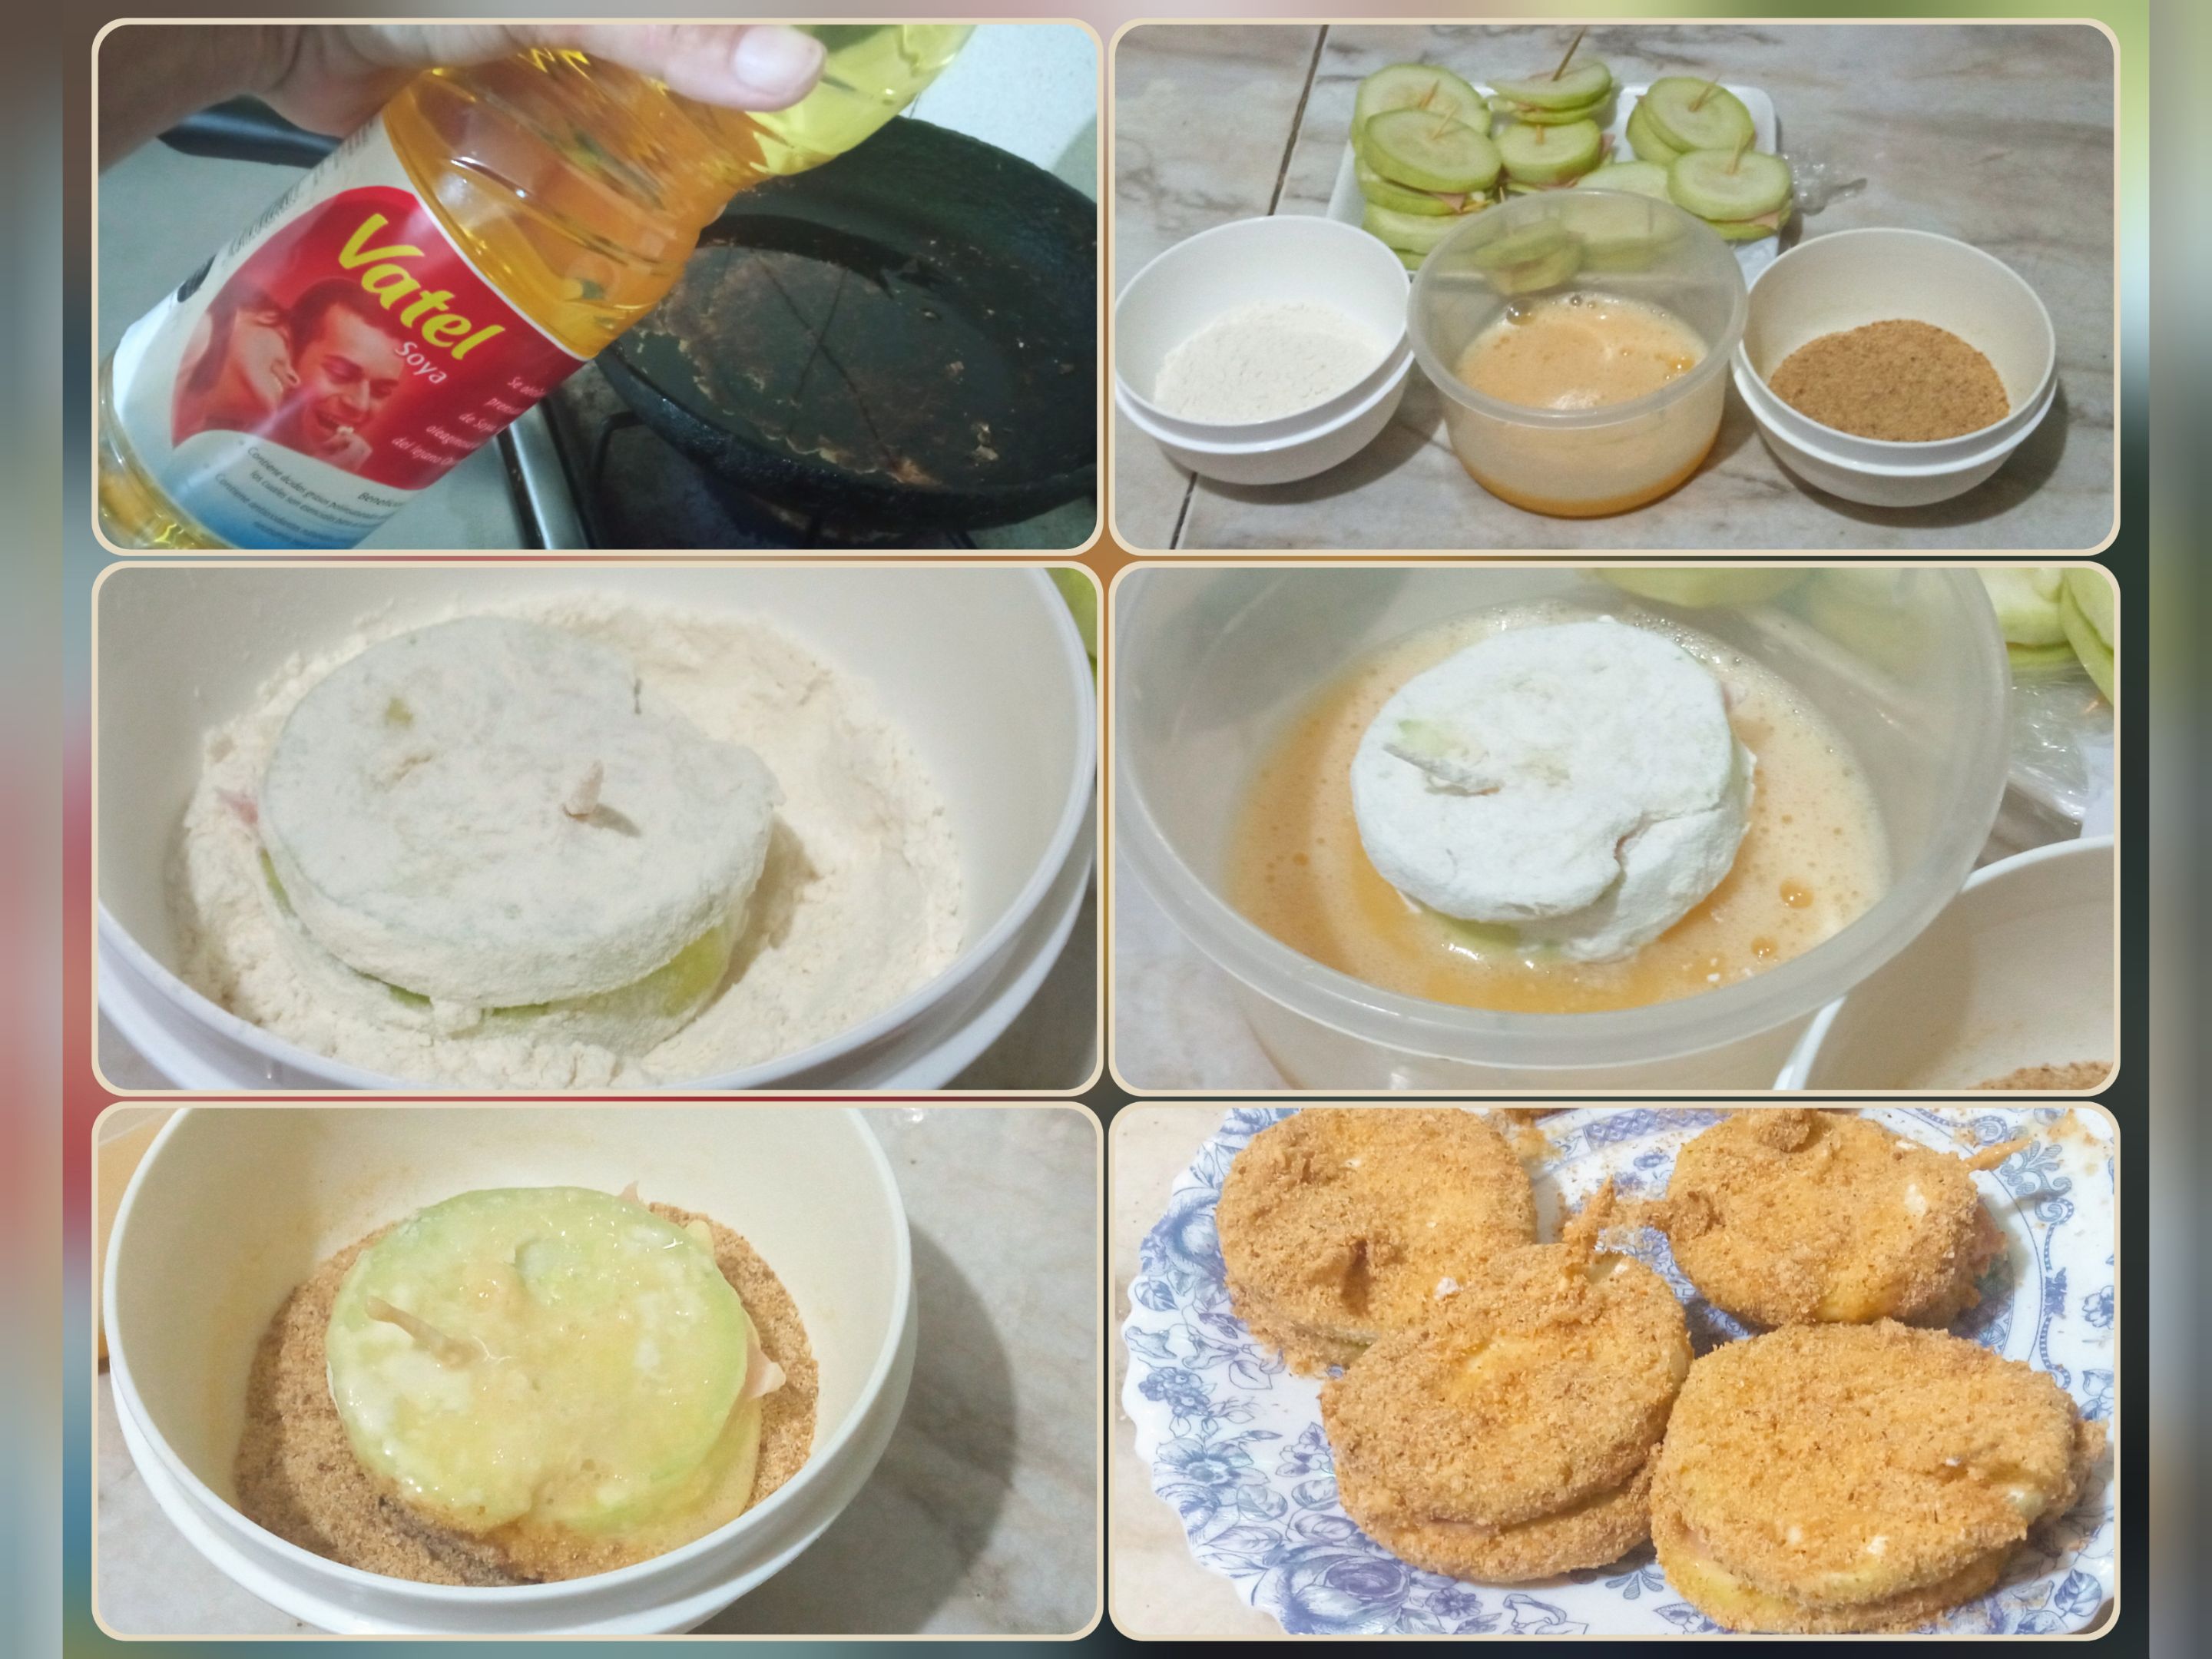
5.- In a frying pan preheated with oil, fry the zucchini slices on both sides until golden brown. When they are ready, remove them from the heat and place them on absorbent paper.

Just serve and enjoy these mini zucchini sandwiches breaded and stuffed with ham and cheese, a delight.


I hope you liked it. See you next time.
All photos are original, taken with my Xiaomi Redmi 9 cell phone. The editions were made with the application GridArt.
[ESP]
Saludos estimados amigos. Hoy les comparto una receta que tiene como protagonista un vegetal que me gusta mucho y que es muy versátil en la cocina, se trata del calabacín. Lo he probado en ensaladas, y guisos, sin embargo, esta vez quise darle un giro diferente a las habituales preparaciones y decidí hacer esta receta, unos mini sandwiches de calabacín que quedaron realmente deliciosos. A mí madre le gustaba preparar a menudo esta receta,pero en lugar de calabacín utilizaba su vegetal preferido, la berenjena. Quise recordar una de sus recetas, solo que hice un cambio con el protagonista de esta obra.
La receta es bastante sencilla y rápida, especialmente podemos disfrutar de estos bocaditos en una cena ligera o entre comidas. El relleno consistió en colocarle pequeñas lajas de jamón y queso paisa. Si lo prefieren, para acentuar más el sabor pueden usar algún tipo de queso amarillo. Estos mini sandwiches no van solos, después de armarlos los empanicé en harina, huevo batido y pan molido, el resultado me encantó, espero que a ustedes también.
Ingredientes
- 1 Calabacín grande
- 3 Lajas de jamón
-3 Lajas de queso paisa
- 2 cucharaditas de sal
- 1 huevo
- 4 Cucharadas de harina de trigo todo uso
- 5 Cucharadas de pan molido
- Aceite para freír
-Palillos de madera y papel absorbente
Preparación
1.-. Lavamos el calabacín y enseguida lo cortamos en rodajas.
2.- Luego, cortamos las lajas de jamón y queso adaptándolas a las rodajas del calabacín. Además, condimentamos con la sal al gusto las rodajas de nuestro vegetal.
3.- Comenzamos a armar nuestros sandwiches de calabacín, colocando las lajas de jamón y queso en una rodaja, cerramos con otra y para evitar que el relleno se salga lo aseguramos atravesando un palillo de madera.
4.- Enseguida iniciamos el procedimiento de empanizado, primero batimos el huevo y le añadimos un poquito de sal. Organizamos el resto de los ingredientes colocándolos en recipientes de acuerdo a las cantidades indicadas de harina de trigo y pan molido. Pasamos la rodaja de calabacín por harina de trigo, luego por el huevo batido y por último por el pan molido. Repetimos este paso hasta empanizar todas las rodajas.
5.- En una sartén precalentada con aceite, freímos las rodajas de calabacín por ambos lados hasta que estén doradas. Cuando estén listas, las retiramos del fuego y las vamos colocando sobre papel absorvente.
Solo nos queda servir y disfrutar de estos mini sandwiches de calabacín empanizados y rellenos de jamón y queso, una delicia.
Espero que les haya gustado. Nos vemos en la próxima oportunidad.
Todas las fotografías son originales, tomadas con mi celular Xiaomi Redmi 9. Las ediciones las hice con la aplicación GridArt.