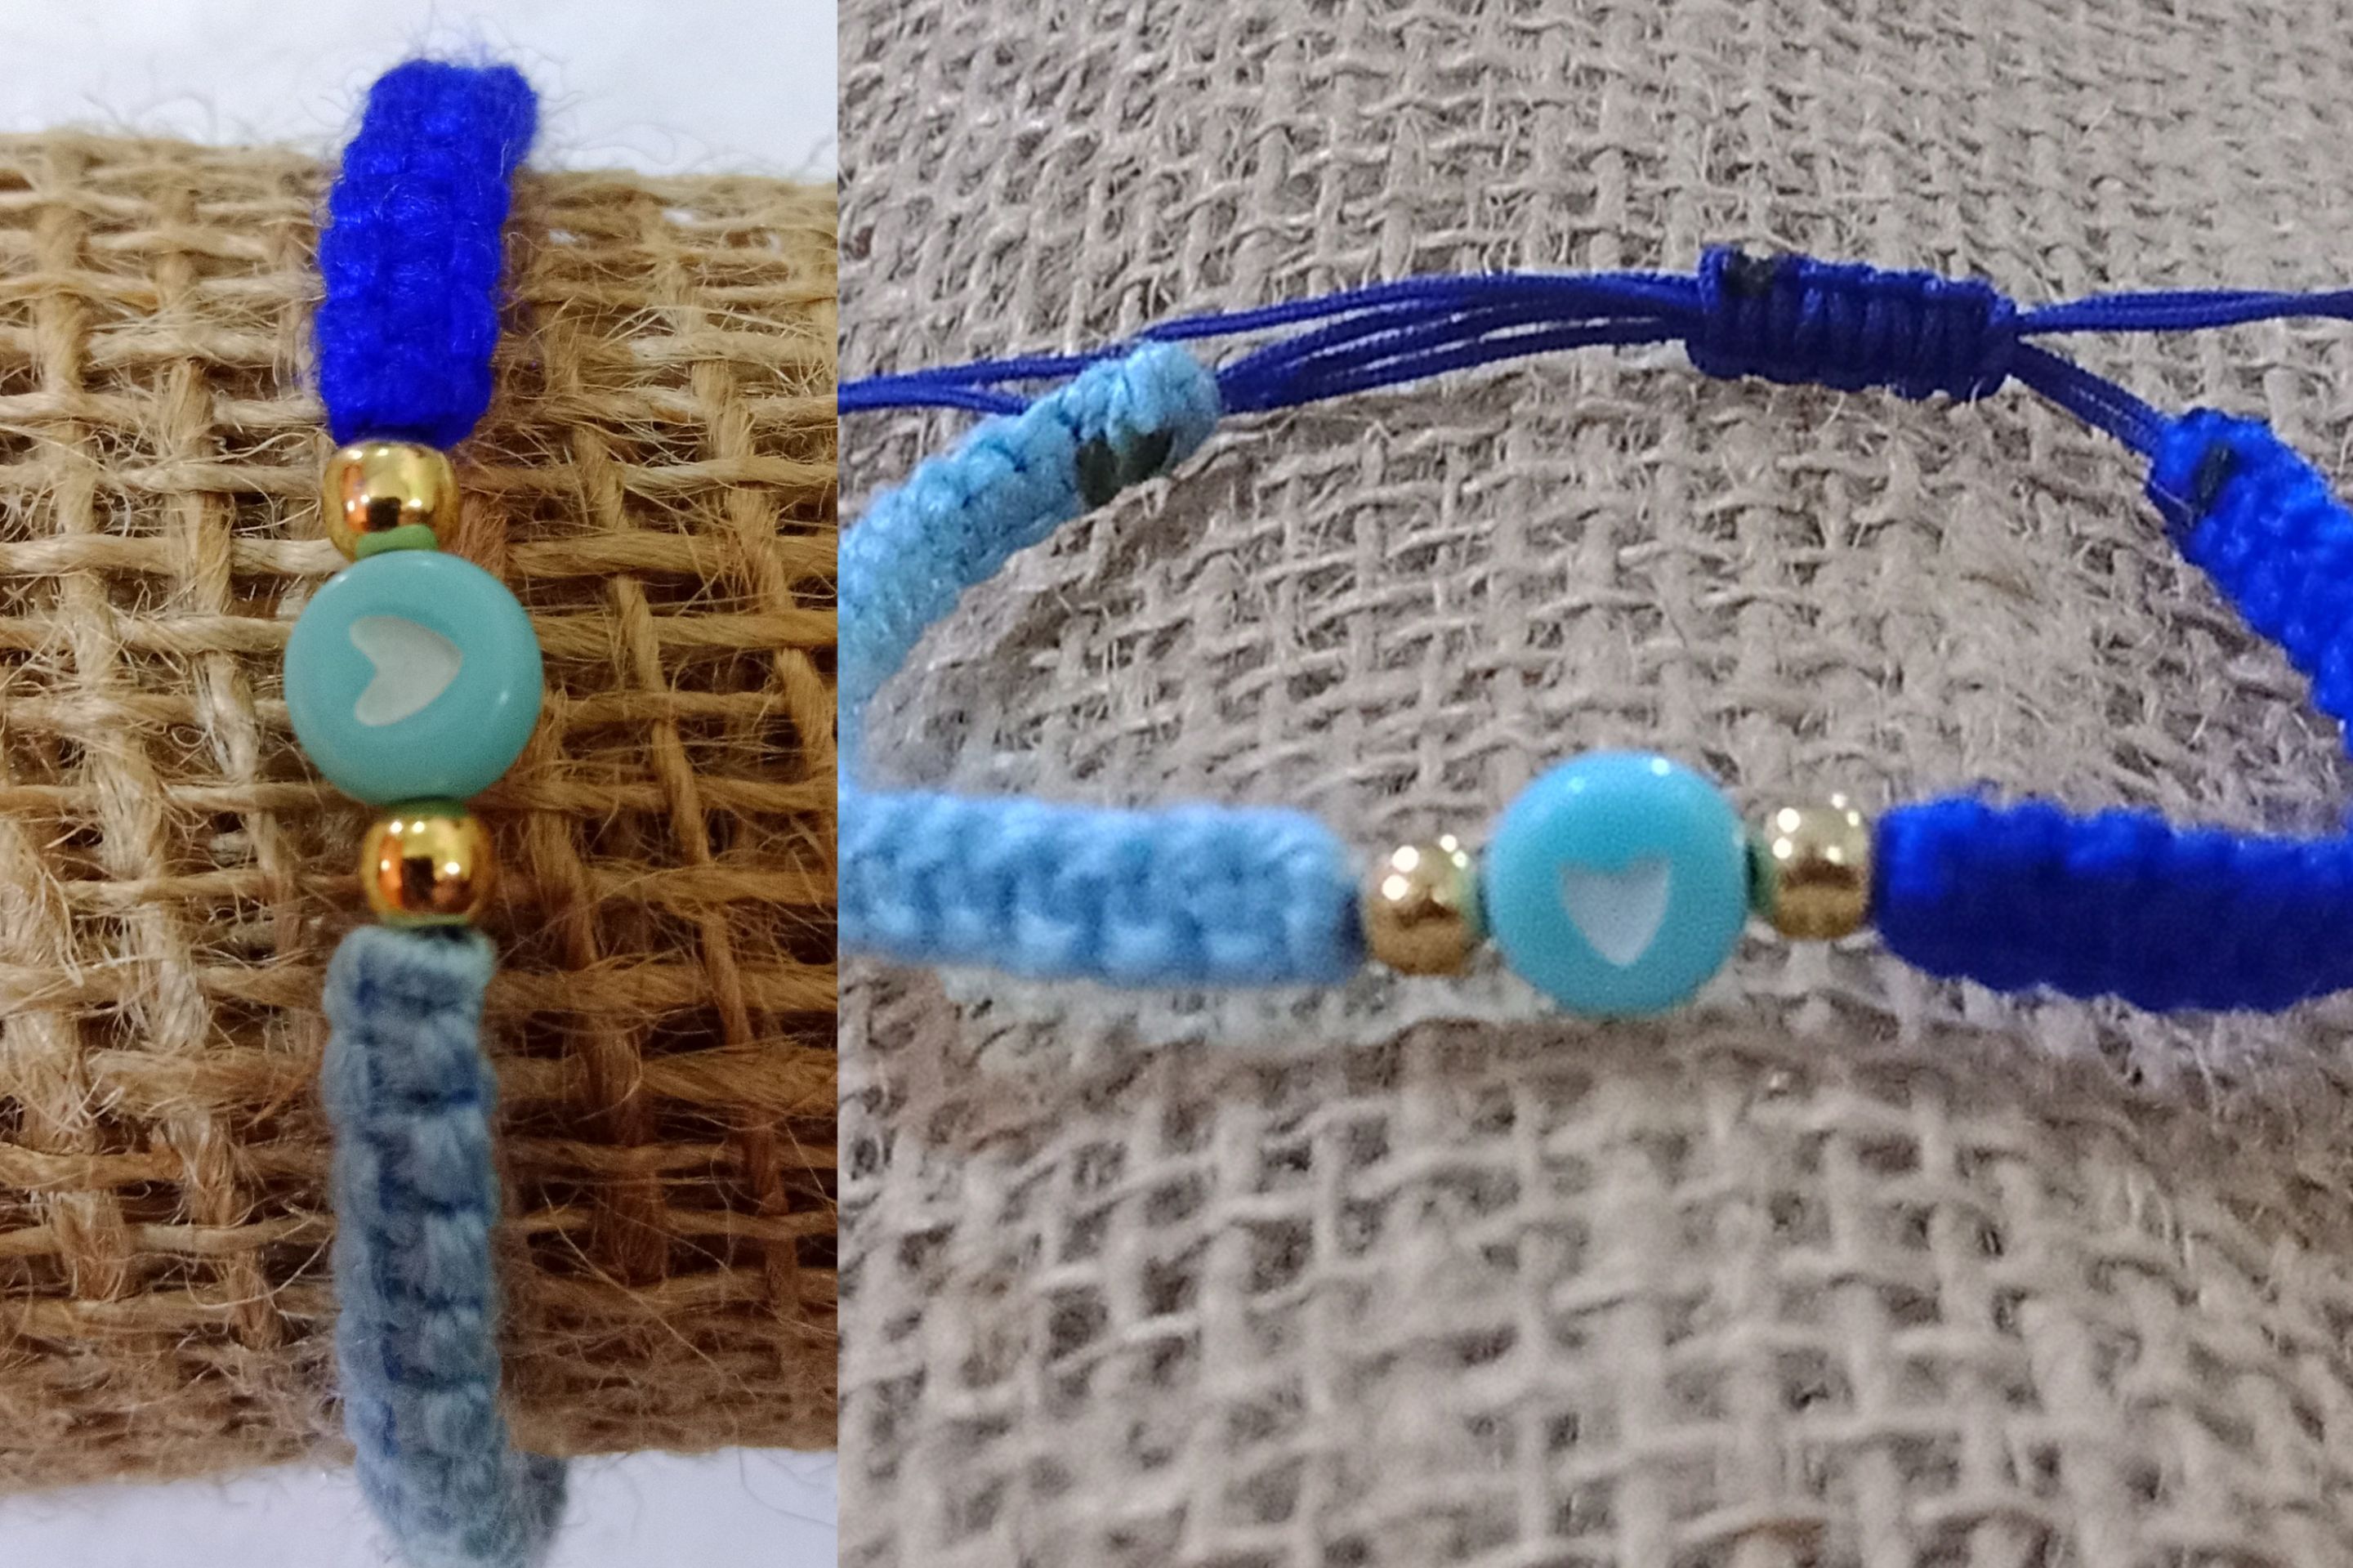
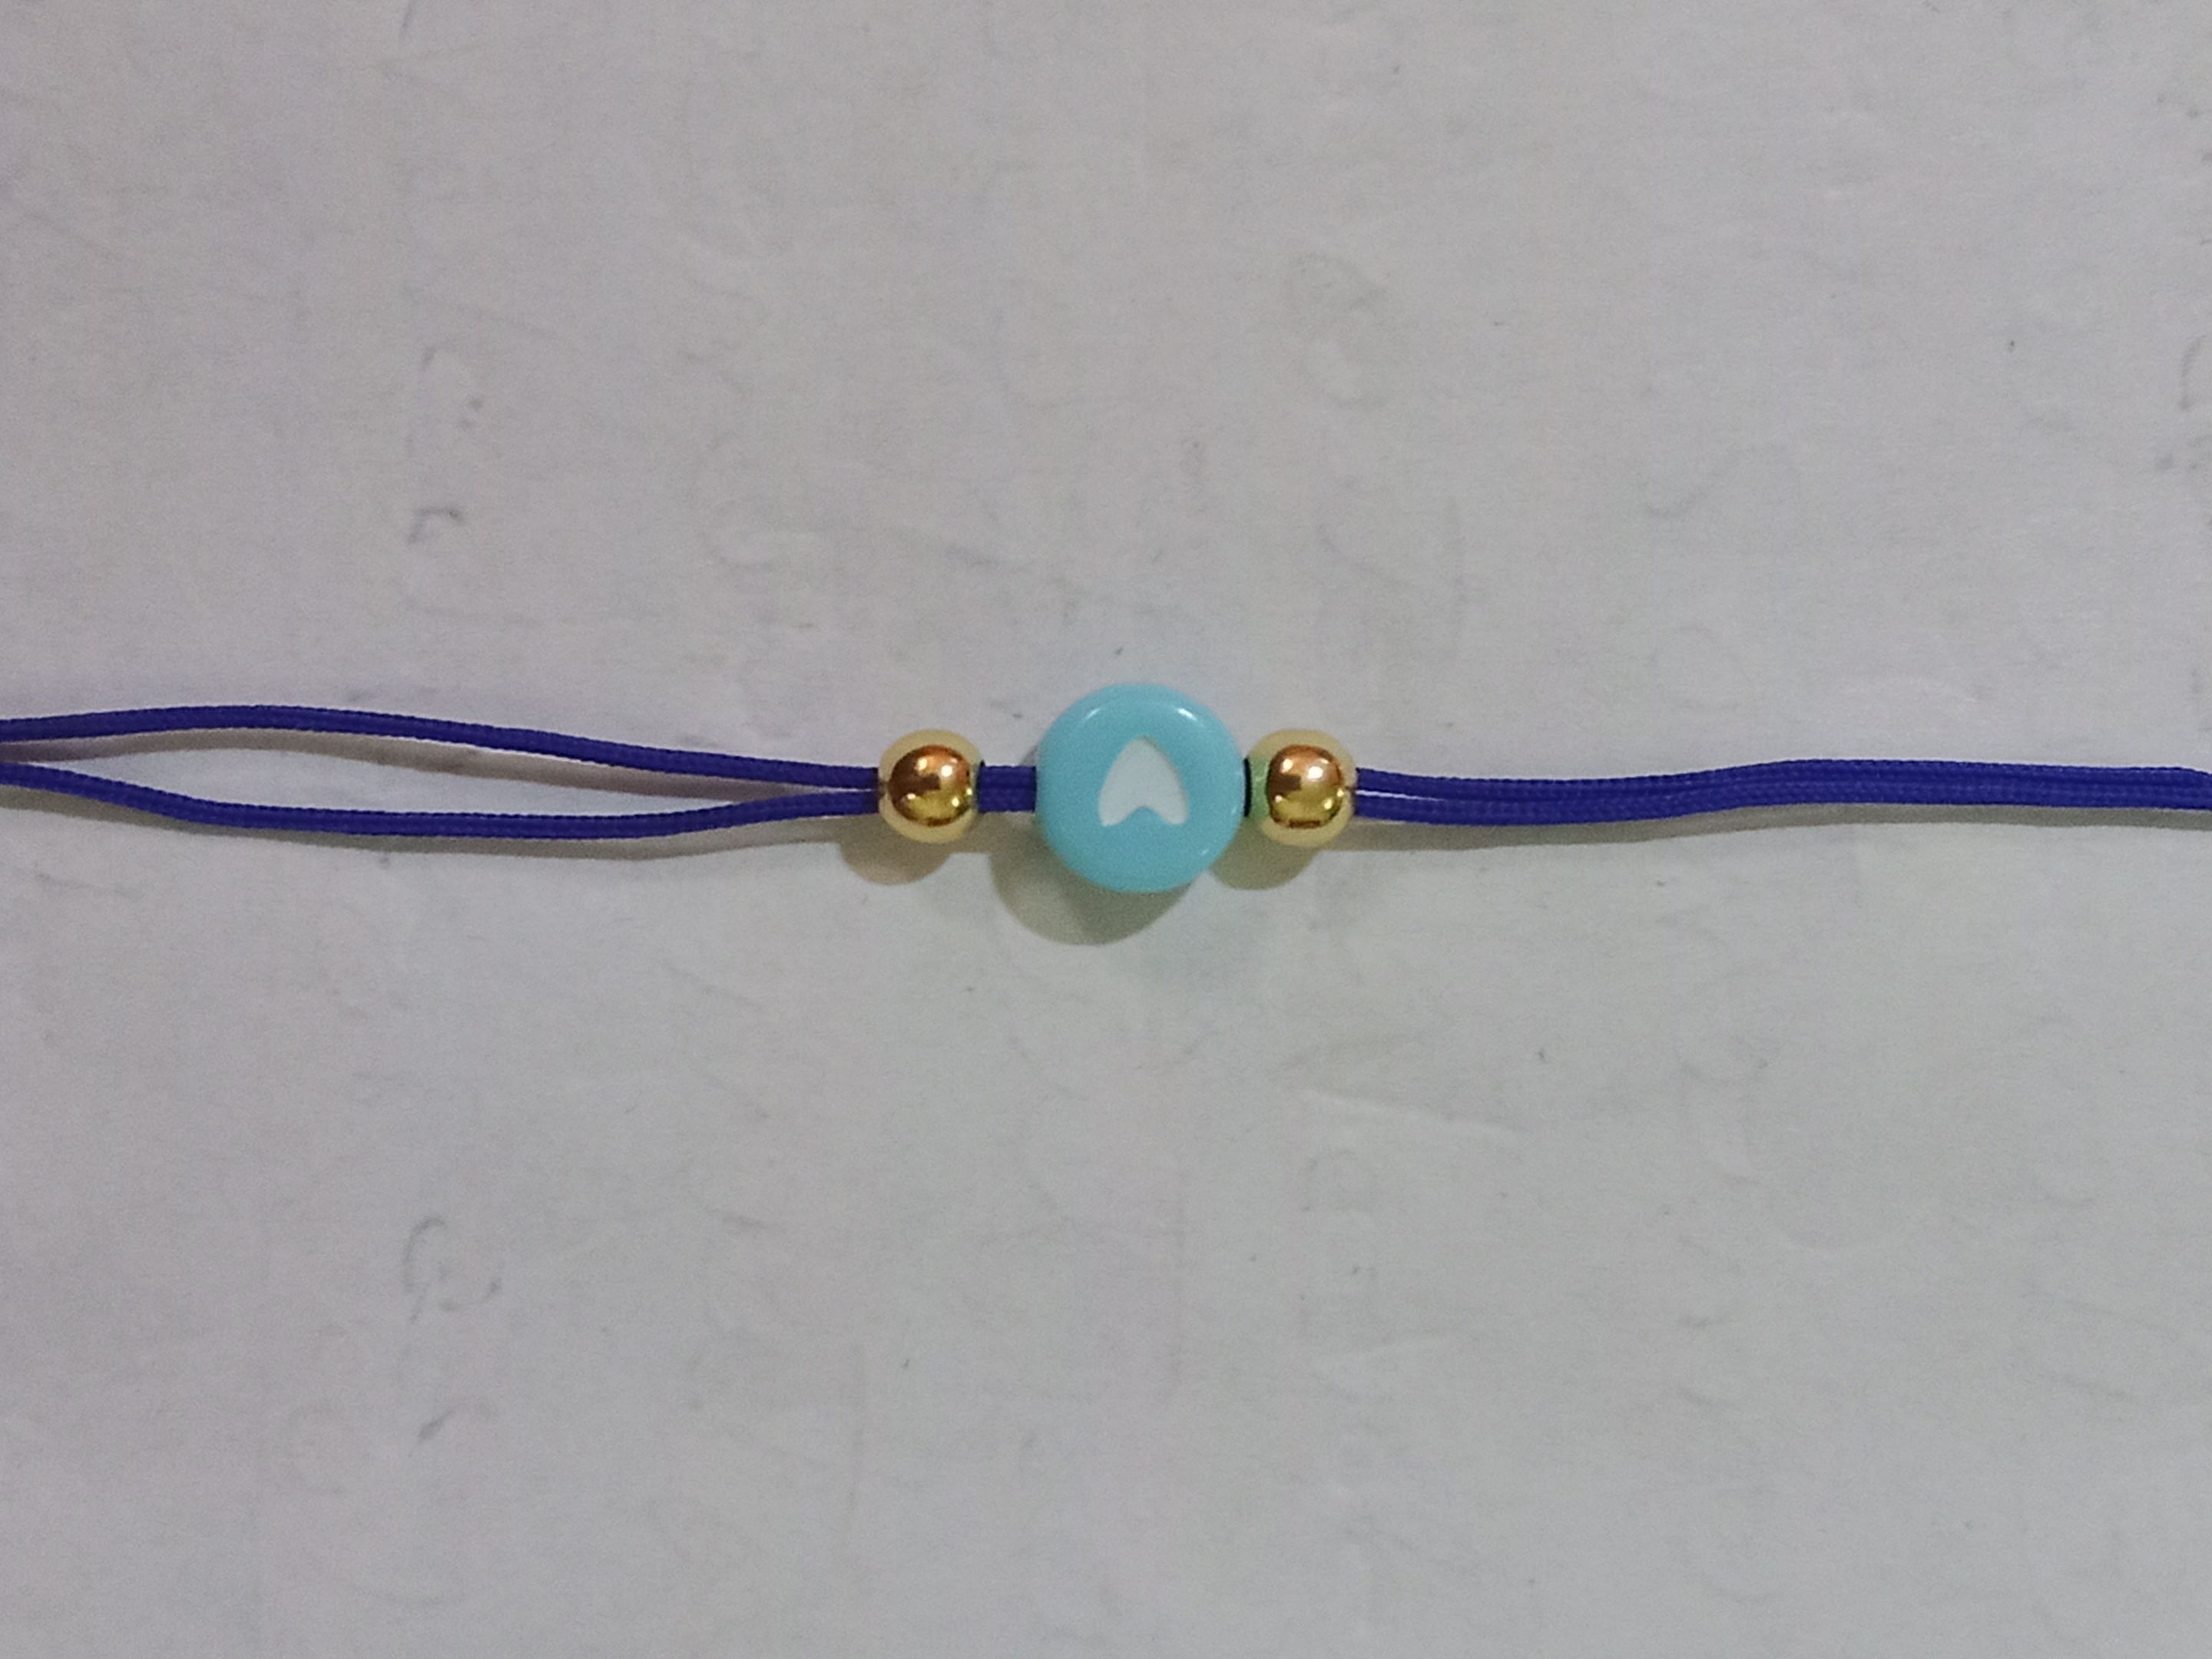
Hola comunidad #mundoautismo encantado en saludarles y desearles feliz y bendecido sábado. En esta ocasión deseo compartirles un hermoso obsequio que hice para la comunidad azul con mucho cariño. Se trata de una hermosa pulsera azul
Hello #worldautism community delighted to greet you and wish you a happy and blessed Saturday. On this occasion I want to share with you a beautiful gift that I made for the blue community with much affection. It is a beautiful blue bracelet

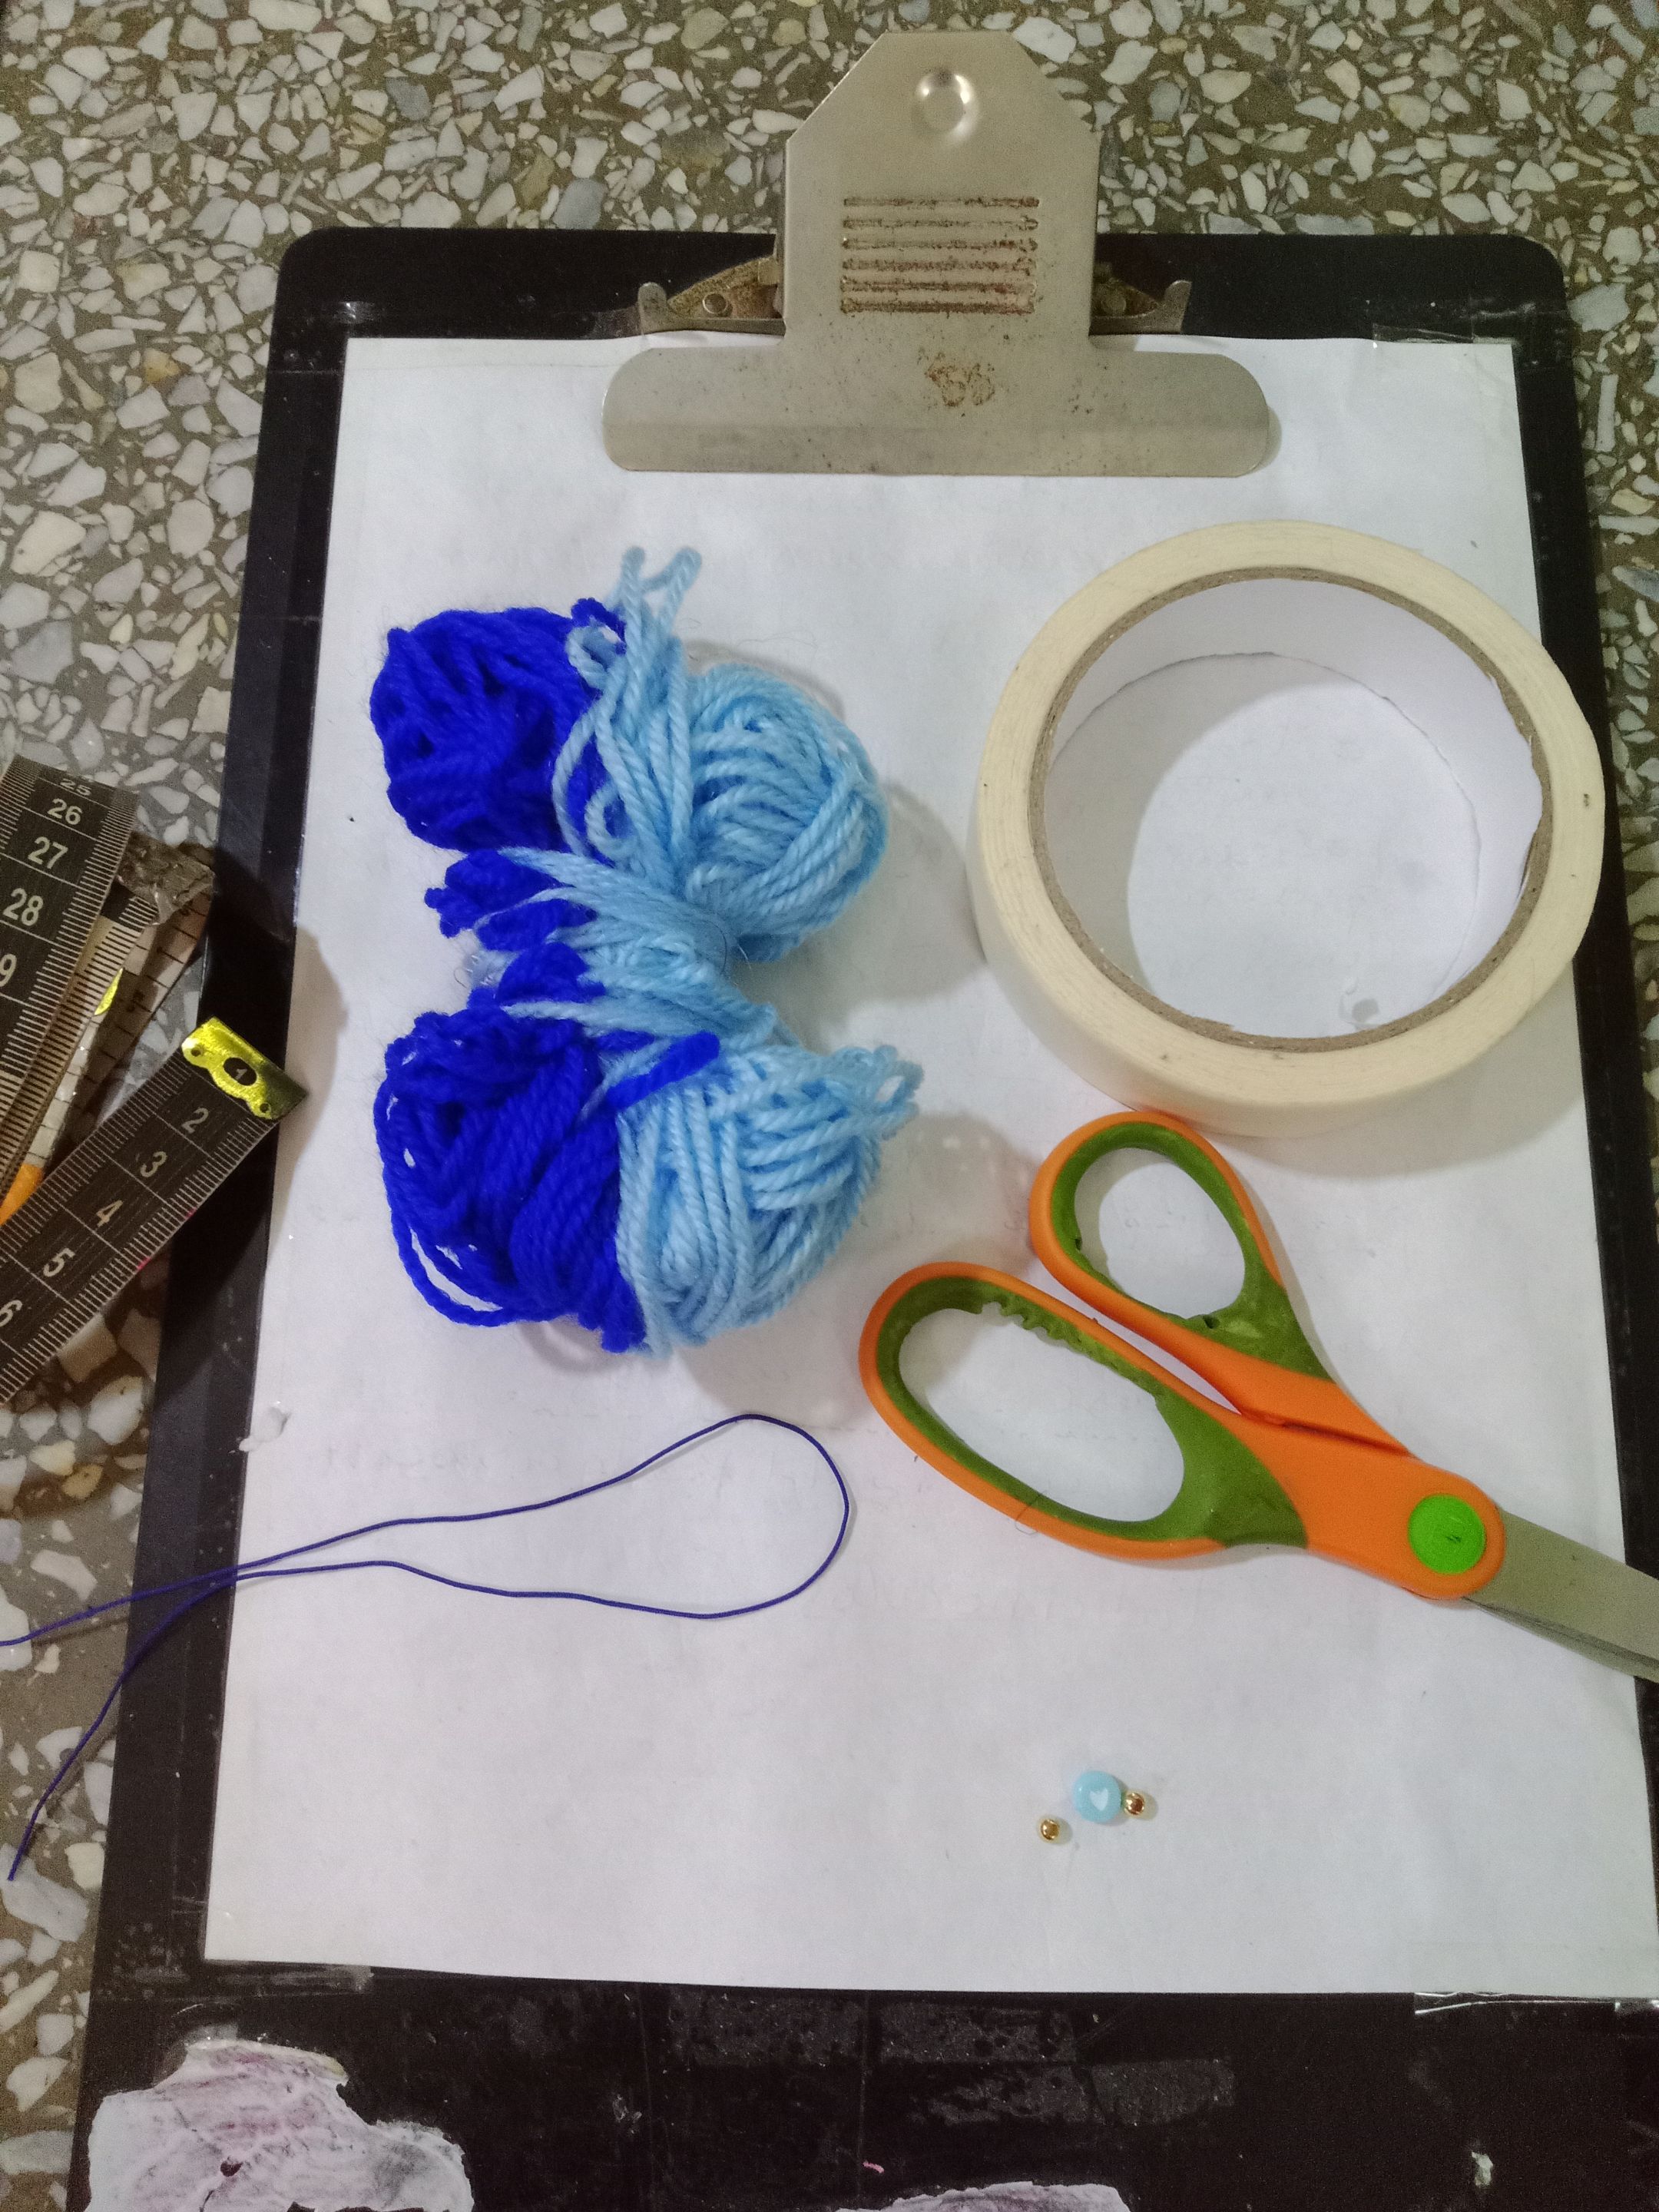
Los materiales que utilicé para realizar esta hermosa pulsera son, a saber:
Estambre de diferentes colores
Hilo chino
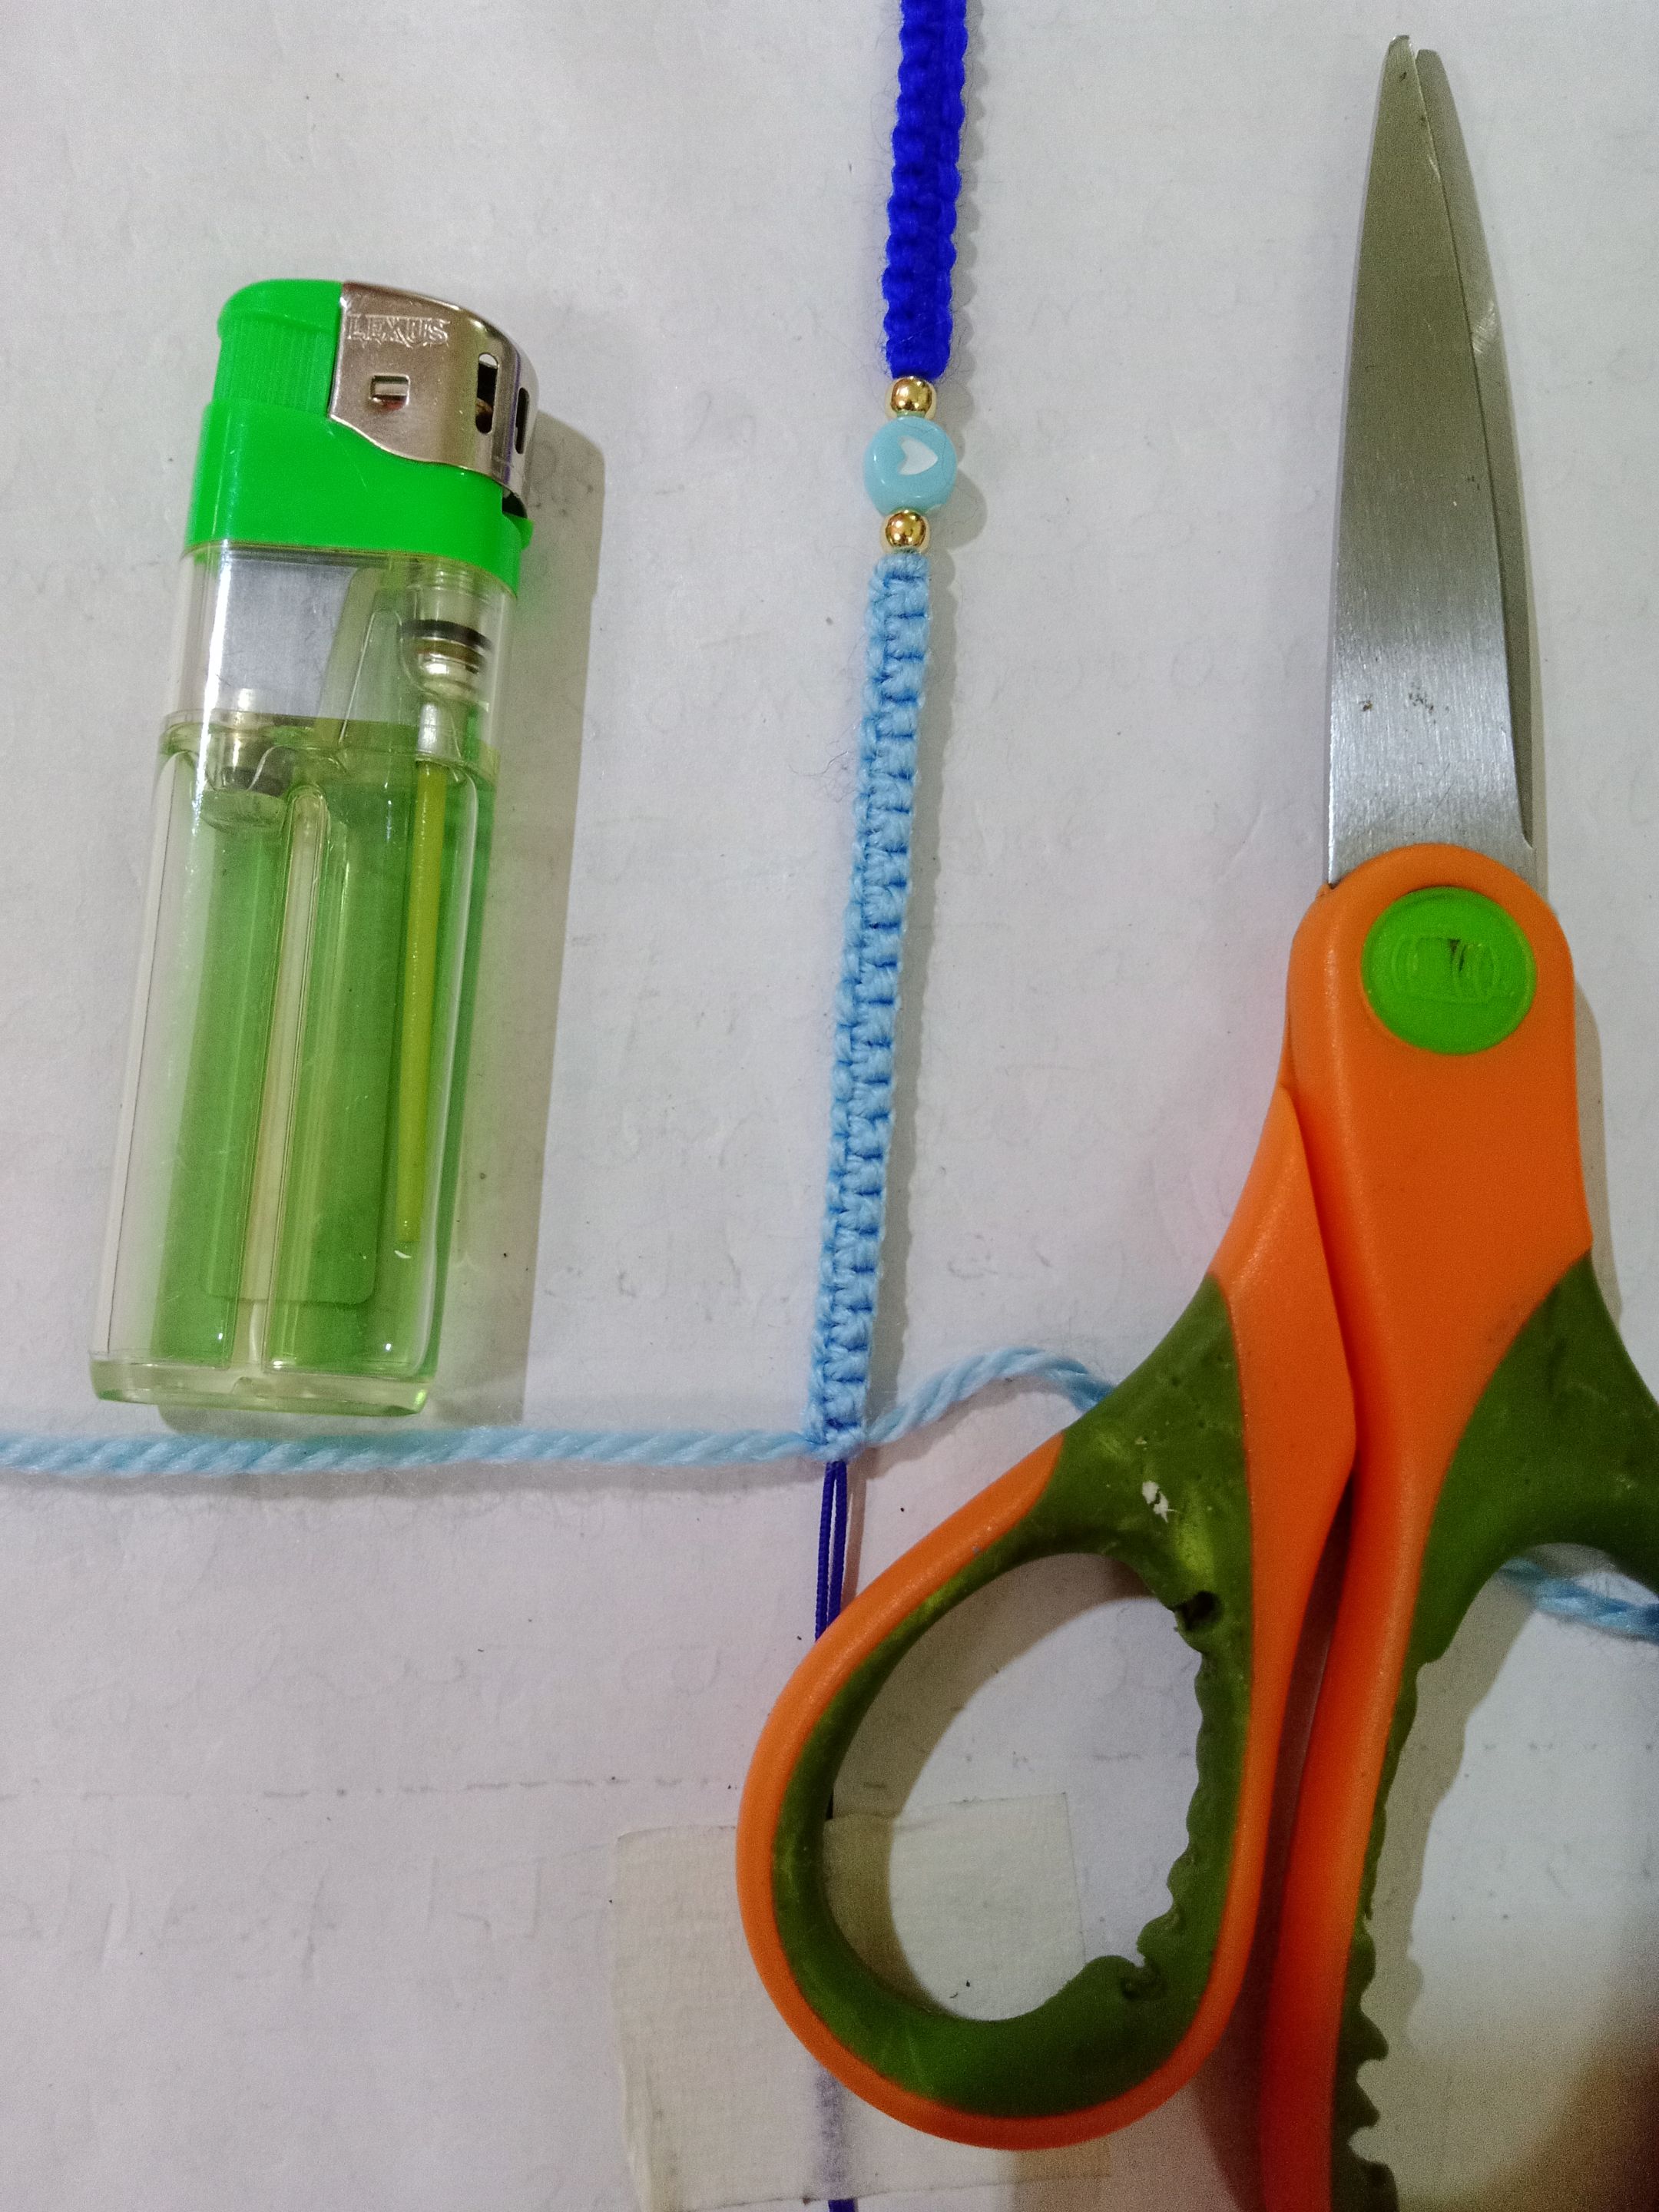
Tijera
Encendedor
Cuentas
Balín
Cinta métrica
Cinta adhesiva
The materials I used to make this beautiful bracelet are as follows:
yarn of different colors
Chinese thread
Scissors
Lighter
Beads
Balin
Tape measure
Adhesive tape
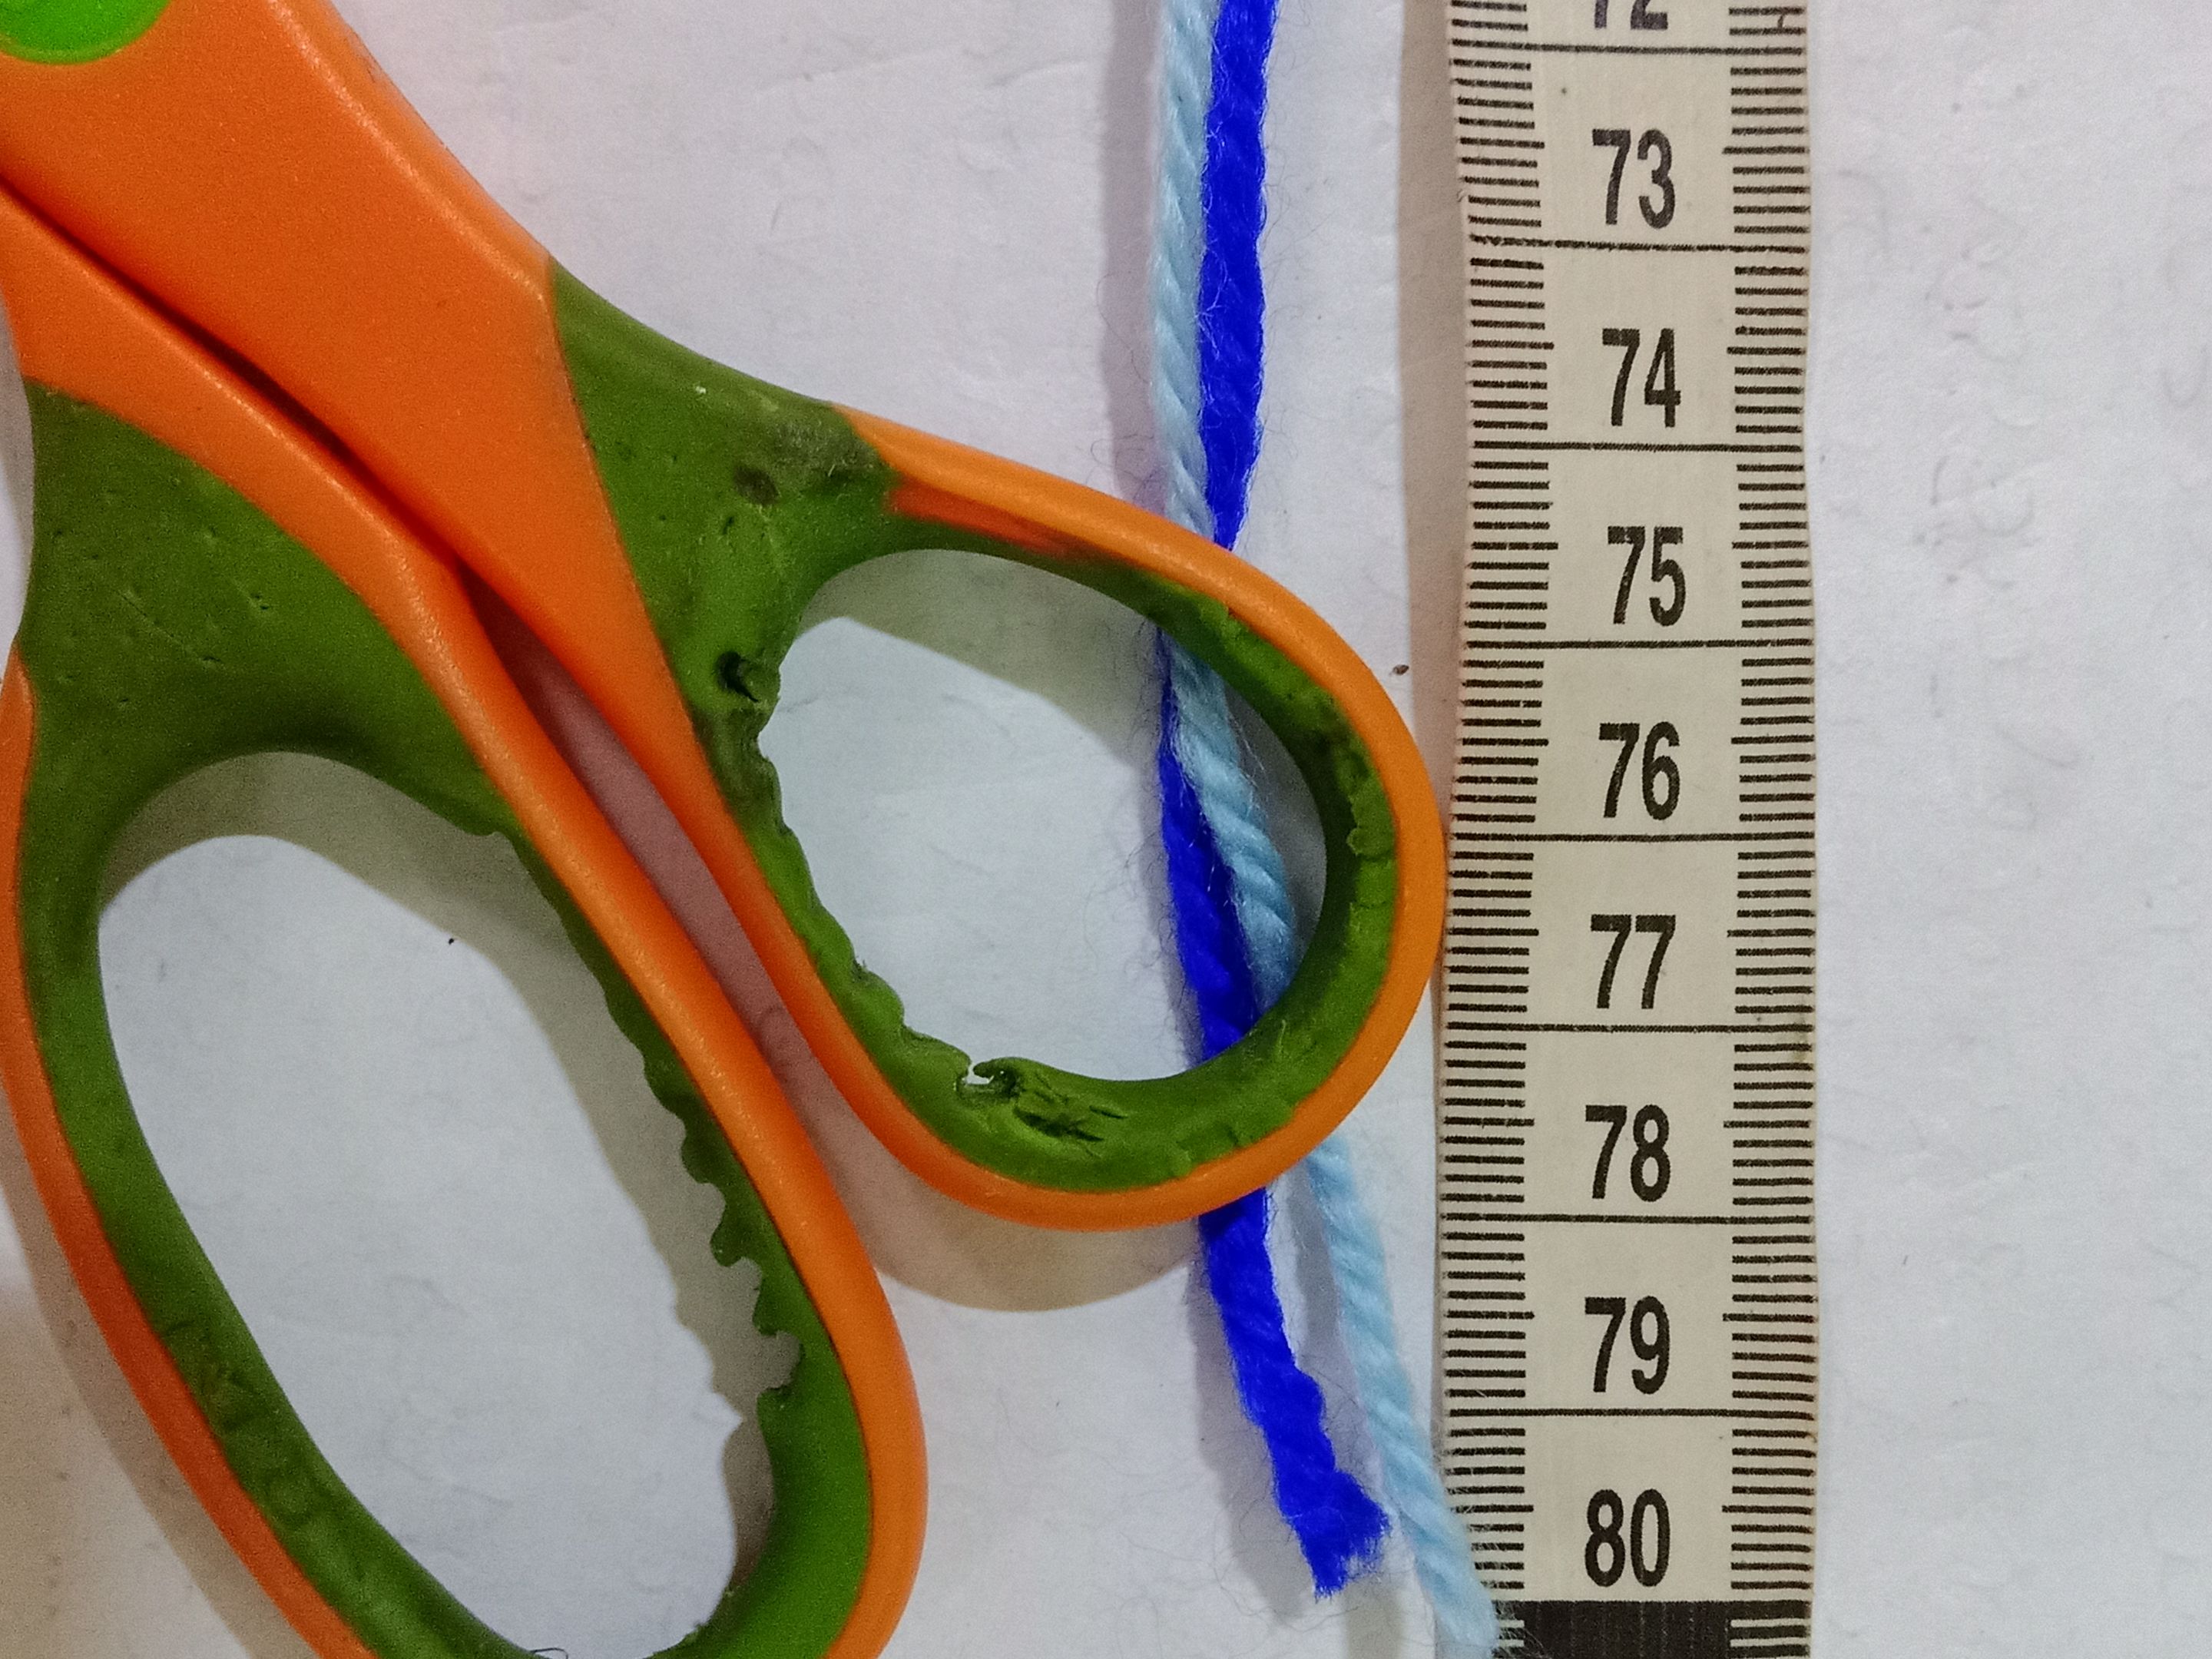
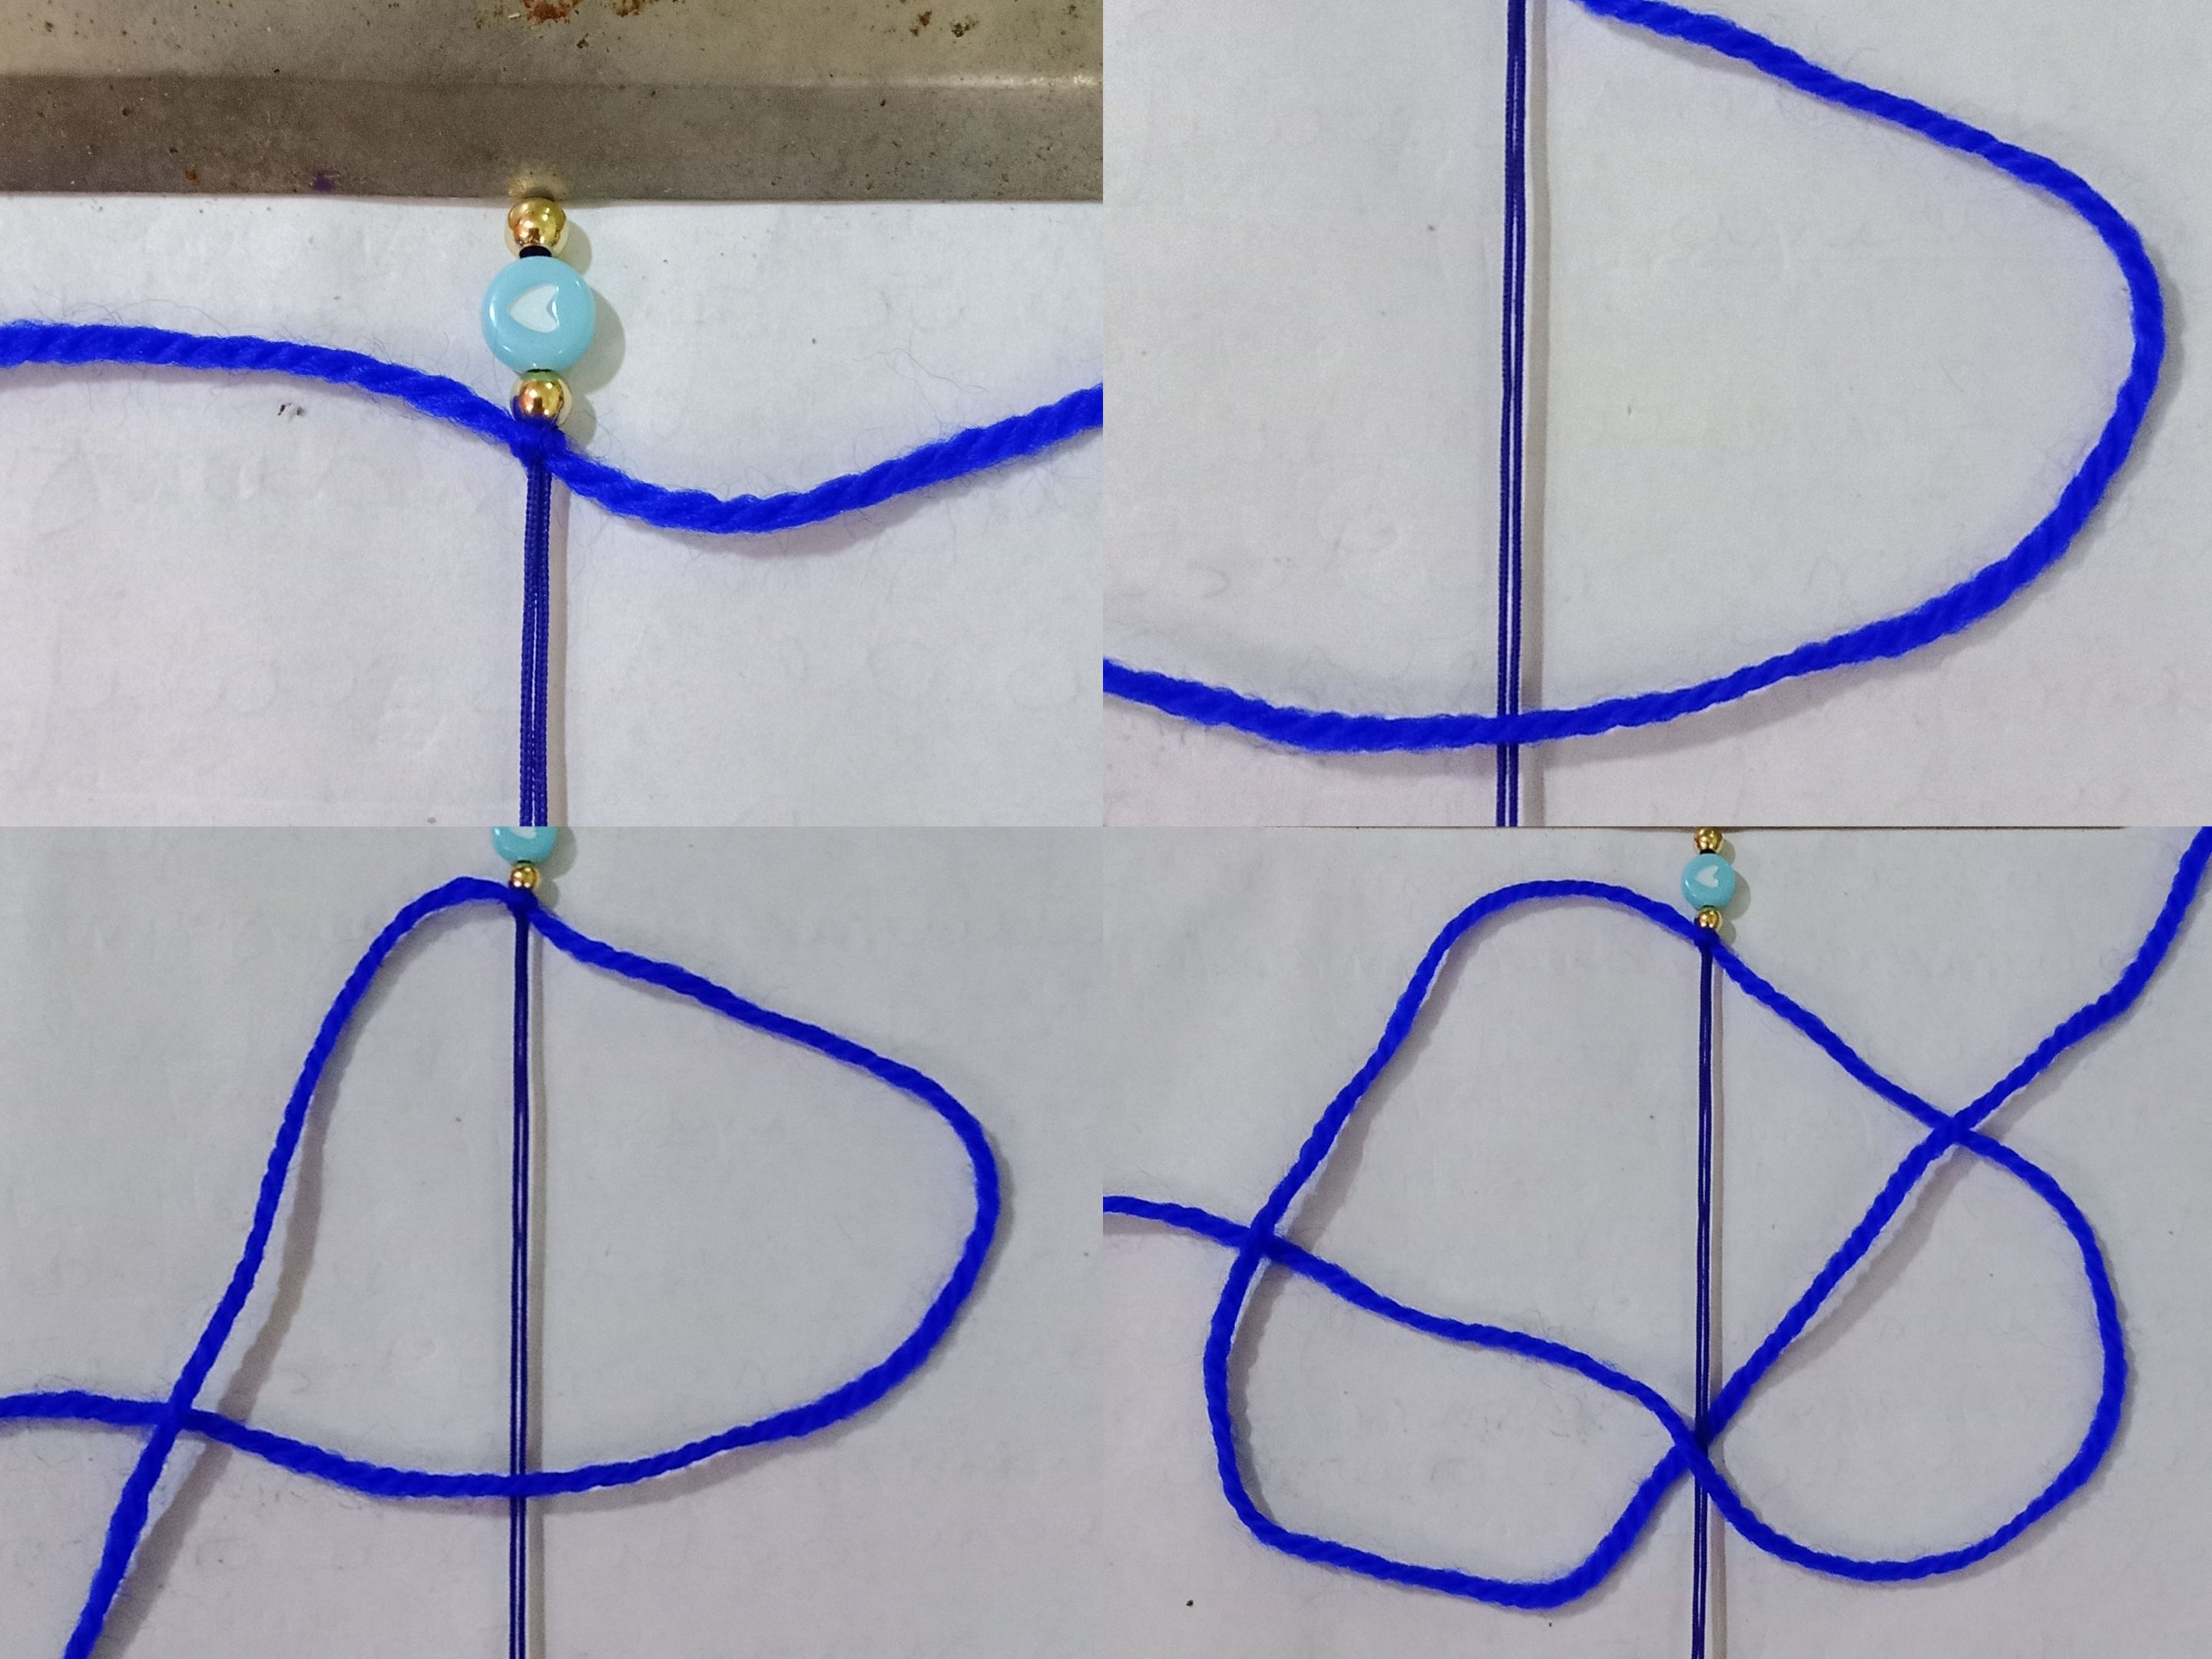
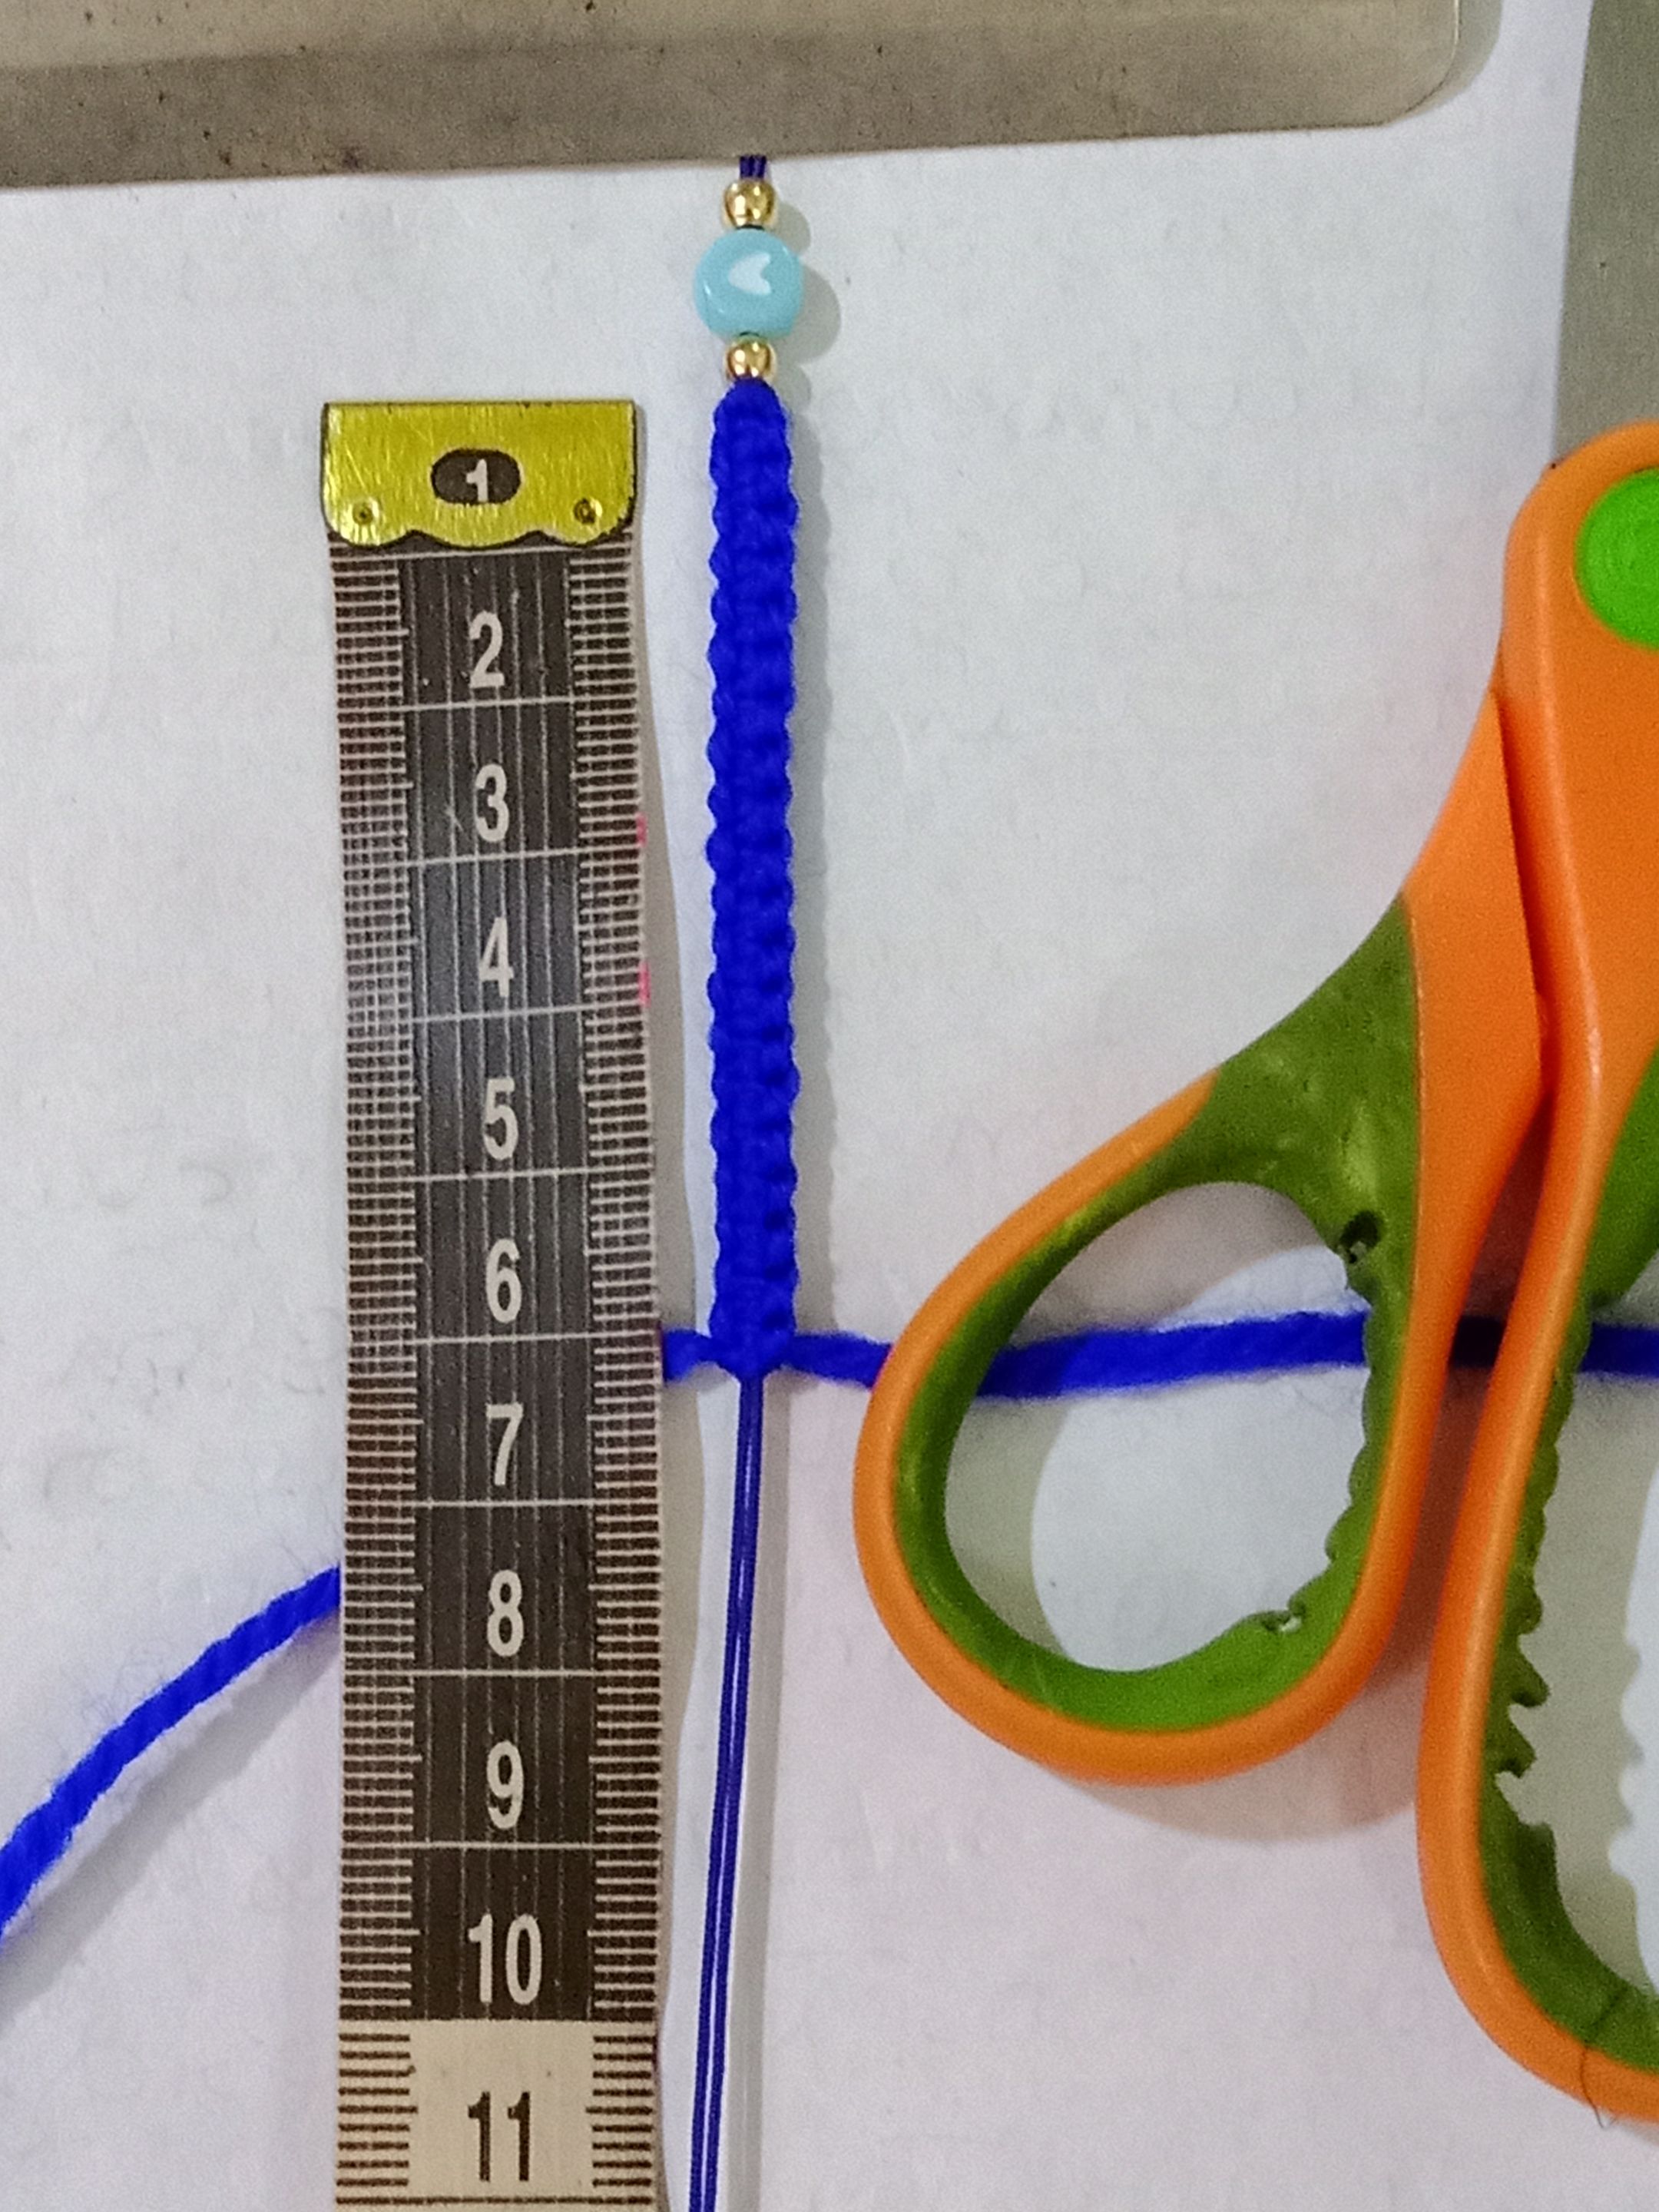
Inicié cortando dos hebras de hilos de 40cm que usaré para la base de la pulsera
I started by cutting two 40cm strands of thread that I will use for the base of the bracelet.

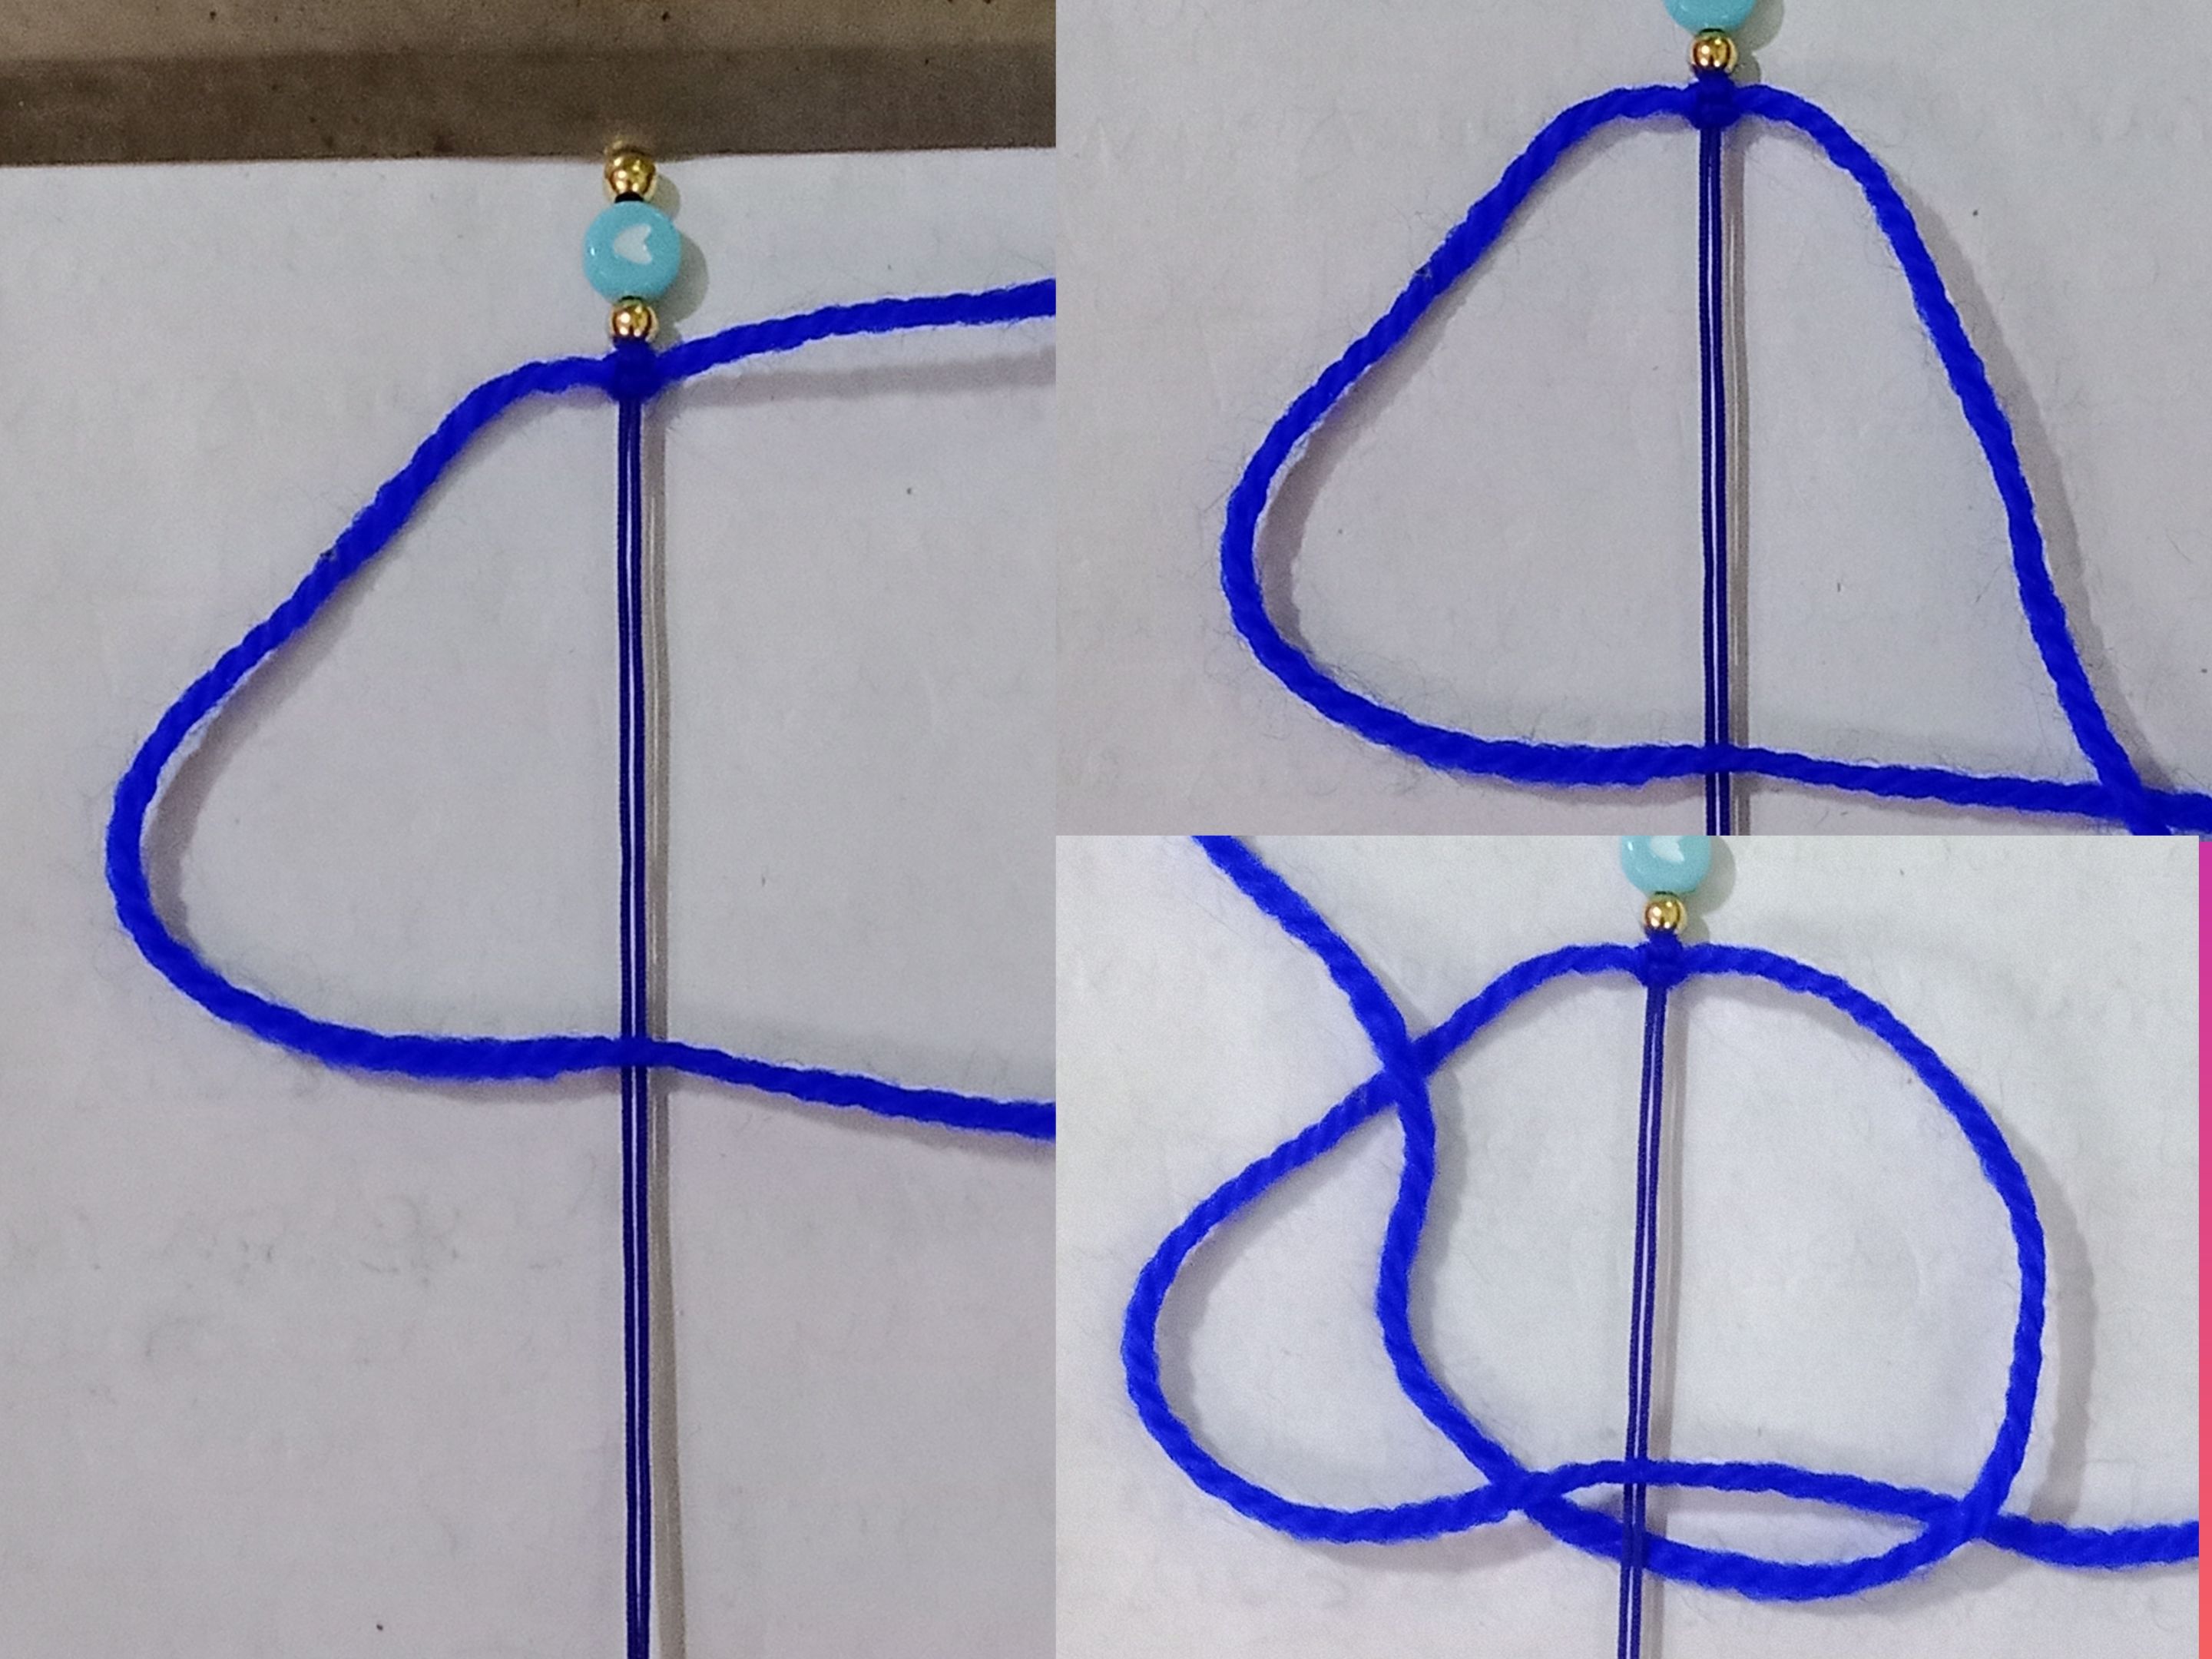
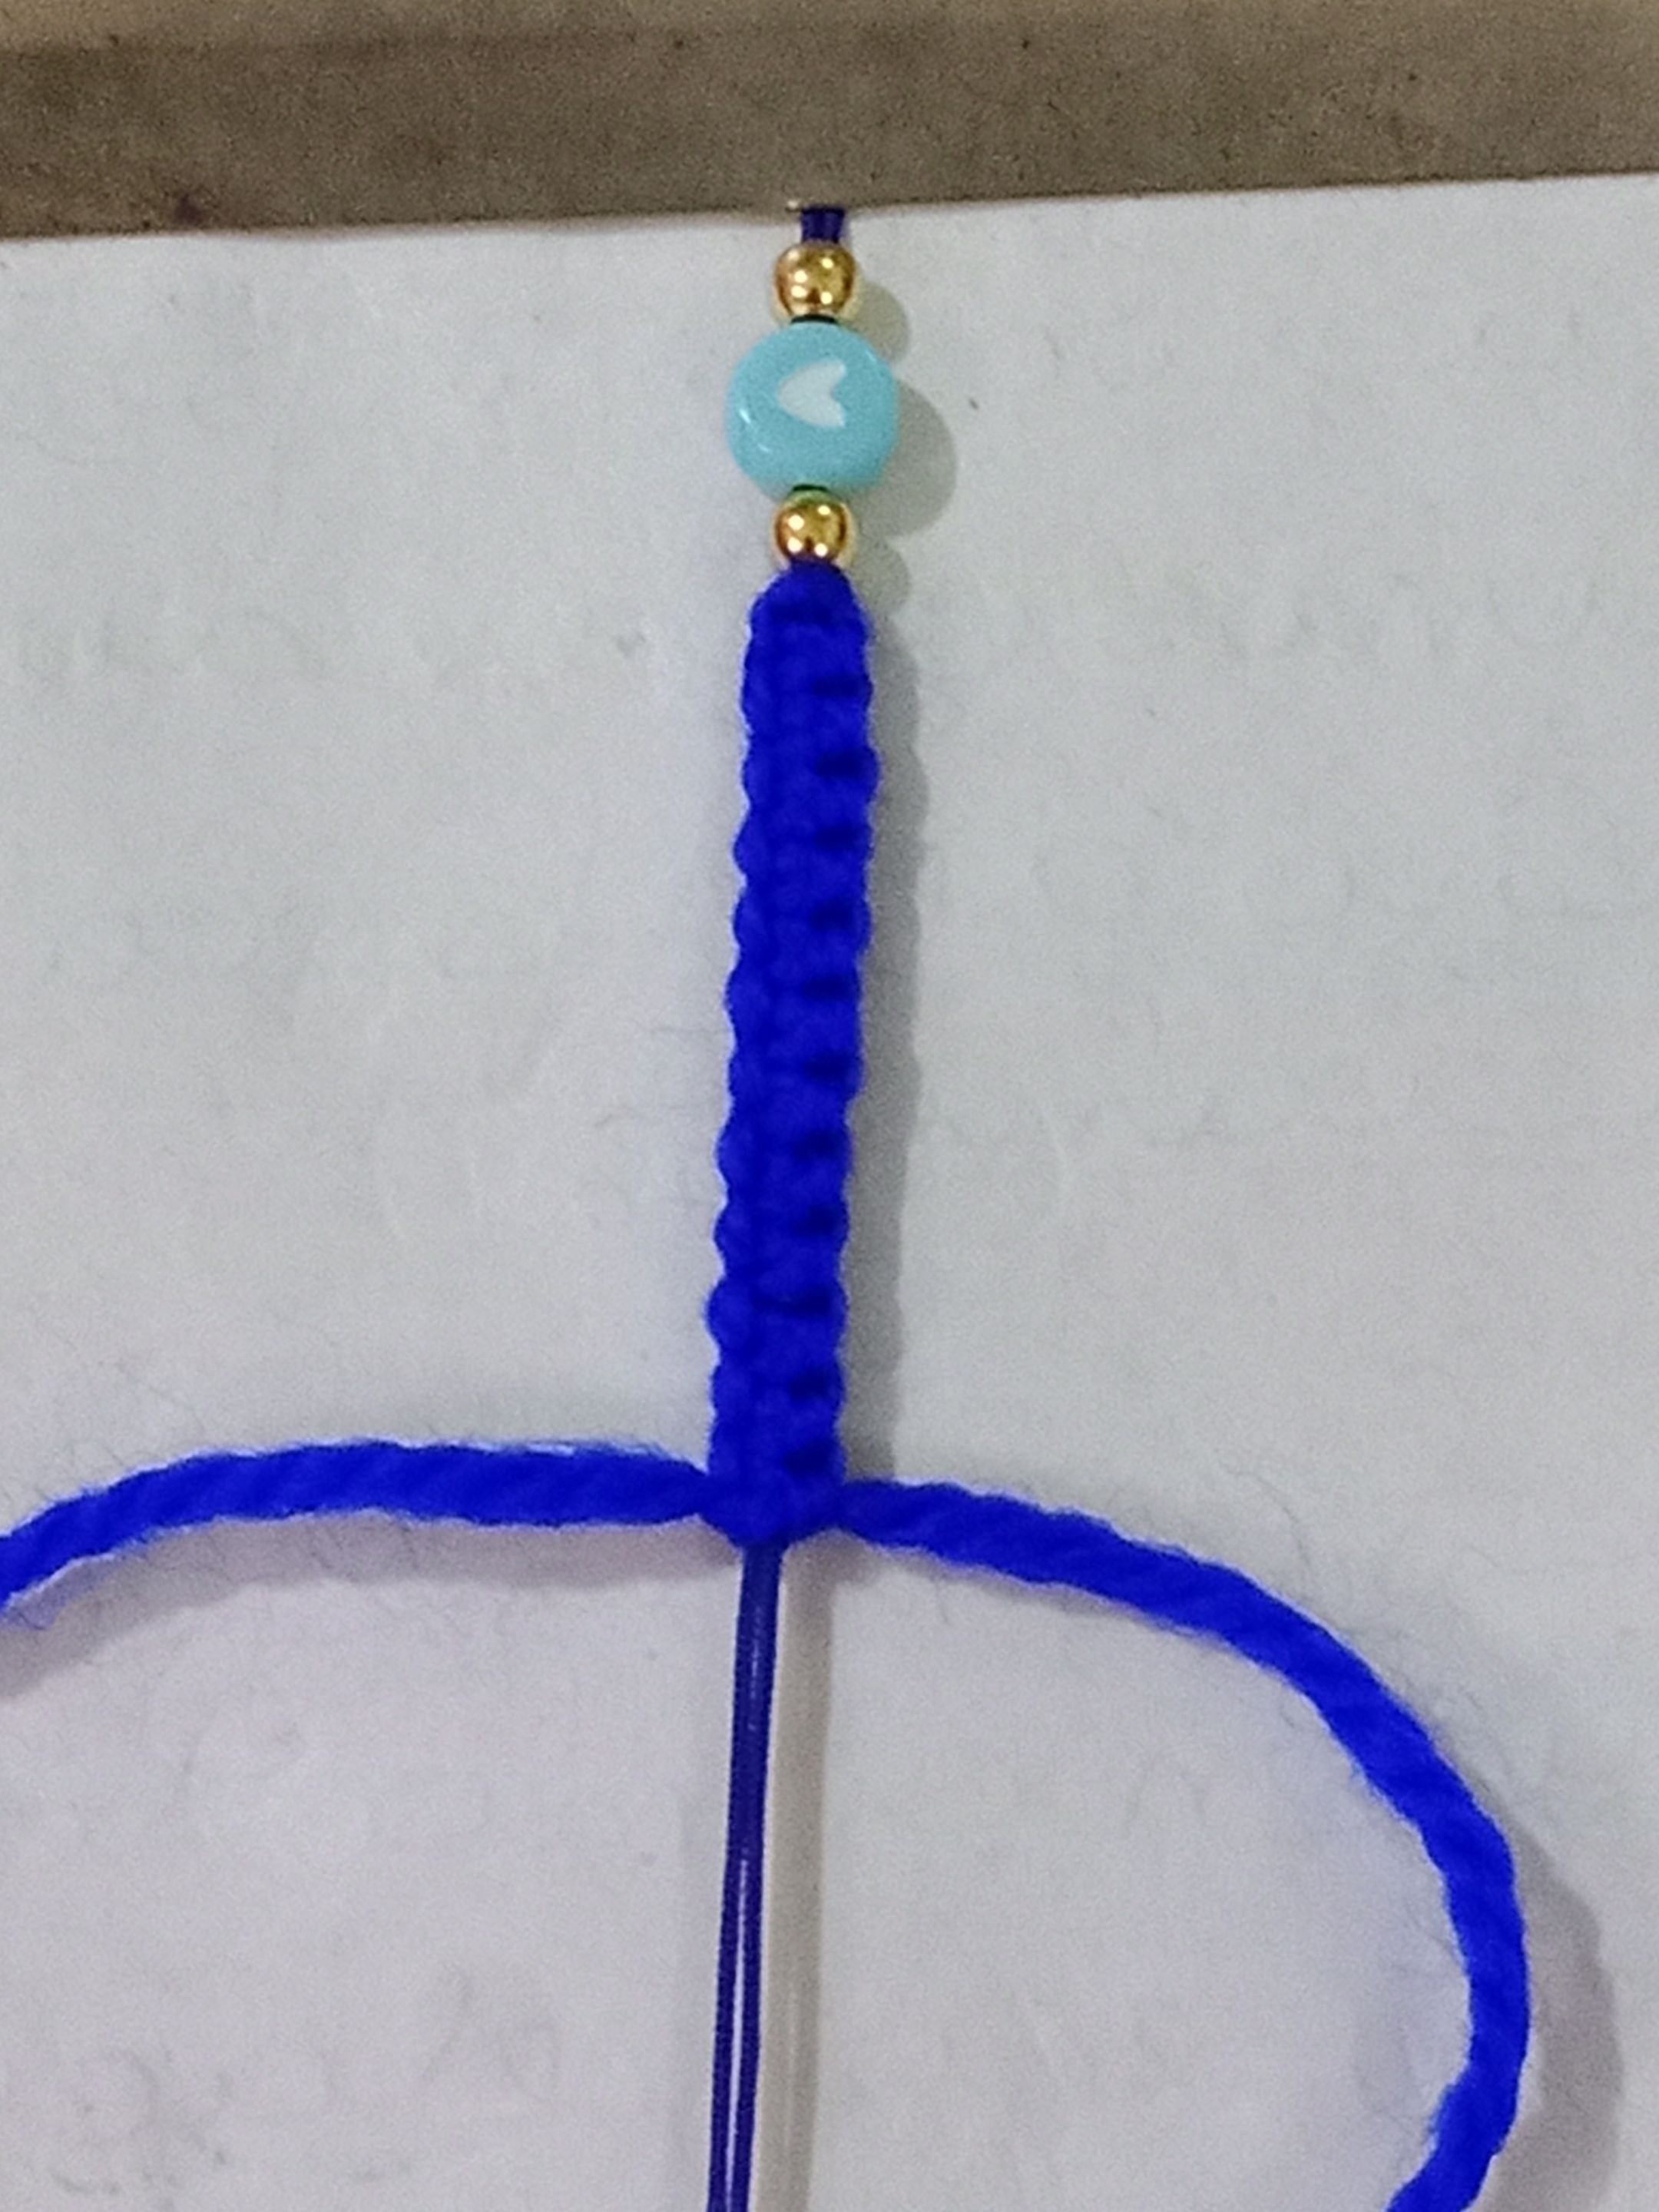
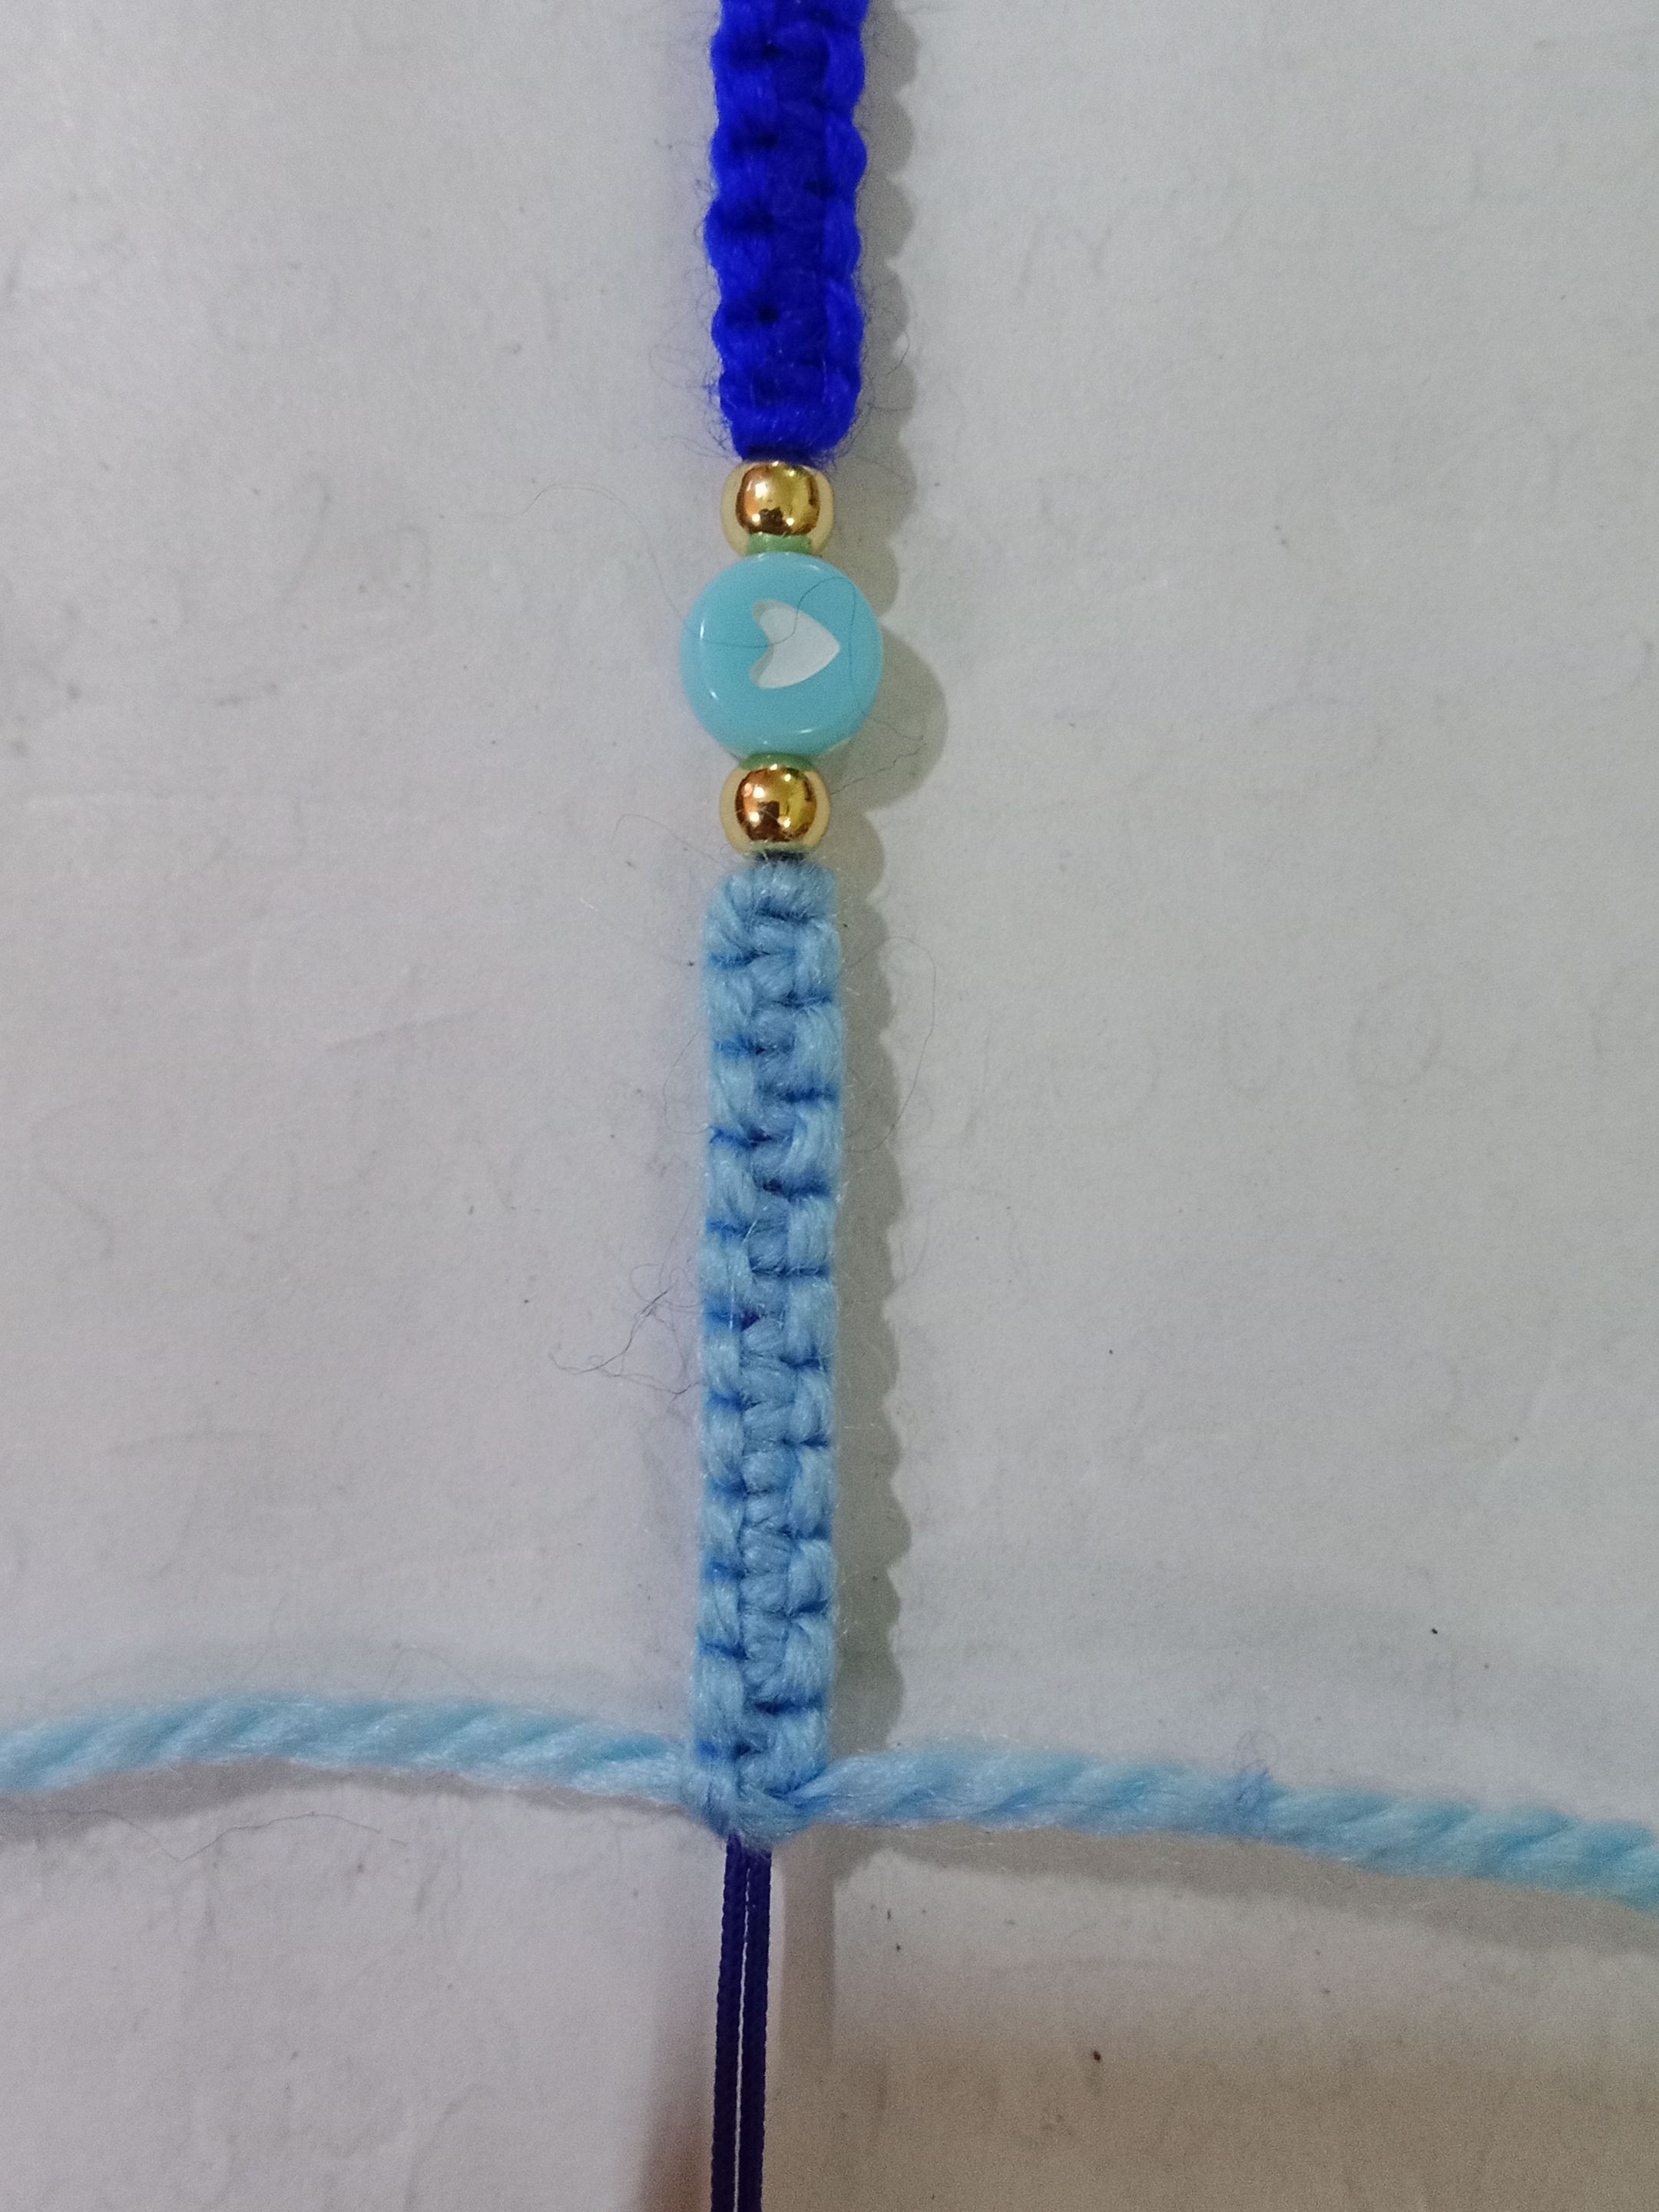
Luego recorté dos hebras de hilos de 80cm que usaré para realizar el tejido nudo plano
Then I cut two 80cm strands of yarn that I will use to weave the flat knot.

I then inserted the pellets and bead into the base wires. Then I brought them to the center of the base and attached them to the board with a hook.

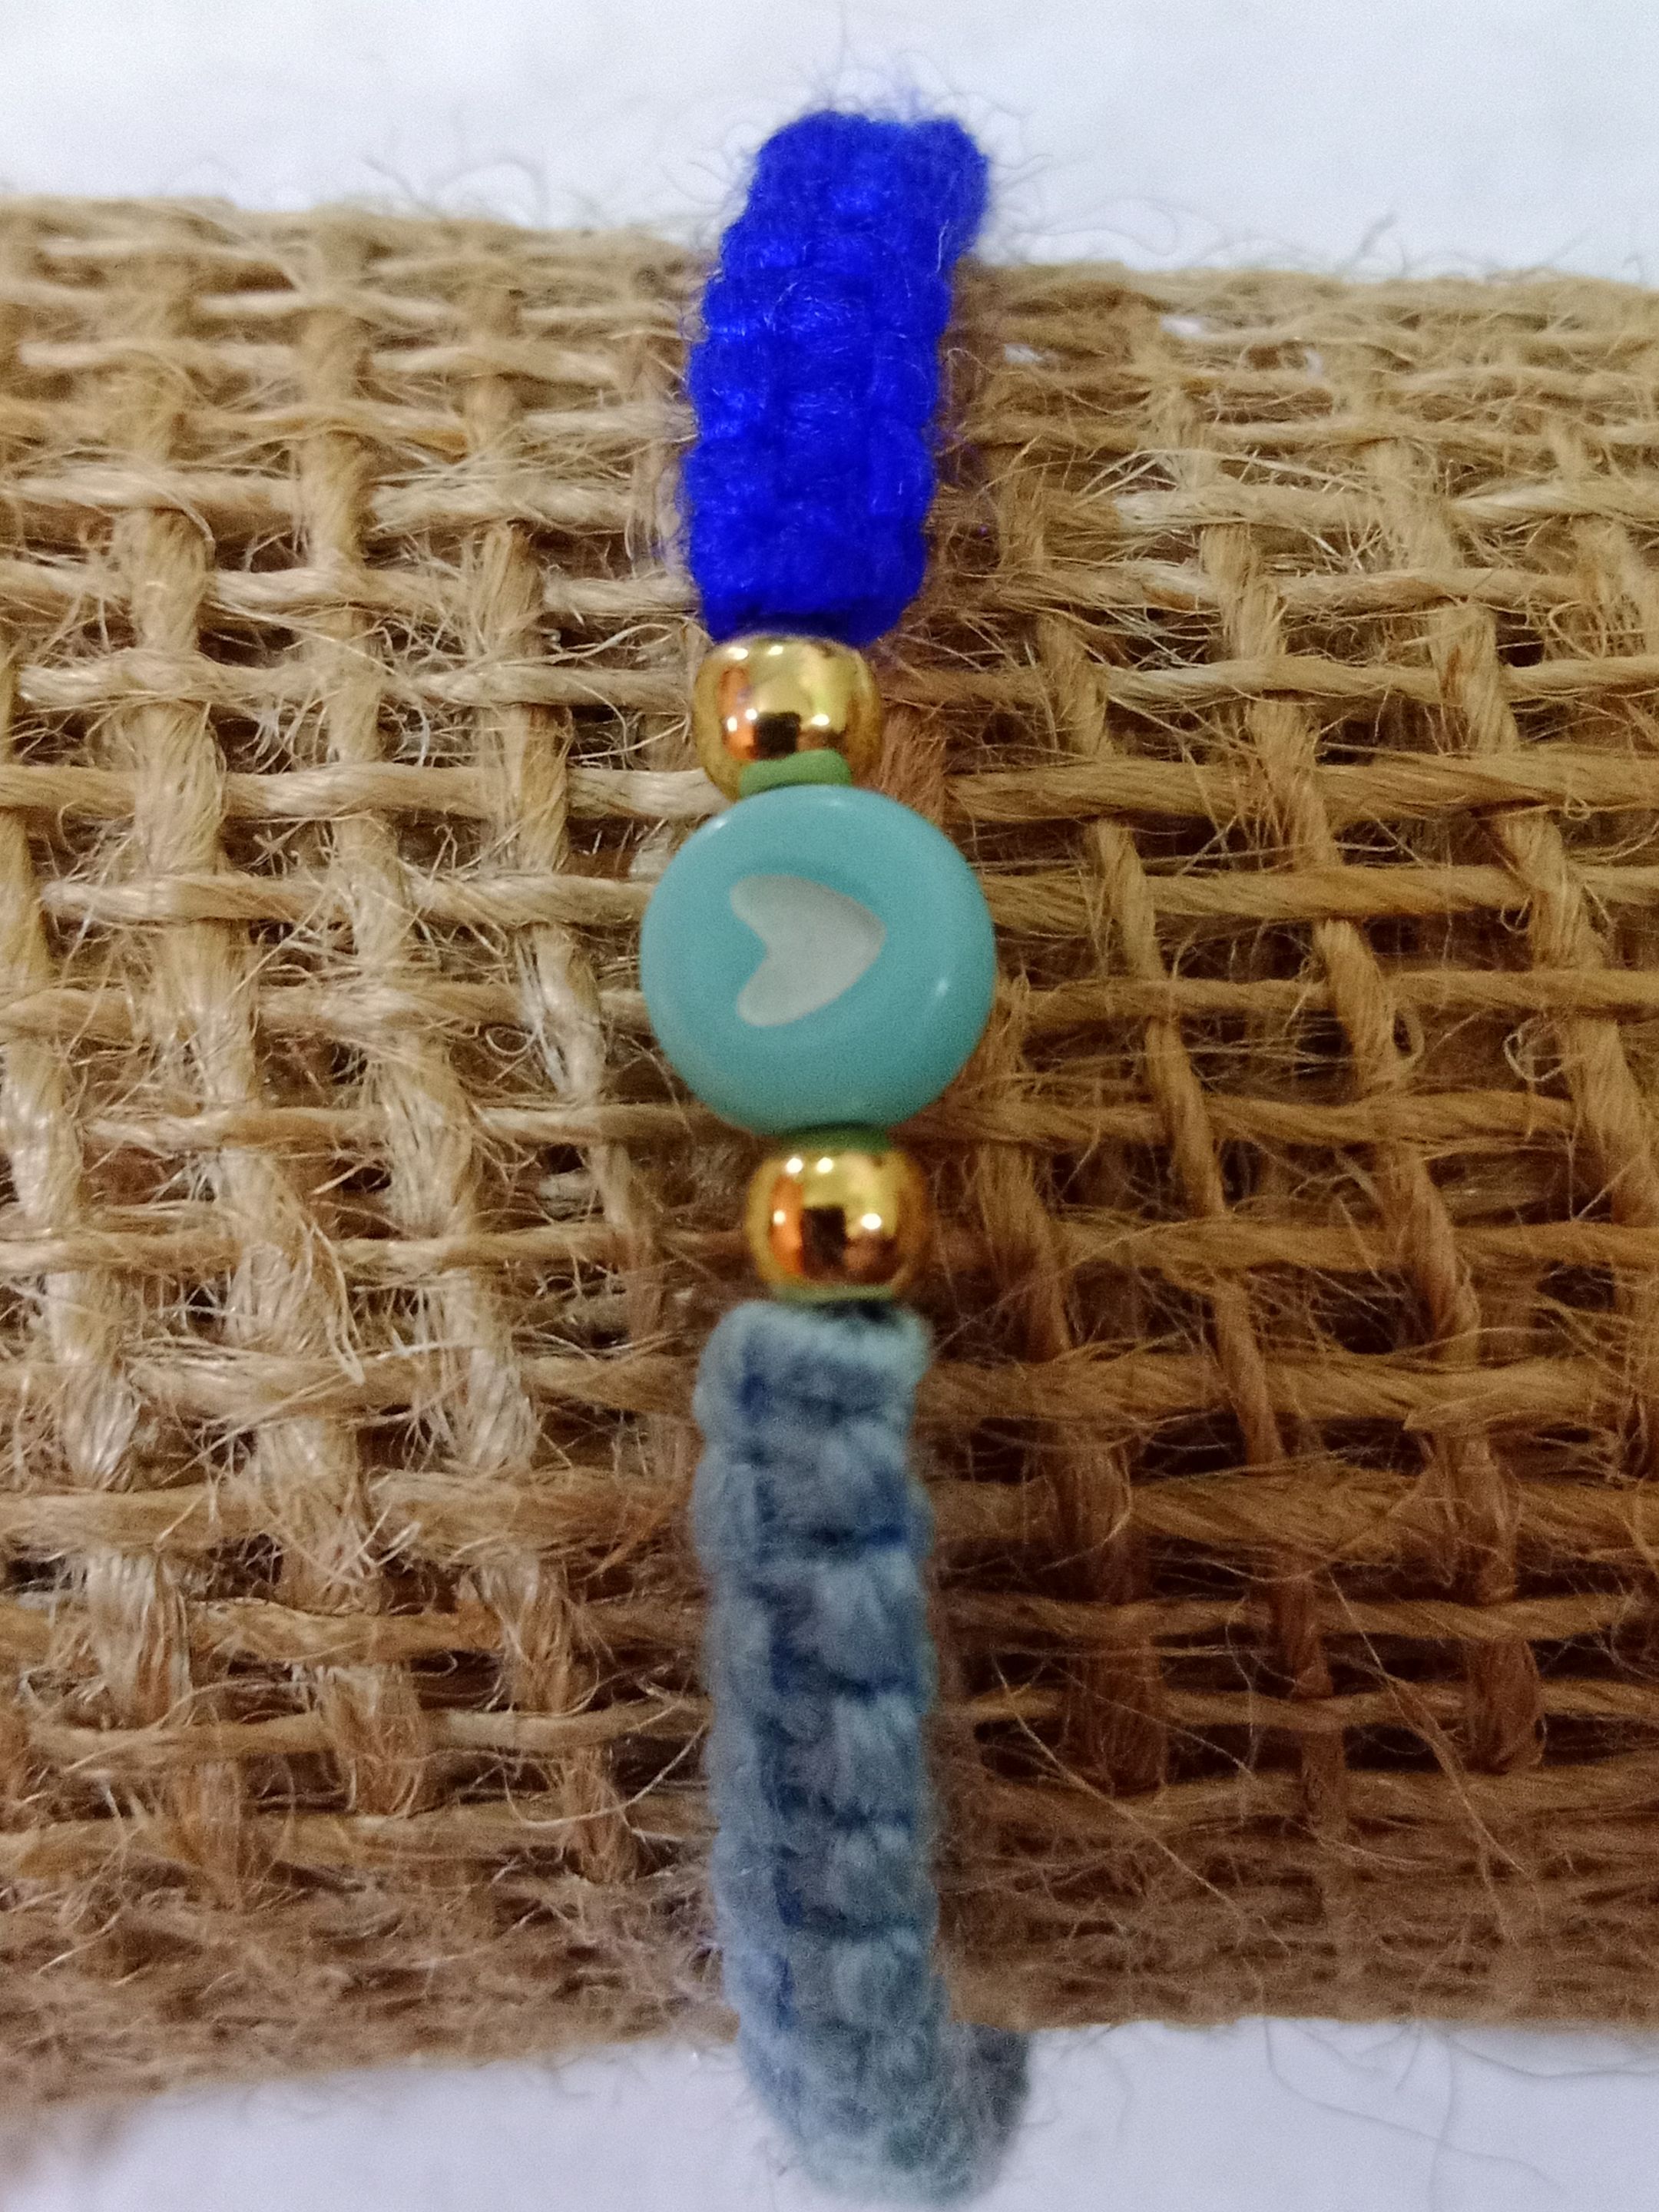
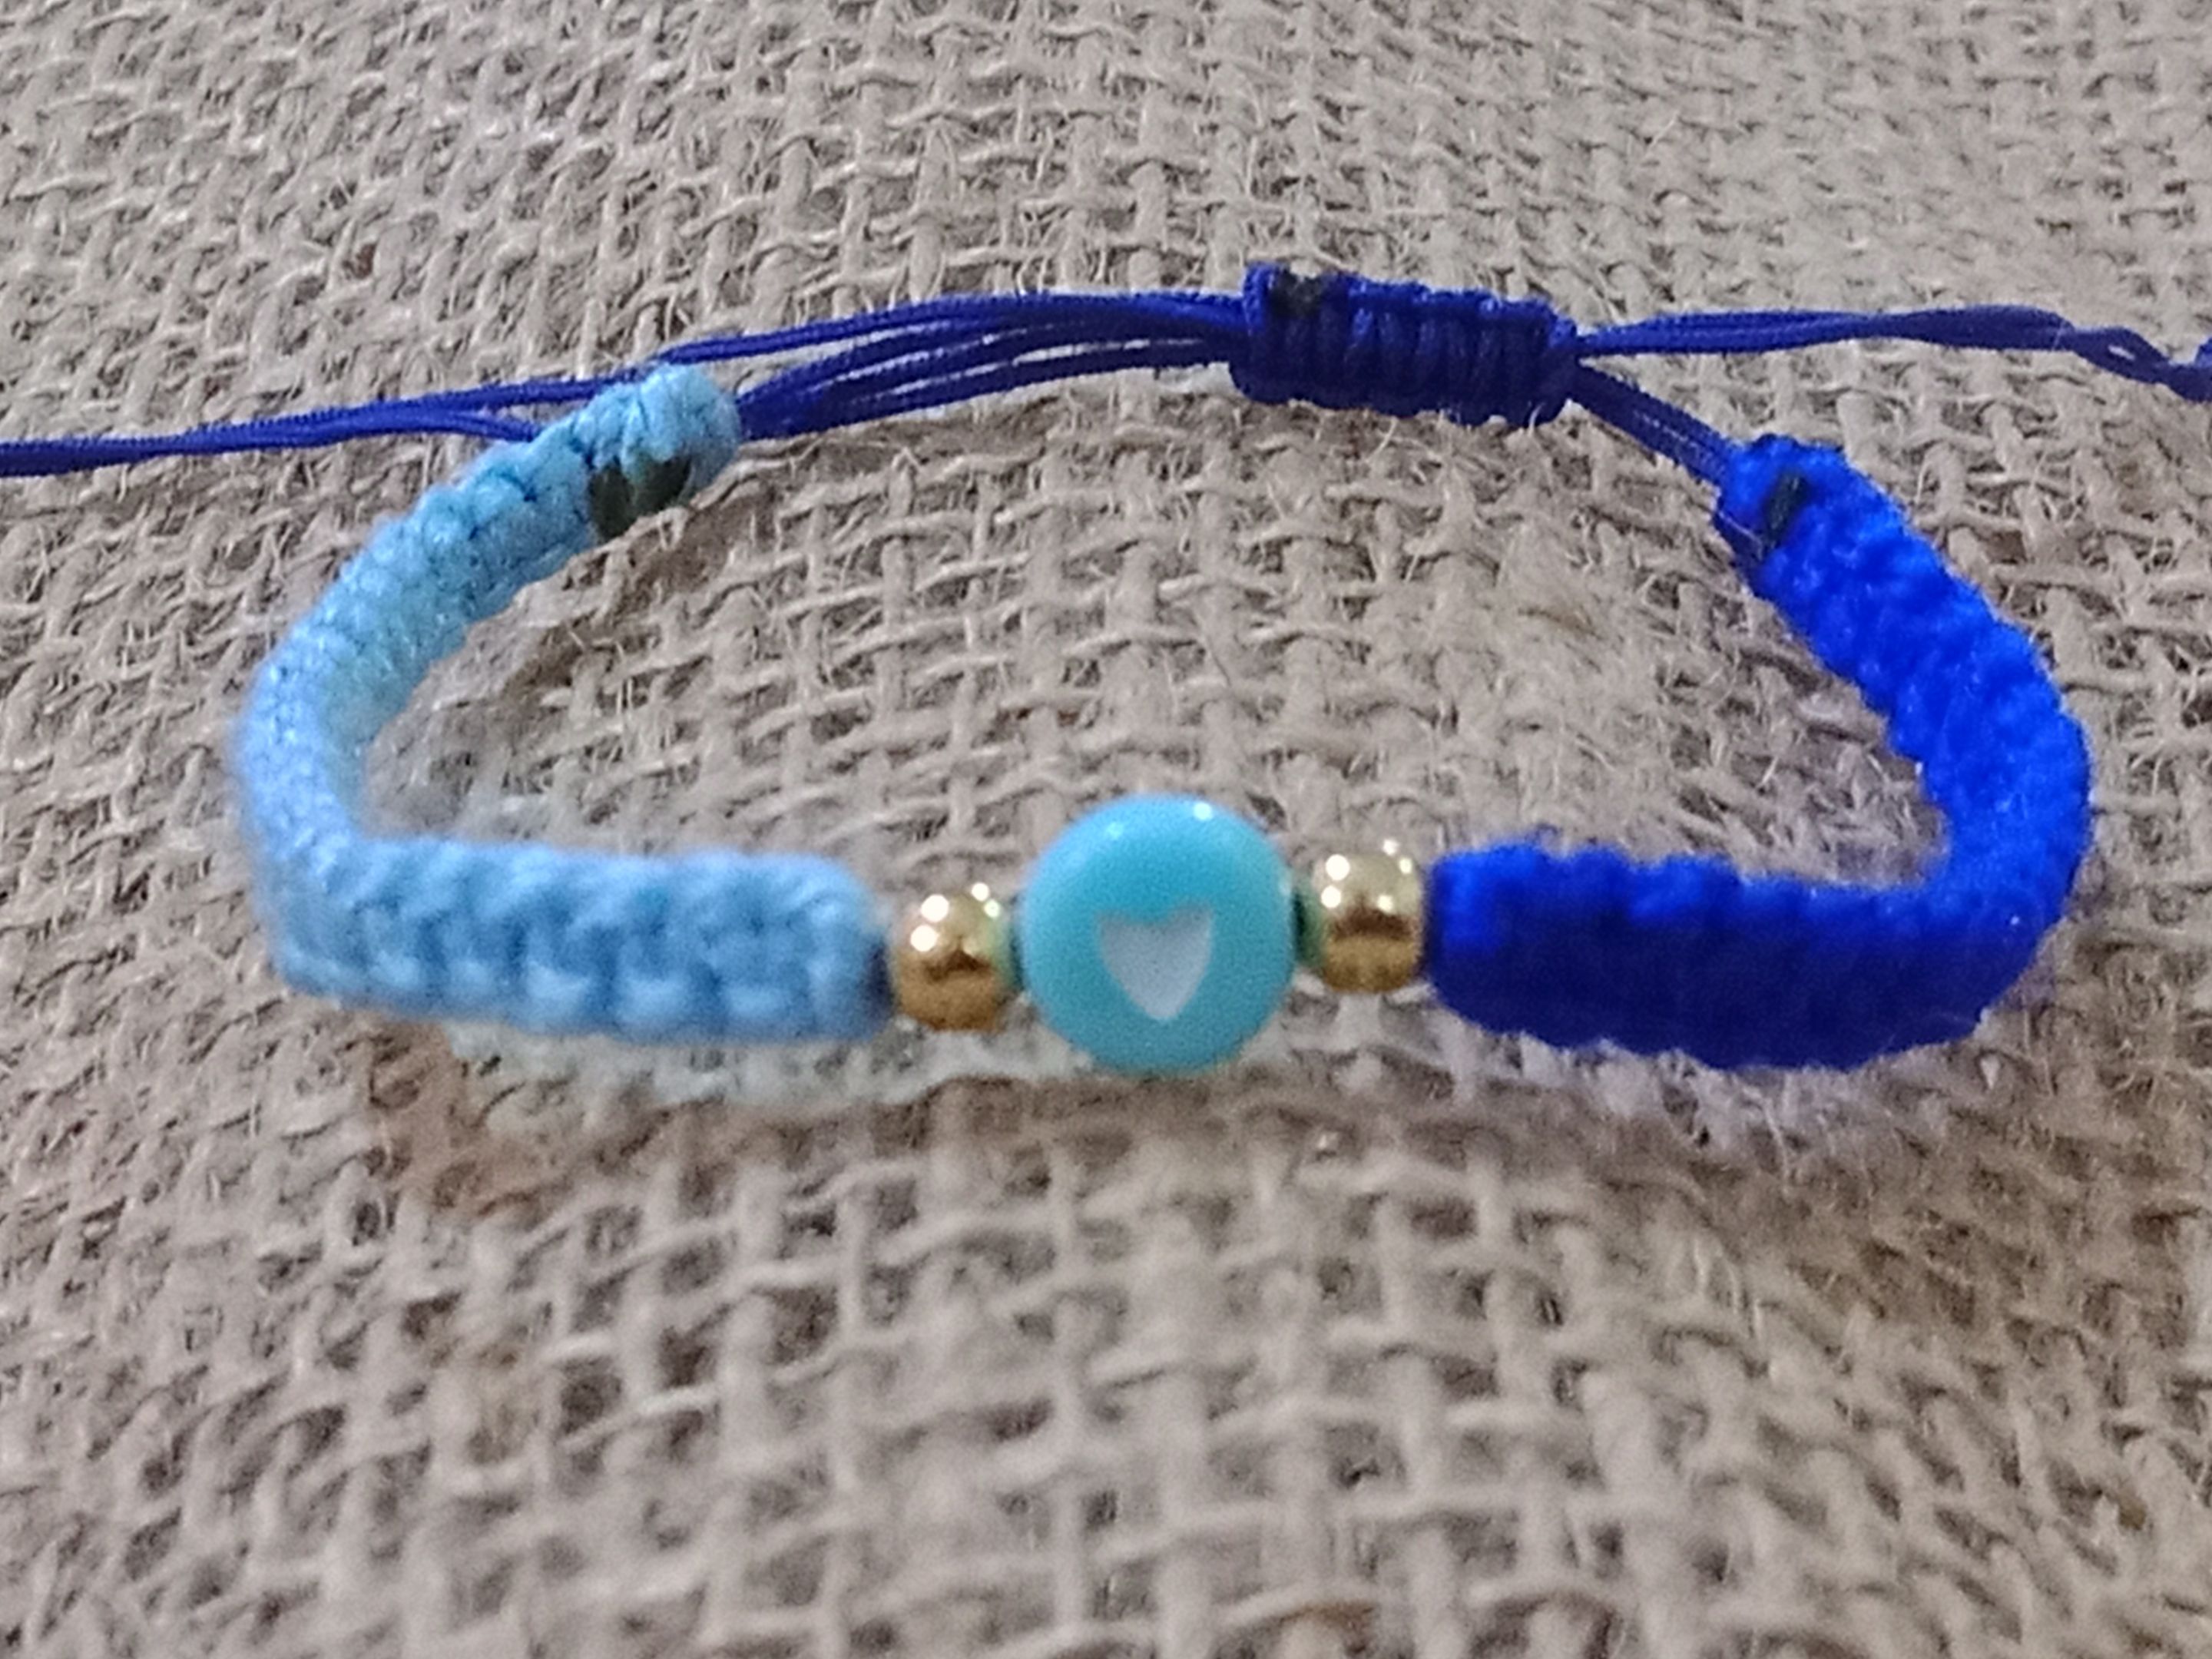
Así queda esta hermosa pulsera para esta maravillosa comunidad
This is the beautiful bracelet for this wonderful community.
Translated with https://www.deepl.com/translator
                  All images are my own, dividers courtesy of @kattycrochet.


             Todas las imágenes son de mi autoría, divisores cortesía de @kattycrochet.