IN ENGLISH:
Hello friends, today I want to share with you a new job, this time I will show you step by step, the maintenance of my Bosch brand Hammer Drill, which I bought 26 years ago, the truth is that this drill has never failed, that is, I have always done its preventive maintenance, which consists of cleaning all its internal parts, this includes the removal of dust and old lubricant, this helps to prolong its useful life, thus avoiding the wear of its internal components, such as: shaft coils and gears.
Well friends, the truth is that electric drills are an essential tool, both in a workshop and at home, since they are used to drill holes in different materials such as: walls, wood, metals and plastics, I would say that today drills have become an indispensable tool that should not be missing in the home, since more and more people try to do their own jobs at home, such as installing cabinets, fixing sinks, placing a picture on the wall, shelves, etc. where it is required to open holes in the walls to place the Ramplus and screws.
It's time to do general maintenance on my drill:
Well friends, today I have decided to perform preventive maintenance on my Bosch drill, really, this drill has turned out well, it has never failed, although I will tell you something, I think that the maintenance that I do every year on my drill has influenced its proper functioning, because the life of a piece of equipment is not the brand, because even if they are from a good brand, they usually deteriorate quickly, due to lack of preventive maintenance.
Well friends, today I have decided to perform preventive maintenance on my Bosch drill, really, this drill has turned out well, it has never failed, although I will tell you something, I think that the maintenance that I do every year on my drill has influenced its proper functioning, because the life of a piece of equipment is not the brand, because even if they are from a good brand, they usually deteriorate quickly, due to lack of preventive maintenance.

How to perform preventive maintenance on a hammer drill
Well friends, it would be advisable to clean the electric drill after each use, especially when it is used to open holes in the walls, because generally, this generates a lot of dust, so we must eliminate any accumulation of dust or remains of materials in the casing, especially where the buttons and switches are located, since the accumulation of dust or residue can cause problems when turning the drill on or off, BUT! This cleaning can be considered superficial maintenance, OF COURSE! It is necessary, but it is also important to perform maintenance on the internal components of the drill at least once or twice a year, depending on use.
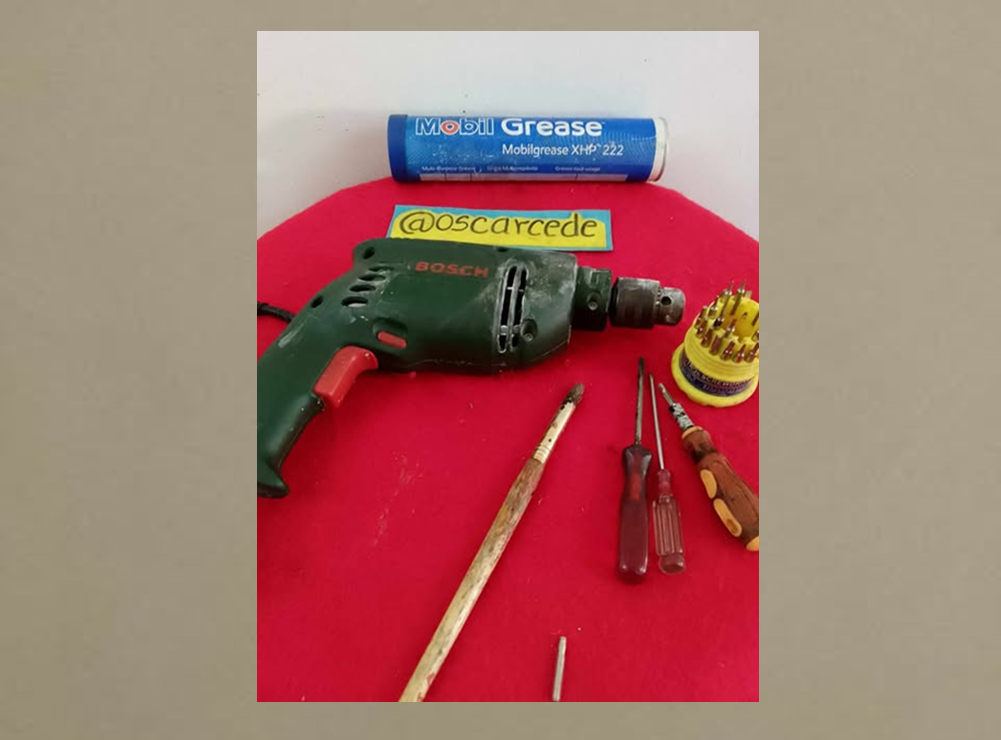
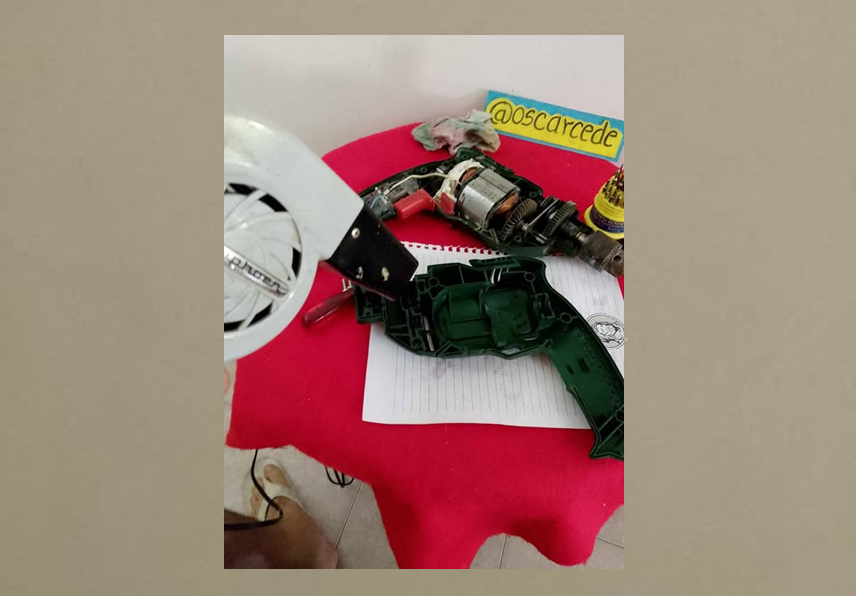
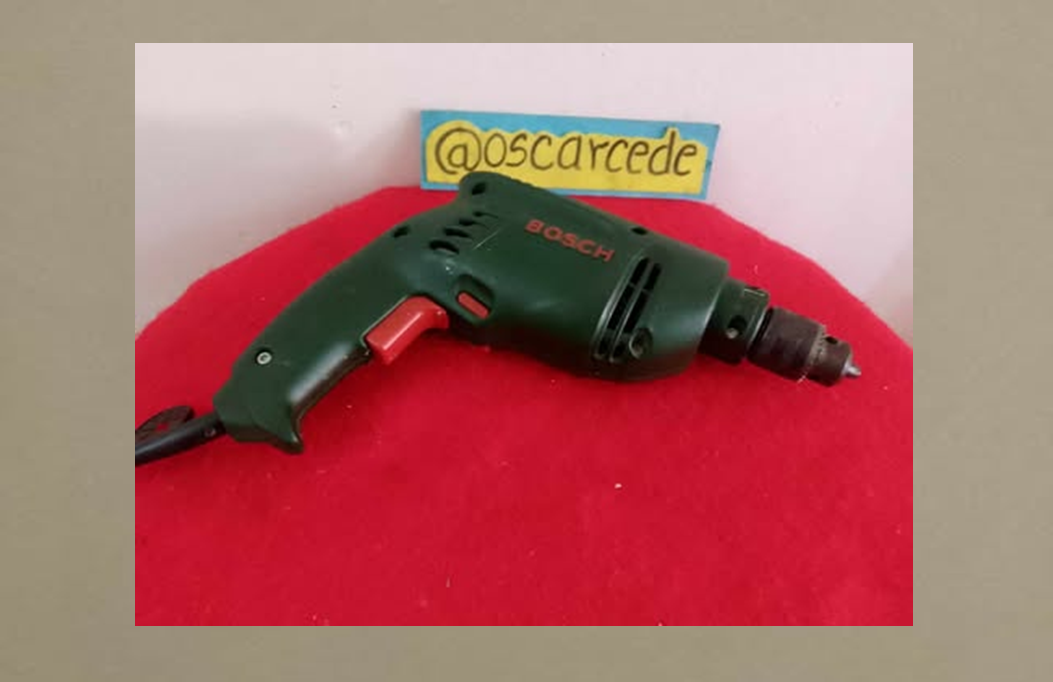
This is my drill:
Performing preventive maintenance on my drill
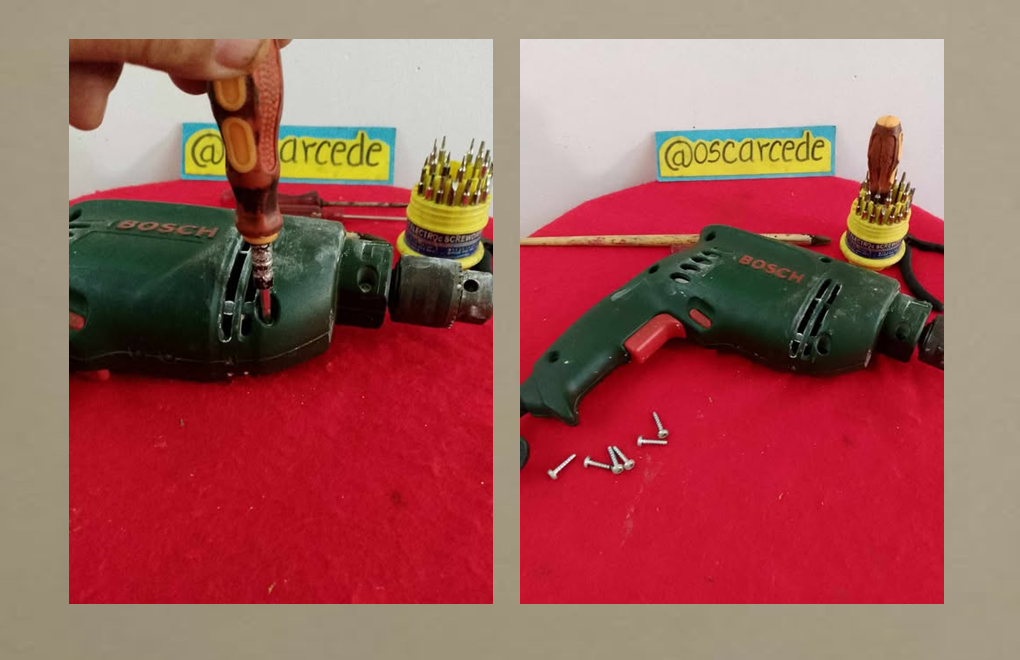
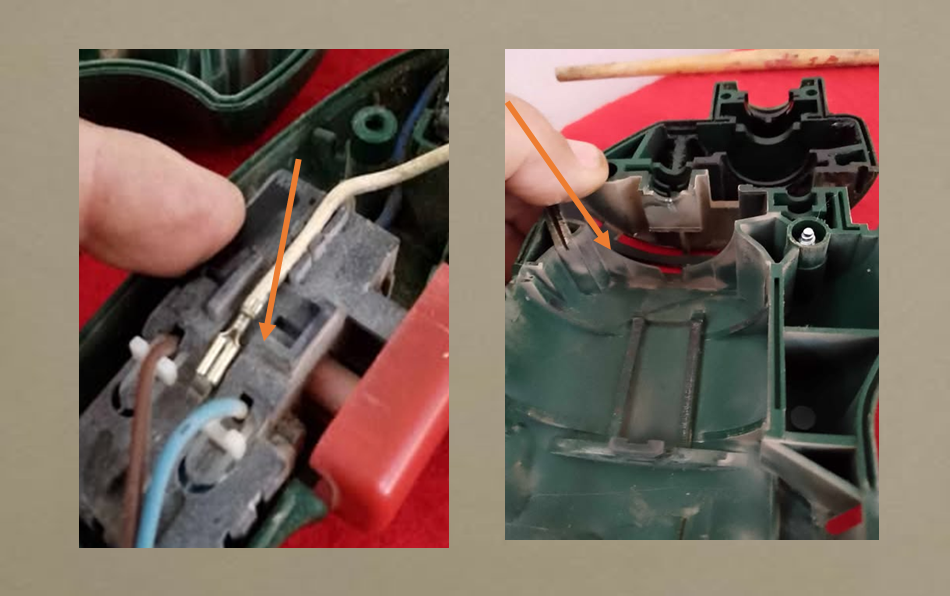
- Step-1: Remove the screws that hold the two casing bodies.
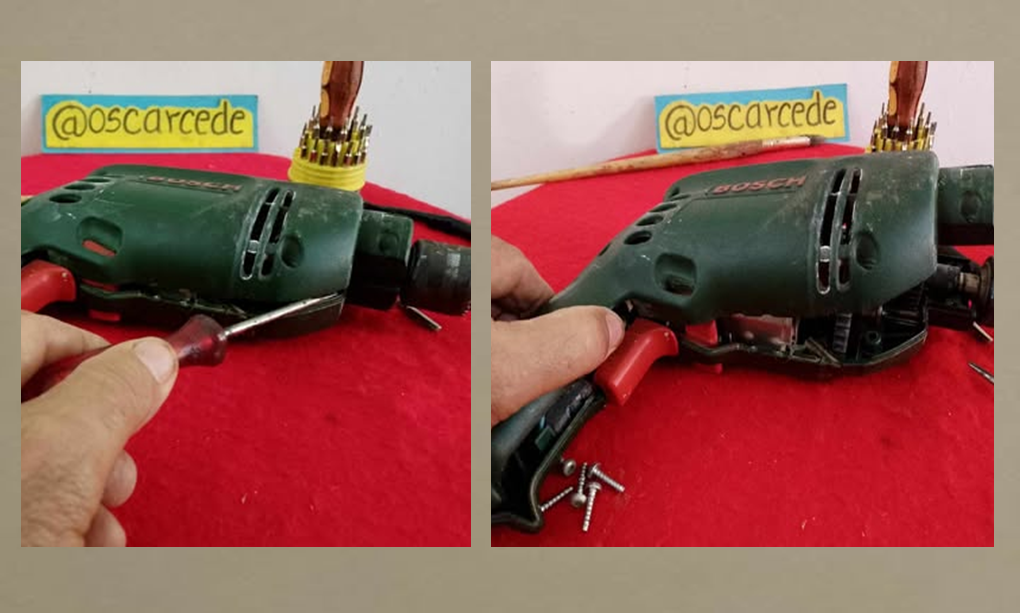
- Step-2: Very carefully, I am going to separate the covers from the casing:
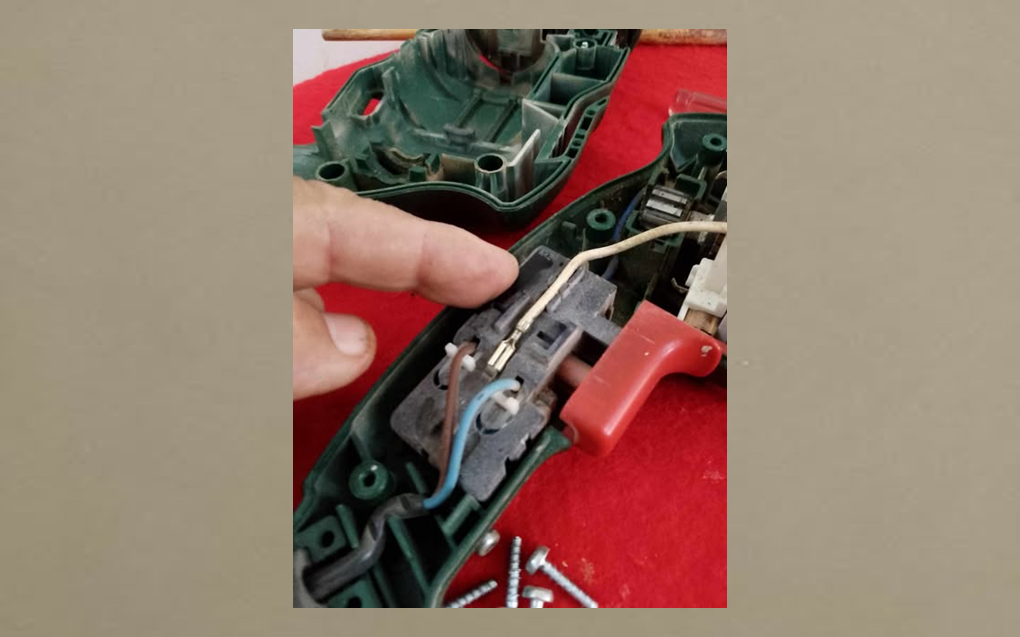
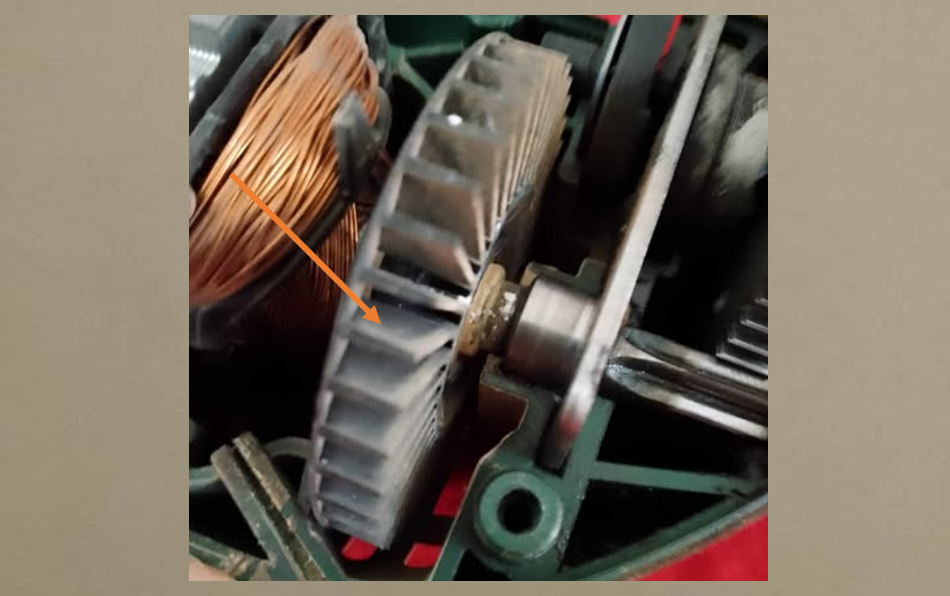
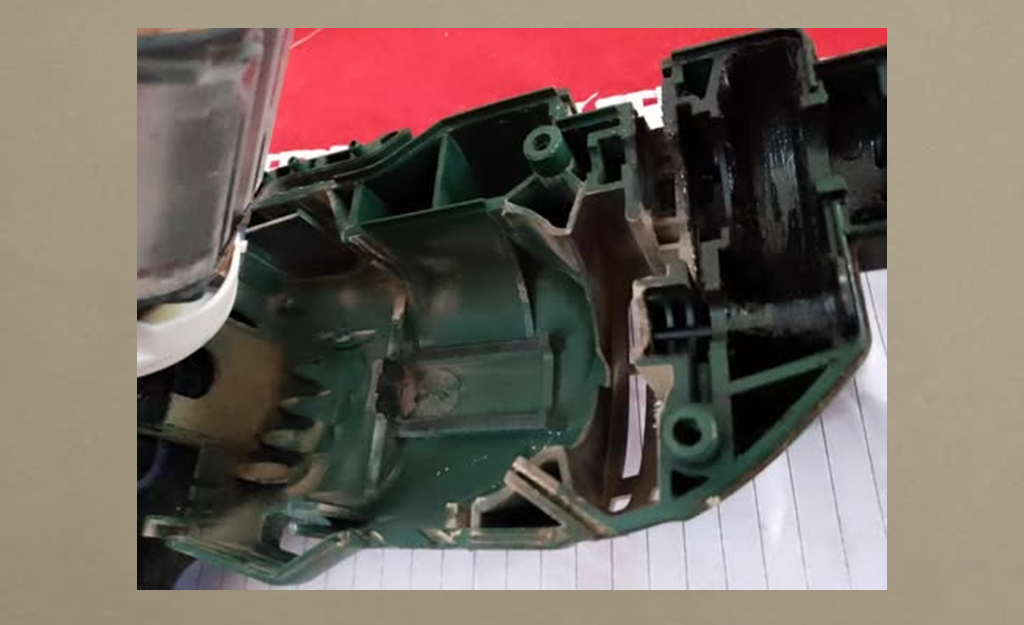
Look at the amount of dust and particle remains that have dirty the casing and mechanical components of the drill:
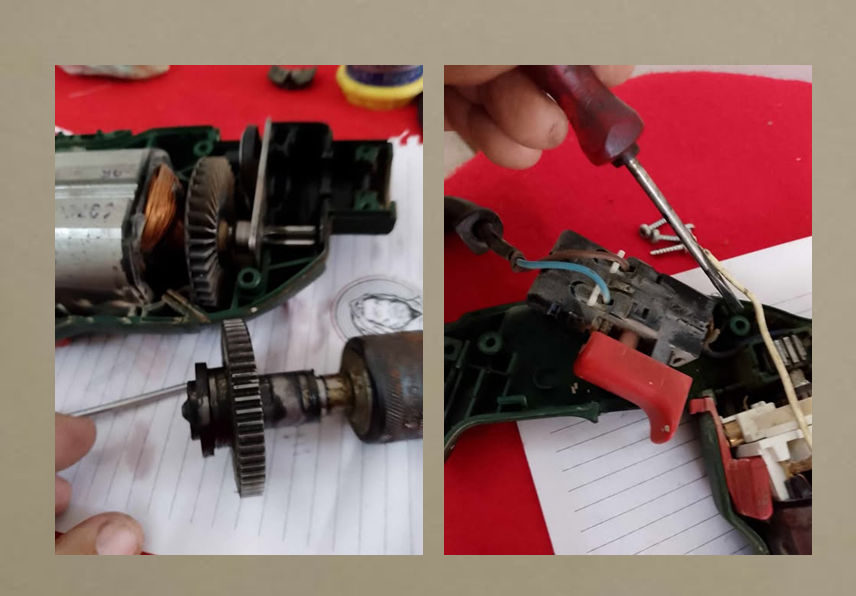
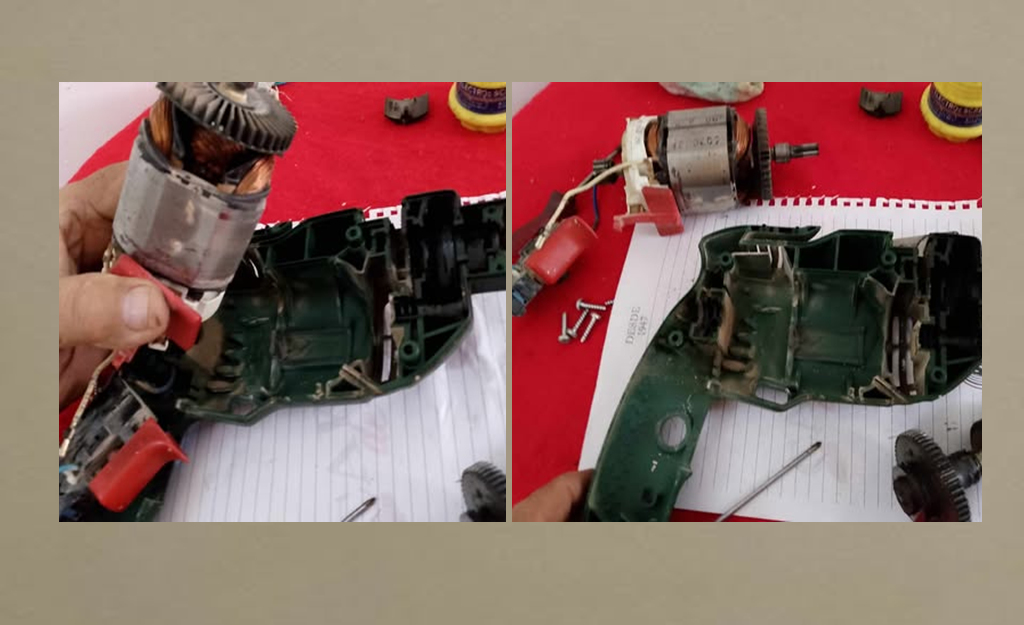
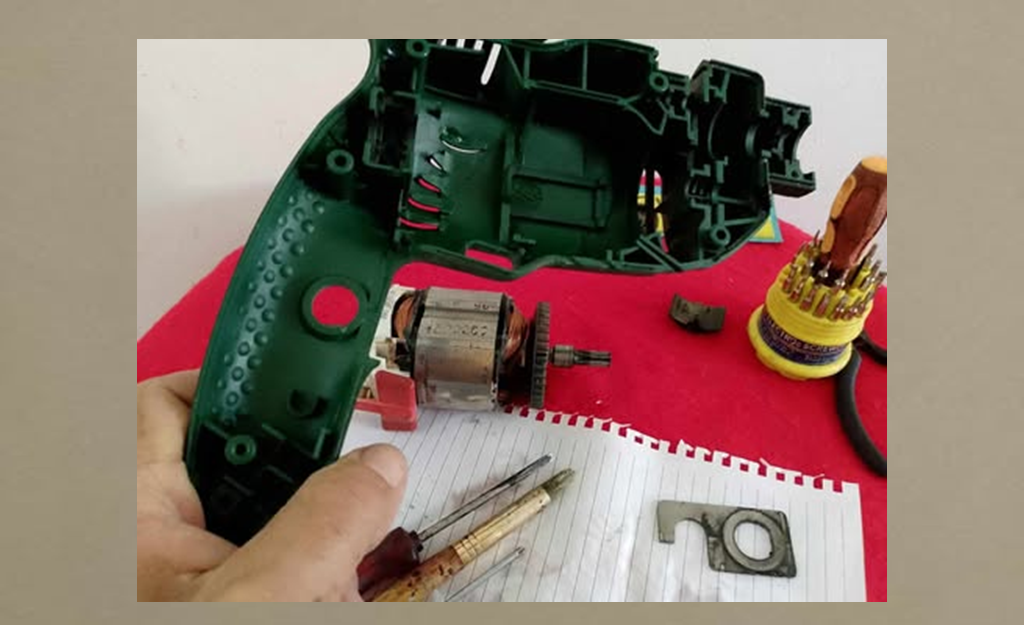
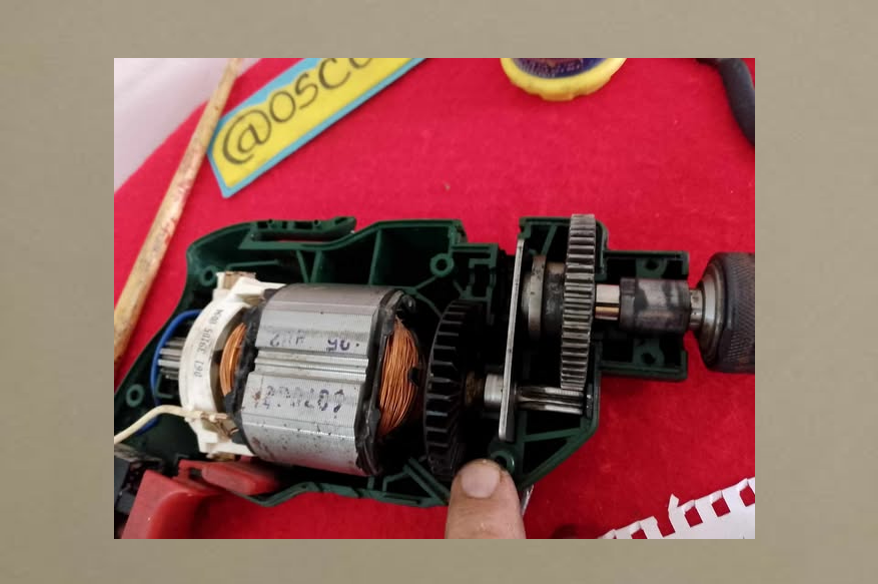
- Step-3: Now I am going to very carefully remove all the mechanical components of the drill, to also wash the other part of the casing:
- Step-4: Now I am going to clean the two parts of the casing, I will do this with the use of detergent, water, a brush and then I will dry the piece with a cloth and a hair dryer.
First piece:

This is the other part of the casing
Now it's clean:
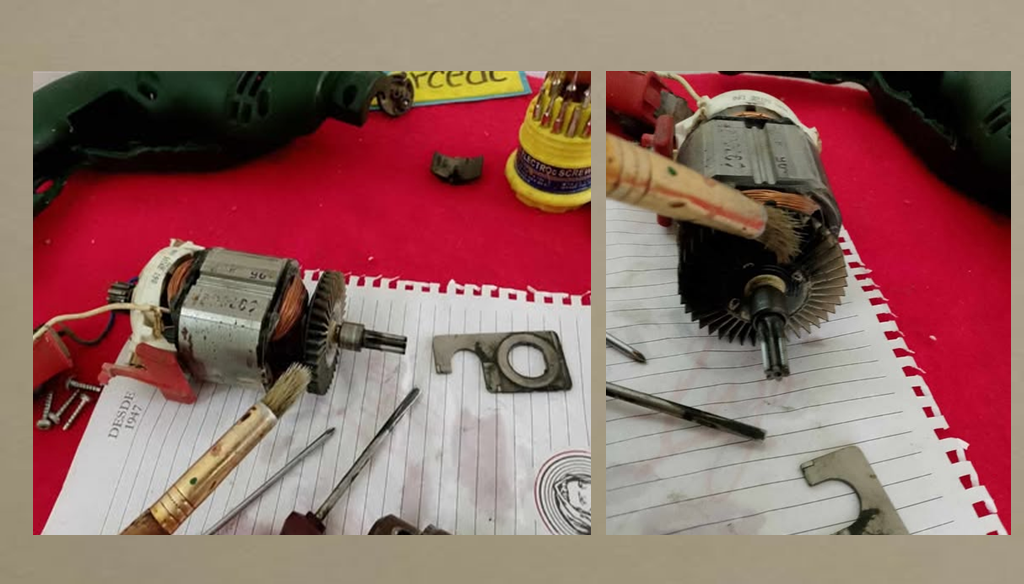
- Step-5: Now I am going to clean the motor fan, which is very dirty:
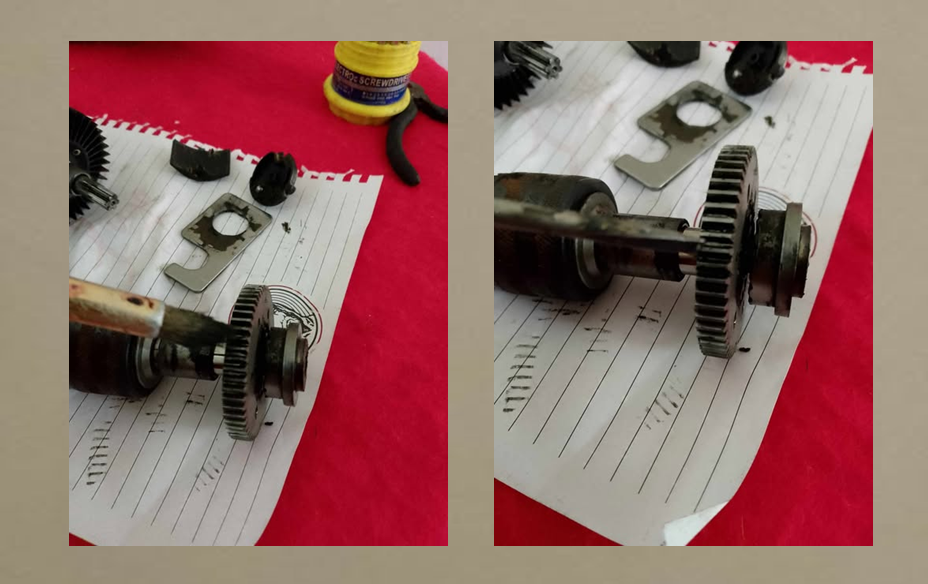
- Step-6: The next thing will be to remove the old grease from the gears to replace it with new grease:
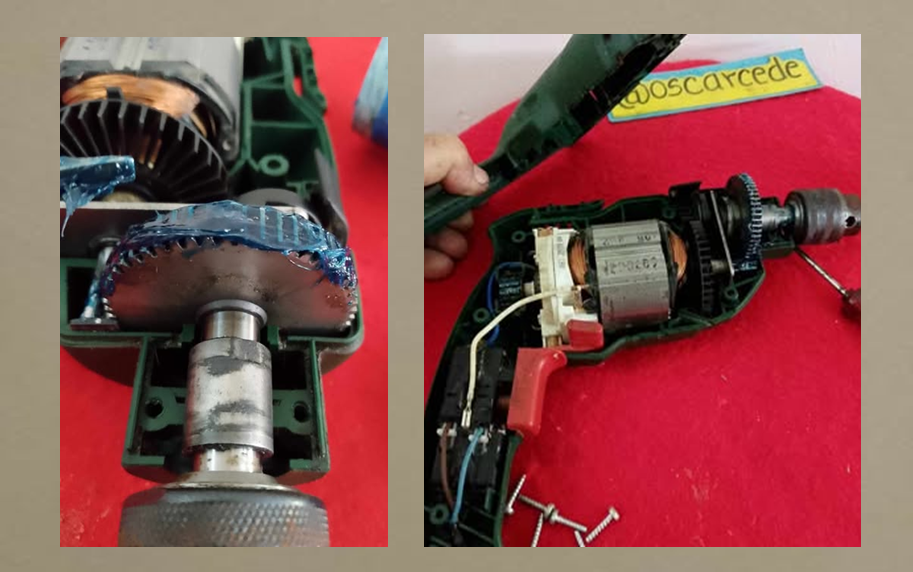
- Step-7: Now I am going to place all the mechanical components again on one of the casing covers:
Step-8: In this step I am going to put new grease on the chuck gear, including the horn:
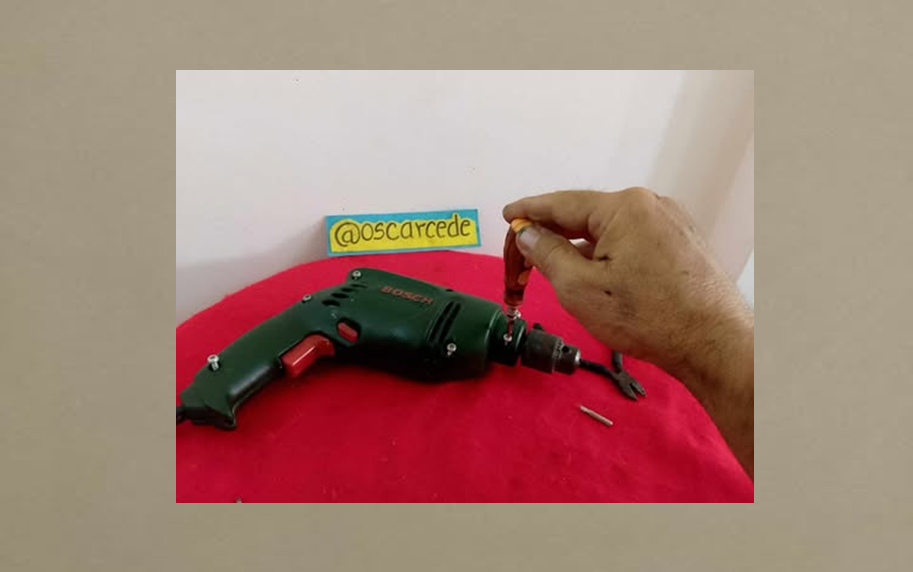
Step-9: Well friends, to finish, now I am going to place the other cover of the case with its respective screws and that's it:
READY!
.gif)
Well friends, I think the decision to perform general maintenance on my drill was very timely, because the truth is that it was already quite dirty, especially full of dust that comes from the concrete of the walls when we open the holes, this dust mixes with the lubricant and becomes a dangerous abrasive, which causes wear to the gears and horns, I will do the next maintenance at the end of this year, well, it all depends on the use you give it, greetings and I hope you liked this one job....

EN ESPAÑOL:
Hola amigos, hoy quiero compartir con ustedes una nuevo trabajo, en esta oportunidad les mostraré paso a paso, el mantenimiento de mi Taladro Percutor de la marca Bosch, el cual lo compré hace 26 años, la verdad es que este taladro nunca ha presentado fallas, eso si, siempre le hado su mantenimiento preventivo, el cual consiste en limpiar todas sus partes internas, esto incluye, la remoción del polvo y del lubricante viejo, esto ayuda a prolongar su vida útil, evitando así el desgaste de sus componentes internos, tales como: las bocinas del eje y los engranajes.
Bueno amigos, la verdad es que los taladros eléctricos constituyen una son herramienta esencial, tanto en un taller como en el hogar, ya que, se utilizan para taladrar agujeros sobre diferentes materiales como: Las paredes, en la madera, metales y en plásticos, yo diria que, que hoy en día, los taladros se han convertido en una herramienta indispensable y que no debe faltar en el hogar, porque cada vez más las personas tratan de hacer sus propios trabajos en casa, como la instalación de gavinetes, fijar lavamanos, colocar un cuadro en la pared, repisas, etc.. donde se requiere abrir los huecos en las paredes para colocar los ramplus y tornillos.
Ya es hora de hacerle un mantenimiento general a mi taladro:
Bueno amigos, hoy he decidido realizarle un mantenimiento preventivo a mi taladro Bosch, de verdad, este taladro me ha salido bien, nunca ha presentado fallas, aunque les diré algo, pienso que el mantenimiento que le hago todos los años a mi taladro, ha influido en su buen funcionamiento, porque la vida de un equipo no es la marca, porque aunque sean de buena marca, suele deteriorarse rápido, por falta de un mantenimiento preventivo.
Cómo realizar mantenimiento preventivo a un taladro percutor
Bueno amigos, lo recomendable sería, limpiar el taladro eléctrico después de cada uso, sobre todo cuando se usa para abrir huecos en las paredes, porque generalmente, esto genera mucho polvo, por lo que debemos eliminar cualquier acumulación de polvo o de restos de materiales en la carcasa, especialmente, donde se encuentran los botones y los interruptores, ya que la acumulación de polvo o residuos puede causar problemas al encender o apagar el taladro, ¡PERO! esta limpieza se puede considerar, como un mantenimiento superficial, ¡CLARO! hace falta, pero también es importante realizar el mantenimiento a los componentes enternos del taladro, por lo menos, uno o dos veces al año, dependiendo del uso.
Este es mi taladro:
Realizando un mantenimiento preventivo a mi taladro
- Paso-1: Retirar los tornillos que sujetan los dos cuerpos de la carcasa.
- Paso-2: Con mucho cuidado, voy a separar las tapas de la carcasa:
Miren la cantidad de polvo y residuos que han ensuciado la carcasa y los componentes mecánicos del taladro:
- Paso-3: Ahora voy a quitar con mucho cuidado todos los componentes mecánicos del taladro, para también lavar la otra parte de la carcasa:
- Paso-4: Ahora voy a limpiar las dos piezas de la carcasa, esto lo haré con el uso de detergente, agua, un pincel y luego secar la pieza con un paño y con un secador.
Primera pieza:
Esta es la otra parte de la carcasa
Ahora quedó bien limpia:
- Paso-5: Ahora voy a limpiar el ventilador del motor, el cual se encuentra muy sucio:
- Paso-6: Lo siguiente será remover la grasa vieja de los engranajes para sustituirla por grasa nueva:
- Paso-7: Ahora voy a colocar nuevamente todos los componentes mecánicos sobre una de las tapas de la carcasa:
- Paso-8: En este paso voy a colocar grasa nueva en el engranaje del mandril, incluyendo la bocina:
- Paso-9: Bueno amigos, para finalizar, ahora voy a colocar la otra tapa de la carcasa con sus respectivos tornillos y listo:
¡LISTO!