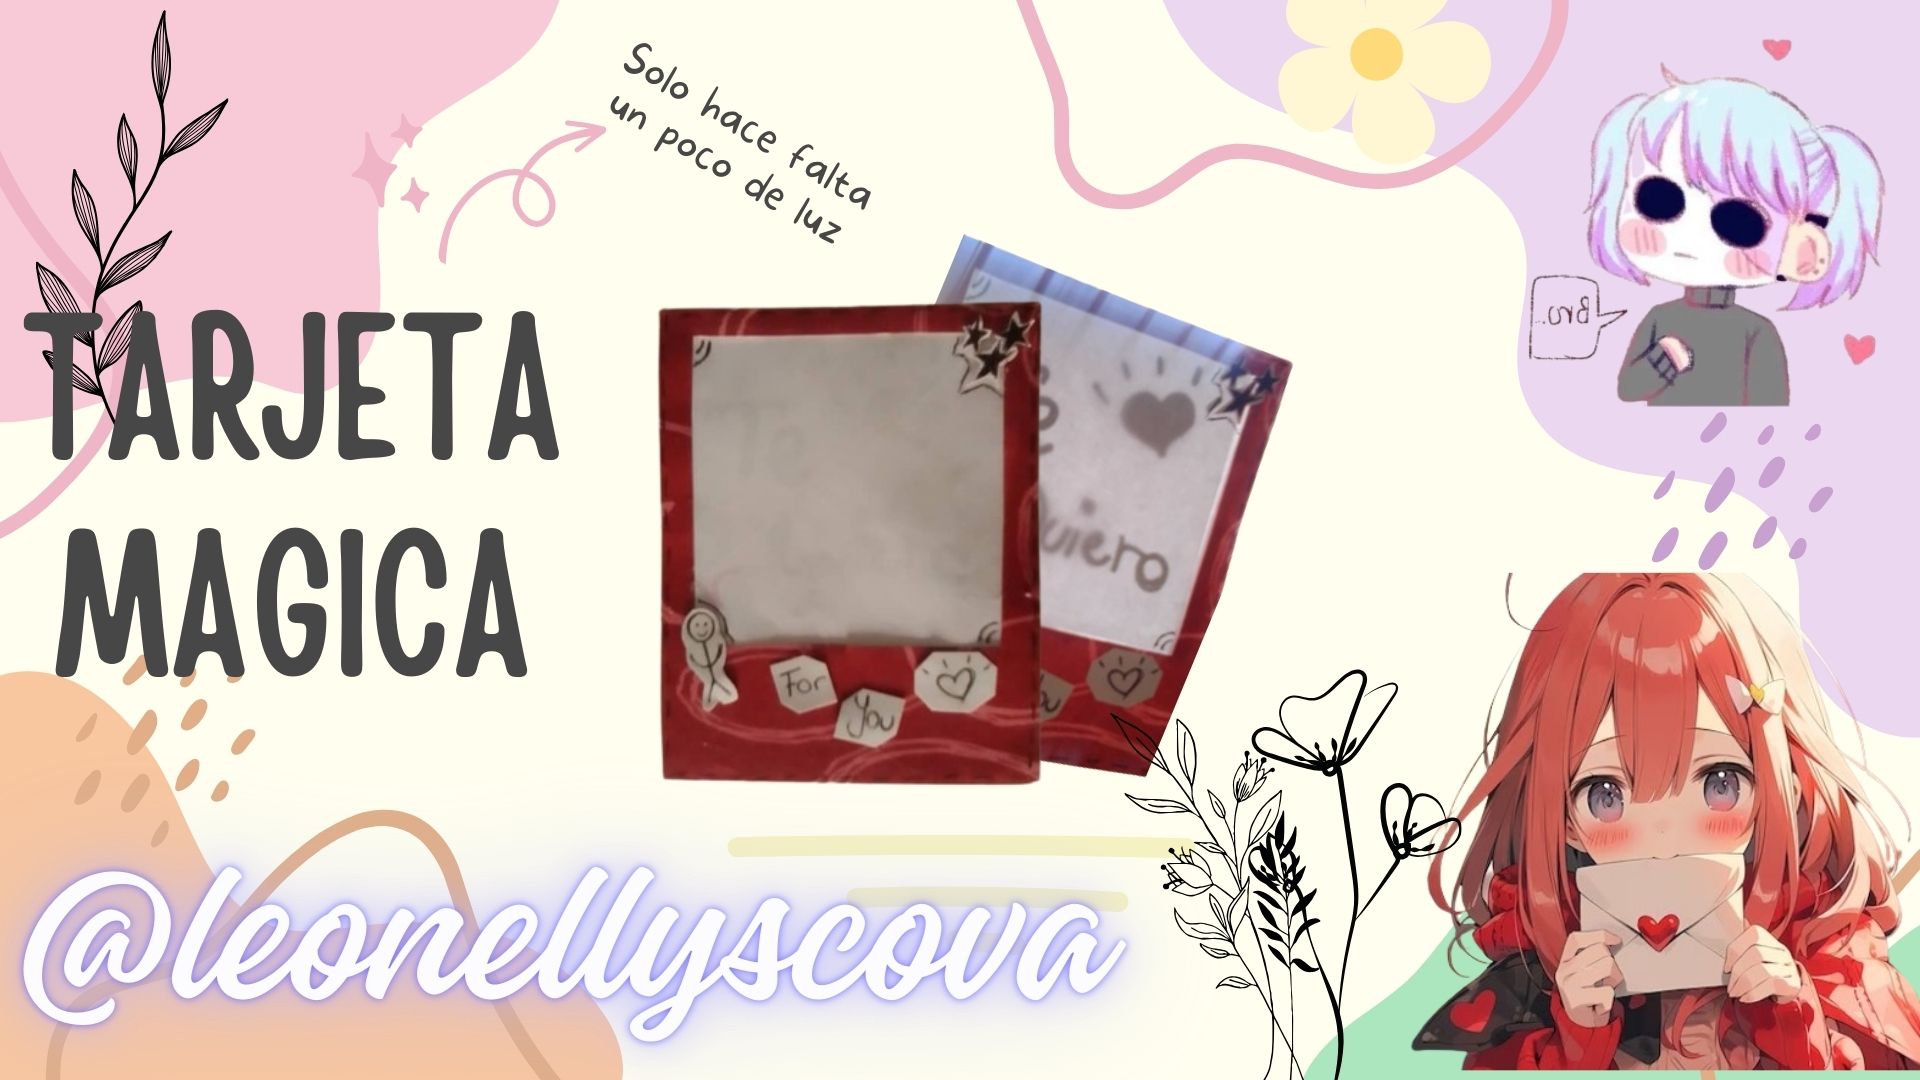
Muy buenas a todos! Espero que estén teniendo un maravilloso día, para la entrada de hoy; les quiero mostrar como crear una Tarjeta Mágica. Parecido a los mensajes ocultos, con la famosa "tinta invisible" que se nos revela al utilizar fuego o por lo menos una luz que emita algo de calor. Pero a diferencia de eso; esta idea es mucho mas sencilla y como todo truco, hoy les revelare el secreto detrás de su elaboración.
Materiales:
- Cartulina (Puede ser blanca o estampada)
- Pegamento
- Una hoja de papel
- Marcadores y lapicero
- Tijera
Paso a Paso:
1
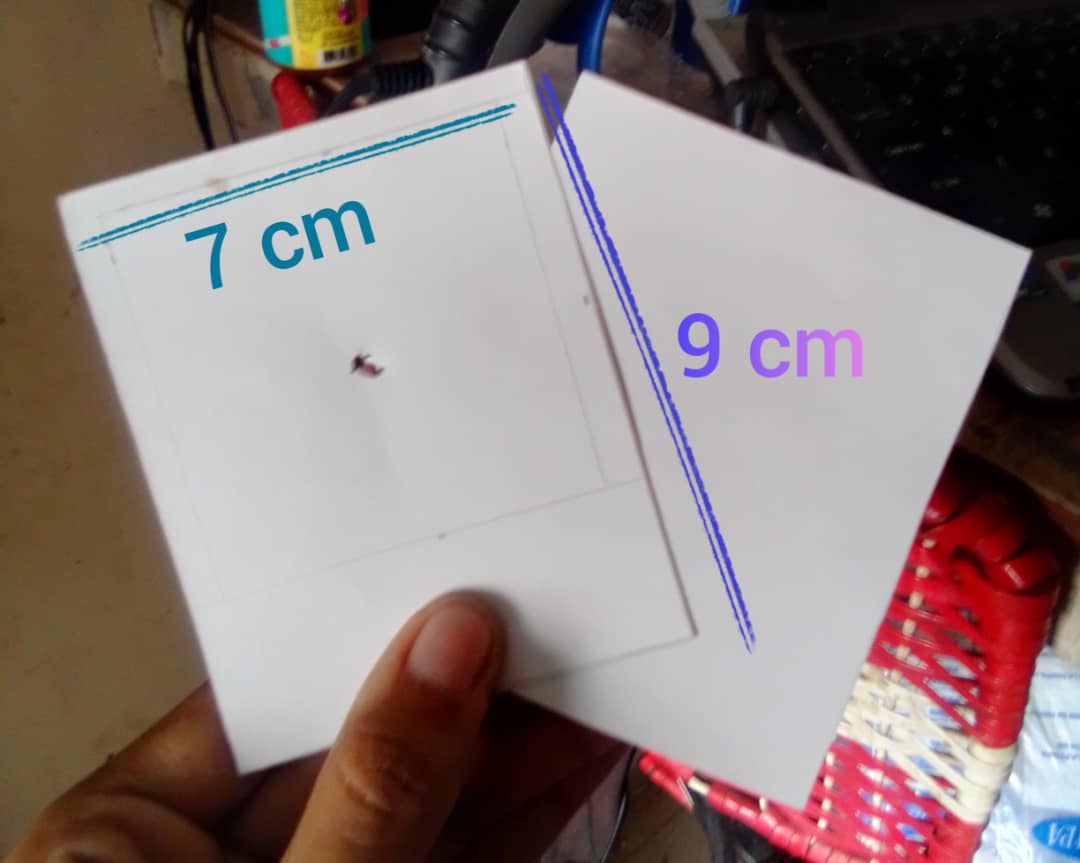
Para comenzar necesitaremos recortar 2 rectángulos en nuestra cartulina; con medidas de 7cm x 9 cm justo como se muestran en la foto.
2
Teniendo ya nuestras 2 piezas, deberemos dibujar en ellas un cuadrado mas pequeño, recomiendo que de 5cm x 5 cm. Y los recortaremos para que quede ese espacio.
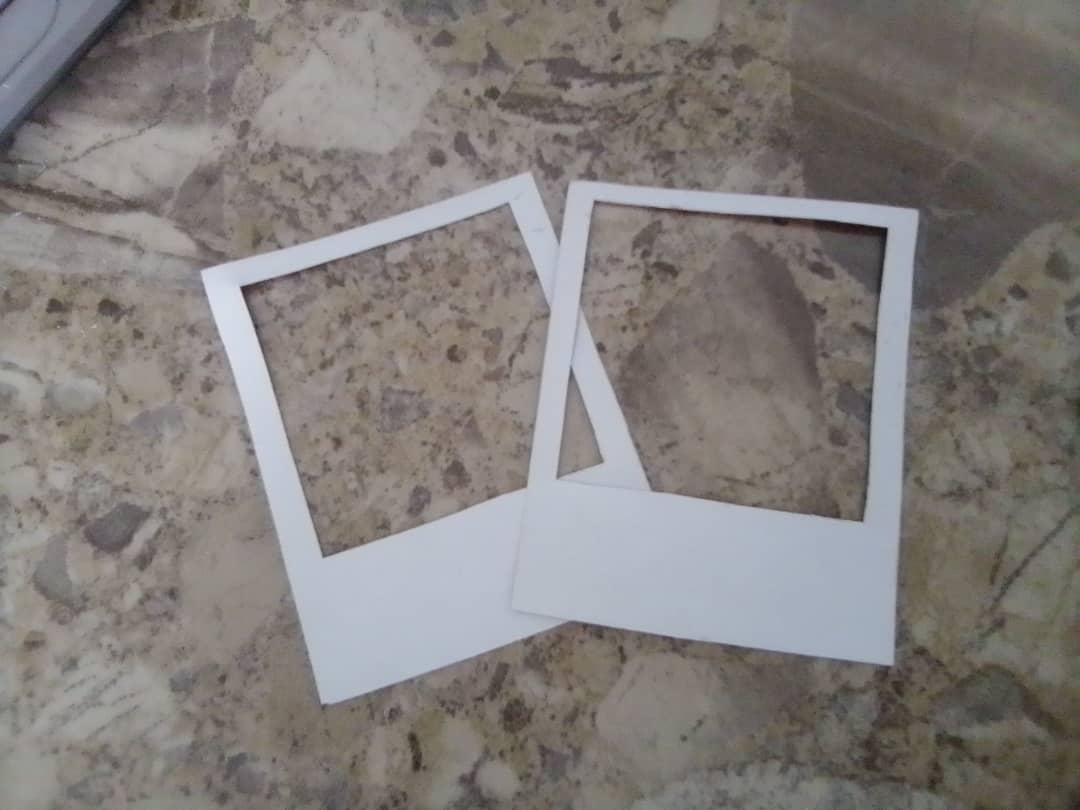
Tienen apariencia de fotos instantáneas.
3
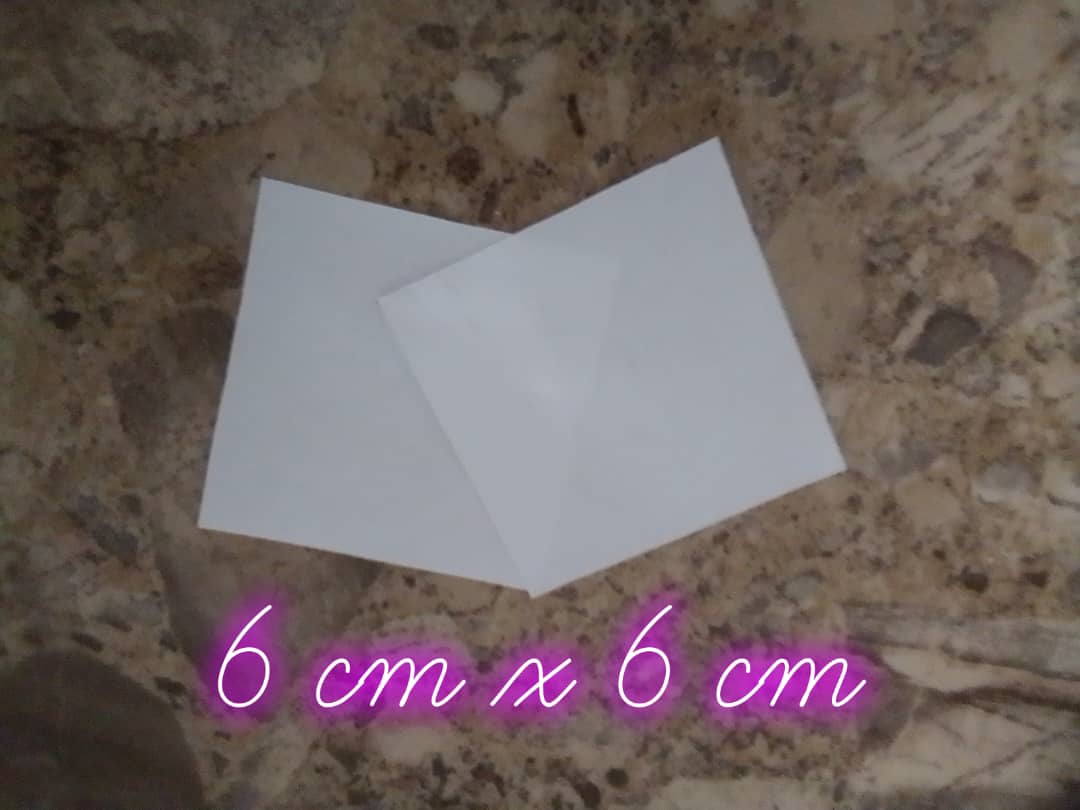
Estando lista esta parte, pasamos a nuestra hoja de papel; recortaremos 2 cuadrados, con medidas de 6 cm x 6 cm.
Y en uno de los cuadrados, dibujaremos o escribiremos nuestro mensaje secreto (Tened cuidado de filtrar la información) 🤐🤭
4
Es la hora de unir las partes, es solo pegar en uno de los rectángulos con el orificio cuadrado, el cuadrado de papel que no tiene nuestro escrito. Intentando centrarlo.
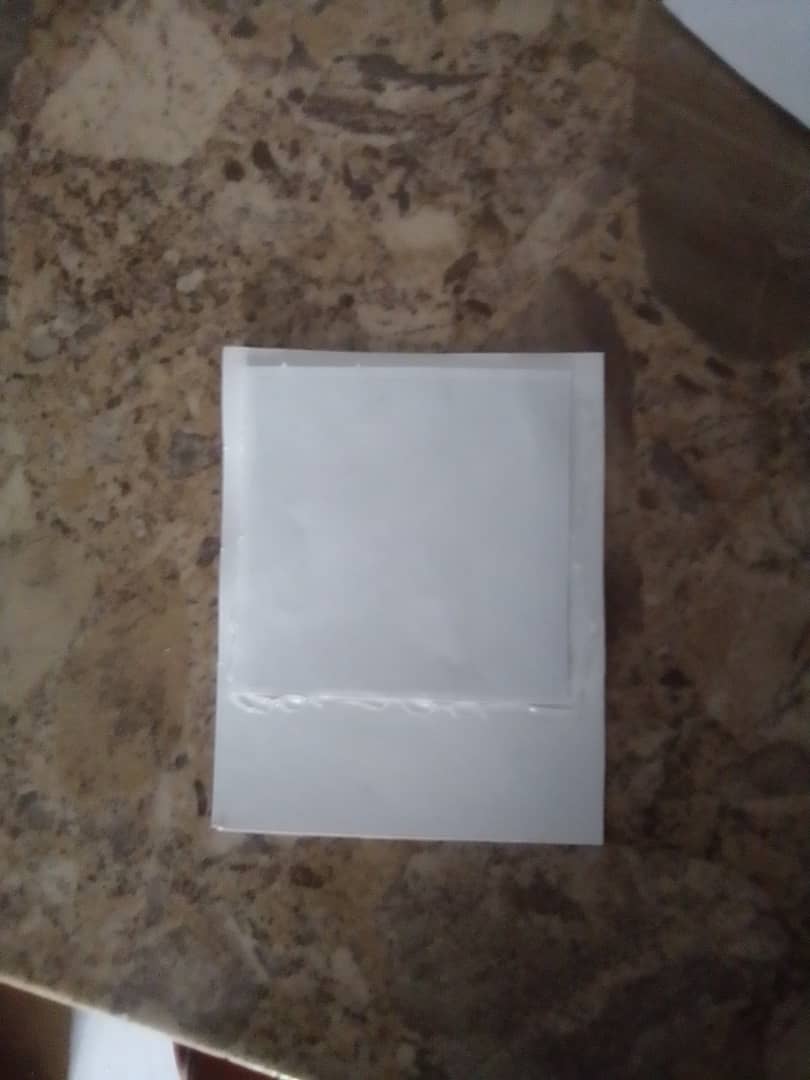
Luego es solo ir pegando, lo siguiente es pegar nuestro cuadrado de papel con el mensaje secreto alineado con su gemelo cuadrado, y por ultimo para cerrarlo, colocamos el 2 rectangulo
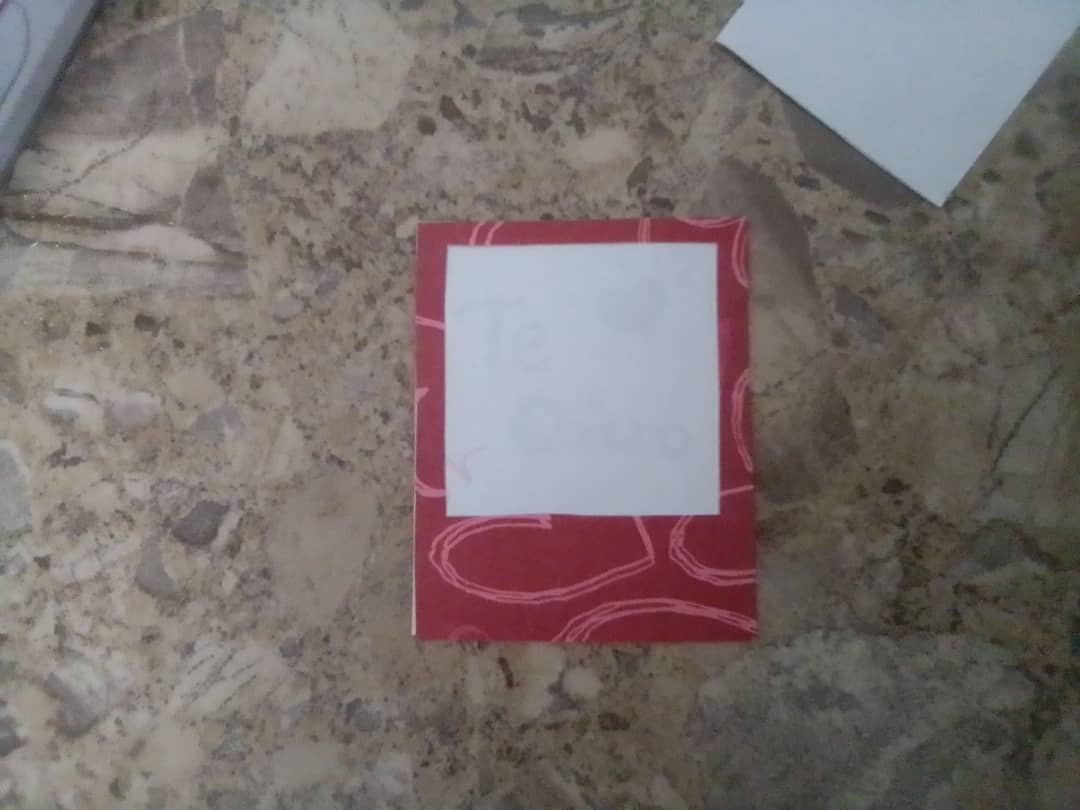
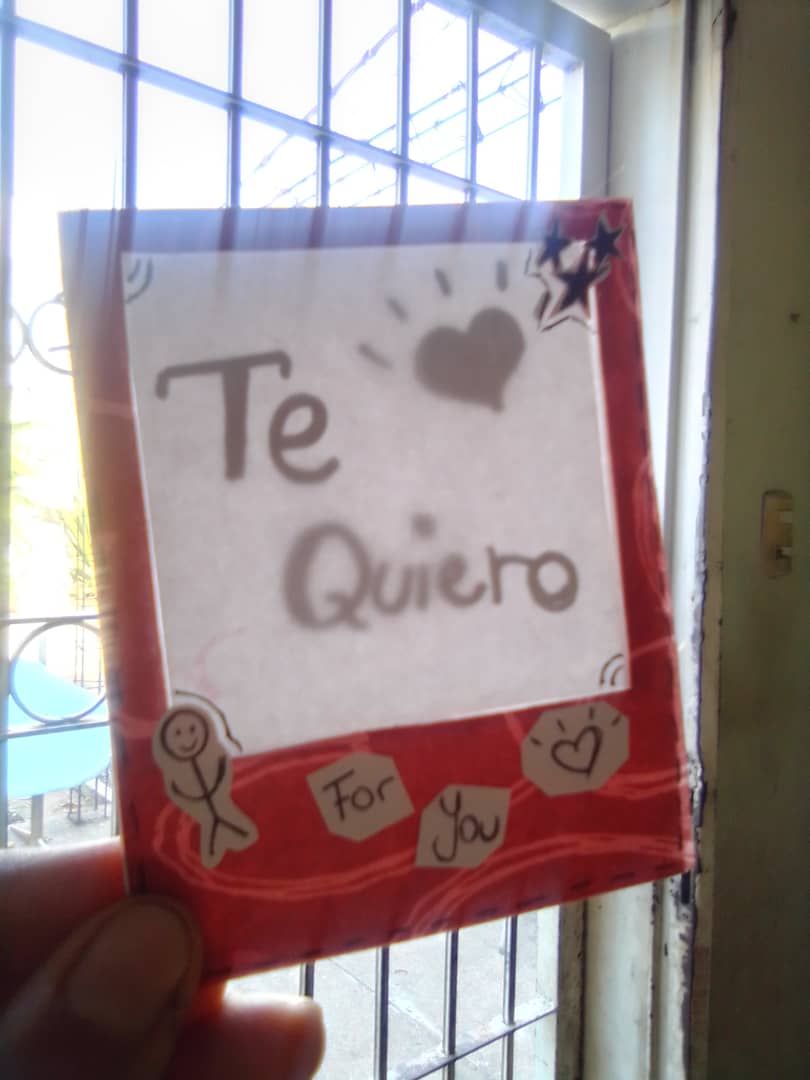
Quedando de esta manera, simulando ser una fotografía polaroid. (Mi cartulina es estampada por un lado y blanca por el otro, por eso ahora se ve así)
5
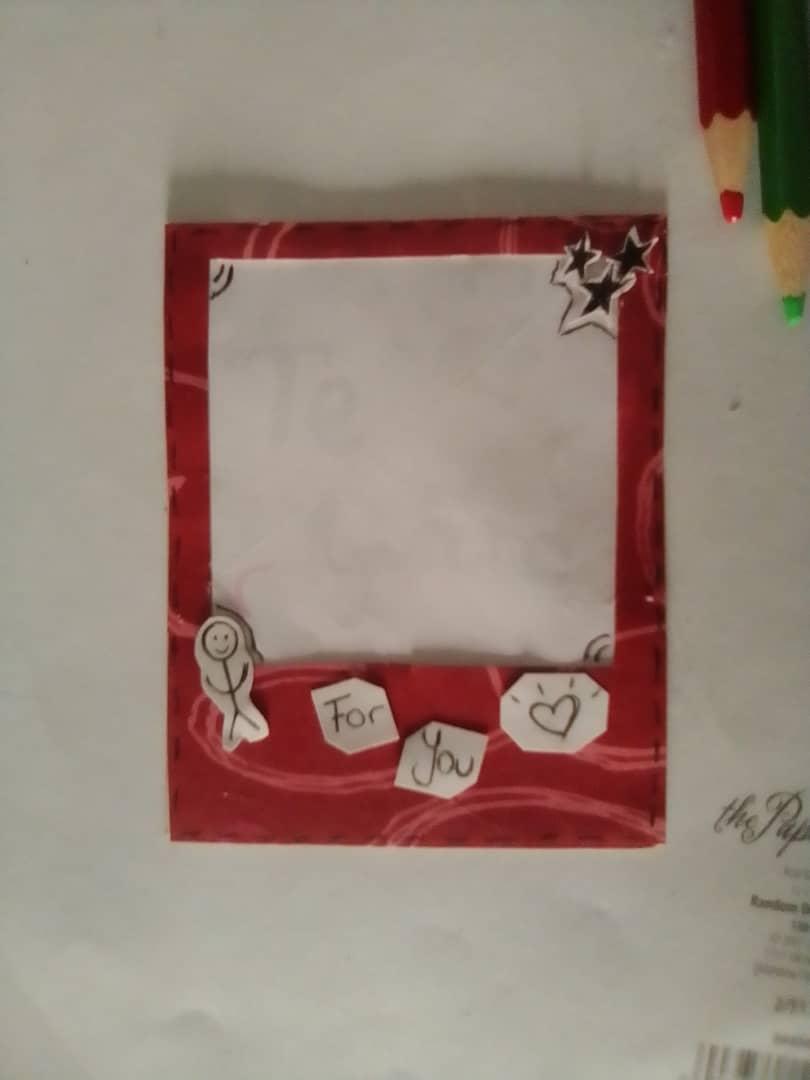
Ya para terminar de adornarla, pueden usar lo que mas les guste. Siempre digo que cada quien le da su toque personal y cargarla de todo un poco. Pueden utilizar papel, brillantina, dibujar con marcador, lapicero. No hay ningun limite para ser creativo.
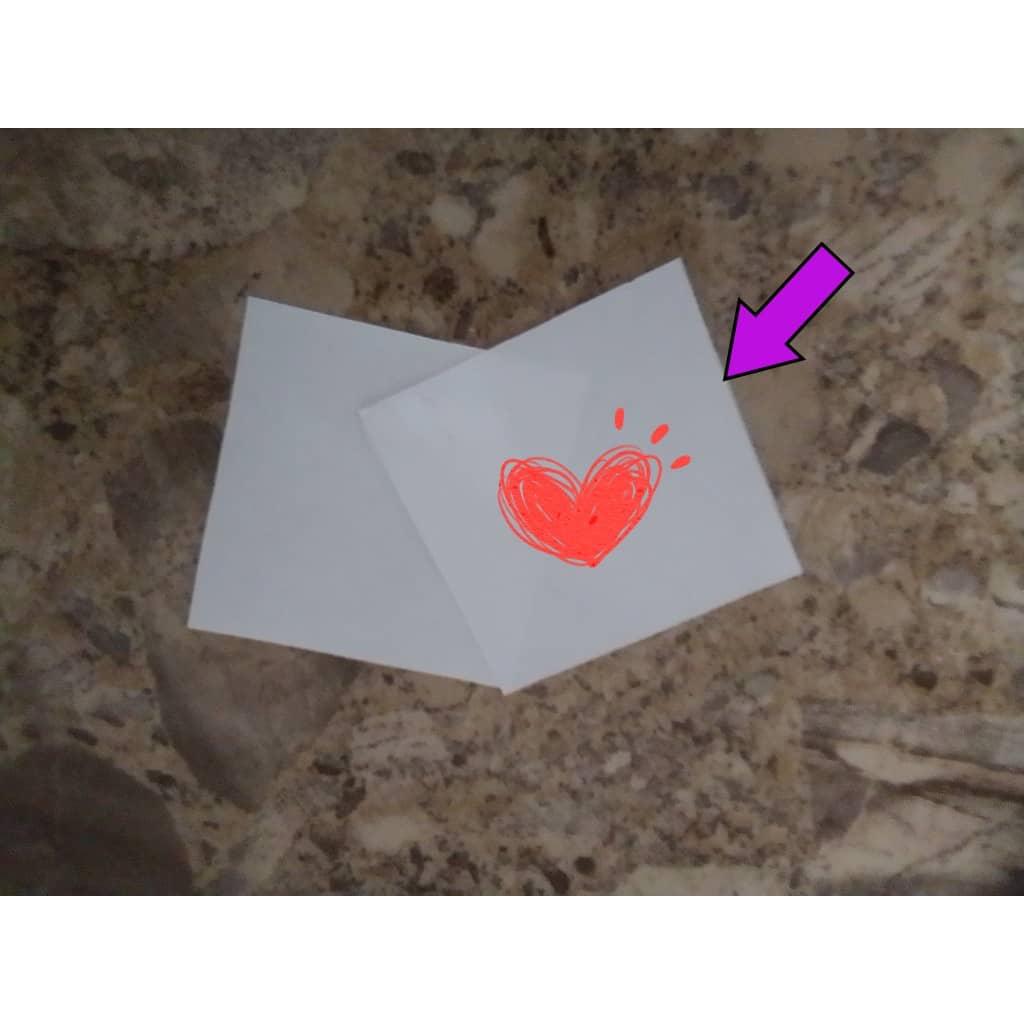
Y ahora, el momento de la verdad... La revelación del gran secreto! Como podemos ver el mensaje? Muy fácil, solo se necesita un poco de luz, ya sea de una linterna o con luz natural.
Y ya estaría!
Una idea muy divertida, fácil de hacer. Cualquiera puede crearla y modificarla a su gusto. Una recomendación, para el mensaje; utilicen marcador de cualquier color que no sea tan oscuro. Así no se notara con solo mirarla y abra que usar el método adecuado.
Pues espero les haya gustado, y también espero poder traerles mas ideas; porque pienso que el amor y la alegría hay que vivirla y mostrarla a diario.
Hasta la próxima!
Editor de imágenes: Canva y Lumii
Traductor: DeepL Translate
Fotografias propiedad de : @leonellyscova
Good morning everyone! I hope you are having a wonderful day, for today's post; I want to show you how to create a Magic Card. Similar to the hidden messages, with the famous "invisible ink" that is revealed to us by using fire or at least a light that emits some heat. But unlike that; this idea is much simpler and like every trick, today I will reveal to you the secret behind its elaboration.
Materials:
- Cardboard (It can be white or printed).
- Glue
- A sheet of paper
- Markers and pencil
- Scissors
Step by Step:
1
To start we will need to cut out 2 rectangles on our cardboard; measuring 7cm x 9 cm just as shown in the photo.
2
Having already our 2 pieces, we will have to draw on them a smaller square, I recommend 5cm x 5 cm. And we will cut them to leave that space.
They look like snapshots.
3
Once this part is ready, we move on to our sheet of paper; we will cut out 2 squares, measuring 6 cm x 6 cm.
And in one of the squares, we will draw or write our secret message (Be careful to filter the information).
4
It's time to join the parts, just glue in one of the rectangles with the square hole, the square of paper that does not have our writing. Trying to center it.
Then it's just gluing, the next thing is to glue our paper square with the secret message aligned with its square twin, and finally to close it, we place the 2 rectangle.
Looking like this, pretending to be a polaroid photograph. (My cardboard is stamped on one side and white on the other, so now it looks like this).
5
To finish it off, you can use whatever you like. I always say that everyone can give it their own personal touch and add a little bit of everything. You can use paper, glitter, marker, pencil or pen. There is no limit to be creative.
And now, the moment of truth... The revelation of the big secret! How can we see the message? Very easy, you only need a little light, either from a flashlight or with natural light.
*And that would be it!
A very fun idea, easy to make. Anyone can create it and modify it to their liking. A recommendation, for the message; use any color marker that is not so dark. This way it won't be noticed just by looking at it and you will have to use the right method.
I hope you liked it, and I also hope to bring you more ideas, because I think that love and joy must be lived and shown daily.
See you next time!
Image Editor: Canva and Lumii
Translator: DeepL Translate
Photographs property of : @leonellyscova