Have you ever thought about connecting to hive blockchain and getting all post on your computer or on another website?
Today I want to show you how simple this can be.
All you need to have is text editor, browser and some time :)
Our goal is to make website where we we can load our posts. I made an example on my static page website here.
All html files are located in github pages server which is completely free. if there ever will be a need to show how to setup github pages, I will gladly show you here.
But let's go back to our goal. Website at the end will look like this:

So what i used here is
- library to download all my hive profile data
- library to read and parse markdowm
- library to simple bootstrap design
Sow how to start?
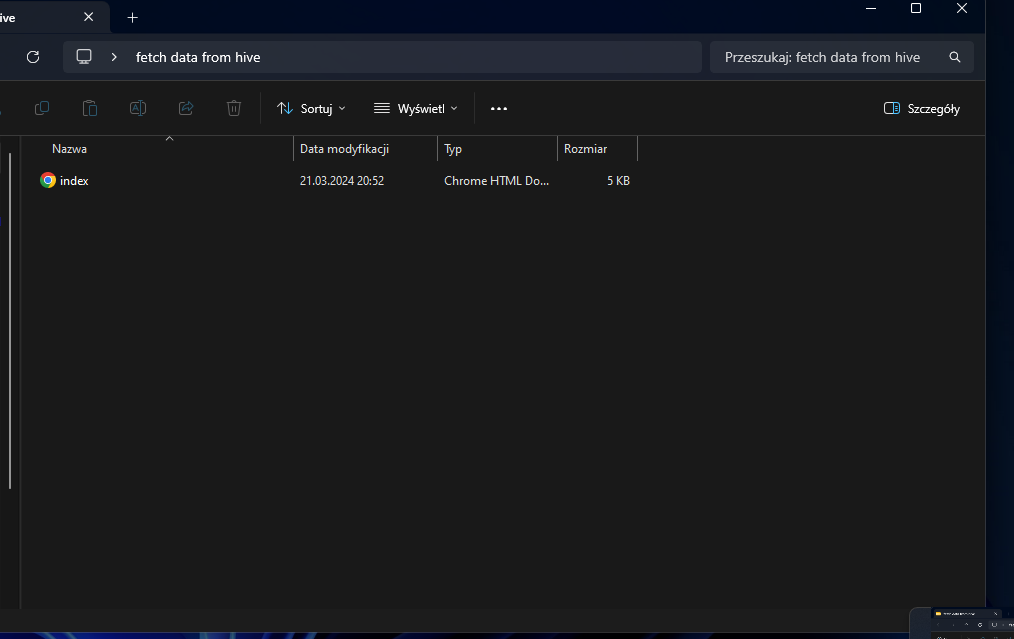
First, create a folder in your desktop in whatever Operating system you have and create file named "index.html.
It should look like this:
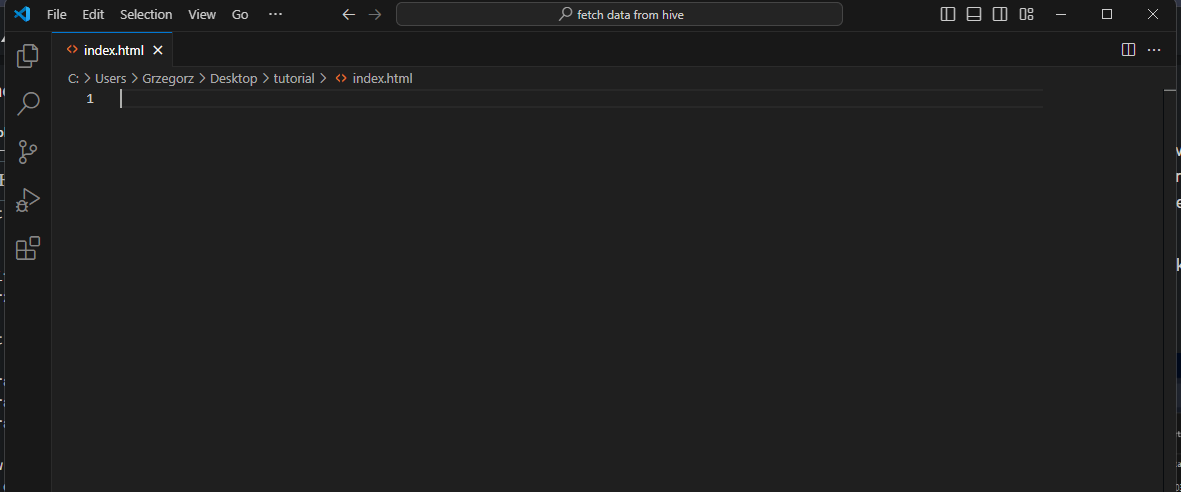
Now use your favorite text editor like notepad++, Visual Studio code, sublime or anything you imagine.
I will use Visual Studio Code and open my index.html file.
next thing is to copy a template of block. It's a base to where we will add content.
So first add this to index.html:
<!DOCTYPE html>
<html>
    <head>
        <meta name="viewport" content="width=device-width, initial-scale=1.0">
    </head>
    <body>
    </body>
</html>
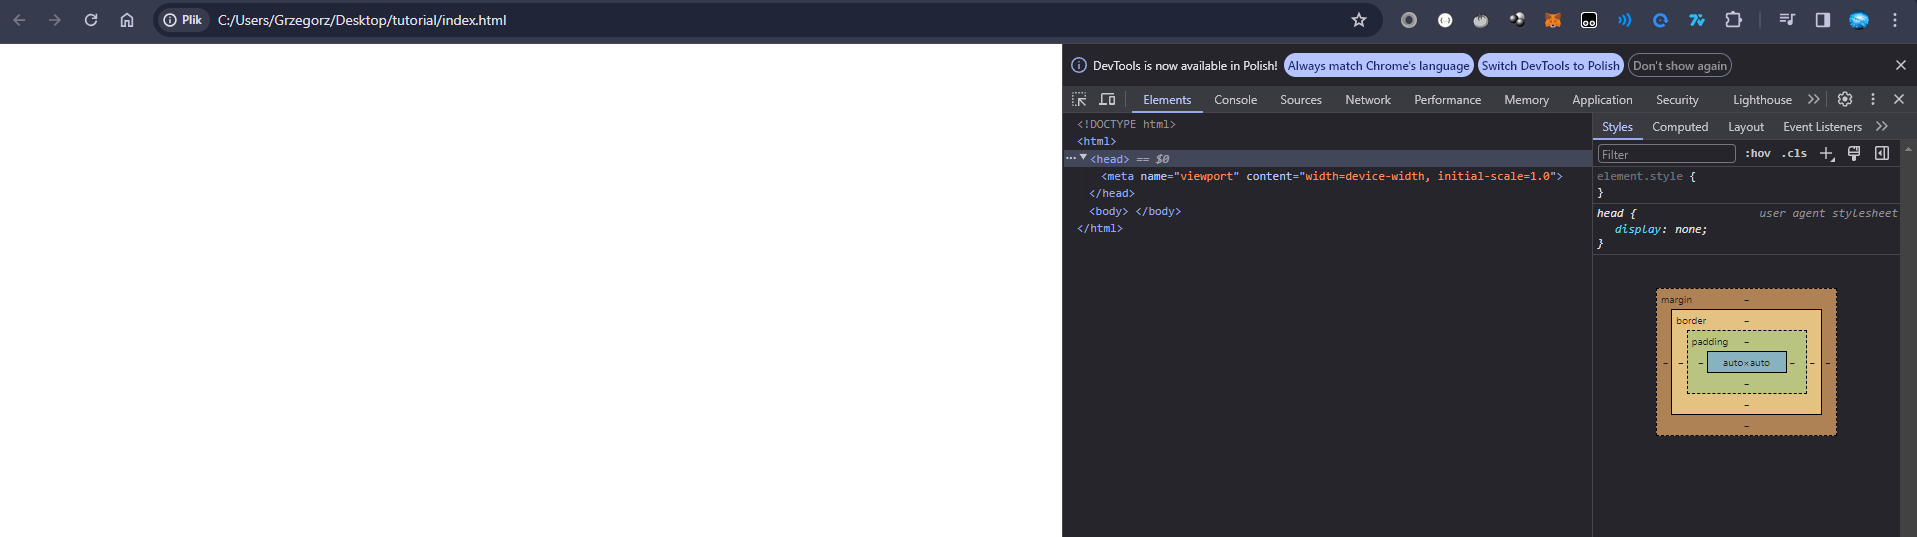
Now run index.html in your browser so source code of website should look like this:
Now it's time to add libraries. Let's add library to download your data from hive blochchain.
In this tutorial I will use hive-js. This is enough for our needs. It will use hive.blog node to connect with our account.
our code should look like this:
<!DOCTYPE html>
<html>
    <head>
        <meta name="viewport" content="width=device-width, initial-scale=1.0">
        <title>Hive blog tutorial</title>
        <script src="https://cdn.jsdelivr.net/npm/@hiveio/hive-js/dist/hive.min.js"></script>
    </head>
    <body>
    </body>
</html>
Next, let's add library to parse markdown. I found a lib named marked.
Let's add script to our code:
<!DOCTYPE html>
<html>
    <head>
        <meta name="viewport" content="width=device-width, initial-scale=1.0">
        <title>Hive blog tutorial</title>
        <script src="https://cdn.jsdelivr.net/npm/@hiveio/hive-js/dist/hive.min.js"></script>
        <script src="https://cdn.jsdelivr.net/npm/marked/marked.min.js"></script>
    </head>
    <body>
    </body>
</html>
And finally let's add a bootstrap and bootstrap design to make it quicker to design:
<!DOCTYPE html>
<html>
    <head>
        <meta name="viewport" content="width=device-width, initial-scale=1.0">
        <title>Hive blog tutorial</title>
        <script src="https://cdn.jsdelivr.net/npm/@hiveio/hive-js/dist/hive.min.js"></script>
        <script src="https://cdn.jsdelivr.net/npm/marked/marked.min.js"></script>
        <script src="https://cdn.jsdelivr.net/npm/bootstrap@5.3.3/dist/js/bootstrap.min.js"></script>
        <link href="https://bootswatch.com/5/superhero/bootstrap.min.css" rel="stylesheet">
        <link href="https://bootswatch.com/5/superhero/bootstrap.rtl.min.css" rel="stylesheet">
    </head>
    <body>
    </body>
</html>
Once we have all needed libs, let's make our template to place our posts from hive. I will add now some html markups so it would look sth like this:
<!DOCTYPE html>
<html>
    <head>
        <meta name="viewport" content="width=device-width, initial-scale=1.0">
        <title>Hive blog tutorial</title>
        <script src="https://cdn.jsdelivr.net/npm/@hiveio/hive-js/dist/hive.min.js"></script>
        <script src="https://cdn.jsdelivr.net/npm/marked/marked.min.js"></script>
        <script src="https://cdn.jsdelivr.net/npm/bootstrap@5.3.3/dist/js/bootstrap.min.js"></script>
        <link href="https://bootswatch.com/5/superhero/bootstrap.min.css" rel="stylesheet">
        <link href="https://bootswatch.com/5/superhero/bootstrap.rtl.min.css" rel="stylesheet">
    </head>
    <body>
        <div class="content">
            <div id="account">
            </div>
            <div id="posts" class="posts">
                <div id="post-list">
                </div>
                <div class="footer">
                    <button type="button" class="btn btn-primary center-button" onclick="appendMorePosts()">More posts</button>
                </div>
            </div>
        </div>
    </body>
</html>
This structure will let you add account data in "account" block, next I put "posts" id, "post-list" to inject posts, and "footer" class to place a button at the bottom of website so we can load more articles.
Also button listening to click event("onclick") where once we click a button, function "appendMorePosts()" will trigger.
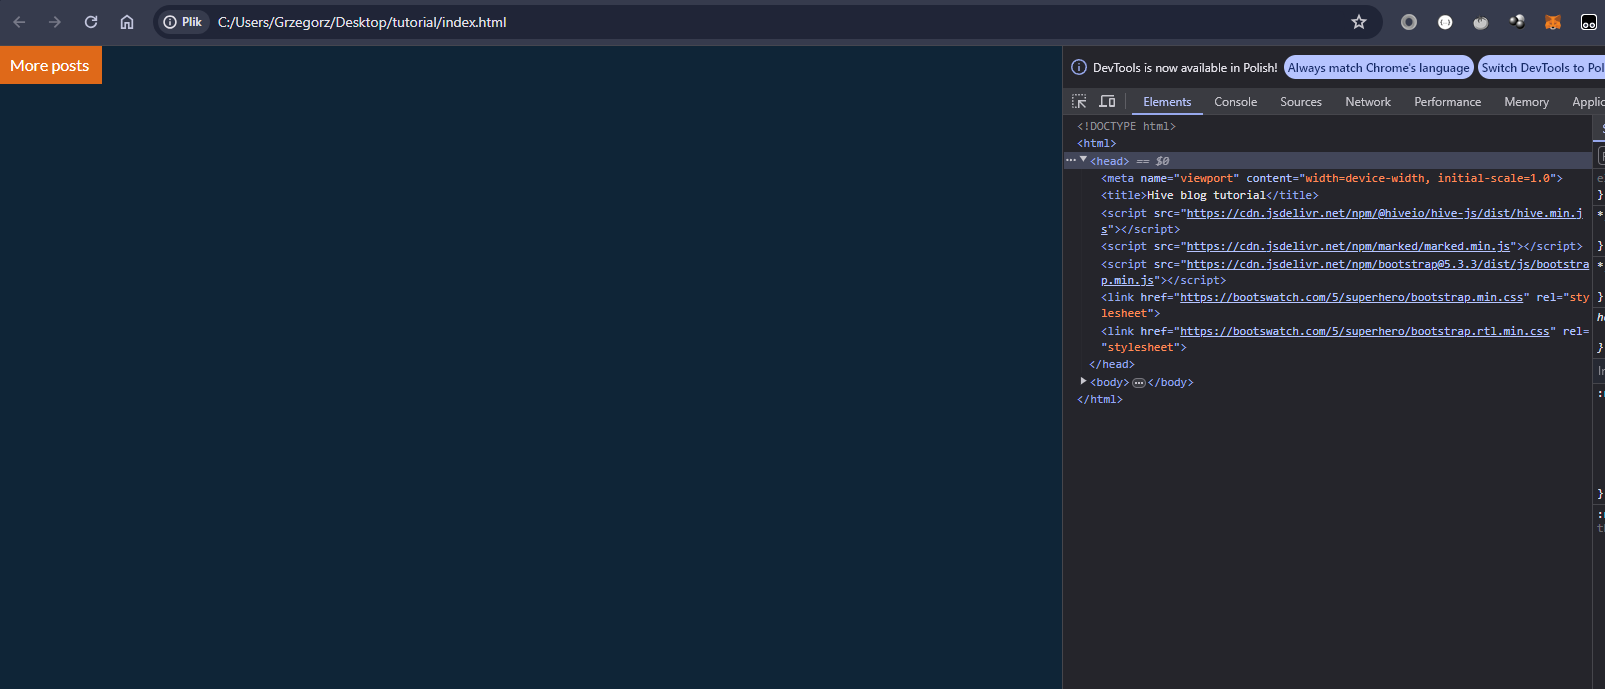
Website should look like this right at this moment:
Now it's time to create our script to load first 5 posts from our hive account.
First function will be to load data from hive api.
We will use 2 functions
const author = "grzegorz2047";
let lastPostId = Infinity;
function addPosts(startingNumber, numberOfPosts) {
 hive.api.getBlogEntries(author, startingNumber, numberOfPosts, function(err, data) {
  lastPostId = data[0].entry_id;
  data.forEach(element => {
   const permlink = element.permlink;
   hive.api.getContent(author, permlink, function(errs, article) {
   console.log(article.title);
   console.log(article.body);
   });
  });
 });
}
function hive.api.getBlogEntries
I added 2 variables - author to get our account name and lastPostId to store pointer to next batch of posts to load.(from newest to oldest)
If we know what is the perm link of post, now we need to get title and content of our post so we use hive.api.getContent

Let's add one more function to run our addPosts function when website loads. The easiest way to do it is to you anonymous function like this:
 (()=>{
  addPosts(Infinity, 5);
 })();
As you can see, I added 2 parameters to addPosts. First is the biggest possible number to get last post create, and number 5 which says load 5 first posts.
Whole code should look like this:
<!DOCTYPE html>
<html>
    <head>
        <meta name="viewport" content="width=device-width, initial-scale=1.0">
        <title>Hive blog tutorial</title>
        <script src="https://cdn.jsdelivr.net/npm/@hiveio/hive-js/dist/hive.min.js"></script>
        <script src="https://cdn.jsdelivr.net/npm/marked/marked.min.js"></script>
        <script src="https://cdn.jsdelivr.net/npm/bootstrap@5.3.3/dist/js/bootstrap.min.js"></script>
        <link href="https://bootswatch.com/5/superhero/bootstrap.min.css" rel="stylesheet">
        <link href="https://bootswatch.com/5/superhero/bootstrap.rtl.min.css" rel="stylesheet">
    </head>
    <body>
        <div class="content">
            <div id="account">
            </div>
            <div id="posts" class="posts">
                <div id="post-list">
                </div>
                <div class="footer">
                    <button type="button" class="btn btn-primary center-button" onclick="appendMorePosts()">More posts</button>
                </div>
            </div>
        </div>
        <script>
            const author = "grzegorz2047";
            let lastPostId = Infinity;
            function addPosts(startingNumber, numberOfPosts) {
                hive.api.getBlogEntries(author, startingNumber, numberOfPosts, function(err, data) {
                    lastPostId = data[0].entry_id;
                    data.forEach(element => {
                        const permlink = element.permlink;
                        hive.api.getContent(author, permlink, function(errs, article) {
                            console.log(article.title);
                            console.log(article.body);
                        });
                    });
                });
            }
            (()=>{
                addPosts(Infinity, 5);
            })();
        </script>
    </body>
</html>
Let's run this code in the browser ans see what console is going to print:
As you can see, there is a title and content of my posts. Code which prints data to console is
console.log(article.title);
console.log(article.body);
Ok, let's use this data and dynamically put it to our html code. To do this, let's create a function to inject html code. Example function would look like this:
function createArticle(title, body) {
 const paragraph = document.createElement("div");
 paragraph.classList = "article";
 let articleTitle = document.createElement("h2");
 let articleBody = document.createElement("p");
 articleTitle.innerHTML = title;
 articleBody.innerHTML = marked.parse(body);
 paragraph.appendChild(articleTitle);
 paragraph.appendChild(articleBody);
 return paragraph;
}
As you can see, I create div to store all text.
I inject "article" css class to change visual aspect of this
Then I create h2 markup to place title.
Then p markup for content of post, innerHTML inject text to html markup.
marked.parse(body) takes content of post and translates markdown code to html code.
At the end I appendChild all parts of html code to a div. So I just link everything to parent div markup.
Our articles should be injected to "article-list". We can use
document.getElementById("post-list").appendChild()
To find "post-list" id element and add articles to this element.
So now, let's replace adding articles instead of console.log functions like this:
<!DOCTYPE html>
<html>
    <head>
        <meta name="viewport" content="width=device-width, initial-scale=1.0">
        <title>Hive blog tutorial</title>
        <script src="https://cdn.jsdelivr.net/npm/@hiveio/hive-js/dist/hive.min.js"></script>
        <script src="https://cdn.jsdelivr.net/npm/marked/marked.min.js"></script>
        <script src="https://cdn.jsdelivr.net/npm/bootstrap@5.3.3/dist/js/bootstrap.min.js"></script>
        <link href="https://bootswatch.com/5/superhero/bootstrap.min.css" rel="stylesheet">
        <link href="https://bootswatch.com/5/superhero/bootstrap.rtl.min.css" rel="stylesheet">
    </head>
    <body>
        <div class="content">
            <div id="account">
            </div>
            <div id="posts" class="posts">
                <div id="post-list">
                </div>
                <div class="footer">
                    <button type="button" class="btn btn-primary center-button" onclick="appendMorePosts()">More posts</button>
                </div>
            </div>
        </div>
        <script>
            const author = "grzegorz2047";
            let lastPostId = Infinity;
            function createArticle(title, body) {
                const paragraph = document.createElement("div");
                paragraph.classList = "article";
                let articleTitle = document.createElement("h2");
                let articleBody = document.createElement("p");
                articleTitle.innerHTML = title;
                articleBody.innerHTML = marked.parse(body);
                paragraph.appendChild(articleTitle);
                paragraph.appendChild(articleBody);
                return paragraph;
            }
            function addPosts(startingNumber, numberOfPosts) {
                hive.api.getBlogEntries(author, startingNumber, numberOfPosts, function(err, data) {
                    lastPostId = data[0].entry_id;
                    data.forEach(element => {
                        const permlink = element.permlink;
                        hive.api.getContent(author, permlink, function(errs, article) {
                            document.getElementById("post-list").appendChild(createArticle(article.title, article.body));
                        });
                    });
                });
            }
            (()=>{
                addPosts(Infinity, 5);
            })();
        </script>
    </body>
</html>
When you run our code in browser, you should see something like this:
It should load some od your posts. (if you changed author variable value :D)
Let's make it more readable by adding some css code to it.
I will narrow articles by creating ".article" class in block in html code and I will make pictures smaller to adjust to width of article like this:
<style>
    img {
       max-width: 100%;
       height: auto;
    }
    .article {
        font-family: Arial, Helvetica, sans-serif;
        font-size: 1.5rem;
        white-space: pre-wrap;
        margin-left: auto;
        margin-right: auto;
        width: 80%;
        padding: 2rem;
        margin-bottom: 2rem;
    }
</style>
As you can see, article has new font, new font size (16px * 1.5), it will look at spaces (pre-wrap), and it will center posts using margin auto and narrowing text to 80% of container width. Inside of this 80% I will take (16px * 2) pixels in padding and (2 * 16px) of bottom margin for every article.
Now code of website should look like this:
<!DOCTYPE html>
<html>
    <head>
        <meta name="viewport" content="width=device-width, initial-scale=1.0">
        <title>Hive blog tutorial</title>
        <script src="https://cdn.jsdelivr.net/npm/@hiveio/hive-js/dist/hive.min.js"></script>
        <script src="https://cdn.jsdelivr.net/npm/marked/marked.min.js"></script>
        <script src="https://cdn.jsdelivr.net/npm/bootstrap@5.3.3/dist/js/bootstrap.min.js"></script>
        <link href="https://bootswatch.com/5/superhero/bootstrap.min.css" rel="stylesheet">
        <link href="https://bootswatch.com/5/superhero/bootstrap.rtl.min.css" rel="stylesheet">
    </head>
    <style>
        img {
            max-width: 100%;
            height: auto;
        }
        .article {
            font-family: Arial, Helvetica, sans-serif;
            font-size: 1.5rem;
            white-space: pre-wrap;
            margin-left: auto;
            margin-right: auto;
            width: 80%;
            padding: 2rem;
            margin-bottom: 2rem;
        }
    </style>
    <body>
        <div class="content">
            <div id="account">
            </div>
            <div id="posts" class="posts">
                <div id="post-list">
                </div>
                <div class="footer">
                    <button type="button" class="btn btn-primary center-button" onclick="appendMorePosts()">More posts</button>
                </div>
            </div>
        </div>
        <script>
            const author = "grzegorz2047";
            let lastPostId = Infinity;
            function createArticle(title, body) {
                const paragraph = document.createElement("div");
                paragraph.classList = "article";
                let articleTitle = document.createElement("h2");
                let articleBody = document.createElement("p");
                articleTitle.innerHTML = title;
                articleBody.innerHTML = marked.parse(body);
                paragraph.appendChild(articleTitle);
                paragraph.appendChild(articleBody);
                return paragraph;
            }
            function addPosts(startingNumber, numberOfPosts) {
                hive.api.getBlogEntries(author, startingNumber, numberOfPosts, function(err, data) {
                    lastPostId = data[0].entry_id;
                    data.forEach(element => {
                        const permlink = element.permlink;
                        hive.api.getContent(author, permlink, function(errs, article) {
                            document.getElementById("post-list").appendChild(createArticle(article.title, article.body));
                        });
                    });
                });
            }
            (()=>{
                addPosts(Infinity, 5);
            })();
        </script>
    </body>
</html>
And browser should look like this:
Next what we can do is to program a button to load more posts. So let's add function to load it:
const postPerPage = 5;
let page = 1;
function appendMorePosts() {
 page += 1;
 console.log(page);
 let loadNext = lastPostId - postPerPage * page;
 if (loadNext < 0) {
  if (lastPostId > 0) {
   loadNext = lastPostId;
  } else {
   loadNext = 0;
  }
 }
 addPosts(loadNext, postPerPage);
}
What we basically do is we have appendMorePosts function which runs when button is clicked.
This function is keeping memory of paging our posts, which page we are in.
lastPostId store memory of newest post id.
*loadNext * is take last post id and substract next 5 post in current page.
and if just makes sure that we don't loop our paging. at the end addPosts just adds next portion of posts.
Now we just move our button to more center and we're ready :)
I just add two css classes like this:
.footer {
 margin-left: auto;
 margin-right: auto;
 width: 80%;
 display: flex;
}
.center-button {
 display: flex;
 margin-left: auto;
 margin-right: auto;
}
Whole code should now look like this:
<!DOCTYPE html>
<html>
    <head>
        <meta name="viewport" content="width=device-width, initial-scale=1.0">
        <title>Hive blog tutorial</title>
        <script src="https://cdn.jsdelivr.net/npm/@hiveio/hive-js/dist/hive.min.js"></script>
        <script src="https://cdn.jsdelivr.net/npm/marked/marked.min.js"></script>
        <script src="https://cdn.jsdelivr.net/npm/bootstrap@5.3.3/dist/js/bootstrap.min.js"></script>
        <link href="https://bootswatch.com/5/superhero/bootstrap.min.css" rel="stylesheet">
        <link href="https://bootswatch.com/5/superhero/bootstrap.rtl.min.css" rel="stylesheet">
    </head>
    <style>
        img {
            max-width: 100%;
            height: auto;
        }
        .article {
            font-family: Arial, Helvetica, sans-serif;
            font-size: 1.5rem;
            white-space: pre-wrap;
            margin-left: auto;
            margin-right: auto;
            width: 80%;
            padding: 2rem;
            margin-bottom: 2rem;
        }
        .footer {
            margin-left: auto;
            margin-right: auto;
            width: 80%;
            display: flex;
        }
        .center-button {
            display: flex;
            margin-left: auto;
            margin-right: auto;
        }
    </style>
    <body>
        <div class="content">
            <div id="account">
            </div>
            <div id="posts" class="posts">
                <div id="post-list">
                </div>
                <div class="footer">
                    <button type="button" class="btn btn-primary center-button" onclick="appendMorePosts()">More posts</button>
                </div>
            </div>
        </div>
        <script>
            const postPerPage = 5;
            var page = 1;
            const author = "grzegorz2047";
            let lastPostId = Infinity;

            function createArticle(title, body) {
                const paragraph = document.createElement("div");
                paragraph.classList = "article";
                let articleTitle = document.createElement("h2");
                let articleBody = document.createElement("p");
                articleTitle.innerHTML = title;
                articleBody.innerHTML = marked.parse(body);
                paragraph.appendChild(articleTitle);
                paragraph.appendChild(articleBody);
                return paragraph;
            }
            function addPosts(startingNumber, numberOfPosts) {
                hive.api.getBlogEntries(author, startingNumber, numberOfPosts, function(err, data) {
                    lastPostId = data[0].entry_id;
                    data.forEach(element => {
                        const permlink = element.permlink;
                        hive.api.getContent(author, permlink, function(errs, article) {
                            document.getElementById("post-list").appendChild(createArticle(article.title, article.body));
                        });
                    });
                });
            }
            function appendMorePosts() {
                page += 1;
                console.log(page);
                let loadNext = lastPostId - postPerPage * page;
                if (loadNext < 0) {
                    if (lastPostId > 0) {
                        loadNext = lastPostId;
                    } else {
                        loadNext = 0;
                    }
                }
                addPosts(loadNext, postPerPage);
            }
            (()=>{
                addPosts(Infinity, postPerPage);
            })();
        </script>
    </body>
</html>
Our website is finished. Now we can add a navbarfrom bootstrap and you can make routing to different pages.
So I just add navbar like this:
        <nav class="navbar navbar-expand-lg bg-primary" data-bs-theme="dark">
            <div class="container-fluid">
              <a class="navbar-brand keychainify-checked" href="#">Cool page</a>
              <button class="navbar-toggler" type="button" data-bs-toggle="collapse" data-bs-target="#navbarColor01" aria-controls="navbarColor01" aria-expanded="false" aria-label="Toggle navigation">
                <span class="navbar-toggler-icon"></span>
              </button>
              <div class="collapse navbar-collapse" id="navbarColor01">
                <ul class="navbar-nav me-auto">
                  <li class="nav-item">
                    <a class="nav-link active keychainify-checked" href="#">Home
                      <span class="visually-hidden">(current)</span>
                    </a>
                  </li>
                  <li class="nav-item">
                    <a class="nav-link keychainify-checked" href="#">Different page</a>
                  </li>
                </ul>
                <form class="d-flex">
                  <input class="form-control me-sm-2" type="search" placeholder="Search">
                  <button class="btn btn-secondary my-2 my-sm-0" type="submit">Search</button>
                </form>
              </div>
            </div>
        </nav>
Final code looks like this:
<!DOCTYPE html>
<html>
    <head>
        <meta name="viewport" content="width=device-width, initial-scale=1.0">
        <title>Hive blog tutorial</title>
        <script src="https://cdn.jsdelivr.net/npm/@hiveio/hive-js/dist/hive.min.js"></script>
        <script src="https://cdn.jsdelivr.net/npm/marked/marked.min.js"></script>
        <script src="https://cdn.jsdelivr.net/npm/bootstrap@5.3.3/dist/js/bootstrap.min.js"></script>
        <link href="https://bootswatch.com/5/superhero/bootstrap.min.css" rel="stylesheet">
        <link href="https://bootswatch.com/5/superhero/bootstrap.rtl.min.css" rel="stylesheet">
    </head>
    <style>
        img {
            max-width: 100%;
            height: auto;
        }
        .article {
            font-family: Arial, Helvetica, sans-serif;
            font-size: 1.5rem;
            white-space: pre-wrap;
            margin-left: auto;
            margin-right: auto;
            width: 80%;
            padding: 2rem;
            margin-bottom: 2rem;
        }
        .footer {
            margin-left: auto;
            margin-right: auto;
            width: 80%;
            display: flex;
        }
        .center-button {
            display: flex;
            margin-left: auto;
            margin-right: auto;
        }
    </style>
    <body>
        <nav class="navbar navbar-expand-lg bg-primary" data-bs-theme="dark">
            <div class="container-fluid">
              <a class="navbar-brand keychainify-checked" href="#">Cool page</a>
              <button class="navbar-toggler" type="button" data-bs-toggle="collapse" data-bs-target="#navbarColor01" aria-controls="navbarColor01" aria-expanded="false" aria-label="Toggle navigation">
                <span class="navbar-toggler-icon"></span>
              </button>
              <div class="collapse navbar-collapse" id="navbarColor01">
                <ul class="navbar-nav me-auto">
                  <li class="nav-item">
                    <a class="nav-link active keychainify-checked" href="#">Home
                      <span class="visually-hidden">(current)</span>
                    </a>
                  </li>
                  <li class="nav-item">
                    <a class="nav-link keychainify-checked" href="#">Different page</a>
                  </li>
                </ul>
                <form class="d-flex">
                  <input class="form-control me-sm-2" type="search" placeholder="Search">
                  <button class="btn btn-secondary my-2 my-sm-0" type="submit">Search</button>
                </form>
              </div>
            </div>
          </nav>
        <div class="content">
            <div id="account">
            </div>
            <div id="posts" class="posts">
                <div id="post-list">
                </div>
                <div class="footer">
                    <button type="button" class="btn btn-primary center-button" onclick="appendMorePosts()">More posts</button>
                </div>
            </div>
        </div>
        <script>
            const postPerPage = 5;
            var page = 1;
            const author = "grzegorz2047";
            let lastPostId = Infinity;

            function createArticle(title, body) {
                const paragraph = document.createElement("div");
                paragraph.classList = "article";
                let articleTitle = document.createElement("h2");
                let articleBody = document.createElement("p");
                articleTitle.innerHTML = title;
                articleBody.innerHTML = marked.parse(body);
                paragraph.appendChild(articleTitle);
                paragraph.appendChild(articleBody);
                return paragraph;
            }
            function addPosts(startingNumber, numberOfPosts) {
                hive.api.getBlogEntries(author, startingNumber, numberOfPosts, function(err, data) {
                    lastPostId = data[0].entry_id;
                    data.forEach(element => {
                        const permlink = element.permlink;
                        hive.api.getContent(author, permlink, function(errs, article) {
                            document.getElementById("post-list").appendChild(createArticle(article.title, article.body));
                        });
                    });
                });
            }
            function appendMorePosts() {
                page += 1;
                console.log(page);
                let loadNext = lastPostId - postPerPage * page;
                if (loadNext < 0) {
                    if (lastPostId > 0) {
                        loadNext = lastPostId;
                    } else {
                        loadNext = 0;
                    }
                }
                addPosts(loadNext, postPerPage);
            }
            (()=>{
                addPosts(Infinity, postPerPage);
            })();
        </script>
    </body>
</html>
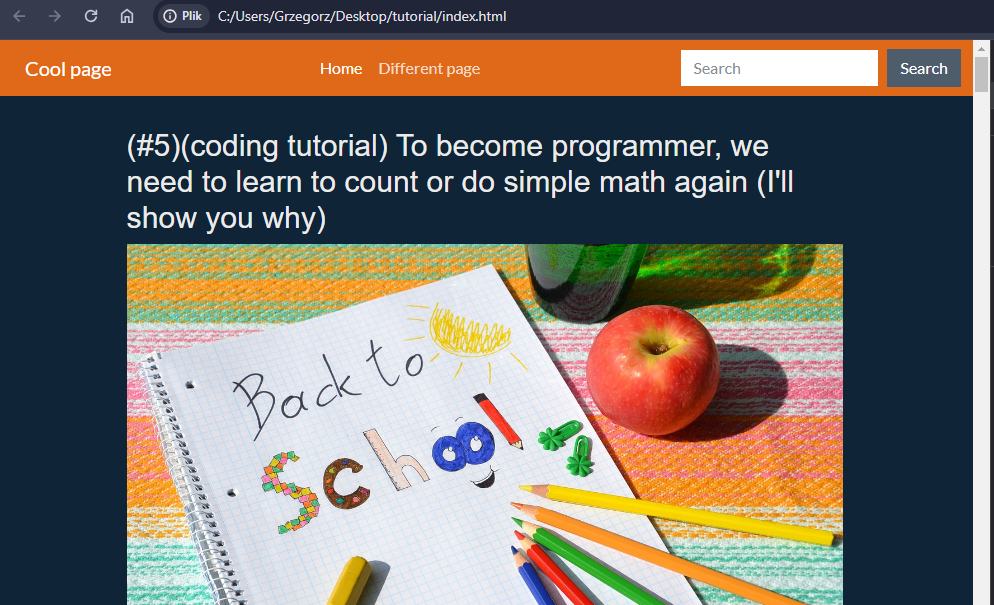
Final page look is
Congratz, you made your own read only hive interface just for your account. Next article will be about getting account information.