📌🌸Pretty flower-shaped pincushion made with your fabric scraps📍🪡[ES🇪🇸~EN🇺🇸]

in voilk •  5 days ago

    Picsart_25-03-10_13-05-47-068.jpg

    🌸Bienvenidos a mi blog 😊🪡🧵

    🌸Welcome to my blog 😊🪡🧵

    🌸Si te apasiona coser con retazos y hacer lindas creaciones te gustará mucho ésta idea de hacer un alfiletero con tus recortes de telas ,estaremos haciendo una linda flor en forma de alfiletero ,puedes usar cualquier tipo de telas para hacer este proyecto quise combinar algunas telas con estampado de cuadros y flores hasta unicolor y la verdad queda muy bien ,hasta incluso puedes hacer tu alfiletero únicamente que con telas de un solo color ya tu decides después cómo hacerlo 🥰 .

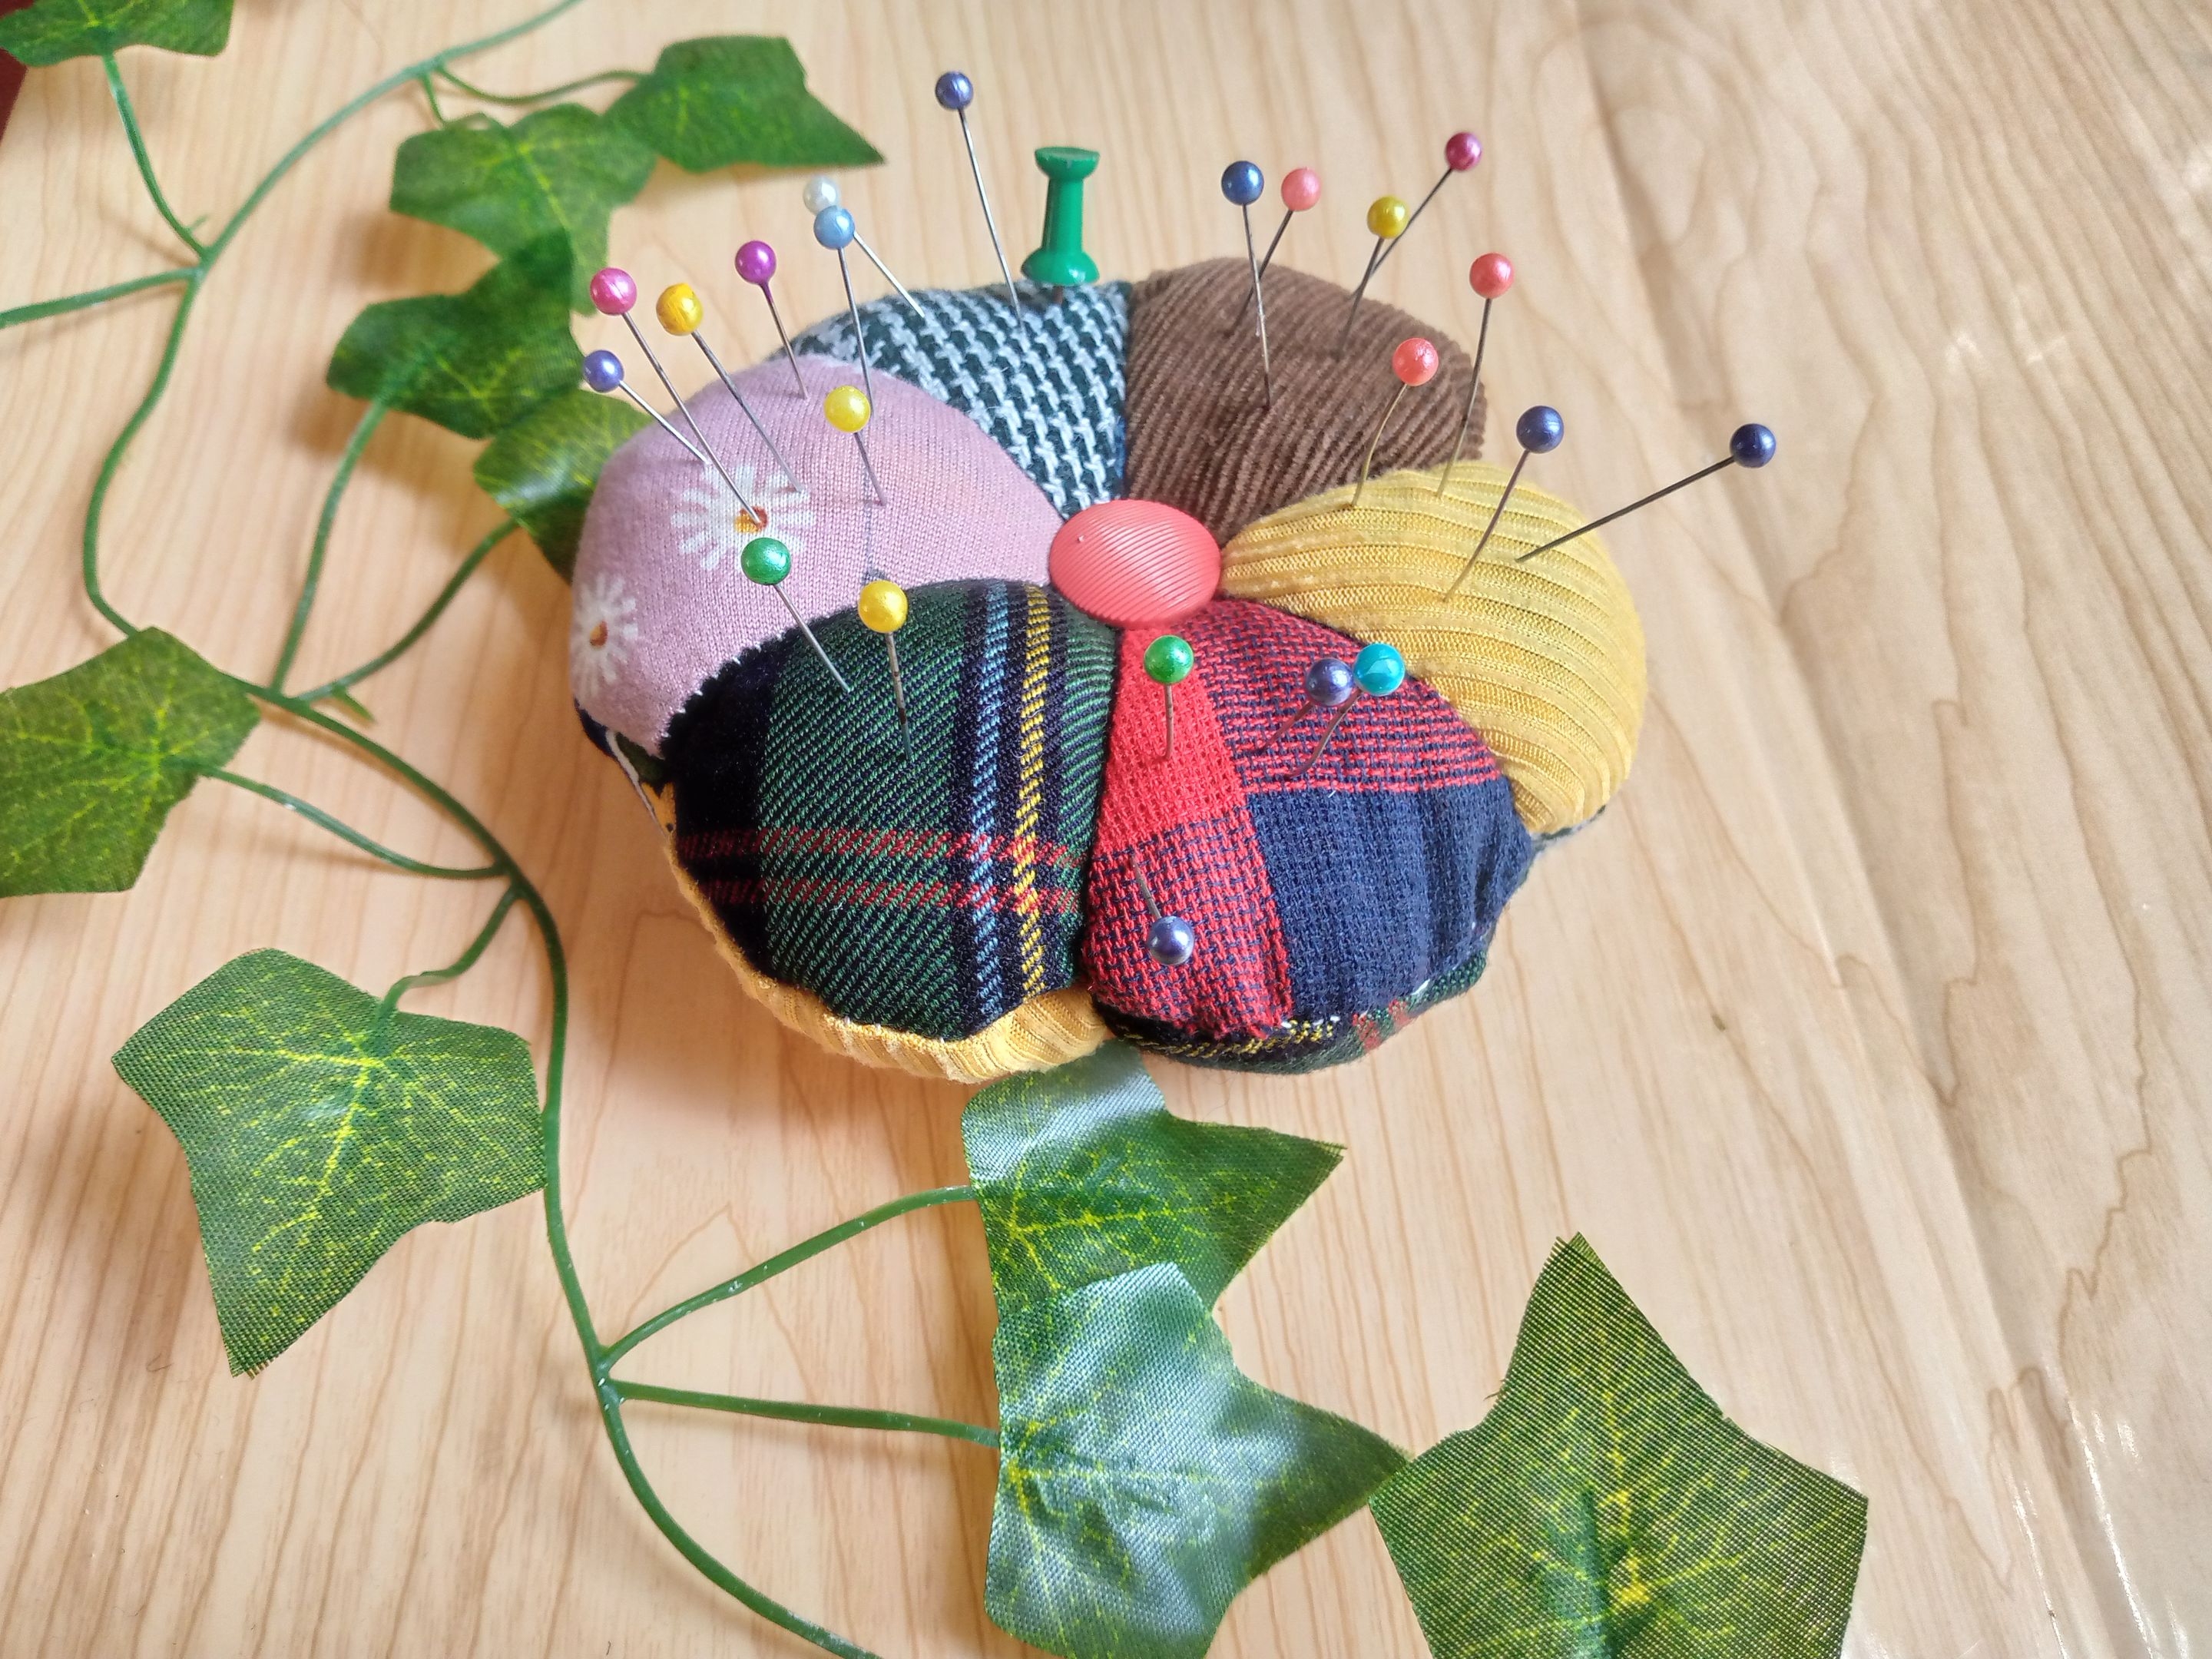
    I wanted to combine some fabrics with plaid and flower prints, even single-color ones, and the truth is that it looks great. You can even make your pincushion only with single-color fabrics, and then you decide how to do it 🥰.```

    Picsart_24-12-20_21-51-36-631 (1).jpg

    🌸Te servirá mucho este alfiletero para organizar los alfileres y tenerlos más cerca a la mano si eres como yo que pues quieres tener cerca los alfileres cuando estás cosiendo pues te ayudará mucho , espero te guste este proyecto y puedas hacerlo ,vamos a comenzar a hacerlo y aquí te dejo los sencillos pasos.

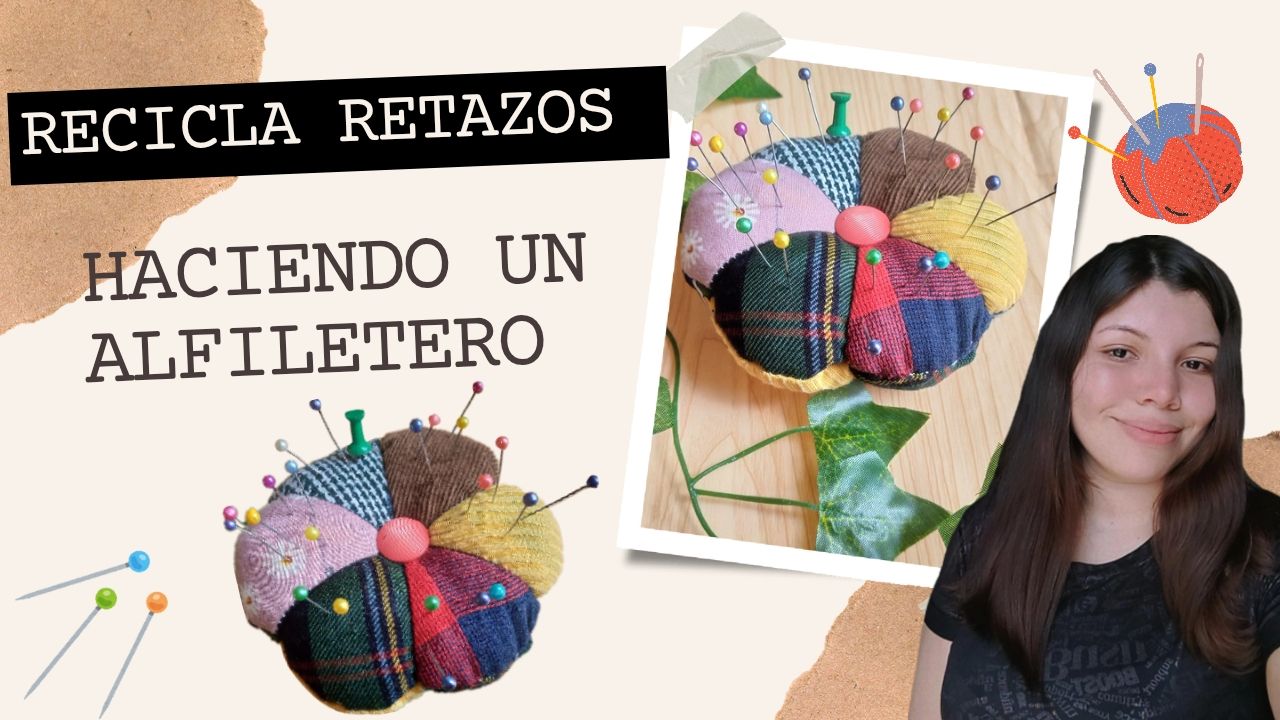
    🌸This pincushion will be very useful to organize the pins and have them closer at hand. If you are like me and want to have the pins close by when you are sewing, it will help you a lot. I hope you like this project and can do it. Let's start doing it and here are the simple steps.


    IMG_20250310_111442_041.jpg

    Picsart_24-12-20_21-51-36-631 (1).jpg

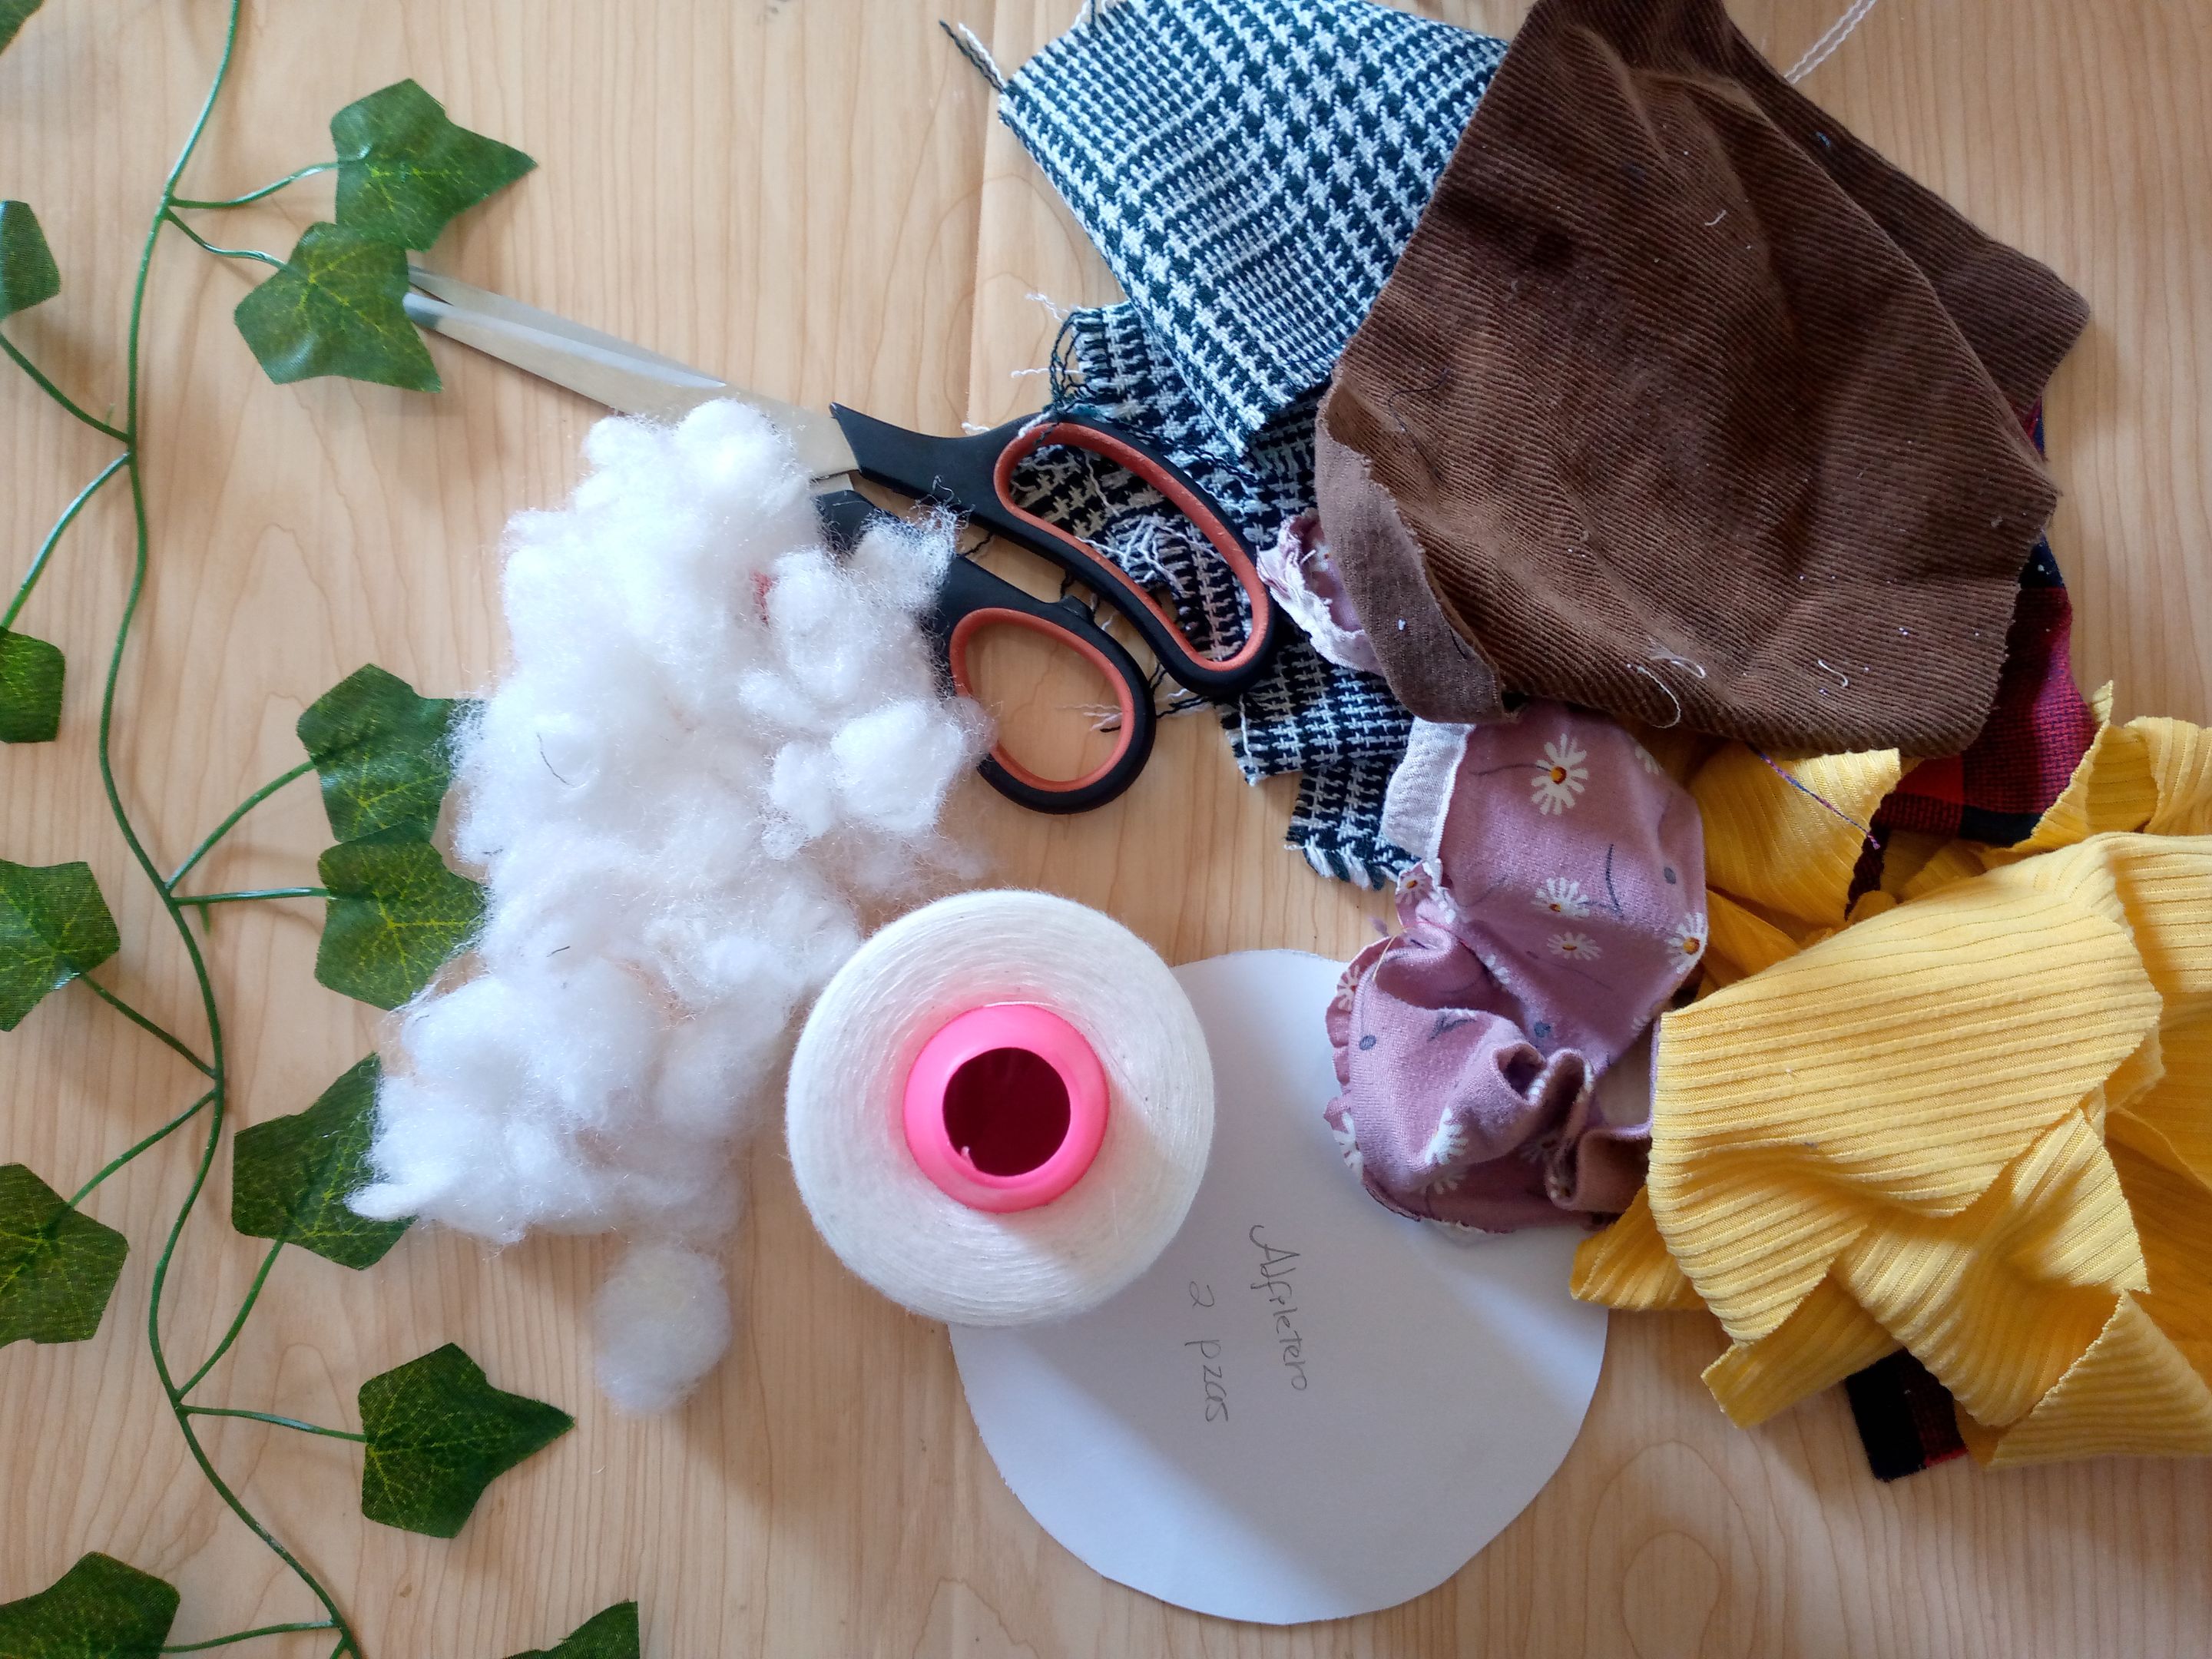
    Materiales:// Materials:

    • Usaremos recortes de tela de los que tú quieras y tengas en casa
    • Relleno de muñecos
    • Tijera
    • Hilo y aguja
    • 1 botón
    • 1 círculo de cartón como patrón

    • We will use fabric scraps of whatever you want and have at home
    • Doll stuffing
    • Scissors
    • Thread and needle
    • 1 button
    • 1 cardboard circle as a pattern

    Picsart_24-12-20_21-51-36-631 (1).jpg

    Pasos a seguir://Steps to follow:
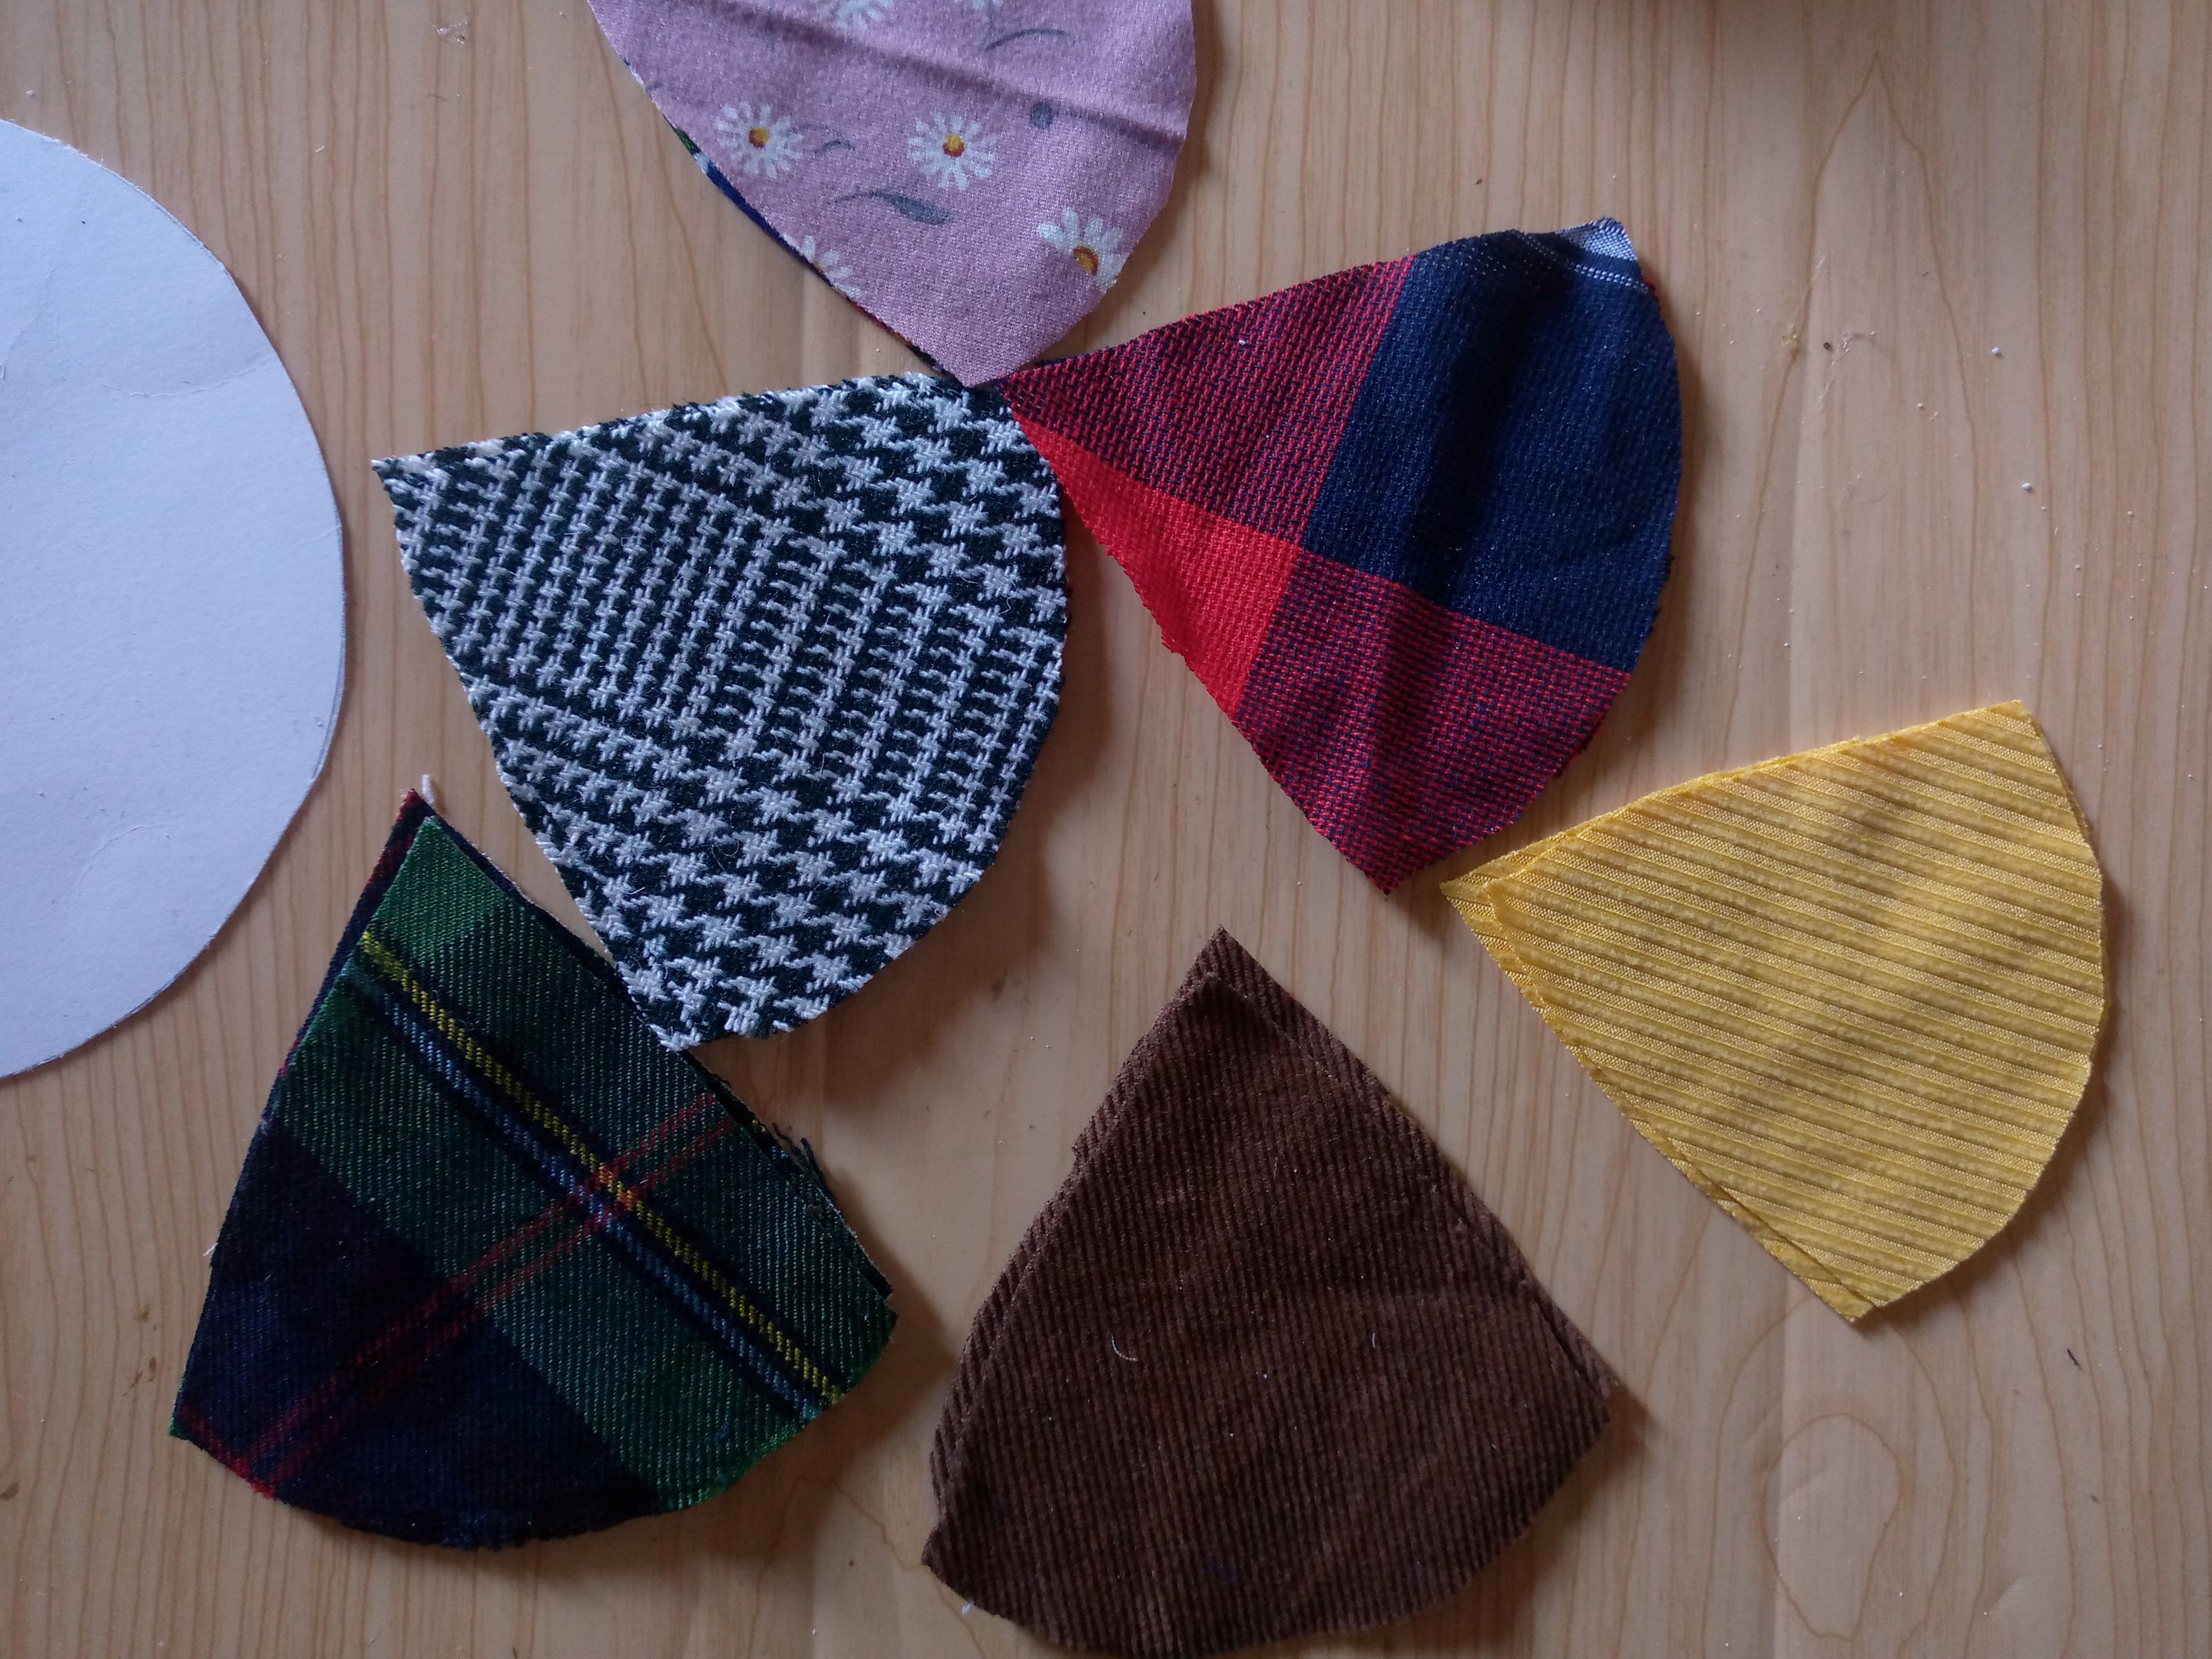
    IMG_20250310_112227_163.jpg

    IMG_20250310_112349_661.jpg

    Paso 01

    Empecé cortando 12 triángulos con mis recortes de telas ,el círculo de cartón lo usaremos para medir el tamaño del alfiletero después que hayamos unido ambas piezas,por los momentos vamos a cortar triángulos,el tamaño de tus triángulos depende mucho del ancho que hagas el alfiletero también, éstos que yo he hecho de la punta de cada triángulo hasta abajo son de 6 cm, entonces en nuestra máquina vamos a ir uniendo los ,yo coloqué uno encima del otro y empiezo a coser.

    Step 01

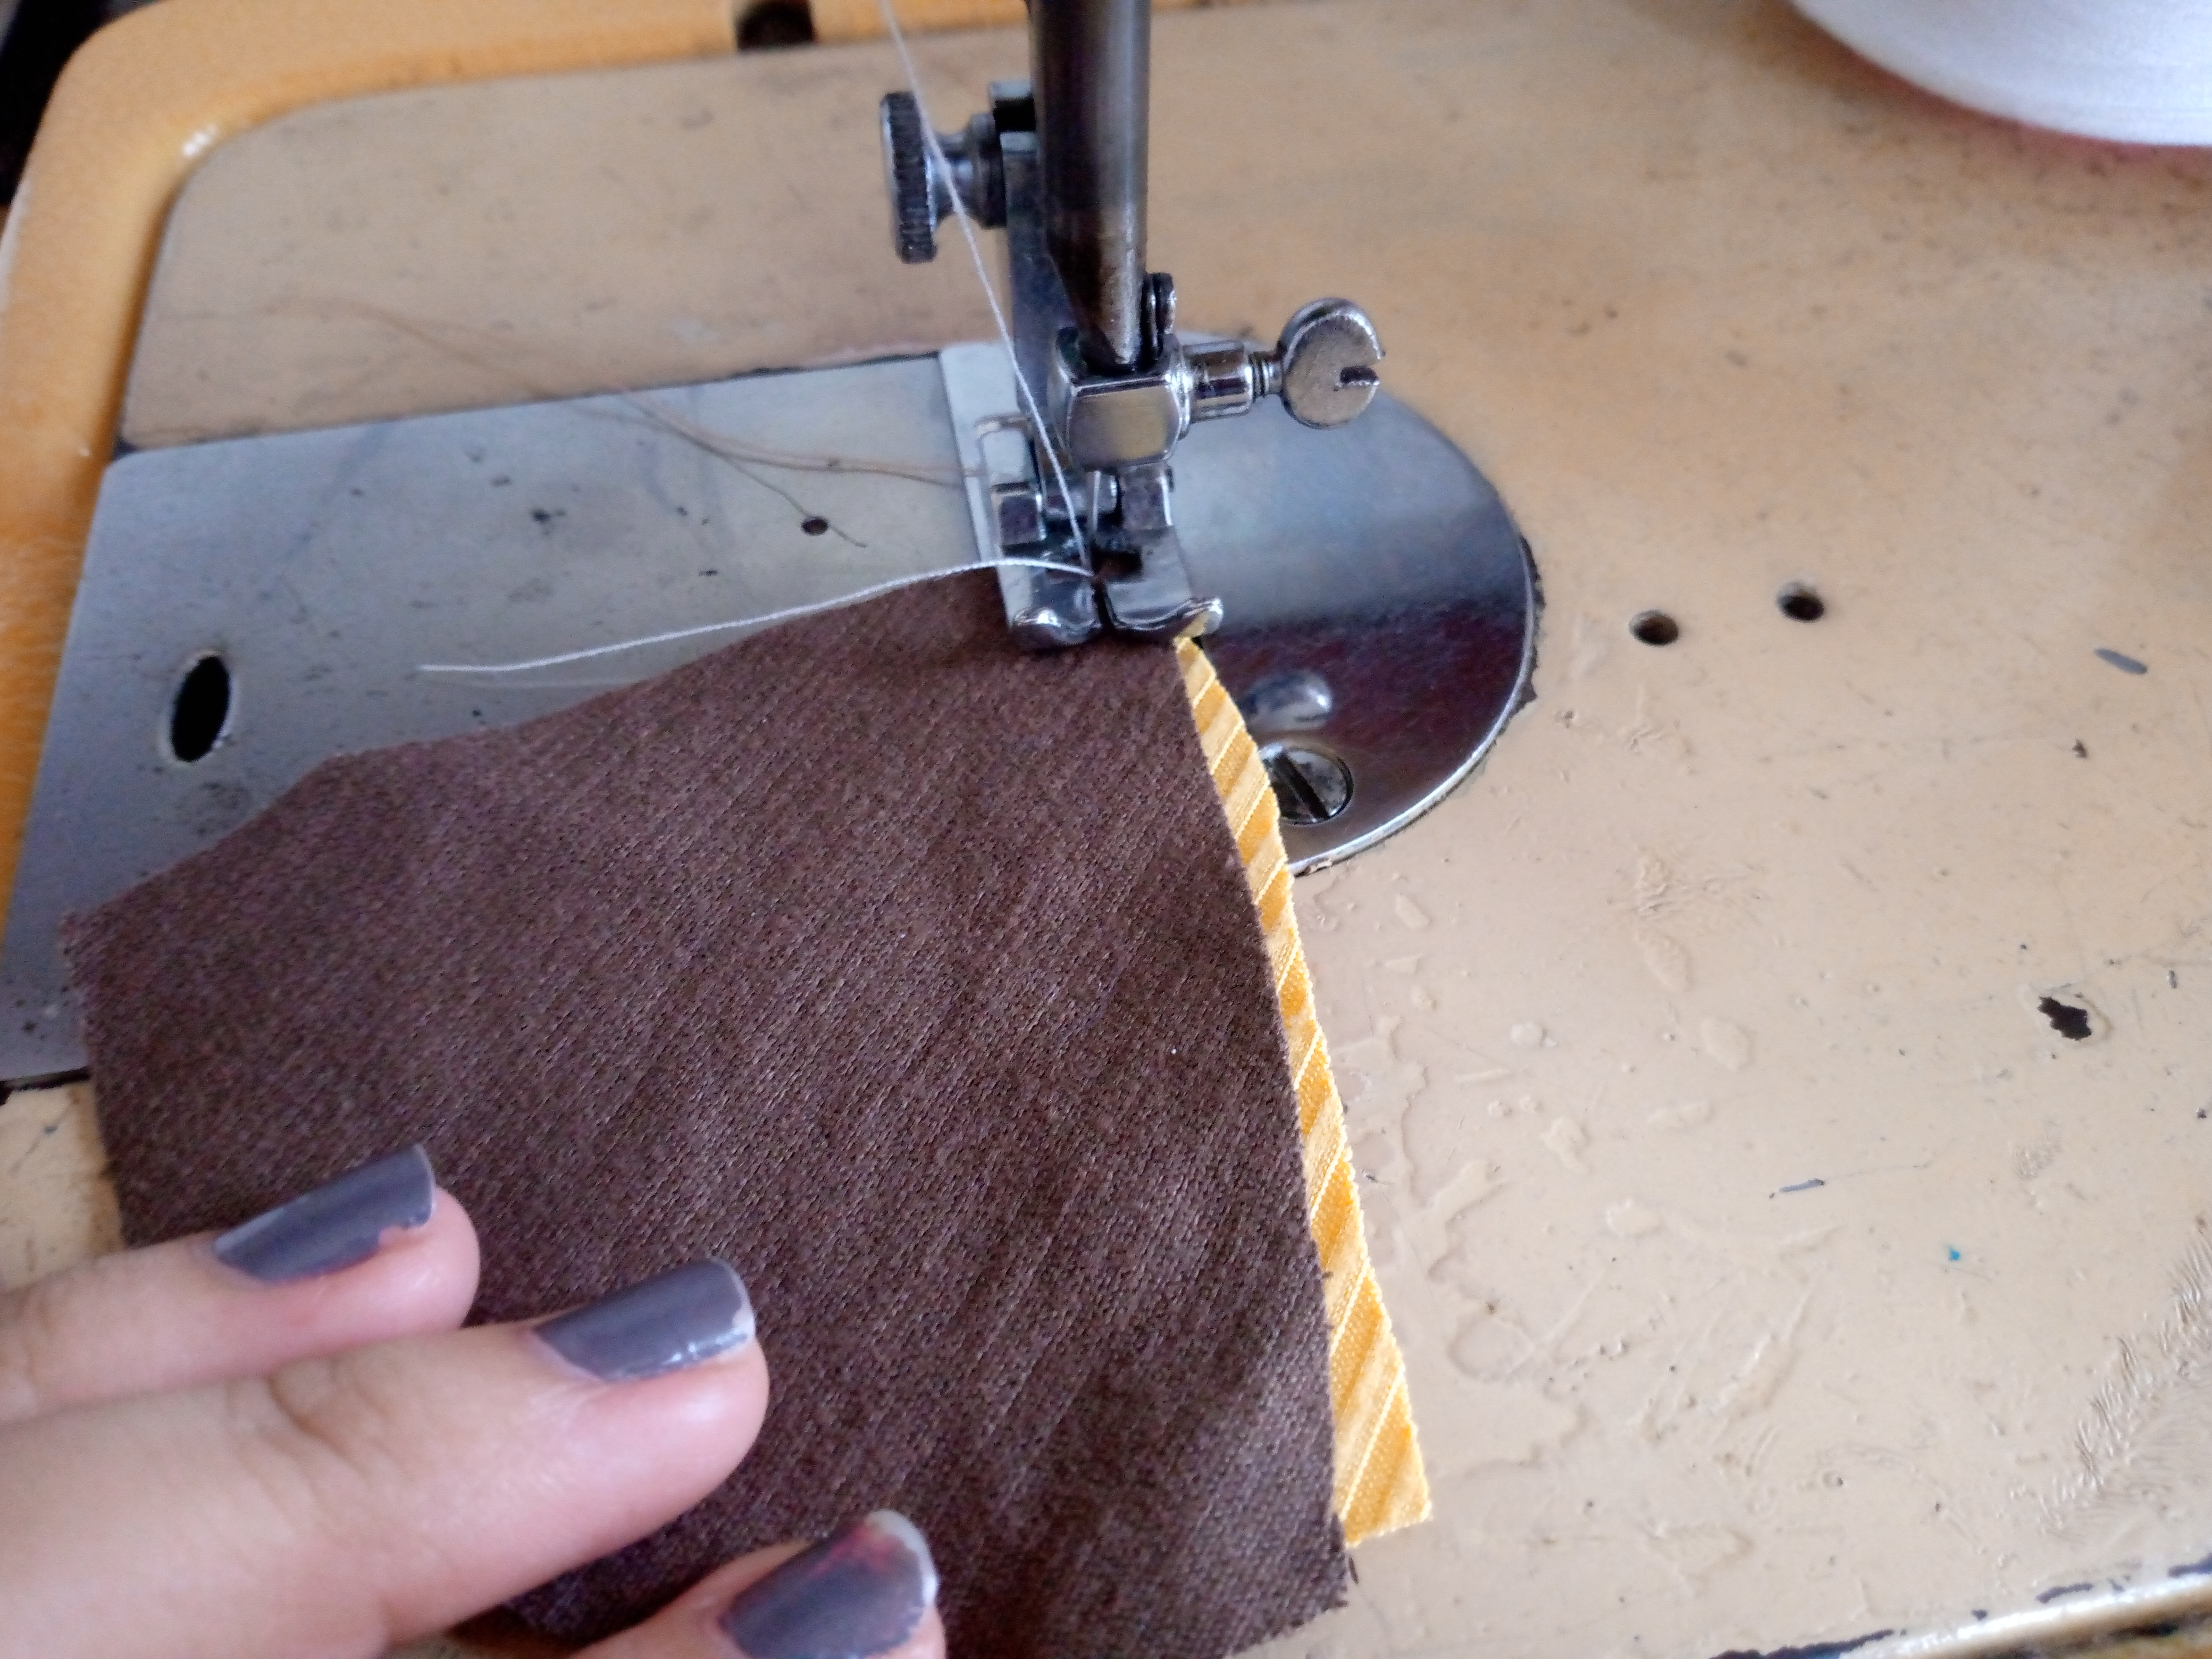
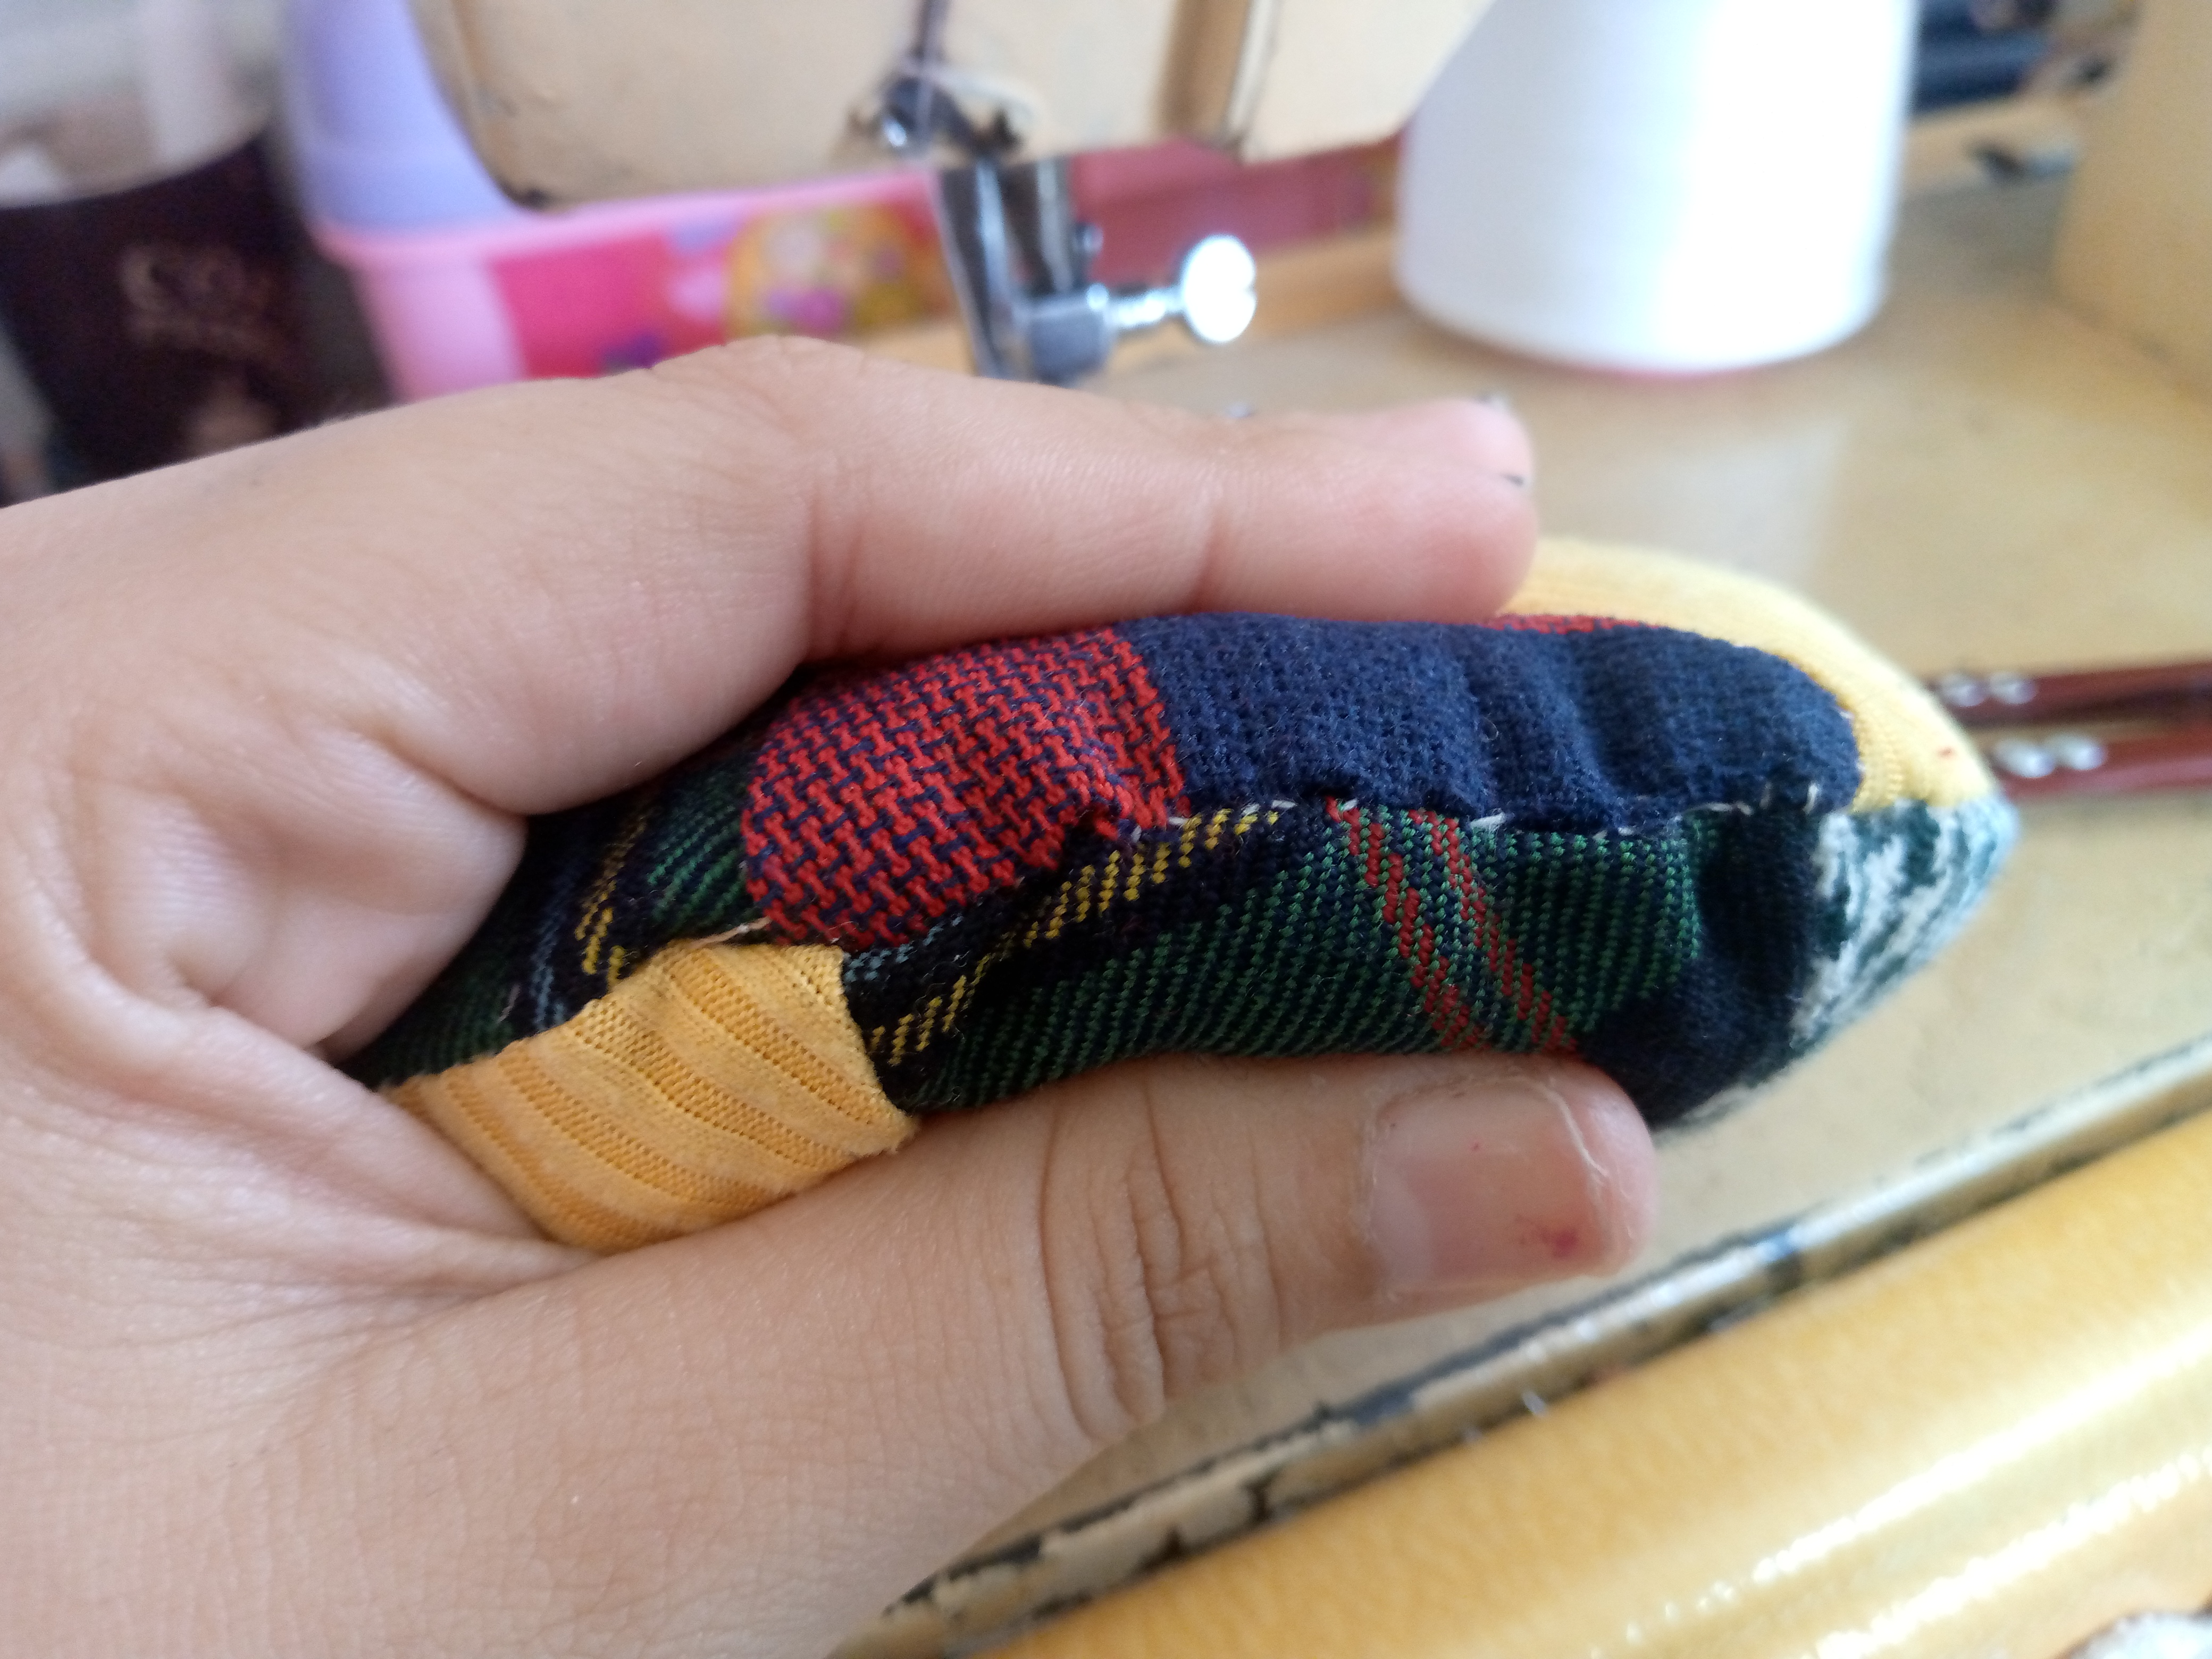
    I started by cutting 12 triangles with my fabric scraps, we will use the cardboard circle to measure the size of the pincushion after we have joined both pieces, for now we are going to cut triangles, the size of your triangles depends a lot on the width you make the pincushion too, these that I have made from the tip of each triangle to the bottom are 6 cm, so on our machine we are going to join them, I placed one on top of the other and started sewing.


    IMG_20250310_112433_617.jpg

    IMG_20250310_112953_531.jpg

    Paso 02

    Vamos a ir cosiendo el tercer triángulo también encima del segundo y vamos a completar todas las piezas osea a coserlas hasta que hayamos cosido a las 6 formando un círculo que luego vamos a medir con el cartón,esta medida pues la quise yo pero si quieres tu alfiletero más pequeño puedes hacer la medida de este usando un vaso un poco más pequeño o una taza redonda.

    Step 02

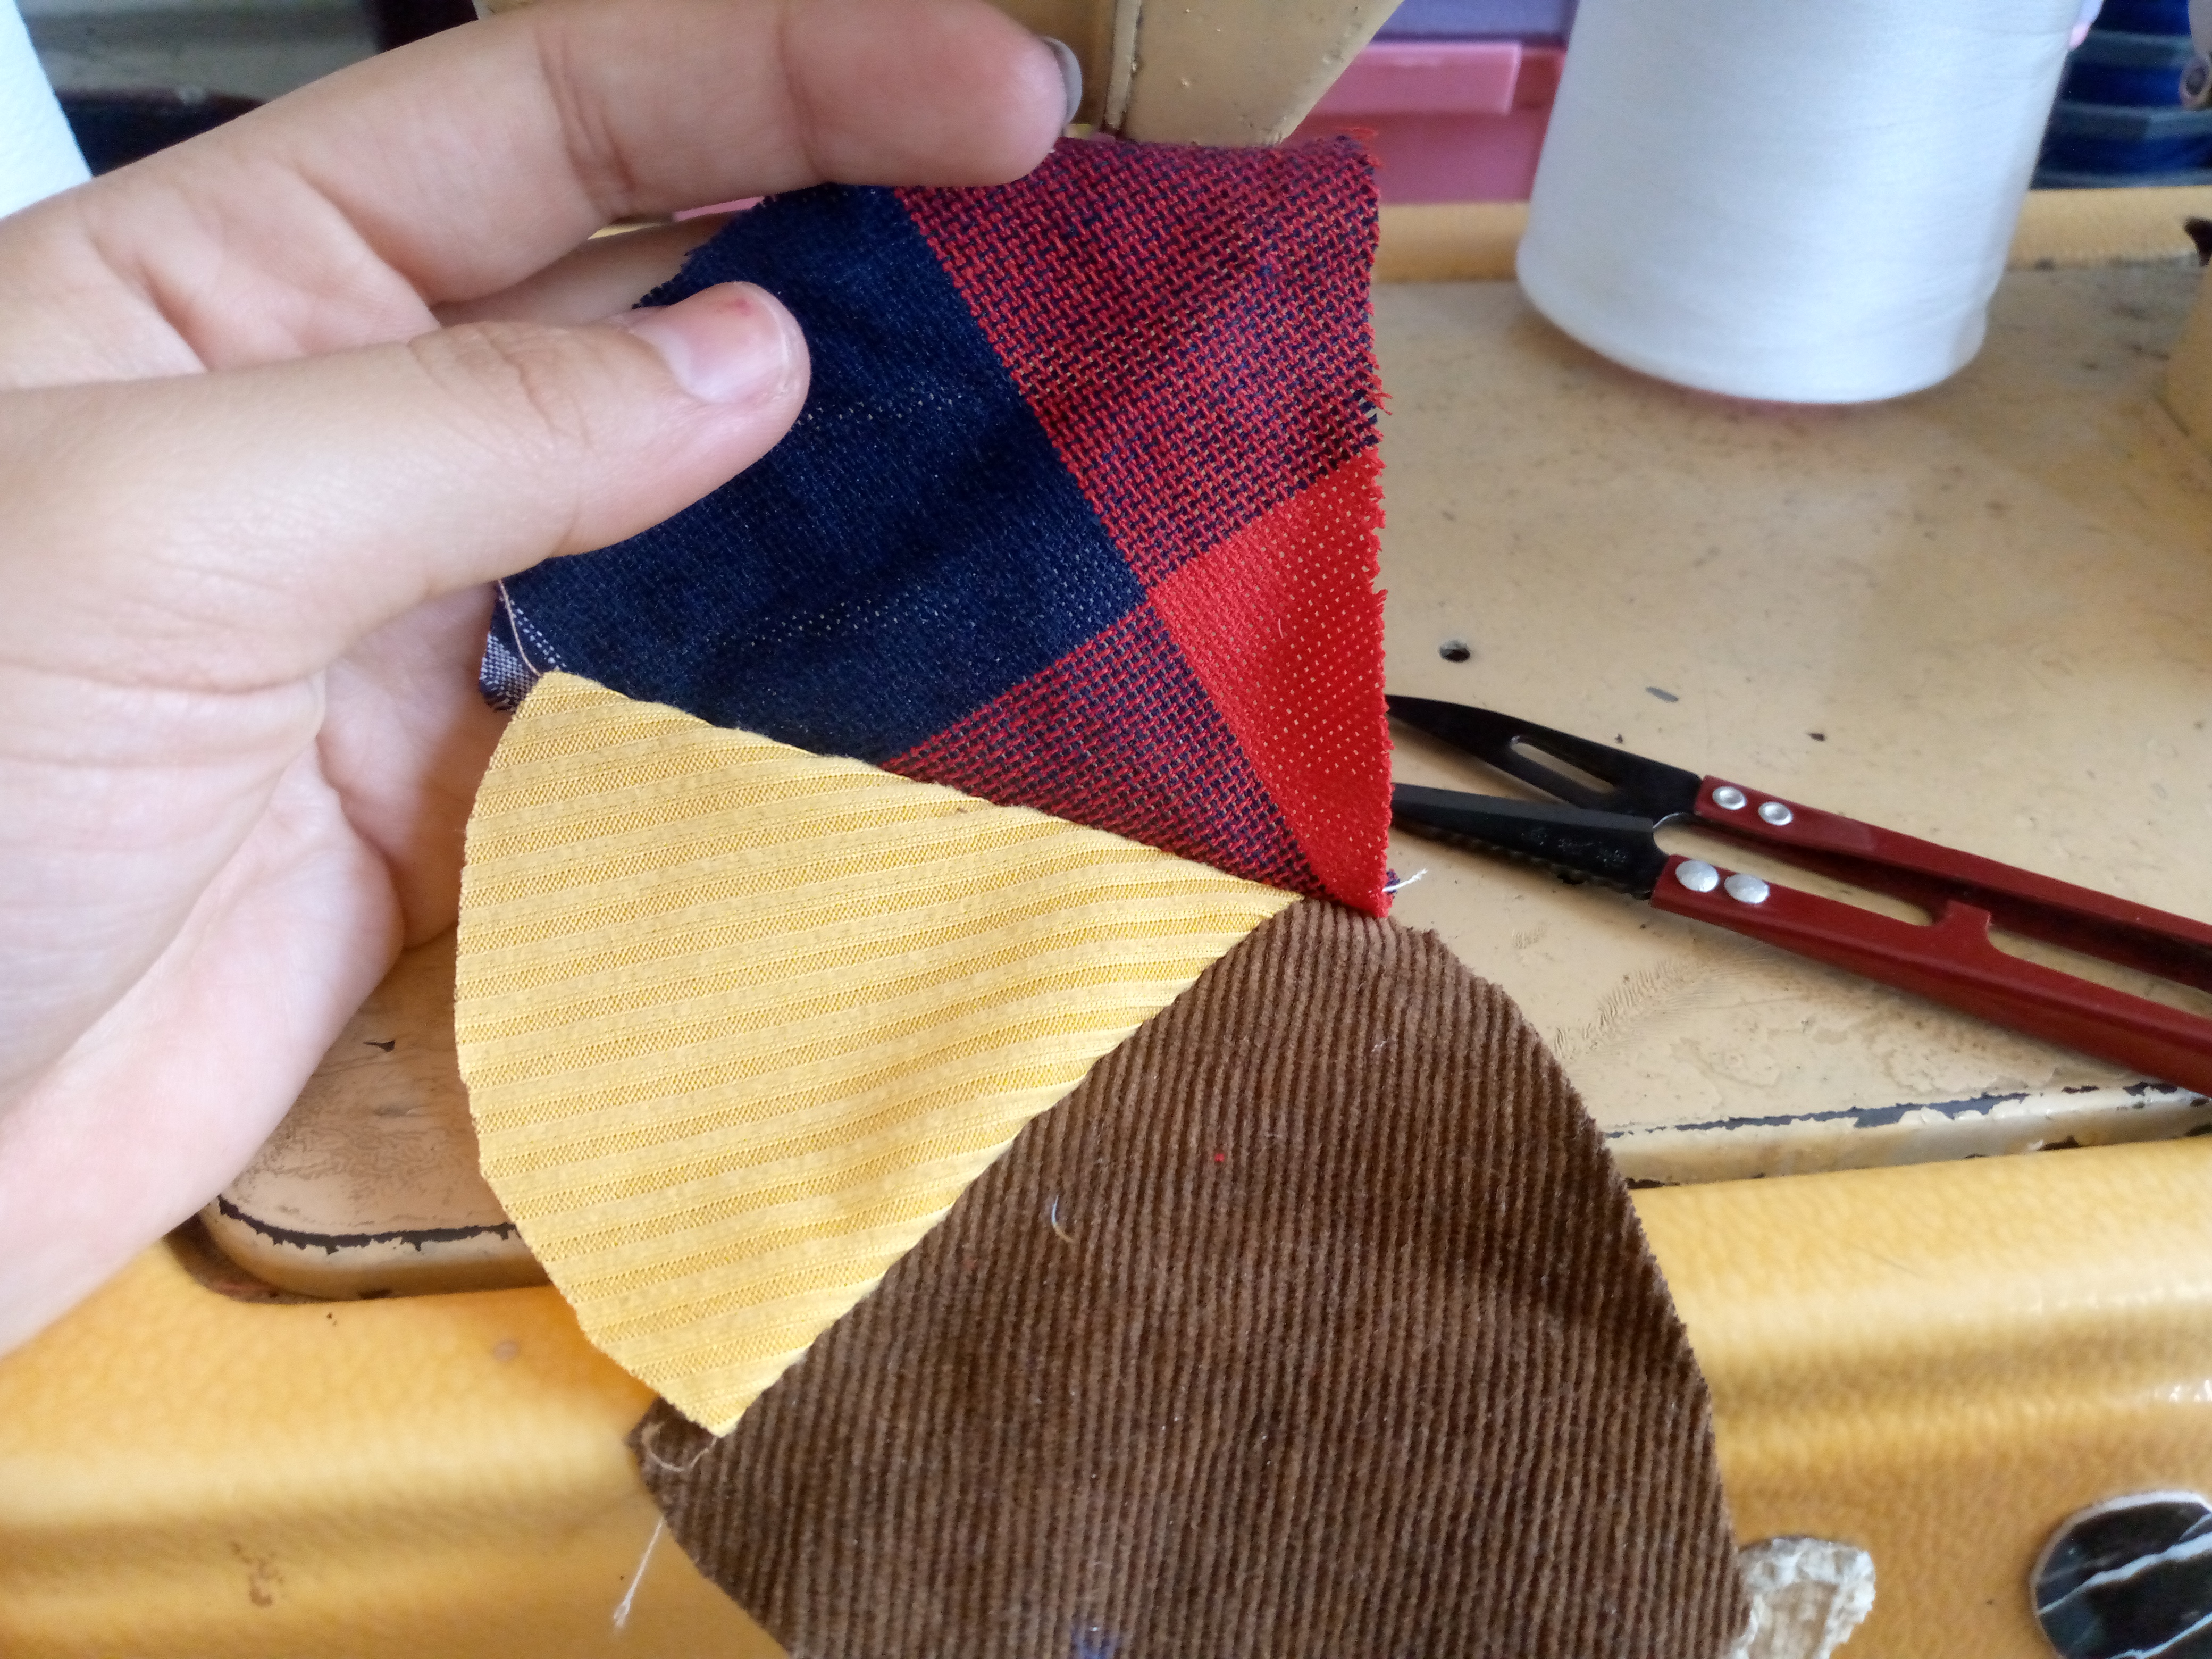
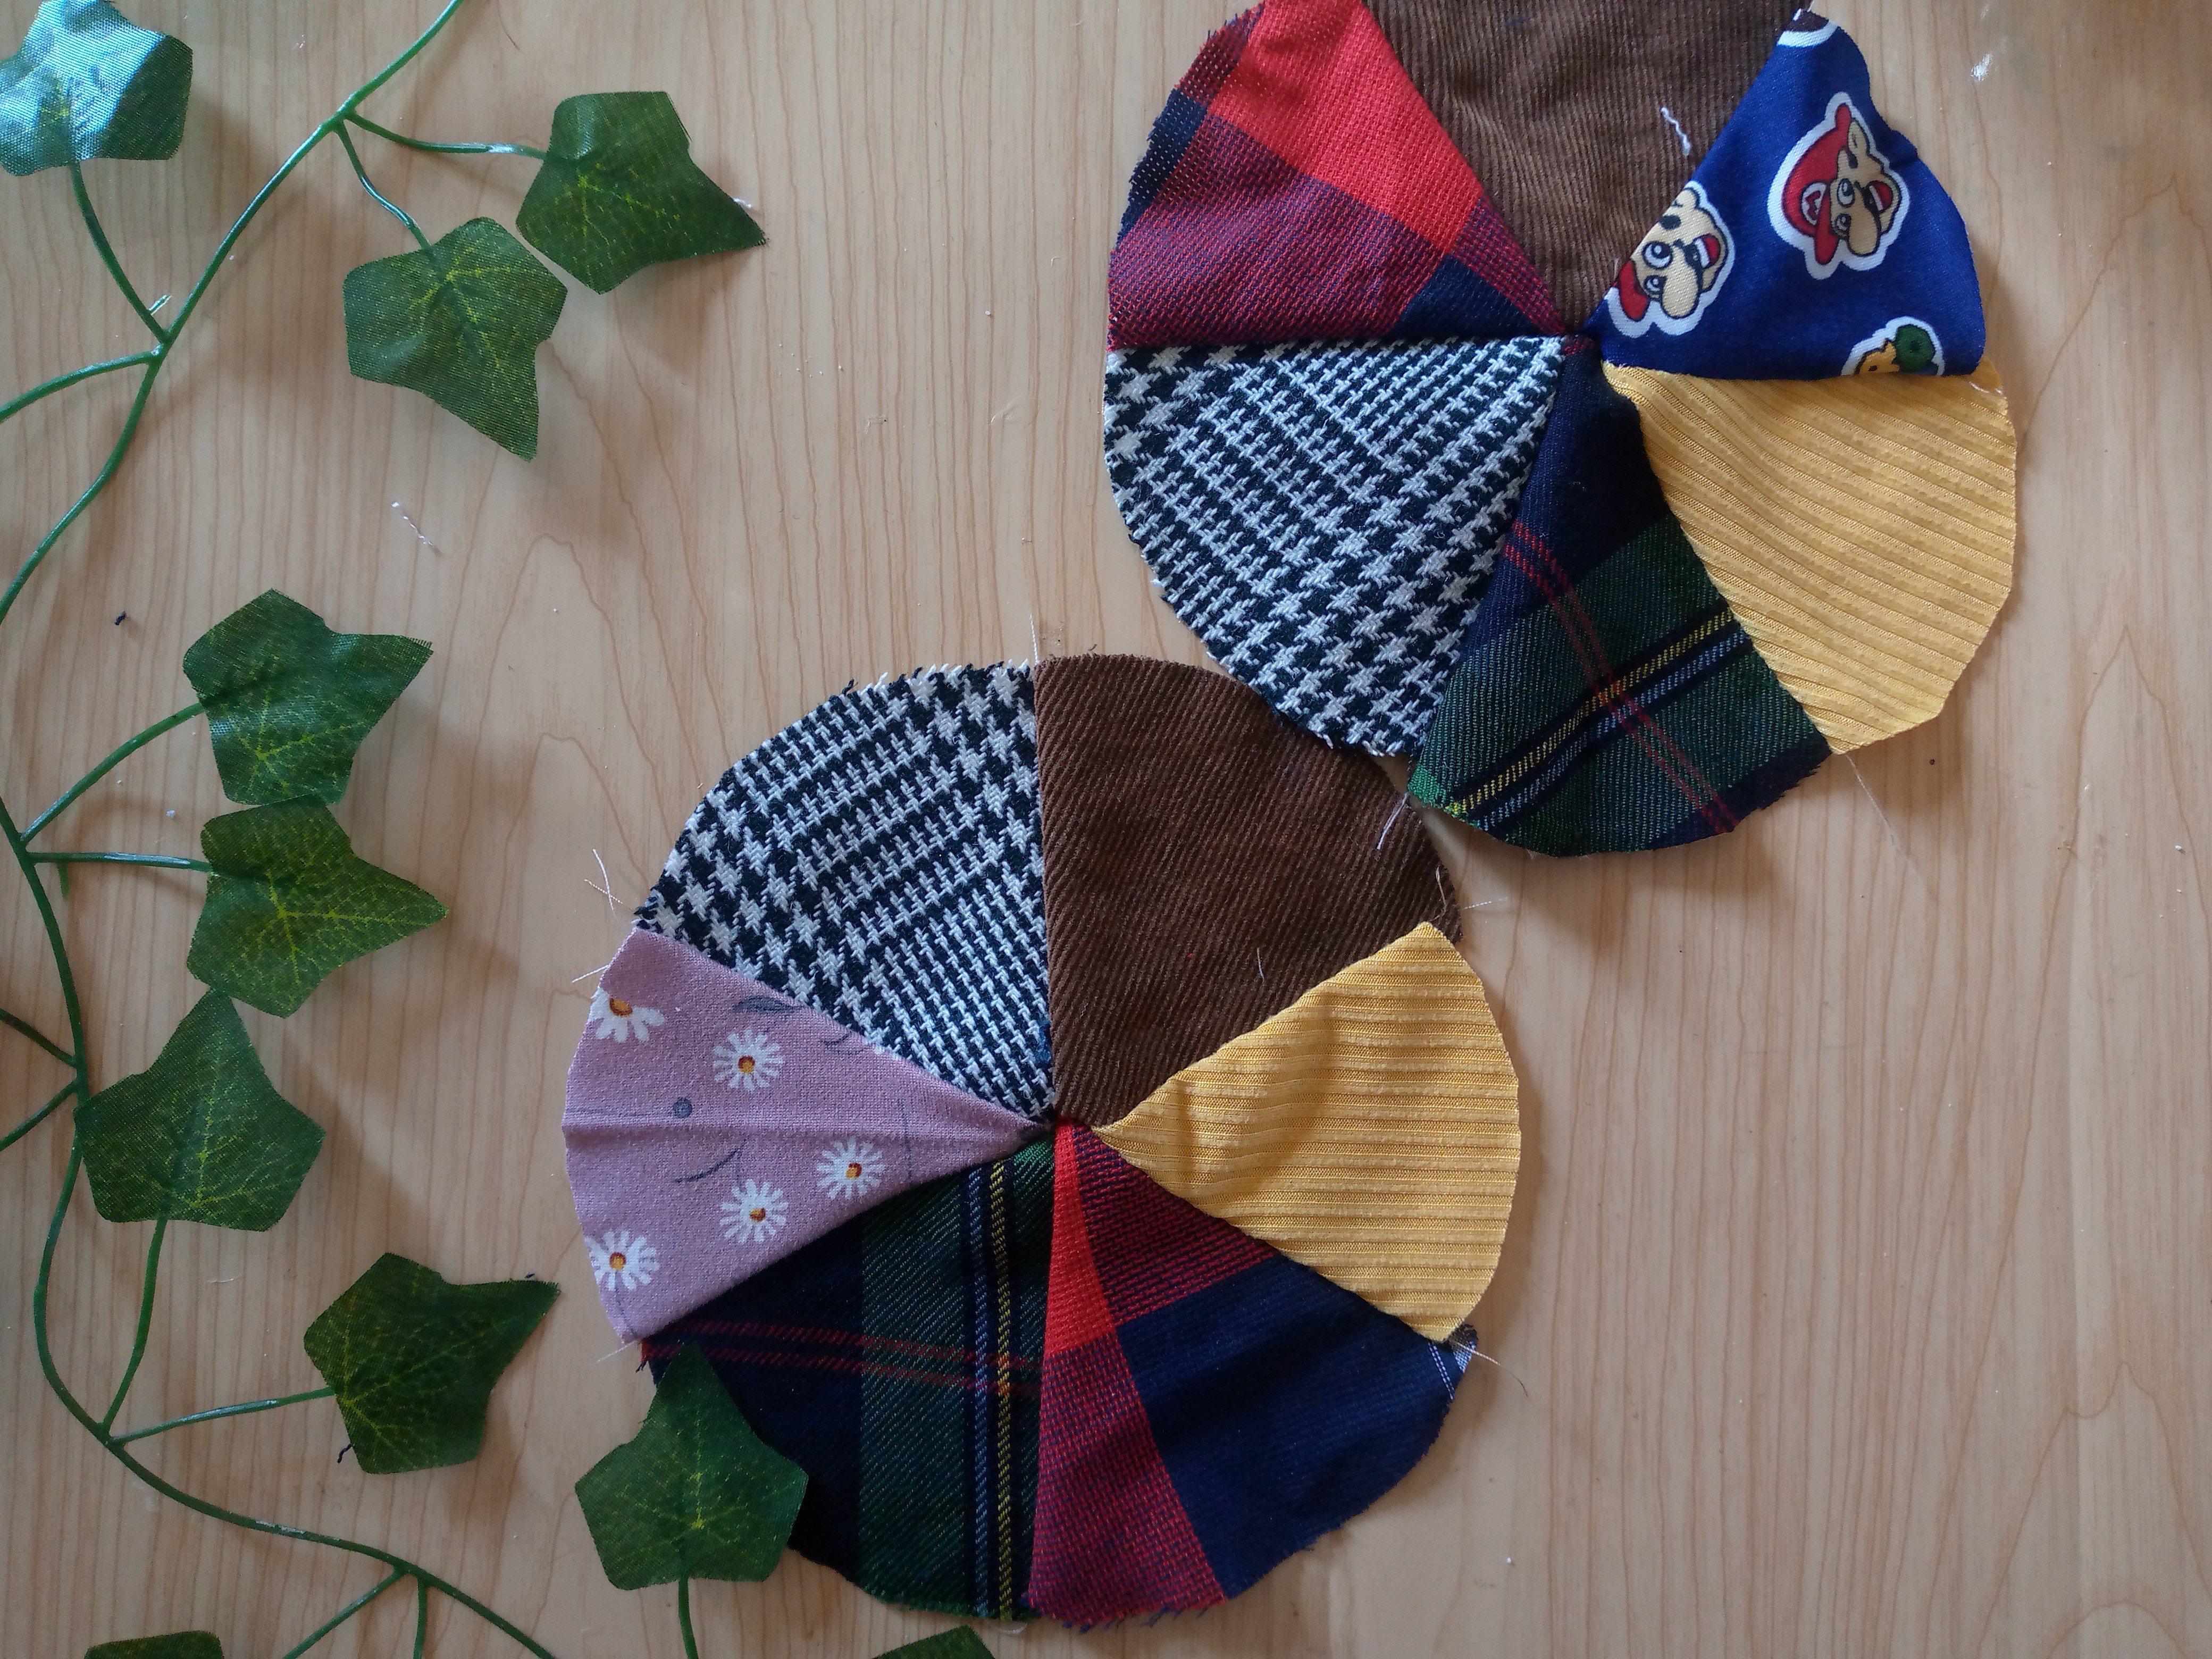
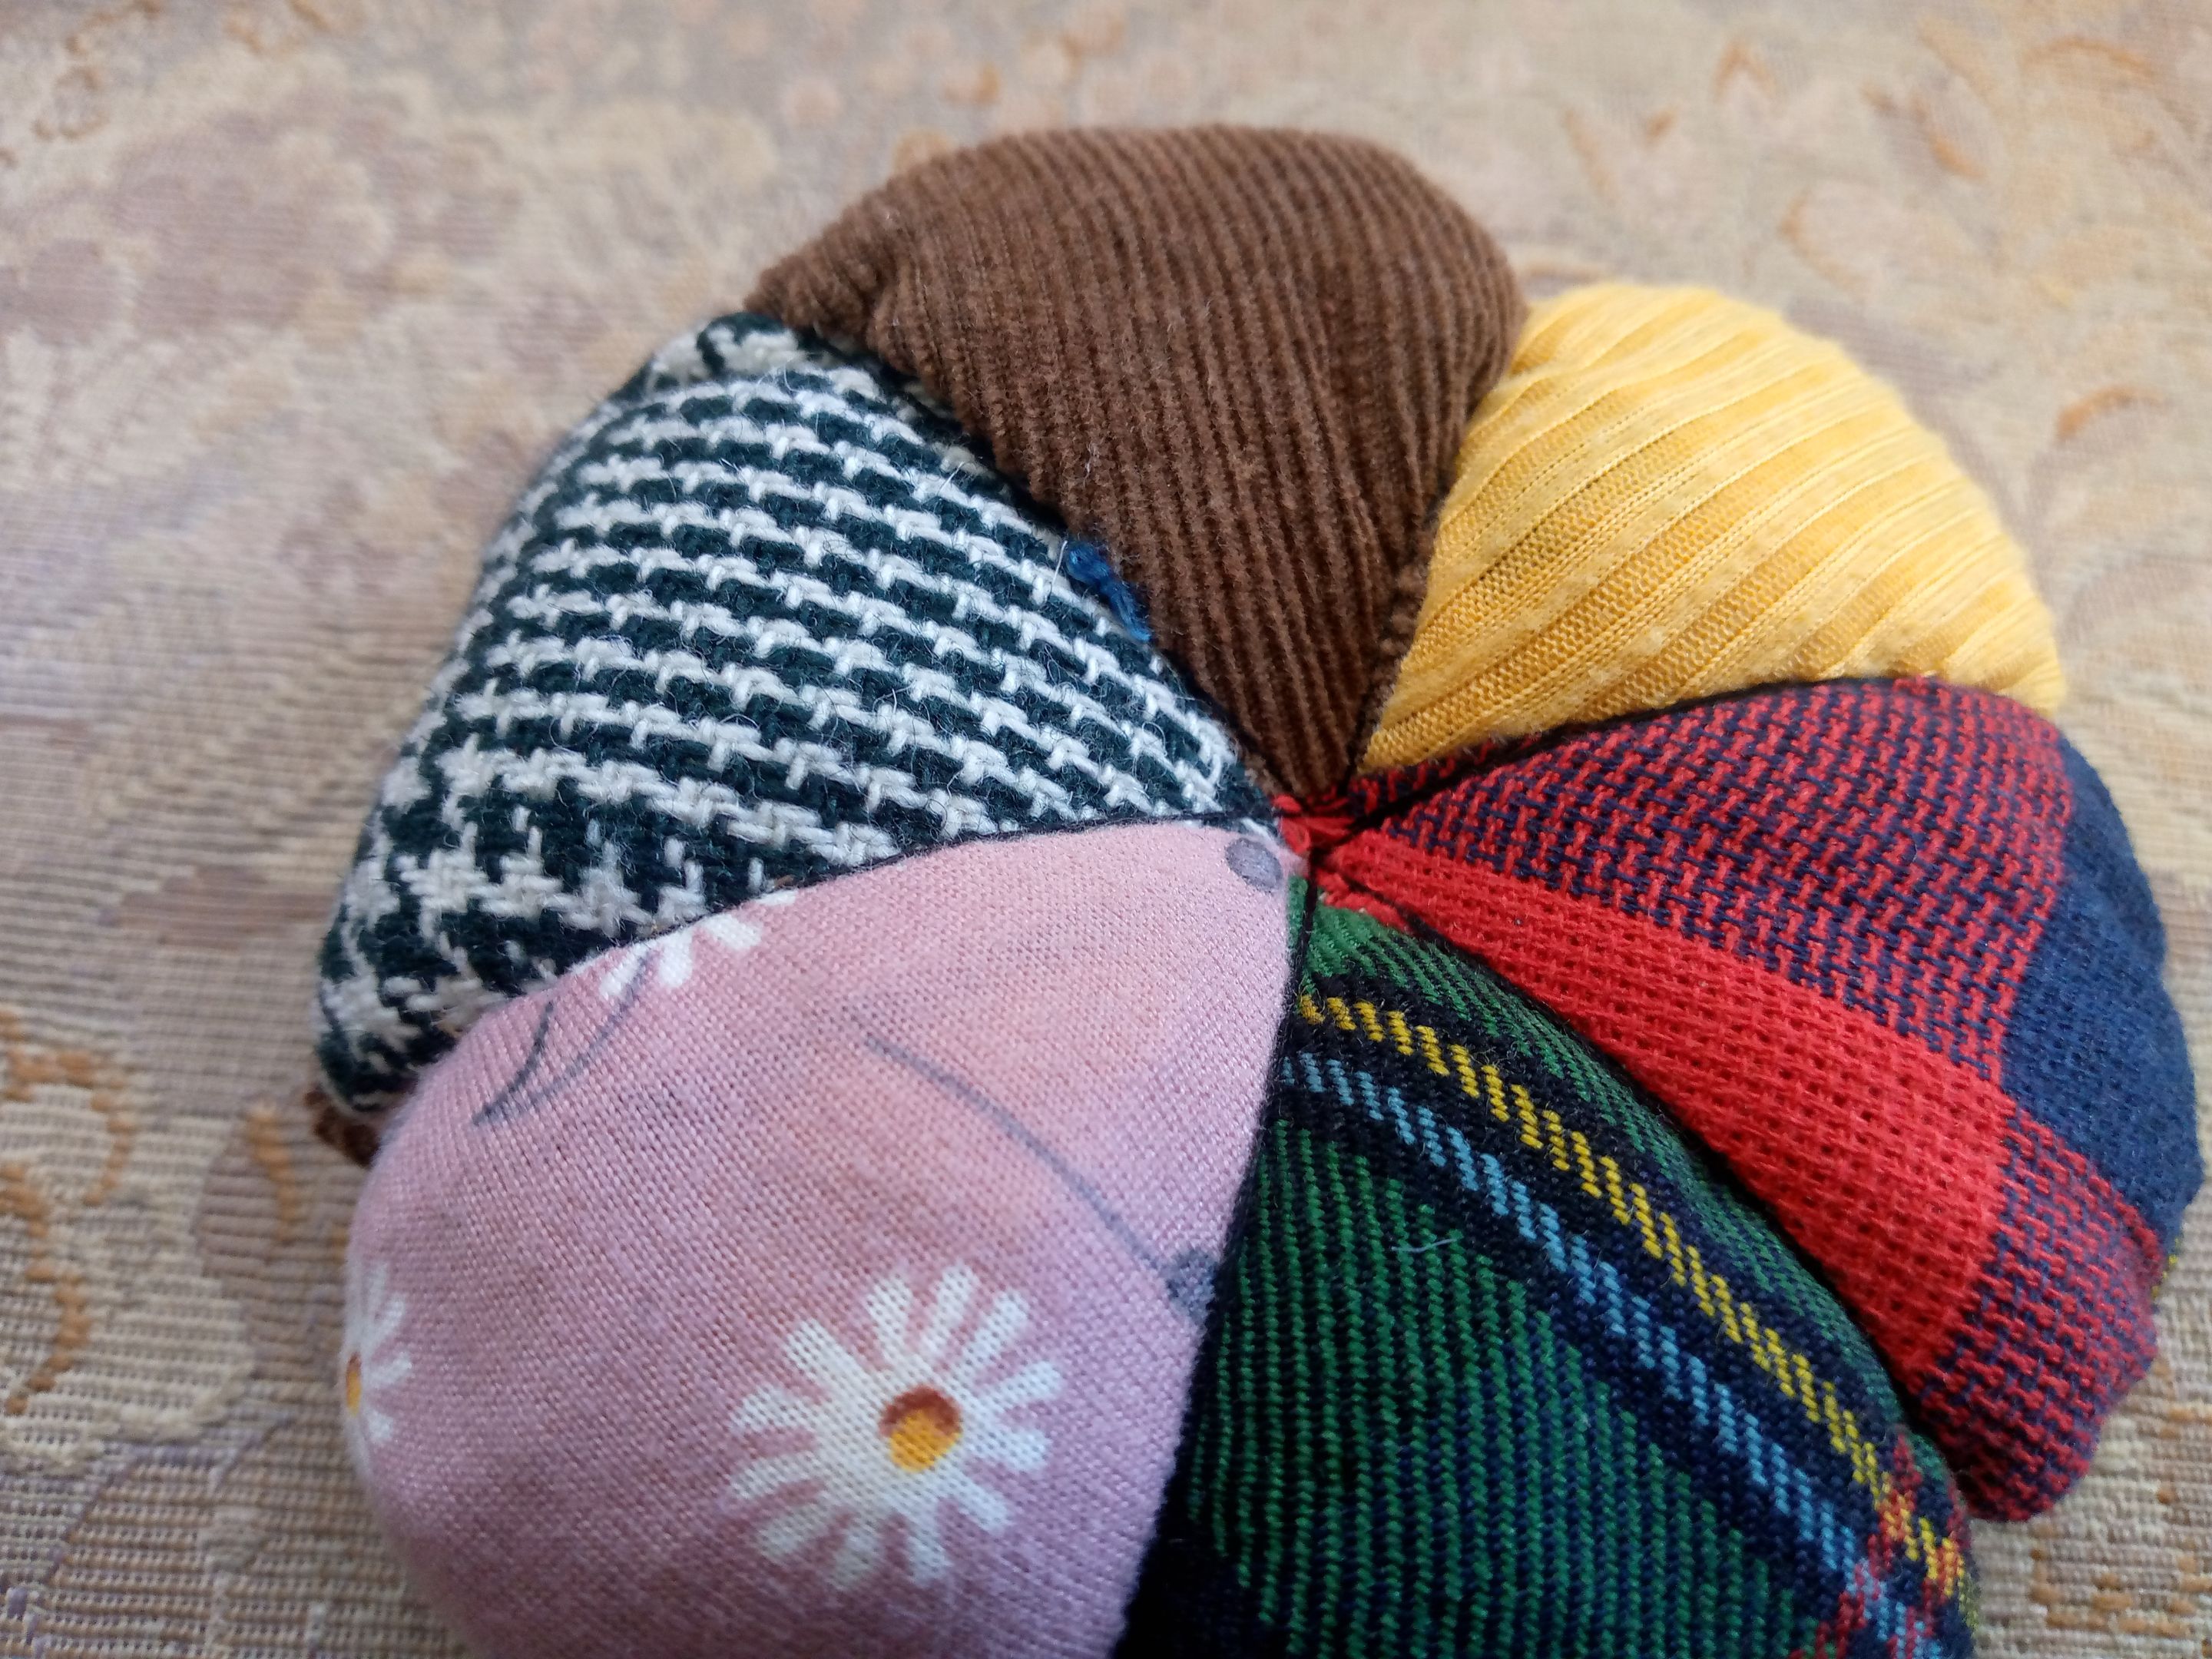
    We are going to sew the third triangle on top of the second one and we are going to complete all the pieces, that is, sew them until we have sewn all 6 together, forming a circle that we are then going to measure with the cardboard. I wanted this measurement myself, but if you want your pincushion smaller, you can measure it using a slightly smaller glass or a round cup.


    IMG_20250310_113240_146.jpg

    IMG_20250310_113340_162.jpg

    IMG_20250310_113810_689.jpg

    IMG_20250310_114242_928.jpg

    Paso 03

    Después pasamos a coser el contorno de nuestras piezas uniendo ambas piezas circulares y dejaremos una abertura por donde insertaremos el relleno ,luego vamos a agarrar nuestro hilo y aguja y en esa parte por donde insertamos el relleno ese hoyito lo vamos a sellar con costura invisible de manera que no se vea nuestra costura,con el mismo hilo y aguja vamos a hacer la forma de nuestra flor al alfiletero por las partes de la unión de cada triángulo.

    Step 03

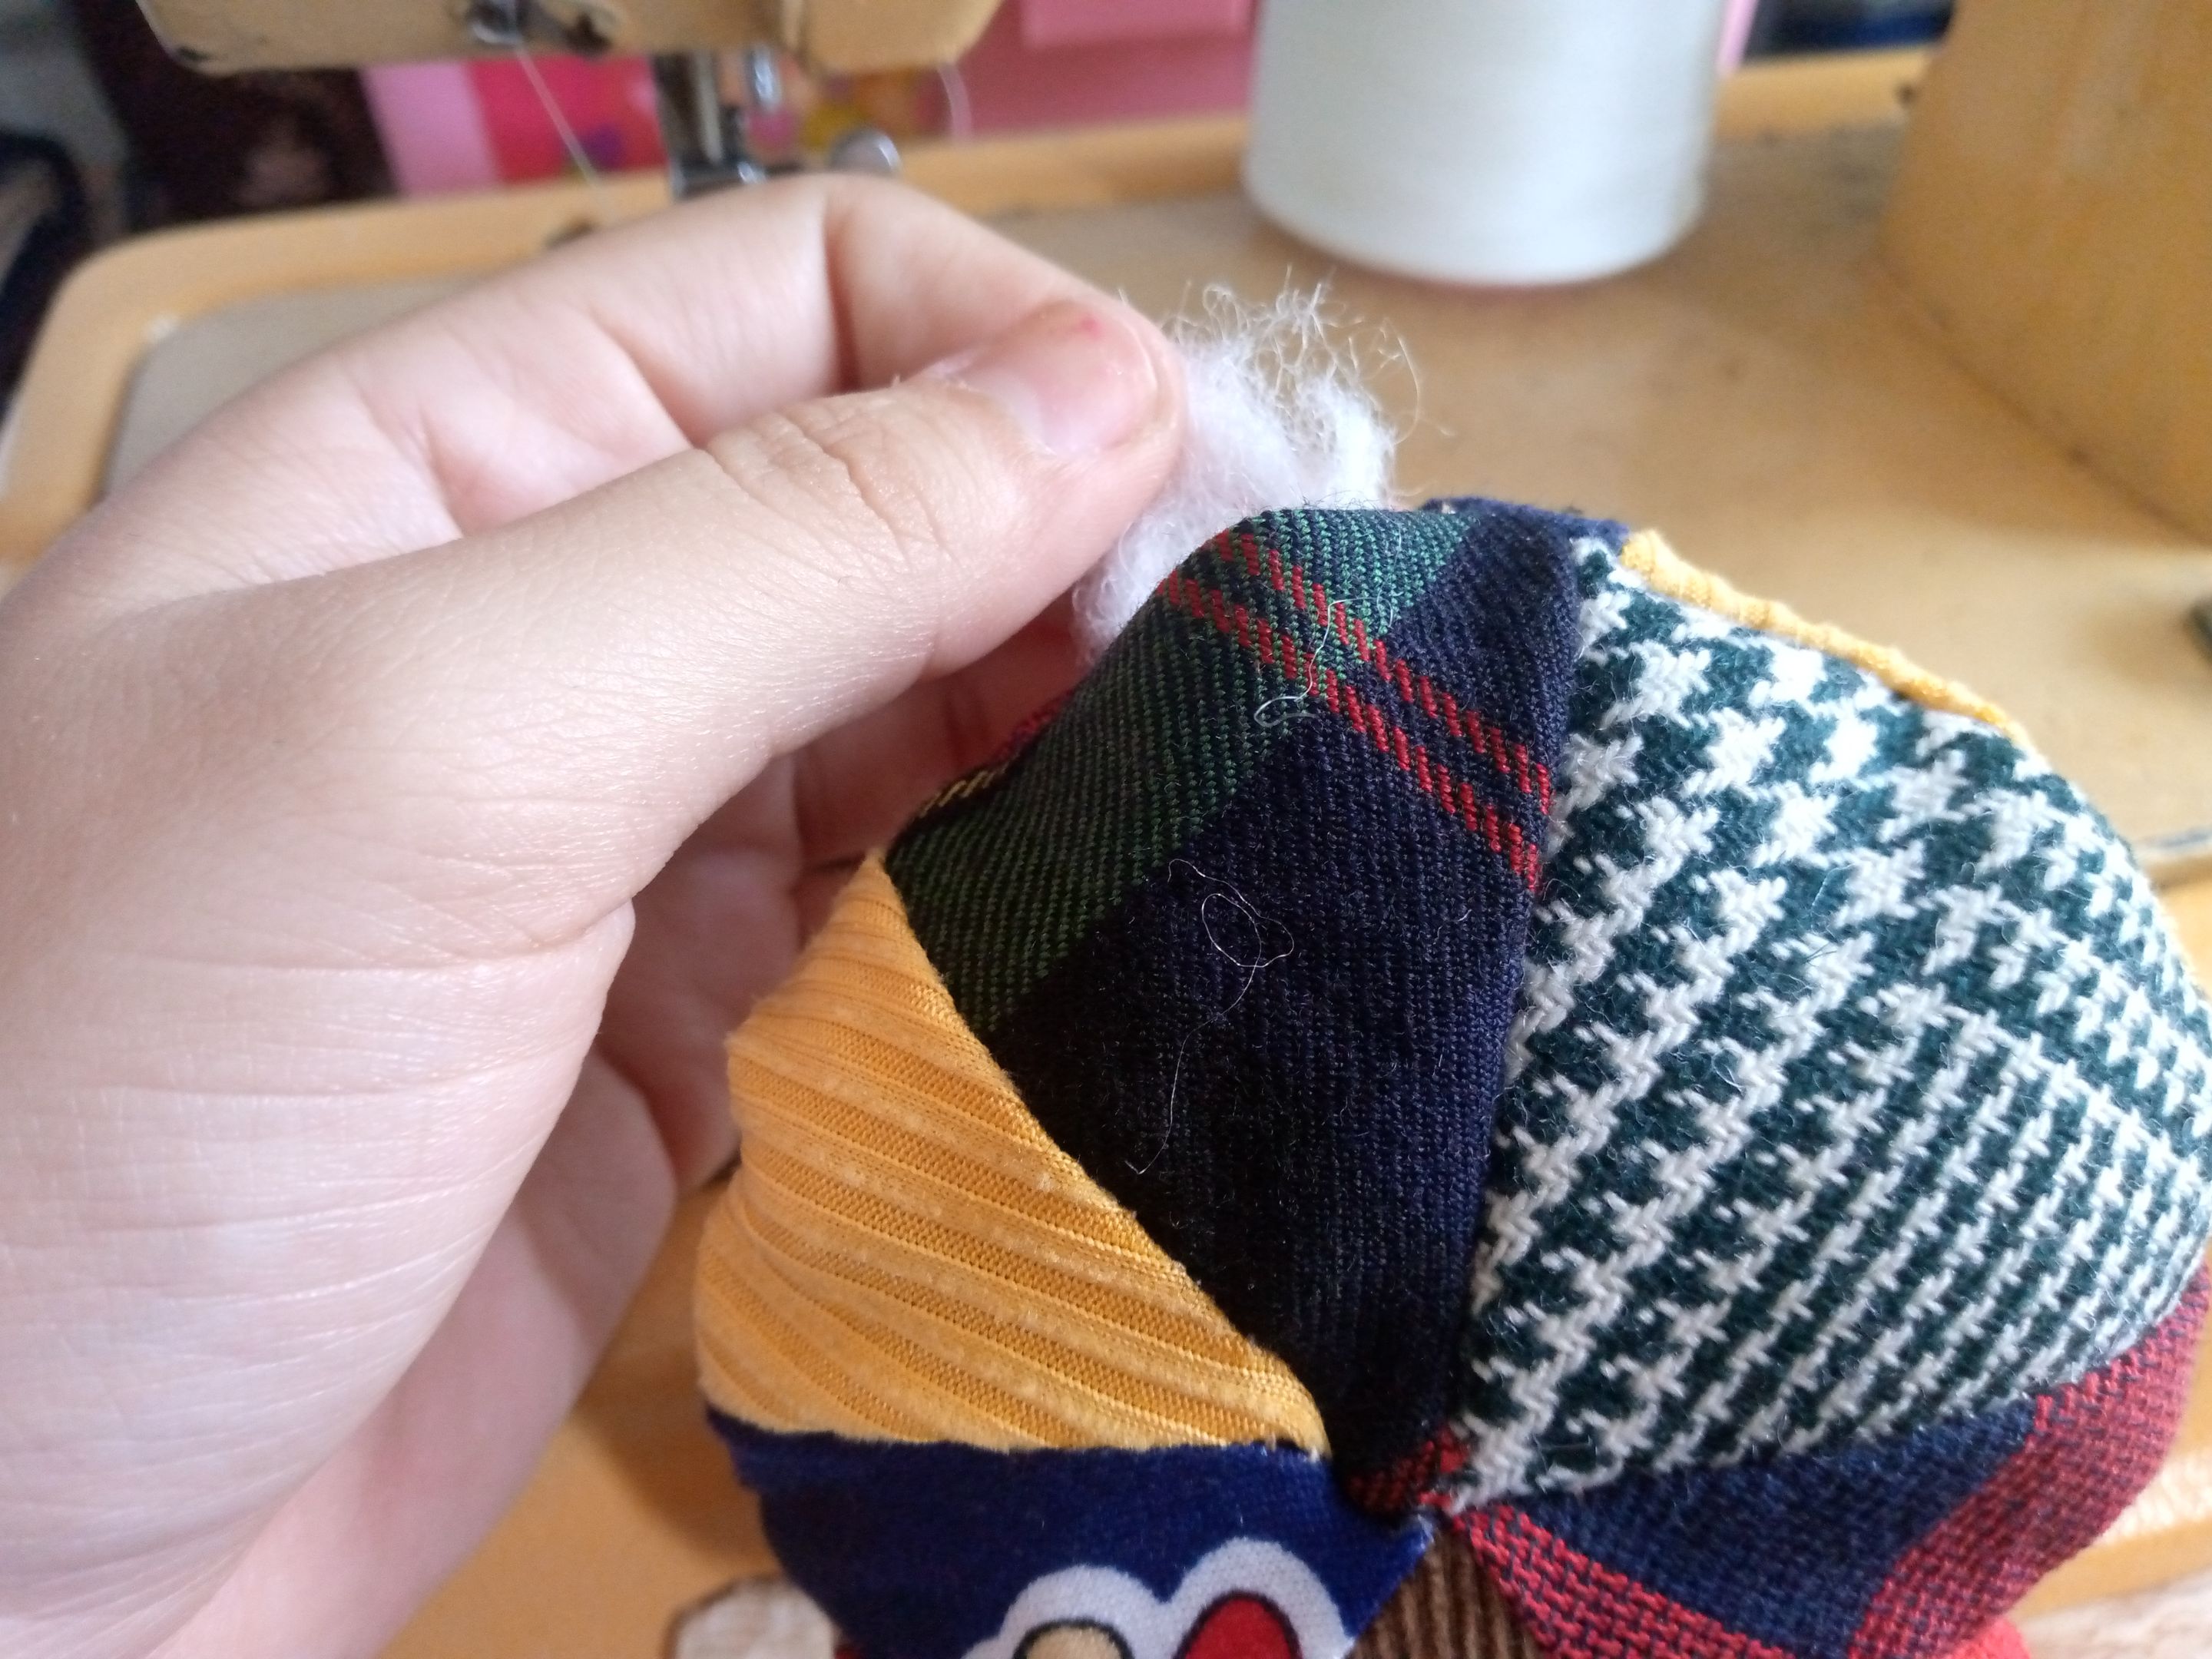
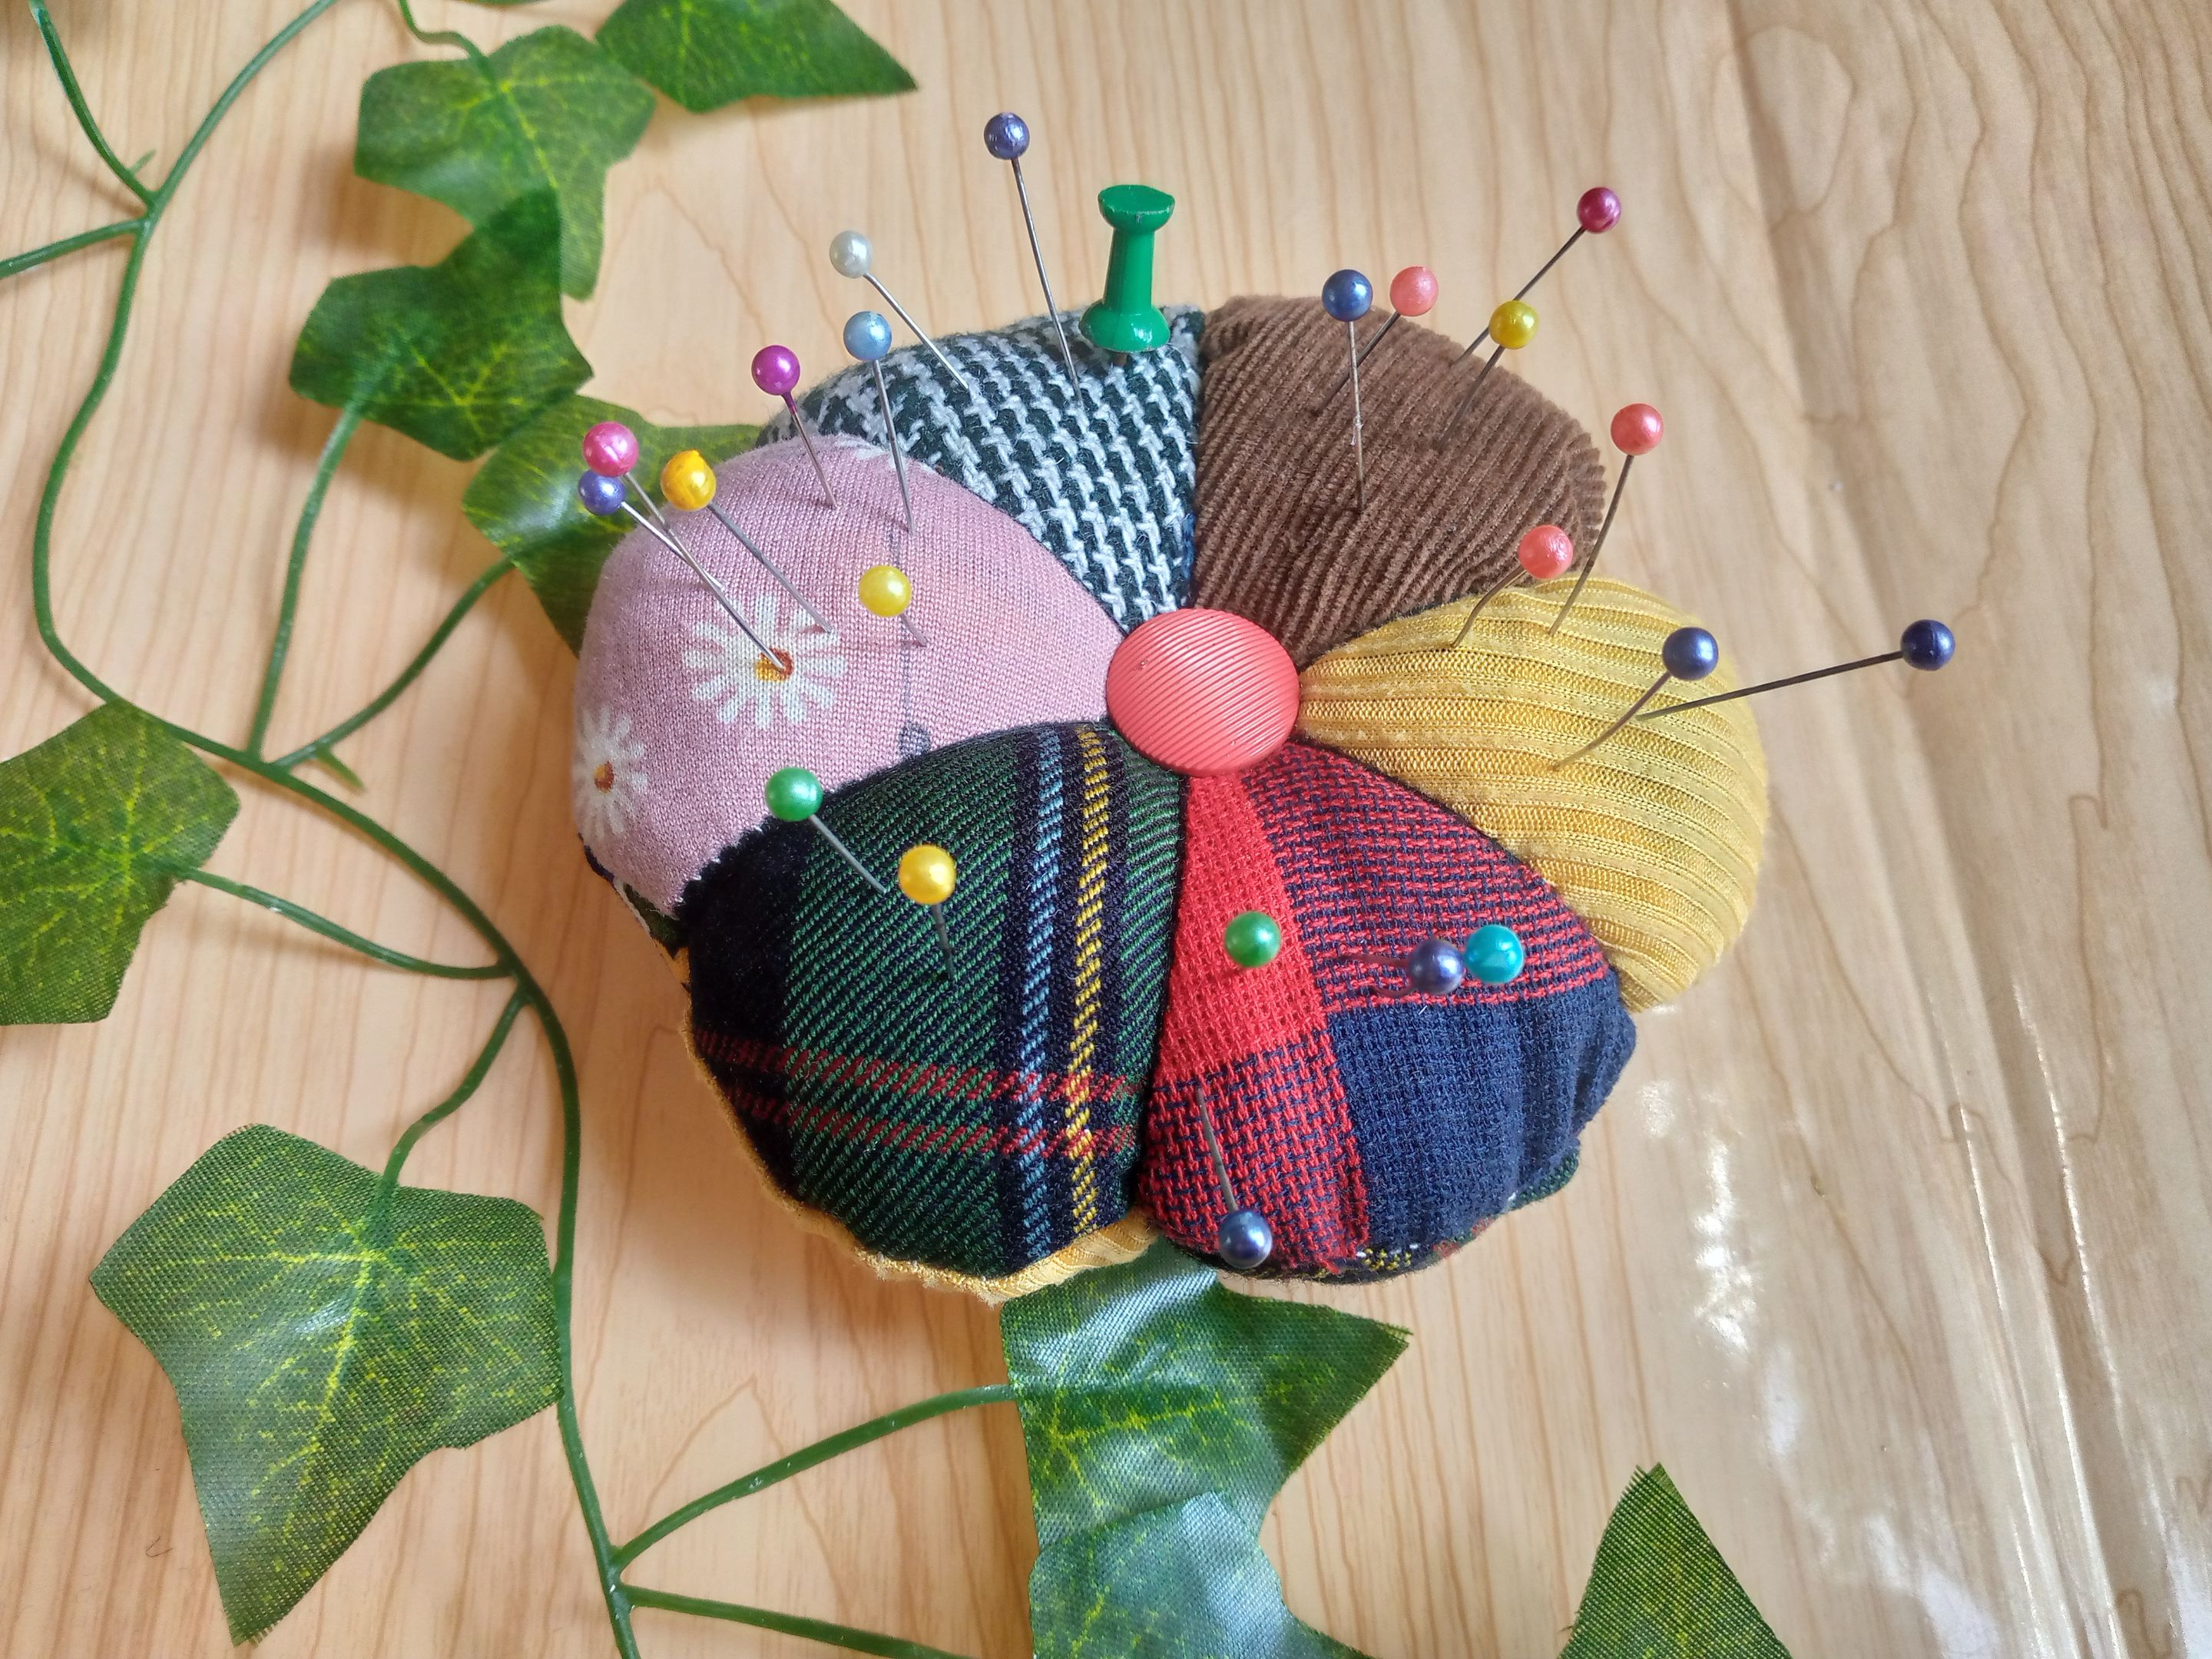
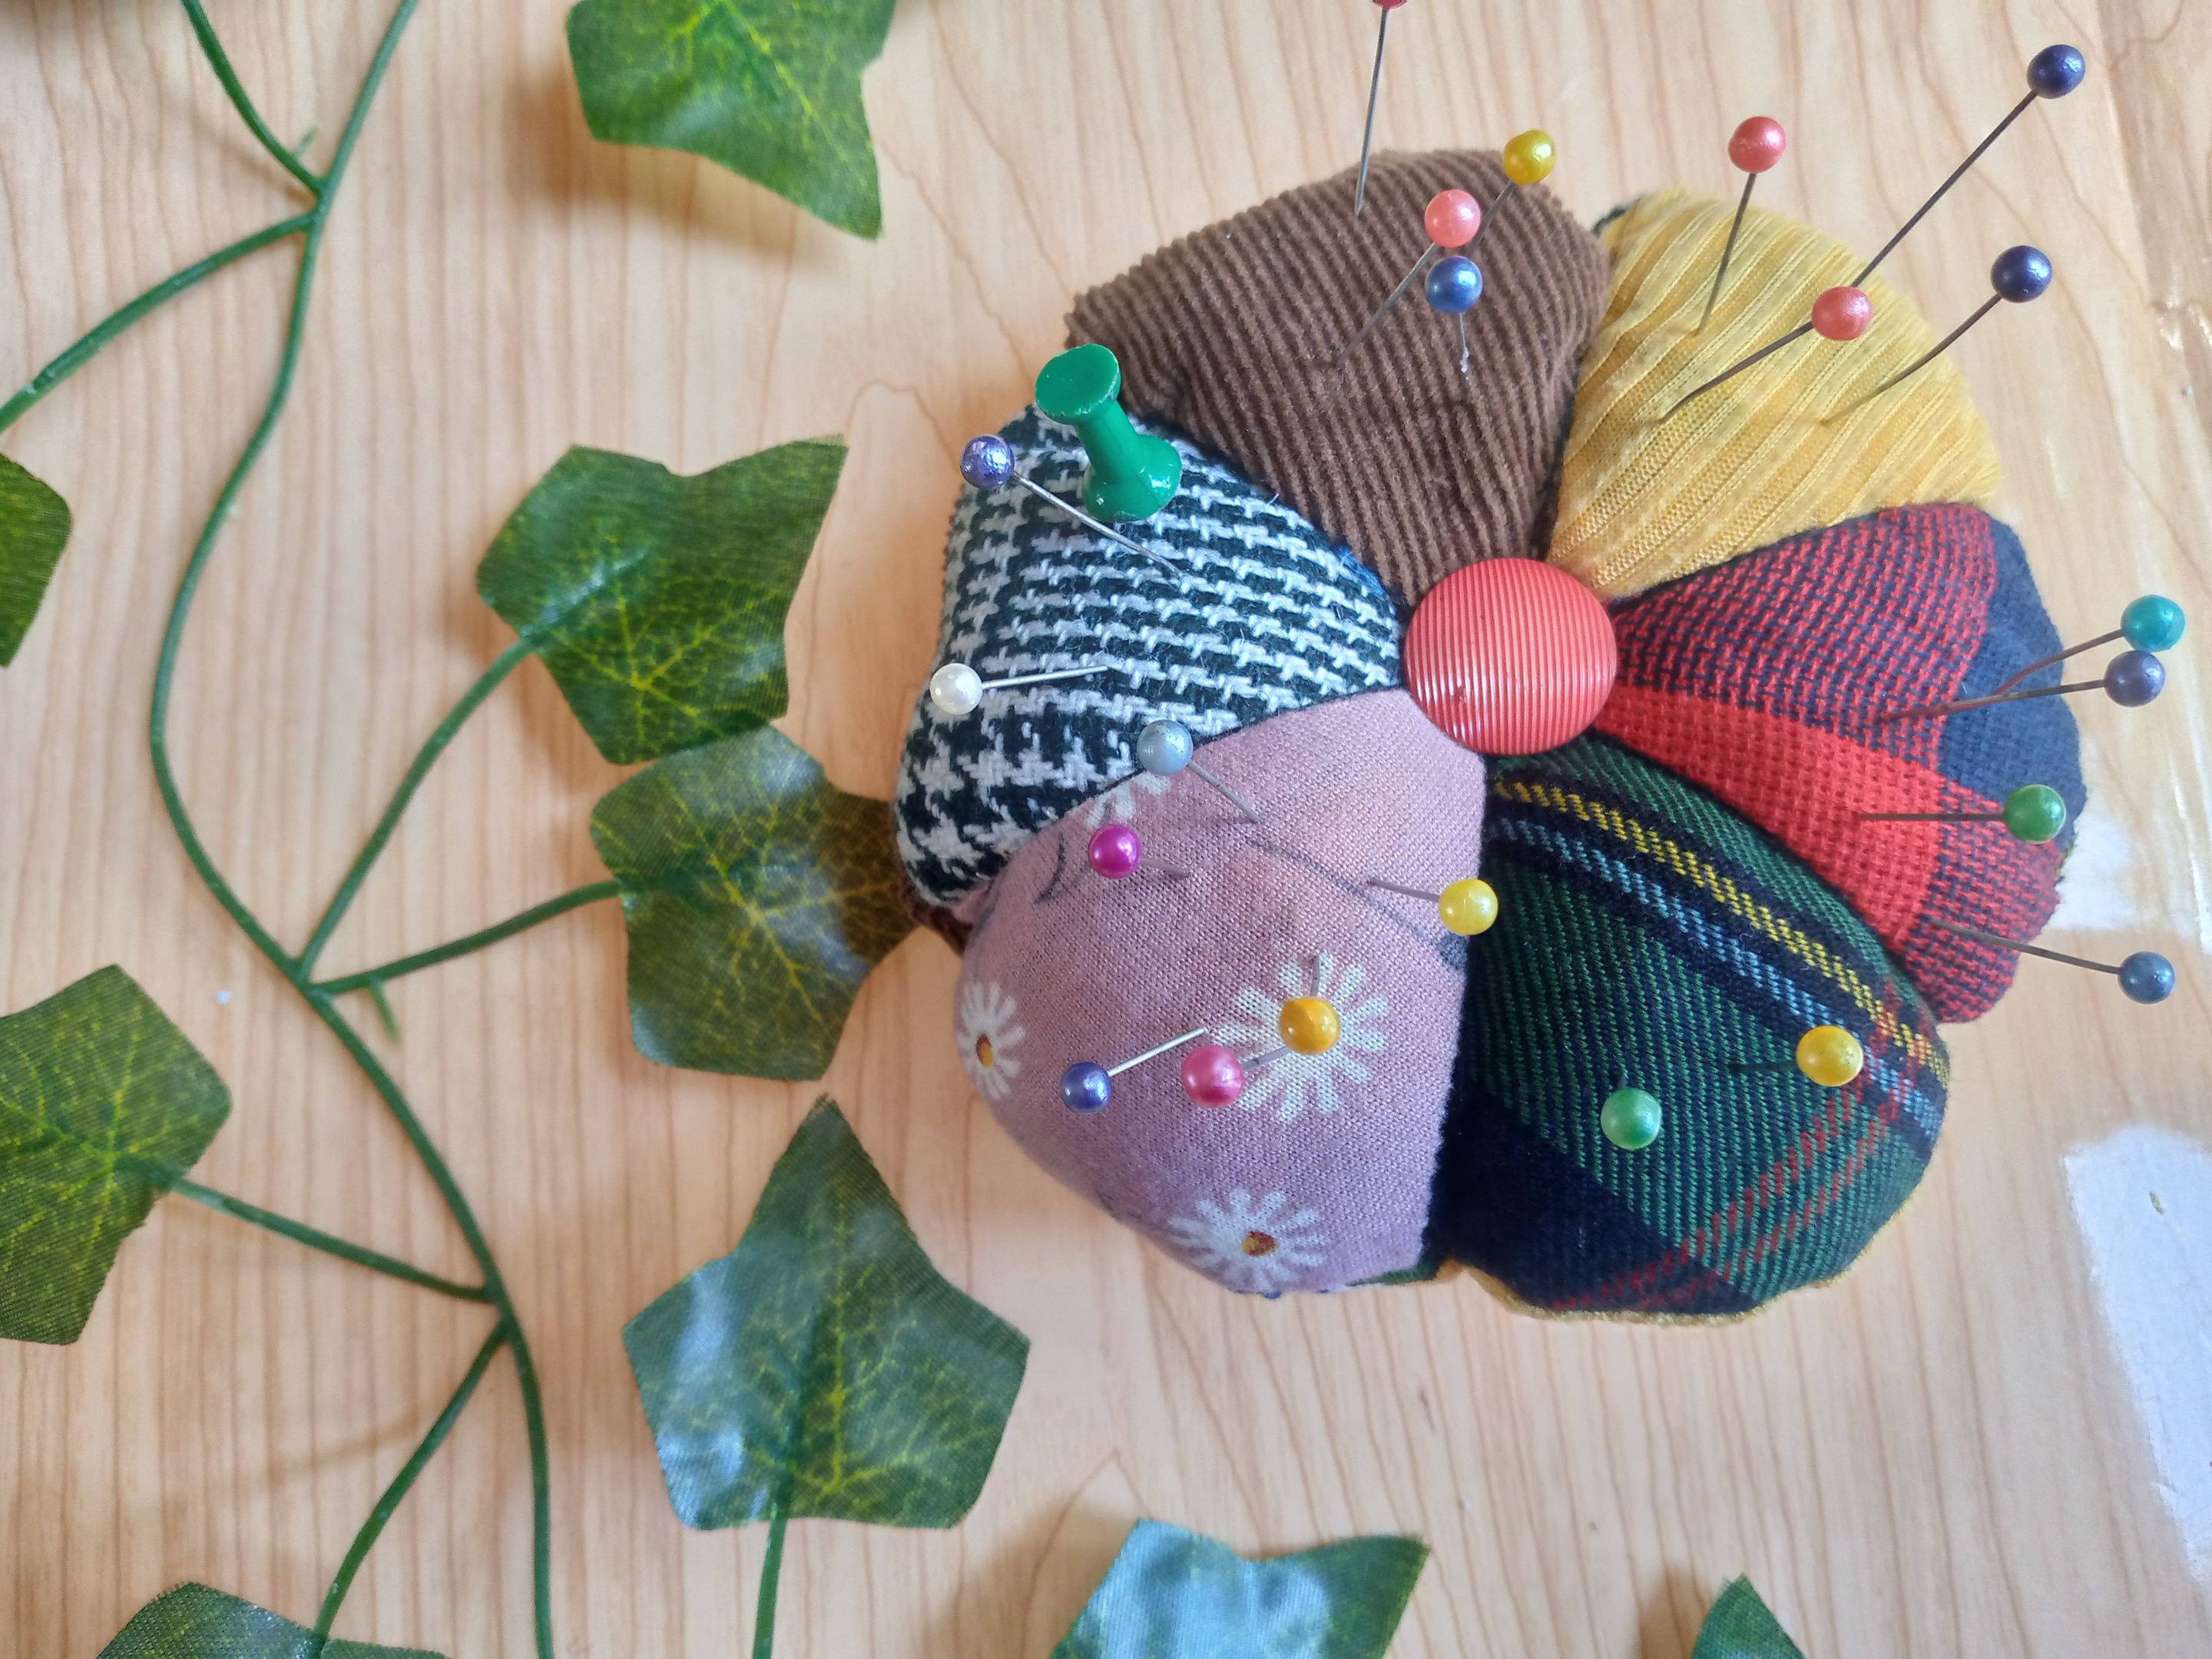
    Then we sew the outline of our pieces by joining both circular pieces and we will leave an opening where we will insert the filling, then we will grab our thread and needle and in that part where we insert the filling, that little hole we will seal with invisible stitching so that our seam cannot be seen, with the same thread and needle we will make the shape of our flower on the pincushion by the parts where each triangle joins.


    IMG_20250310_114500_381.jpg

    IMG_20250310_114519_441.jpg

    IMG_20250310_114703_261.jpg

    Paso 04

    Por último con mi aguja gruesa decidí meter cinco hebras de hilo y pues coser el botón ,ajustamos las hebras del hilo al botón para que este no se nos vaya a soltar lo cosemos justo en el centro así nos queda nuestra flor en forma de alfiletero ya terminada.

    Step 04

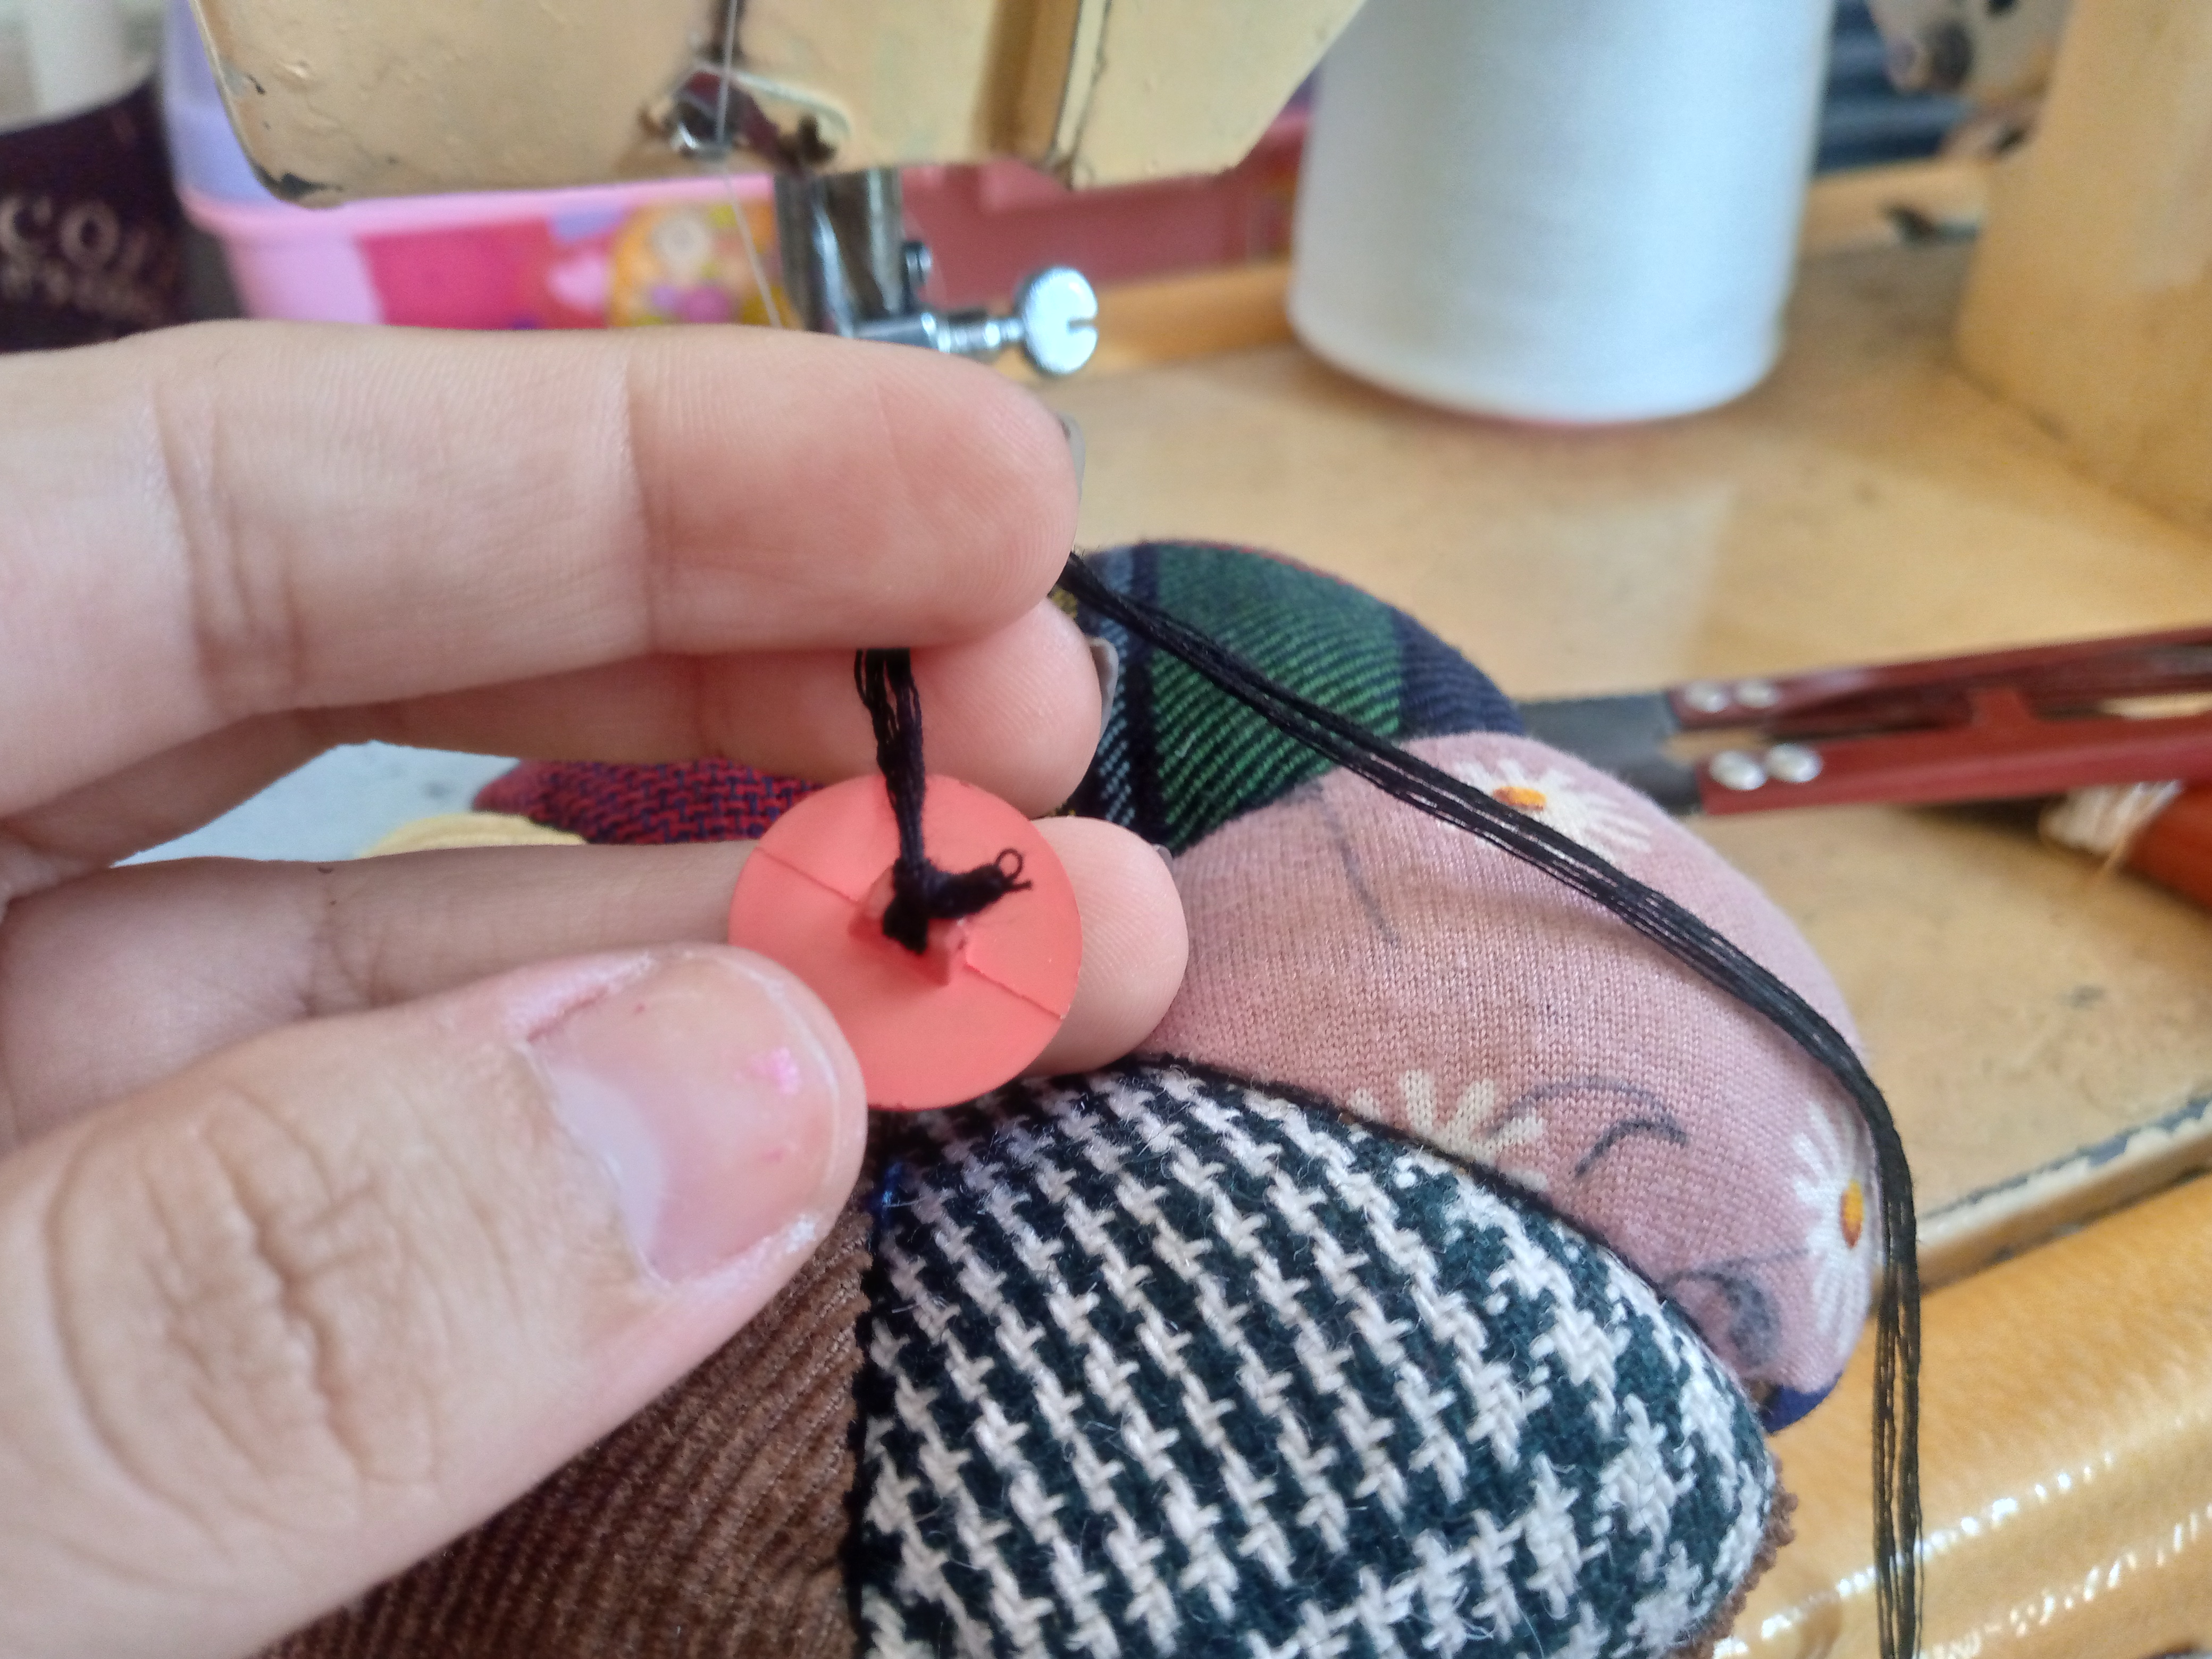
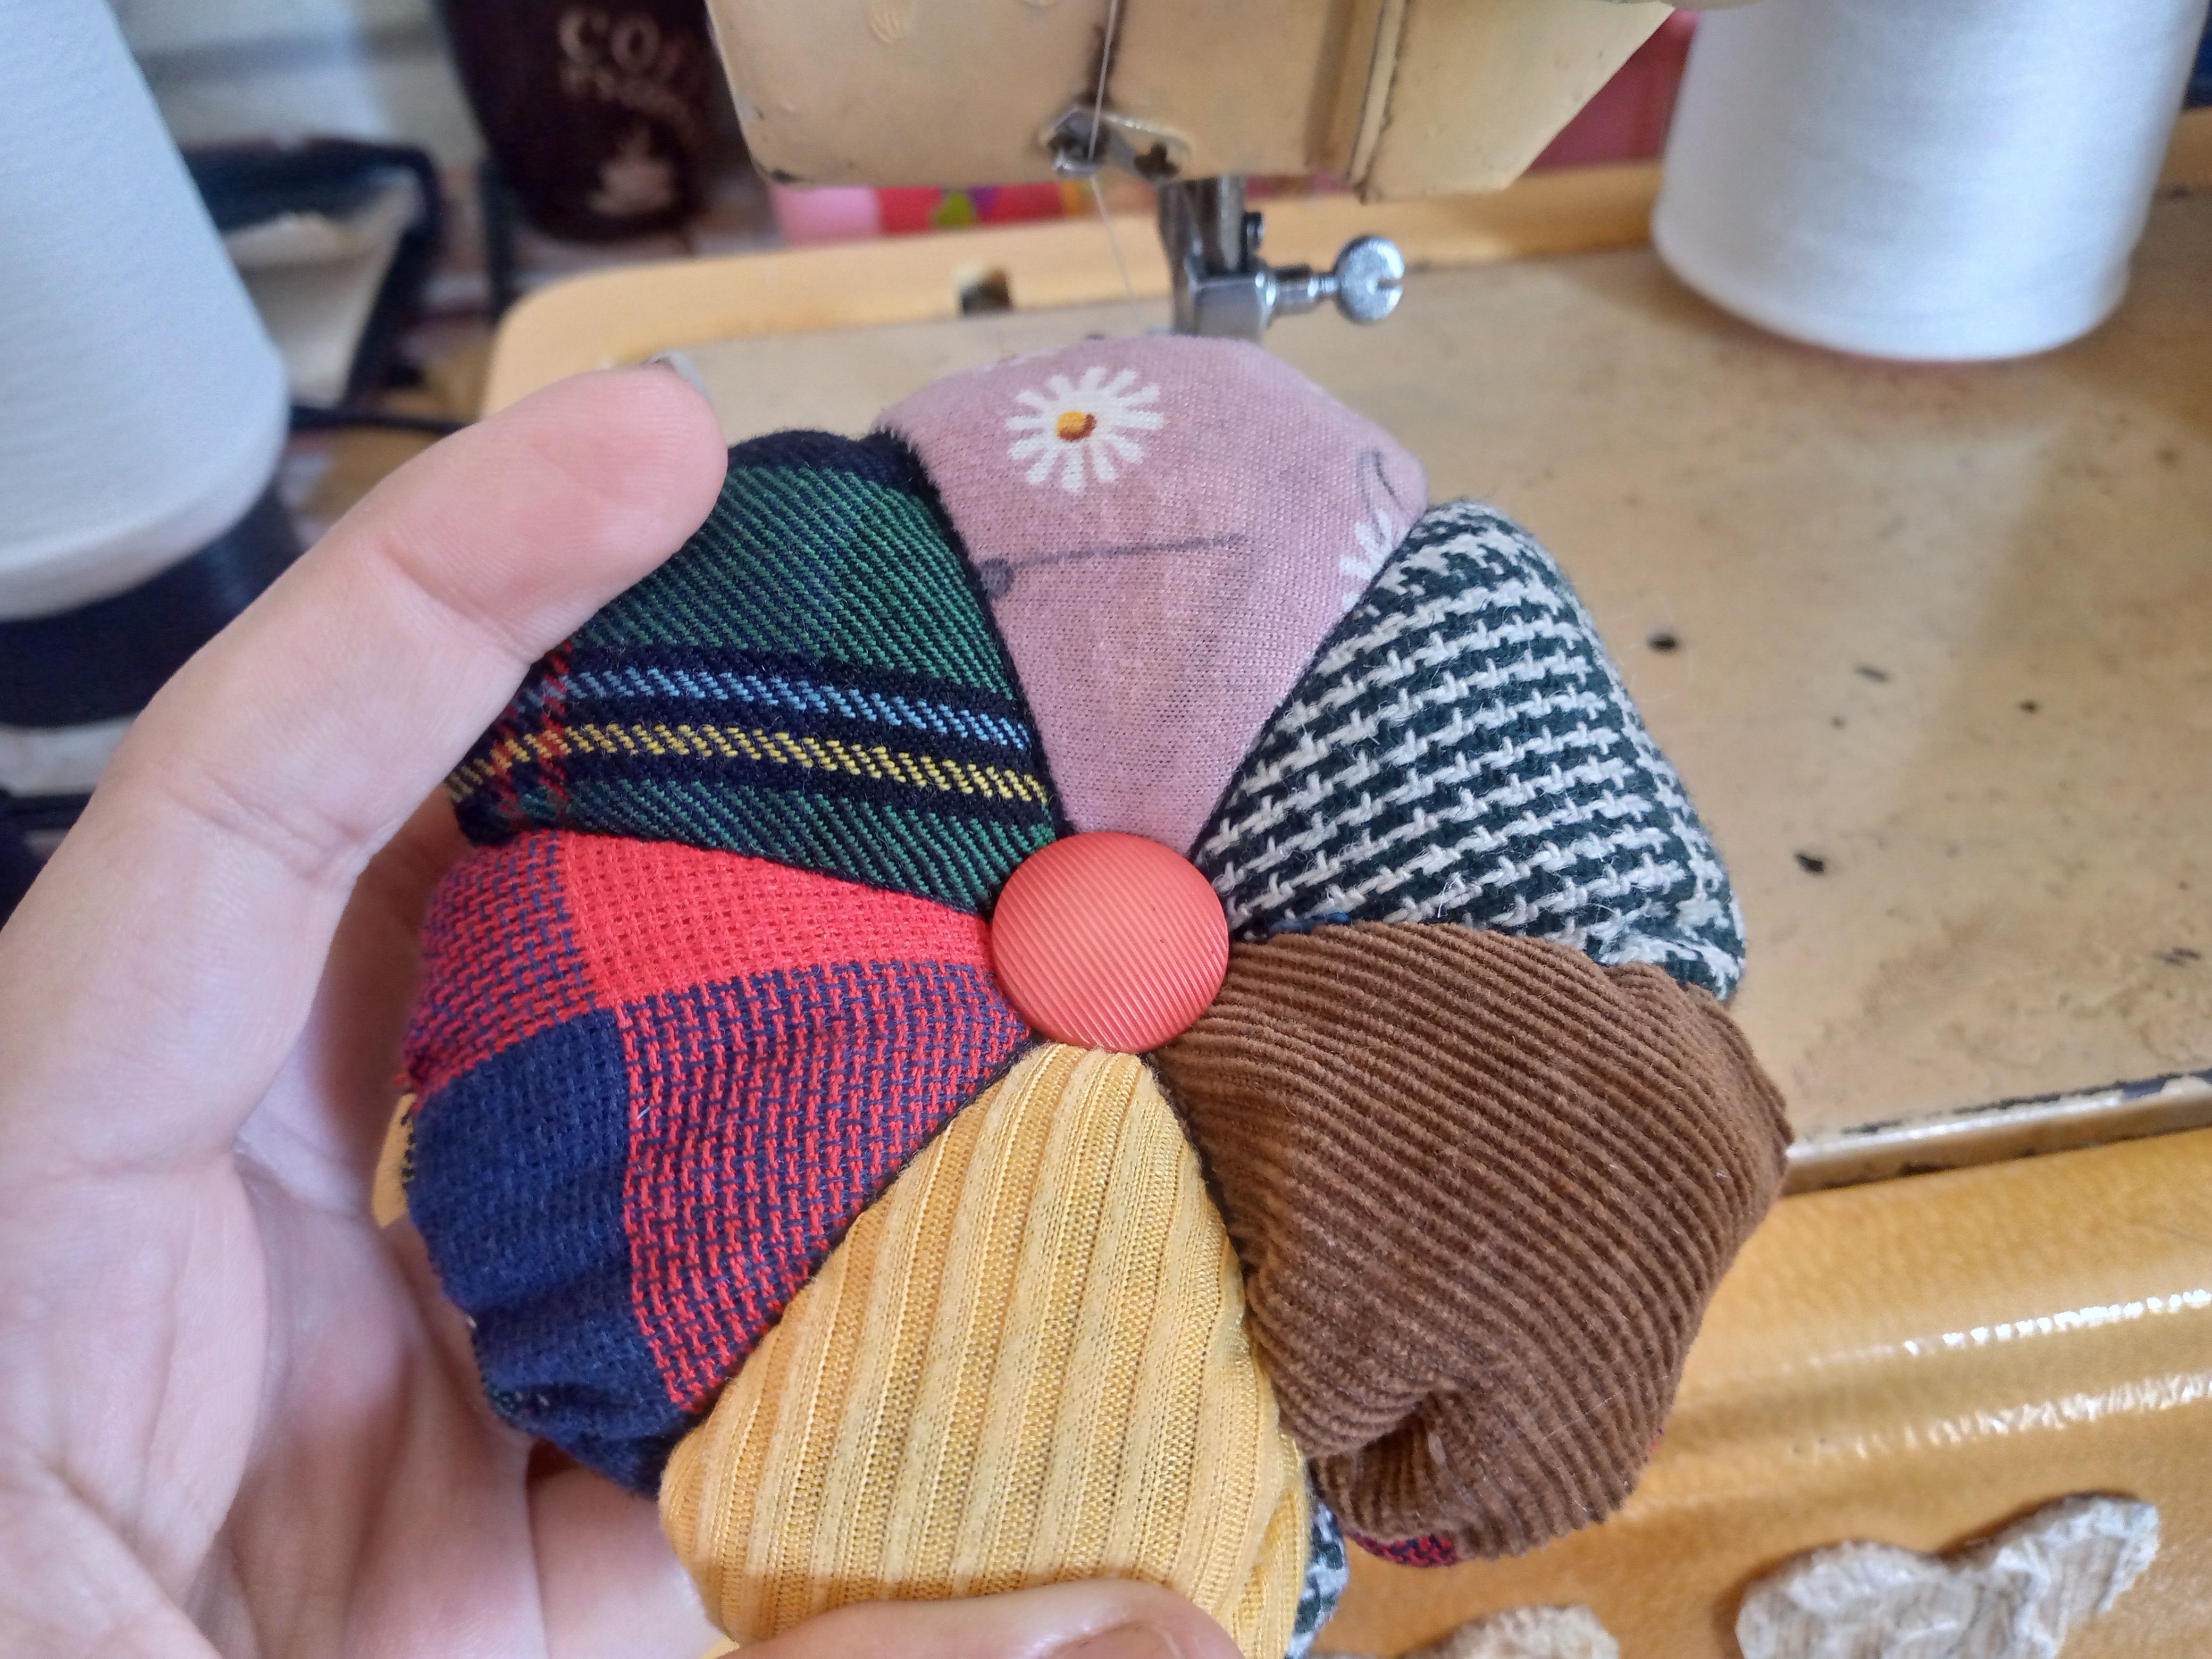
    Finally, with my thick needle I decided to insert five strands of thread and sew the button. We adjust the strands of thread to the button so that it does not come loose. We sew it right in the center, so our flower is in the shape of a pincushion, now finished.


    Picsart_24-12-20_21-51-36-631 (1).jpg

    Resultado:// Result:

    A mi me encantó muchísimo este alfiletero creo se convertirá en unos de mis favoritos estos meses usandolo 🥰es muy cómodo y práctico a la hora de sentarme a coser en mi rinconcito preferido ,el de las costuras.Si te ha gustado no olvides comentarme que tal te pareció y si ya has hecho un alfiletero como este , también podrías dejarme aquí tus fotos en los comentarios estaré muy contenta de ver tus alfileteros hechos por ti 😍.

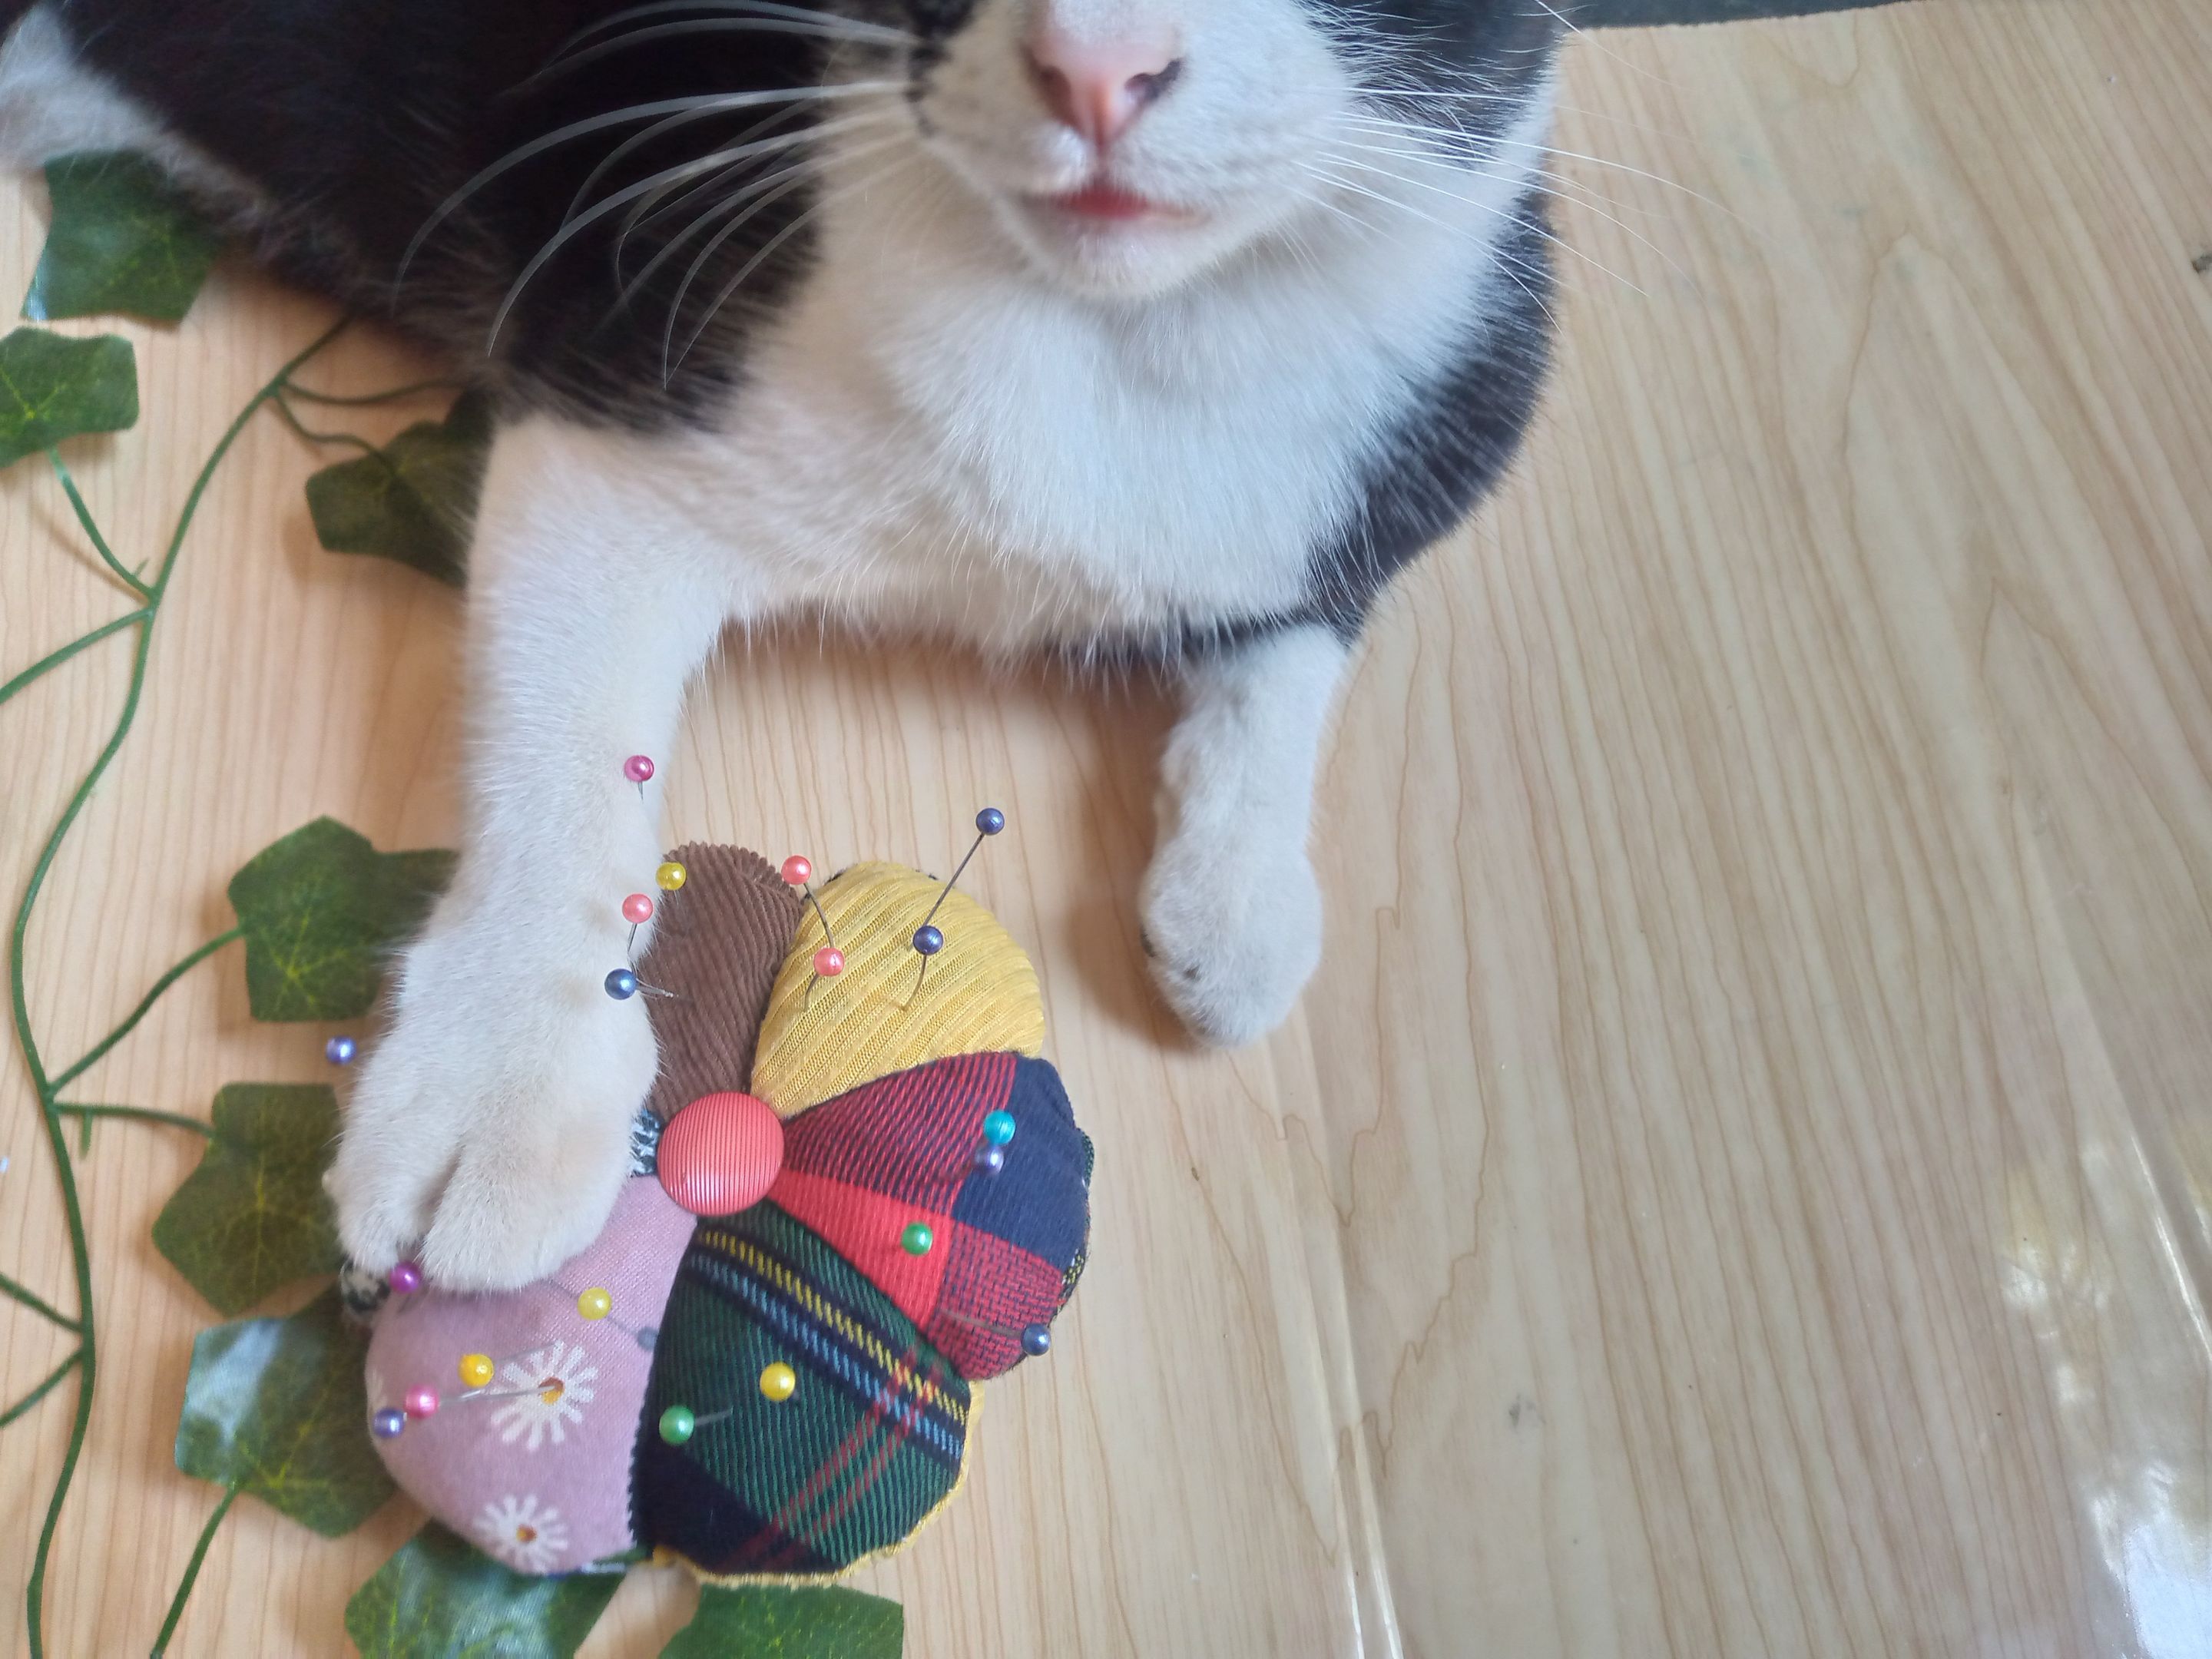
    I really loved this pincushion and I think it will become one of my favorites over the next few months. It's very comfortable and practical when I sit down to sew in my favorite corner, the seams one. If you liked it, don't forget to tell me what you thought and if you've already made a pincushion like this, you could also leave me your photos in the comments. I'll be very happy to see your pincushions made by you 😍.

    Espero pasen un lindo martes y me despido de ustedes ,les mando un abrazo virtual amigos ,hasta pronto 🫂💖.

    I hope you have a nice Tuesday and I say goodbye to you, I send you a virtual hug friends, see you soon 🫂💖.

    IMG_20250310_114859_882.jpg

    IMG_20250310_115130_433.jpg

    IMG_20250310_114856_837.jpg

    IMG_20250310_114950_751.jpg

    Picsart_24-12-20_21-51-36-631 (1).jpg

    Creando las cosas con amor 🌷❤️

    🦋✨Todas las imágenes de esta publicación son de mi autoria ,📱tomadas con mi celular TecnoSpark8C |📸Fotos editadas en PicsArt y Canva. Texto traducido en el traductor de Google.

    Creating things with love 🌷❤️

    🦋✨ All the images in this publication are my author ,📱taken with my TecnoSpark8C cell phone |📸Photos edited in PicsArt and Canva. Text translated in Google Translate.


    Video de Youtube Outro Final Agradecimiento Bonita Acuarela Rosa_20250310_082357_0000.png


      Authors get paid when people like you upvote their post.
      If you enjoyed what you read here, create your account today and start earning FREE VOILK!