 |
|---|
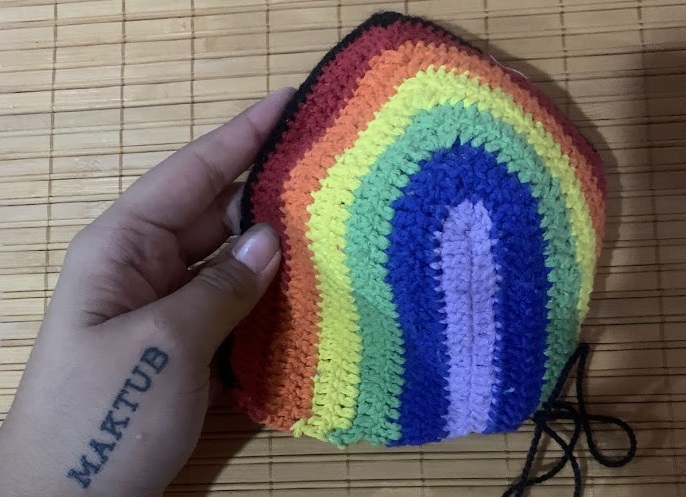
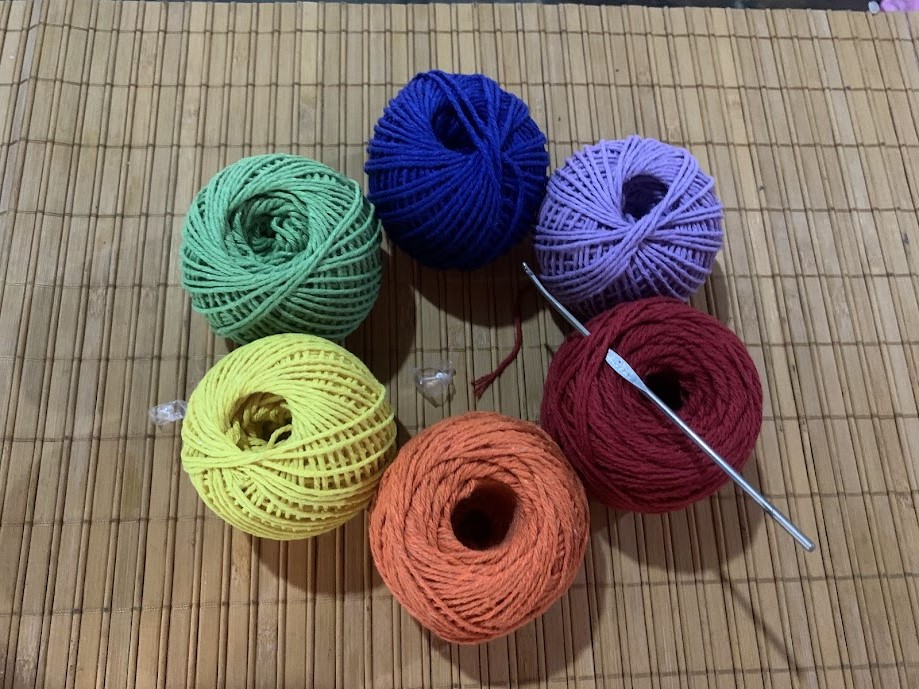
Hace algunas semanas compré varios hilos pabilo, uno por cada color del arco iris: uno rojo, uno anaranjado, uno amarillo, uno verde, uno azul, uno lila y uno negro; y decidí hacer algo con ellos así que empecé por idear lo que quería y luego puse manos a la obra para hacerlo.
Puedo decir que me costó un poco pensar en como quería que quedara mi proyecto ya que en sí mi idea era hacer un top tipo brasier a crochet con los colores del arco iris pero no sabía como llevarlo a cabo. Luego de mucho pensar empecé por simplemente confiar en lo que iba haciendo y en mi poca experiencia con el tejido para hacer así lo que considero más importante de la pieza: las copas.
No hice más que ambas copas, ya que aún no tengo completamente pensado como va a ser el resto del top, por lo que hoy solo les mostraré como hice estas:
A few weeks ago I bought some wick yarns, one for each color of the rainbow: one red, one orange, one yellow, one green, one blue, one purple and one black; and I decided to make something with them so I started by thinking about what I wanted and then I got down to work to make it.
I can say that it took me a while to think about how I wanted my project to look like because my idea was to make a crochet bra type top with the colors of the rainbow but I didn't know how to carry it out. After a lot of thinking I started by simply trusting in what I was doing and in my little experience with knitting to make what I consider the most important part of the piece: the Bra cups.
I didn't make more than both bra cups, since I haven't completely thought about how the rest of the top is going to be, so today I'll only show you how I made these:
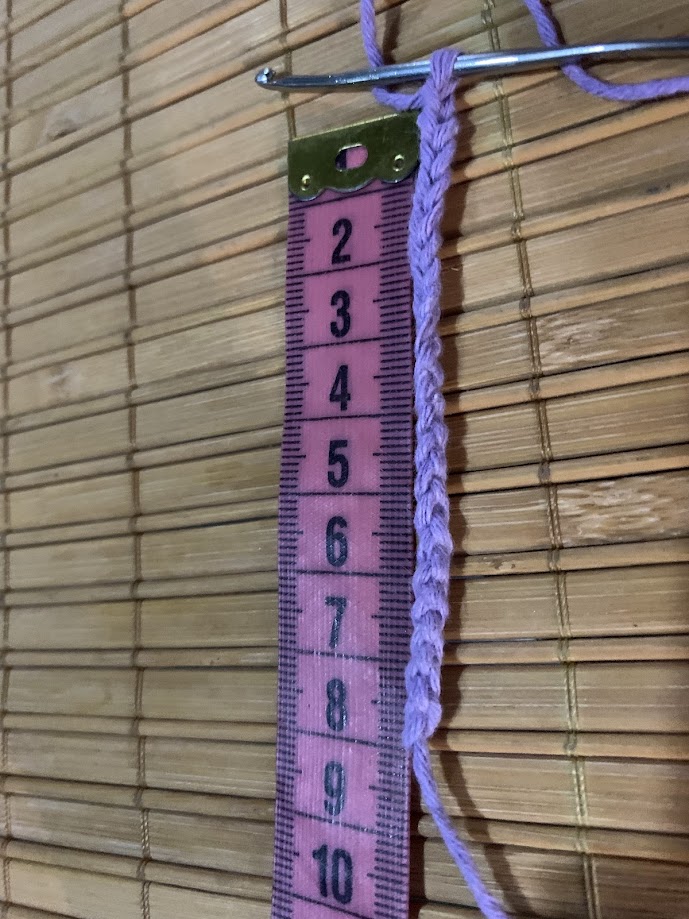
Empecé por medir, con ayuda de una cinta métrica, la distancia entre el pezón y el final inferior del busto. Esta distancia me dió una medida de 8cm así que esa fué la que utilicé para empezar el centro de la copa.
 |  |
|---|
Utilicé el hilo de color lila para hacer las cadenas suficientes para igualar la medida que había tomado anteriormente. Como es un hilo grueso solamente hice 20 cadenas para llegar a los 8cm, luego de estas agregué otras dos cadenas más para devolverme con puntos altos (a partir de la antepenúltima cadena) uno por cada cadena que había hecho anteriormente.
I started by measuring, with the help of a tape measure, the distance between the nipple and the lower end of the bust. This distance gave me a measurement of 8cm so that was the one I used to start the center of the cup.
I used the lilac colored thread to make enough chains to match the measurement I had taken earlier. As it is a thick yarn I only made 20 chains to reach the 8cm, after these I added two more chains to give me back with high stitches (starting from the antepenultimate chain) one for each chain I had made previously.
 |  |
|---|
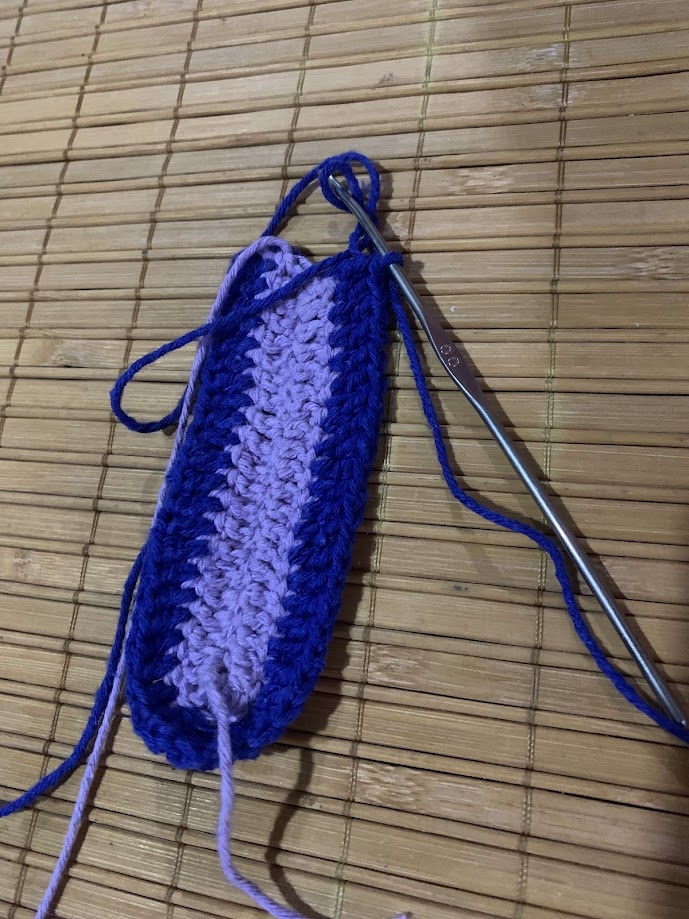
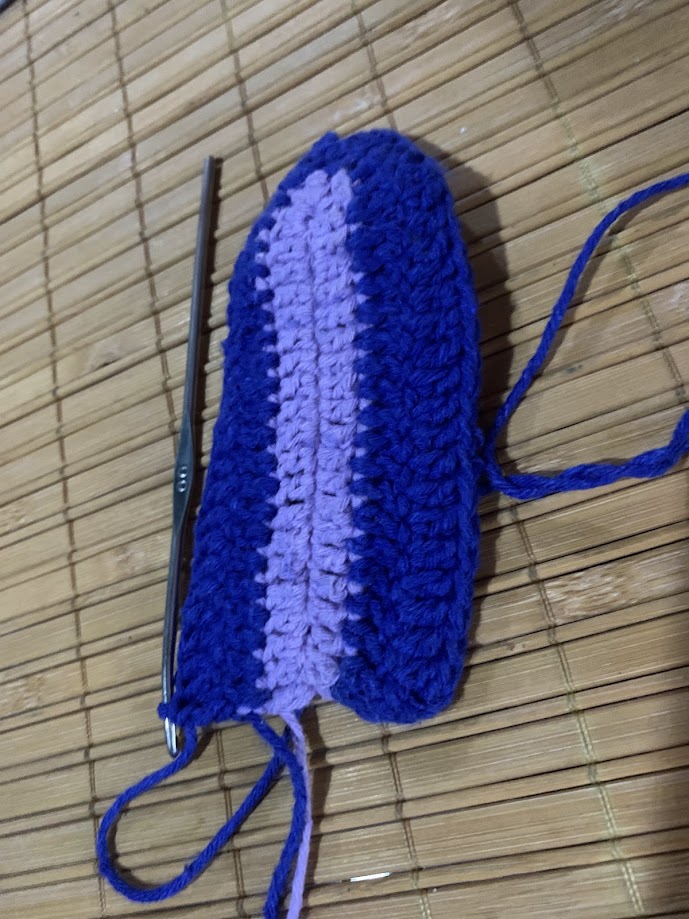
Luego de hacer 20 puntos altos hice otros 5, todos en un mismo punto, para pasar al otro lado del tejido. Una vez le di la vuelta al tejido, haciendo una especie de arco, hice otros 20 puntos altos. Al finalizar esa vuelta corté el hilo lila y agregué el azul para así cambiar el color del tejido. Con este hilo azul subí dos cadenas para empezar otra vuelta donde hice 22 puntos altos, 3 puntos altos en uno mismo y luego otros 22.
After making 20 high stitches I made another 5, all in one stitch, to move to the other side of the fabric. Once I went around the fabric, making a kind of bow, I made another 20 high stitches. At the end of this round I cut the purple yarn and added the blue yarn to change the color of the fabric. With this blue yarn I went up two chains to start another round where I made 22 high stitches, 3 high stitches in one stitch and then another 22.
 |
|---|
Aquí hice 2 puntos altos para subir a la siguiente vuelta donde hice 24 puntos altos, dos más que en la anterior, seguidos de tres puntos altos en un mismo punto y, dada la vuelta al tejido, otros 24 puntos. Luego de estas dos vueltas, teniendo 2 de cada lado del mismo color, cambié al hilo verde.
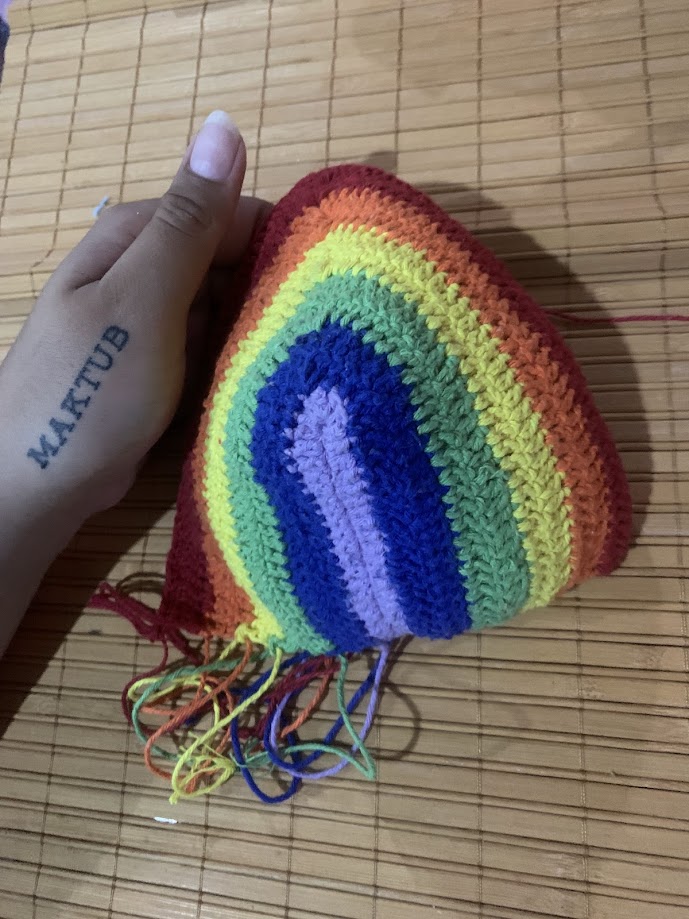
Con este hice una vuelta de 26 puntos altos, seguidos de 3 puntos en uno mismo y otros 26 puntos para luego subir dos cadenas y hacer otra vuelta de 28 puntos seguidos de 3 puntos en uno mismo y otros 28 puntos. Una vez tenía, igual que con la azul, dos vueltas a cada lado del tejido volví a cambiar el color, esta vez por el color amarillo y así sucesivamente con el amarillo, el anaranjado y el rojo.
Here I made 2 high stitches to go up to the next round where I made 24 high stitches, two more than in the previous one, followed by three high stitches in the same stitch and, turned around the knitting, another 24 stitches. After these two rounds, having 2 on each side of the same color, I switched to green yarn.
With this I made a round of 26 double crochet stitches, followed by 3 single crochet stitches and another 26 stitches and then went up two chains and made another round of 28 stitches followed by 3 single crochets and another 28 stitches. Once I had, as with the blue, two rows on each side of the fabric I changed the color again, this time to yellow and so on with yellow, orange and red.
 |  |
|---|
La última vuelta, es decir la segunda vuelta de color rojo, la terminé con 40 puntos altos seguidos de los 3 puntos en uno mismo y otros 40 puntos altos.
Para finalizarla, con un hilo de color negro, hice 42 puntos altos seguidos de los 3 puntos en uno mismo y los otros 42 puntos altos.
The last row, that is, the second row in red, I finished it with 40 double crochet stitches followed by 3 single crochets and another 40 double crochet stitches.
To finish it, with a black yarn, I made 42 double crochet stitches followed by 3 single crochets and another 42 double crochet stitches
Todas las fotografías de esta publicación son de mi propiedad
All photographs in this publication are my property.
