In today's digital age, safeguarding your data against unexpected disasters is crucial. For users of Synology Network Attached Storage (NAS) systems, backing up your valuable data to the cloud offers an added layer of security and accessibility. This guide will walk you through the essential steps to ensure your Synology NAS data is safely backed up to a cloud service, providing peace of mind and data resilience.
1. Choose Your Cloud Service
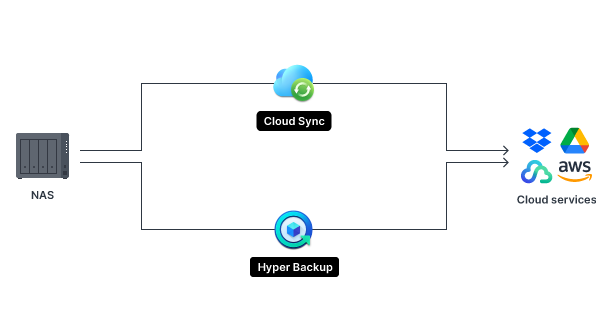
The first step in backing up your Synology NAS to the cloud is selecting a cloud service provider. Synology's Cloud Sync and Hyper Backup applications support a wide range of cloud services, including Google Drive, Dropbox, Amazon Drive, and Microsoft Azure. Consider factors like storage costs, data security, and ease of access when choosing a provider.
2. Install and Configure Cloud Sync or Hyper Backup
Depending on your needs, you can choose between Cloud Sync, which synchronizes files between your NAS and the cloud, and Hyper Backup, which provides comprehensive backup solutions.
Cloud Sync Setup: Access the Synology DiskStation Manager (DSM), navigate to the Package Center, and install Cloud Sync. Open Cloud Sync and connect to your chosen cloud service by entering your account details and granting the necessary permissions.
Hyper Backup Setup: For a more traditional backup solution, install Hyper Backup from the Package Center. Launch Hyper Backup and create a new data backup task. Select your cloud service as the backup destination and configure your backup settings, including schedule, file versions, and encryption for data security.
3. Select Data for Backup
Carefully choose which folders and files you want to back up. It's crucial to back up essential data, but consider storage limitations and costs. Both Cloud Sync and Hyper Backup allow you to select specific folders, ensuring that only necessary data is transferred to the cloud.
4. Schedule Regular Backups
Regular backups are vital for data security. With Hyper Backup, you can schedule backups daily, weekly, or at any custom interval, ensuring your data is always up to date. Cloud Sync operates in real-time but also offers scheduling options for specific sync tasks.
5. Monitor and Test Your Backups
Regular monitoring and testing of your backups are essential to ensure data integrity. Check the backup logs within Hyper Backup or Cloud Sync for any errors or issues. Additionally, perform periodic test restores of backup files to verify that your data can be recovered successfully.
6. Maintain Security
Always keep your Synology NAS and cloud services secure. Use strong, unique passwords, enable two-factor authentication, and ensure your NAS software is up to date with the latest security patches.
7. Explore Advanced Options
For users with advanced needs, explore options like multi-version backup, which keeps multiple versions of your files, and block-level backup, which only uploads changed parts of files, saving bandwidth and storage space.
By following these steps, you can effectively back up your Synology NAS data to the cloud, ensuring it remains safe, secure, and accessible from anywhere. Remember, the key to data security is regular maintenance and vigilance, so make sure to keep an eye on your backup tasks and update your settings as needed.