(ENG)
Hello everyone, I am very pleased to be once again with all of you at @jewelry, on this occasion, to join the Initiative: Pink Month, this by the way, to celebrate Mom's Cancer Month. For this I have designed a cute and delicate youth headband, ideal to wear at any time and occasion, where I use the jewelry technique. Before giving it, step by step. I want to motivate you to be very aware of your breasts and love me above all things, touch yourself frequently and if you see any anomaly in them, seek help. Having self-love will give you the strength to face your life.
Now I do want to invite my friends @lorennys, @gloriana071 and @linita. Also grateful for the invitation of my always remembered friend @nhaydu.
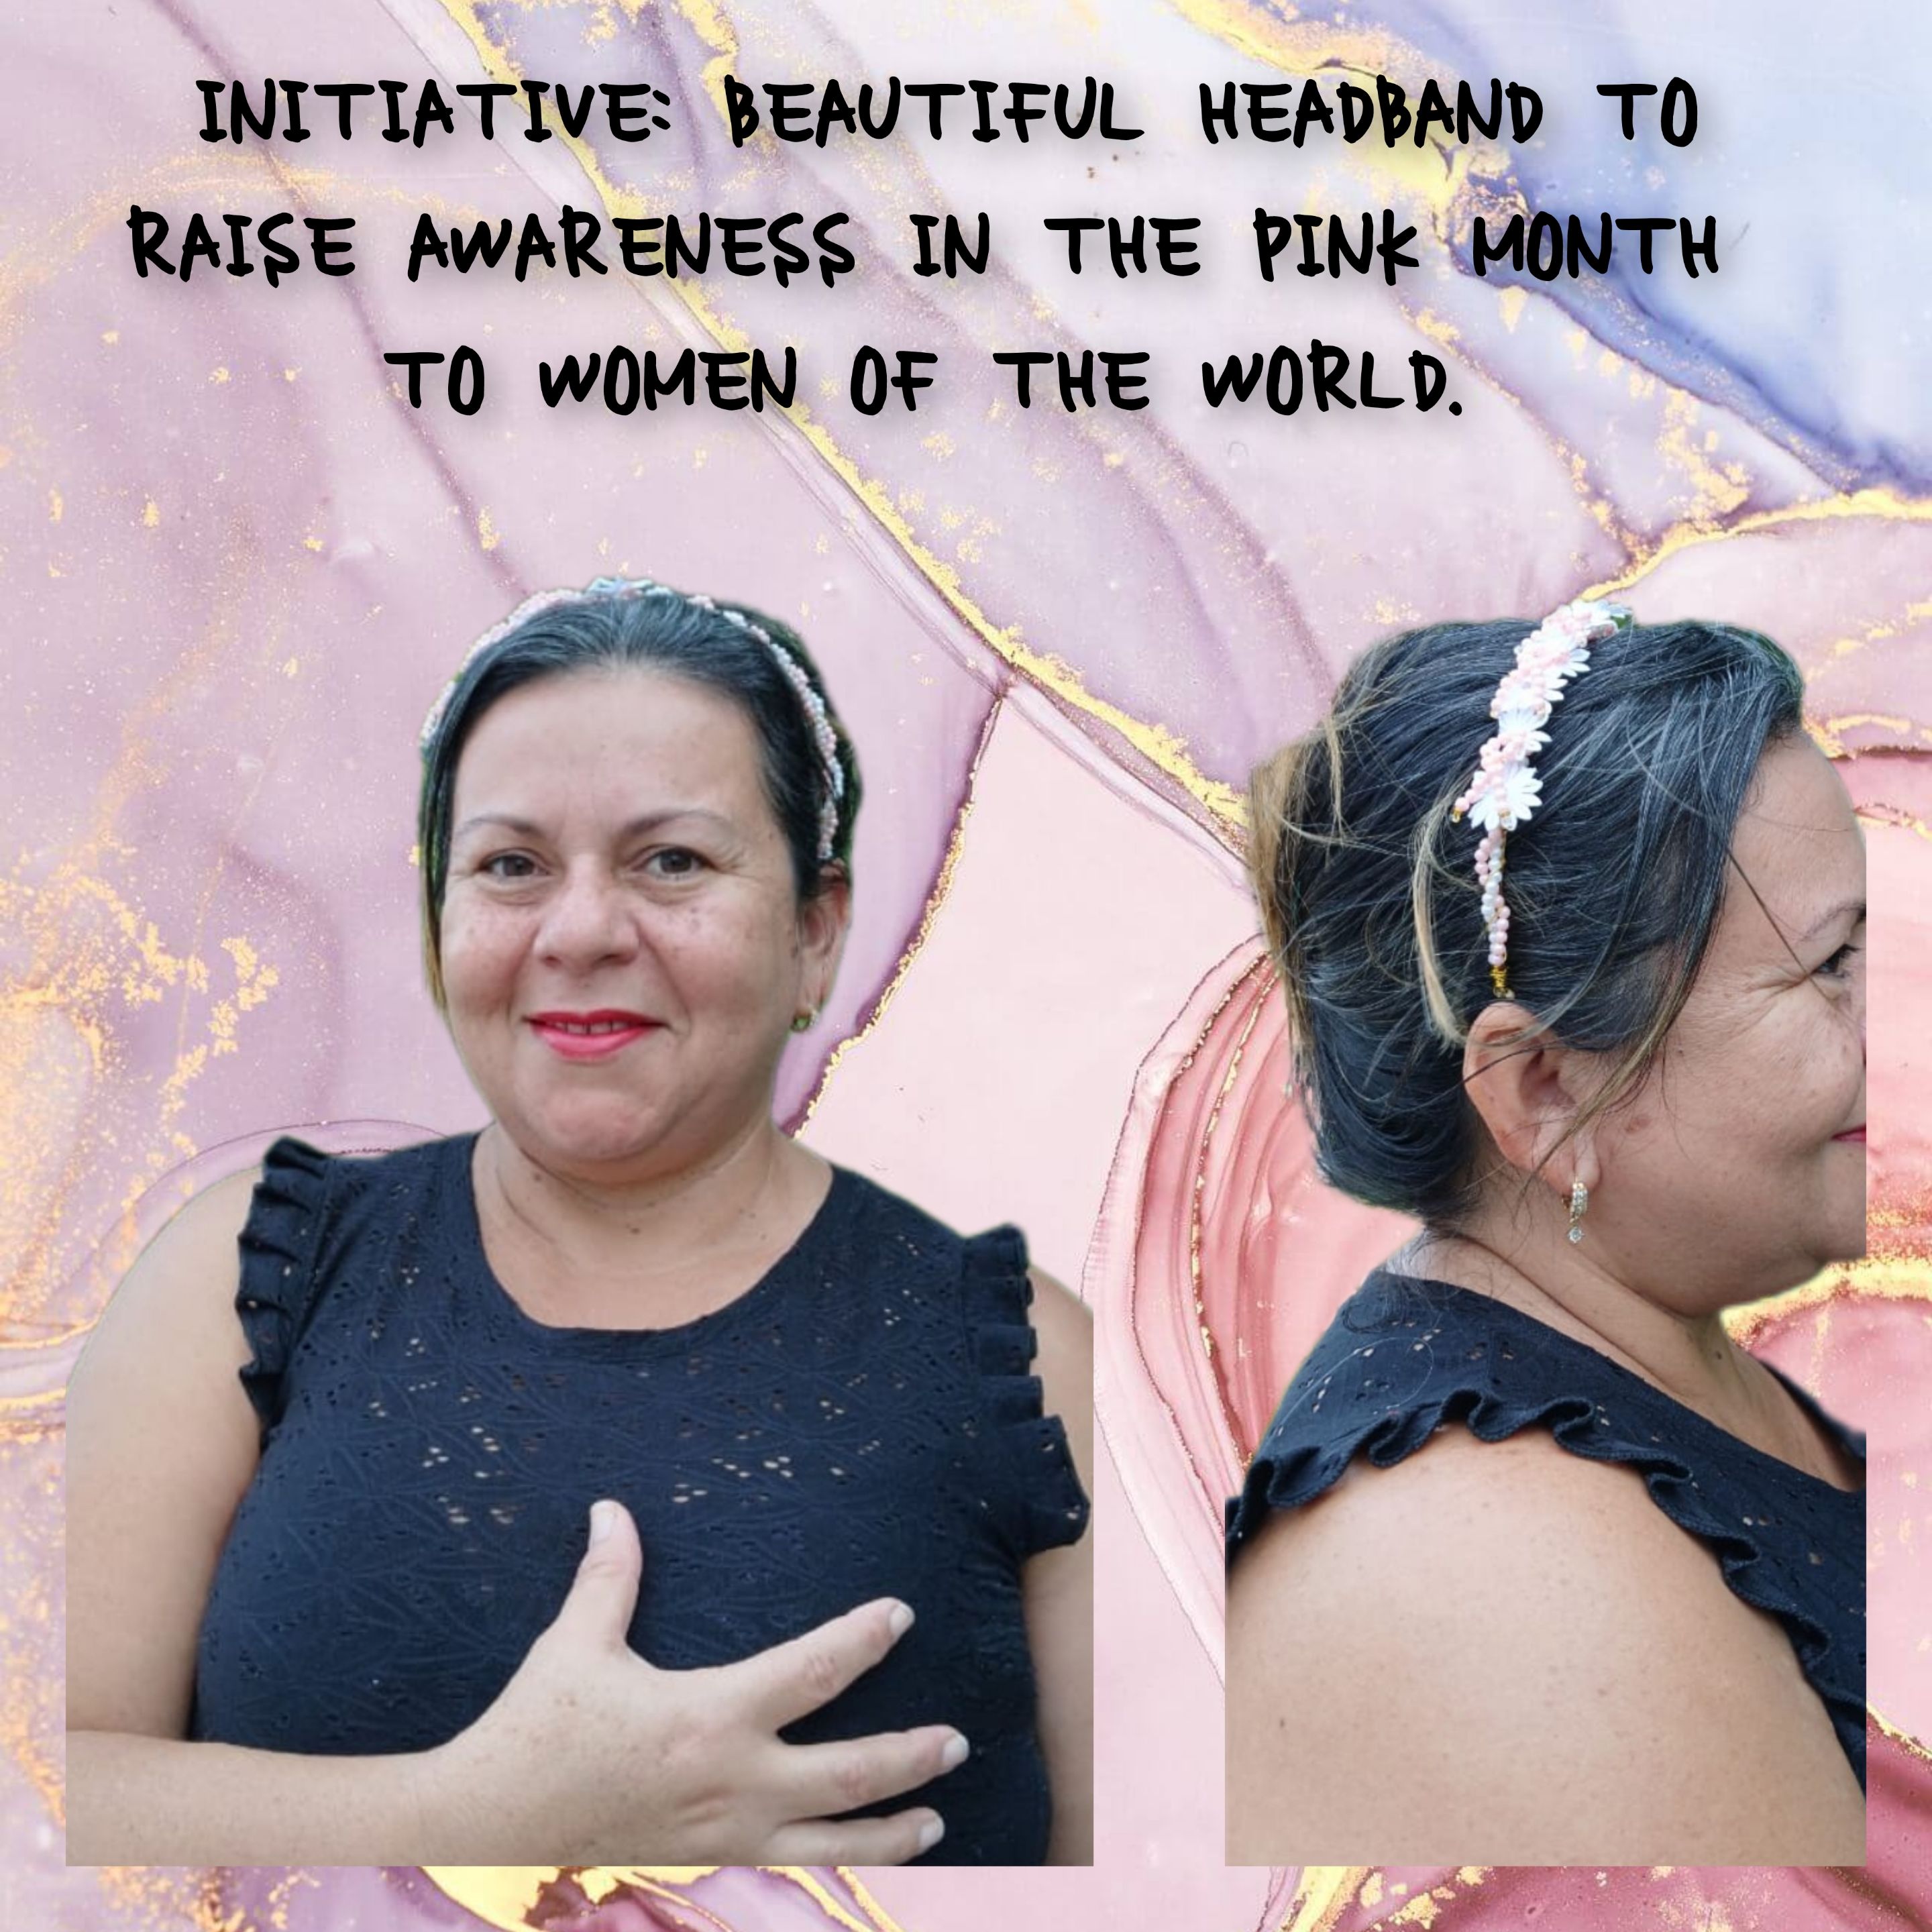
Materials used:
. Pink and white peels.
. Golden metal headband.
. Golden pearls.
. Transparent comb.
. Wire.
. Applications of white flowers.
. Liquid silicone.
. Jewelry tweezers.
. Scissors.
Steps:
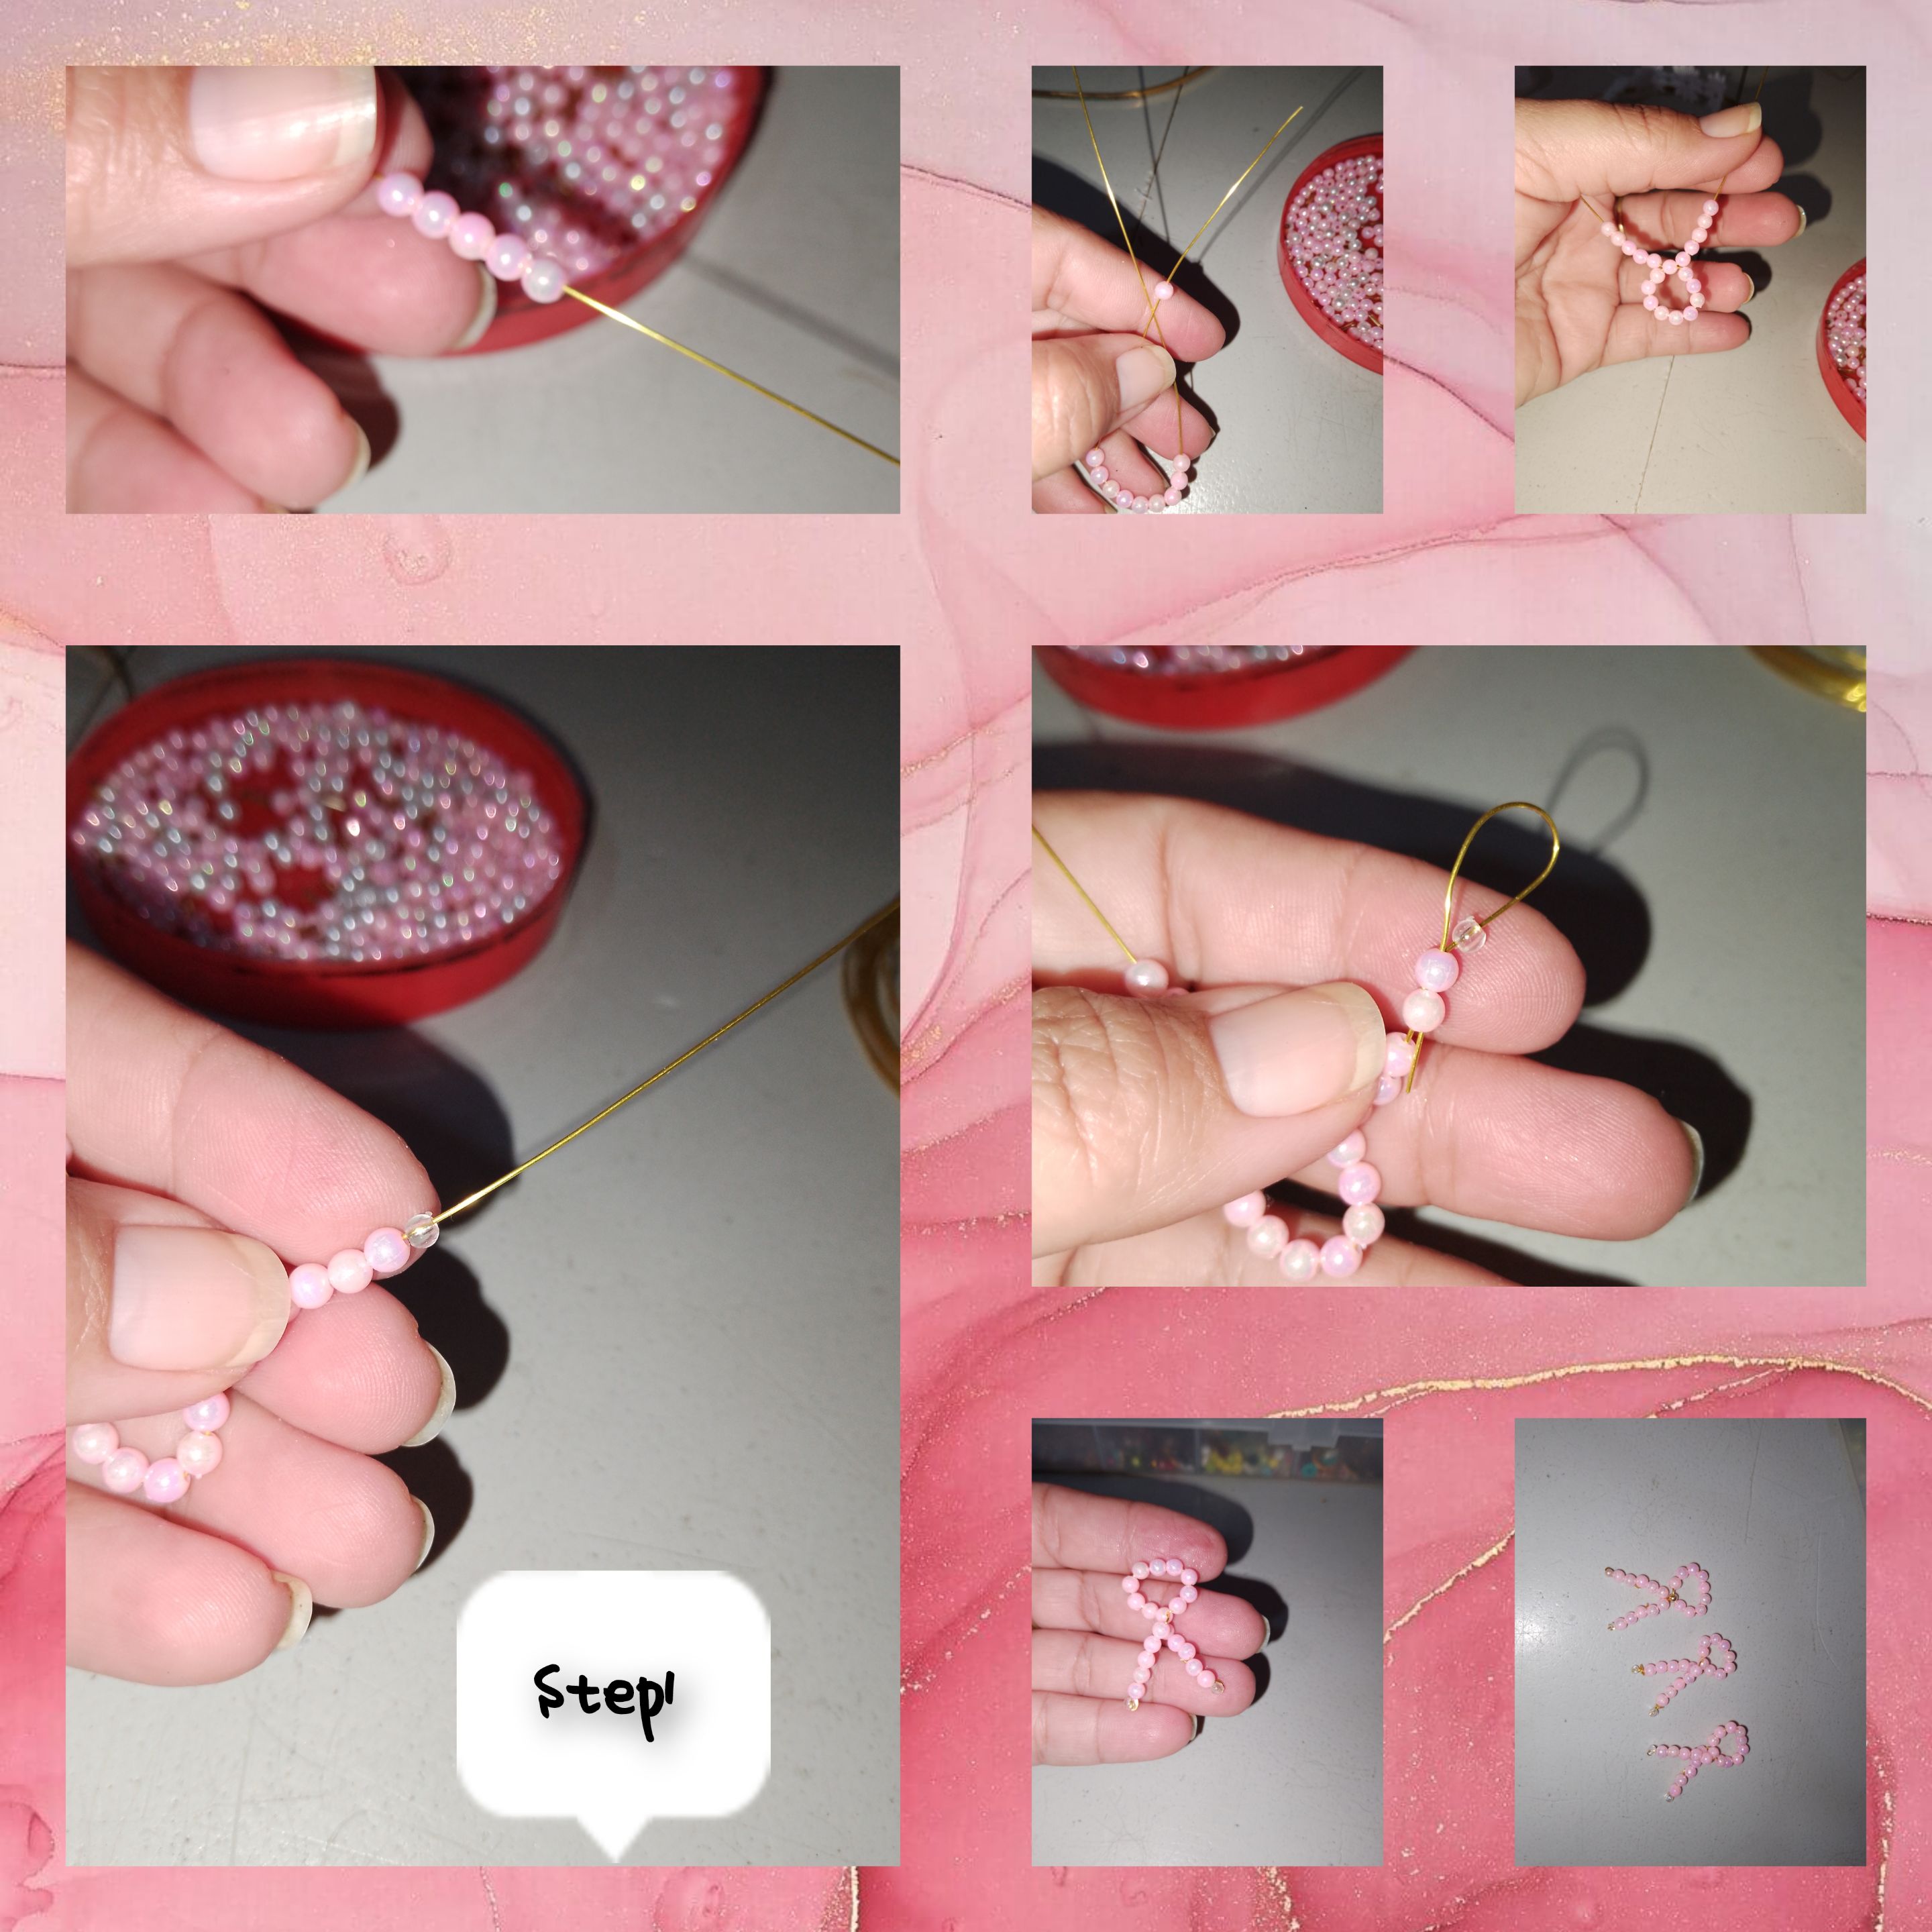
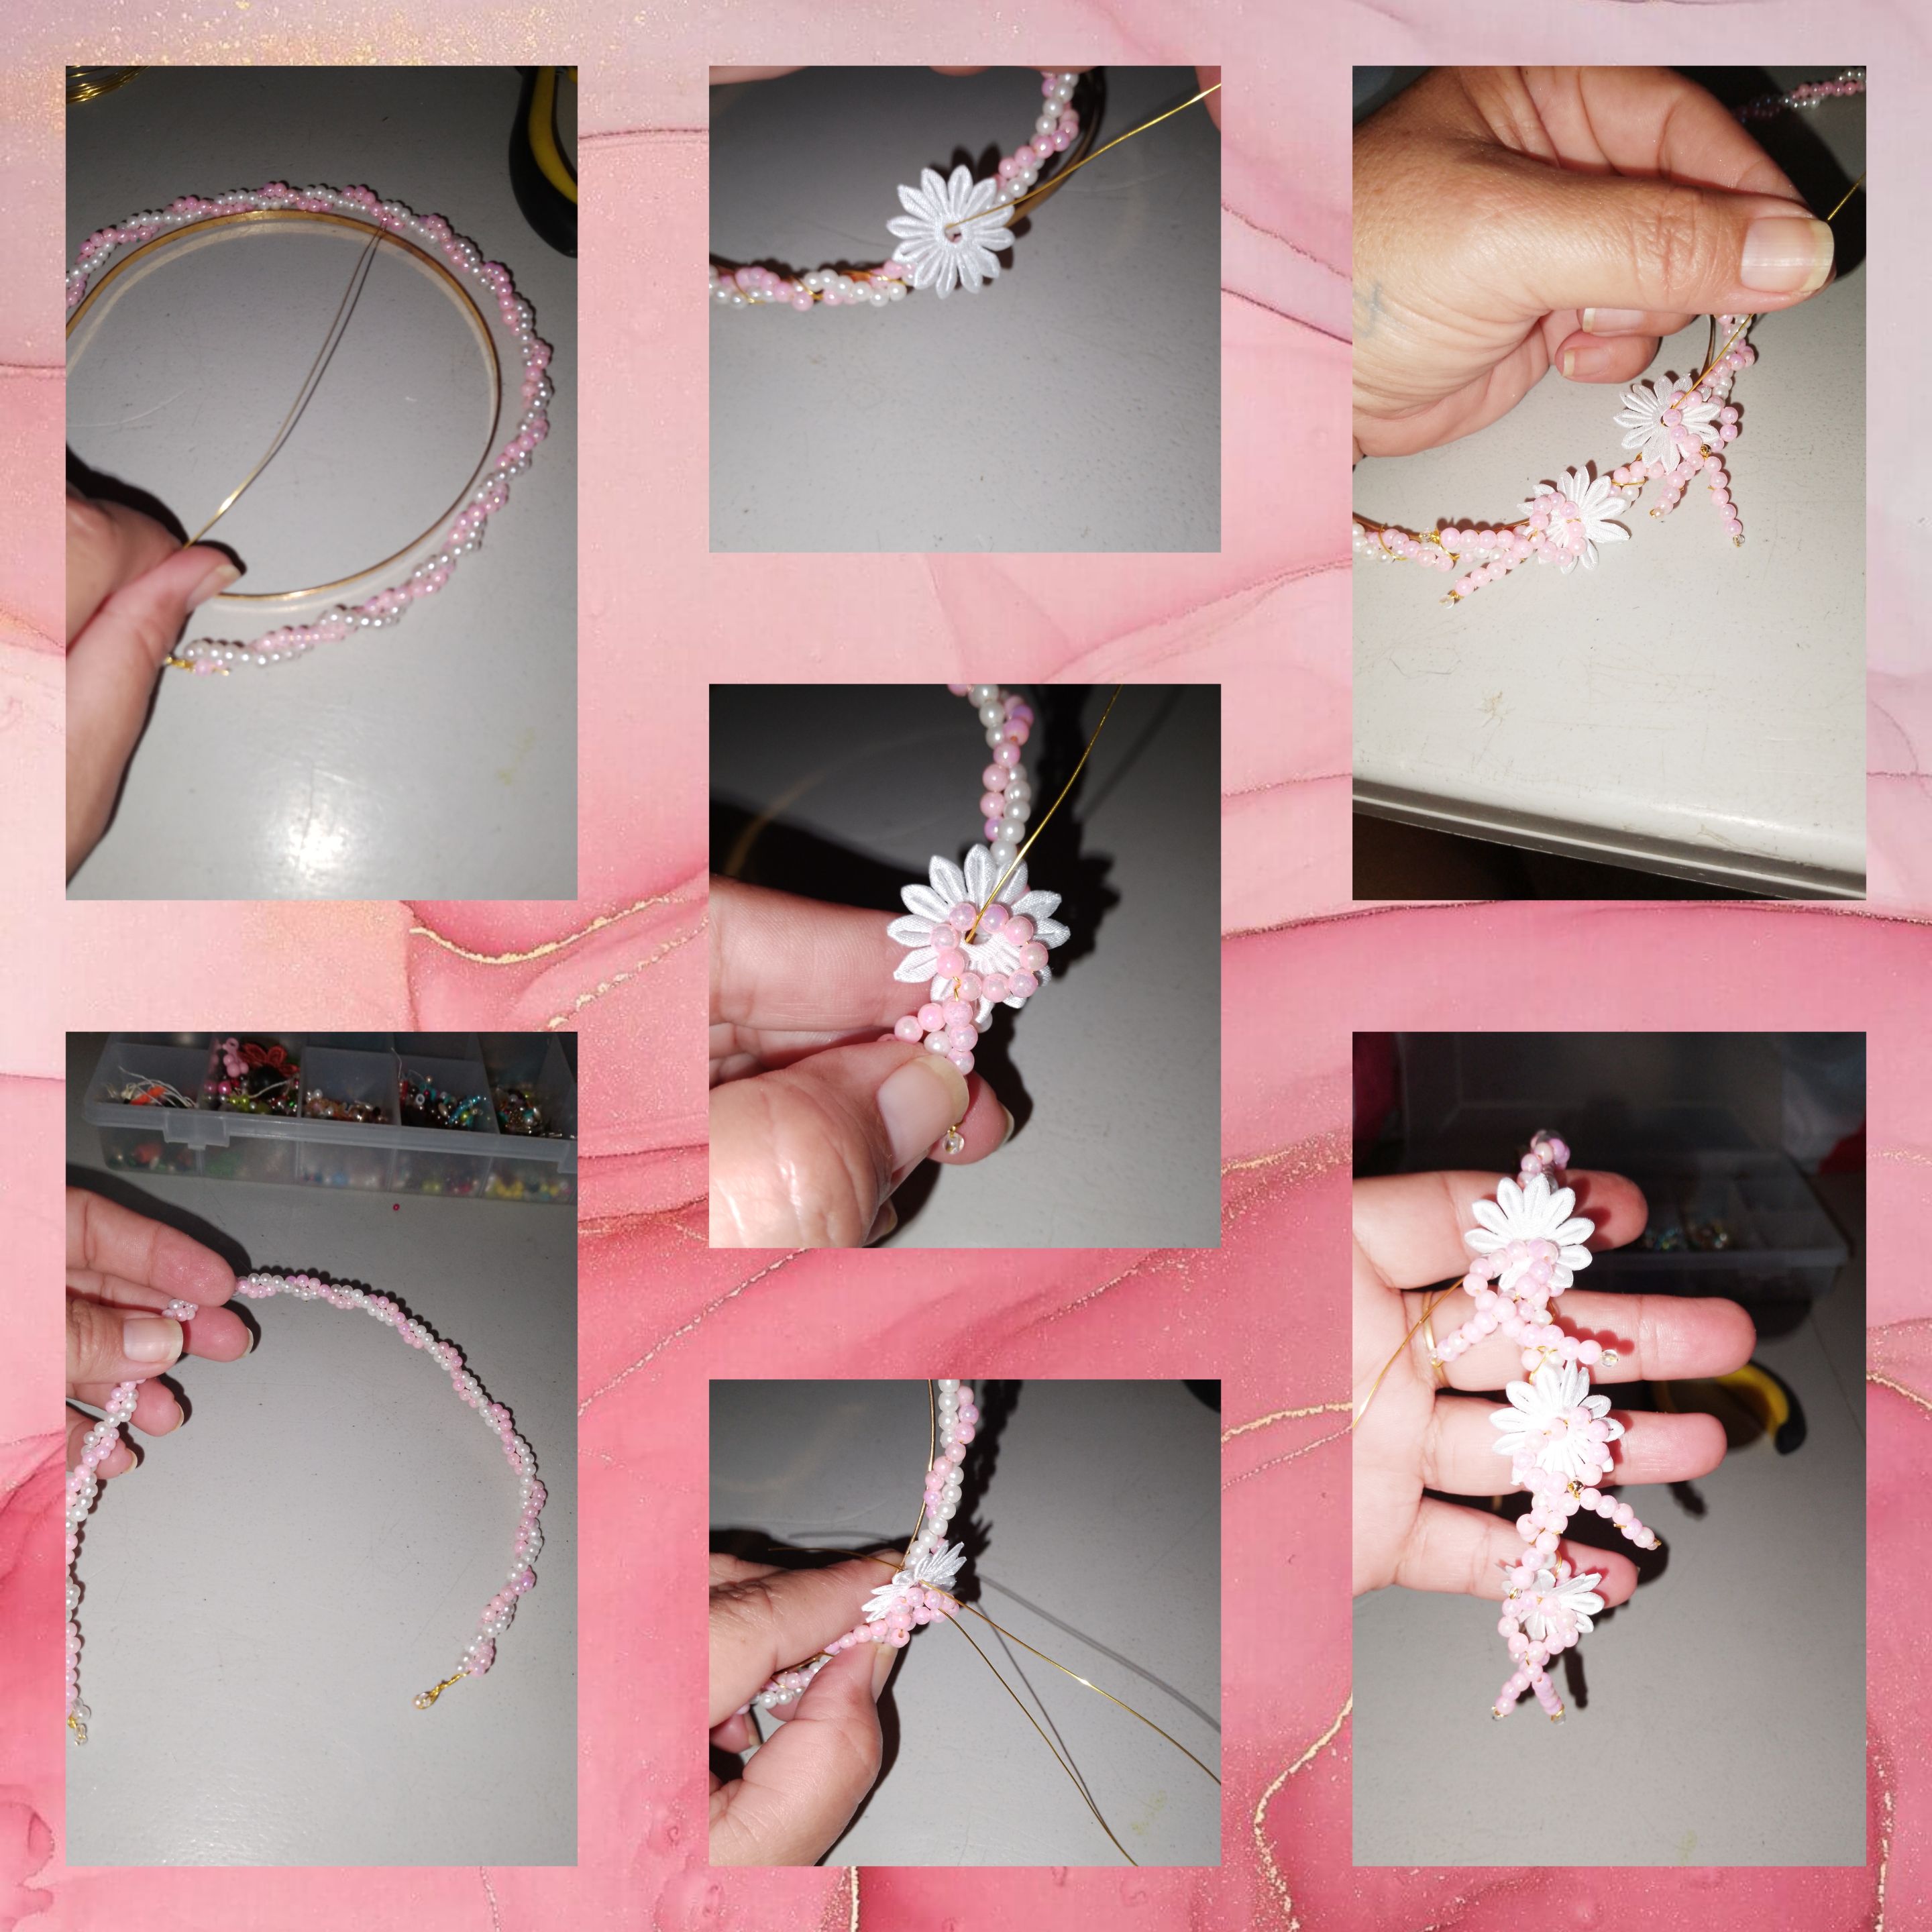
1.) Short, three pieces of wire, the same size. I fold it in equal parts, place nine pearls, place a new pearl, and insert the wire from one side to the other, making a small cut. I continue and on each side of the wire I place four pearls, then a transparent bead, I return it with the wire hiding it, inside the pearls and I cut the residue of wire. In this way, I repeat and in this way I do the next side. In this way, I repeat the process and make two more diges, with the symbol of breast cancer.
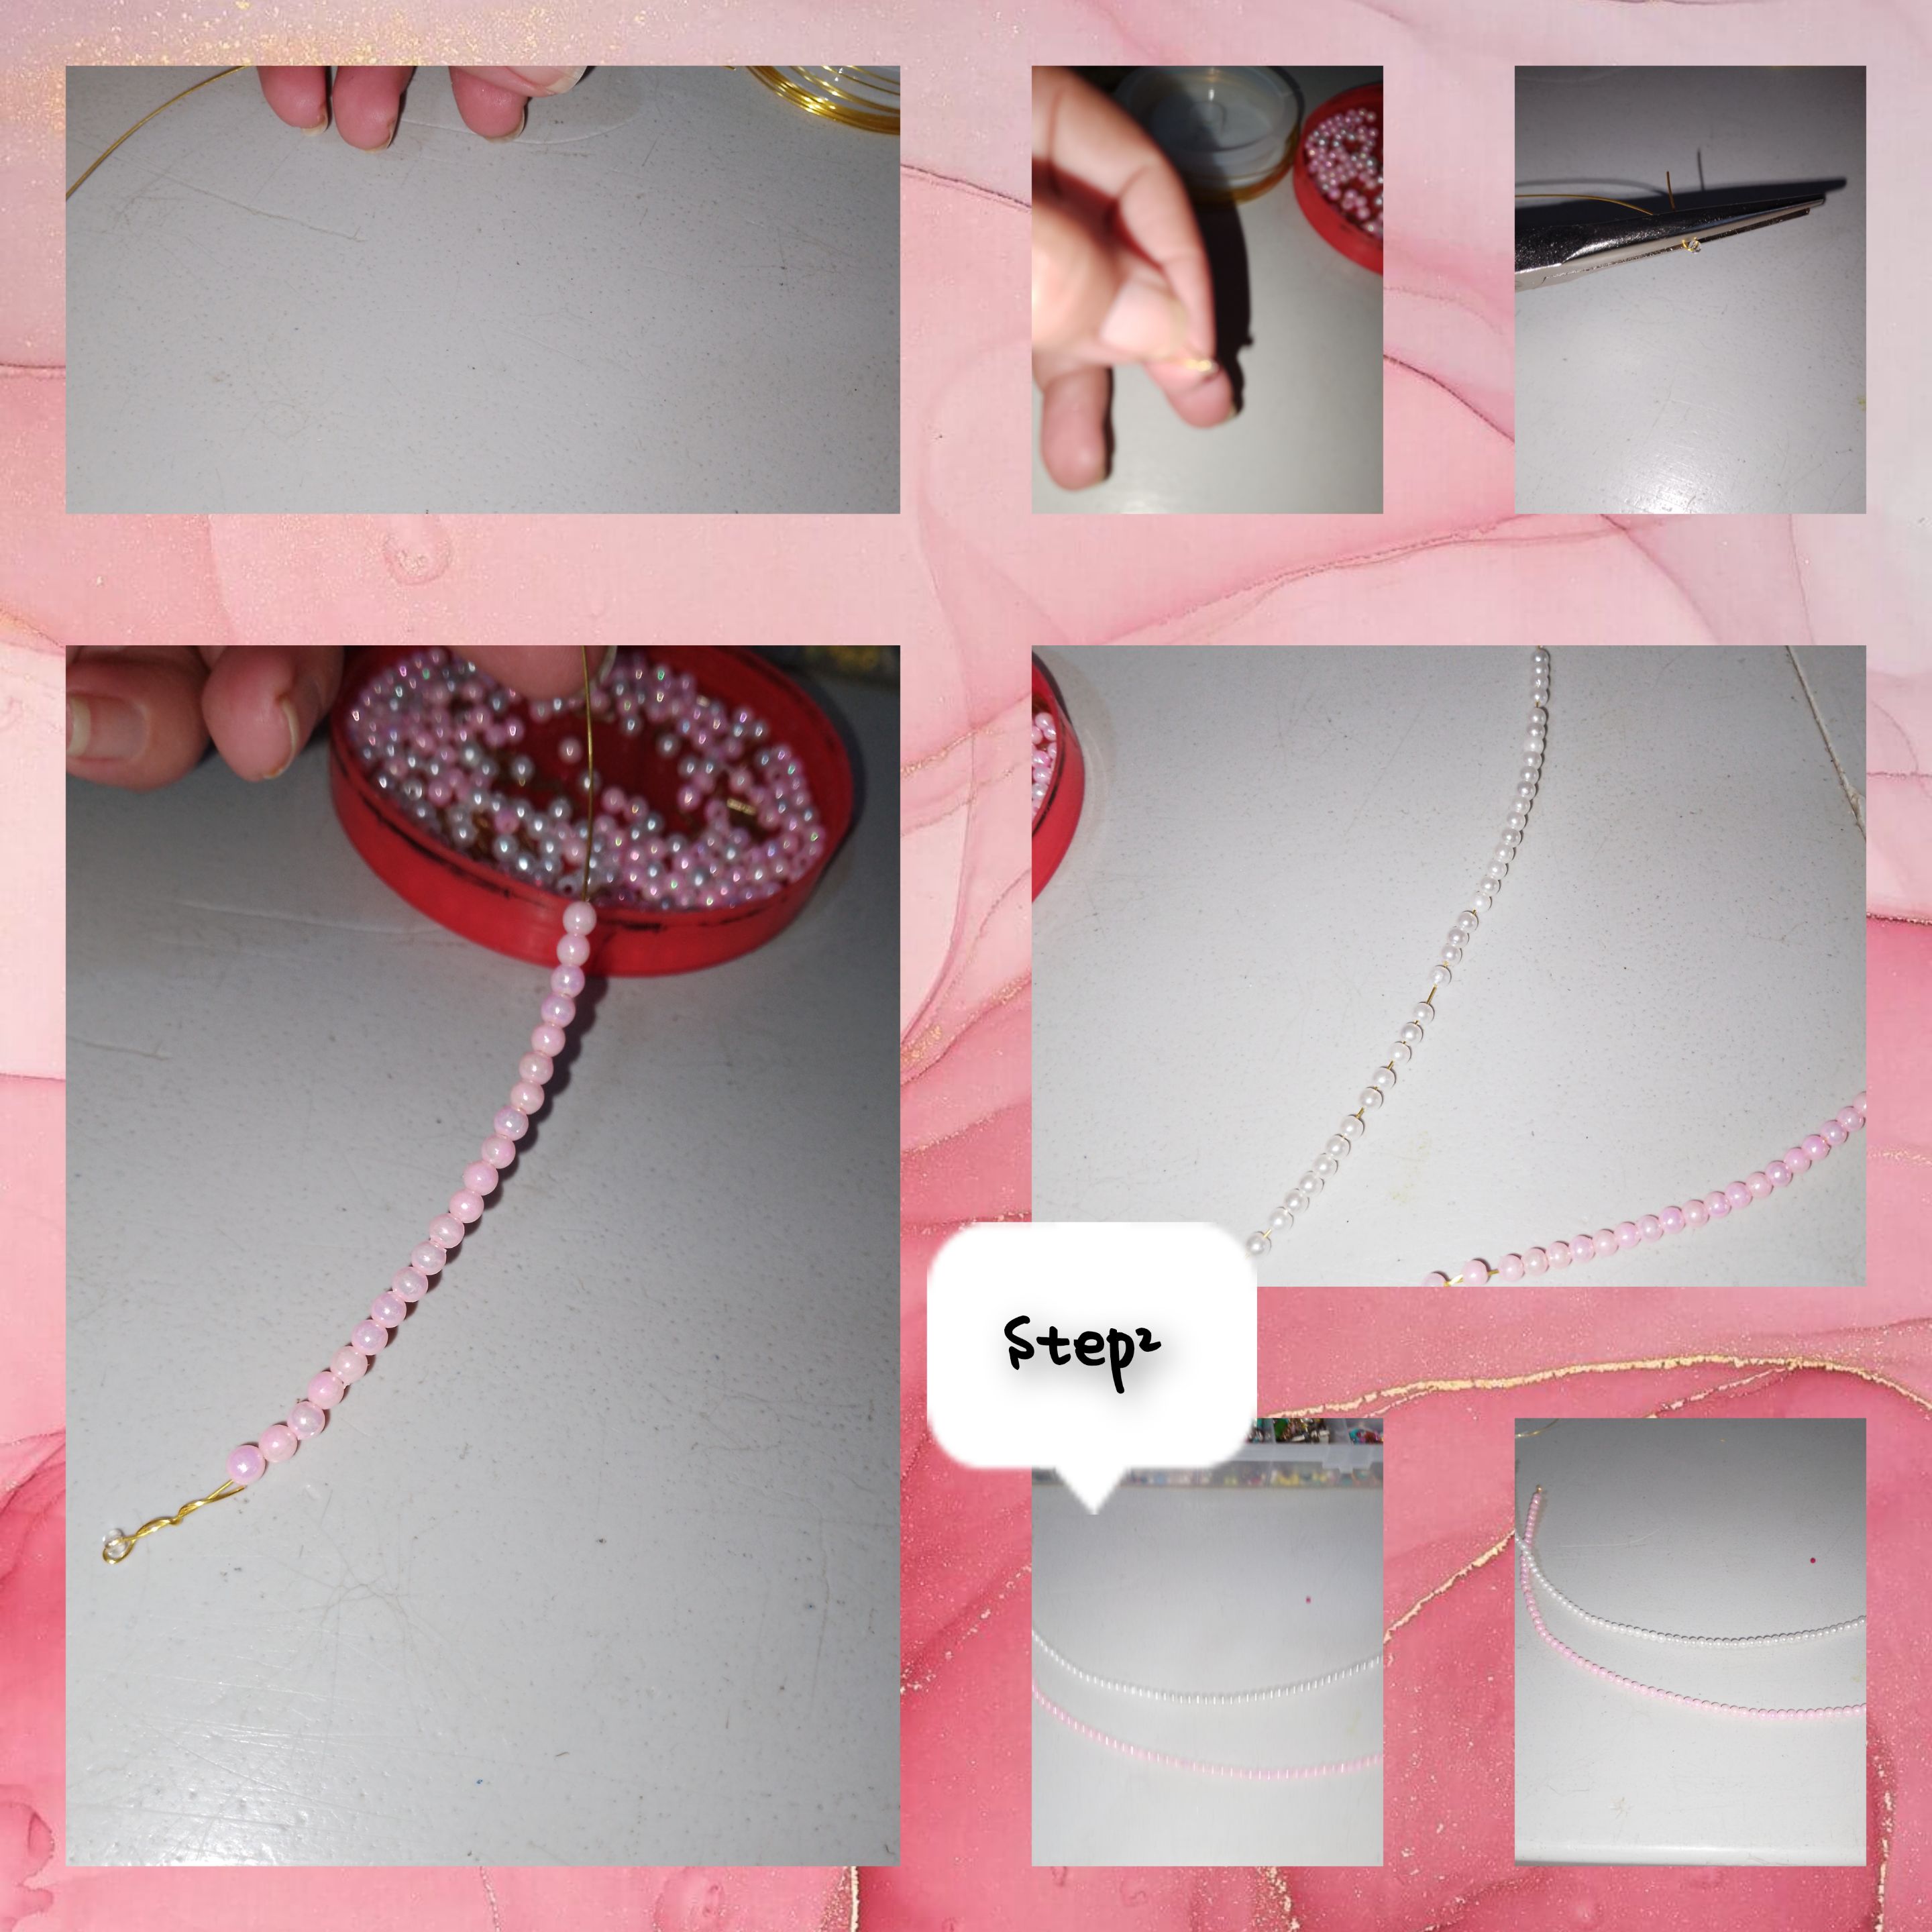
2.) short, two pieces of wire, I begin to insert beads, before I secure one of the ends, to secure the beads. I continue and in this way I cover the second piece of wire with white beads. In this way, I cover the two pieces of wire.
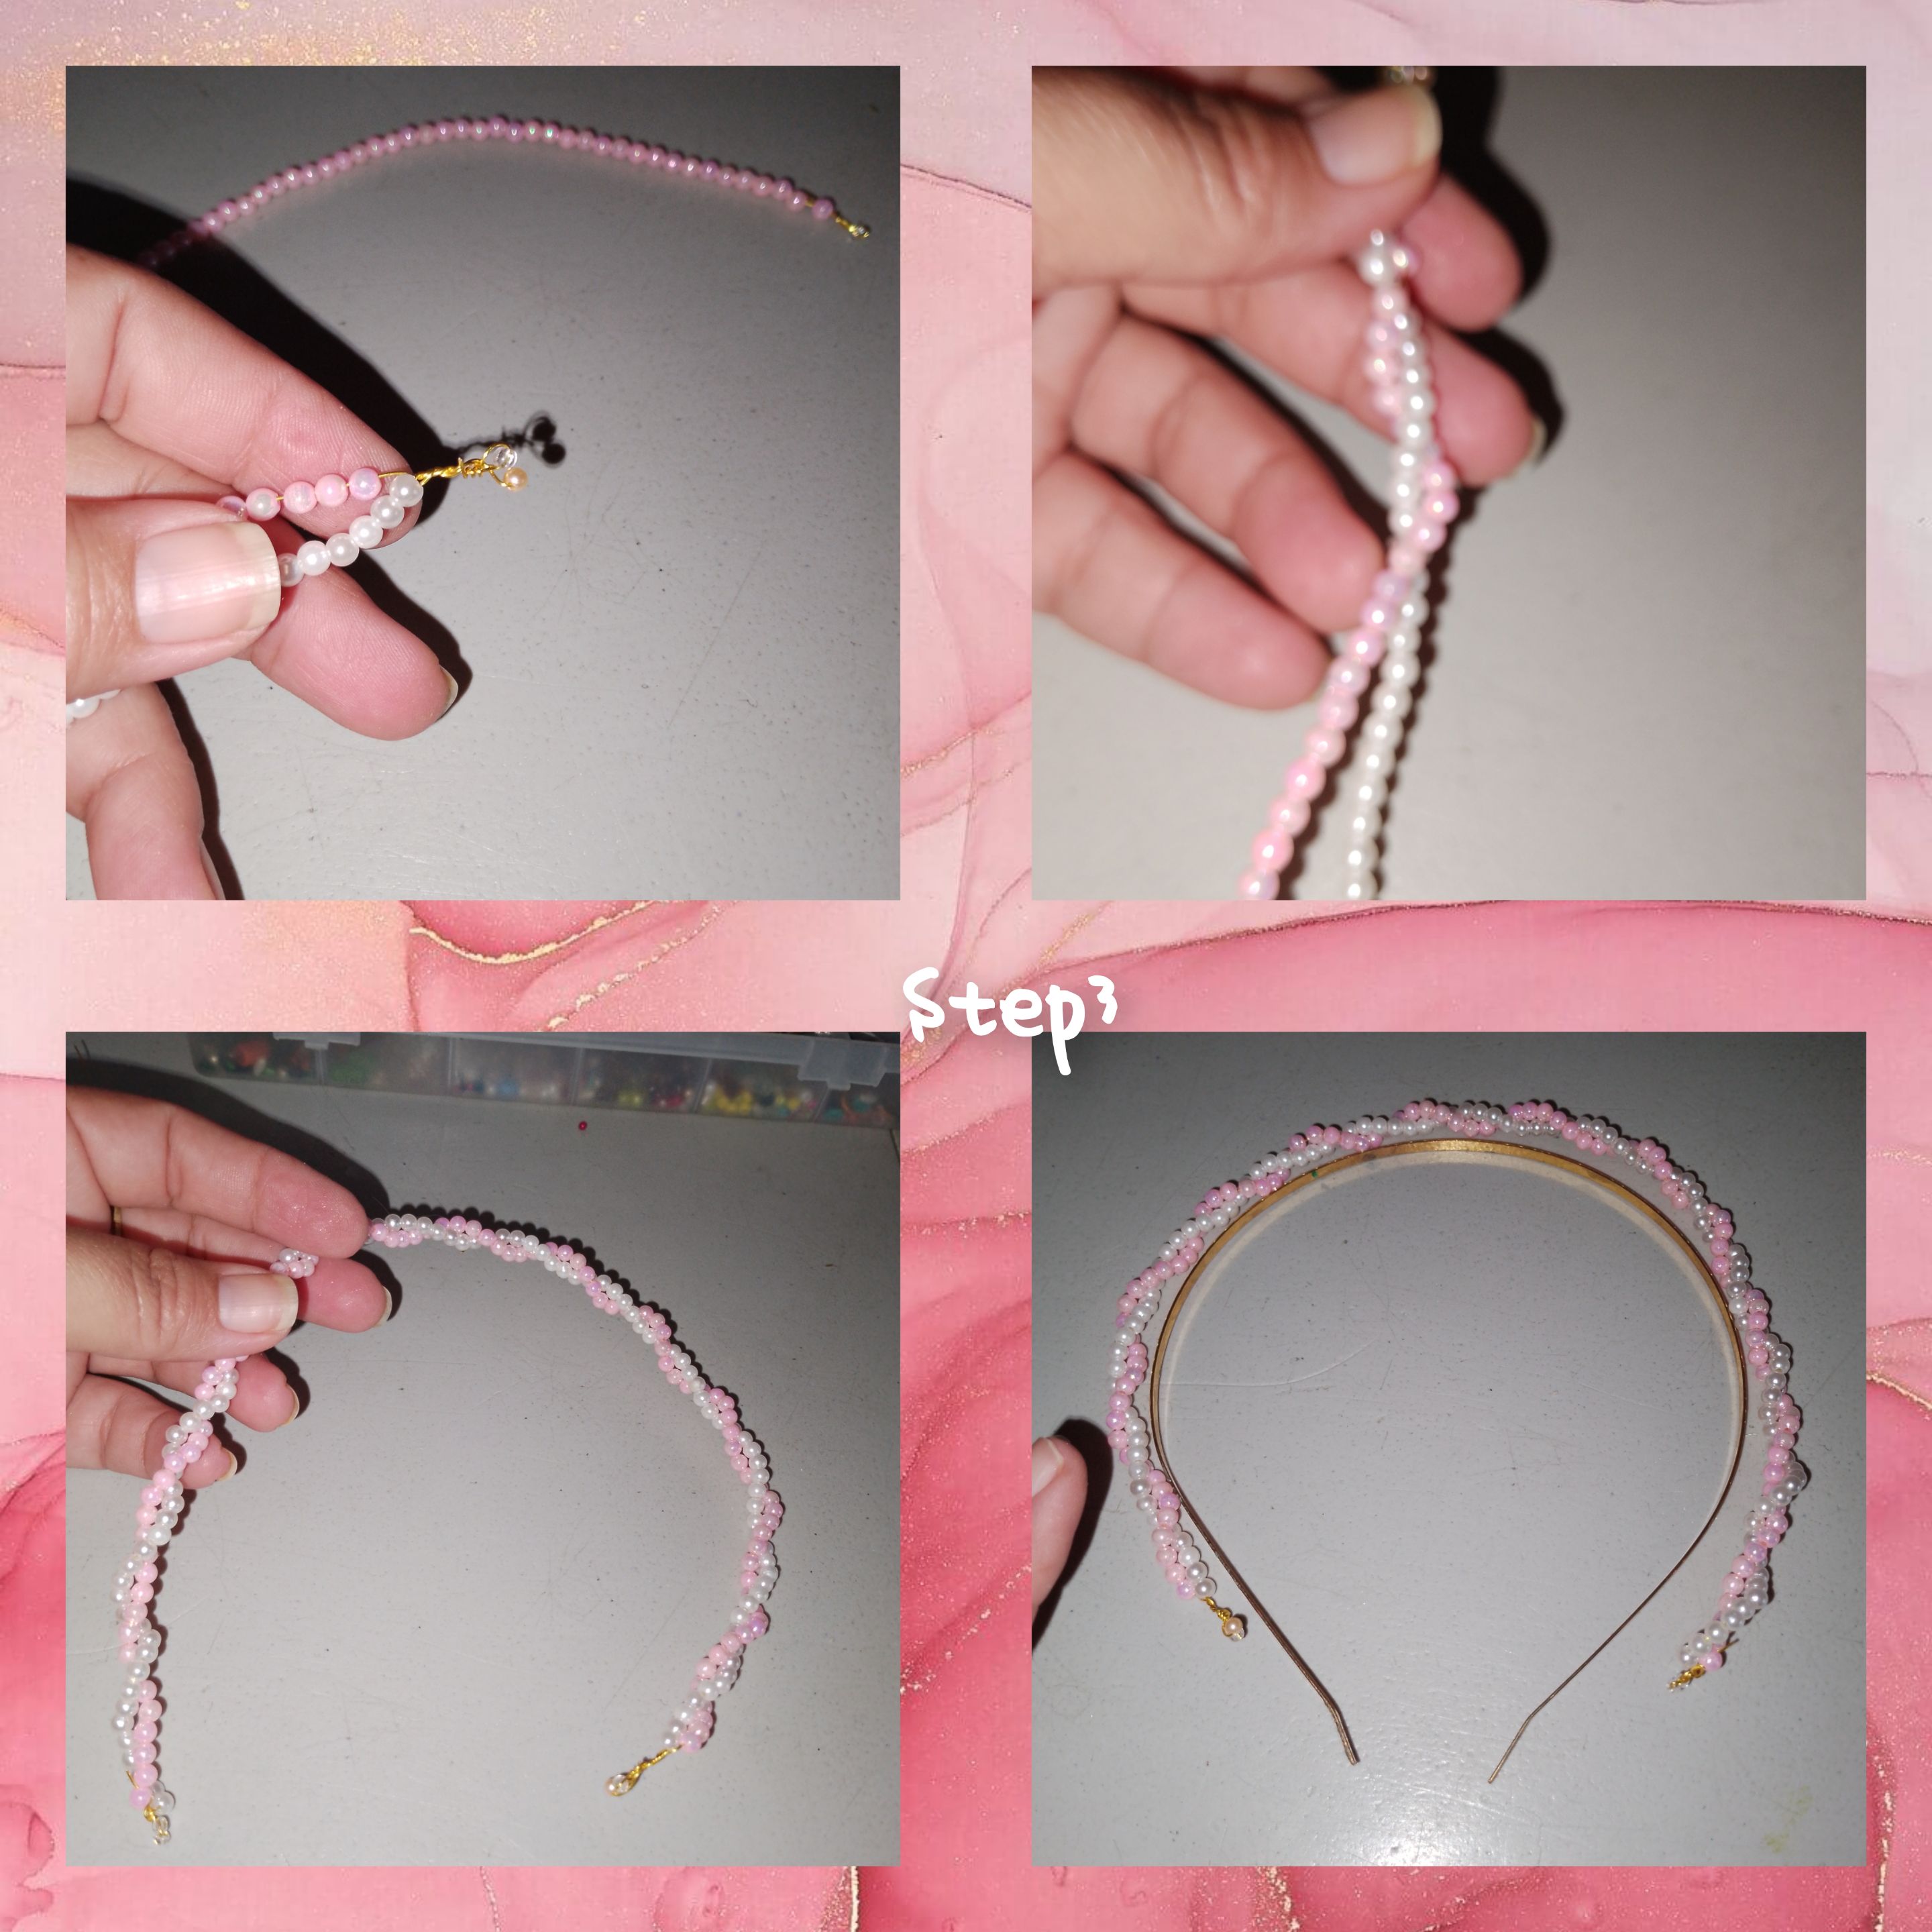
3.) After having covered the pieces of wire with beads. I tie them together, and eating them spin around each other. I verify that it is enough and that after hugging both pearl wire, it almost completely covers the headband.
4.) I begin to tie the pearl wire with a new piece of wire, involving the headband, after going through a space, considering the one that goes just behind the ear, I introduce the wire, inside there is a first flower of application and a symbol, I return just inside the application hole, I make two more turns with the wire and repeat, until I exhaust the symbols. Now I have part of the headband covered, and I have used the three applications done in step. One, so I continue the route, and cover the other part of the headband.
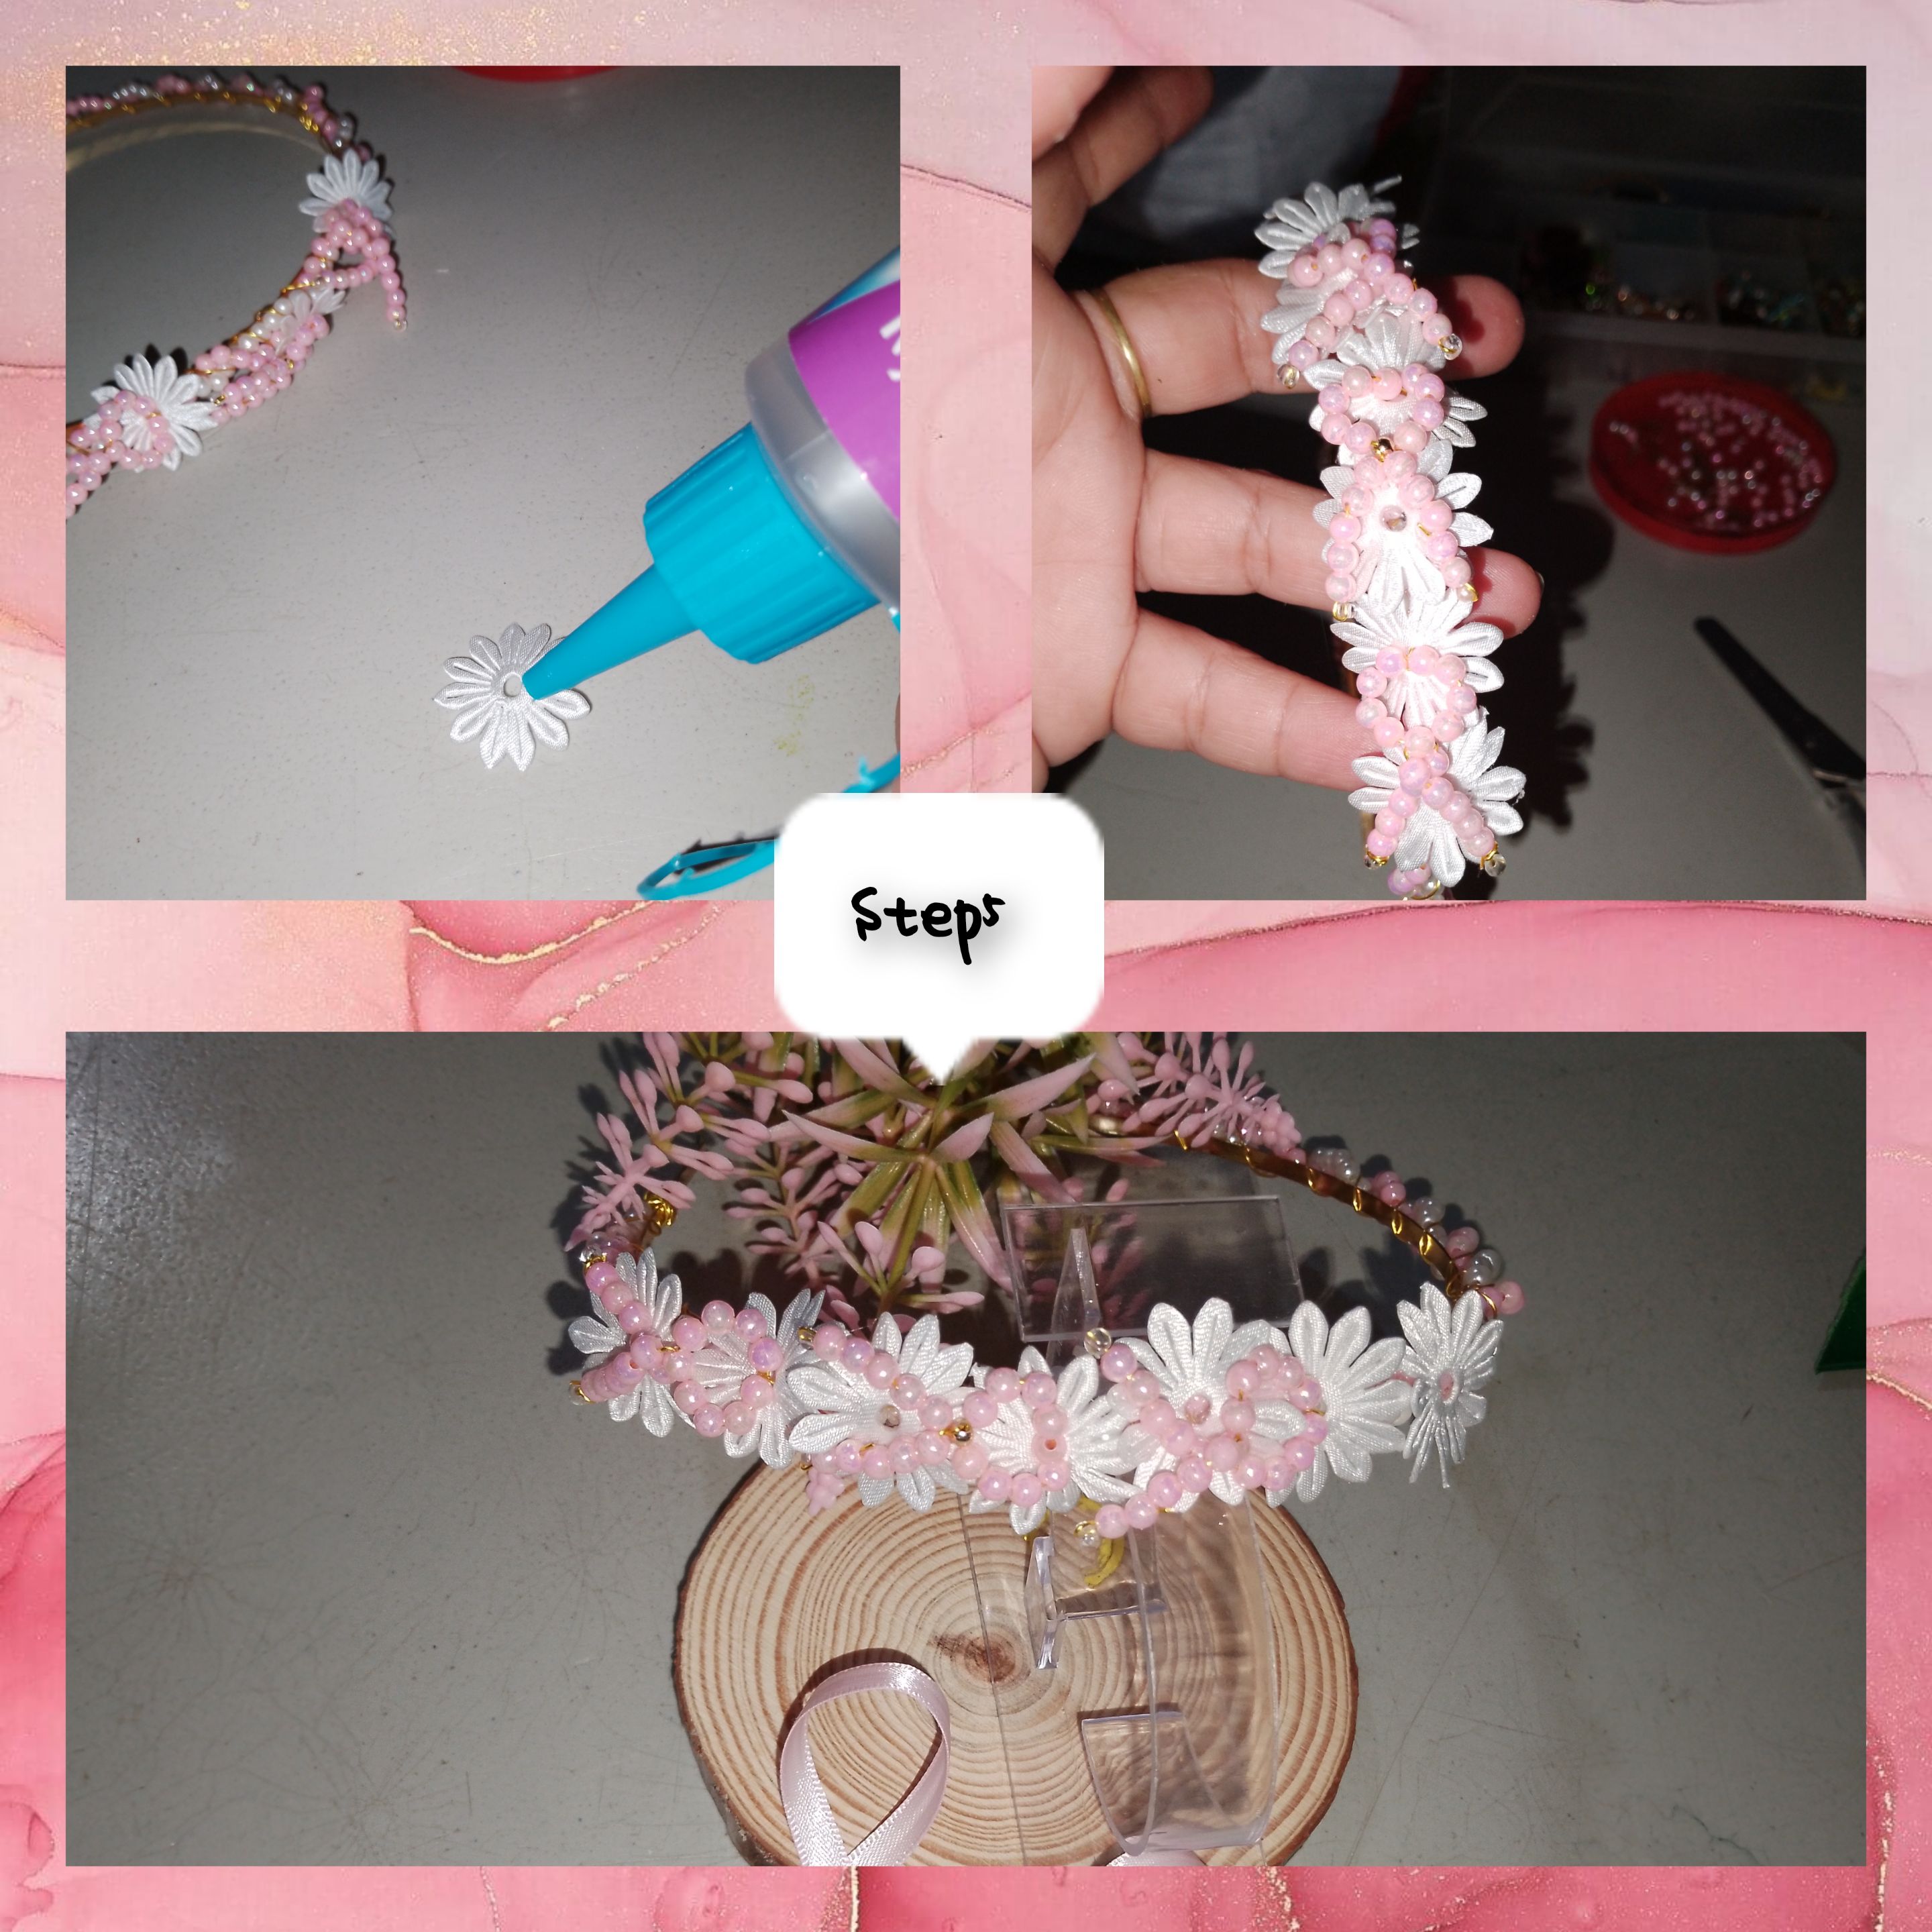
5.) I applied liquid silicone to the following application flowers and glued one in the separation of each symbol. Thus giving more view to the symbols.
. All photos are my property.
. Use incollage to show the steps.
. Use language translator.
Grateful for your visit to my blog. I feel very happy to have participated in such a significant initiative. It will be until a next opportunity.
(ESP)
Hola a todos,e complace, grandemente, estar una vez mas con todos ustedes en @jewelry, en esta oportunidad, para unirme a la Iniciativa : Mes Rosa, esto a propósito, me Celebrarse el mes, de el cáncer de Mamá. Para ello he diseñado un lindo y delicado Cintillo juvenil, ideal para lucir en cualquier momento y ocasión, dónde use la técnica de bisutería. Antes de darle, el paso a paso. Quiero, motivarlos, a este muy pendiente de sus senos y amarme por sobre todas las cosas, tocate, frecuentemente y si vez alguna anomalia en ellos, buscar ayuda. Tener amor propio, te dará la fortaleza de enfrentar tu vida.
Ahora sí quiero invitar a mis amigas @lorennys, @gloriana071 y @linita. Agradecida además por l a invitación de mi siempre recordada amiga @nhaydu.

Materiales usados:
. Pelas de color rosa y blanca.
. Cintillo dorado de metal.
. Perlitas doradas.
. Canutillo transparente.
. Alambre.
. Aplicaciones de flores de color blanca.
. Silicón líquido.
. Pinzas de bisutería.
. Tijeras.
Pasos:
1.) Corto, tres pedazos de alambre, de mismo tamaño. Doblo en partes iguales, coloco nueve perlitas, coloco una nueva perla, e introduzco el alambre de un lado a el otro, haciendo un pequeño corte. Continuo y en cada lado de alambre coloco, cuatro perlitas, luego un canutillo transparente, le devuelvo con el alambre ocultando, por dentro de las perlas Y corto el residuo de alambre. De esta forma, repito y de esta manera hago el siguiente lado. De esta manera, repito el proceso y hago dos diges más, con el simbólico de el cáncer de mama.

2.) corto, dos pedazos de alambre, comienzo a introducir, perlas, antes aseguro uno de los extremos, para asegurar las perlas. Continuo y desta manera cubro el segundo trozo de alambre con perlas de color blanca. De esta manera, cubro los dos pedazos de alambre.

3.) Luego, de haber cubierto, los pedazos de alambre con perlitas. Ato entre sí, y comiendo a dar vueltas entre sí. Verifico que sea suficiente y que luego de abrazar a ambos alambre de perlas, cubra, casi en su totalidad el cintillo.

4.) comienzo a atar, los alambre de perlas con un nuevo trozo de alambre, involucrando el cintillo, luego de recorrer, un espacio, considerando el que va justo detrás de la oreja, introduzco el alambre, por dentro fe una primera flor de aplicación y un símbolo, me devuelvo justos, por dentro de el orificio de la aplicación, doy doa vueltas más con el alambre y repito, hasta agotar los símbolos. Ahora tengo parte de el cintillo cubierto, y he usado las tres aplicaciones hechas en paso. Uno, así que continuo el recorrido, y cubro la otra parte de el cintillo.

5.) Aplicó, silicón líquido, a las siguientes flores de aplicación y pego una en la separación de cada símbolo. Dando así más vista a los símbolos.

. Todas las fotos son, de mí propiedad.
. Use incollage para mostrar los pasos.
. Use traductor lenguaje.
Agradecida, por su visita a mí blog. Me siento muy contenta de haber participado, en tan significativa, iniciativa. Será hasta una próxima oportunidad.